testo Instruments 05605522 Digital Vacuum Gauge with Bluetooth User Manual 0970 5222 en 01x
testo Instruments (Shenzhen) Co., Ltd Digital Vacuum Gauge with Bluetooth 0970 5222 en 01x
UserManual.wiki
>
testo Instruments
>
05605522 User Manual
User Manual
Navigation menu
Upload a User Manual
Namespaces
Wiki Guide
HTML
PDF
Info
Views
User Manual
Discussion / Help
Navigation

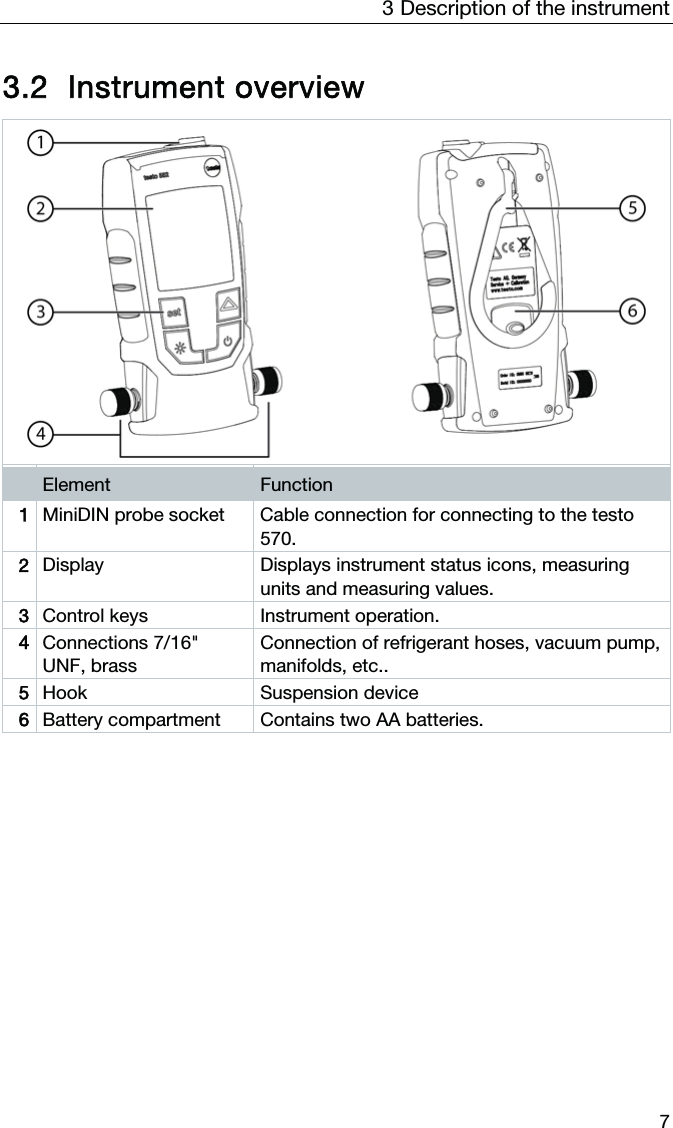
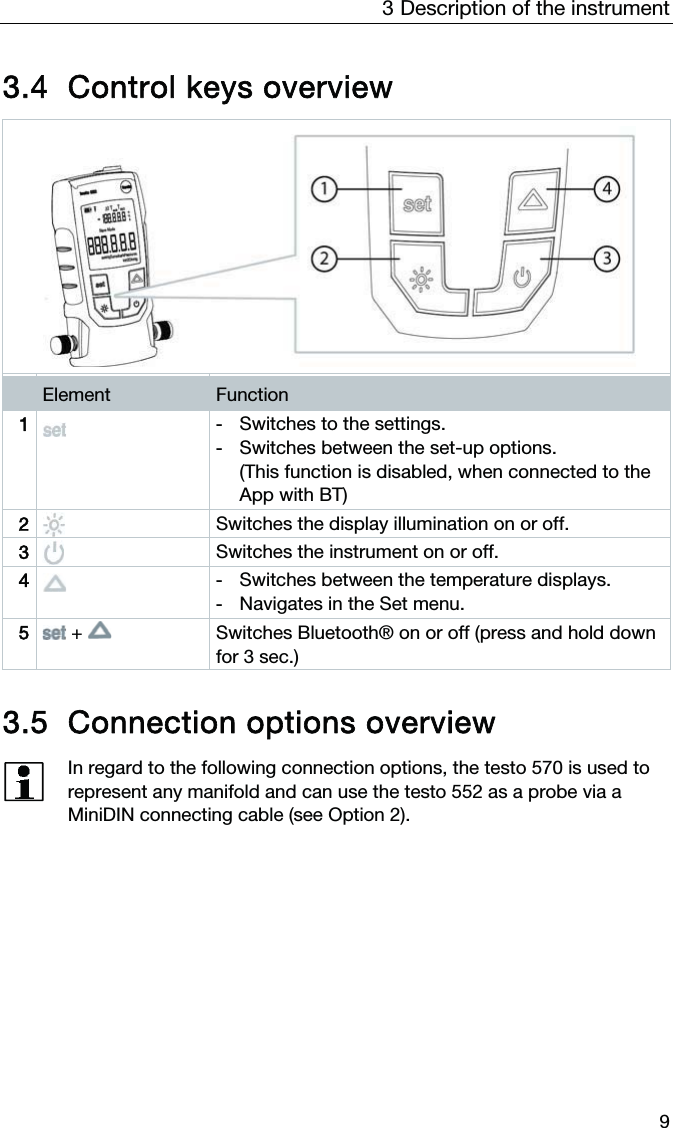
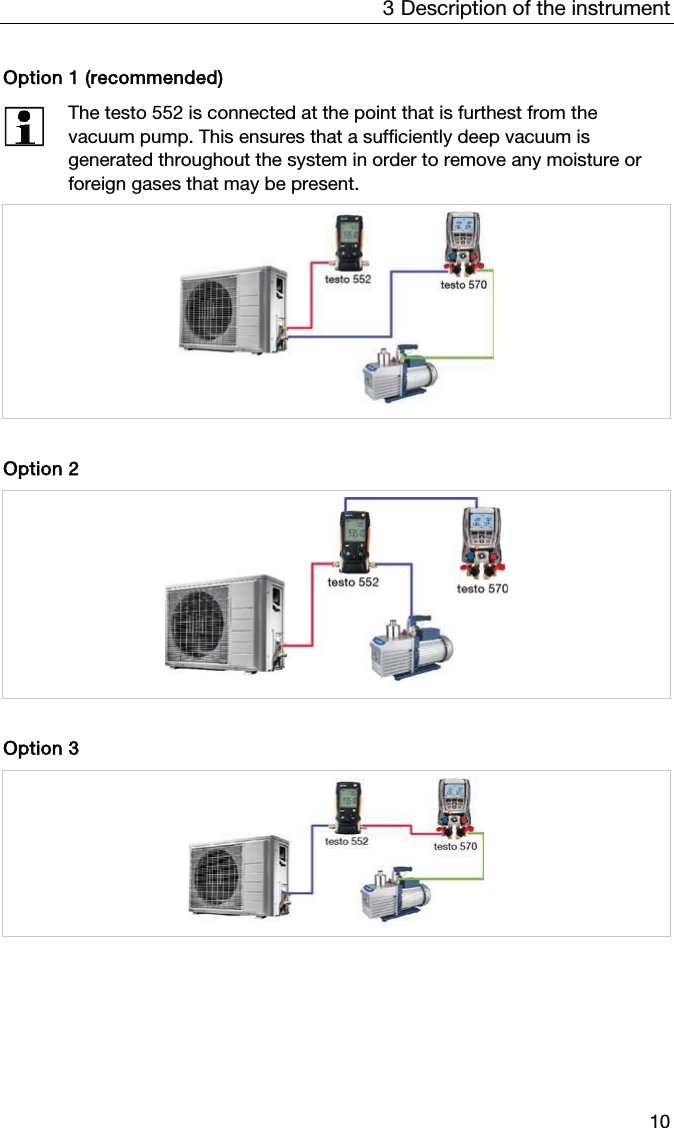
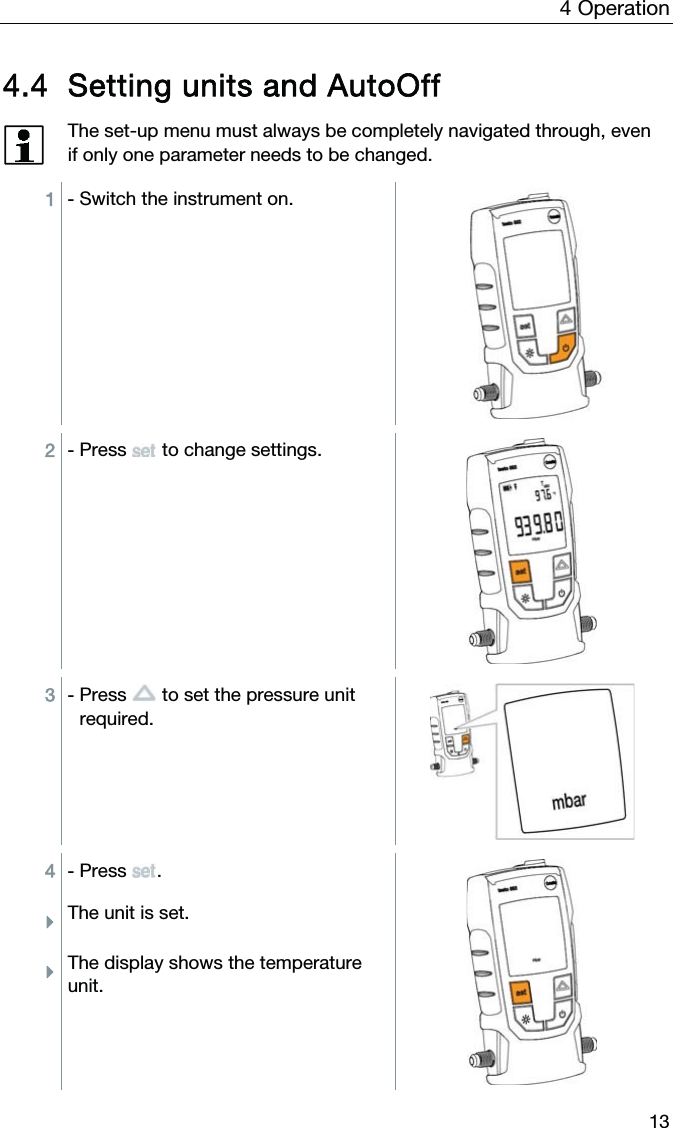
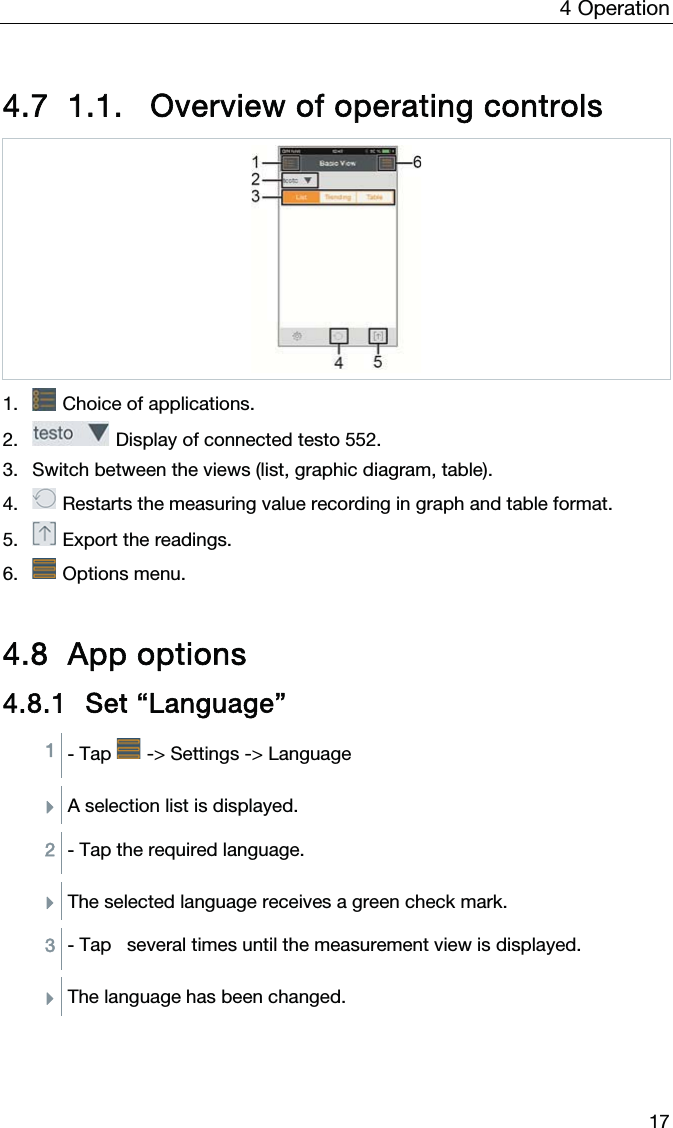
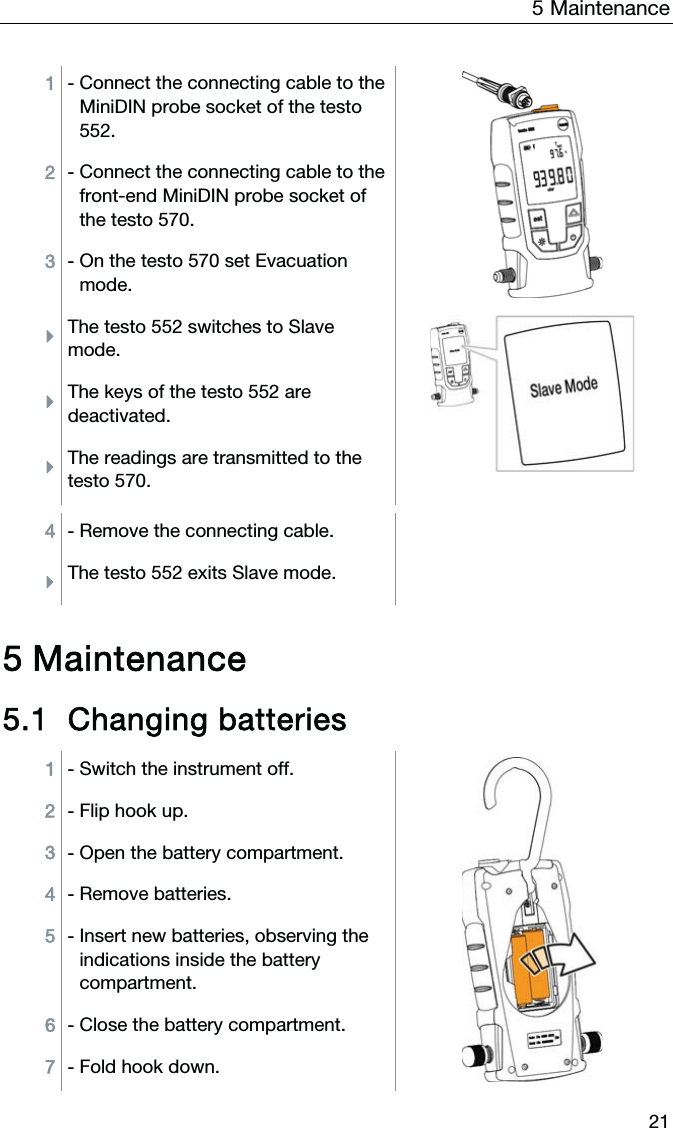
![3 Description of the instrument 8 3.3 Displays overview Element Function 1 Icon [ ] Displays the remaining battery capacity. >75% >50% >25% <10% 2 Icon [ ] Bluetooth® appears when Bluetooth has been activated on the instrument. 3 Icon [ ] An alarm threshold is set. 4 Temperature display - selected, currently measured temperature - Measurement parameter: TH2O = evaporation temperature of water Tamb = ambient temperature Δt = temperature difference between evaporation temperature of water and ambient temperature - unit set (°C, °F) 5 Slave Mode Appears when the testo 552 is connected to the testo 570 via a connecting cable and the testo 570 is in Evacuation mode. 6 Pressure display Displays the currently measured pressure, the measurement parameter and the unit set (mmHG, Torr, mbar, hPa, micron, inH2O, inHg).](https://usermanual.wiki/testo-Instruments/05605522/User-Guide-2972257-Page-9.png)