Yaesu Musen 20345X40 AMATEUR RADIO WITH SCANNING RECEIVER User Manual OM
Yaesu Musen Co., Ltd. AMATEUR RADIO WITH SCANNING RECEIVER OM
Contents
- 1. User Manual
- 2. User Manual 1
- 3. User Manual 2
- 4. User Manual 3
- 5. User Manual 4
- 6. User Manual 5
- 7. User Manual 6
- 8. User Manual 7
- 9. User Manual 8
- 10. User Manual 9
- 11. User Manual 10
- 12. User Manual 11
- 13. User Manual 12
- 14. User Manual 13
- 15. User Manual 14
- 16. User Manual 15
- 17. User Manual 16
- 18. User Manual 17
- 19. User Manual 18
- 20. User Manual 19
- 21. User Manual 20
- 22. User Manual 21
User Manual 9
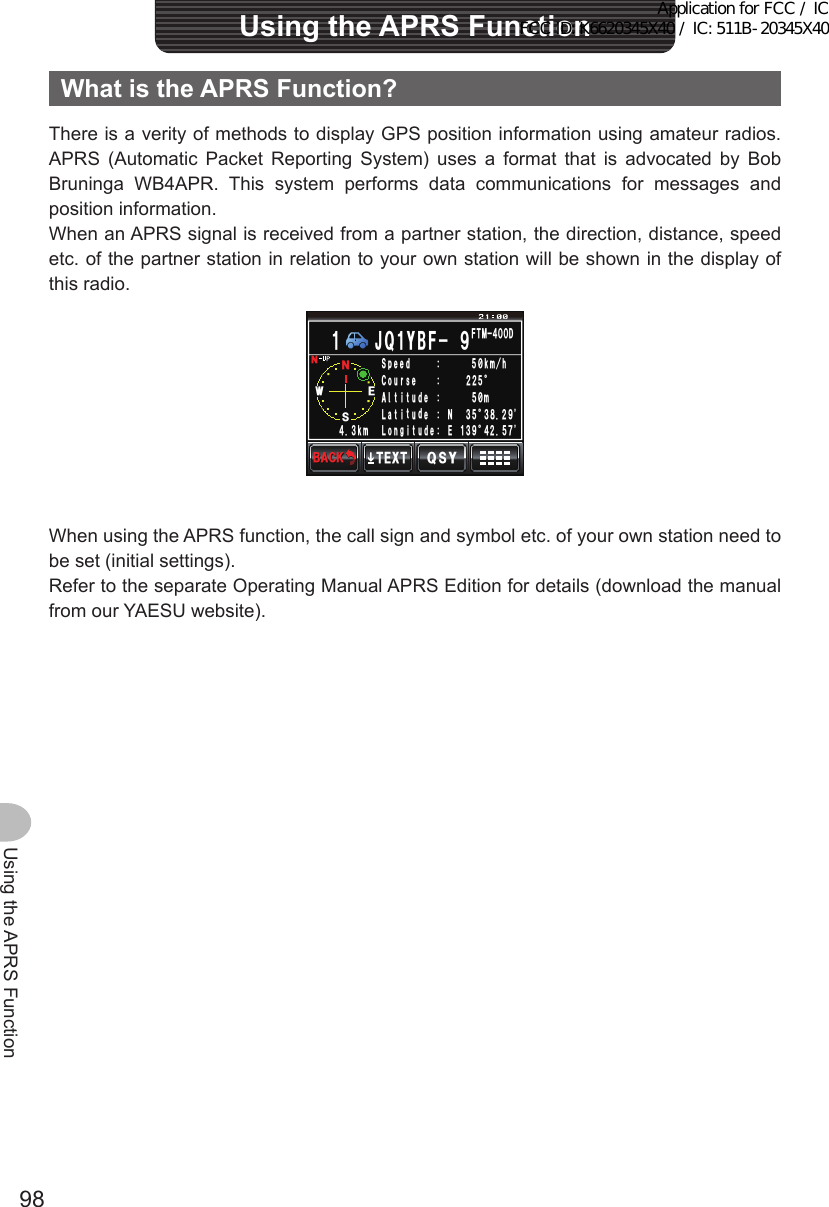
![95Using the GPS FunctionUsingtheSmartNavigationFunctionWhen a partner station comes within 50 meters of your location, a beep will sound, the compass needle display will disappear, and the scope scale will appear in green%1/2#55 &+56#0%'/;;4.Ჺ.Ჹ/'/14;ᲸᲽᲹᲺ ᲹᲽᲾᲺᲸ᳁᳁᳁MO09'5Ჹ,#<4.ᲺᲹ%1/2#55 &+56#0%'/;;4.Ჺ.Ჹ/'/14;ᲸᲽᲹᲺ ᲹᲽᲾᲺMOᲸᲸ09'5Ჹ,#<4.ᲺᲹUsingthebacktrackfunctionSavingthedestinationA maximum of three locations can be saved in the memory. ●Registeringthecurrentlocation(departurepoint)1 Switch to the Compass screen2 Touch [MY] The display will turn orange in color.%1/2#55 &+56#0%'/;;4.Ჺ.Ჹ/'/14;ᲸᲽᲹᲺ ᲹᲽᲾᲺᲸ᳁᳁᳁MO09'5Ჹ,#<4.ᲺᲹ3 Touch [MEMORY] Tip This symbol is not active be touched when there is no position information. [★], [L1] and [L2] will blink.%1/2#55 &+56#0%'/;;4.Ჺ.Ჹ/'/14;ᲸᲽᲹᲺ ᲹᲽᲾᲺᲽ6-;11ᲺᲸᲸMO09'5Application for FCC / IC FCC ID: K6620345X40 / IC: 511B-20345X40](https://usermanual.wiki/Yaesu-Musen/20345X40.User-Manual-9/User-Guide-2766136-Page-1.png)
![96Using the GPS FunctionUsingtheSmartNavigationFunction4 Touch [★], [L1] or [L2] The position information will be saved in the memory and the touched location will turn orange in color.TipWhen position information is already registered in [★], [L1] and [L2], the text will be displayed in green color.%1/2#55 &+56#0%'/;;4.Ჺ.Ჹ/'/14;ᲸᲽᲹᲺ ᲹᲽᲾᲺᲽ6-;11ᲺᲸᲸMO09'5%1/2#55 &+56#0%'O/;;4.Ჺ.Ჹ/'/14;ᲸᲽᲹᲺ ᲹᲽᲾᲺᲽ6-;11ᲺᲸᲸMO09'5 ●RegisteringthelocationsofotherstationsWhen position information is included in the data of other stations received through digital communications, it can be saved in the memory.1 Switch to the Compass screen2 Touch [YR] The display will turn orange in color.%1/2#55Ჸ18( ᲹᲽᲾᲺ&+56#0%'/;;4.Ჺ.Ჹ/'/14;MOᲽ6-;11ᲺᲸᲸ09'53 Touch [MEMORY] [★], [L1] and [L2] will blink.%1/2#55Ჸ18( ᲹᲽᲾᲺ&+56#0%'/;;4.Ჺ.Ჹ/'/14;Ჸ᳁᳁᳁MO09'5Ჹ,#<4.ᲺᲹApplication for FCC / IC FCC ID: K6620345X40 / IC: 511B-20345X40](https://usermanual.wiki/Yaesu-Musen/20345X40.User-Manual-9/User-Guide-2766136-Page-2.png)
![97Using the GPS FunctionUsingtheSmartNavigationFunction4 Touch [★], [L1] or [L2] The position information will be saved in the memory and the touched location will turn orange in color.TipWhen position information is already registered in [★], [L1] and [L2], the text will be displayed in green color.%1/2#55Ჸ18( ᲹᲽᲾᲺ&+56#0%'/;;4.Ჺ.Ჹ/'/14;Ჸ᳁᳁᳁MO09'5Ჹ,#<4.ᲺᲹ%1/2#55Ჸ18( ᲹᲽᲾᲺ&+56#0%'/;;4.Ჺ.Ჹ/'/14;Ჸ᳁᳁᳁MO09'5Ჹ,#<4.ᲺᲹDisplayingthepositionofthedestinationinrealtime1 Switch to the Compass screen2 Touch [★], [L1] or [L2] Tip This symbol is not active when position information has not been saved in the memory. The direction of the compass needle will change following the position information that has been saved in the memory and a green circle will be displayed at the tip to show the direction of the destination. The distance to the destination will also be displayed.%1/2#55 &+56#0%'/;;4.Ჺ.Ჹ/'/14;ᲸᲽᲹᲺ ᲹᲽᲾᲺᲽ6-;11ᲺᲸᲸMO09'53 Move while keeping the tip of the compass needle to point towards the top Tip When the destination registered after touching [MY] is selected, the date and time of the registration will also be displayed.%1/2#55ᲸᲹᲽᲾᲺ&+56#0%'/;;4.Ჺ.ᲹMO/'/14;ᲽᲹᲺᲸ᳁᳁᳁09'5ᲺᲸᲸ᳀ᲹᲹᲹᲾᲹApplication for FCC / IC FCC ID: K6620345X40 / IC: 511B-20345X40](https://usermanual.wiki/Yaesu-Musen/20345X40.User-Manual-9/User-Guide-2766136-Page-3.png)
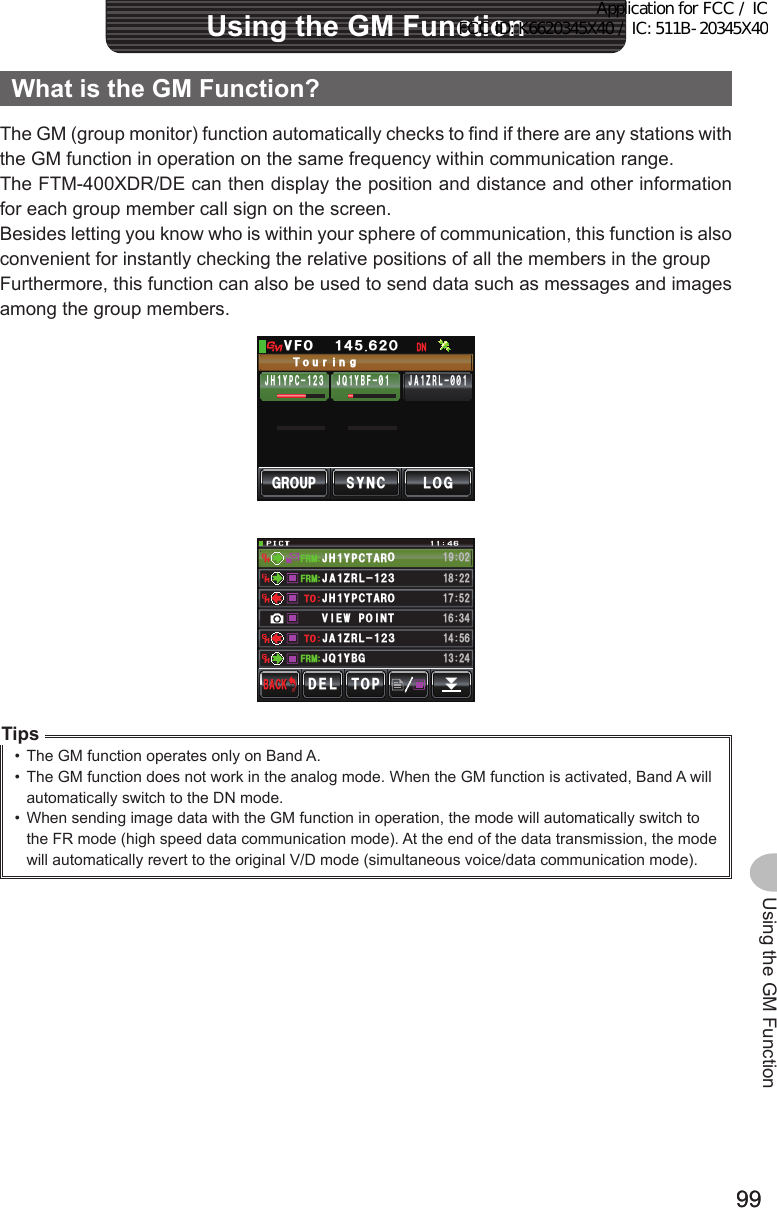
![100100Using the GM FunctionBasicMethodstousetheGMfunctionThere are two ways to use the GM function:(1) Displays all stations where the GM function is in operation in communications range (maximum of 24 stations can be displayed)(2) Registers the ID of partners in the group and displays only the partnersAn explanation of the two methods of starting the GM operation will be given.Refer to the separate Operating Manual GM Edition for other details on how to use the function (download the manual from our YAESU website). ●DisplayingallthestationswheretheGMfunctionisinoperation1 Tune the frequency in Band A2 Press Up to 24 stations operating within the sphere of communication where the GM function is in operation. Tips • Stations within the sphere of communications are displayed in green. • Stations outside the sphere of communications are displayed in grey.)41725;0% .1)#..ᲸᲹᲽᲺᲾ81(,* Ჹ;2%ᲹᲺ ,# Ჹ<4.᳂᳂,3 Ჹ;$(᳂Ჹ Ჹ ●DisplayingonlypartnersregisteredinthegroupWhen a group that has been created beforehand is selected from the group list and the screen is touched, the status of the members registered in that group will be displayed.A total of up to 16 groups can be created. Names such as “Touring”, “Camp” etc. can be assigned to the groups. Up to 24 stations can be registered as members in each group.1 Tune in the frequency of Band A2 Press 3 Touch [GROUP])41725;0% .1)#..ᲸᲹᲽᲺᲾ81(,* Ჹ;2%ᲹᲺ ,# Ჹ<4.᳂᳂,3 Ჹ;$(᳂Ჹ ᲹApplication for FCC / IC FCC ID: K6620345X40 / IC: 511B-20345X40](https://usermanual.wiki/Yaesu-Musen/20345X40.User-Manual-9/User-Guide-2766136-Page-6.png)
![101101Using the GM FunctionBasicMethodsofUse4 Turn or touch the screen to select a group5 Touch the screen to select the group Up to 24 group members with the GM function in operation at the same frequency will be displayed.#..$#%-$#%-&'. '&+6Ჹ᳂ 6QWTK᳂ )4172 ᳂)4172 ᳂PI6 Touch [GROUP] The display will return to the group list.7 Press The GM function will be turned off and the display will return to the previous screen. Tip The communications mode will automatically switch to the DN mode of the AMS.Application for FCC / IC FCC ID: K6620345X40 / IC: 511B-20345X40](https://usermanual.wiki/Yaesu-Musen/20345X40.User-Manual-9/User-Guide-2766136-Page-7.png)
![102Convenient FunctionsConvenientFunctionsCommunicatingwithSpecifiedPartnerStationsUsingthetonesquelchThis radio is equipped with the CTCSS (Continuous Tone-coded Squelch System) which allows audio to be heard only when receiving signals containing the same frequency tone as the tone that has been set in the tone squelch menu. By matching the tone frequency with the partner station in advance, a quiet standby is possible.CautionCTCSS does not work in the digital mode. Use the key at the beginning to switch the communication mode to the auto-mode select function (AMS), or to the analog mode.SettingthetonefrequencyThe tone can be selected from 50 frequencies between 67.0 Hz and 254.1 Hz.1 Press for one second or longer The set-up menu will be displayed.2 Touch [SIGNALING] The menu list will be displayed.$#%-$#%-6:4:5'672/'074'5'6%.10'%10(+)9Ჰ4'55%#0&+52.#;5+) 0#.+0)#245 126+105&%#4&/'/14;&#6#%#..5+) 03 Turn or touch the screen to select [1TONESQLFREQ]4 Touch [1TONESQLFREQ] The characters of the set value will turn orange in color.$#%-$#%-&%5%1&'610'53.(4'3&6/(/'/14;#761&+#.'45+) 0#.+0)ᲸᲺ1((*\Ჽ᳀᳀ᲹᲺŻ5 Turn to select the frequency Tip Factory default value: 88.5 Hz&%5%1&'610'53.(4'3#761 &+#.'45+) 0#.+0)ᲸᲺ1((*\Ჽ᳀᳀ᲹᲺ6 Touch [1TONESQLFREQ] The characters of the set value will turn green in color.&%5%1&'610'53.(4'3#761 &+#.'45+) 0#.+0)ᲸᲺ1((*\Ჽ᳁ᲹᲹᲺ&%5%1&'610'53.(4'3#761 &+#.'45+) 0#.+0)ᲸᲺ1((*\Ჽ᳁ᲹᲹᲺApplication for FCC / IC FCC ID: K6620345X40 / IC: 511B-20345X40](https://usermanual.wiki/Yaesu-Musen/20345X40.User-Manual-9/User-Guide-2766136-Page-8.png)
![103Convenient FunctionsCommunicatingwithSpecifiedPartnerStationsConvenientFunctions7 Press for one second or longer The tone frequency will be set and the display will return to the previous screen. Tip The display can also be returned to the previous screen by touching [BACK] twice.Usingthetonesquelch1 Press The function menu will be displayed.2 Touch [SQL] to display “T-TRX” Tips • When [SQL] is not displayed in the menu, use [BACK] or [FWD] to change the menu. • The squelch type changes in the following sequence each time it is touched. “NOISE” “T-TX” “T-TRX” “T-REV” “D-TRX” “PRGM” “PAGER” “D-TX”* “TT/DR”* “DT/TR”* * These squelch types will be displayed when [SIGNALING] → [8SQLEXPANSION] is set to “ON” in the set-up menu.ᲹᲽᲾᲸᲸᲹᲺ᳀;1-1*#/# ᳀ᲾᲸᲽᲸᲸ61-;1Ჺ/76'5%12'/8 53.$#%- (9&/8 /76'5%12'53.01+5'53.&6/( The squelch will open only when receiving a tone signal of the set frequency.ᲹᲽᲾᲸᲸᲹᲺ᳀;1-1*#/# ᳀ᲾᲸᲽᲸᲸ61-;1Ჺ/76'5%12'/8 53.$#%- (9&/8 /76'5%12'53.664:53.&6/(TipA bell can be rung (beep) when signals containing the same tone code are received ( P.110).Transmittingthetonesignal1 Press The function menu will be displayed.2 Touch [SQL] to display “T-TX”ᲹᲽᲾᲸᲸᲹᲺ᳀;1-1*#/# ᳀ᲾᲸᲽᲸᲸ61-;1Ჺ/76'5%12'/8 53.$#%- (9&/8 /76'5%12'53.01+5'53.&6/(Application for FCC / IC FCC ID: K6620345X40 / IC: 511B-20345X40](https://usermanual.wiki/Yaesu-Musen/20345X40.User-Manual-9/User-Guide-2766136-Page-9.png)
![104Convenient FunctionsCommunicatingwithSpecifiedPartnerStations3 Press the microphone [PTT] Radio waves including the tone signal will be transmitted while [PTT] is being pressed.ᲹᲽᲾᲸᲸᲹᲺ᳀;1-1*#/# ᳀ᲾᲸᲽᲸᲸ61-;1Ჺ/76'5%12'/8 53.$#%- (9&/8 /76'5%12'53.66:53.&6/(TipWhen alternating between transmit and receive repeatedly, set [SQL] in the function menu to “T-TRX”.UsingdigitalcodesquelchThis radio is equipped with a DCS (Digital Coded Squelch) function that allows audio to be heard only when signals containing the same DCS code are received. By matching the DCS code with the partner station beforehand, a quiet receive standby is possible.CautionDCS does not work in the digital mode. Use the key at the beginning to switch the communication mode to the auto-mode select function (AMS) or analog mode.SettingtheDCScodeThe DCS code can be selected from 104 digital codes 023 to 754.1 Press for one second or longer The set-up menu will be displayed.2 Touch [SIGNALING] The menu list will be displayed.$#%-$#%-6:4:5'672/'074'5'6%.10'%10(+)9Ჰ4'55%#0&+52.#;5+) 0#.+0)#245 126+105&%#4&/'/14;&#6#%#..5+) 03 Turn , or touch the screen to select [2DCSCODE]4 Touch [2DCSCODE] The characters of the set value will turn orange in color.$#%-$#%-&%5%1&'610'53.(4'3&6/(/'/14;#761&+#.'45+) 0#.+0)ᲸᲺ1((*\Ჽ᳀᳀ᲹᲺŻApplication for FCC / IC FCC ID: K6620345X40 / IC: 511B-20345X40](https://usermanual.wiki/Yaesu-Musen/20345X40.User-Manual-9/User-Guide-2766136-Page-10.png)