X Micro Technology XWL-11BARG X-Micro WLAN 11b Access Point User Manual WL 1302 User s Manual v1 0
X-Micro Technology Corp., X-Micro WLAN 11b Access Point WL 1302 User s Manual v1 0
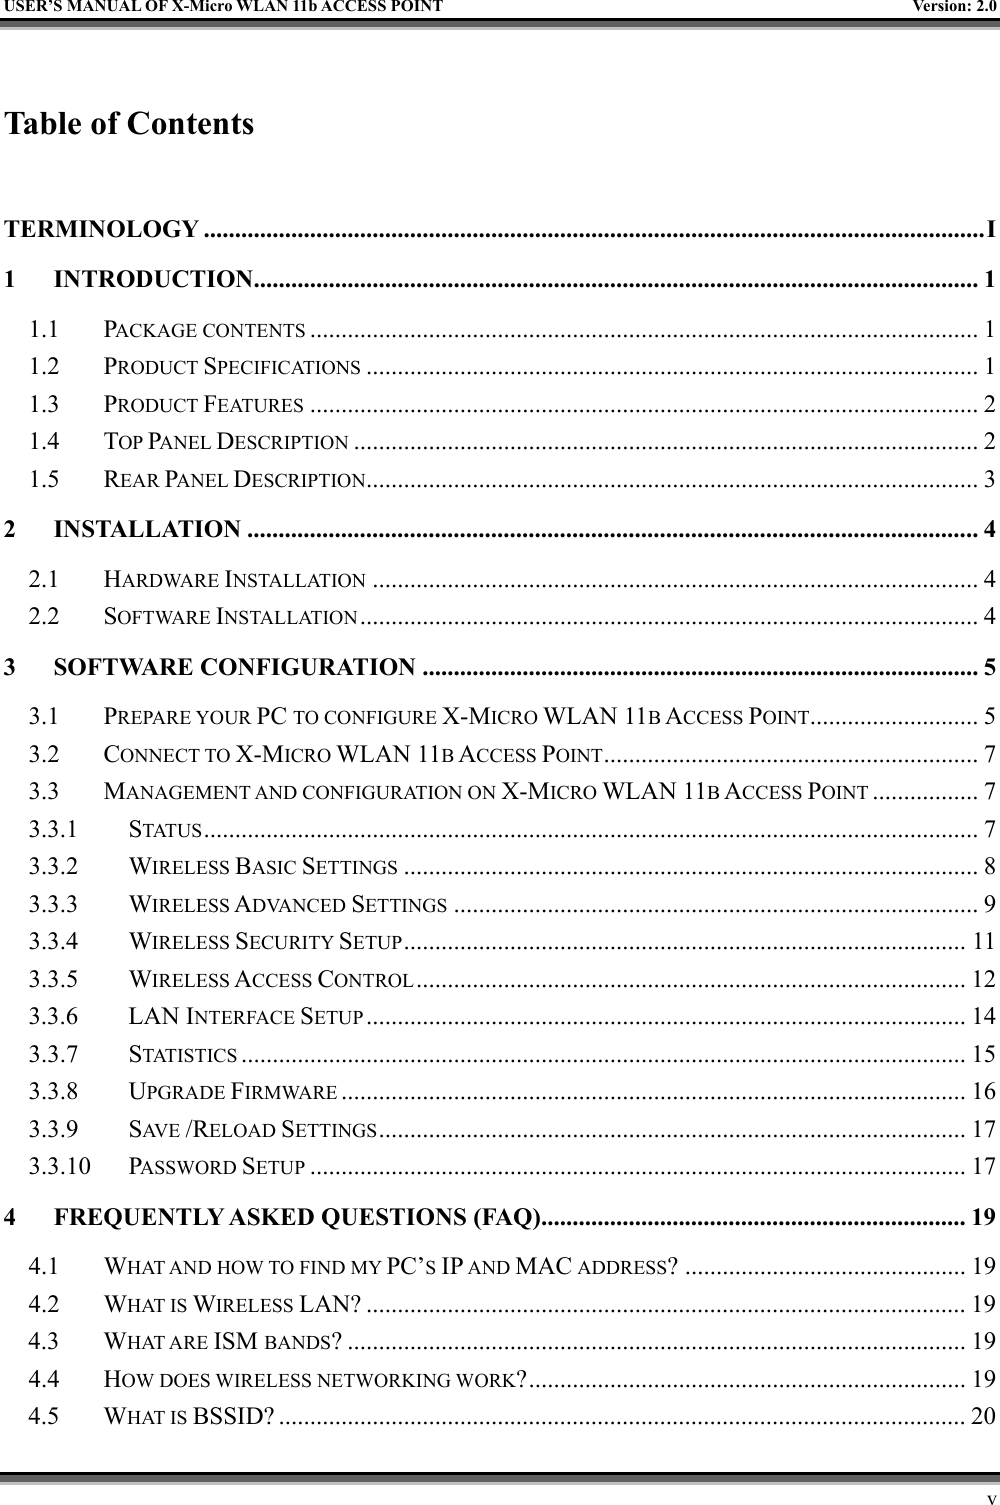
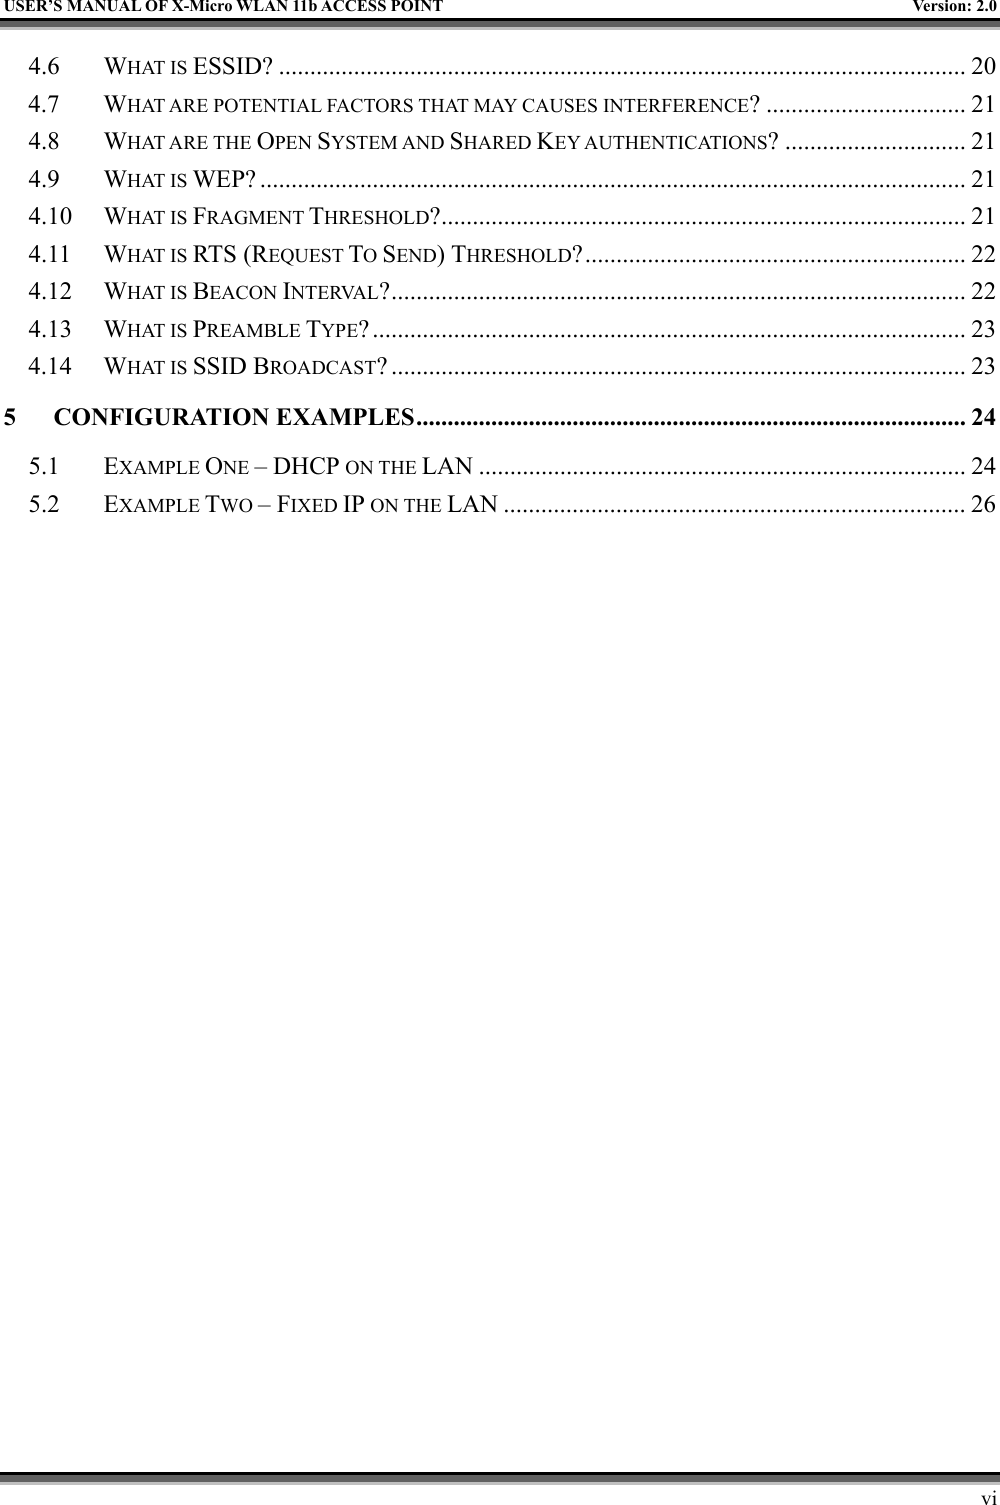
Contents
- 1. DoC
- 2. Users Manual Part 1
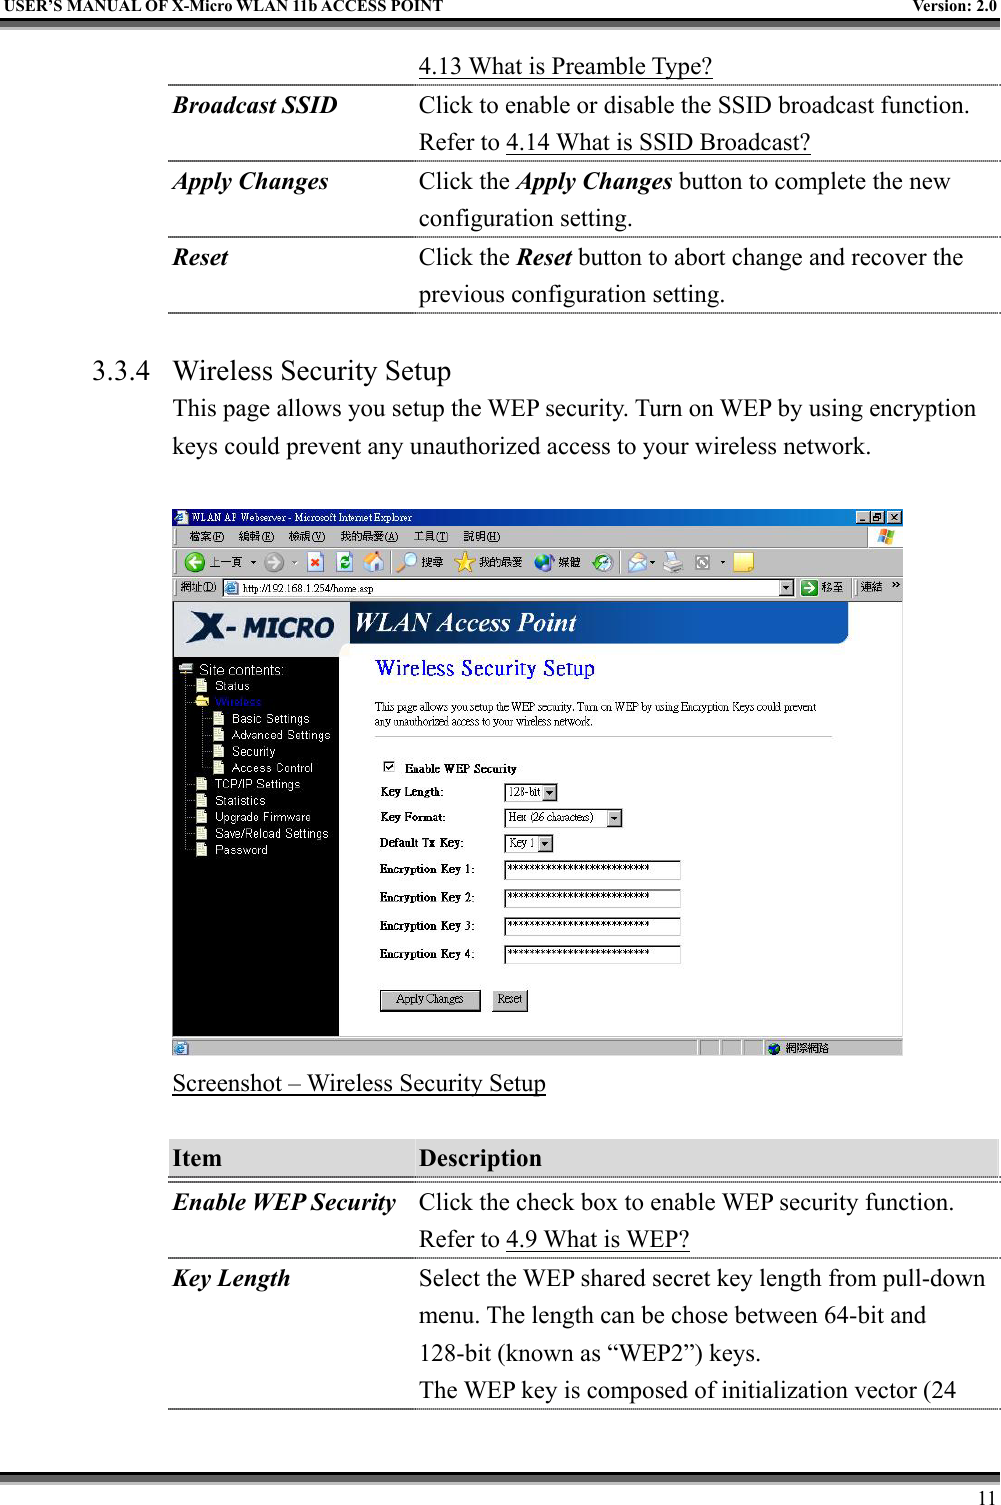
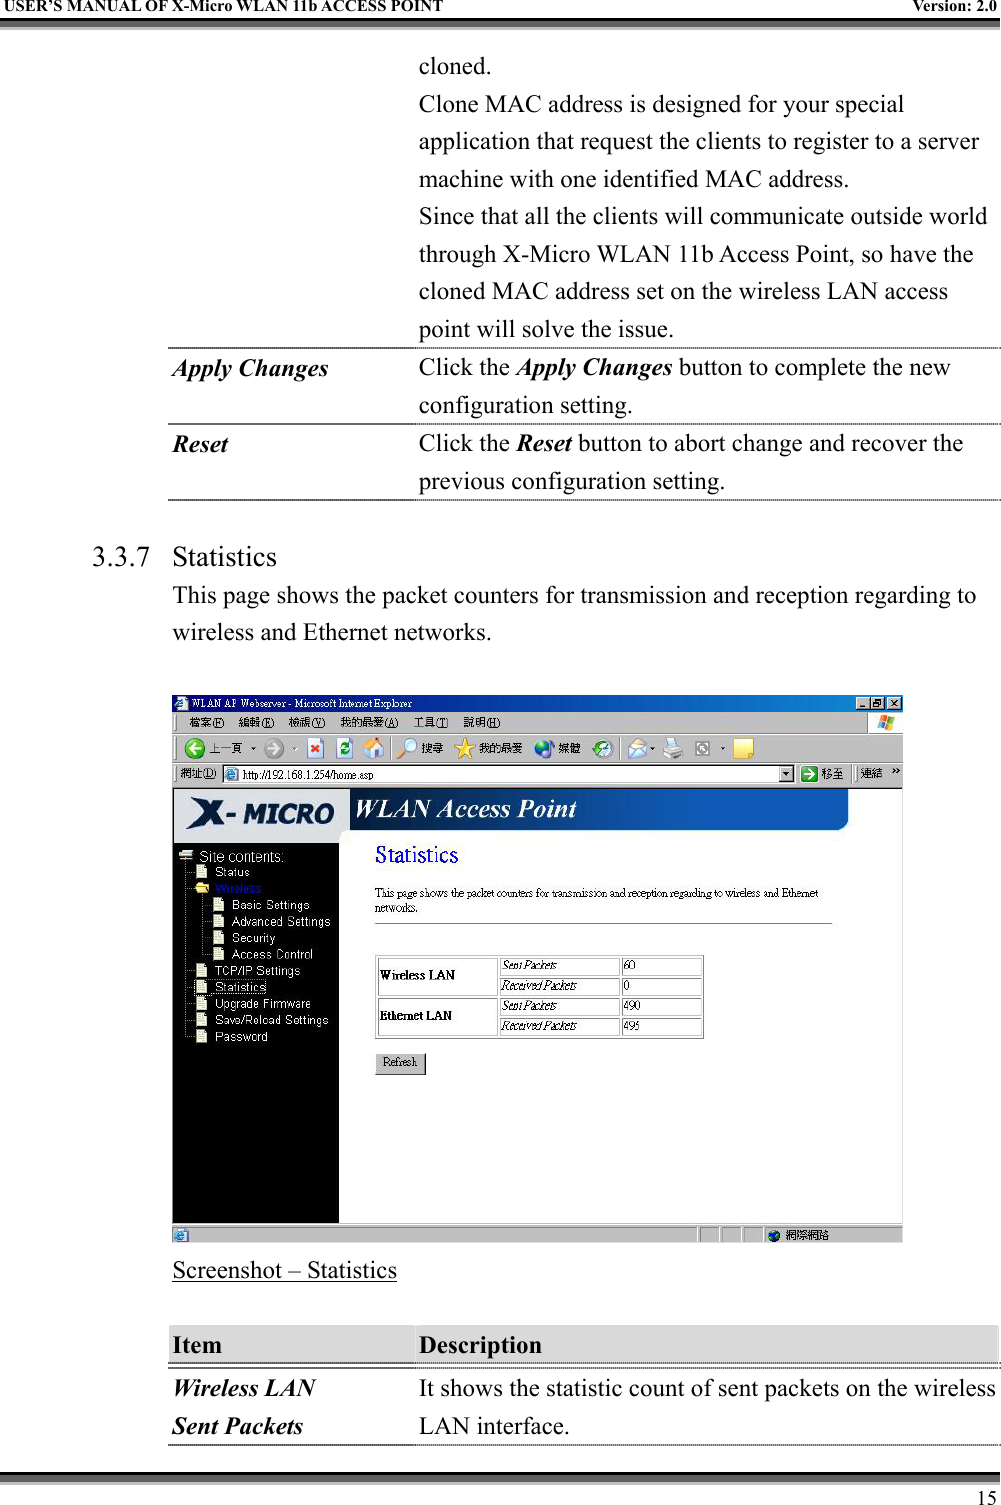
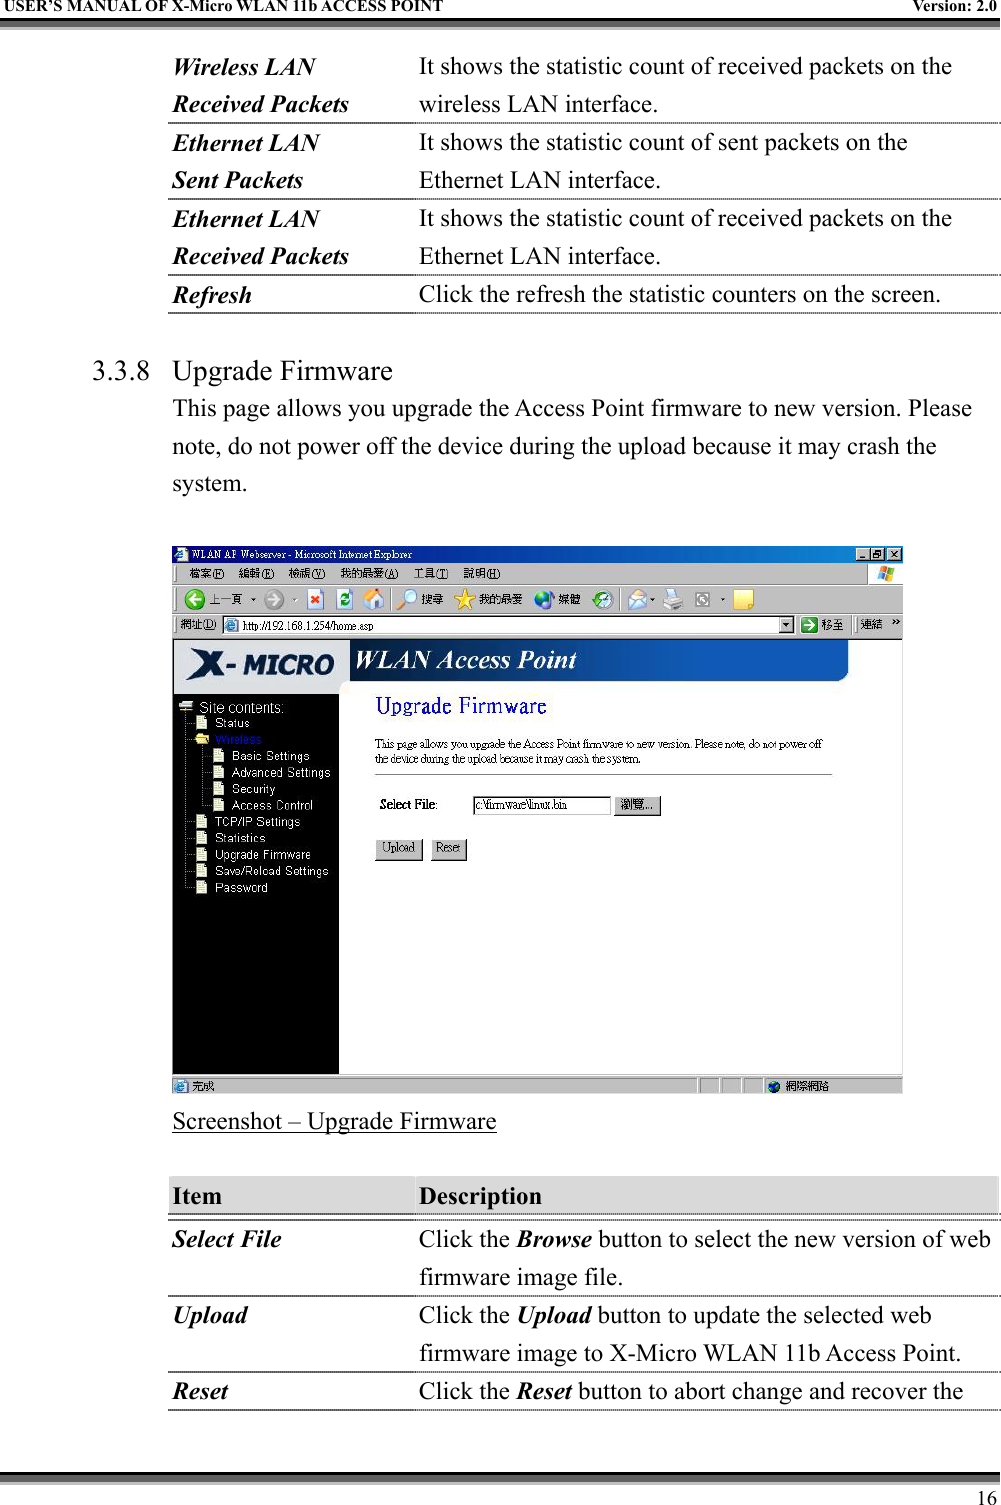
- 3. Users Manual Part 2
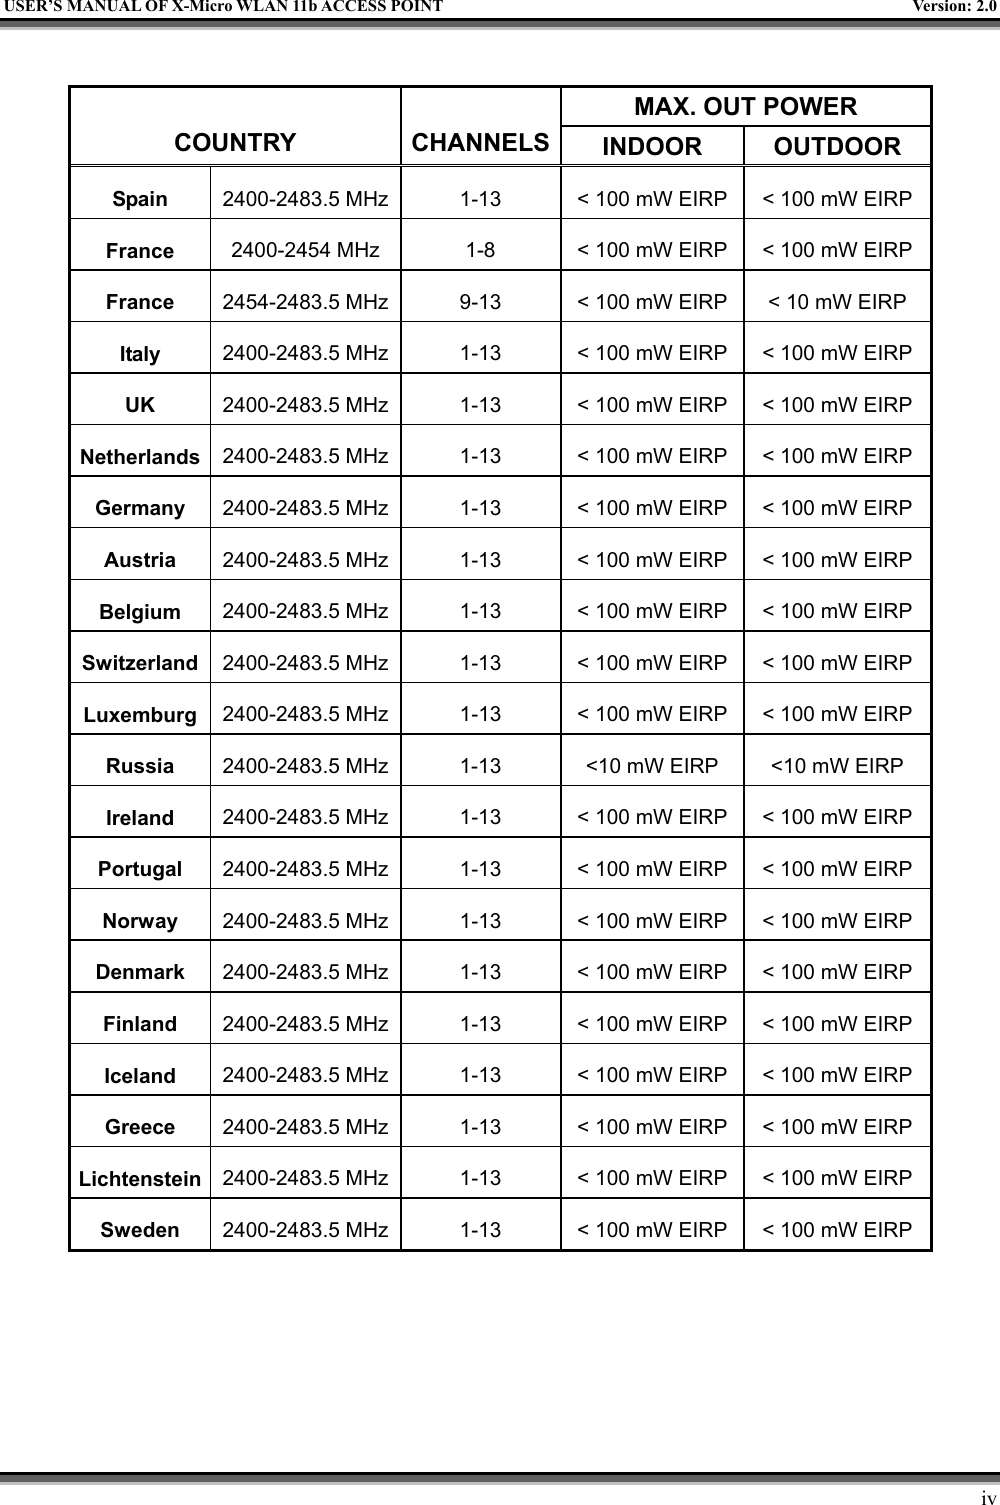
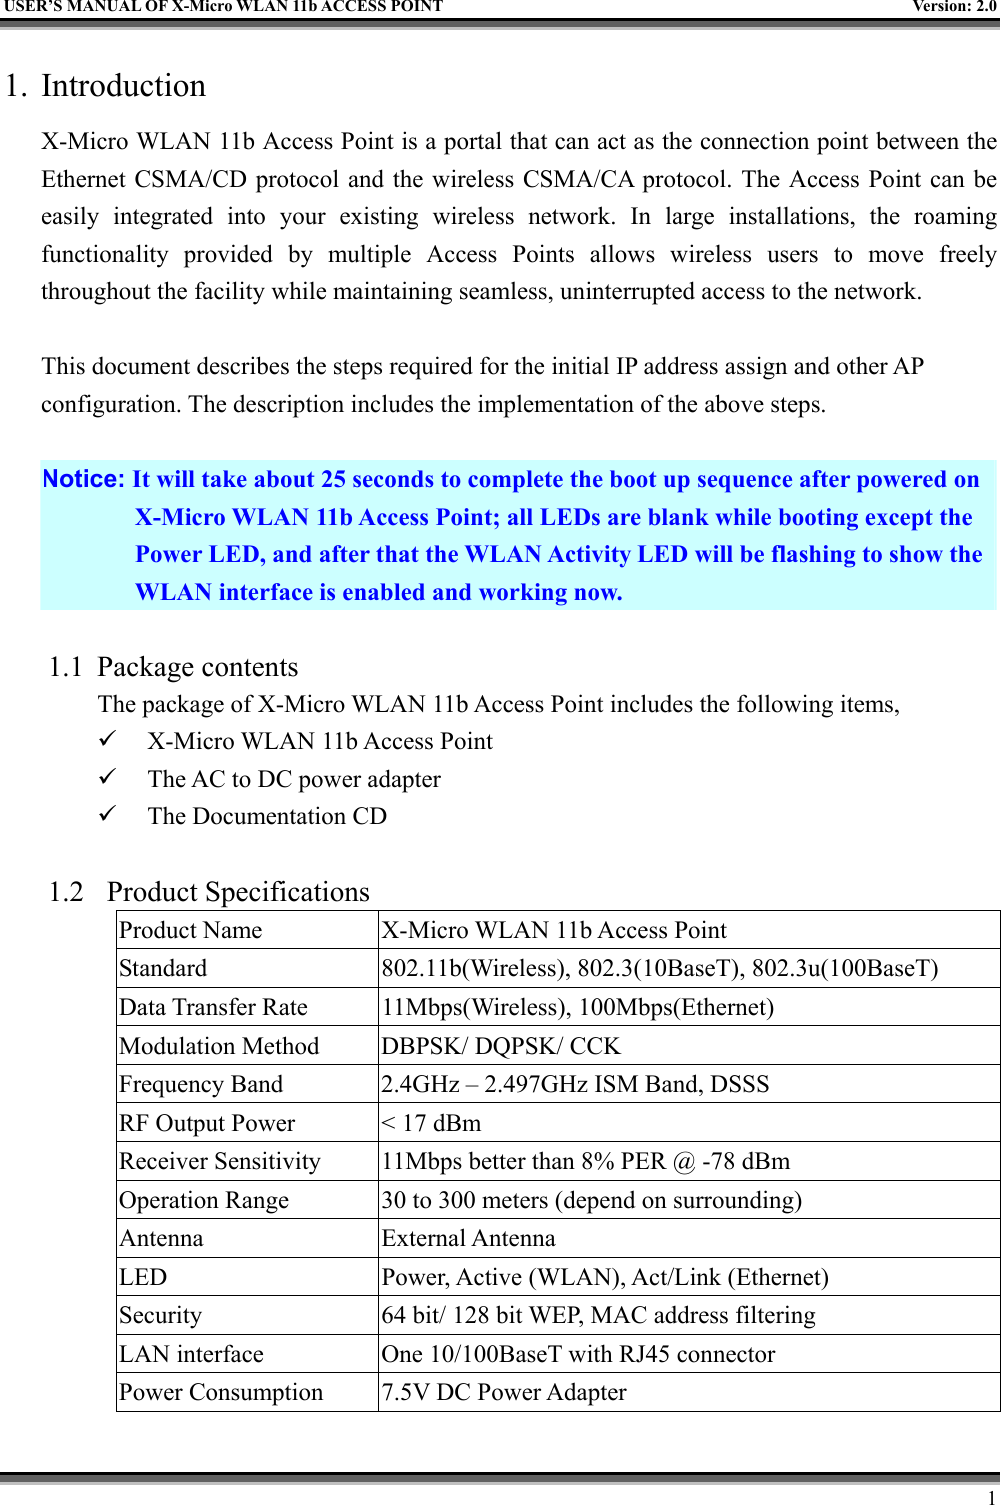
Users Manual Part 1