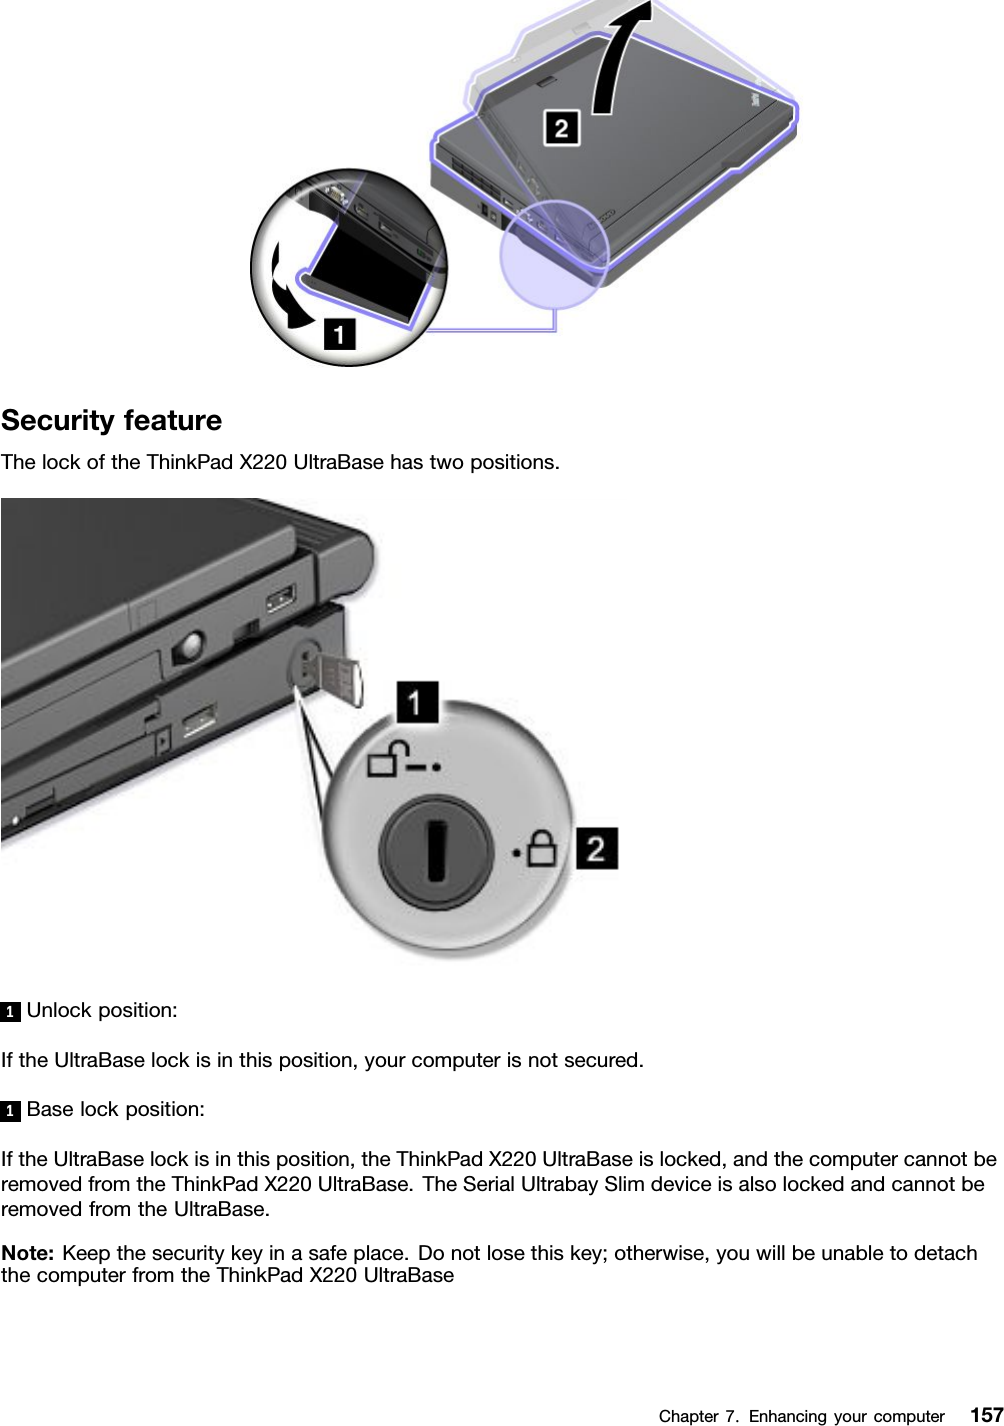
Wistron TP00019A LENOVO NOTEBOOK COMPUTER (WITH WACOM DIGITIZER, MODEL: SU6E-12W04AU, SU6C-12W04AU) User Manual 2
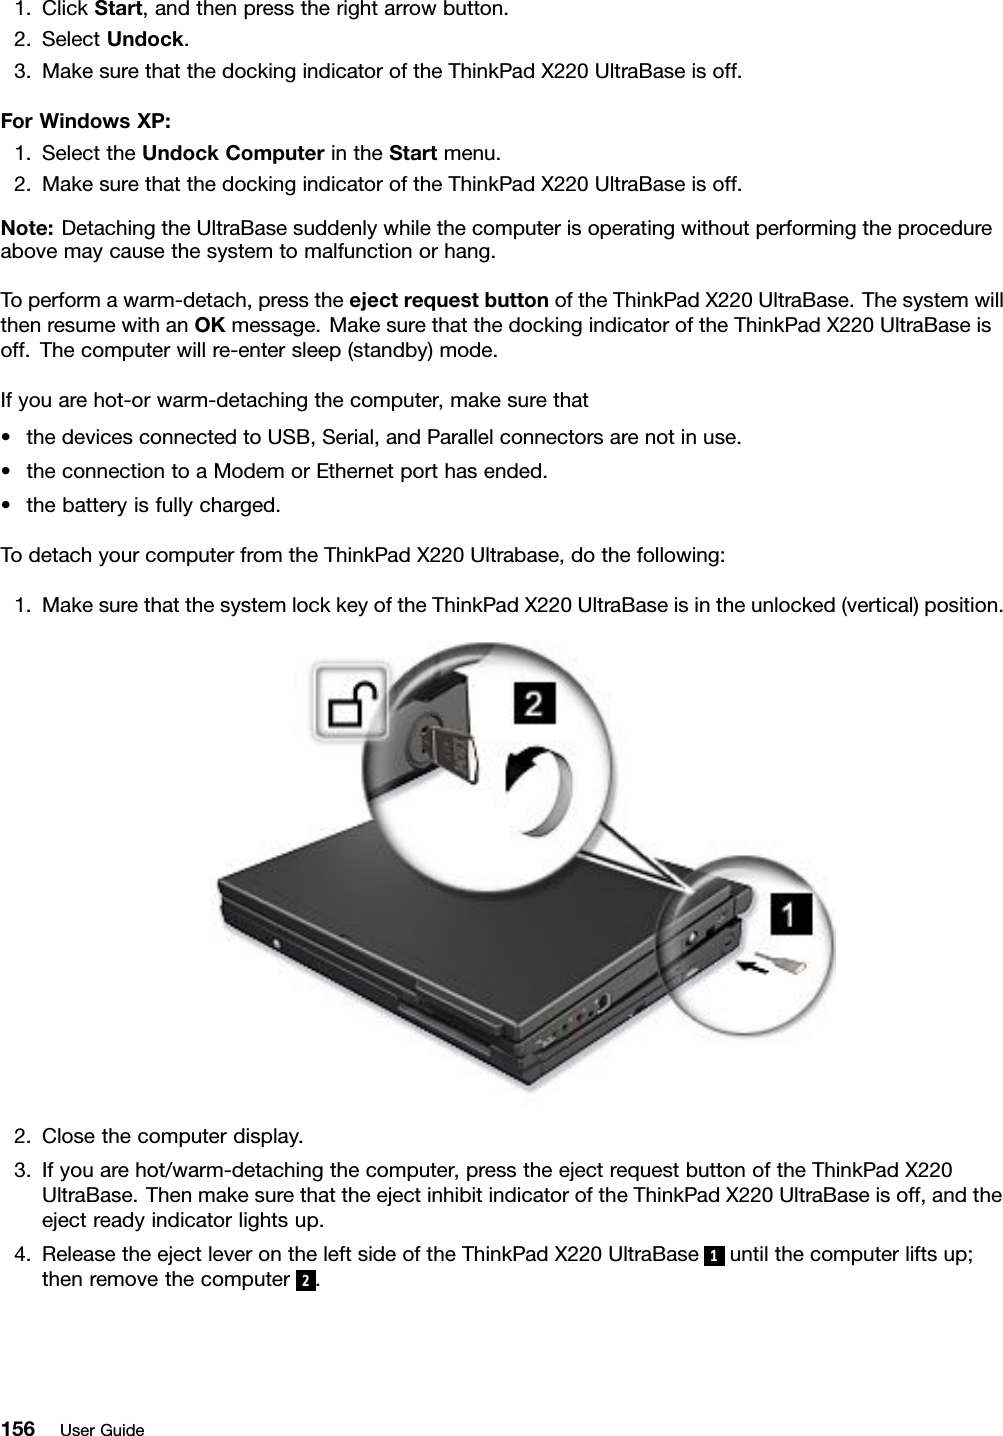
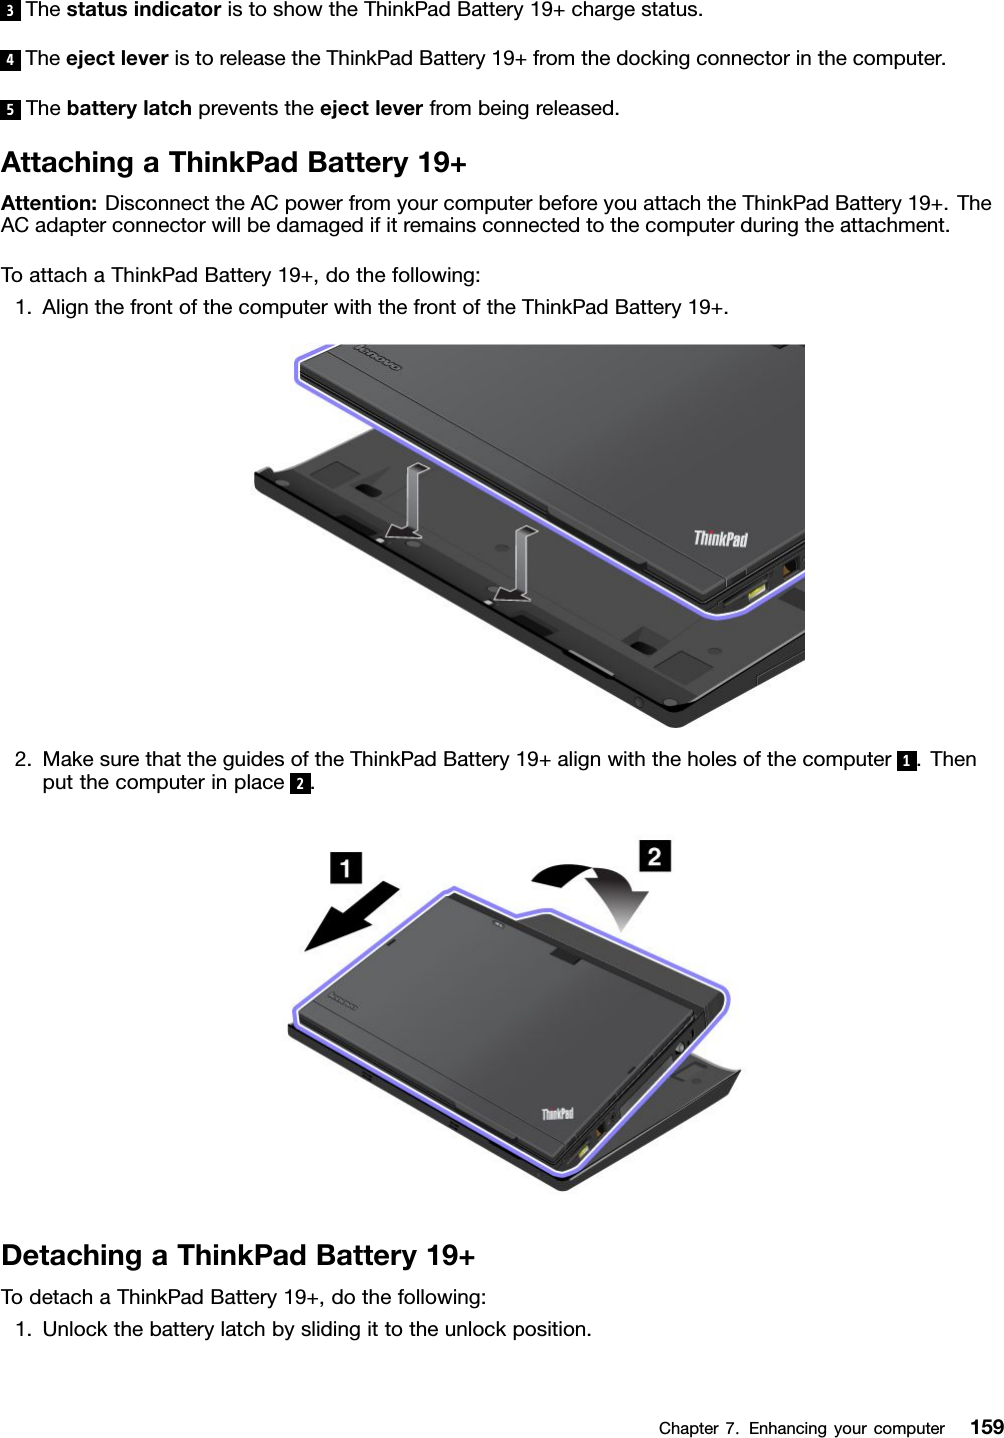
Wistron Corporation LENOVO NOTEBOOK COMPUTER (WITH WACOM DIGITIZER, MODEL: SU6E-12W04AU, SU6C-12W04AU) Users Manual 2
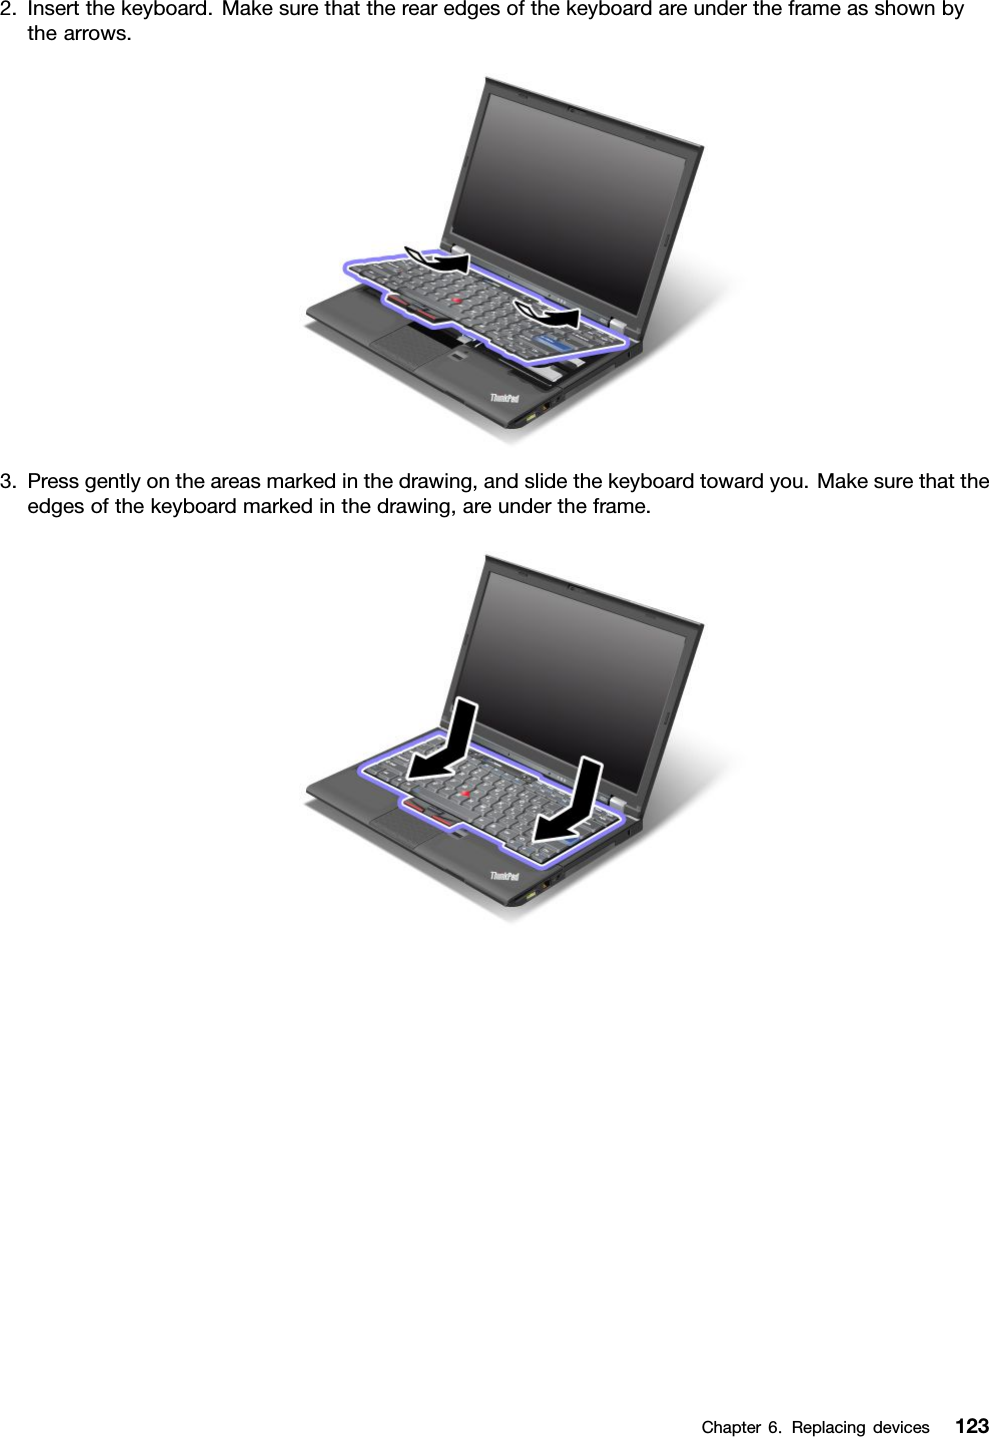
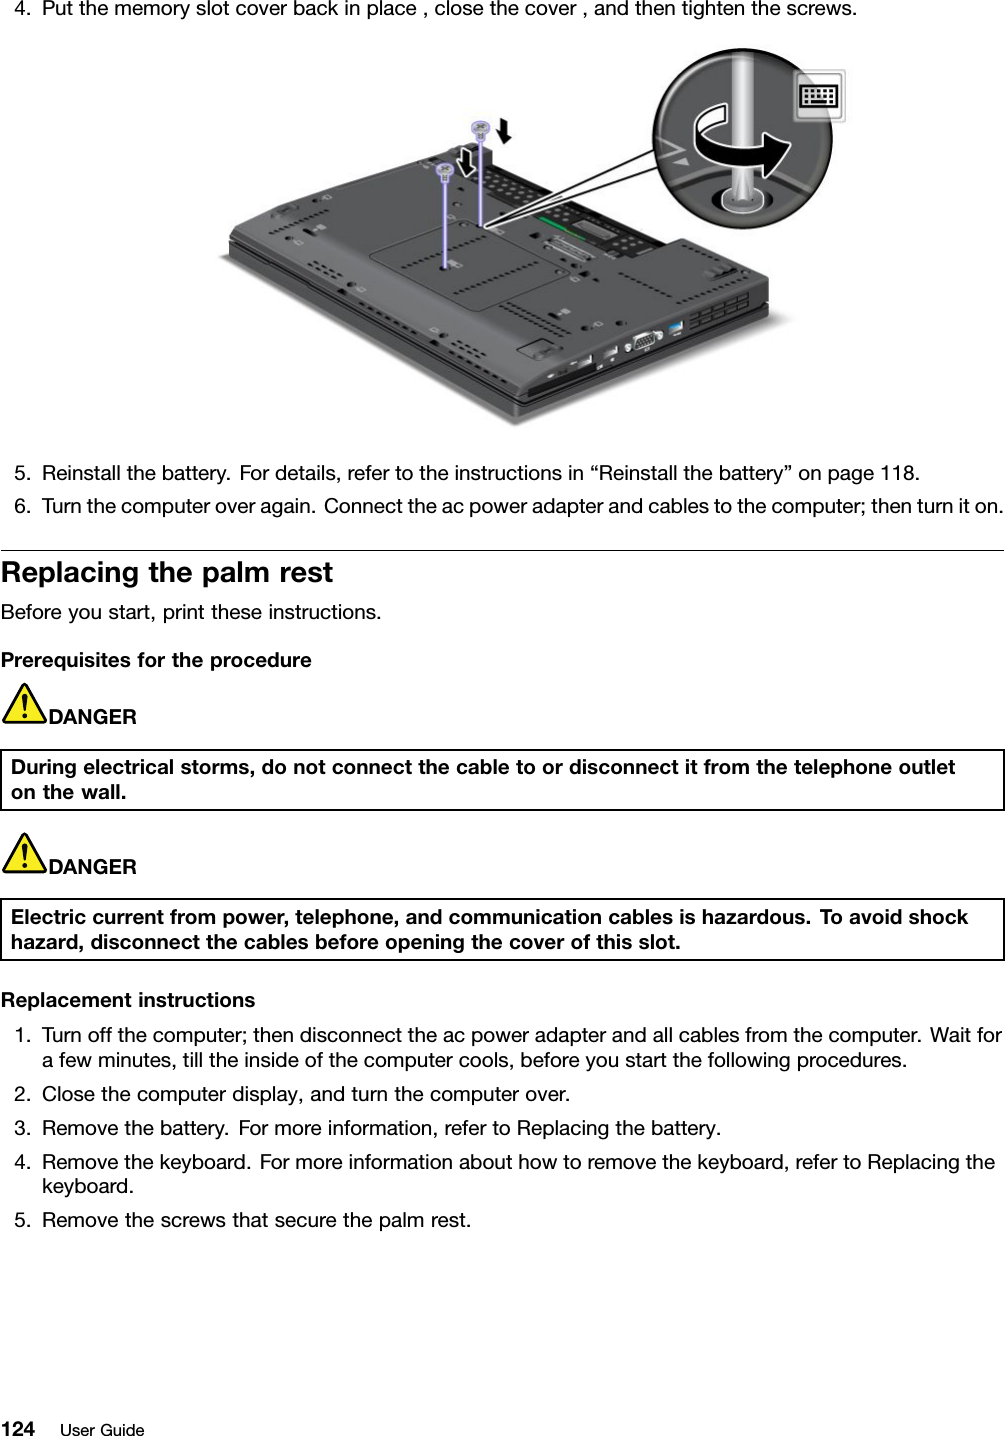
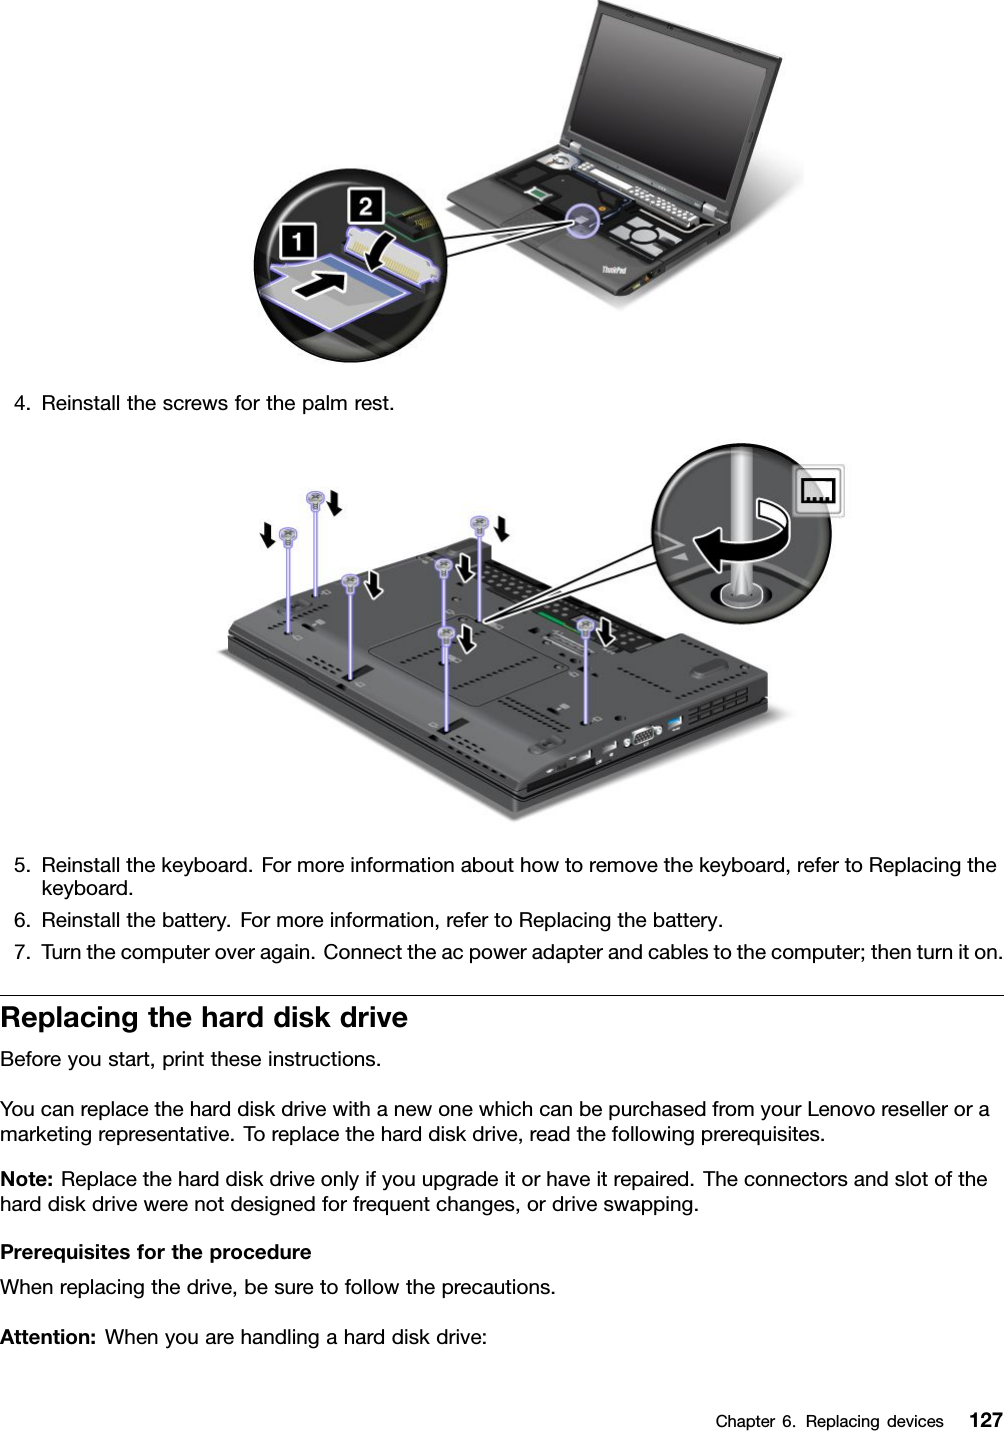
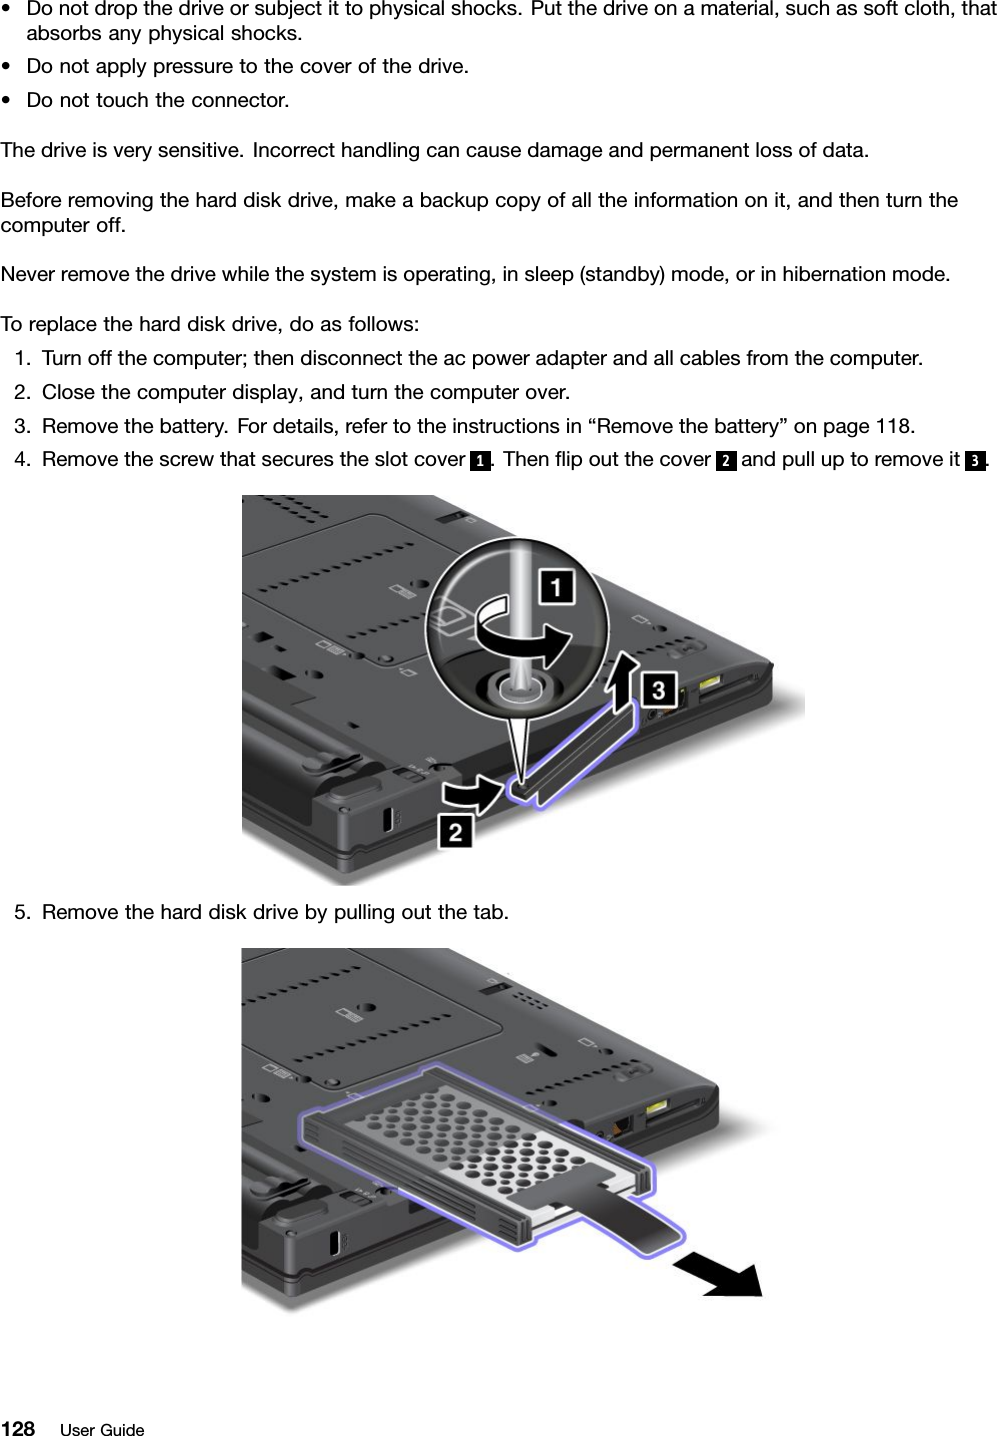
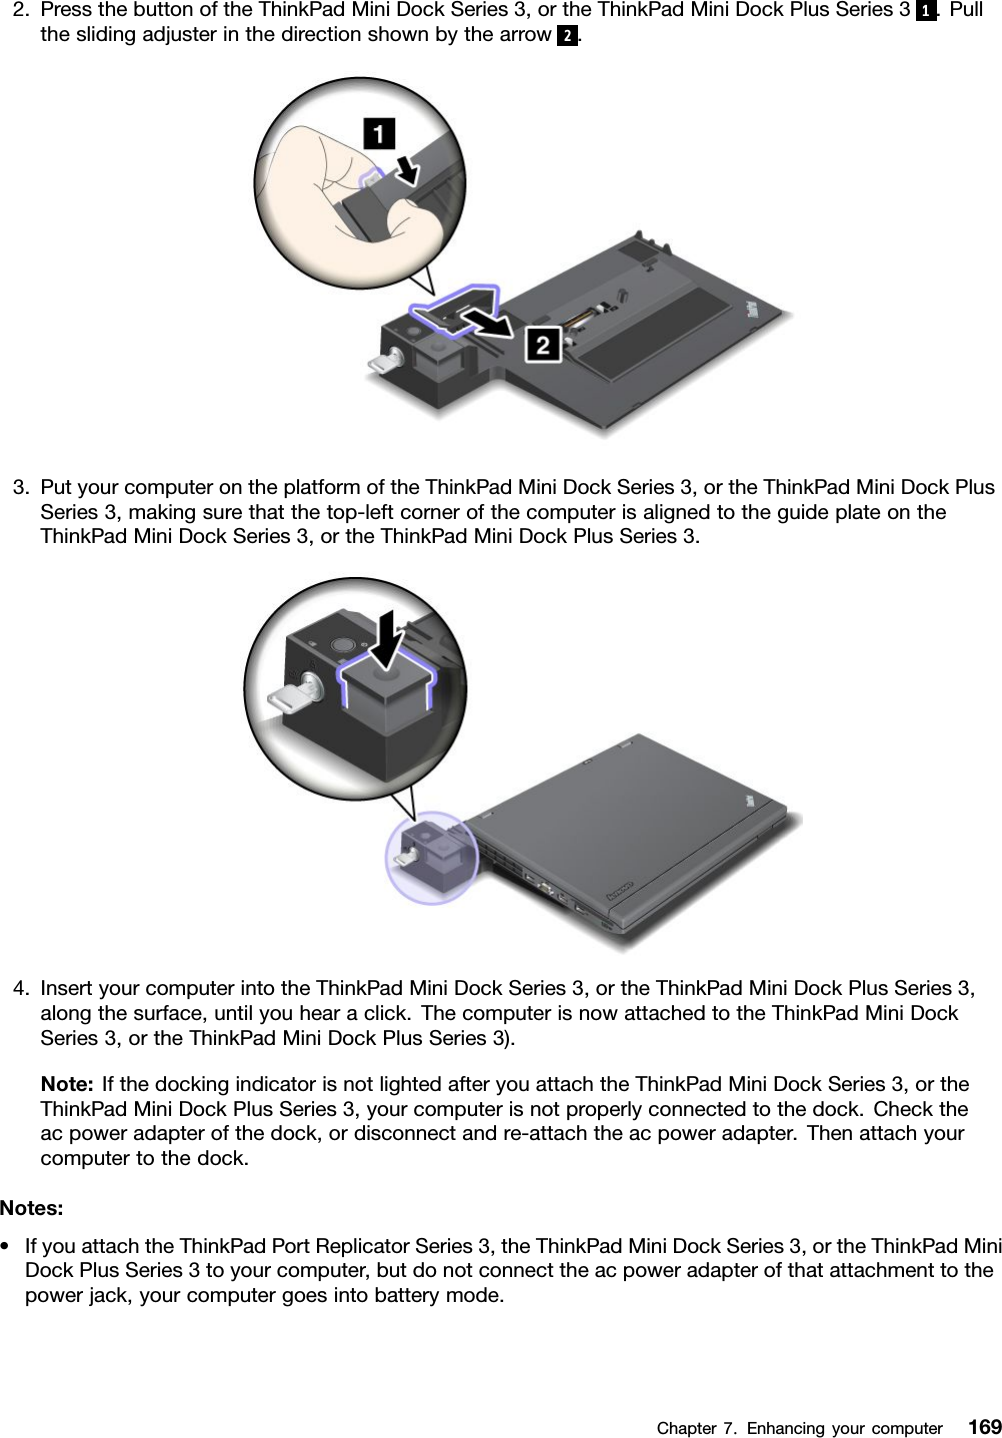
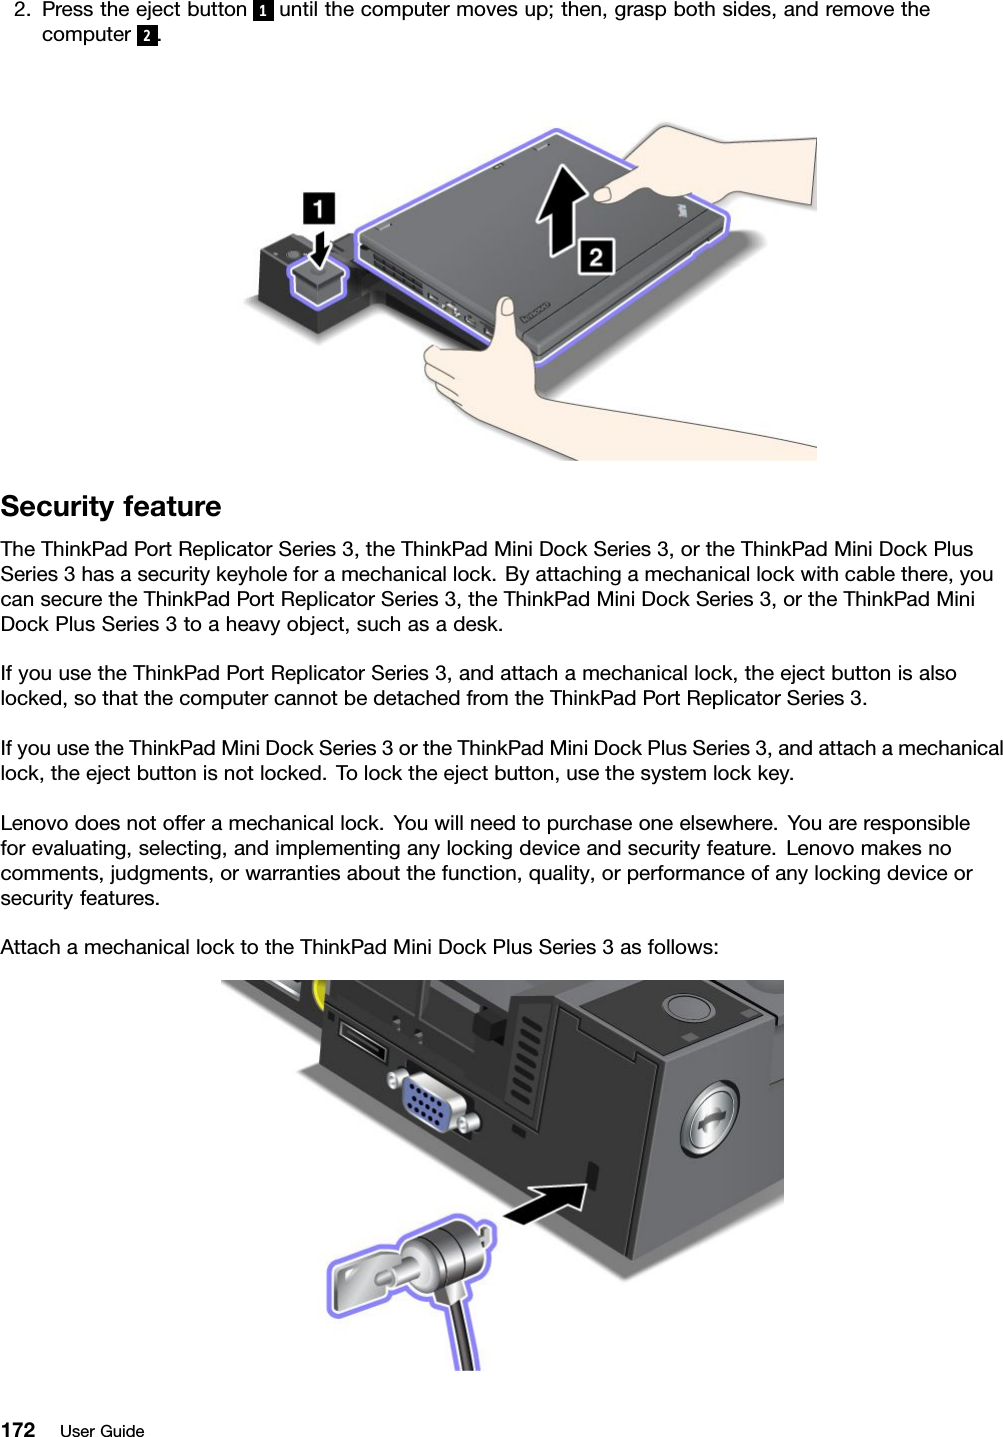
Wistron >
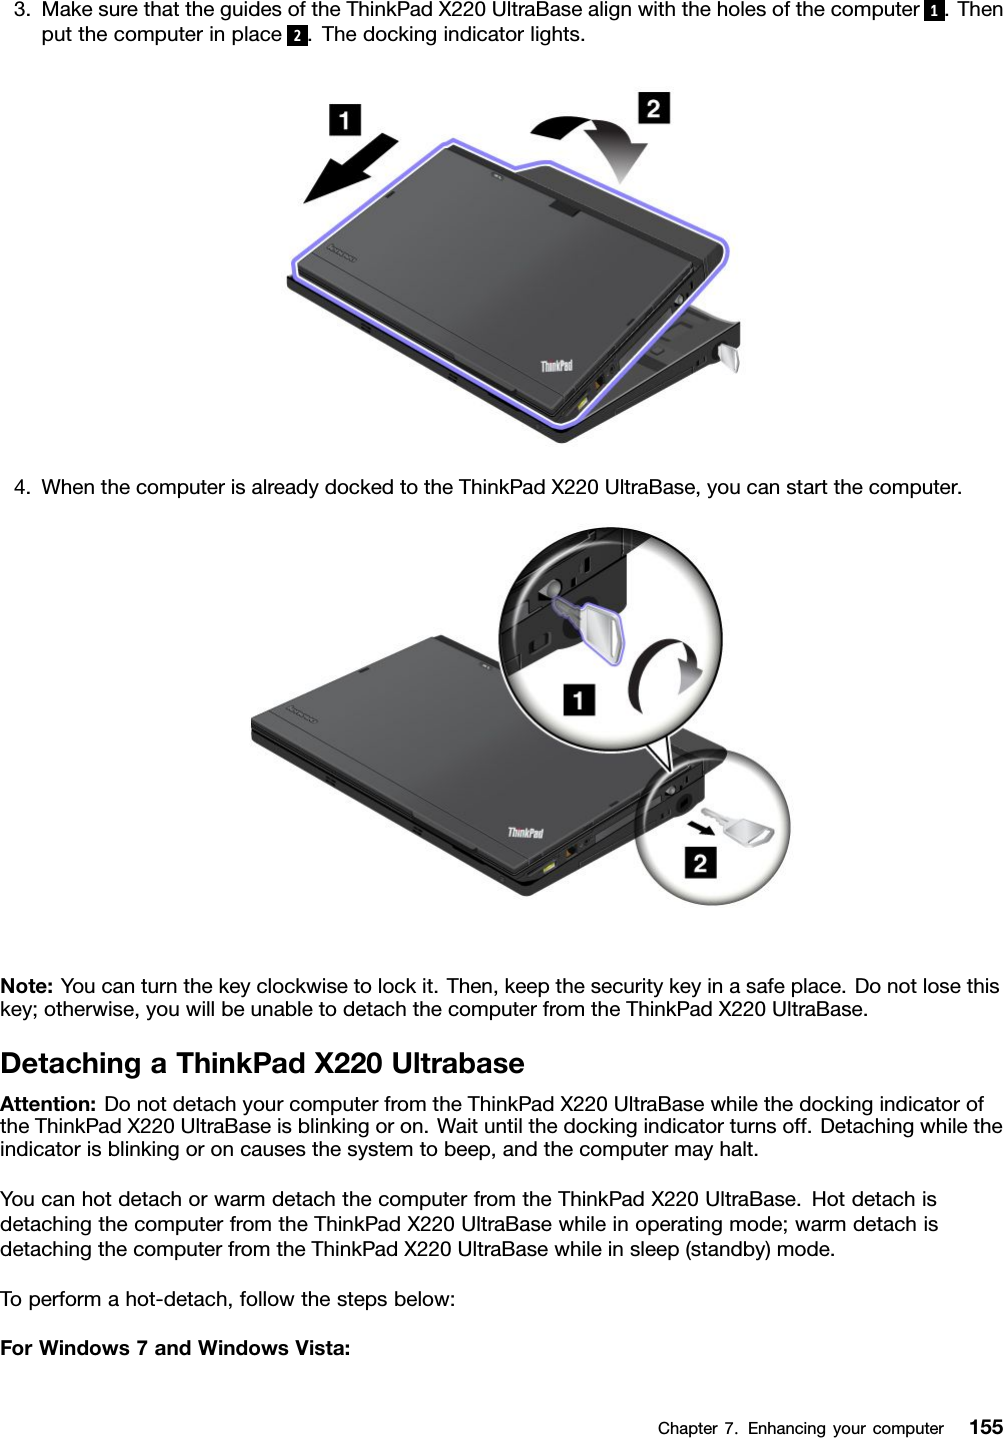
Contents
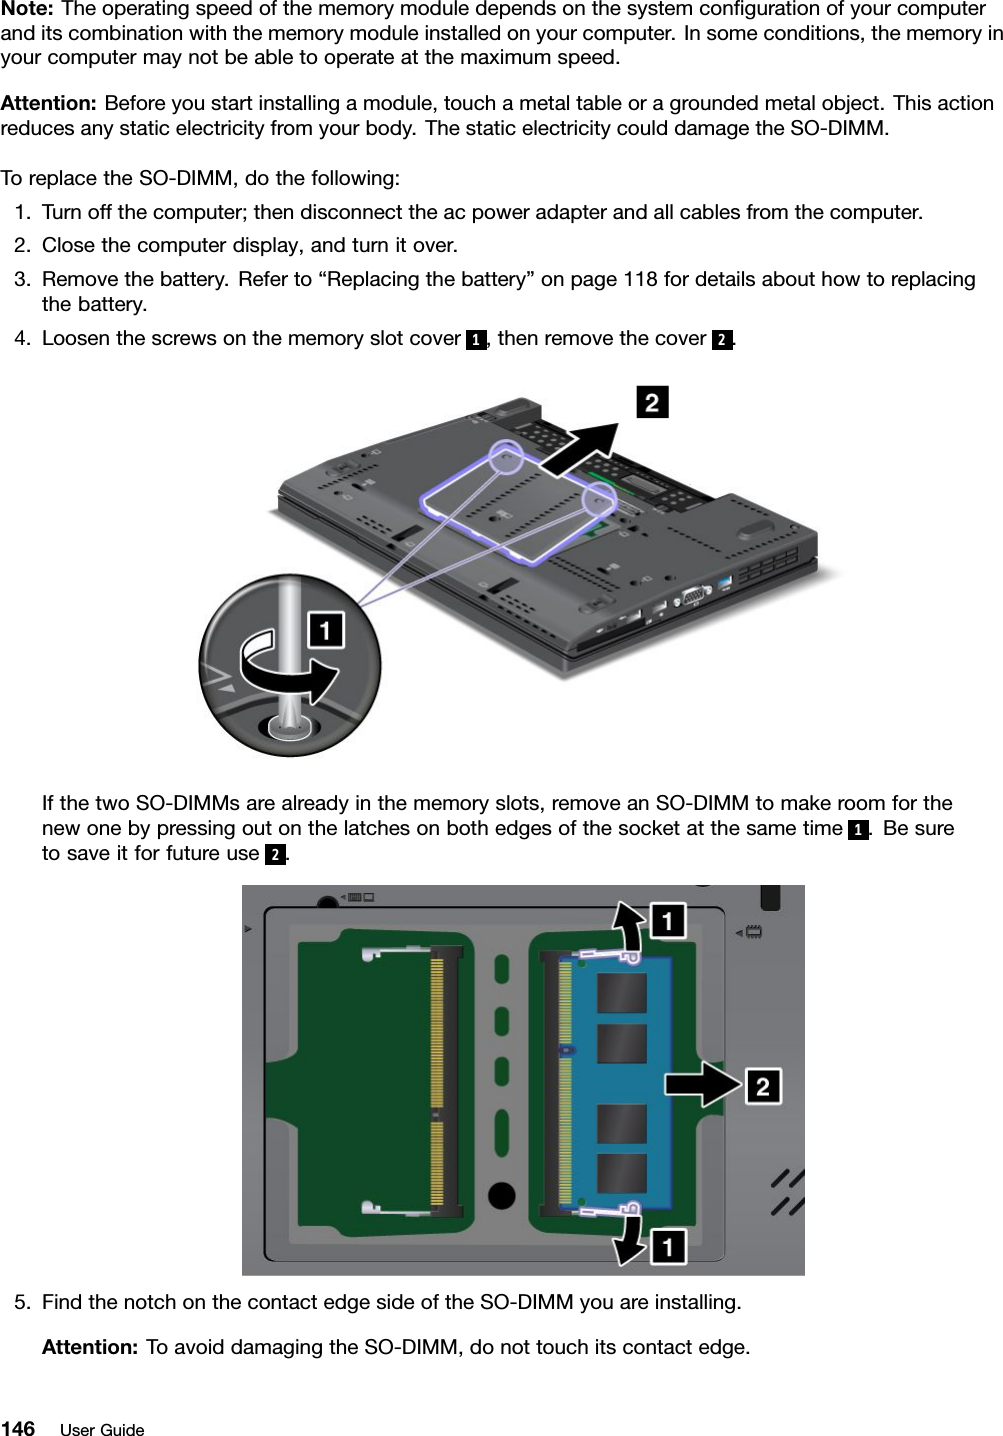
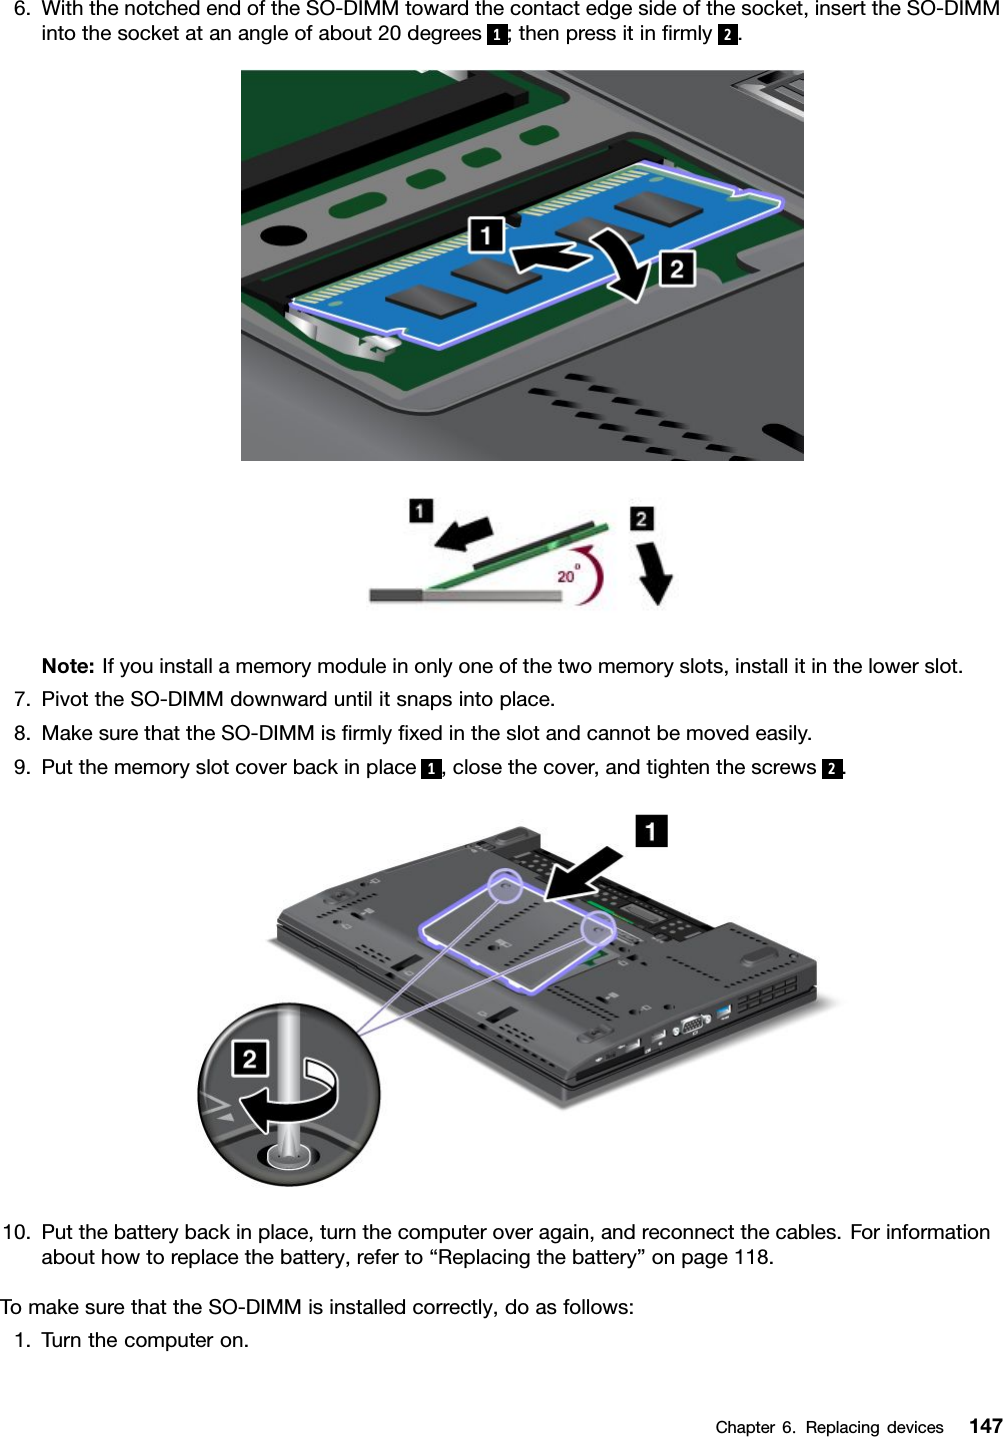
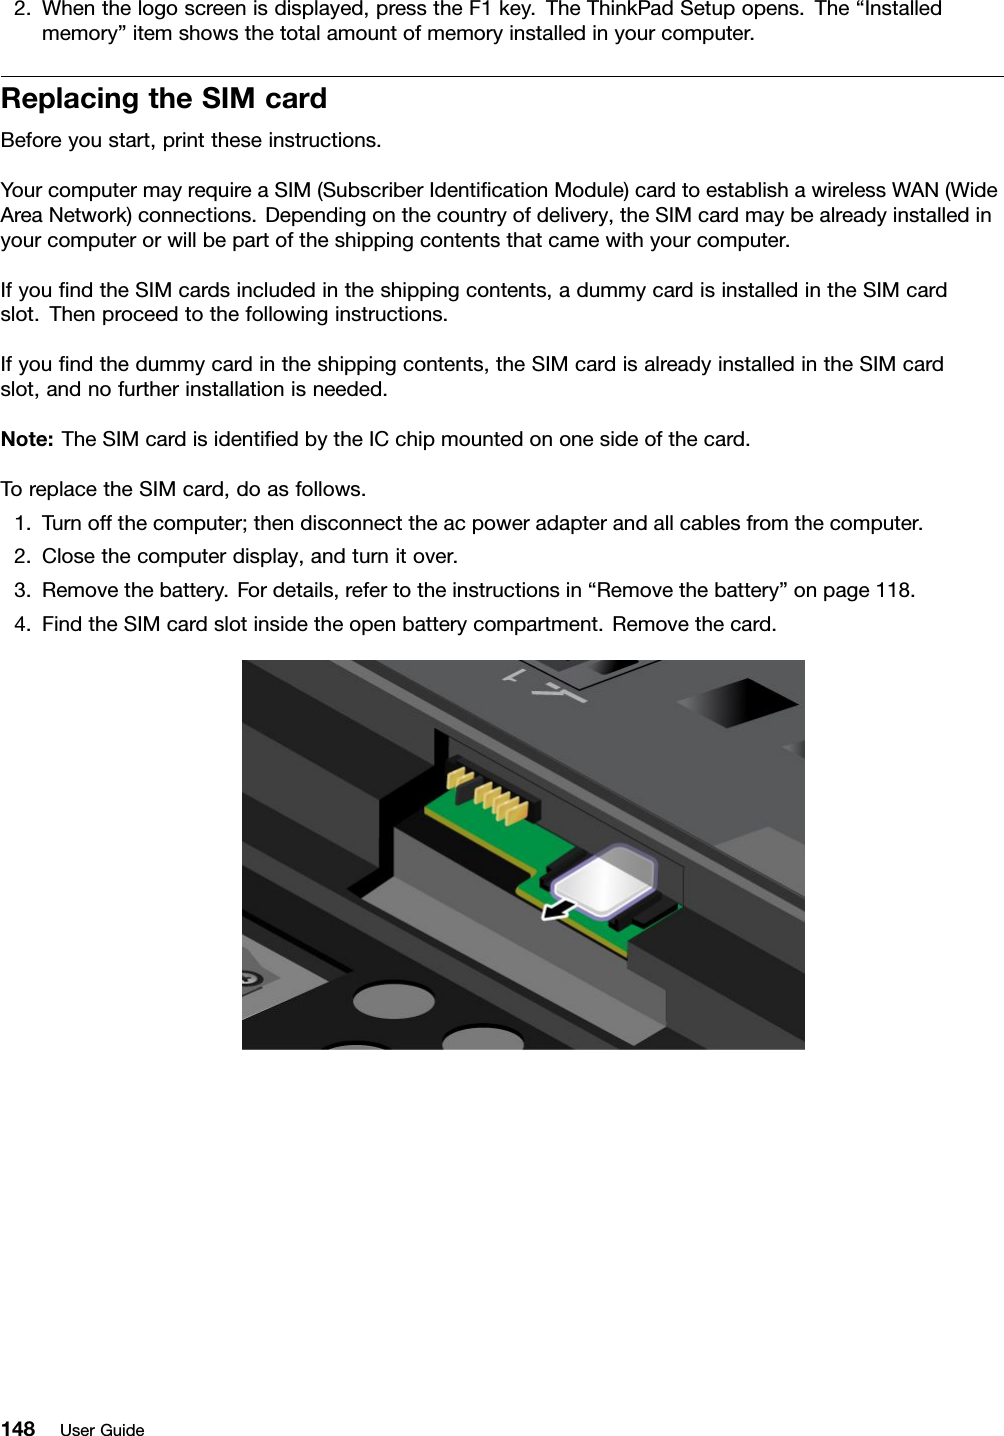
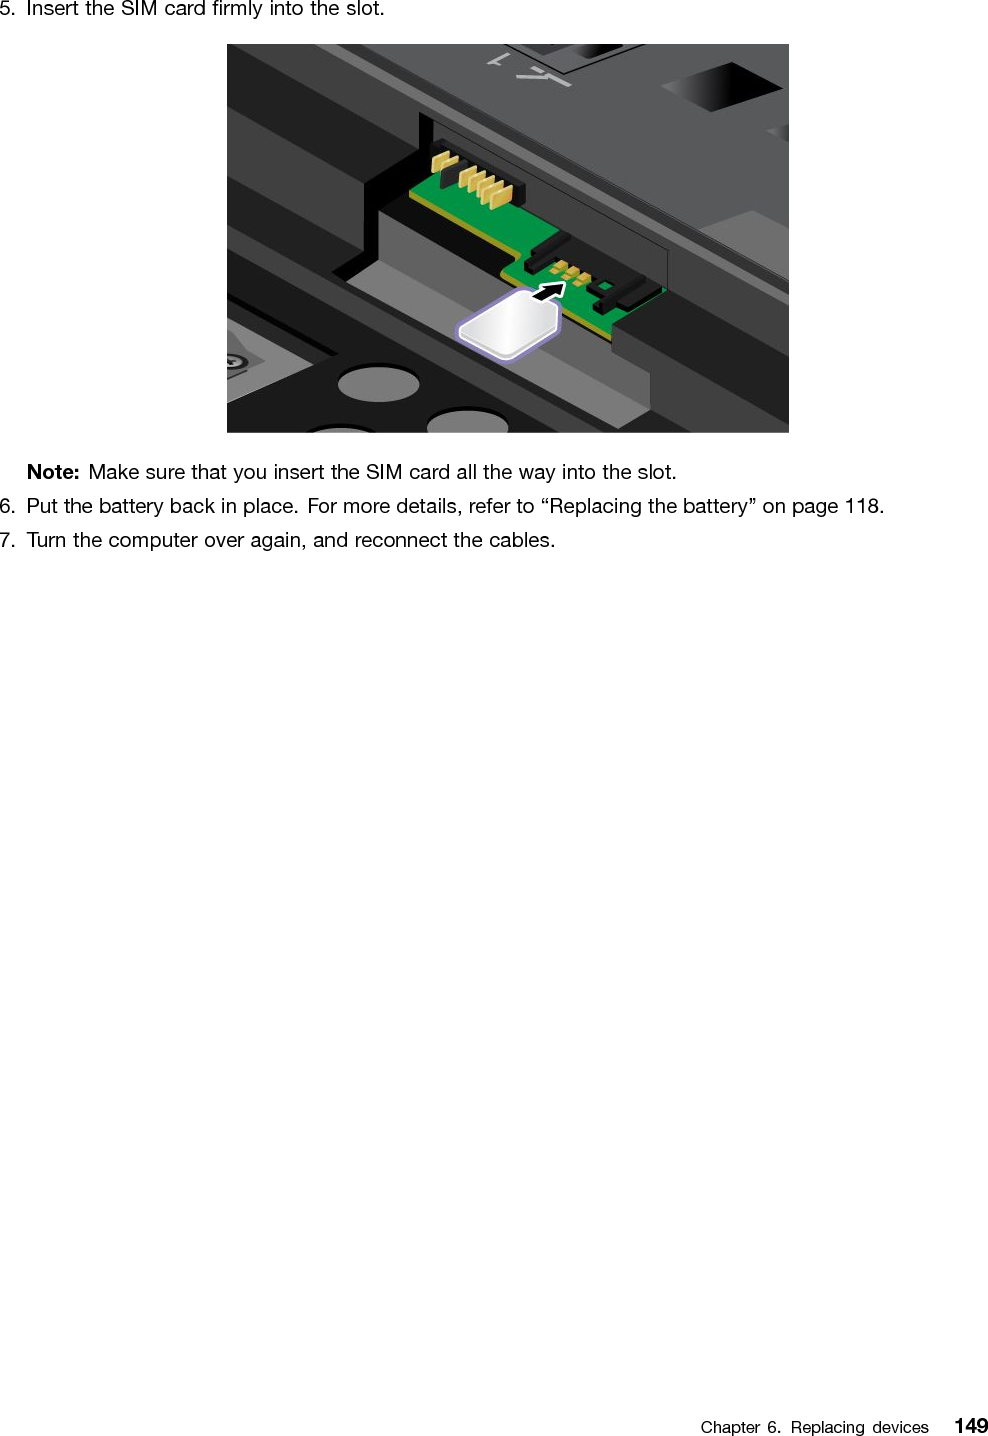
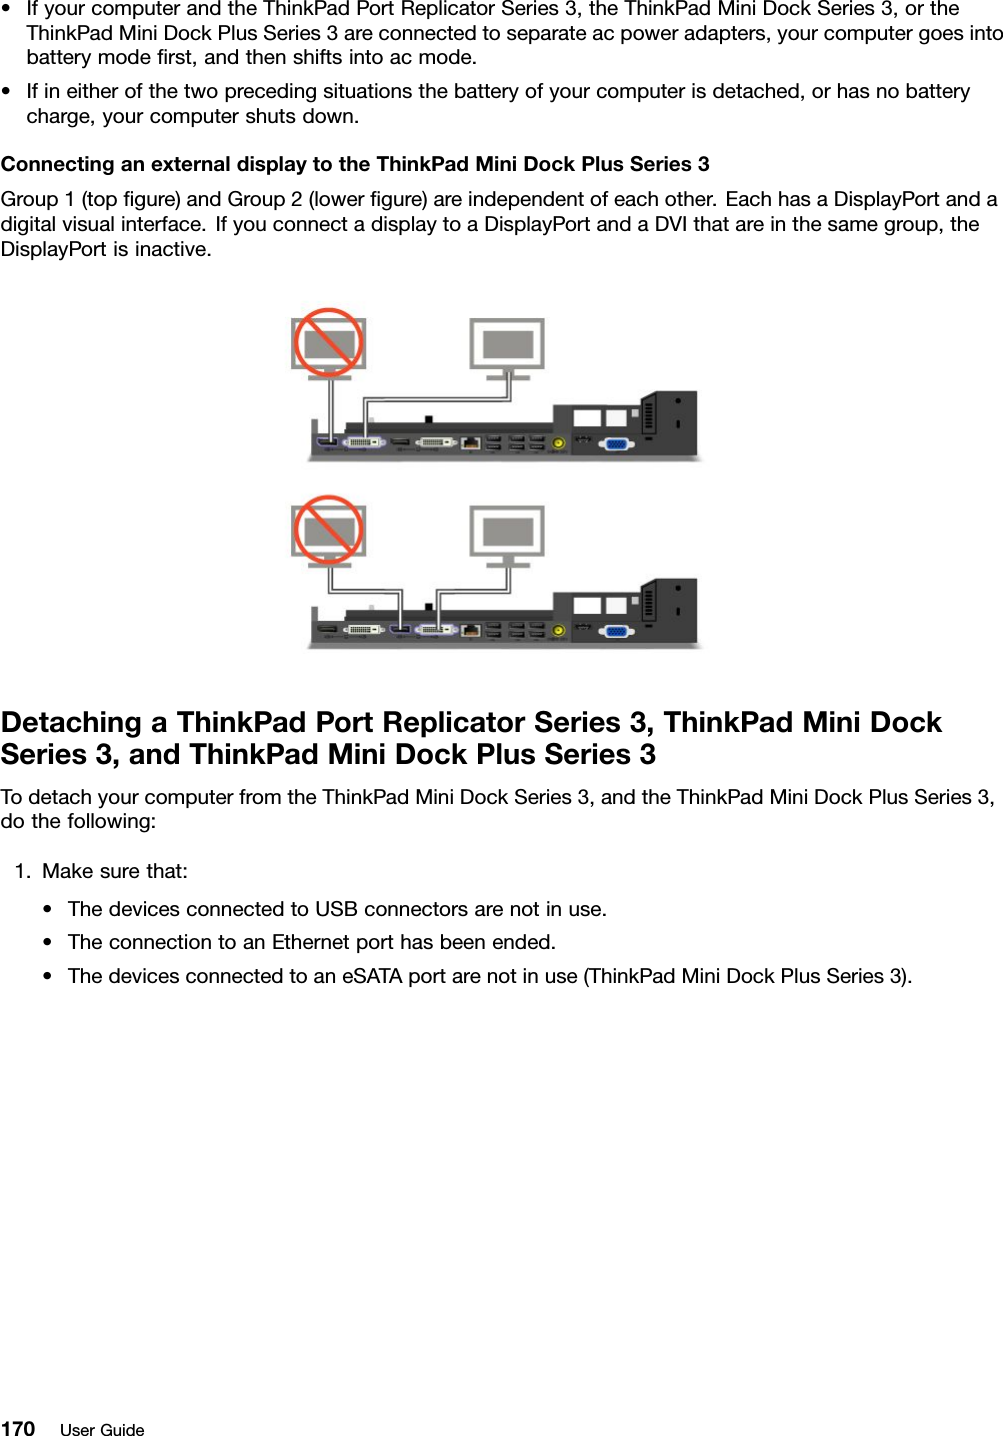
- 1. Users Manual 1
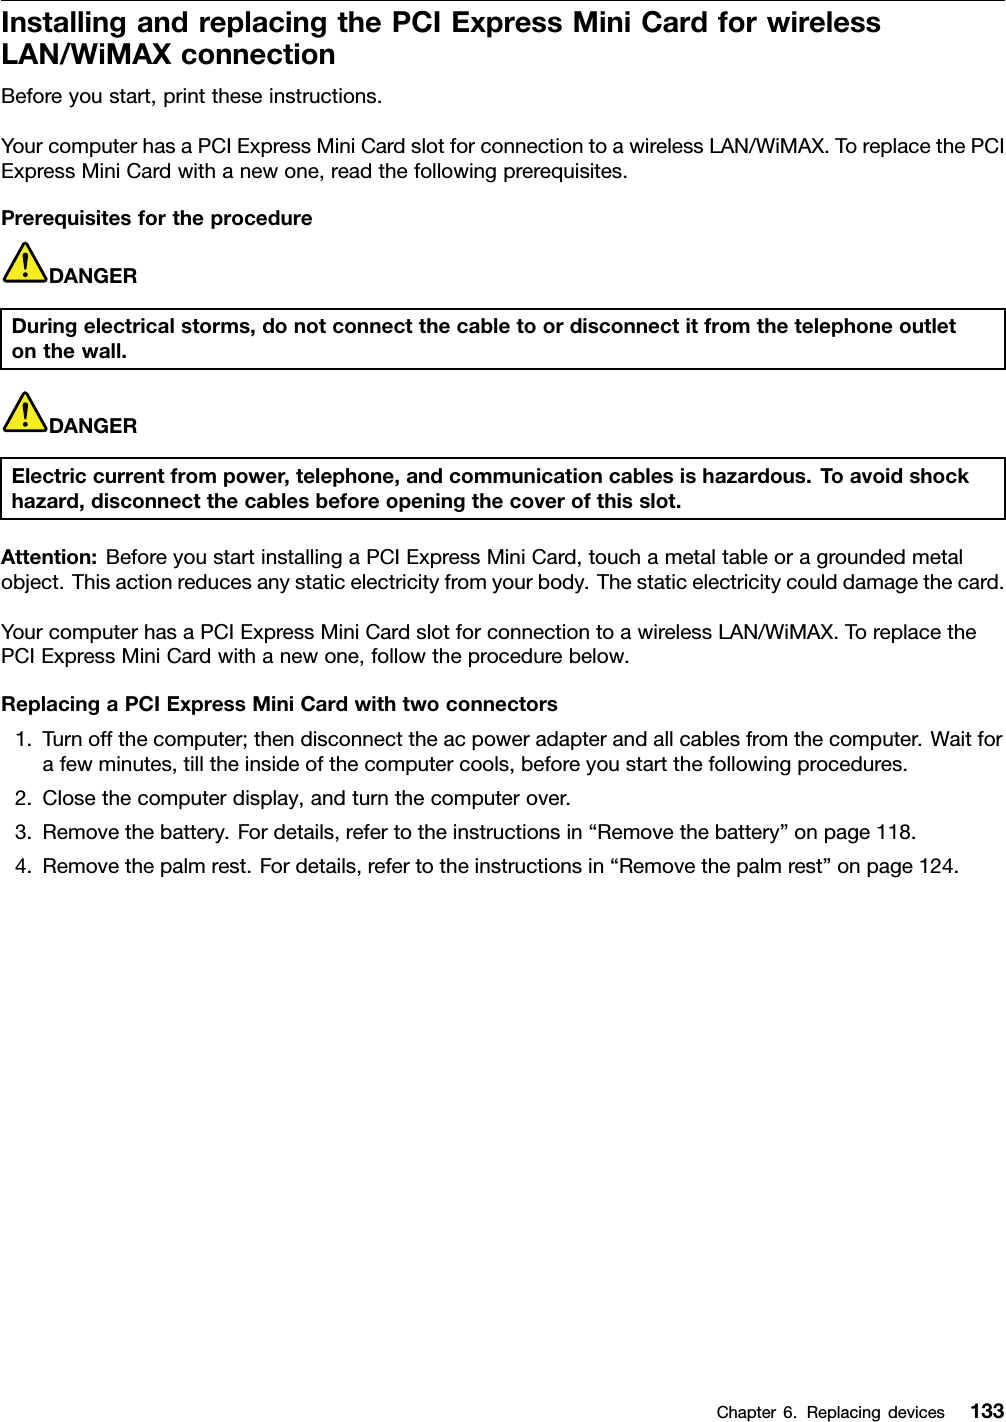
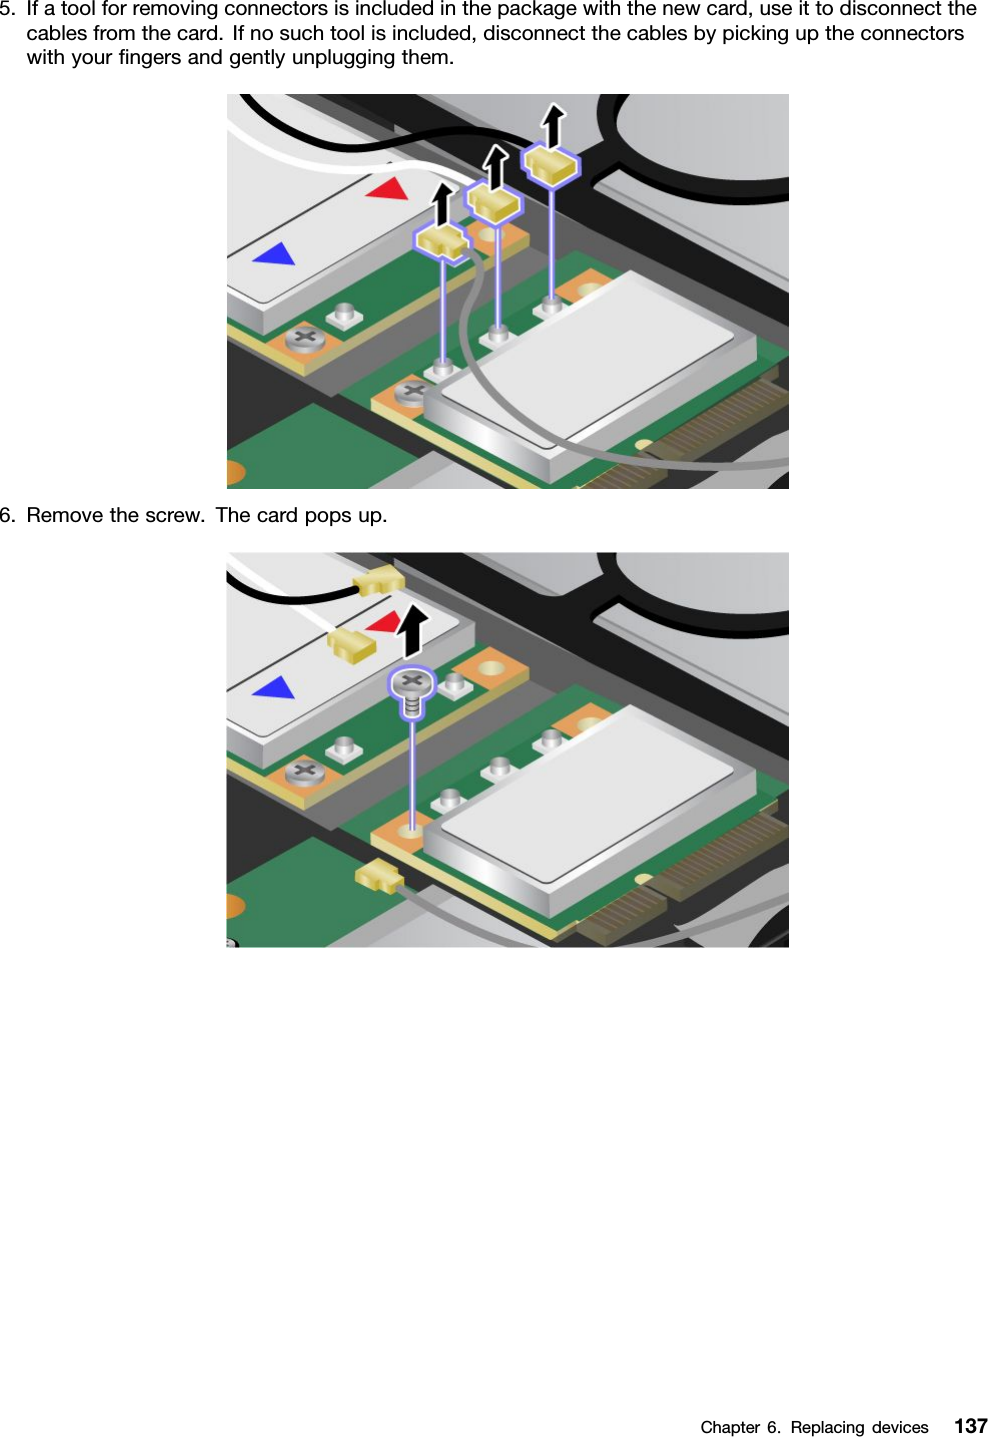
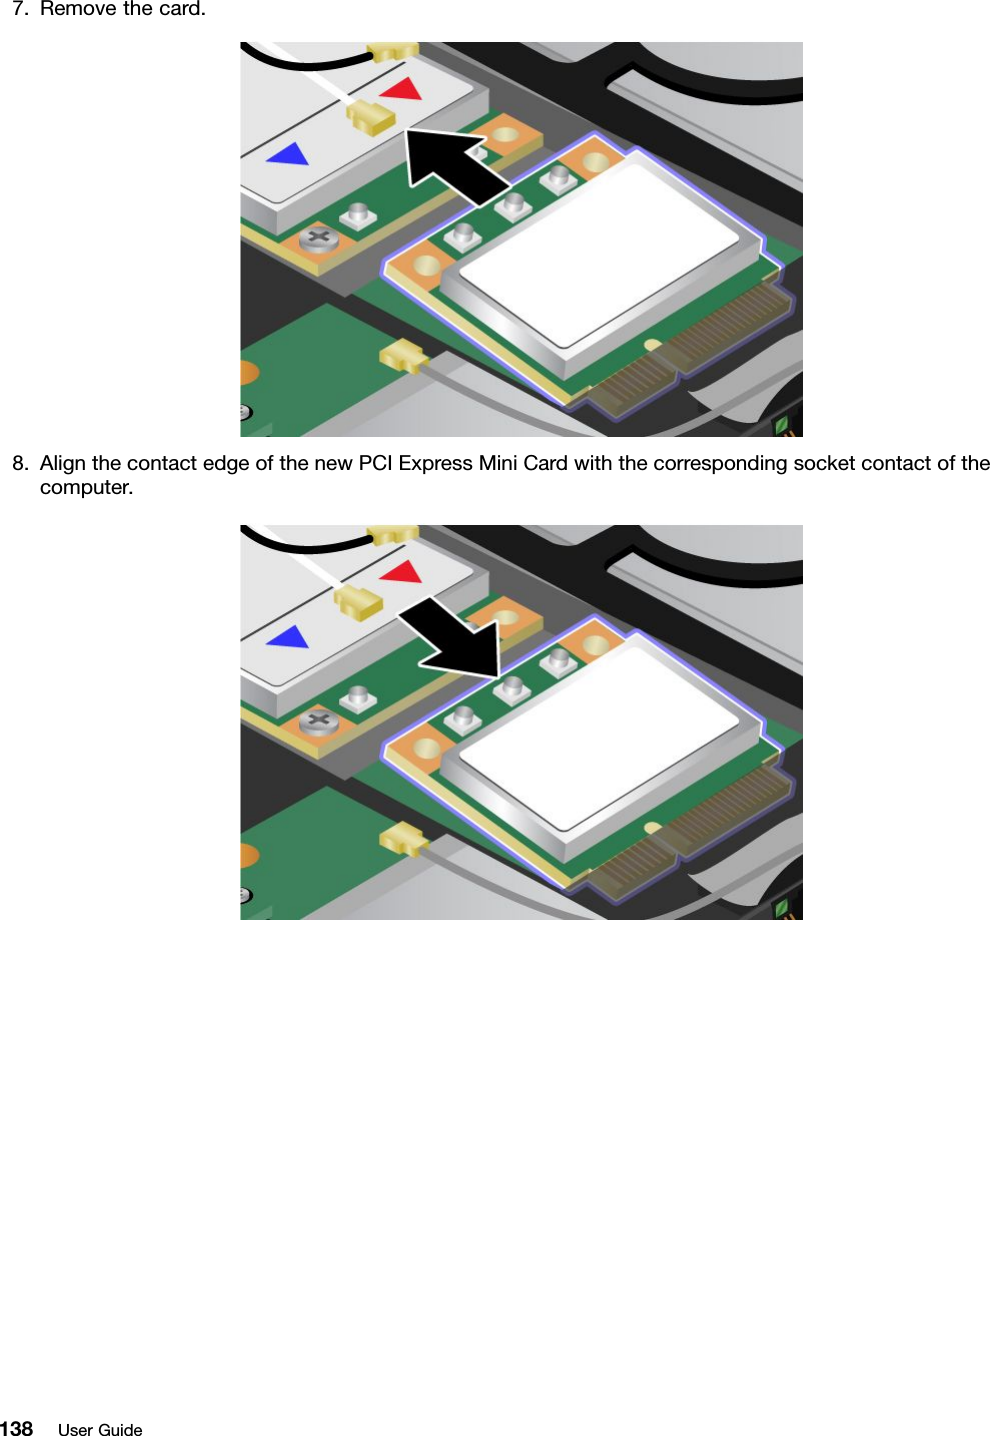
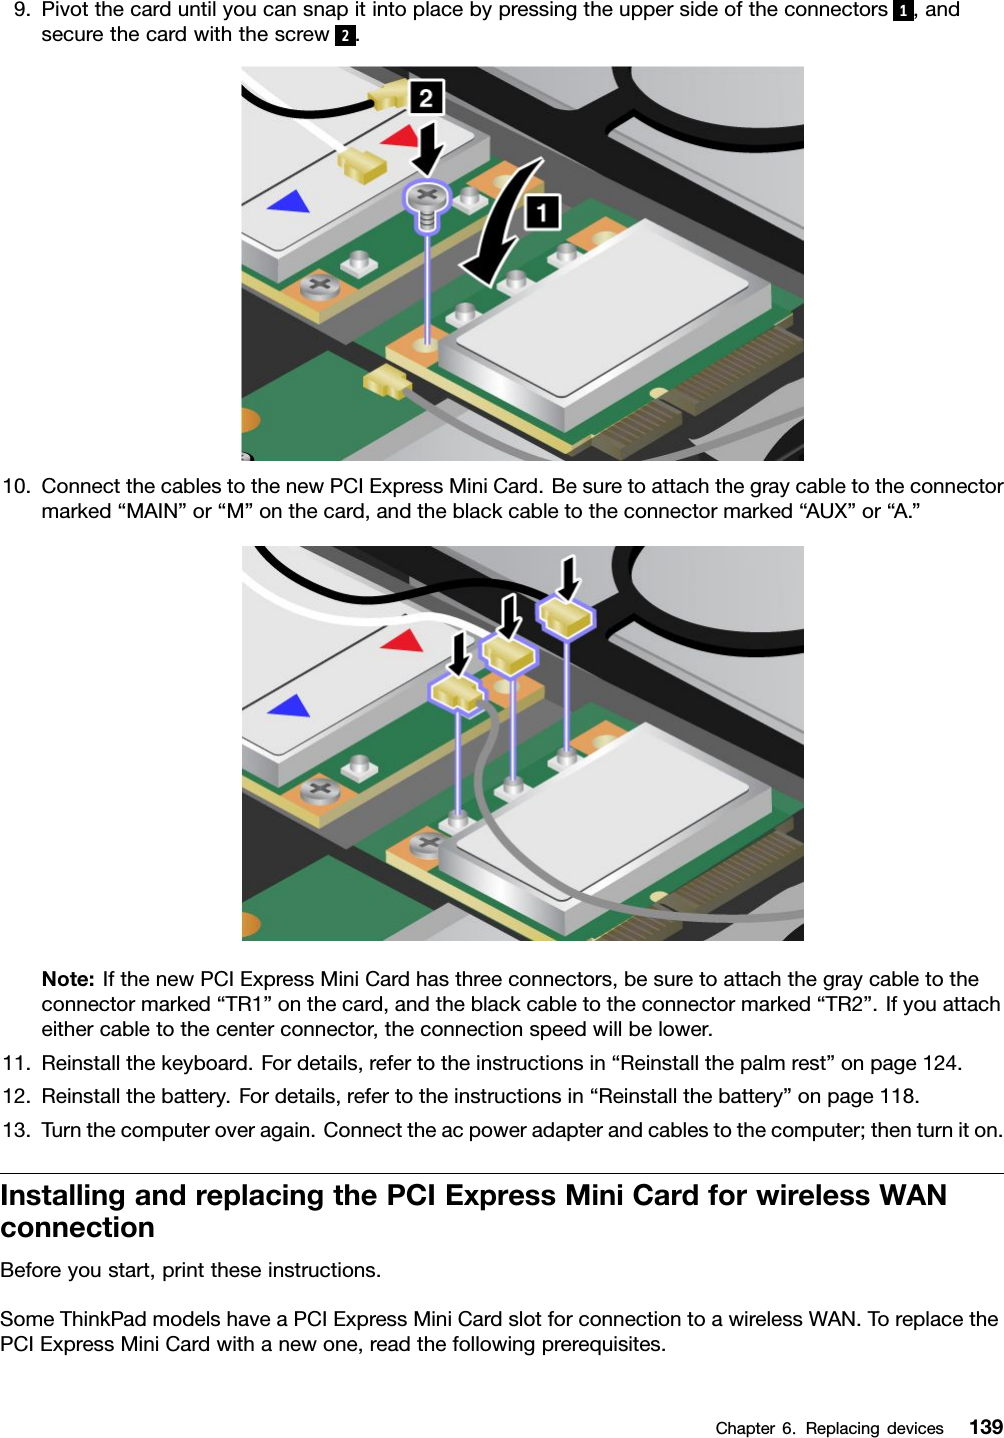
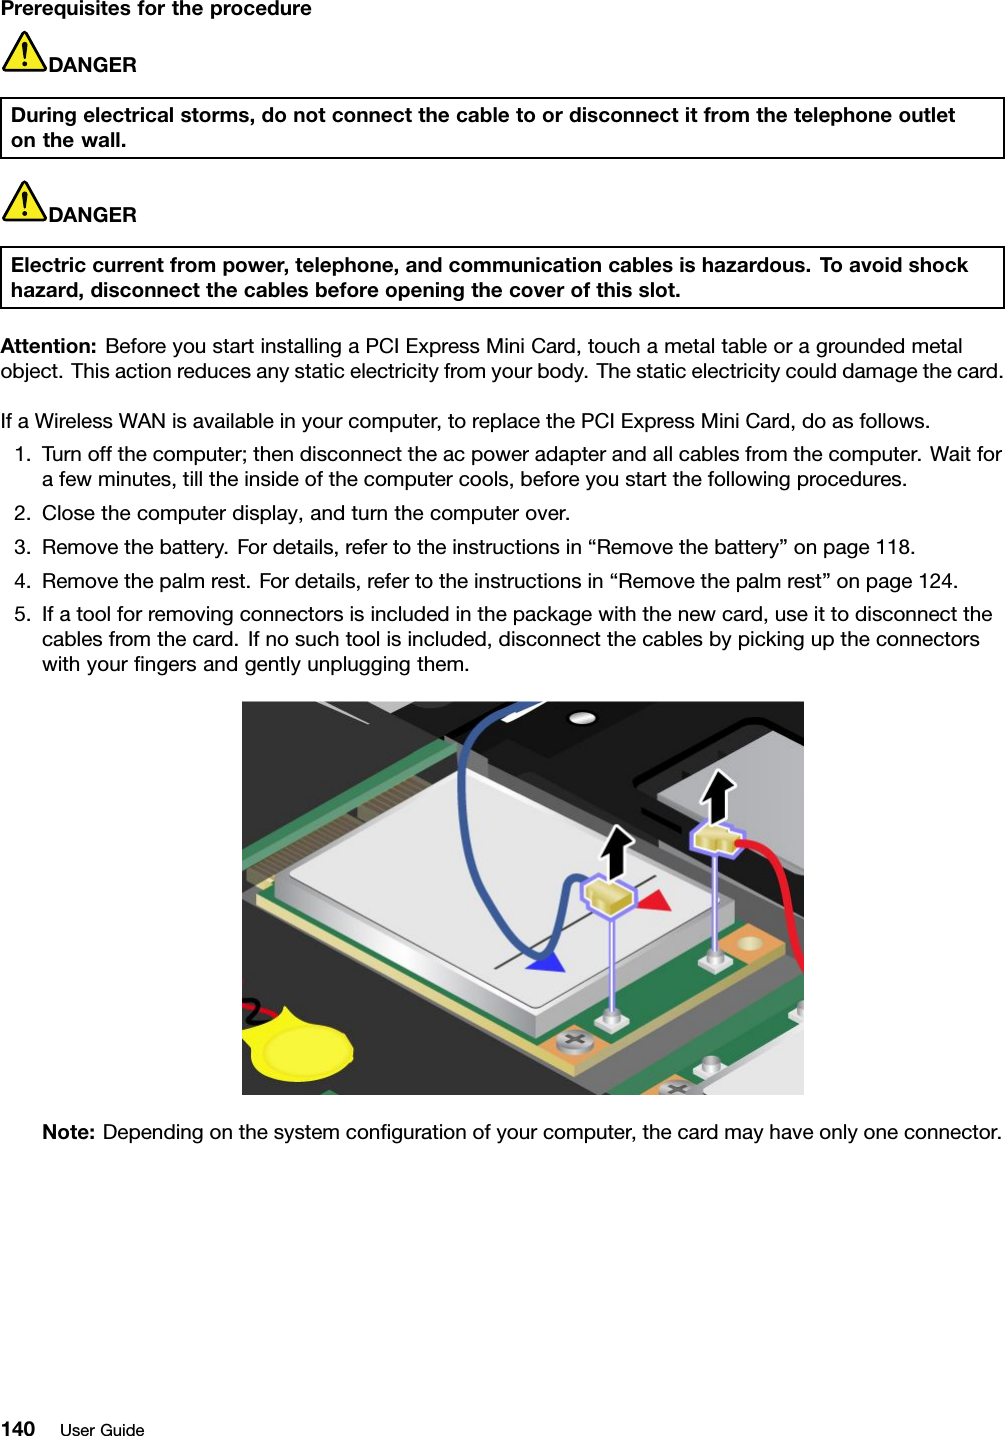
- 2. Users Manual 2
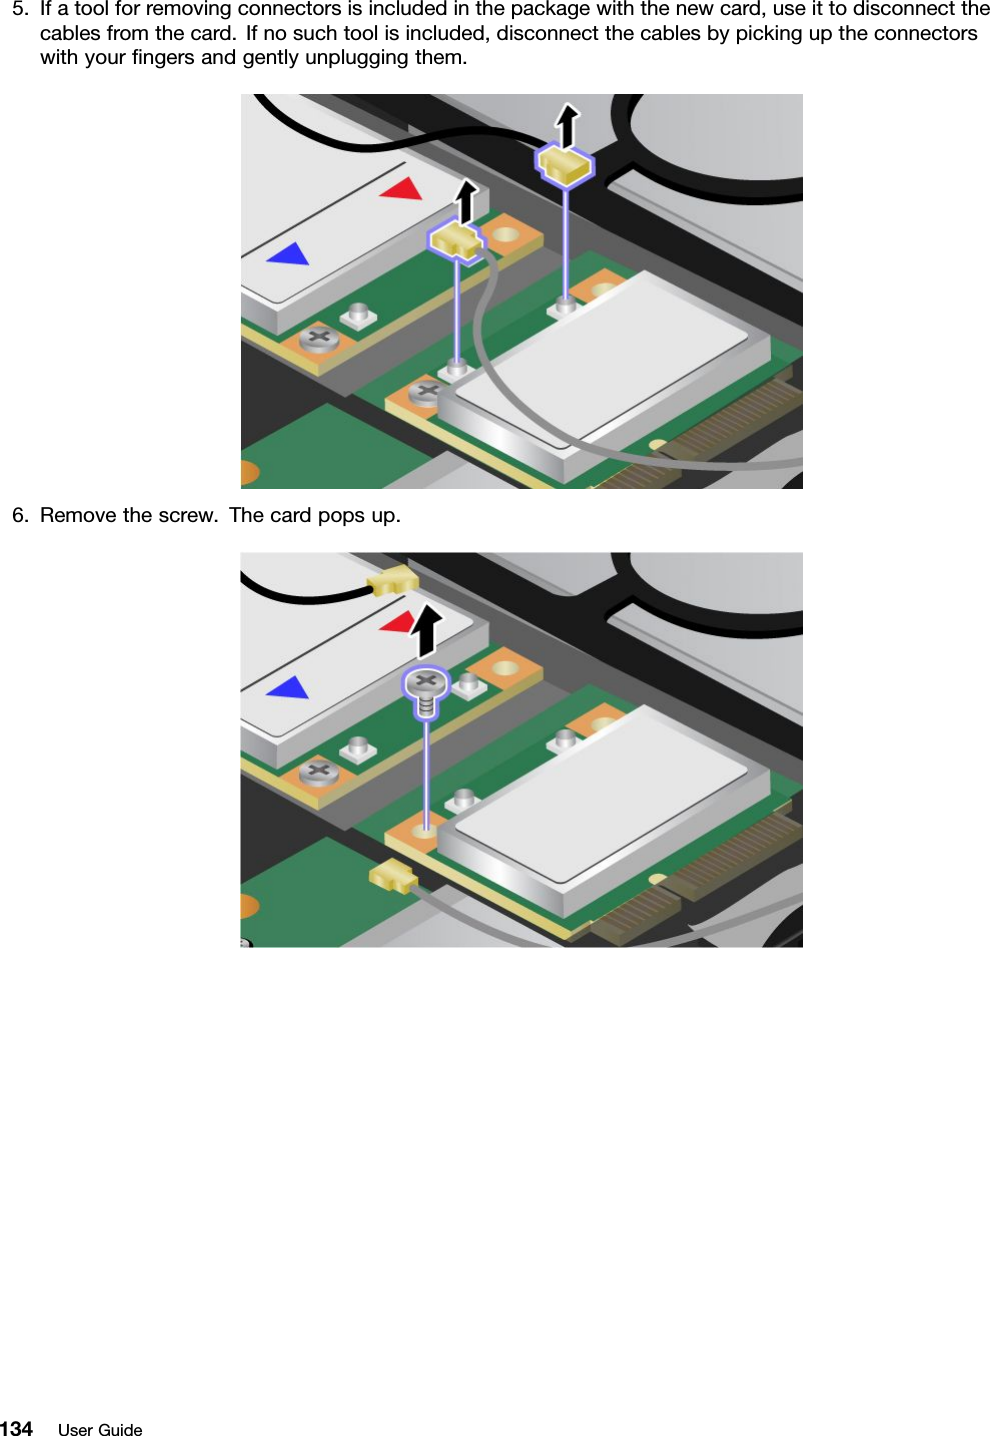
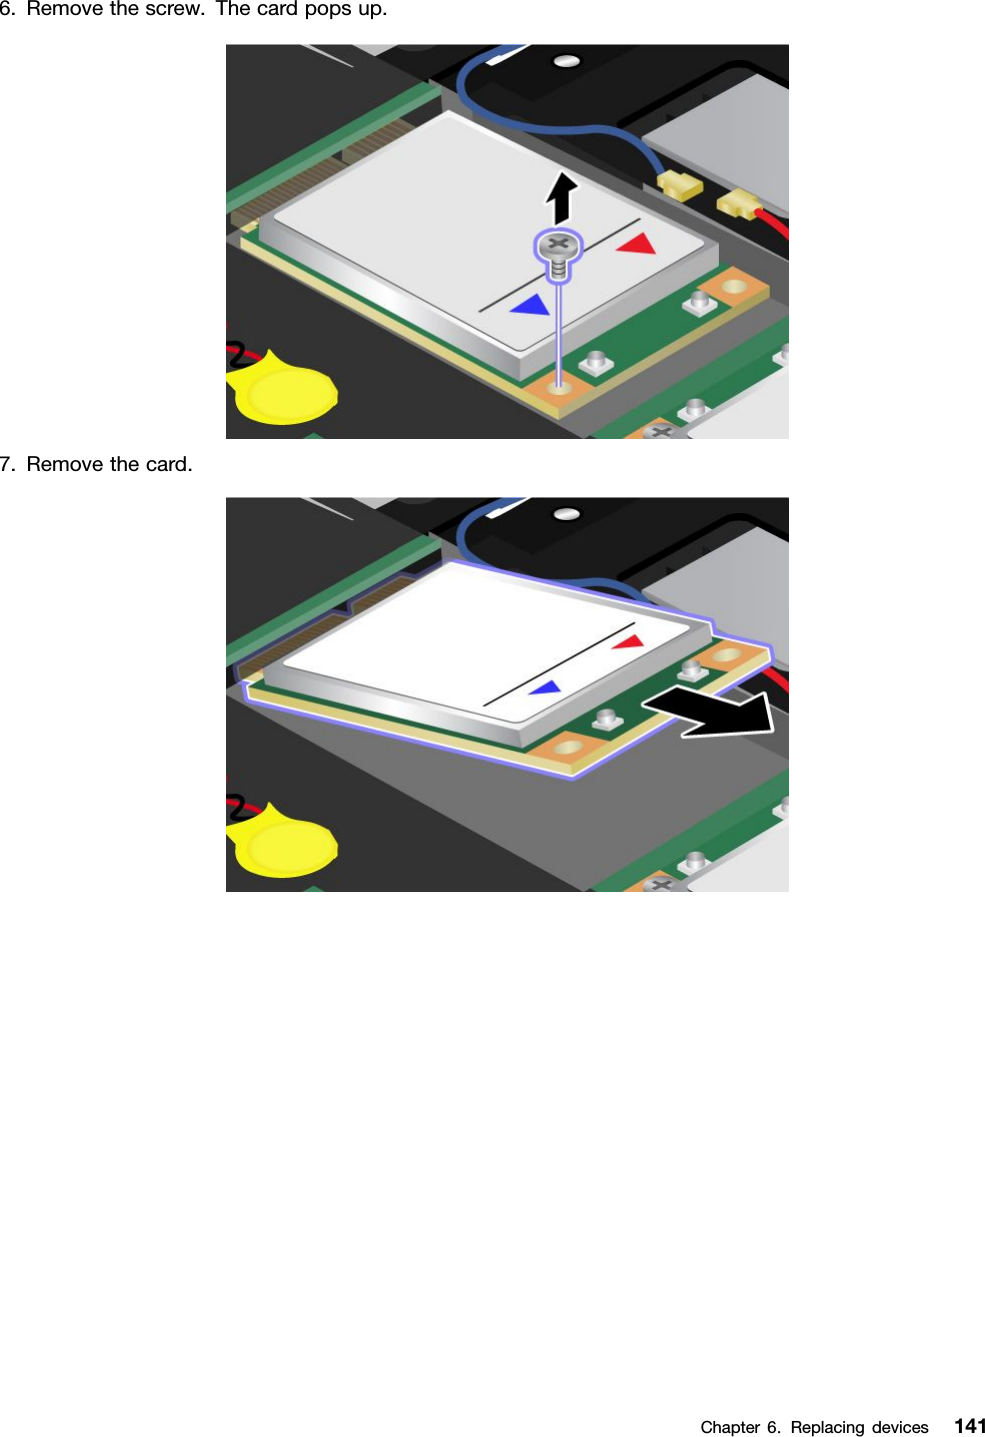
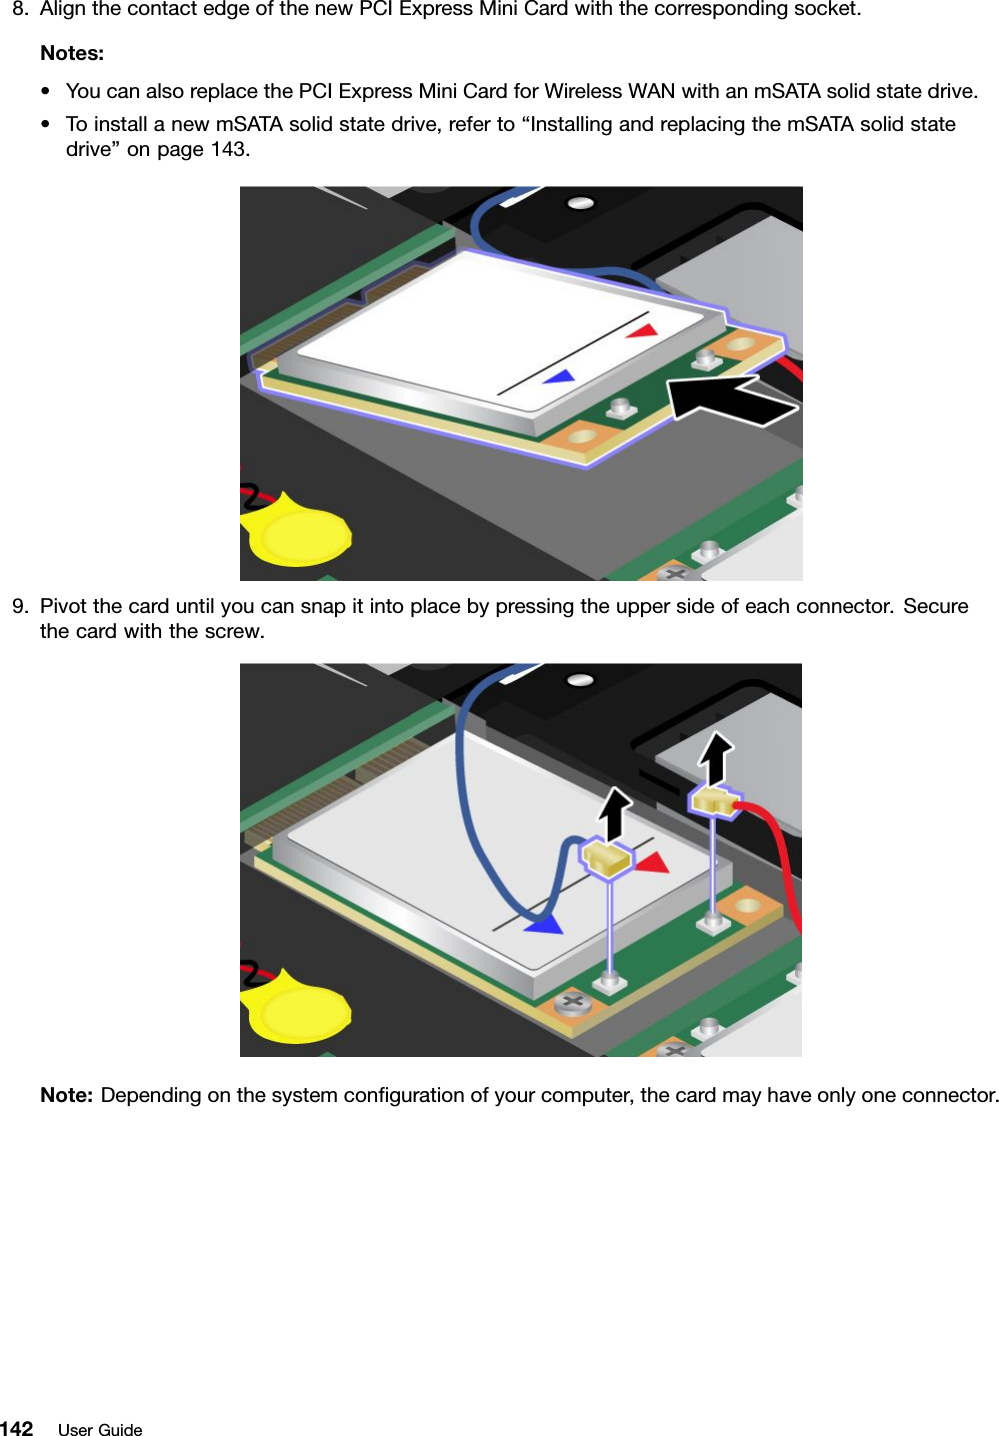
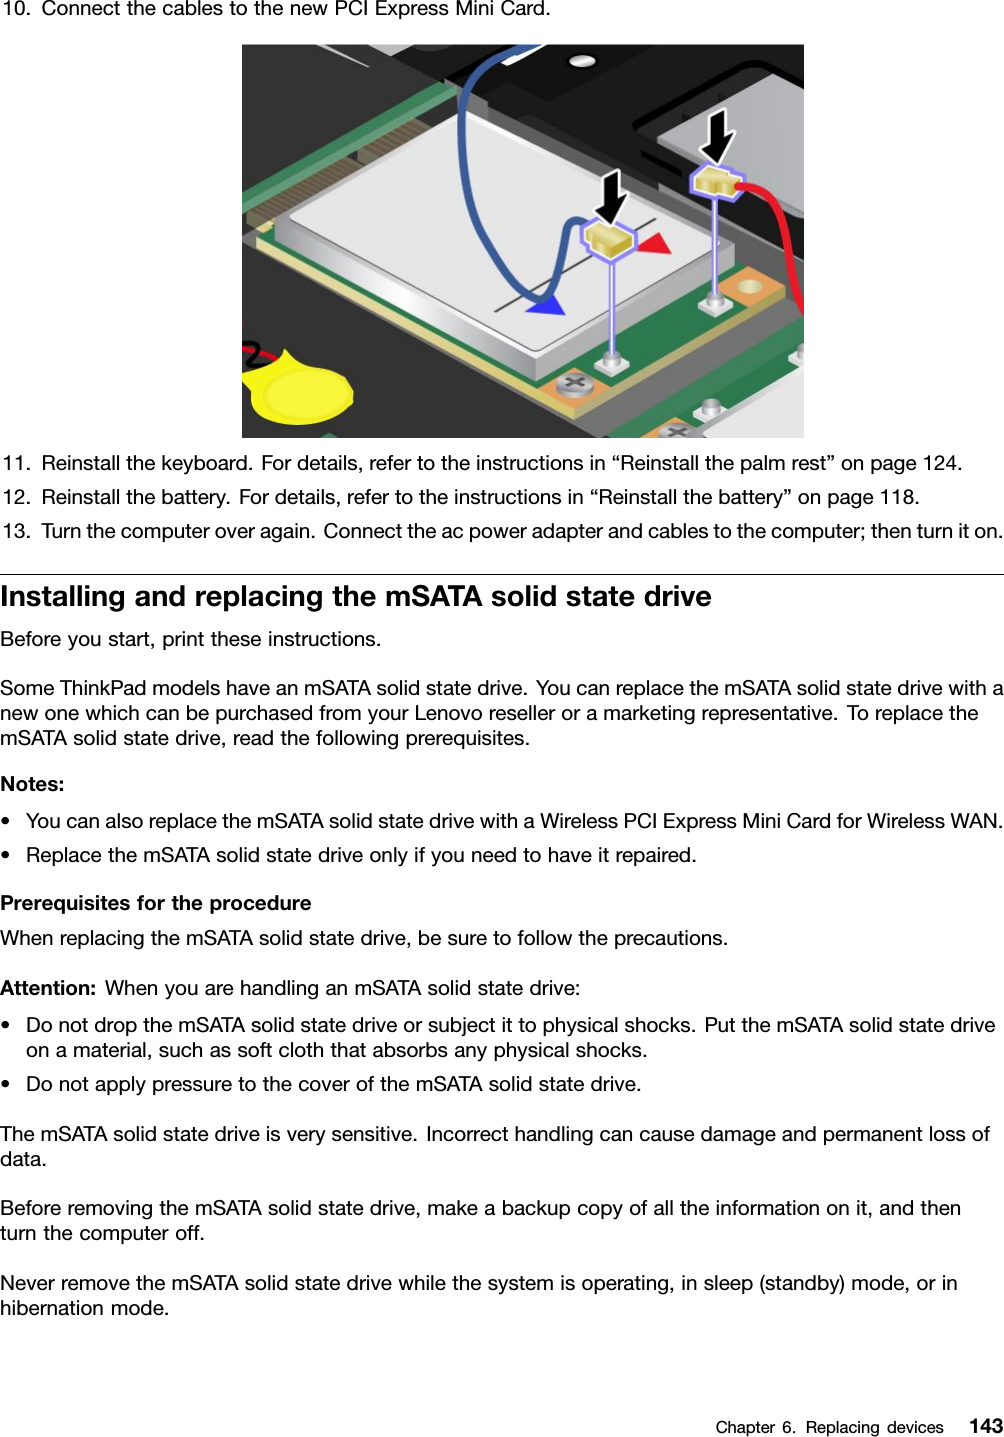
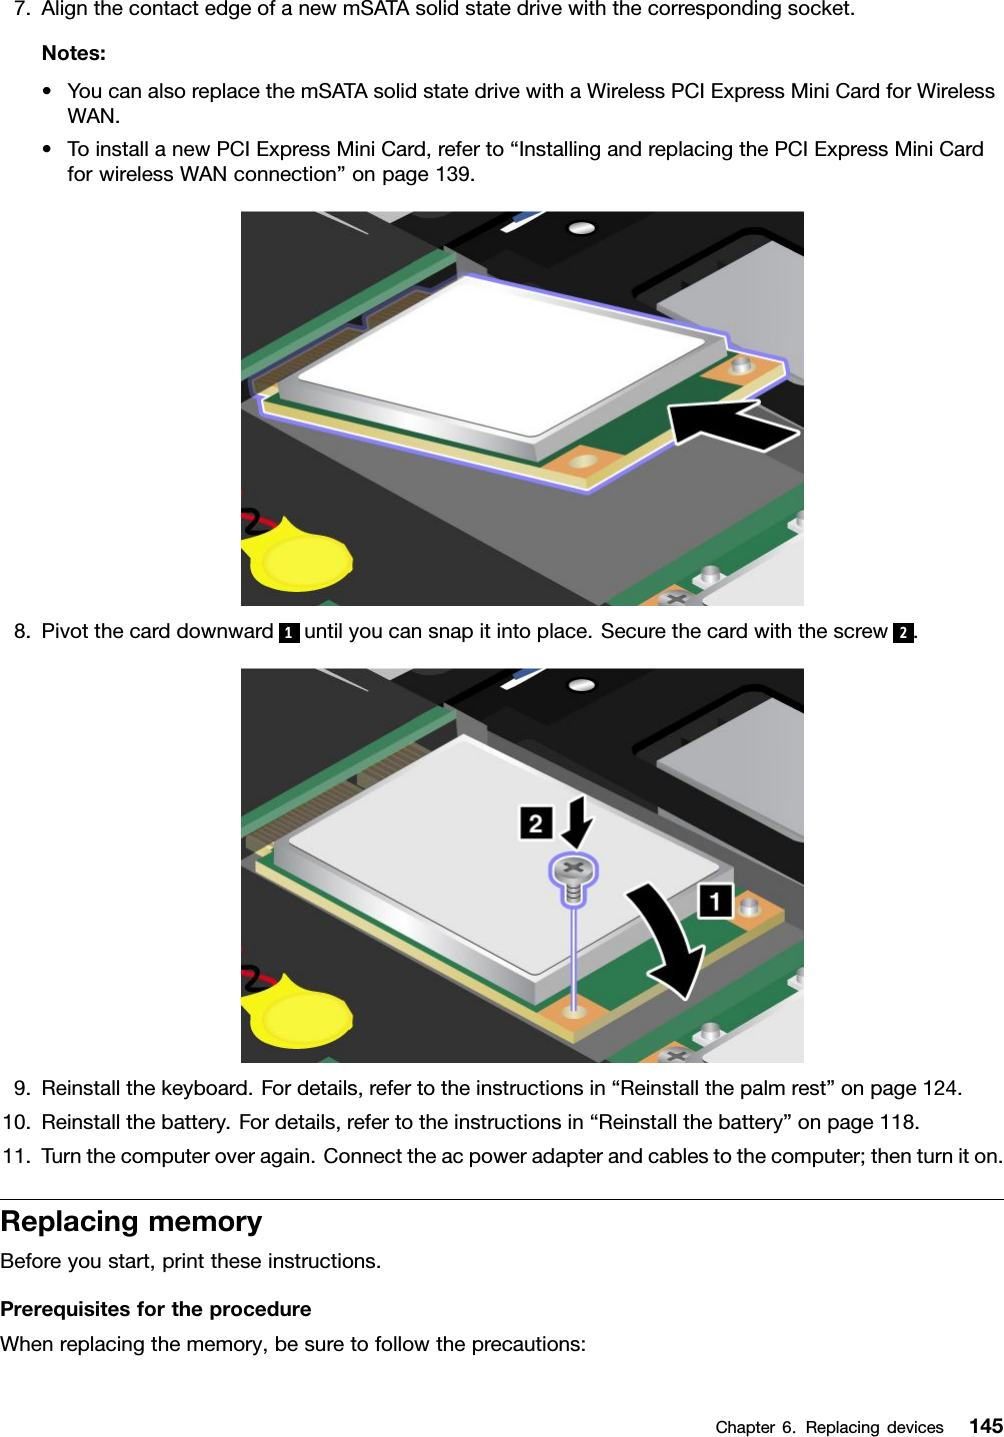
- 3. Users Manual 3
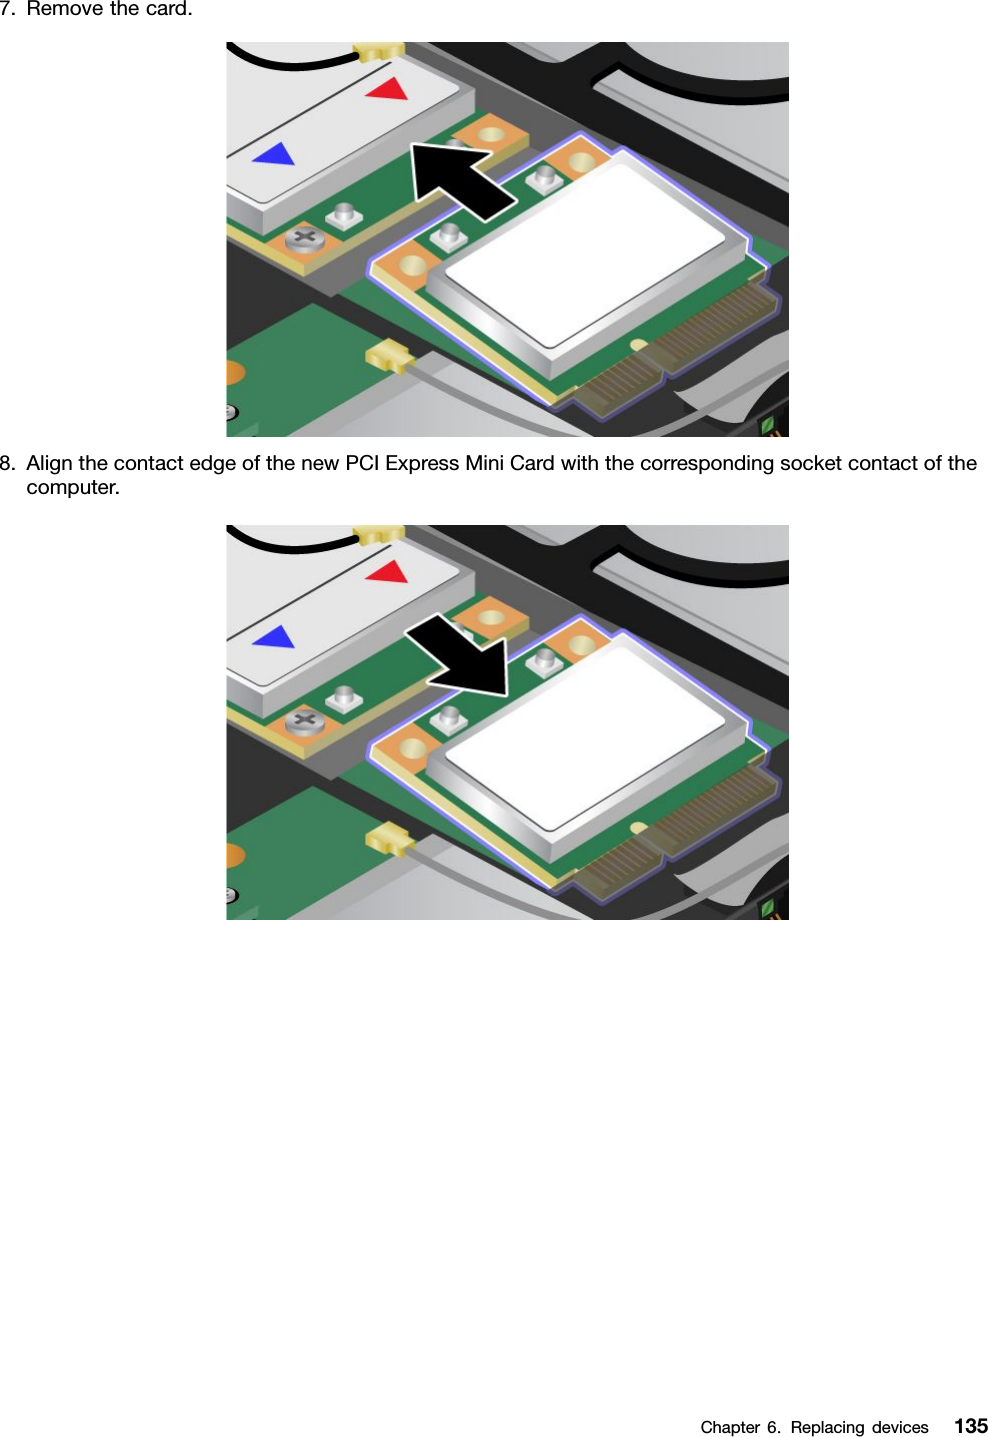
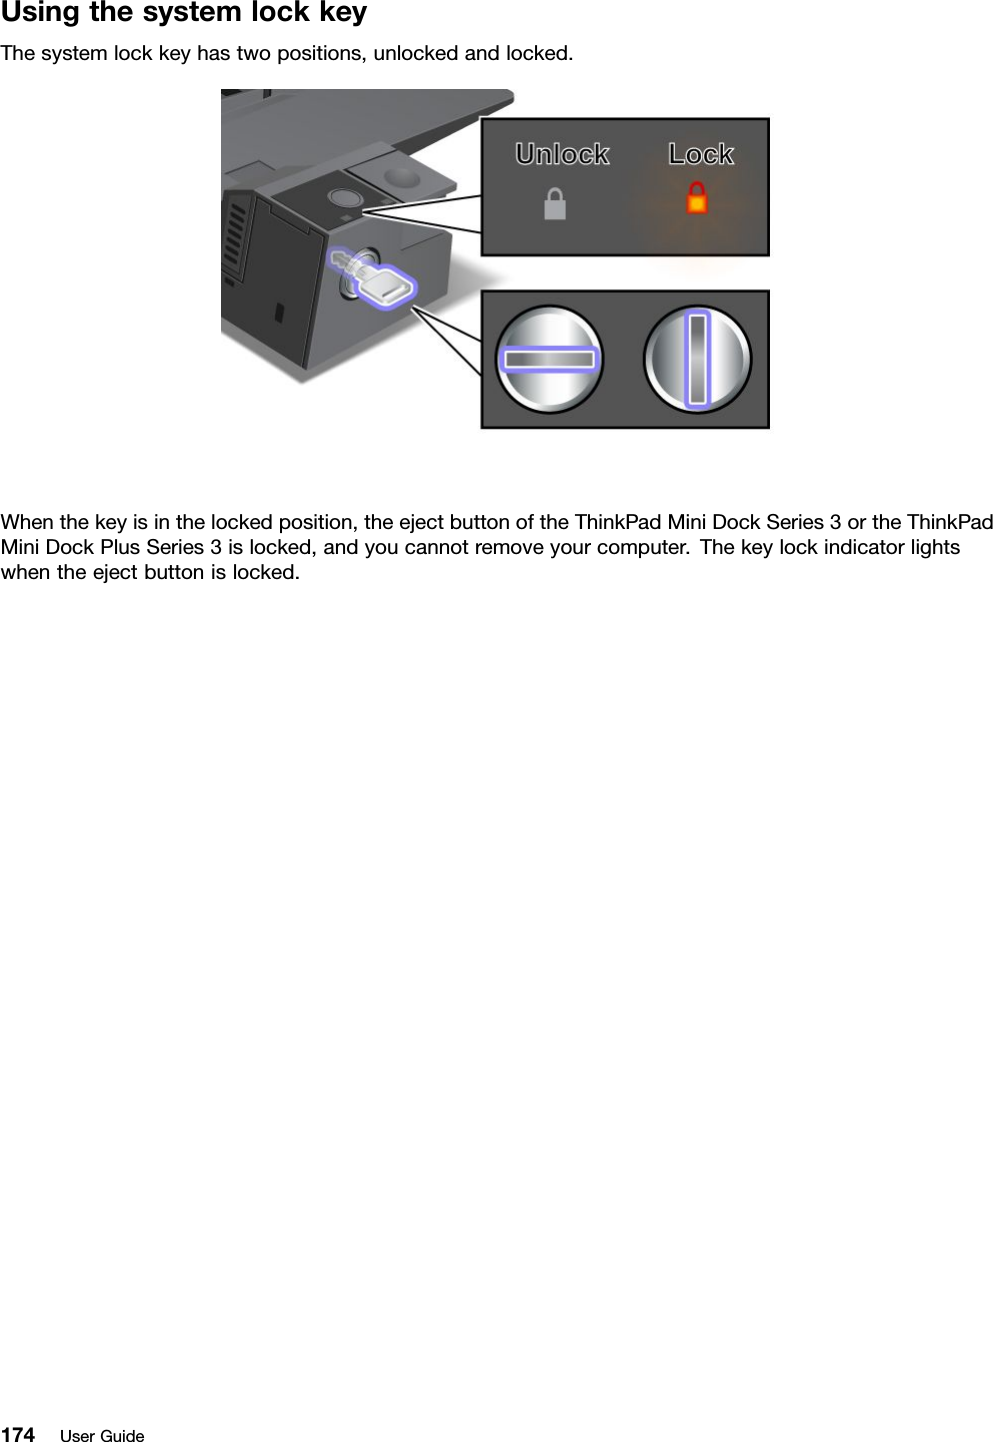
Users Manual 2