Western Digital Technologies SDIPB Phone case with memory expansion User Manual user guide
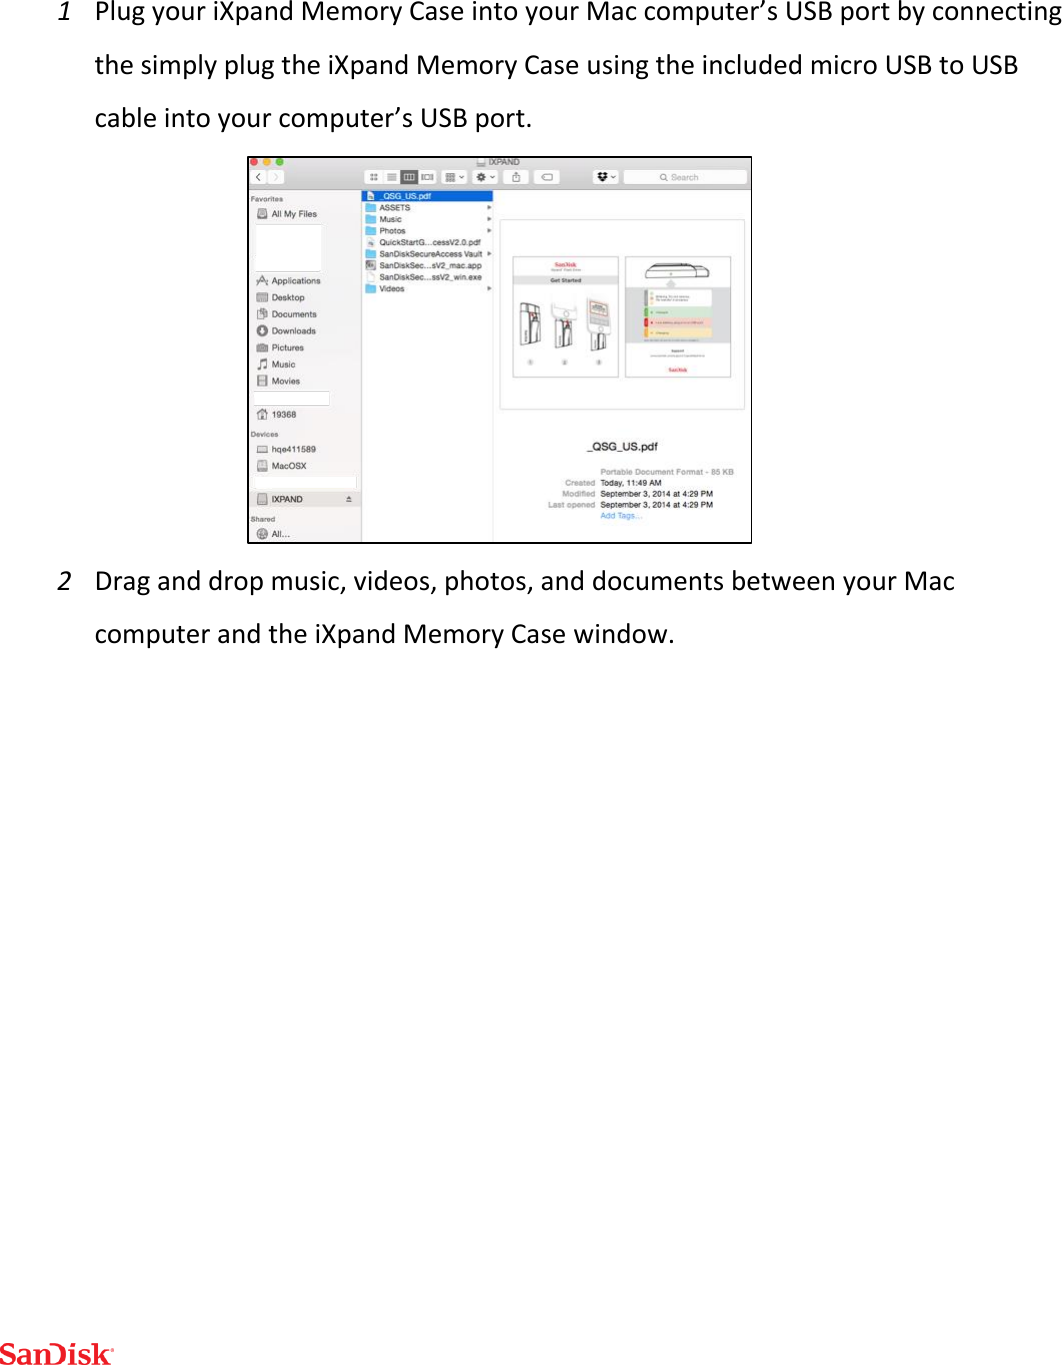
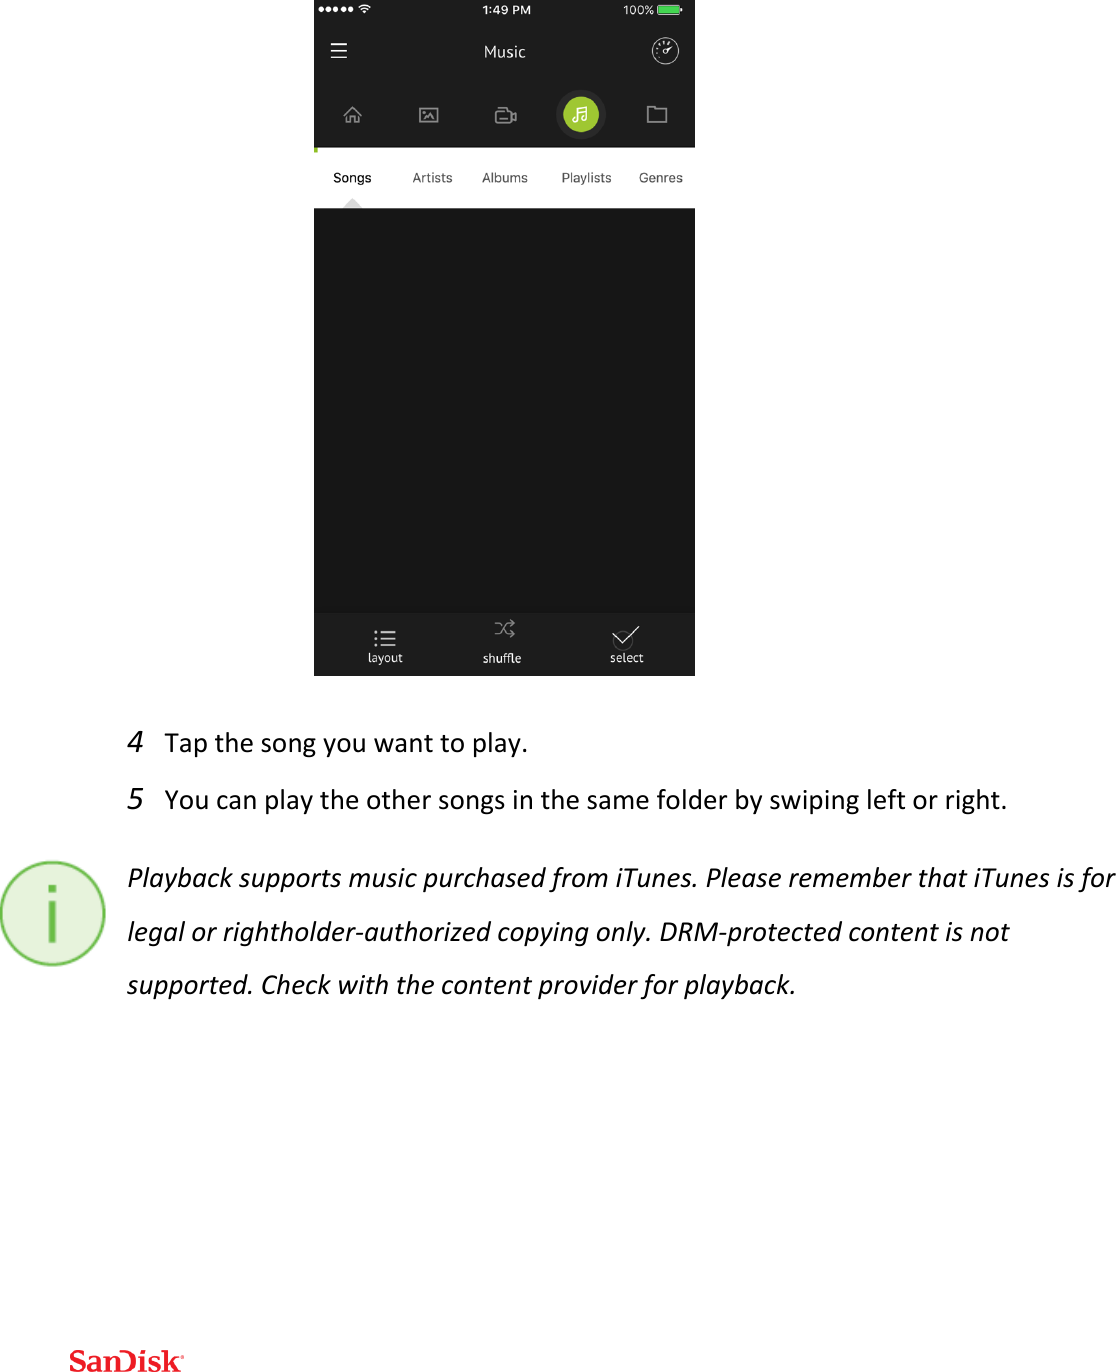
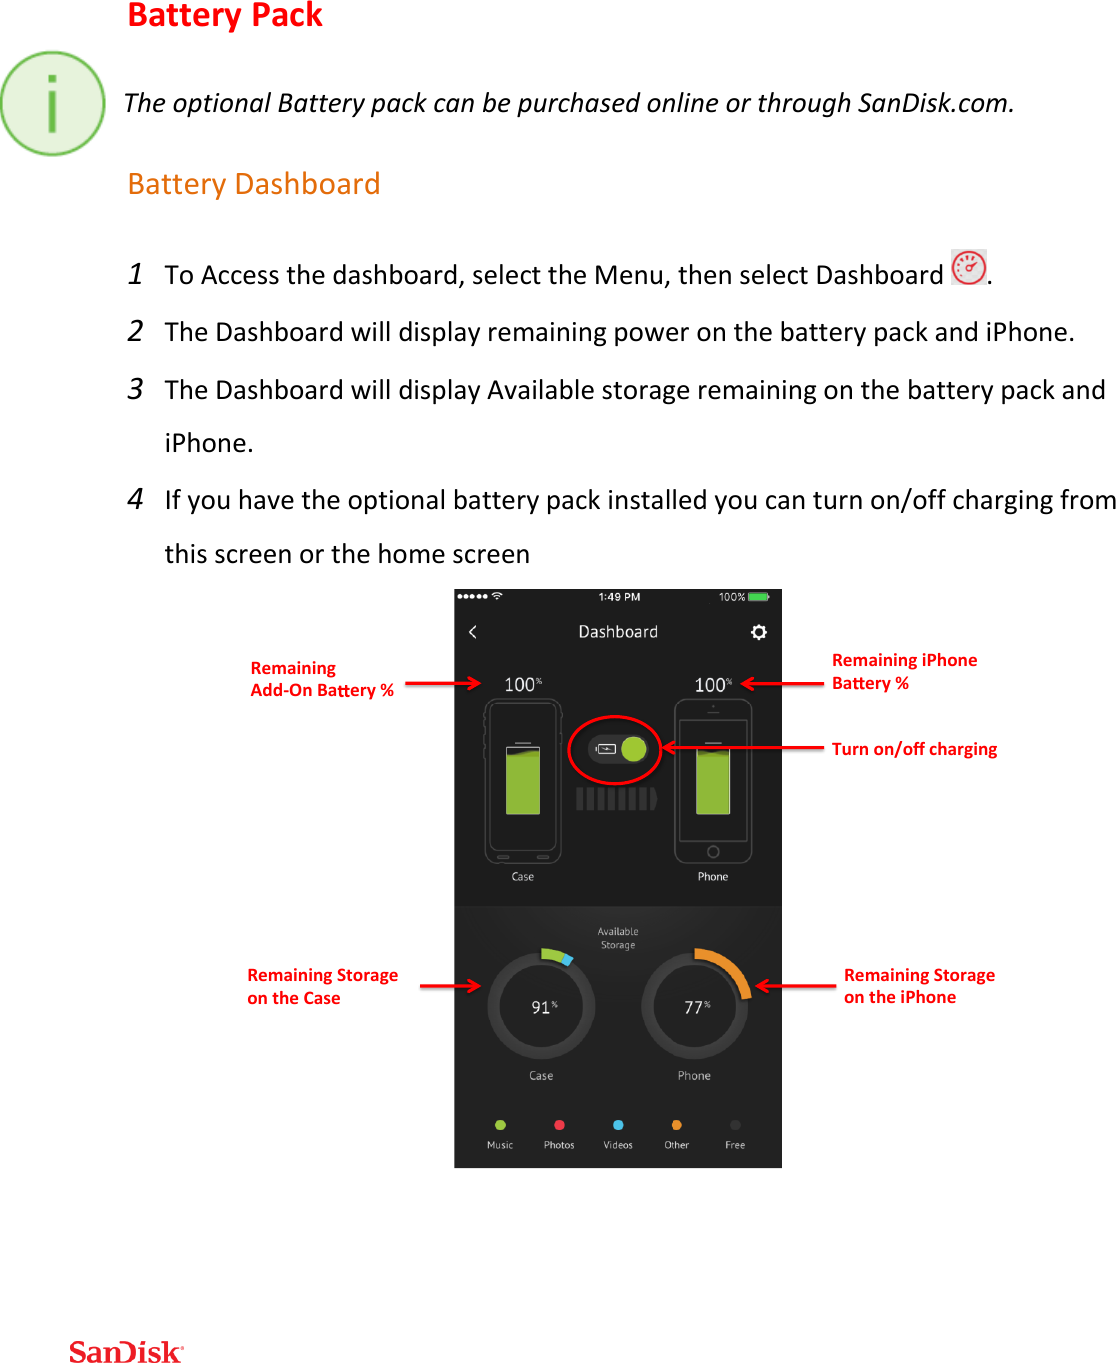
SanDisk Phone case with memory expansion user guide
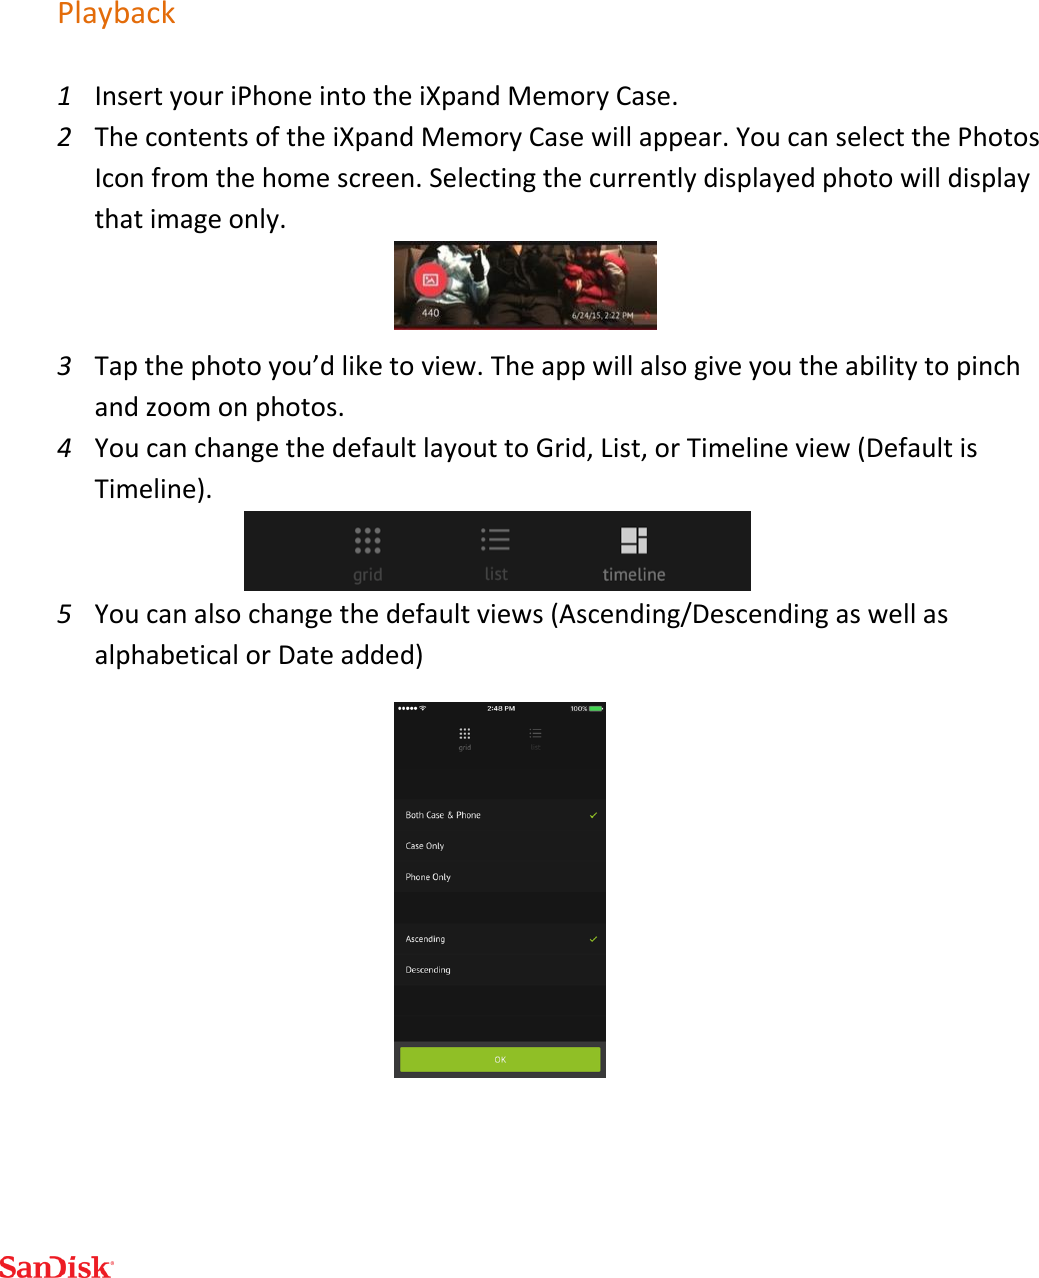
UserManual.wiki
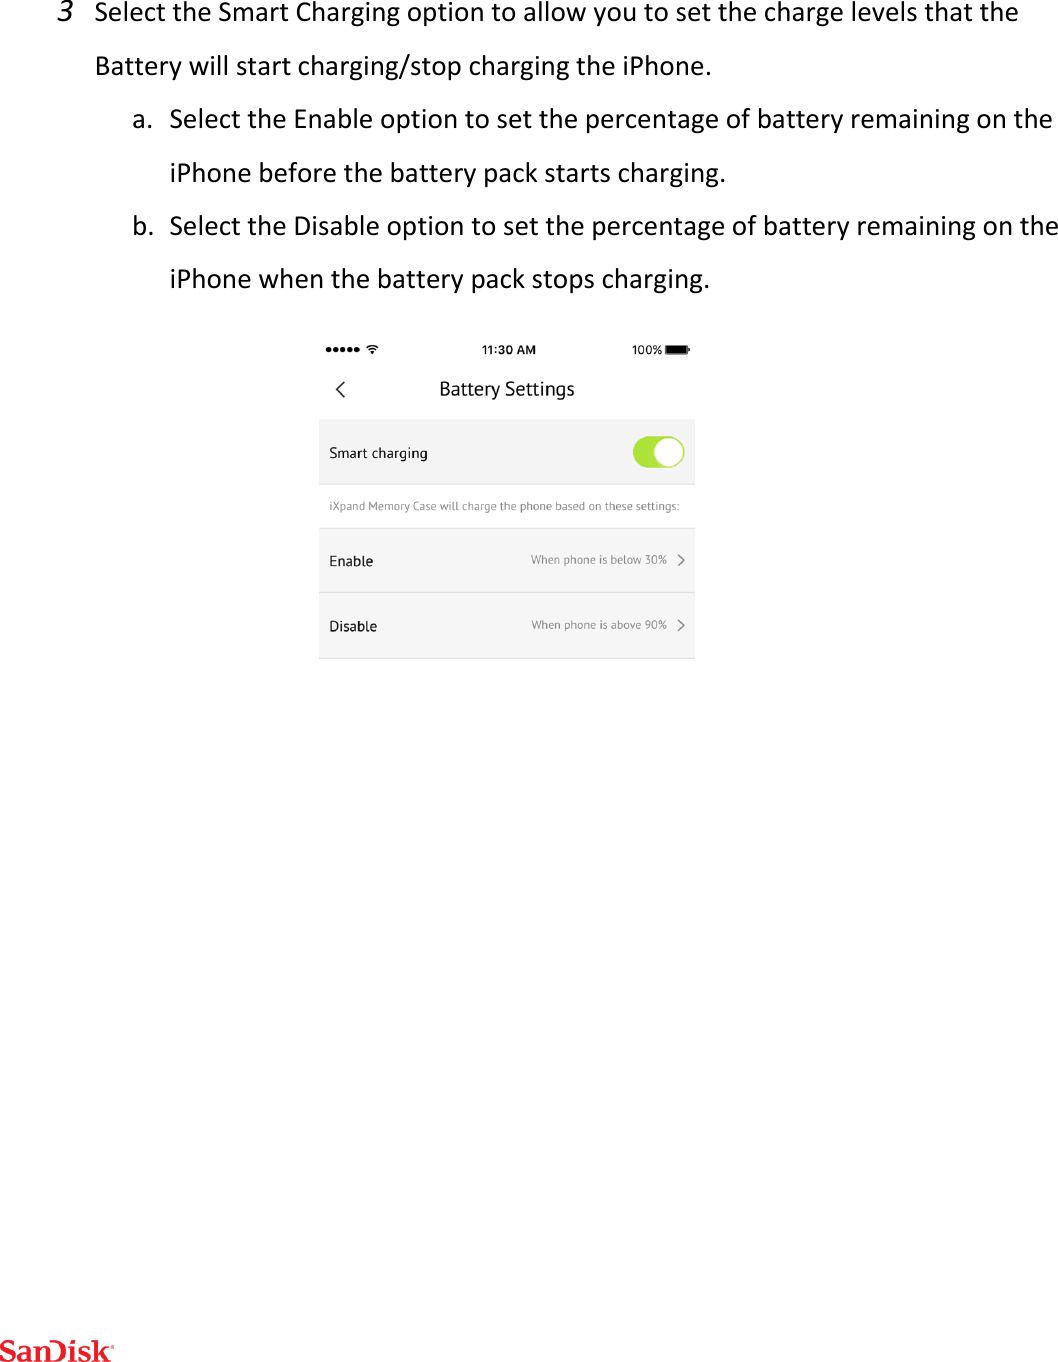
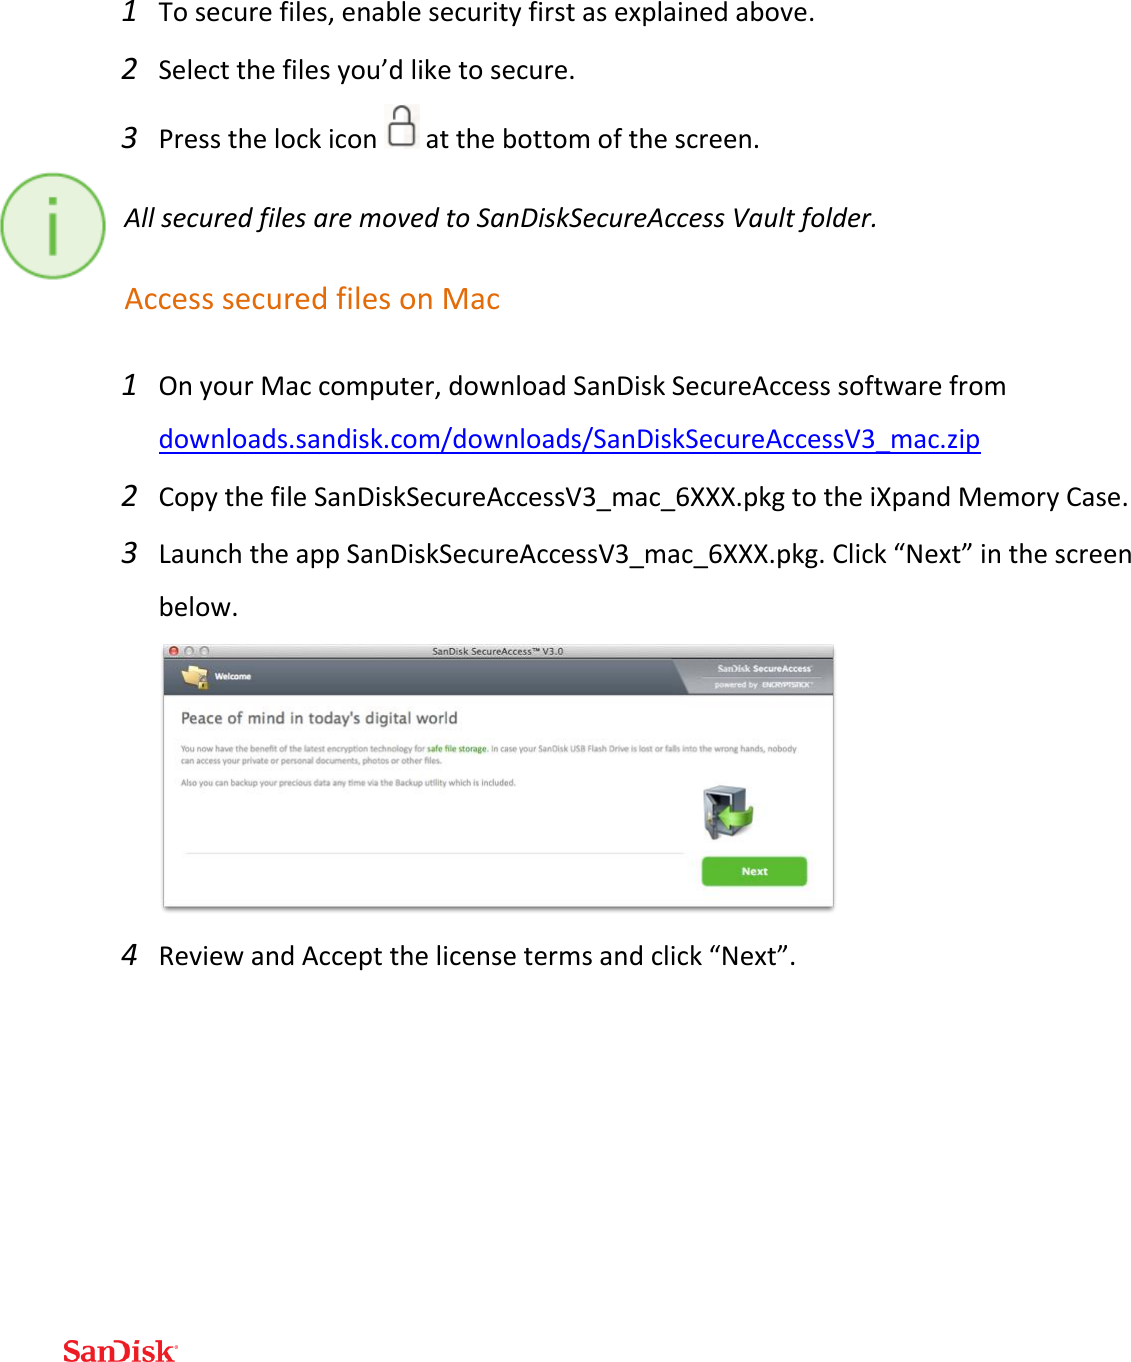
>
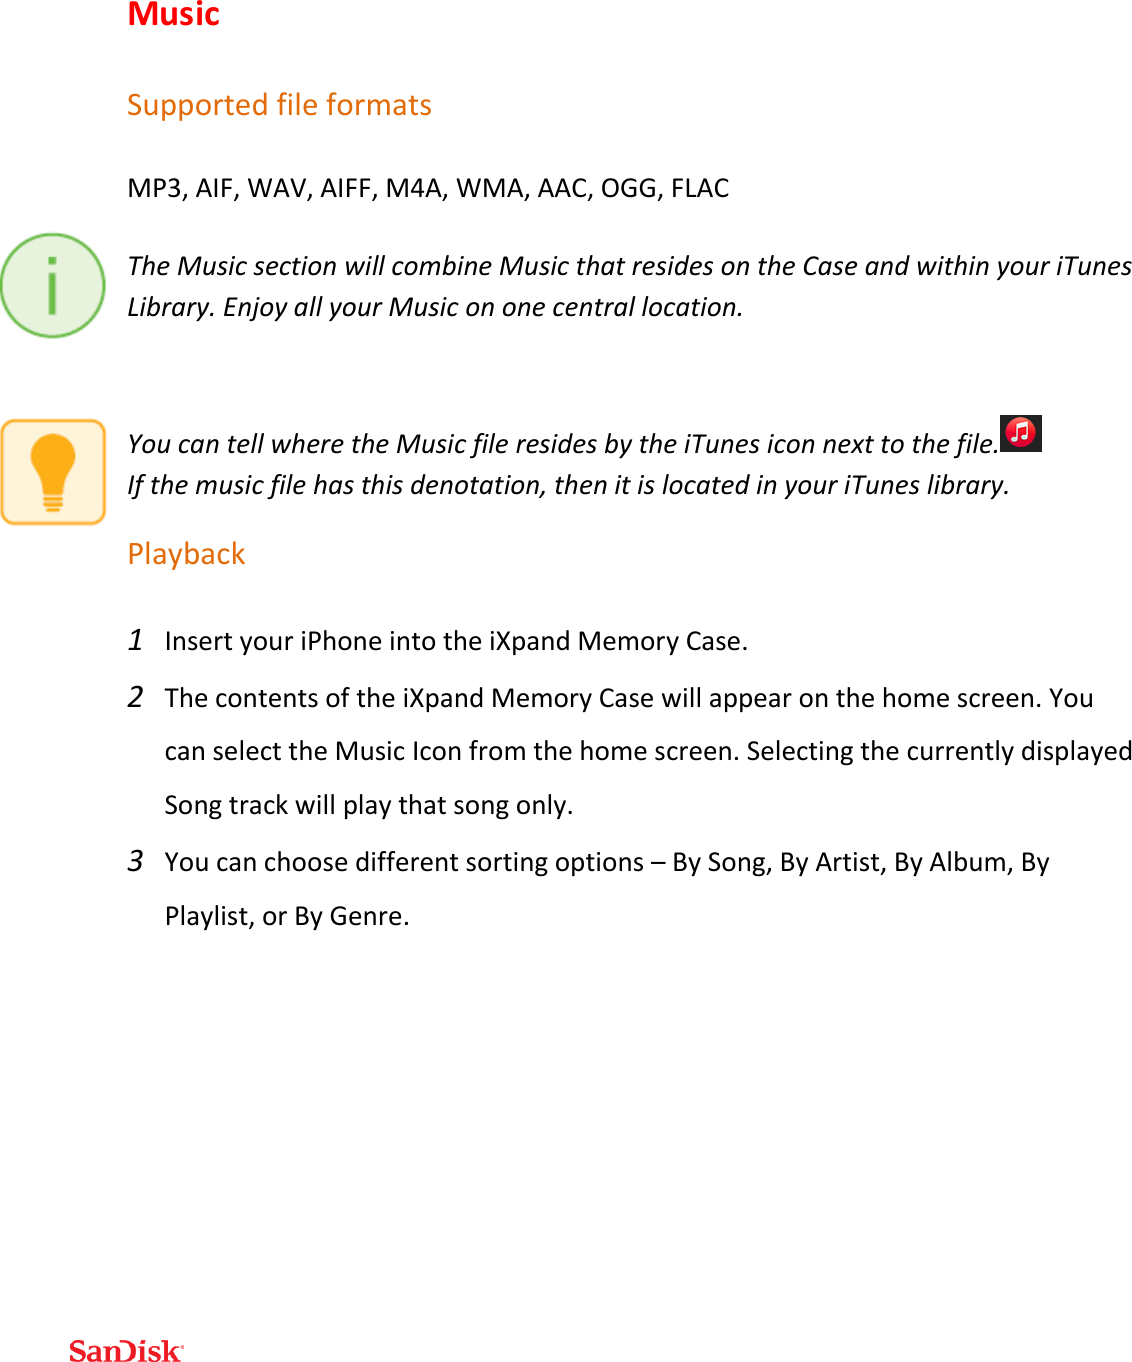
Western Digital Technologies
>
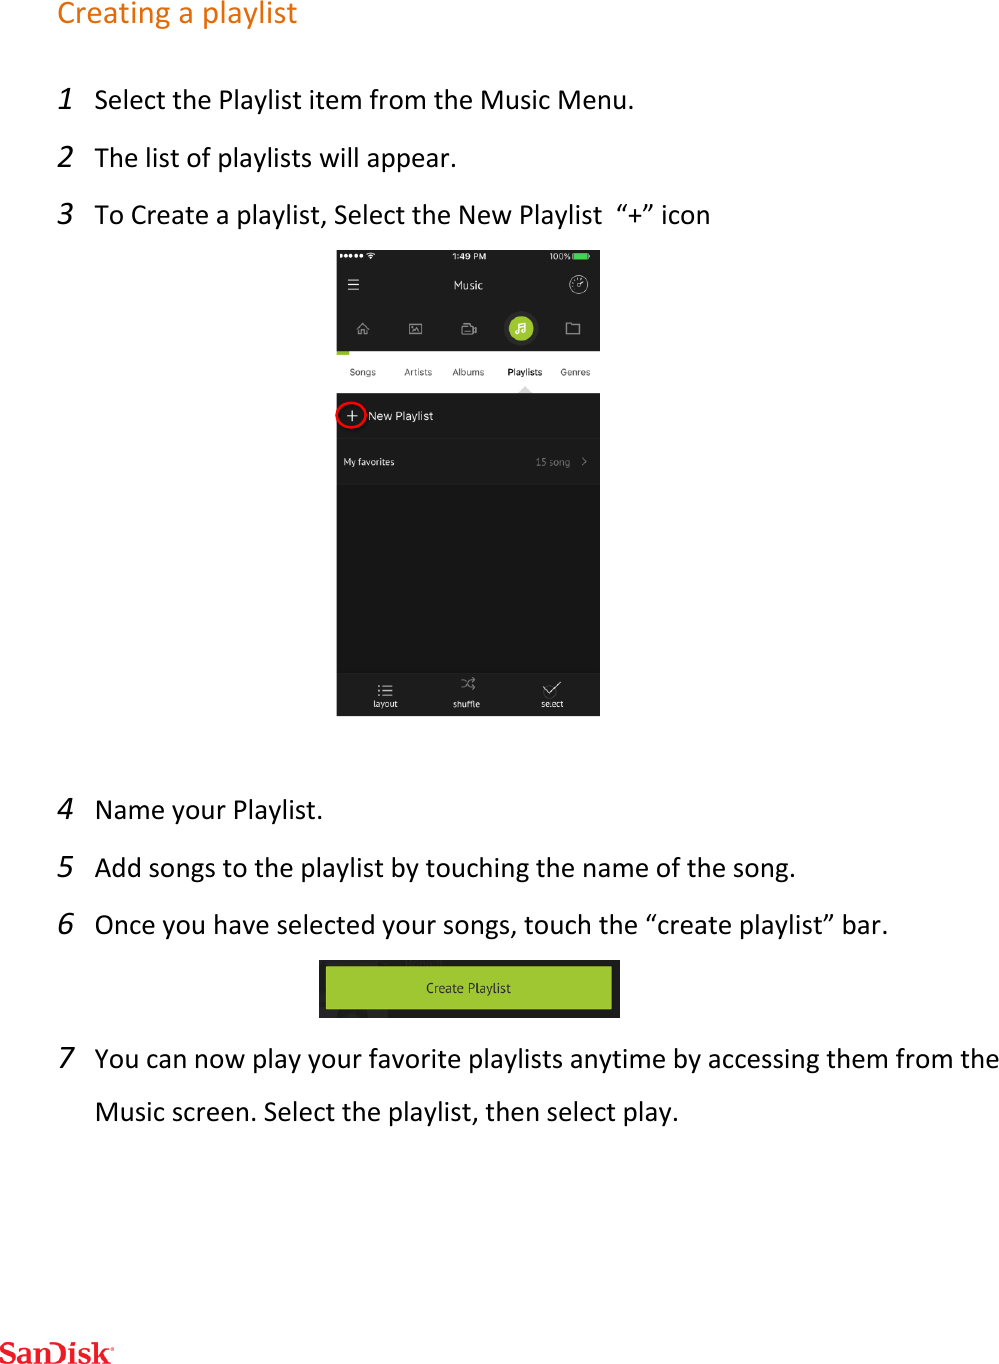
SDIPB User Manual
user guide
Navigation menu
Upload a User Manual
Namespaces
Wiki Guide
HTML
PDF
Info
Views
User Manual
Discussion / Help
Navigation