TranSystem 961900101 TripMate User Manual 850 v2
TranSystem TripMate 850 v2
UserManual.wiki
>
TranSystem
>
961900101 User Manual
>
850 UserMan
Contents
1.
UserMan
2.
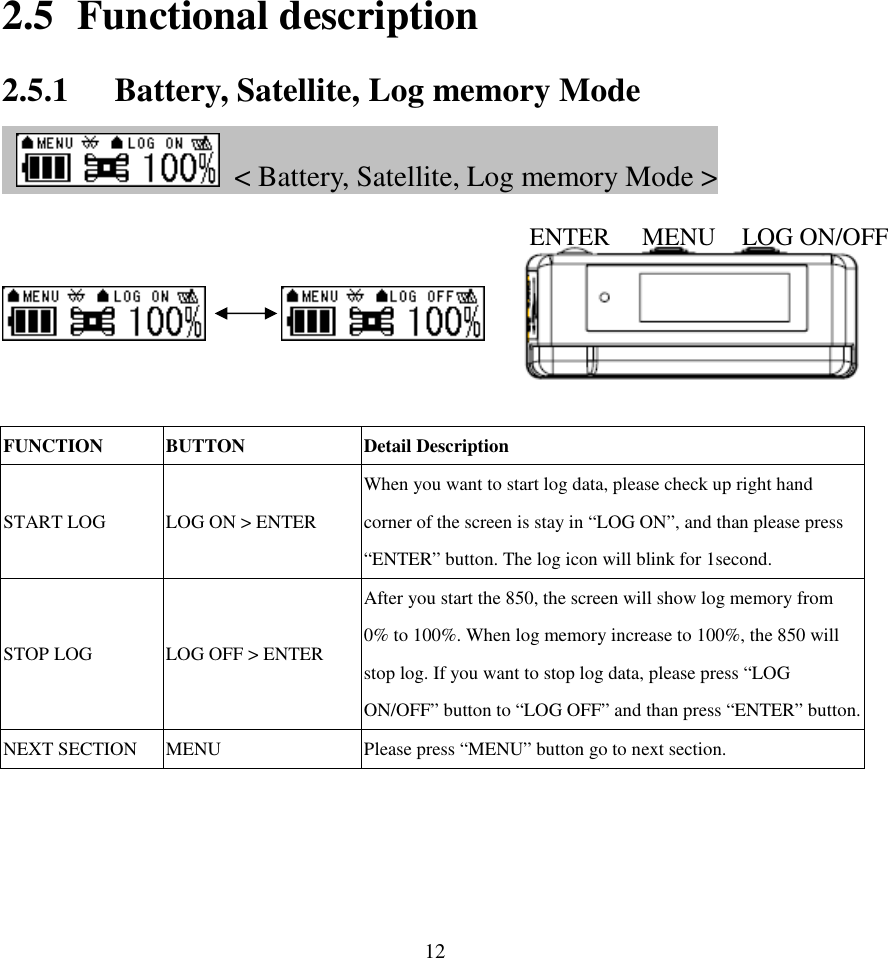
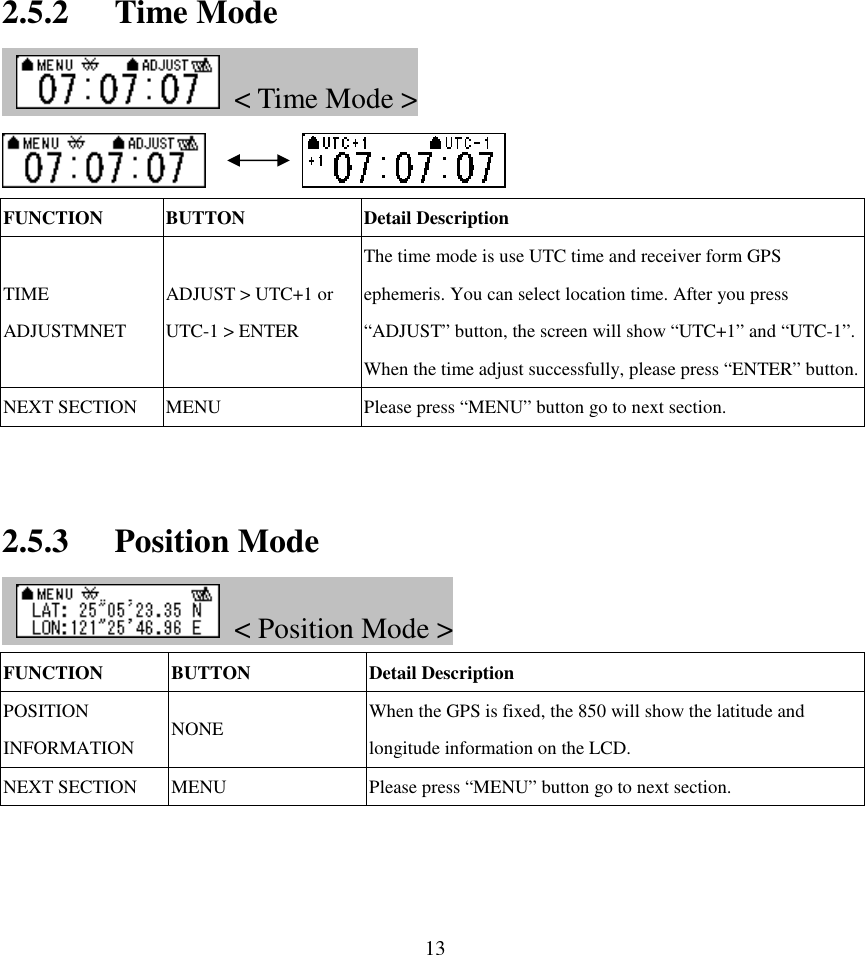
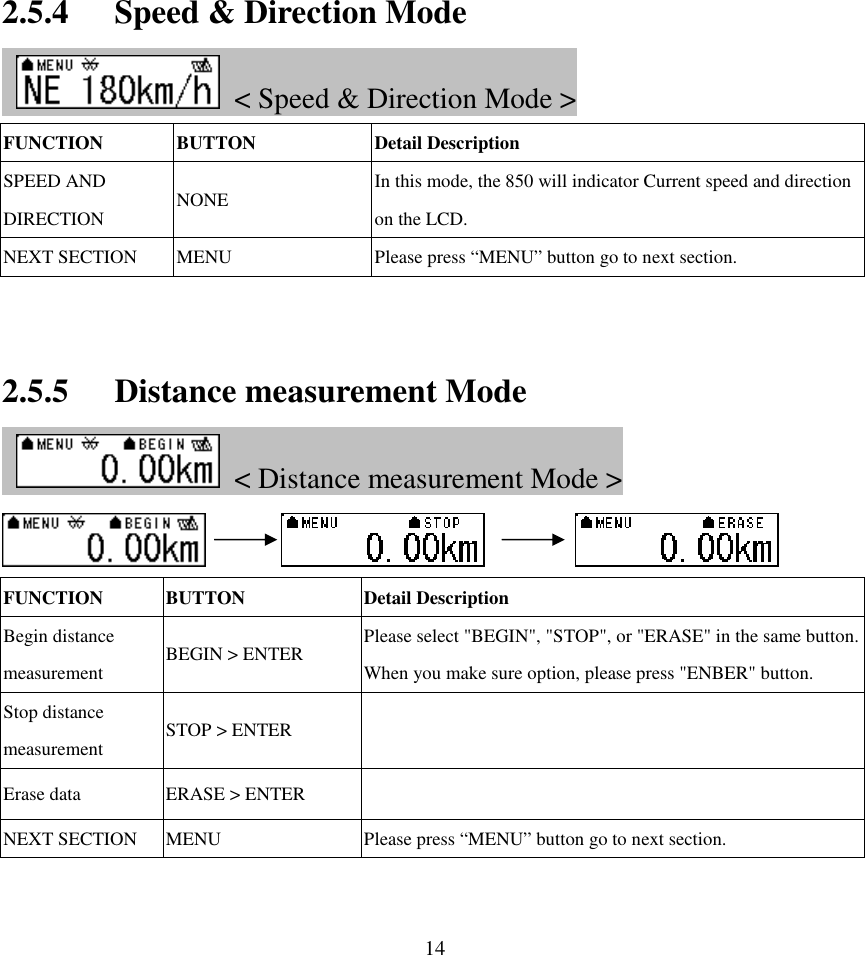
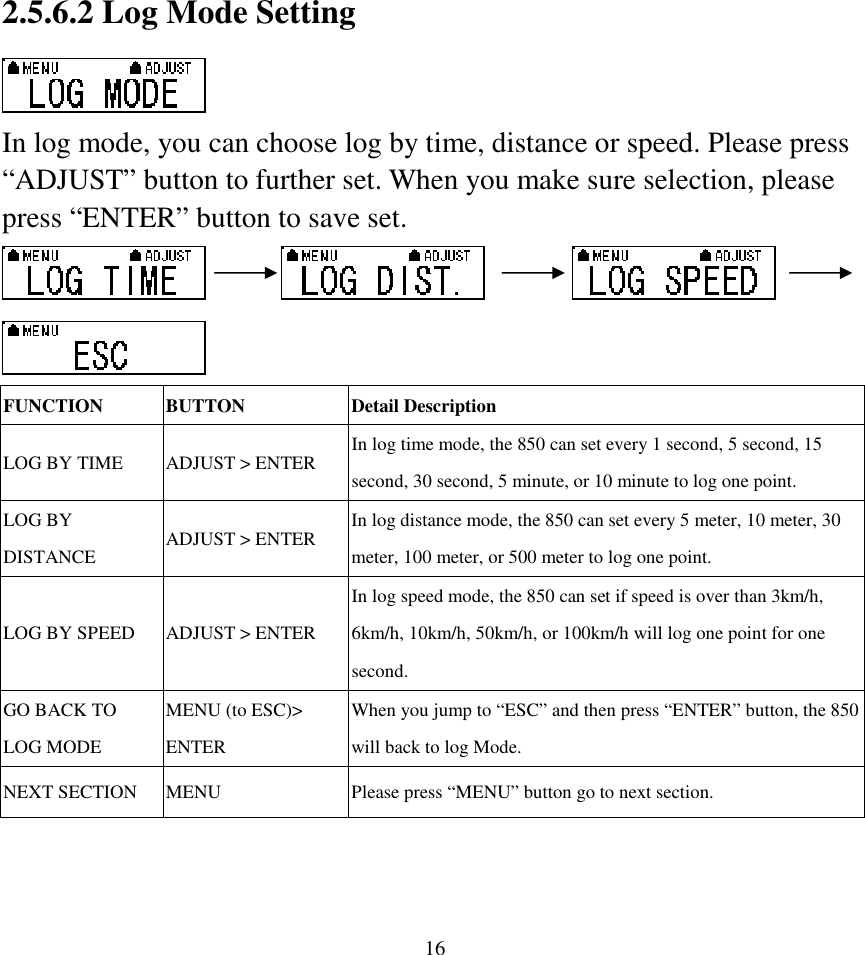
850 UserMan
850 UserMan
Navigation menu
Upload a User Manual
Namespaces
Wiki Guide
HTML
PDF
Info
Views
User Manual
Discussion / Help
Navigation


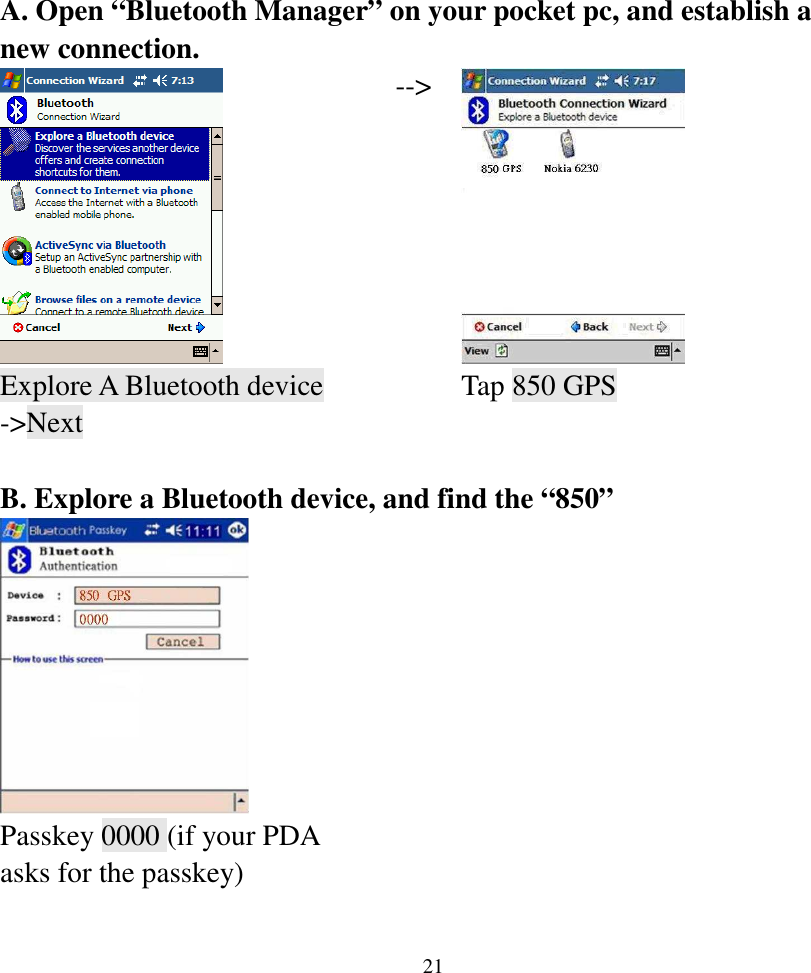
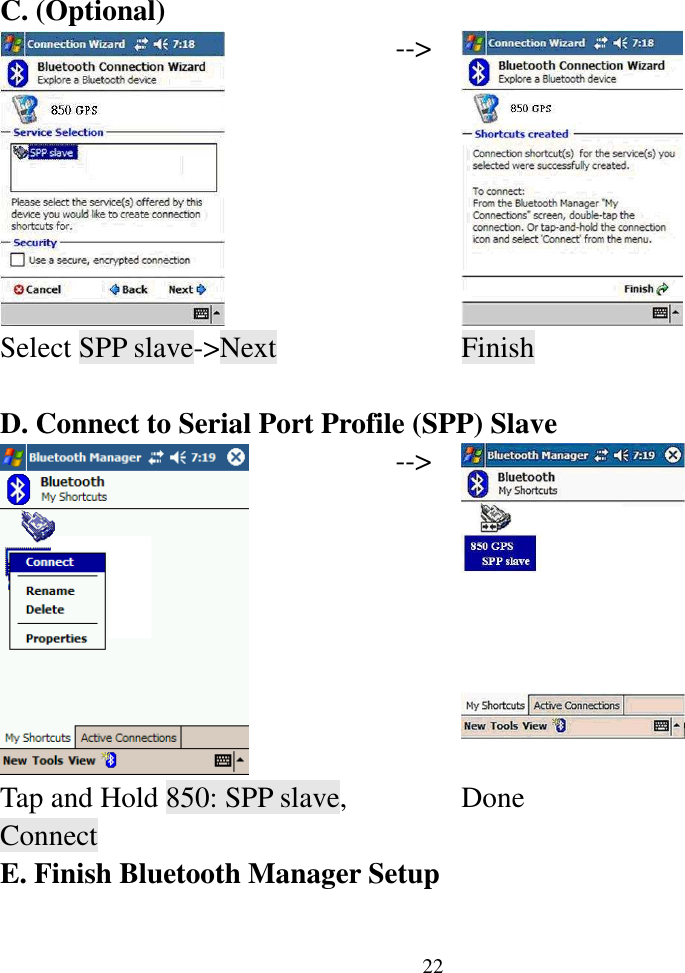
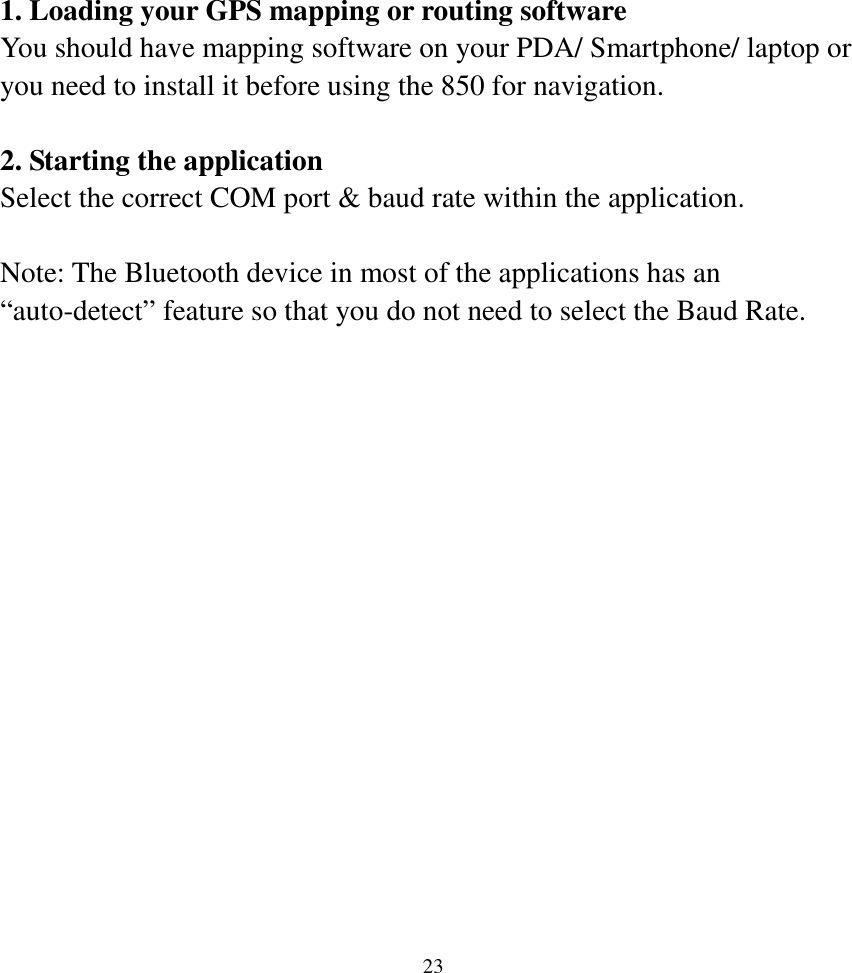
![294. Choice Update。 5. When Updating now…100%, click Enter complete。 [Note] When you use GpsView software download AGPS data, it only supports use Bluetooth connect to PC and 850.](https://usermanual.wiki/TranSystem/961900101.850-UserMan/User-Guide-1079716-Page-30.png)