Tobii Dynavox T15 DynaVox T15 User Manual S6 DynaVoxT10 T15 Book
Dynavox Systems LLC DynaVox T15 S6 DynaVoxT10 T15 Book
UserManual.wiki
>
Tobii Dynavox
>
T15 User Manual
Users Manual
Navigation menu
Upload a User Manual
Namespaces
Wiki Guide
HTML
PDF
Info
Views
User Manual
Discussion / Help
Navigation

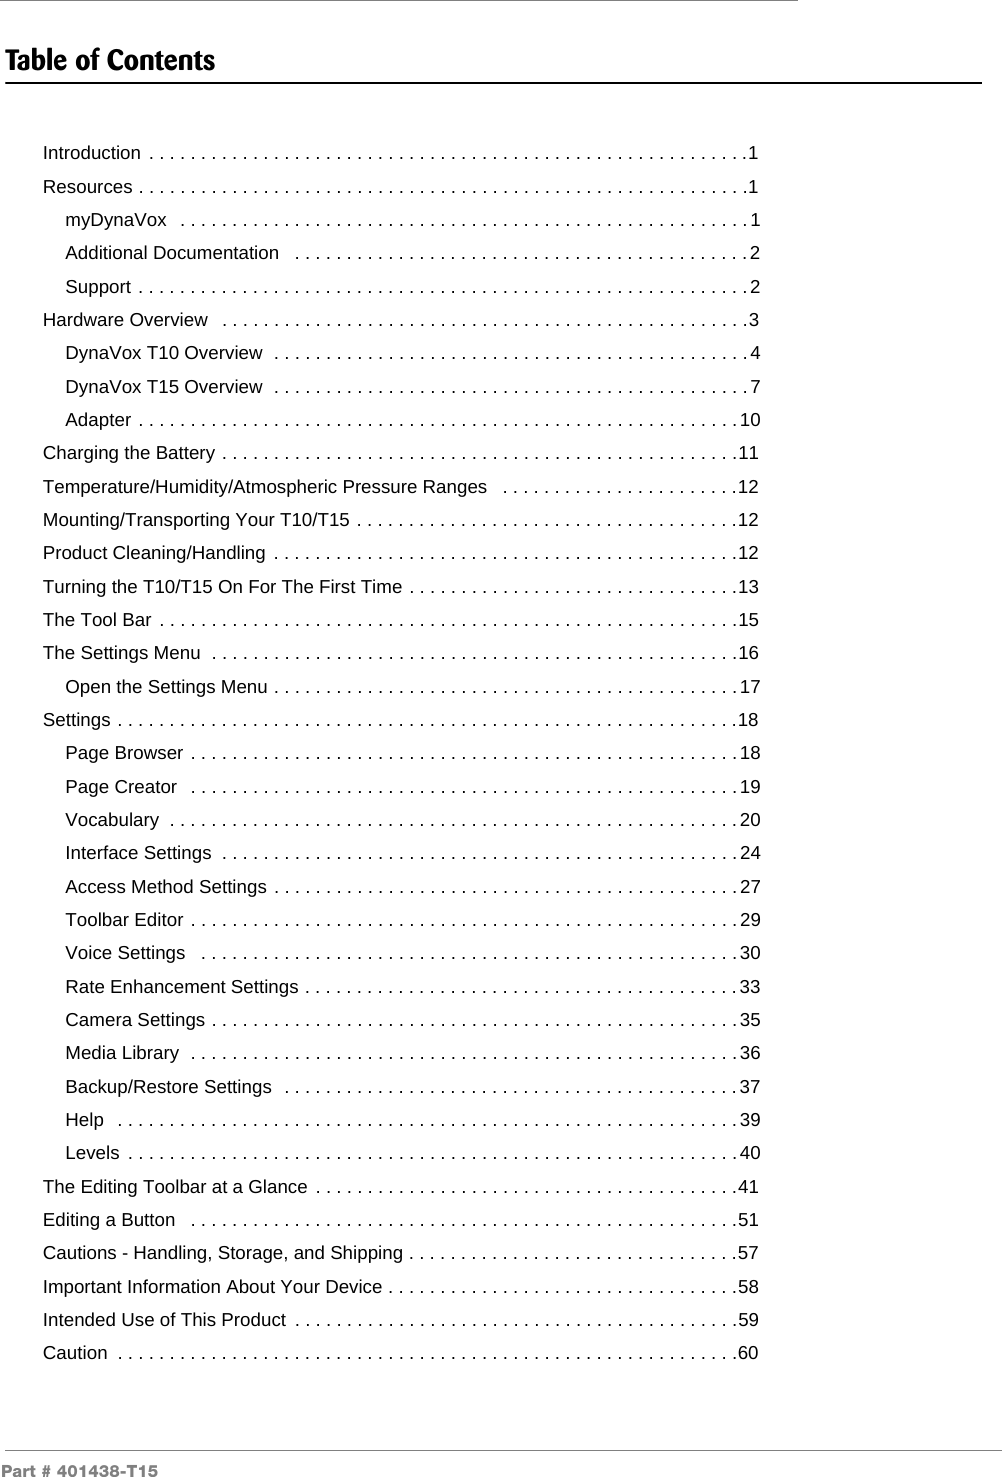

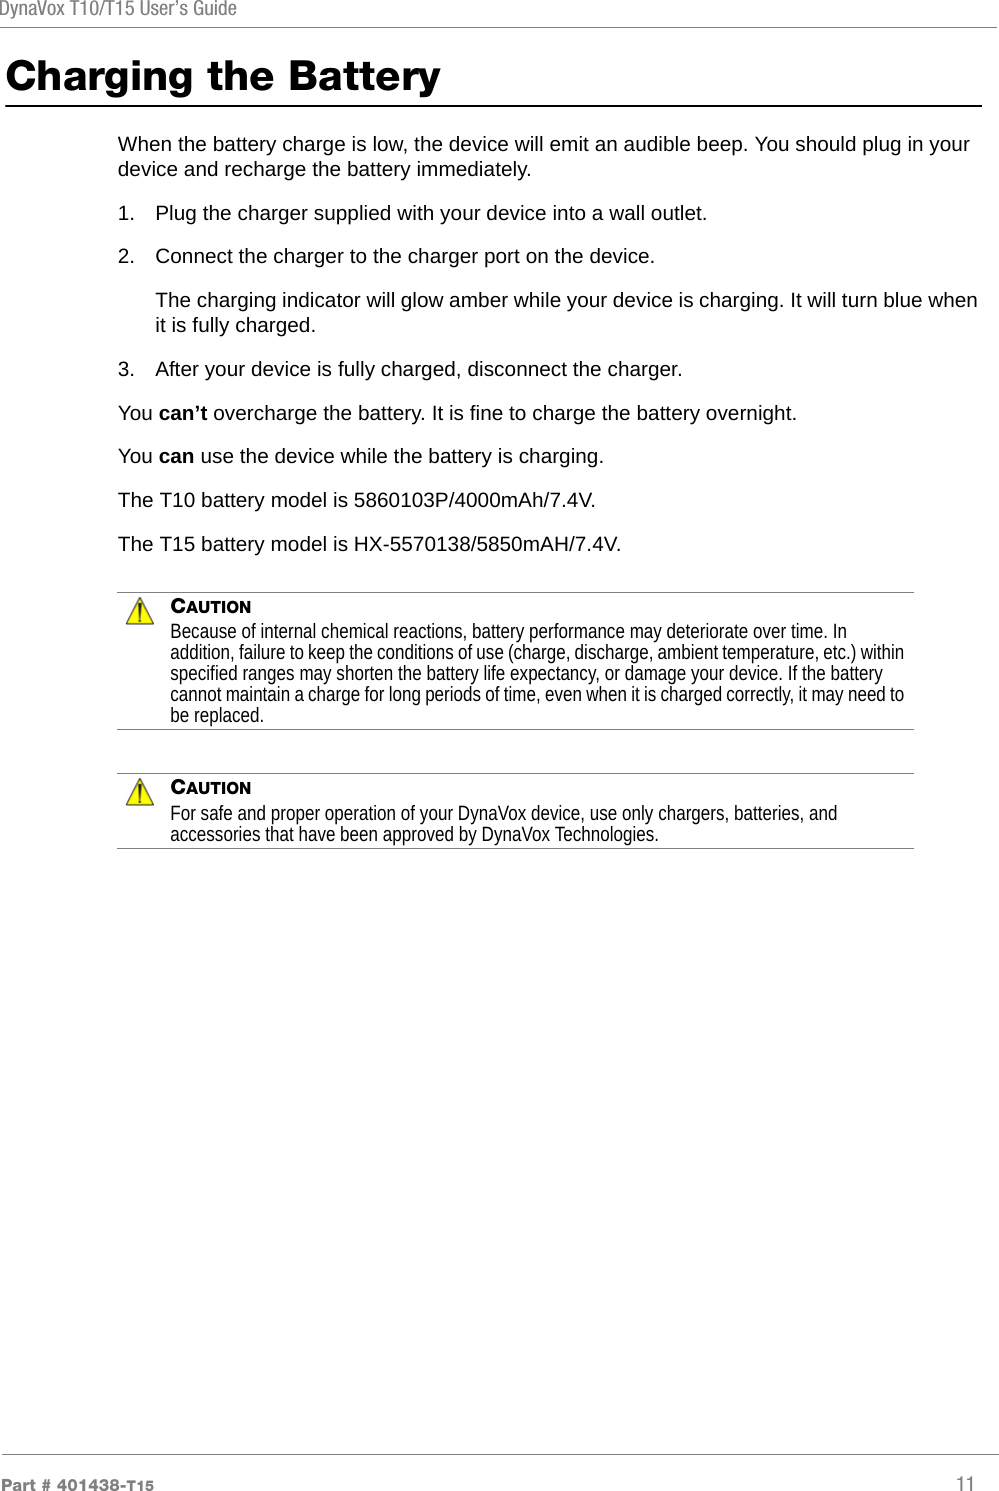

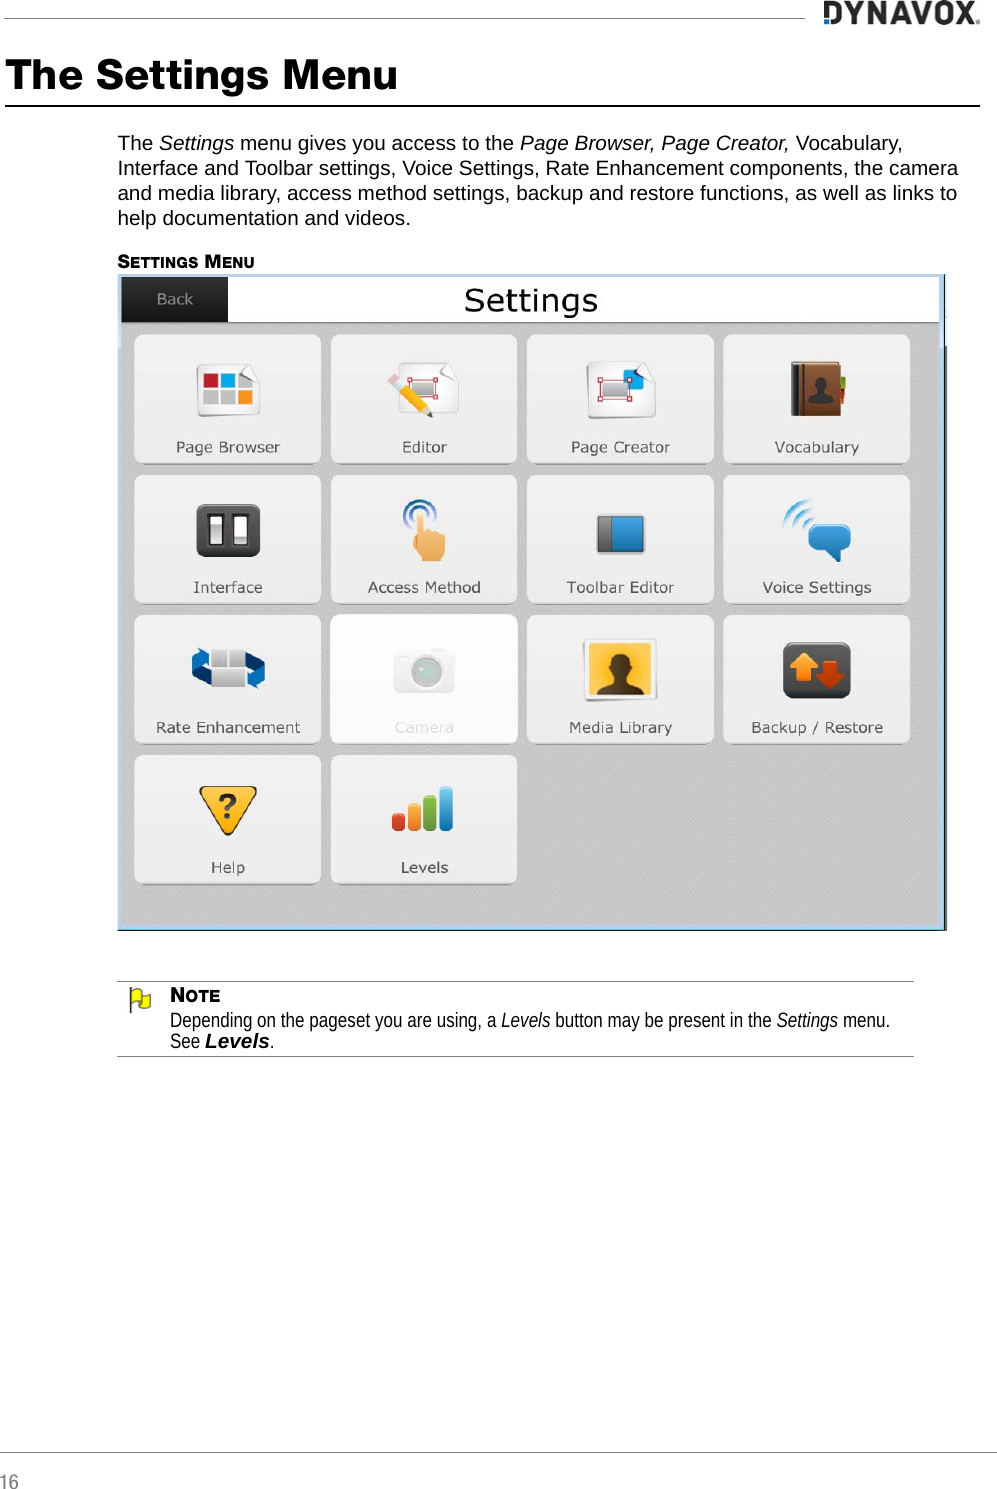
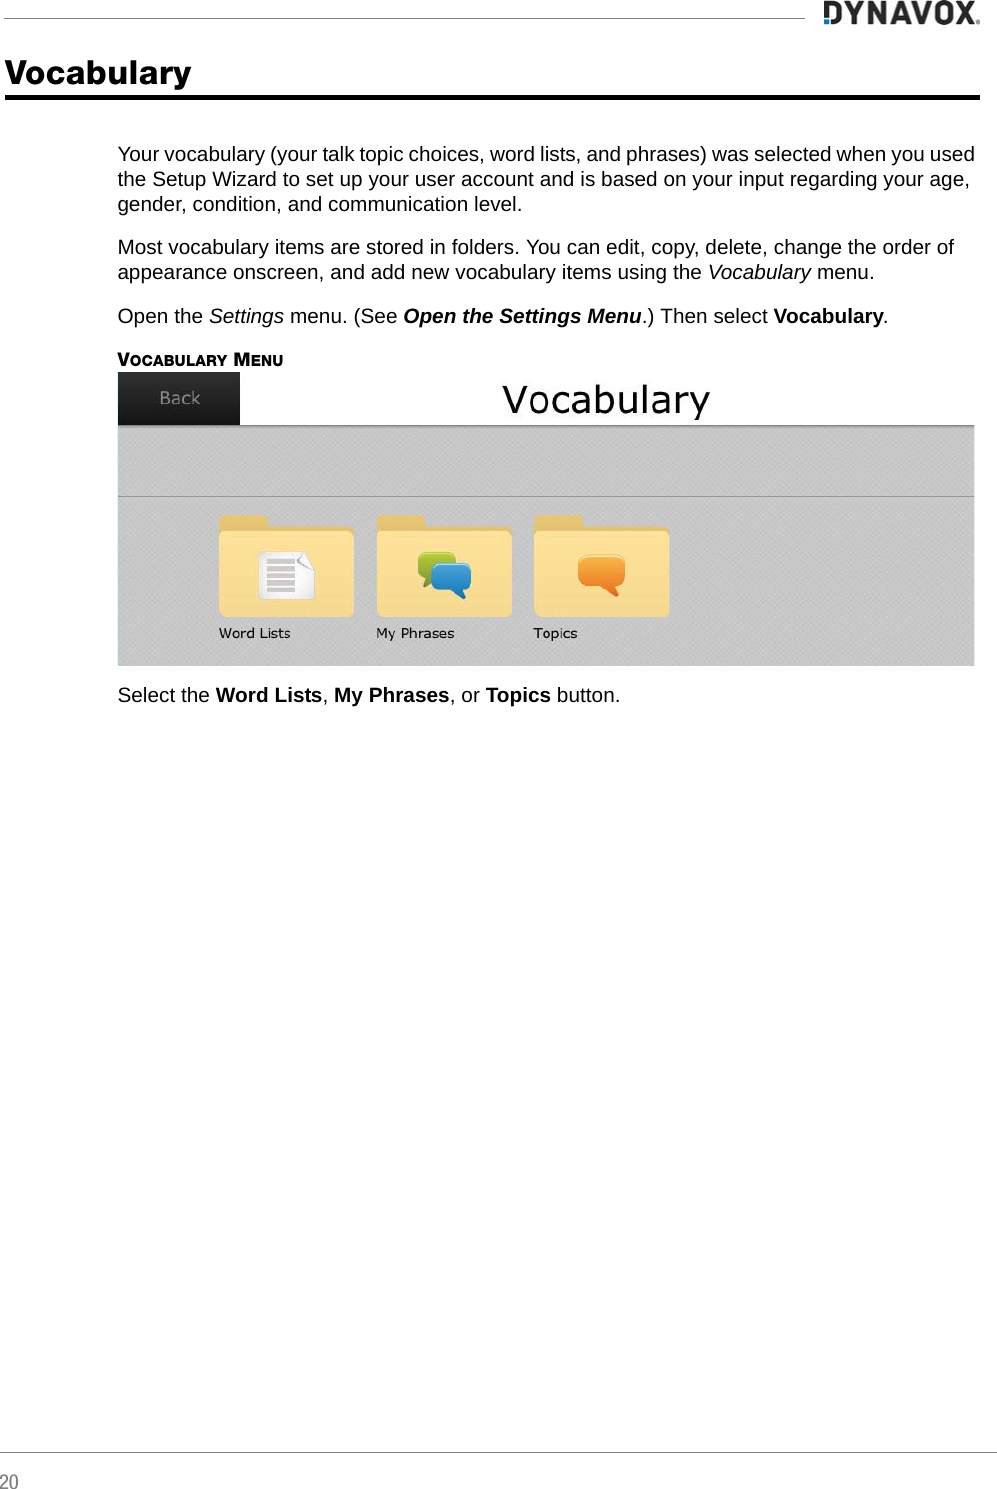
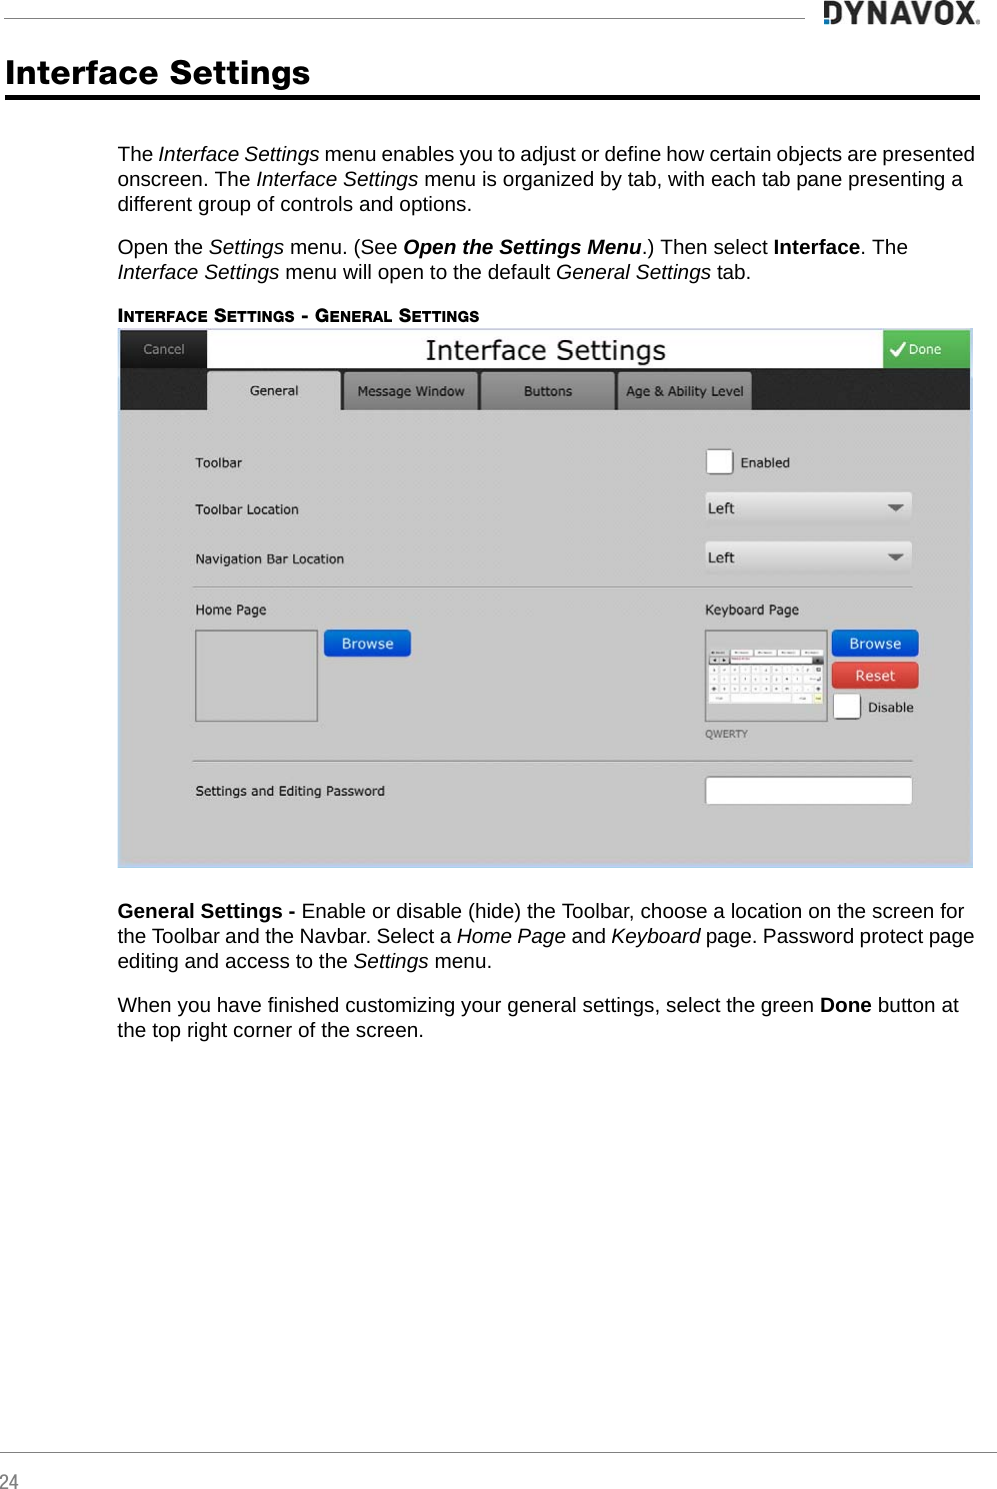

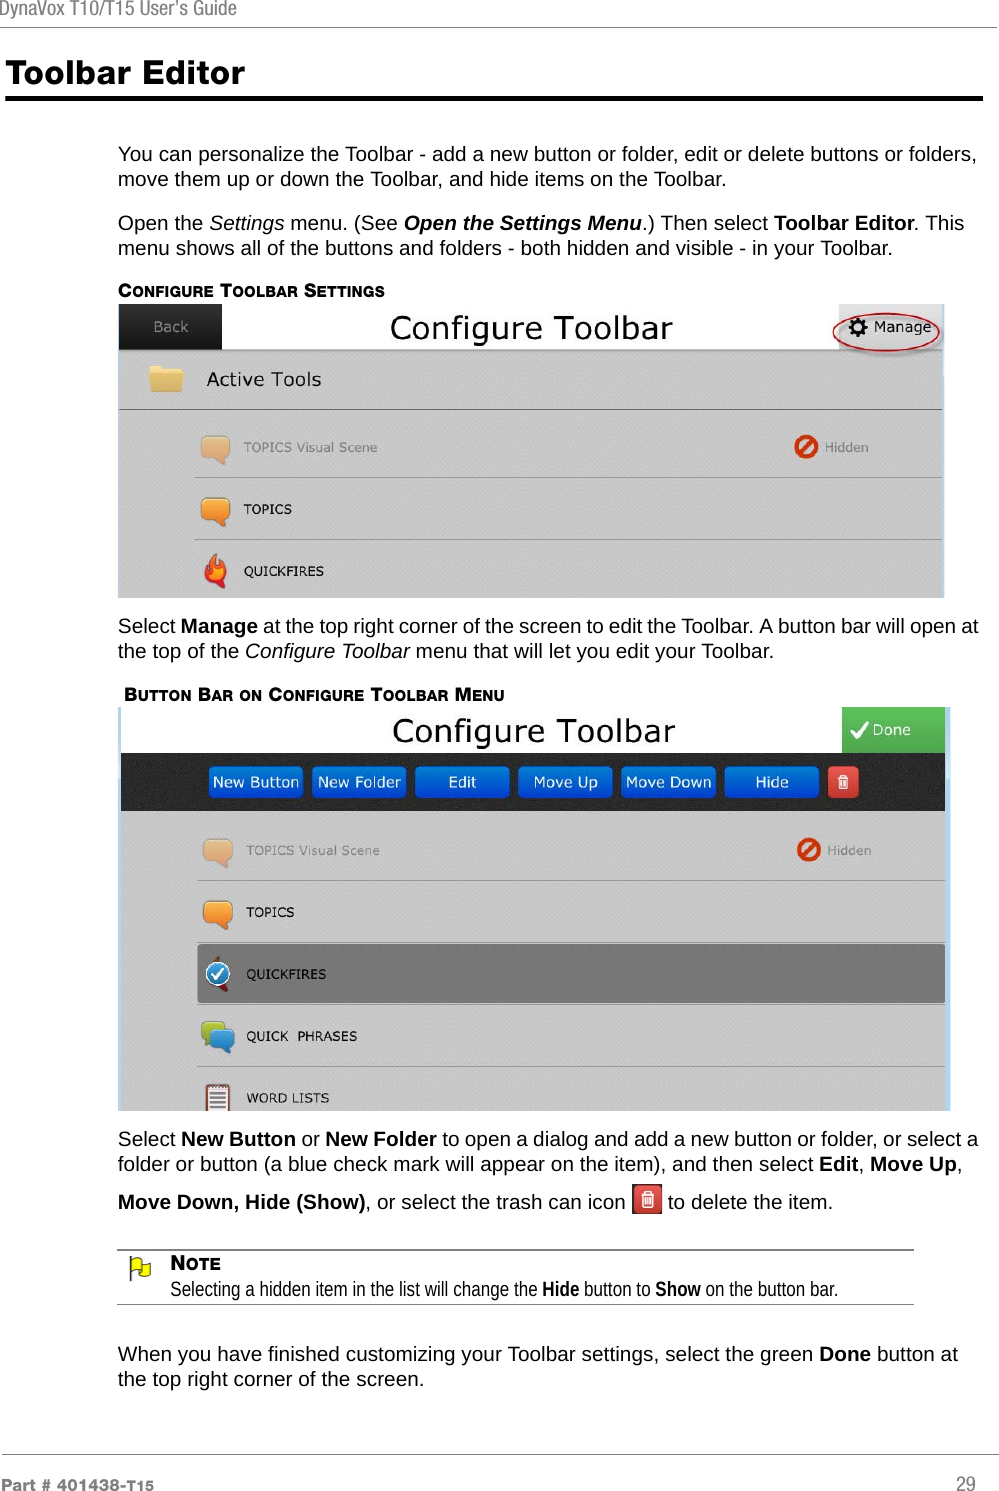
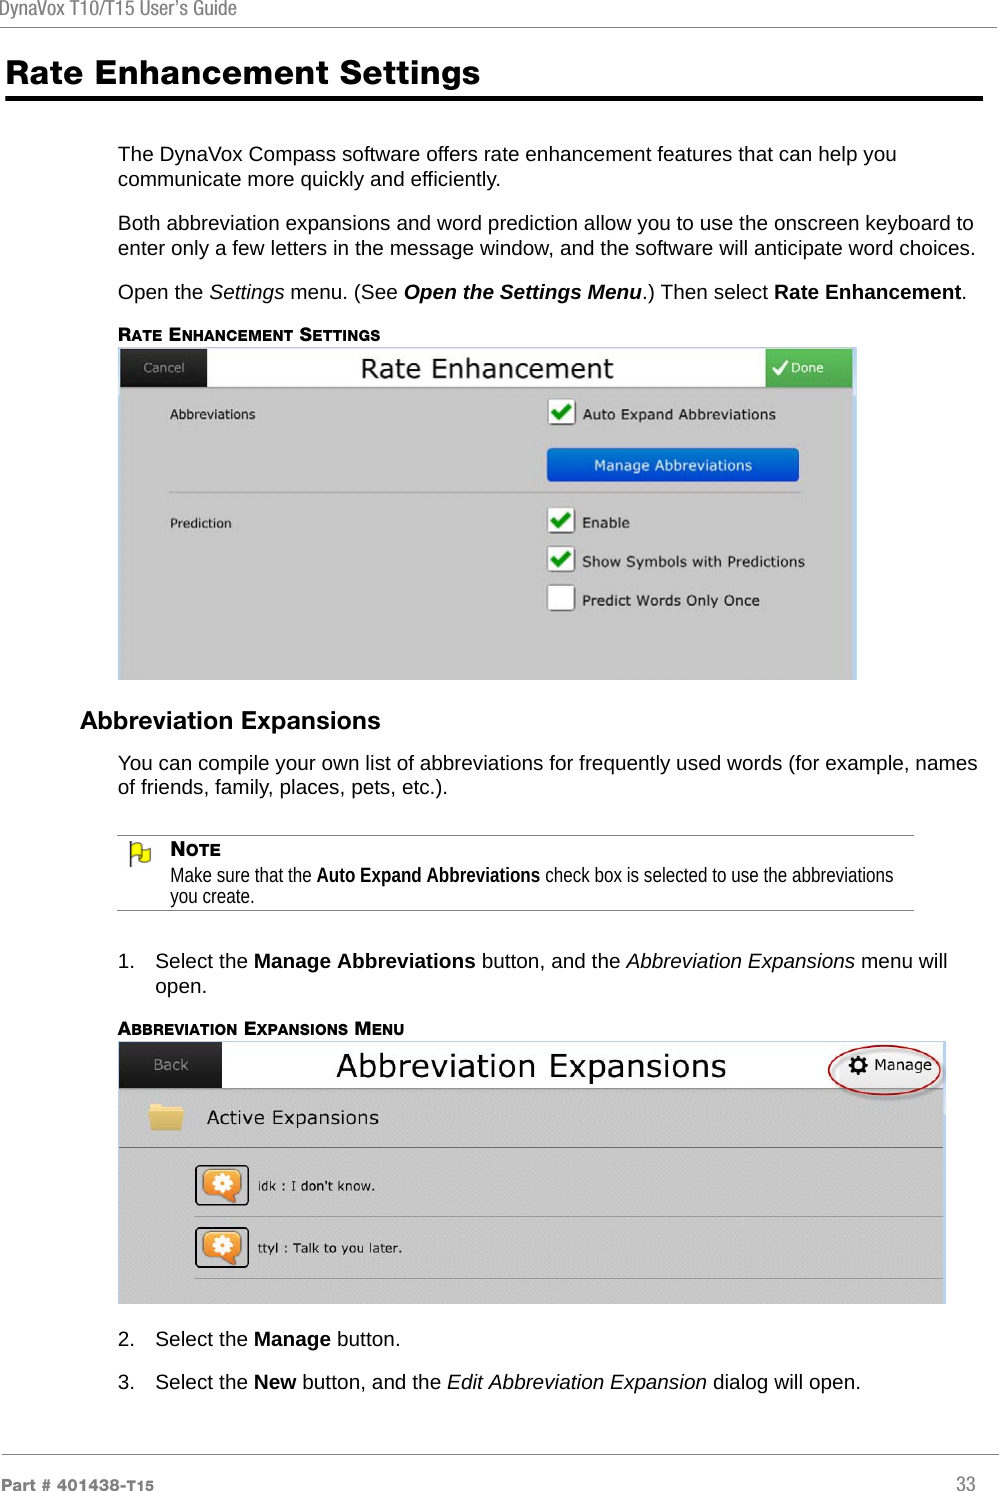

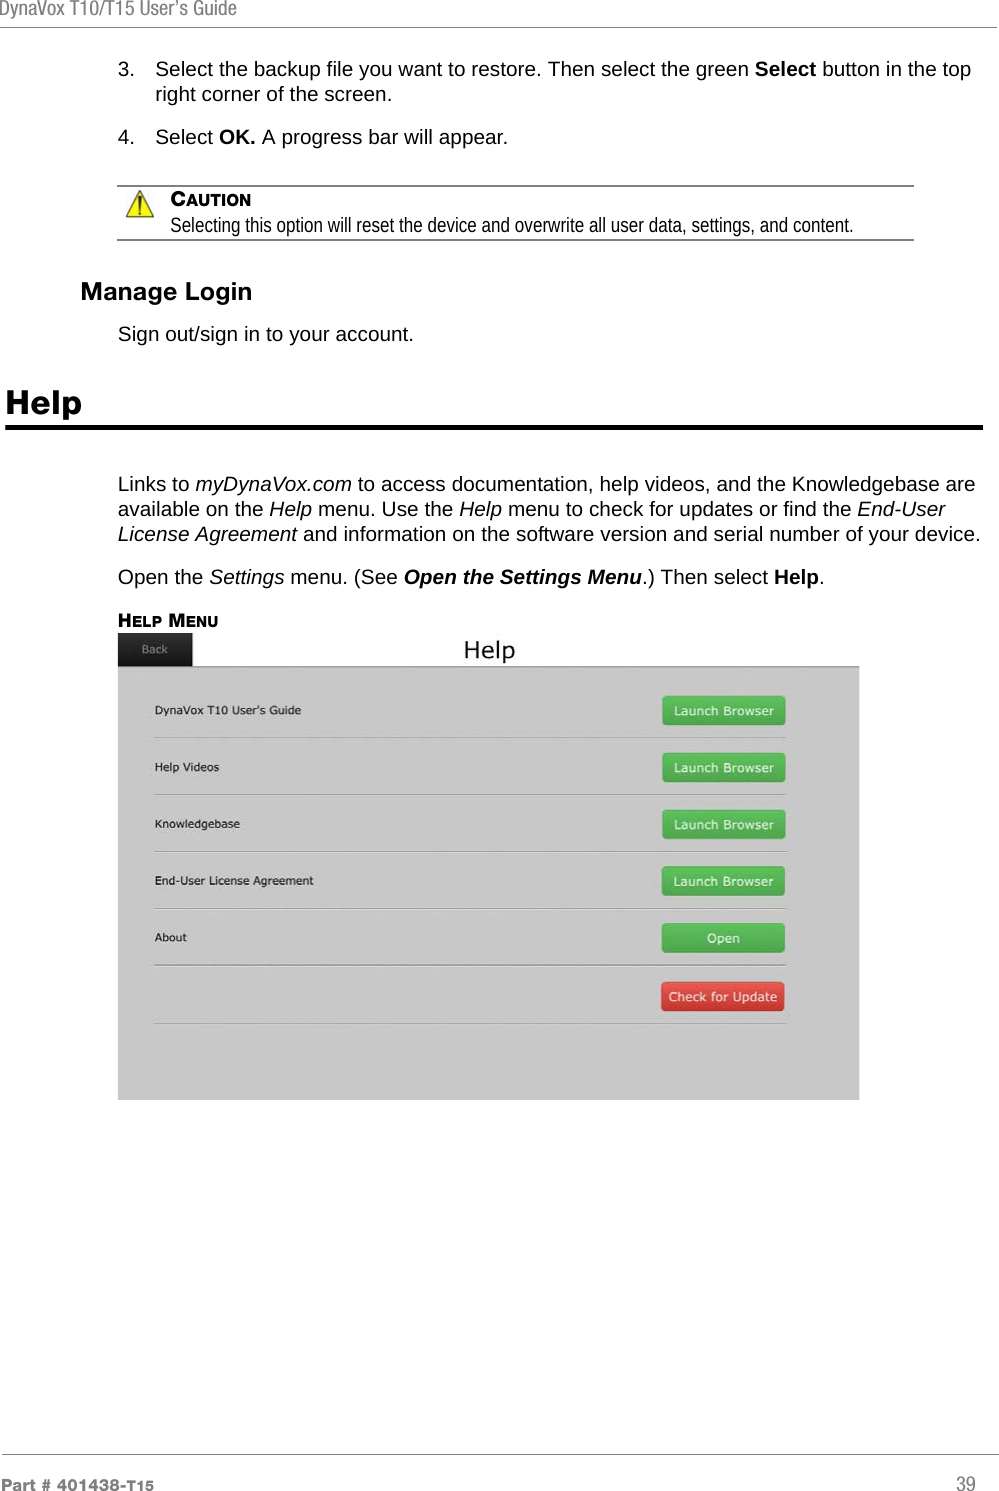
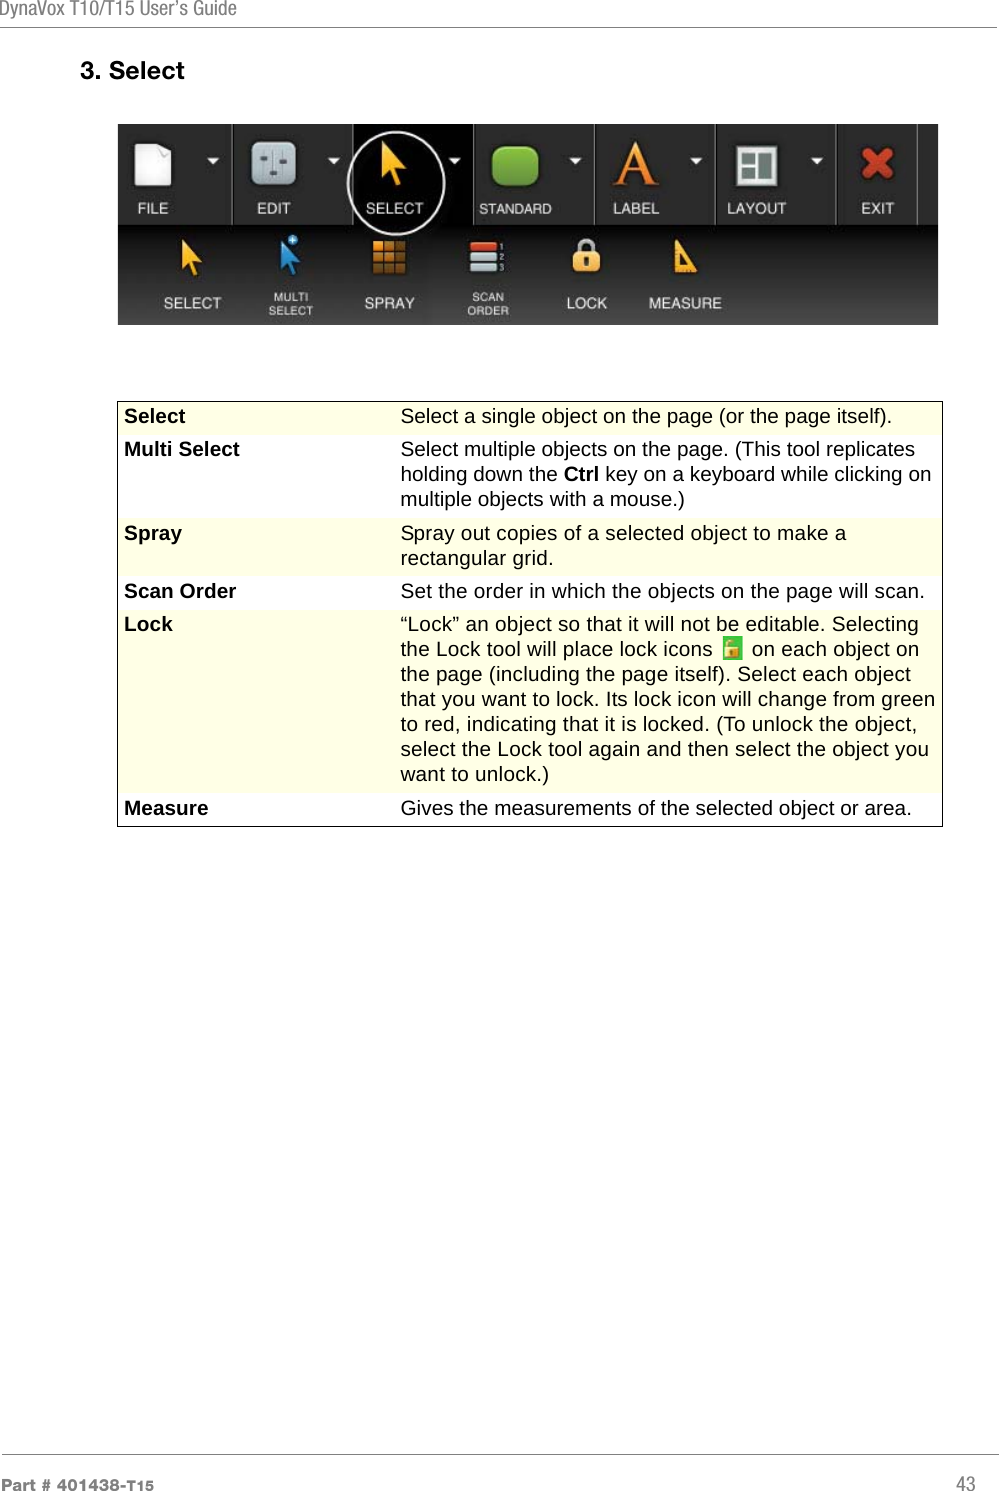
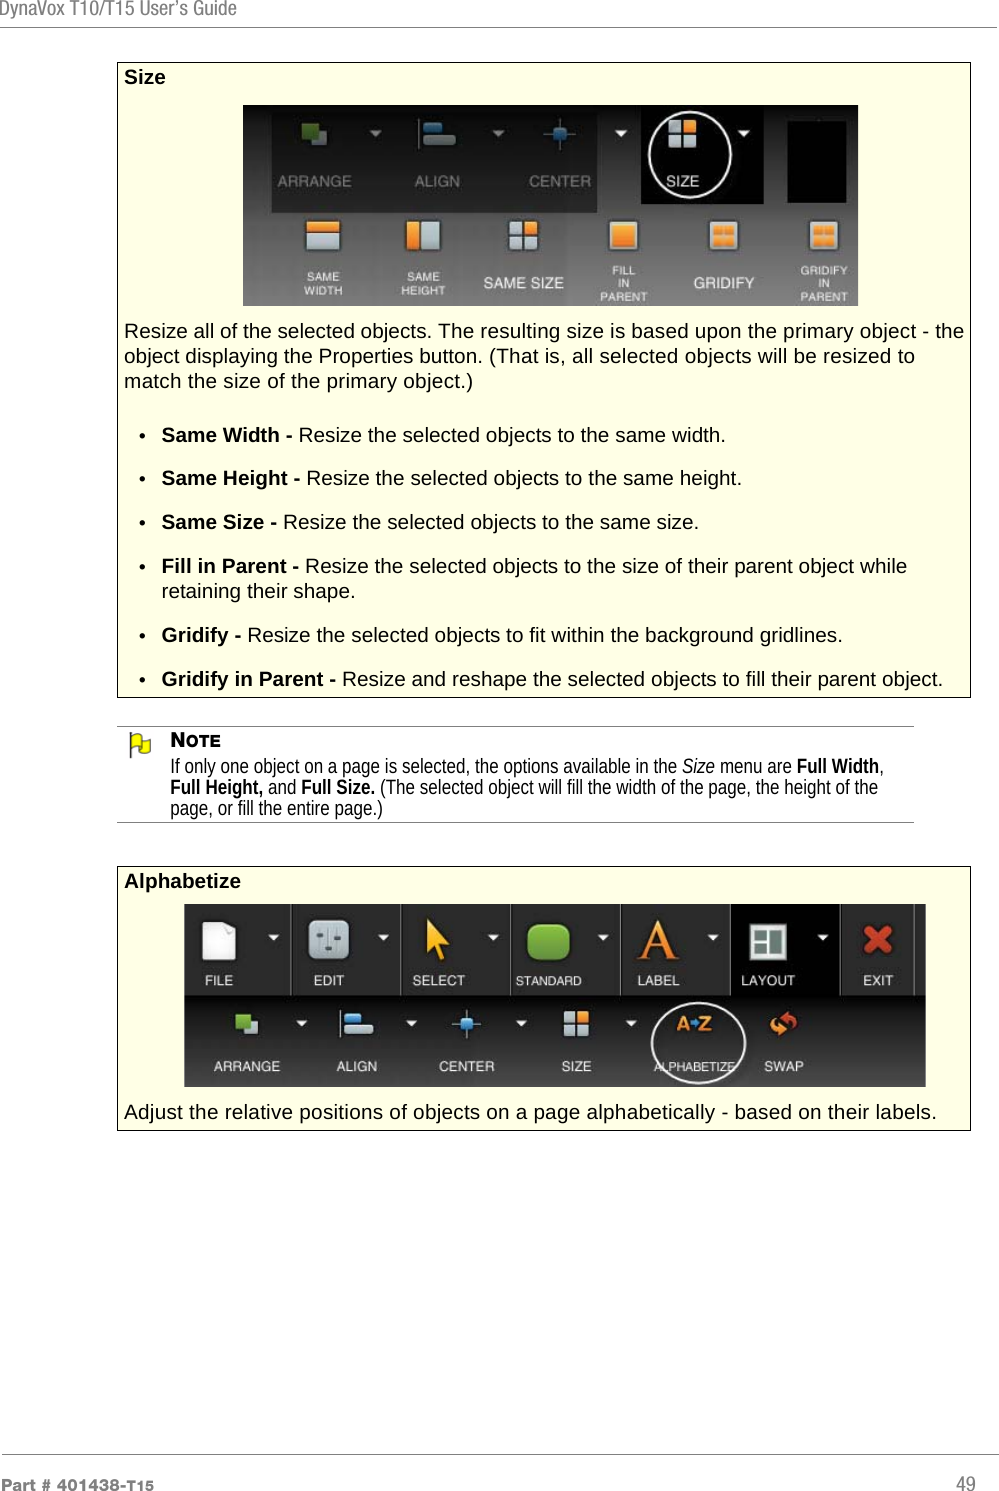
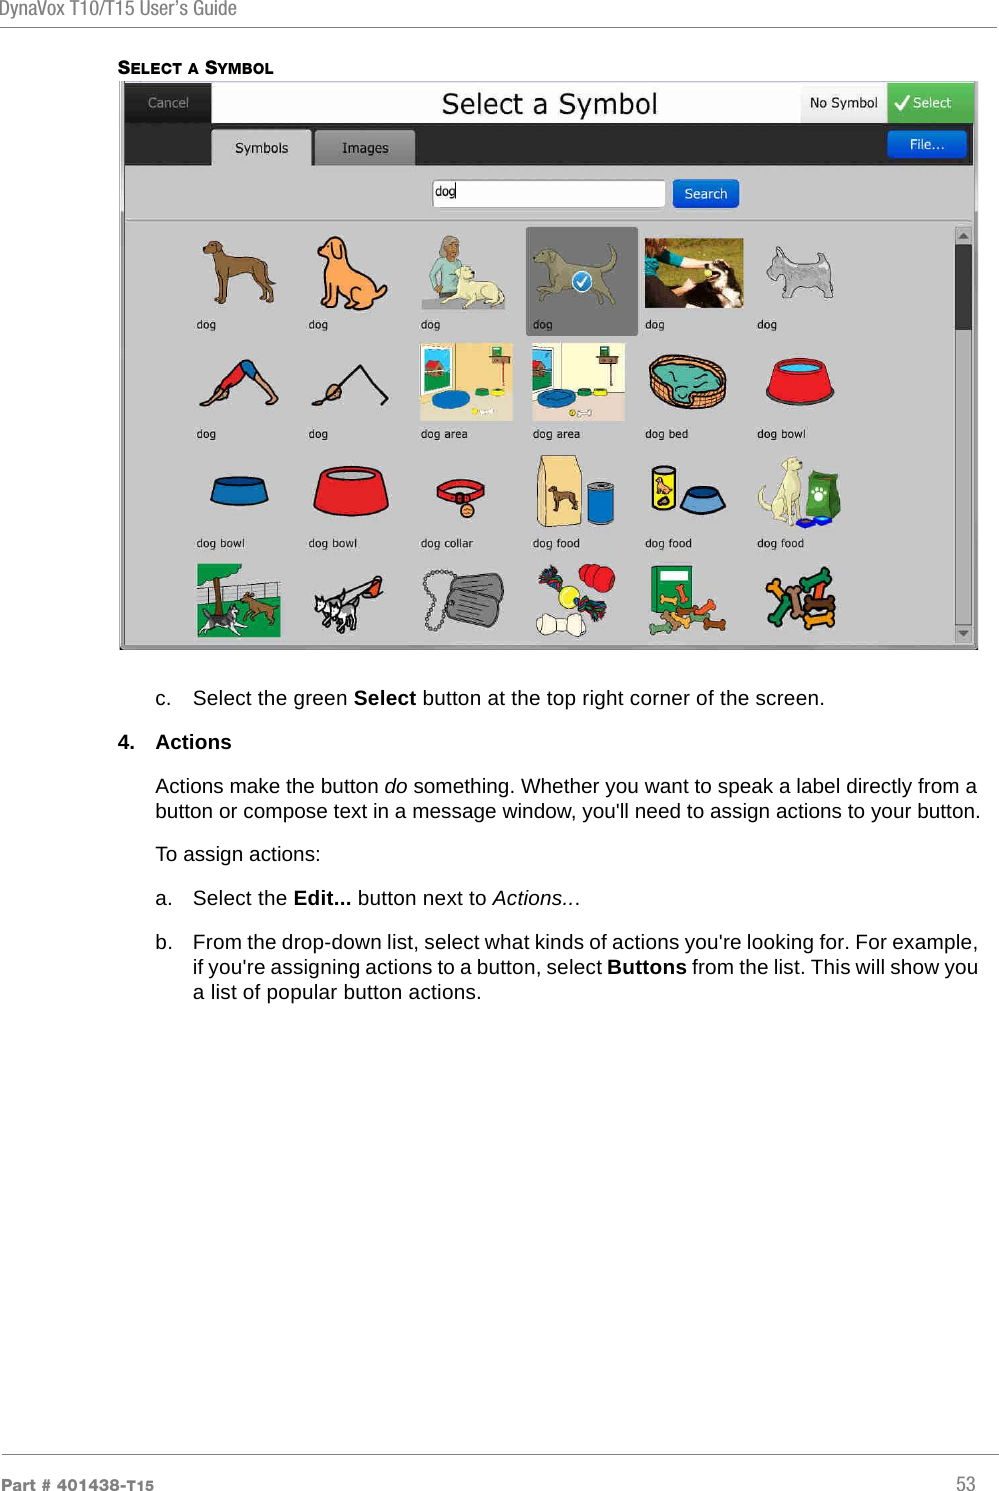
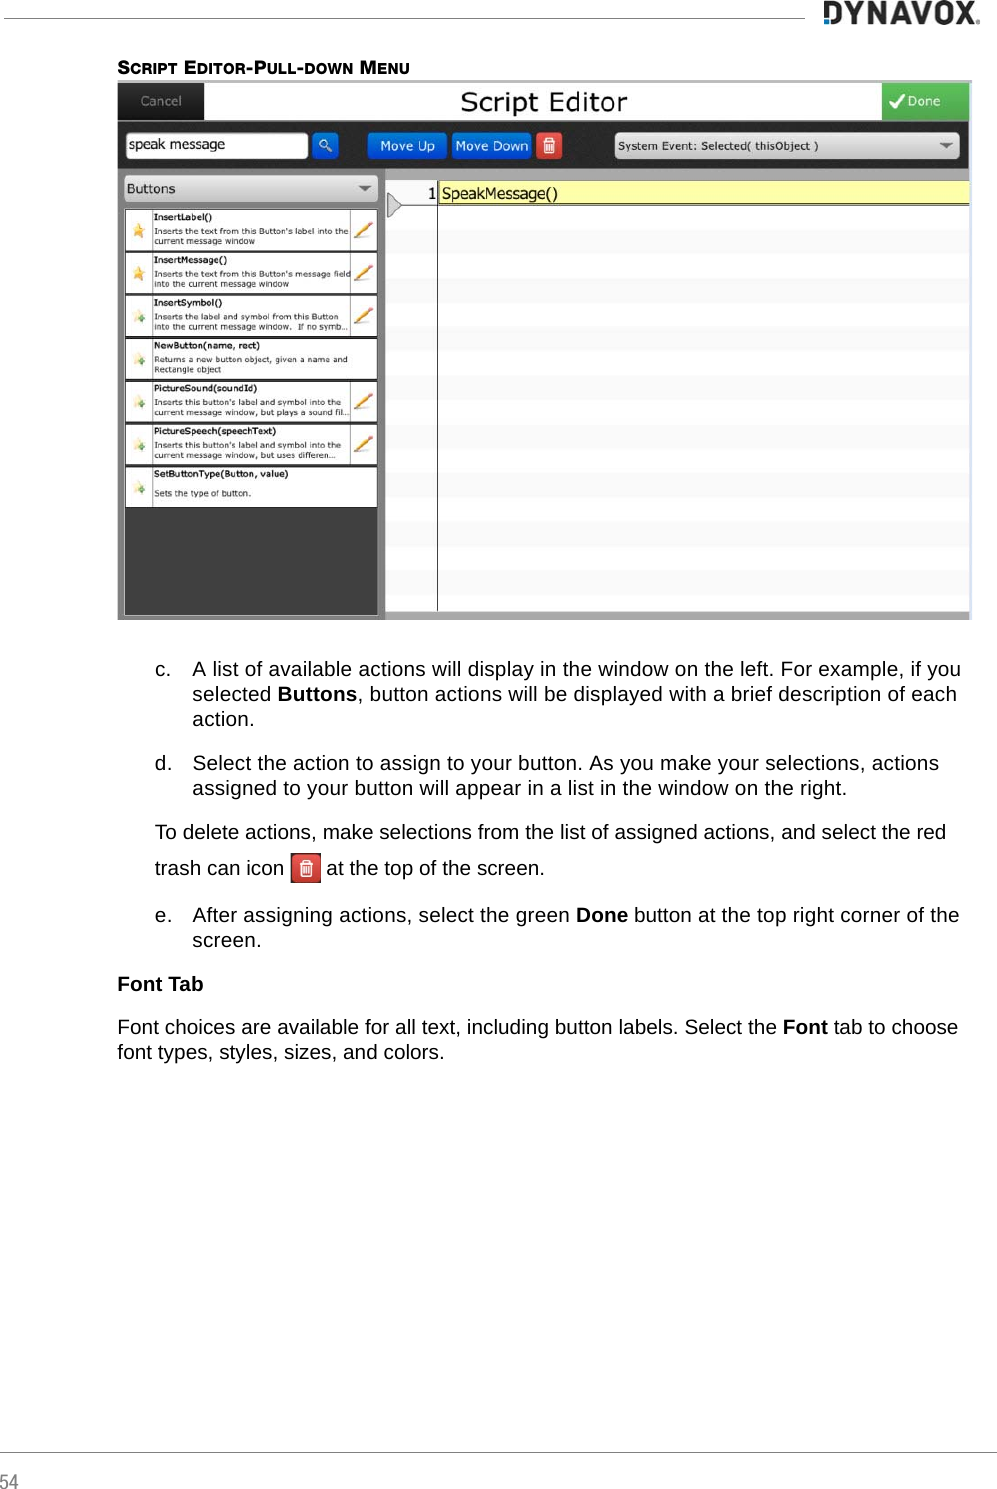
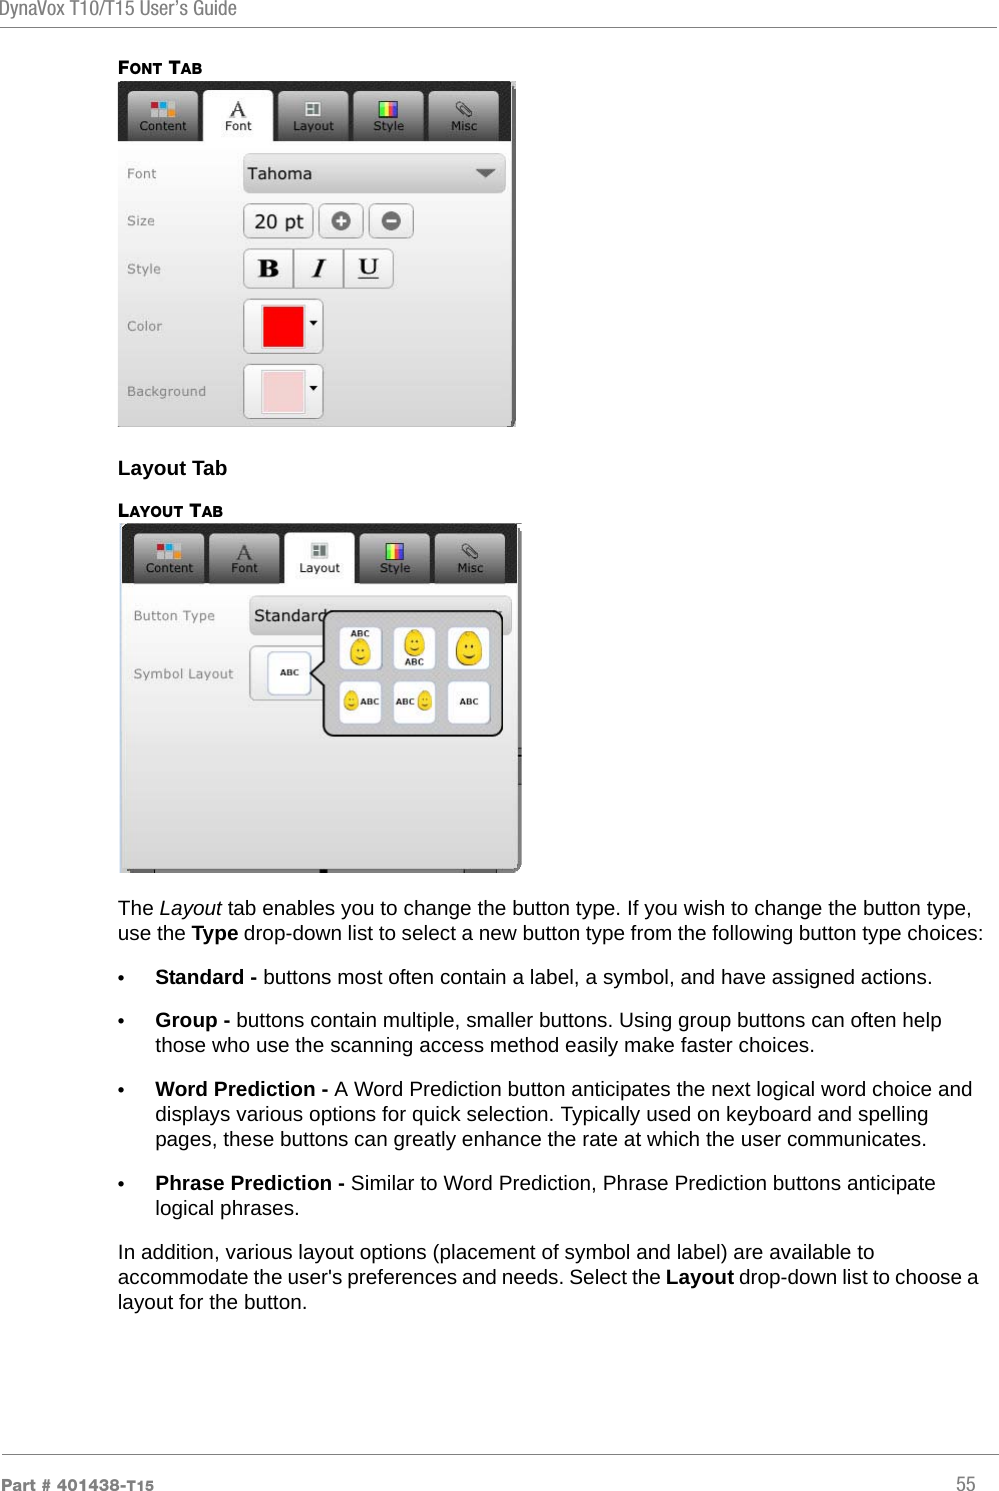
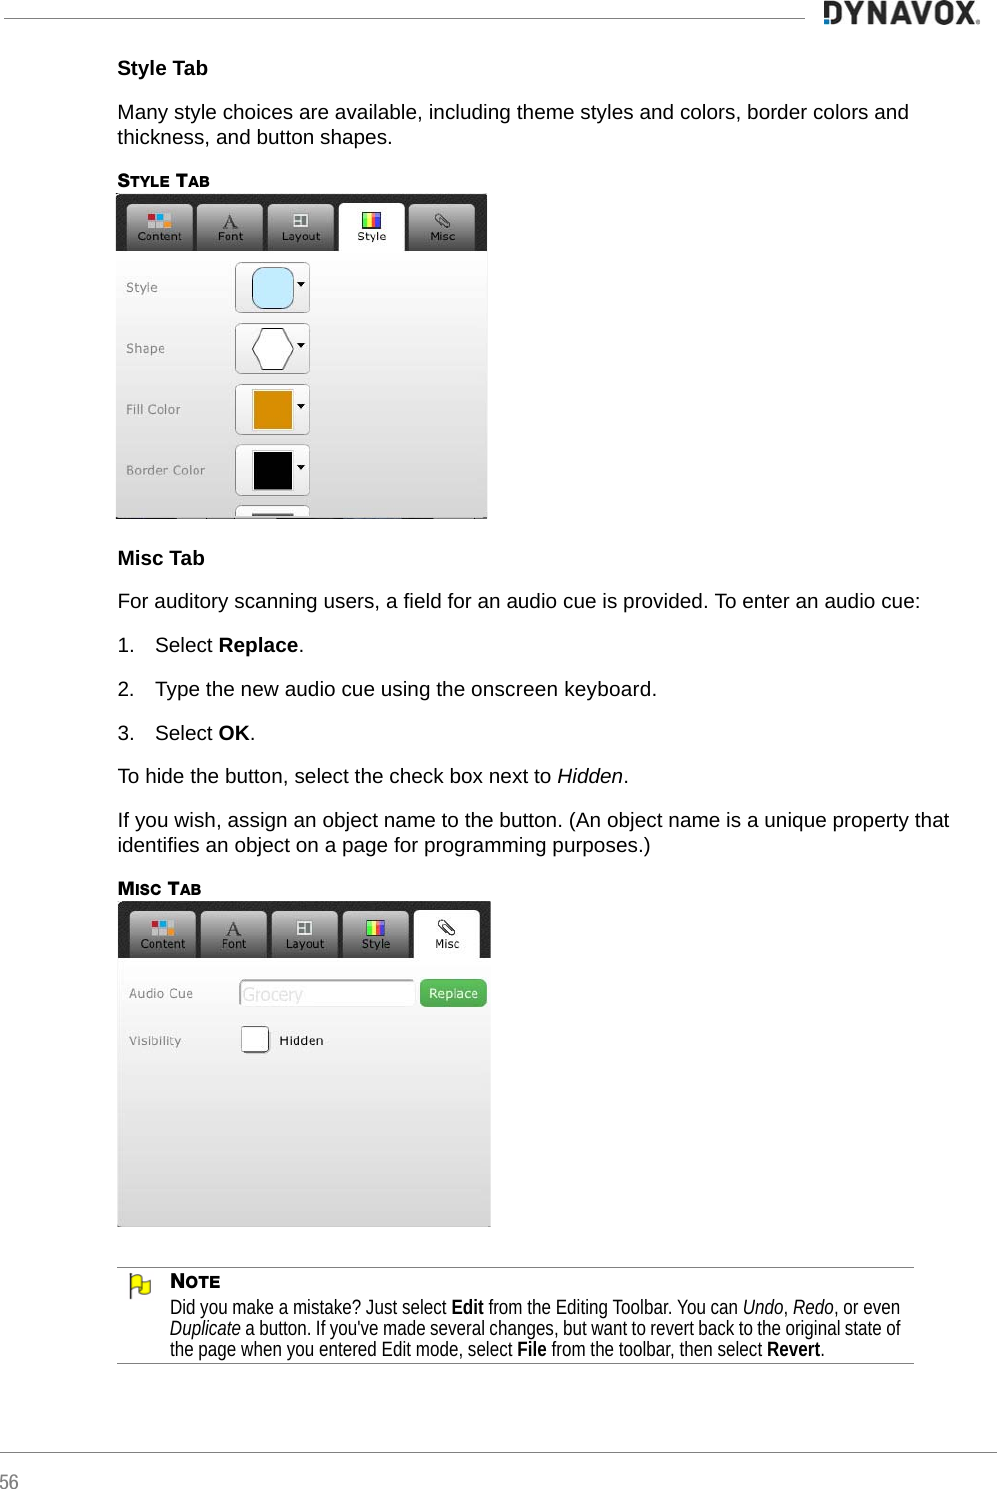
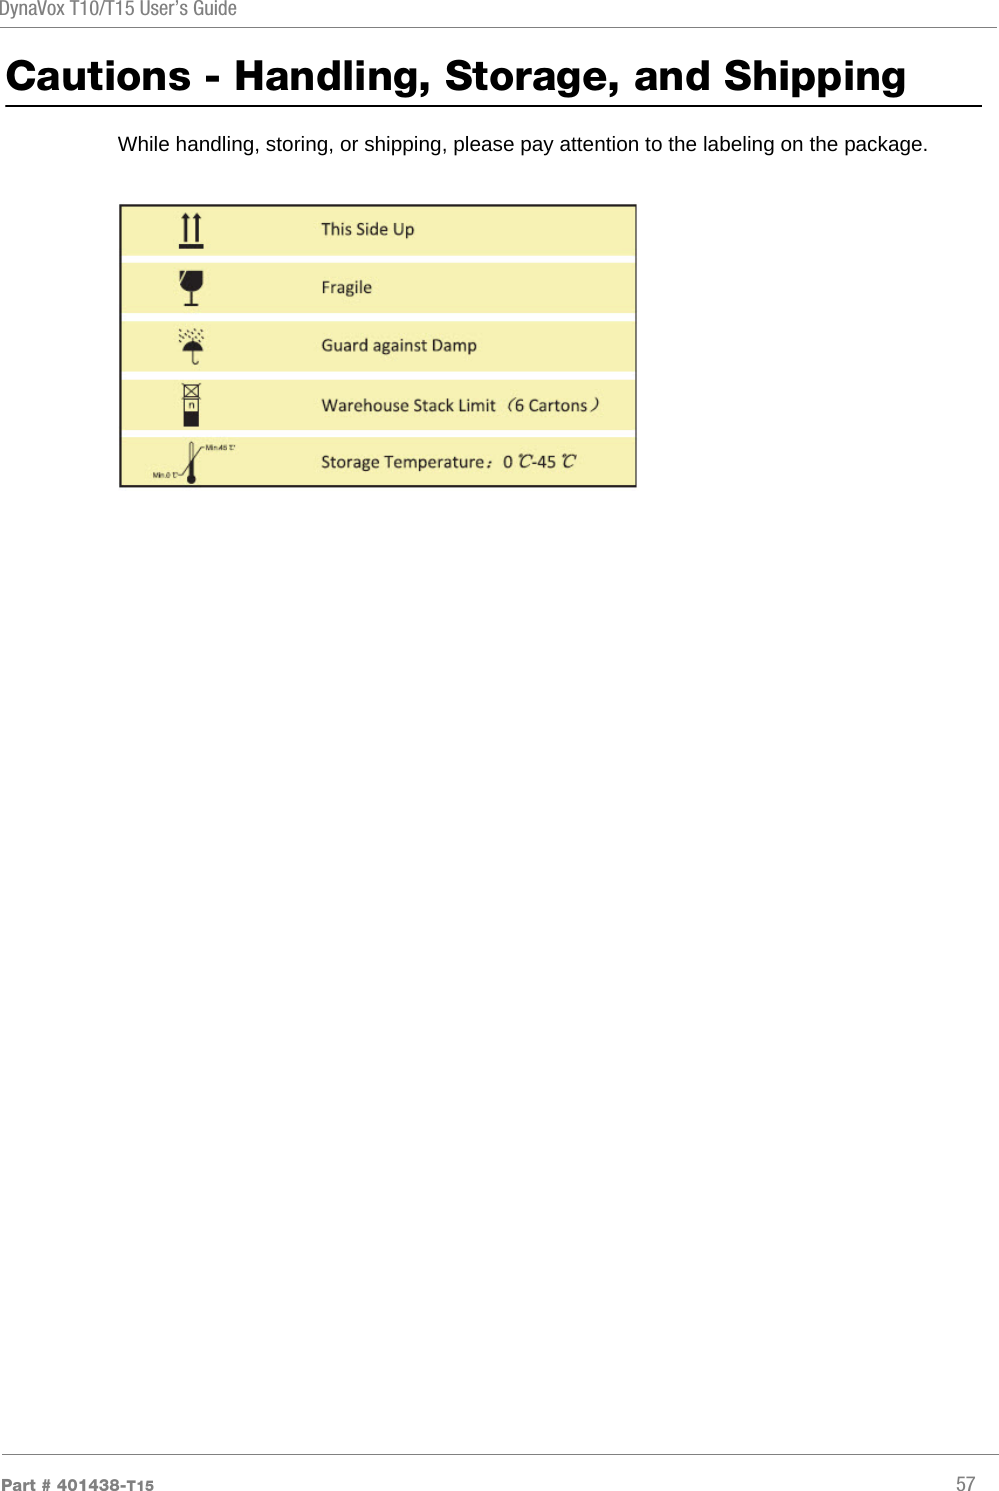
![DynaVox T10/T15 User’s GuidePart # 401438-T15 37Backup/Restore SettingsWhen you completed the Setup Wizard in a page set, you saved many settings for the page set, vocabulary, media library, rate enhancement information, selection method settings, etc. A backup file saves these customized settings.Open the Settings menu. (See Open the Settings Menu.) Then select Backup/Restore.BACKUP/RESTORE SETTINGSYou can backup and restore your user file either locally (to a folder on your device or a USB drive) or to myDynavox.Backup to myDynaVox.com1. Select the Backup to myDynaVox button.2. If you are prompted, sign in to your account by entering your username and password.3. Enter a name (and description [optional]) for your backup file in the text box. (It’s a good idea to include the date in the file name.)4. Select OK.Backup LocallyYou can back up on the device or to a USB drive. •T10 - You must use the Micro USB OTG adapter. (Insert the adapter into the micro USB port on your device. Then plug the USB drive into the adapter.)](https://usermanual.wiki/Tobii-Dynavox/T15/User-Guide-2288521-Page-41.png)
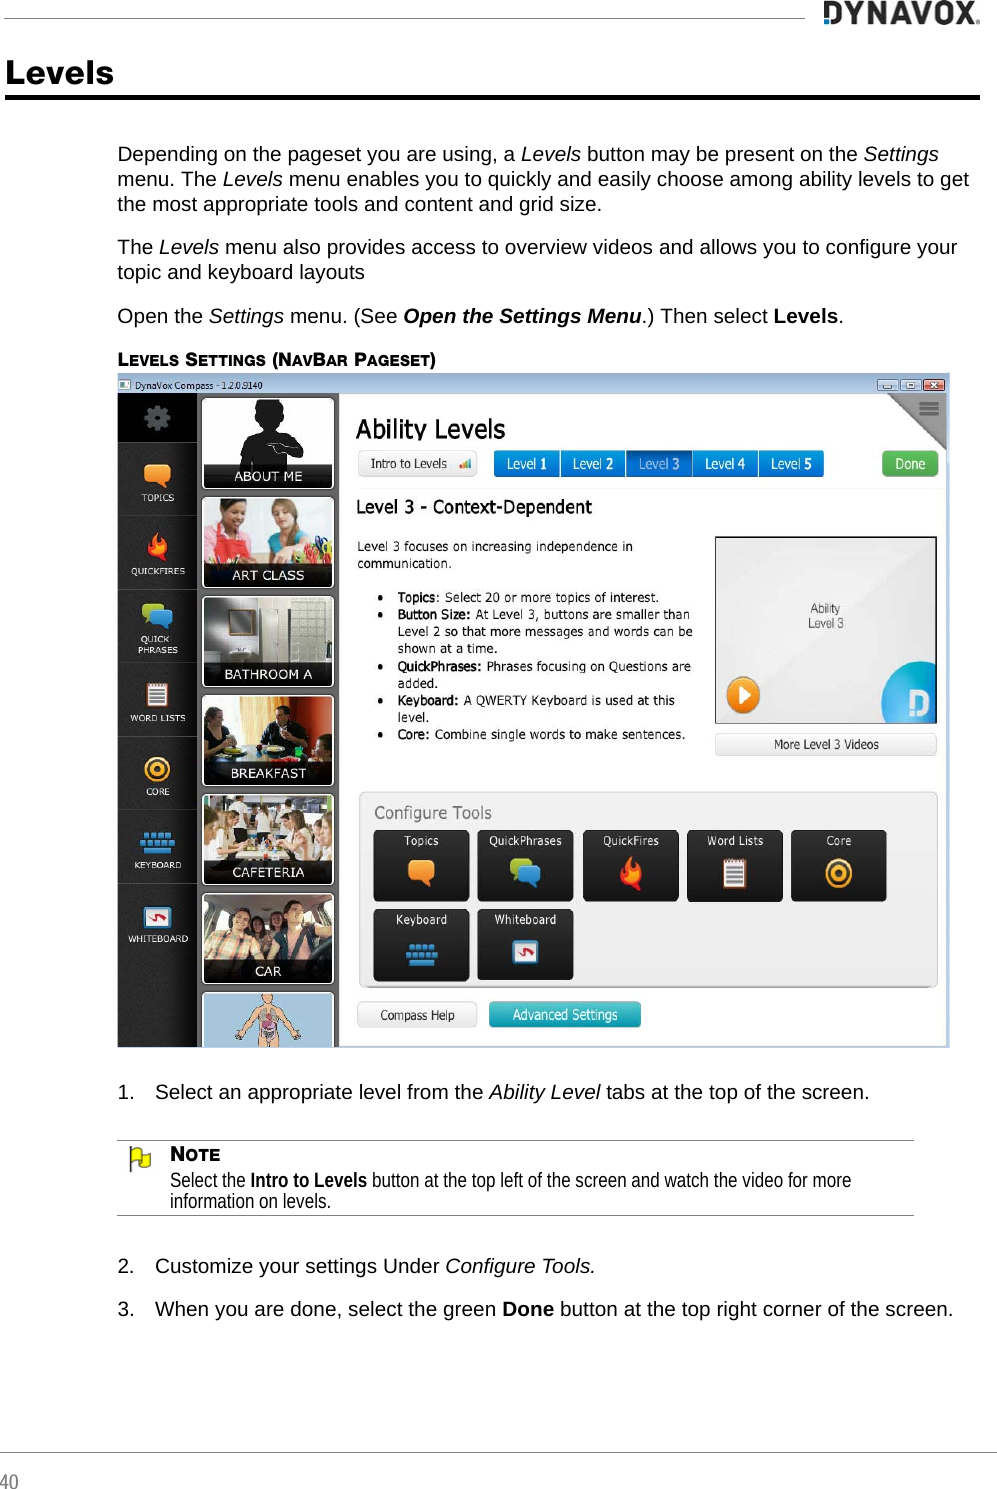
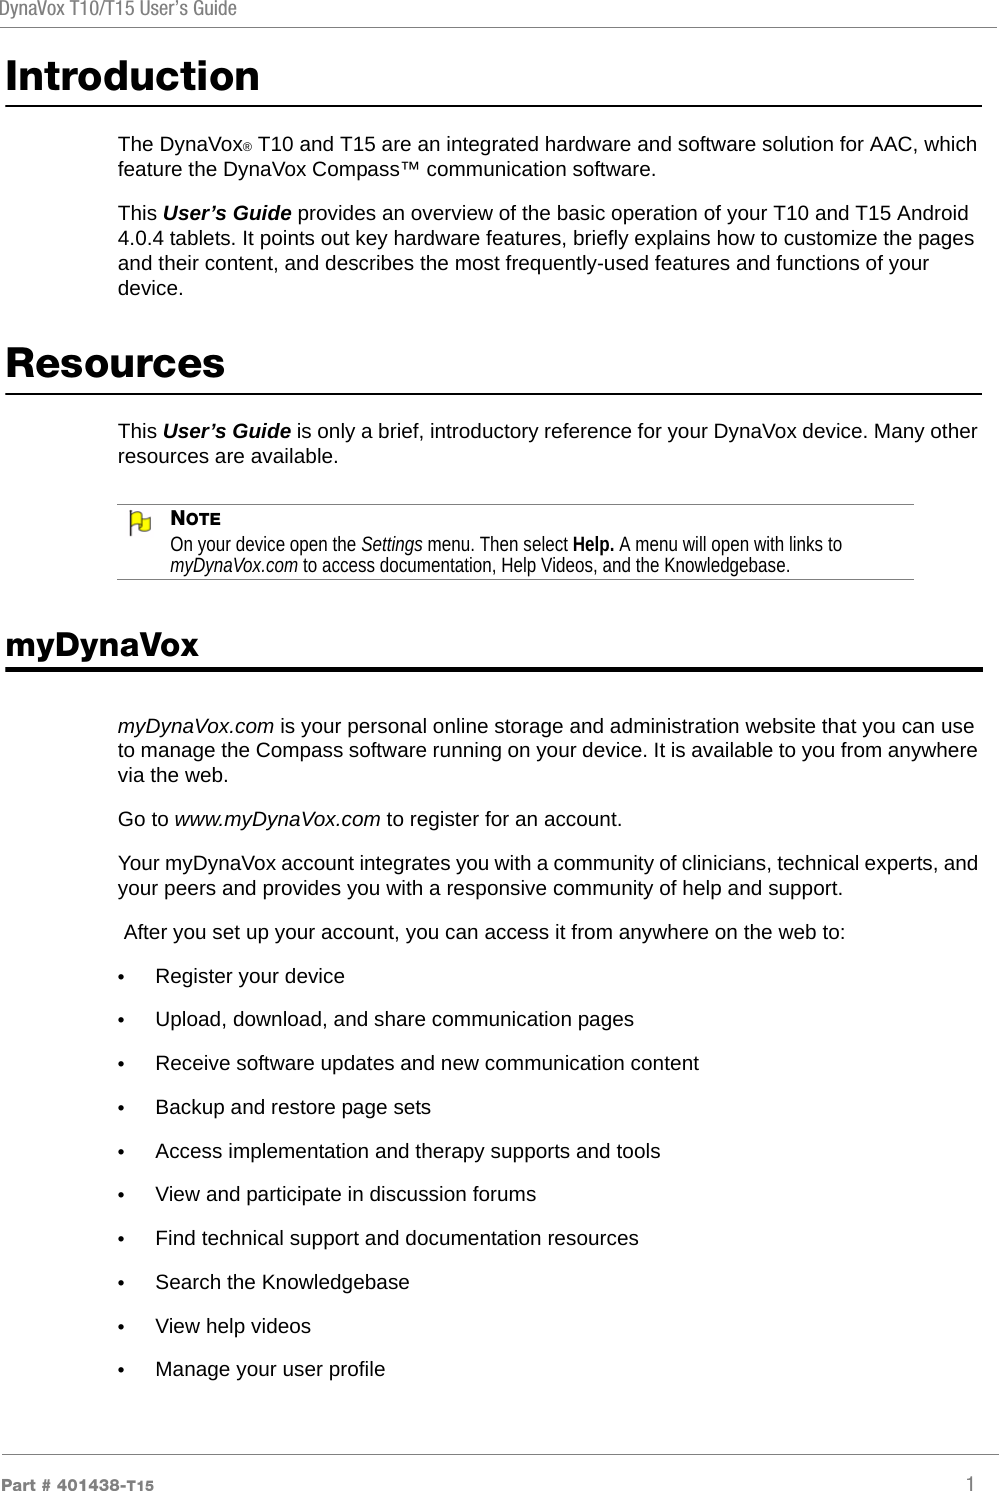
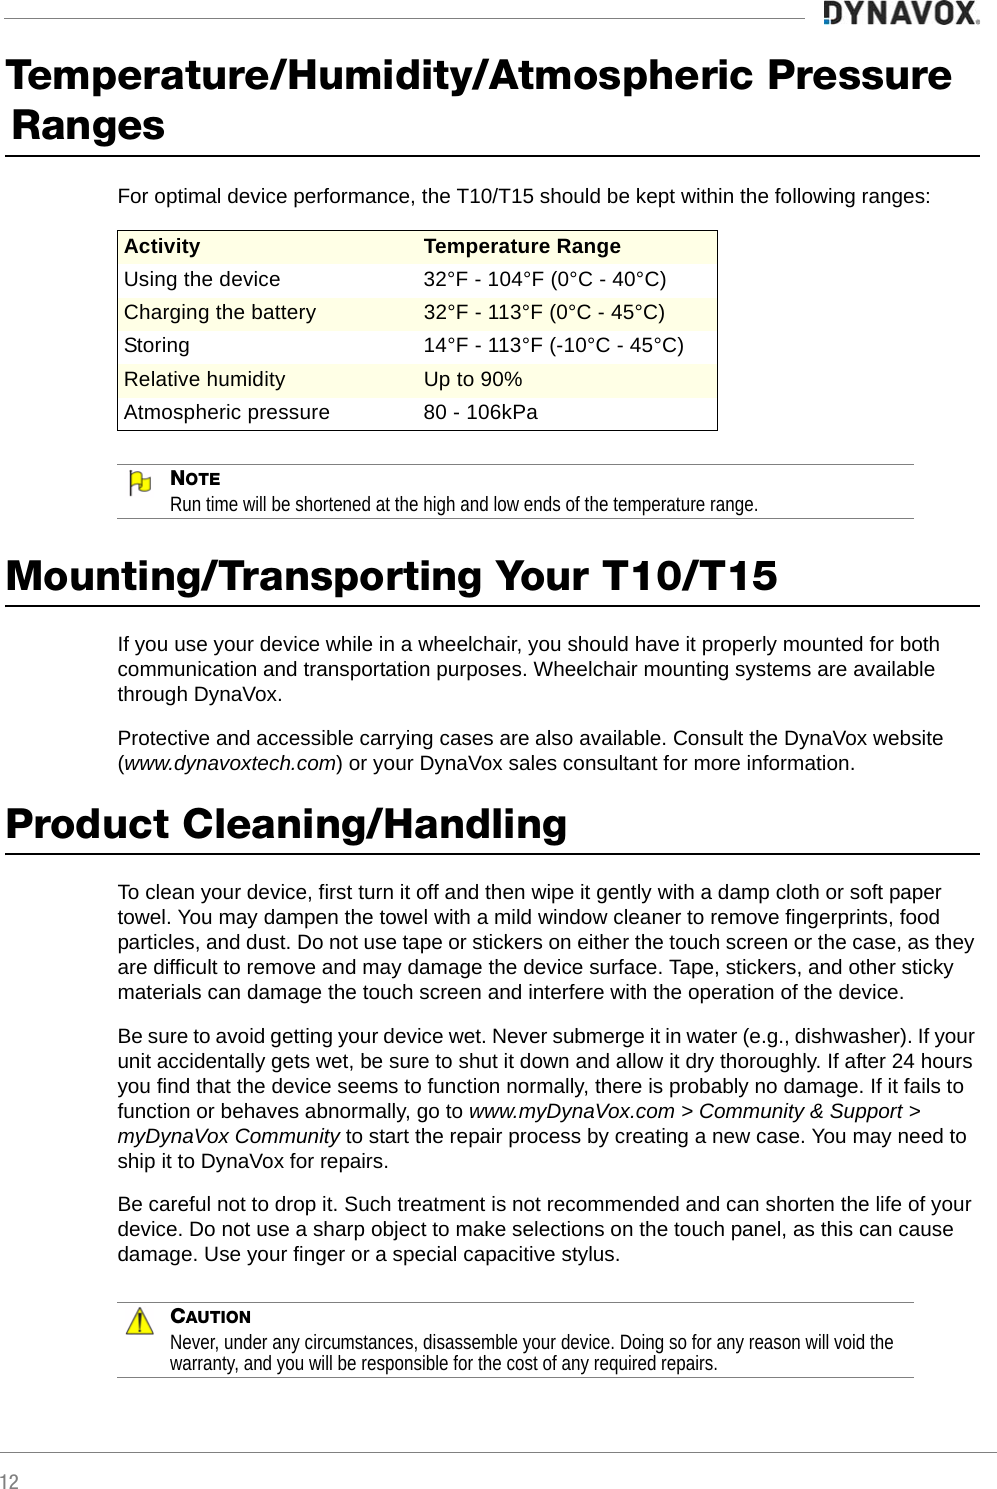
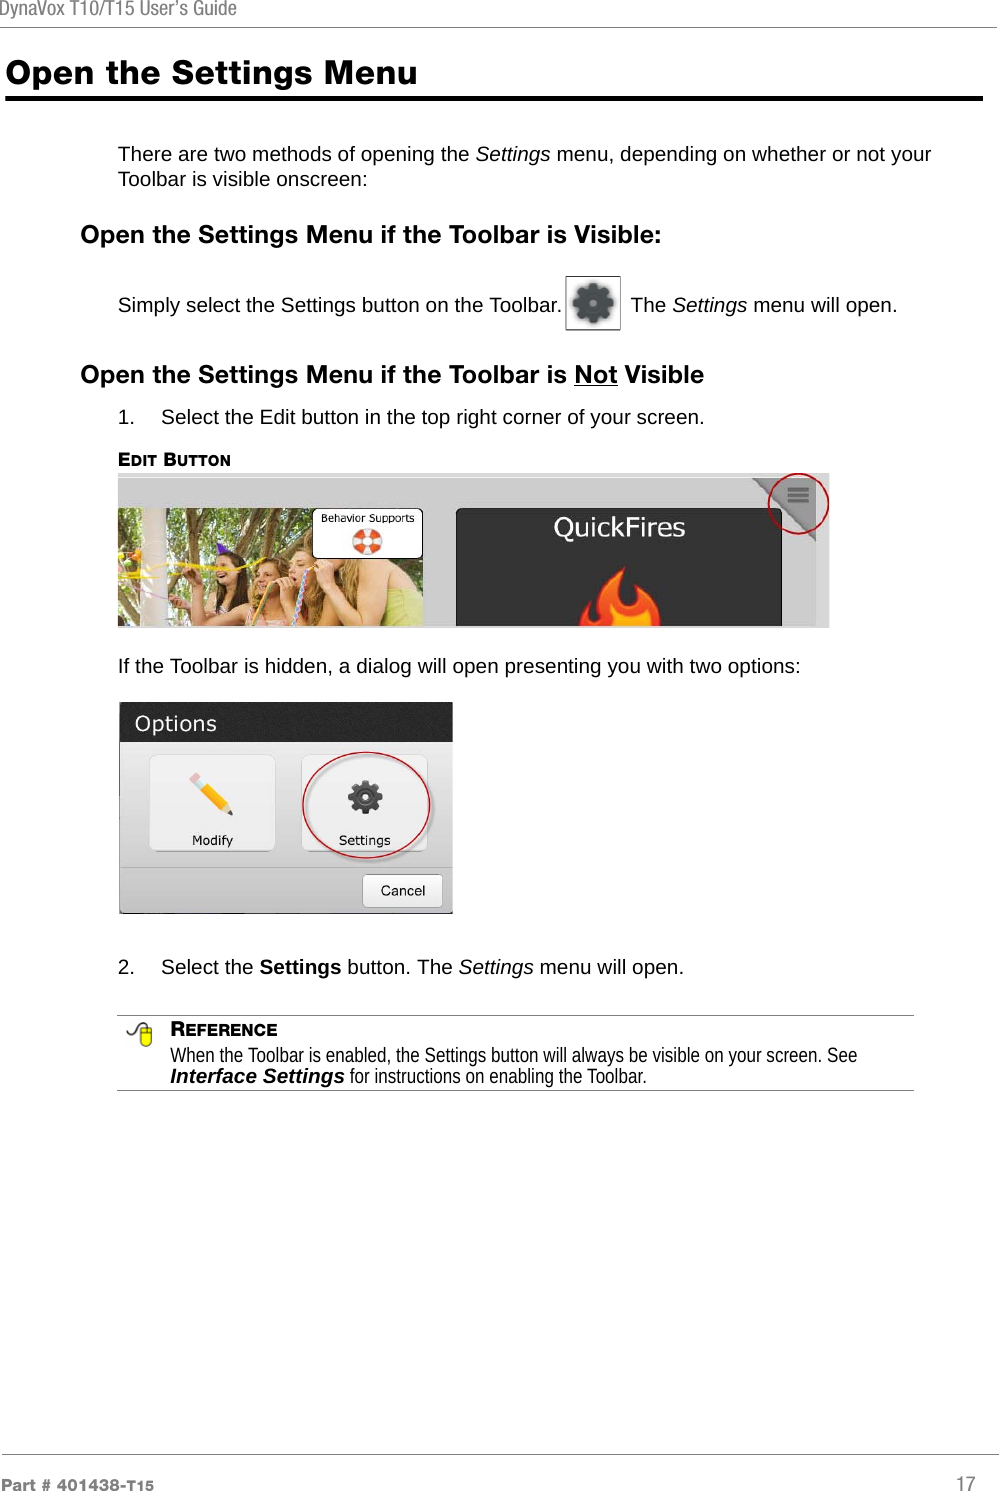
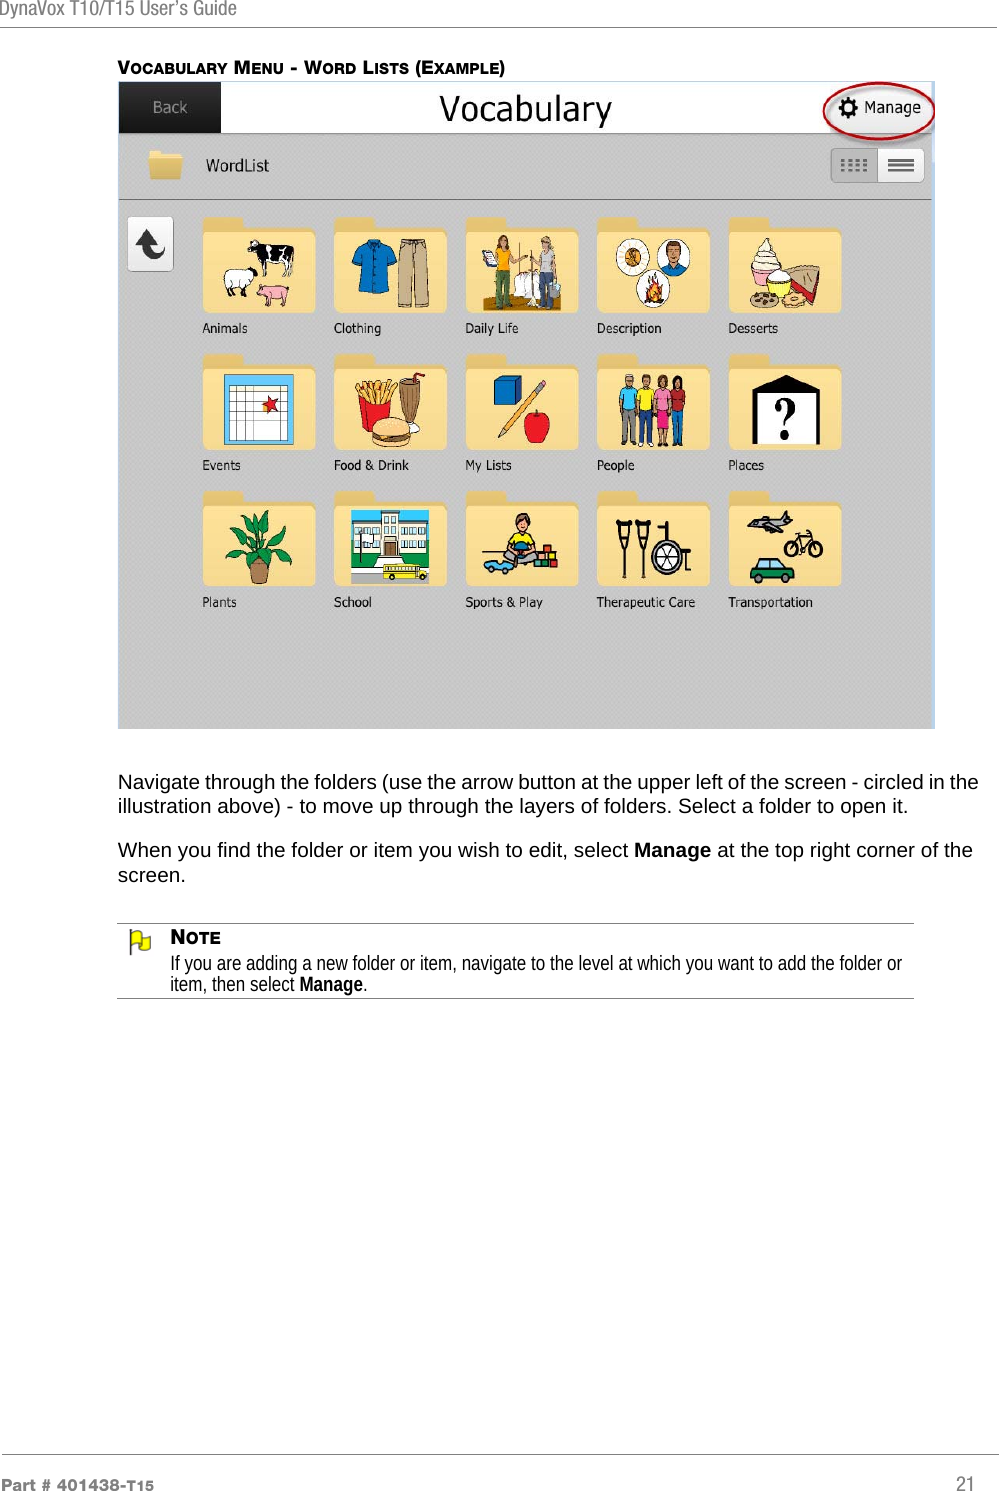
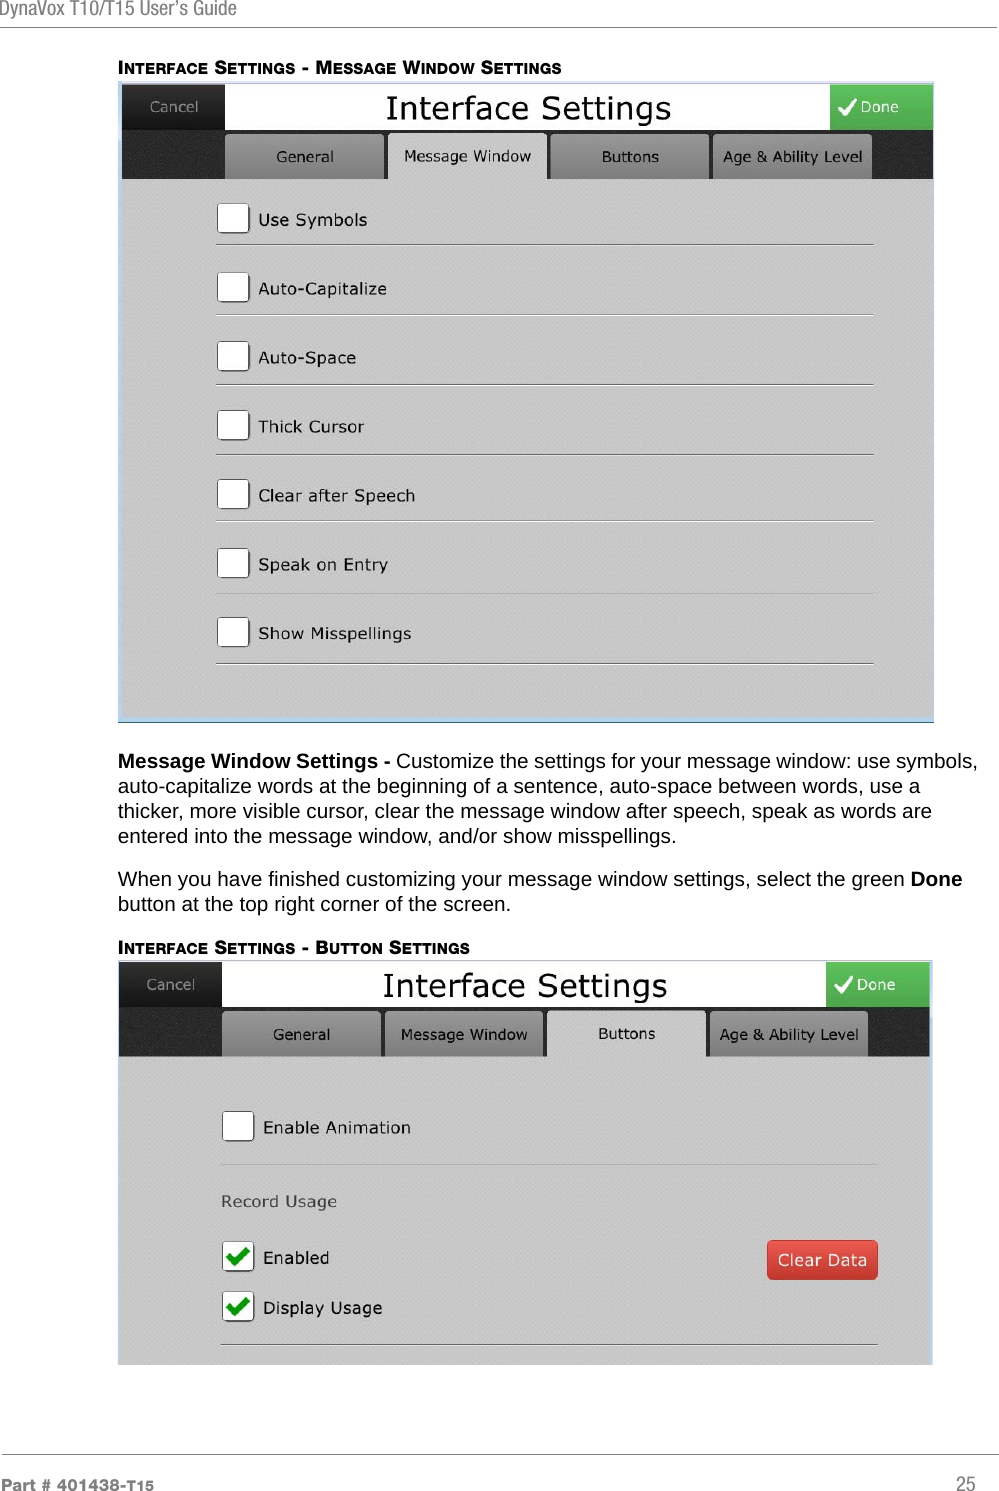
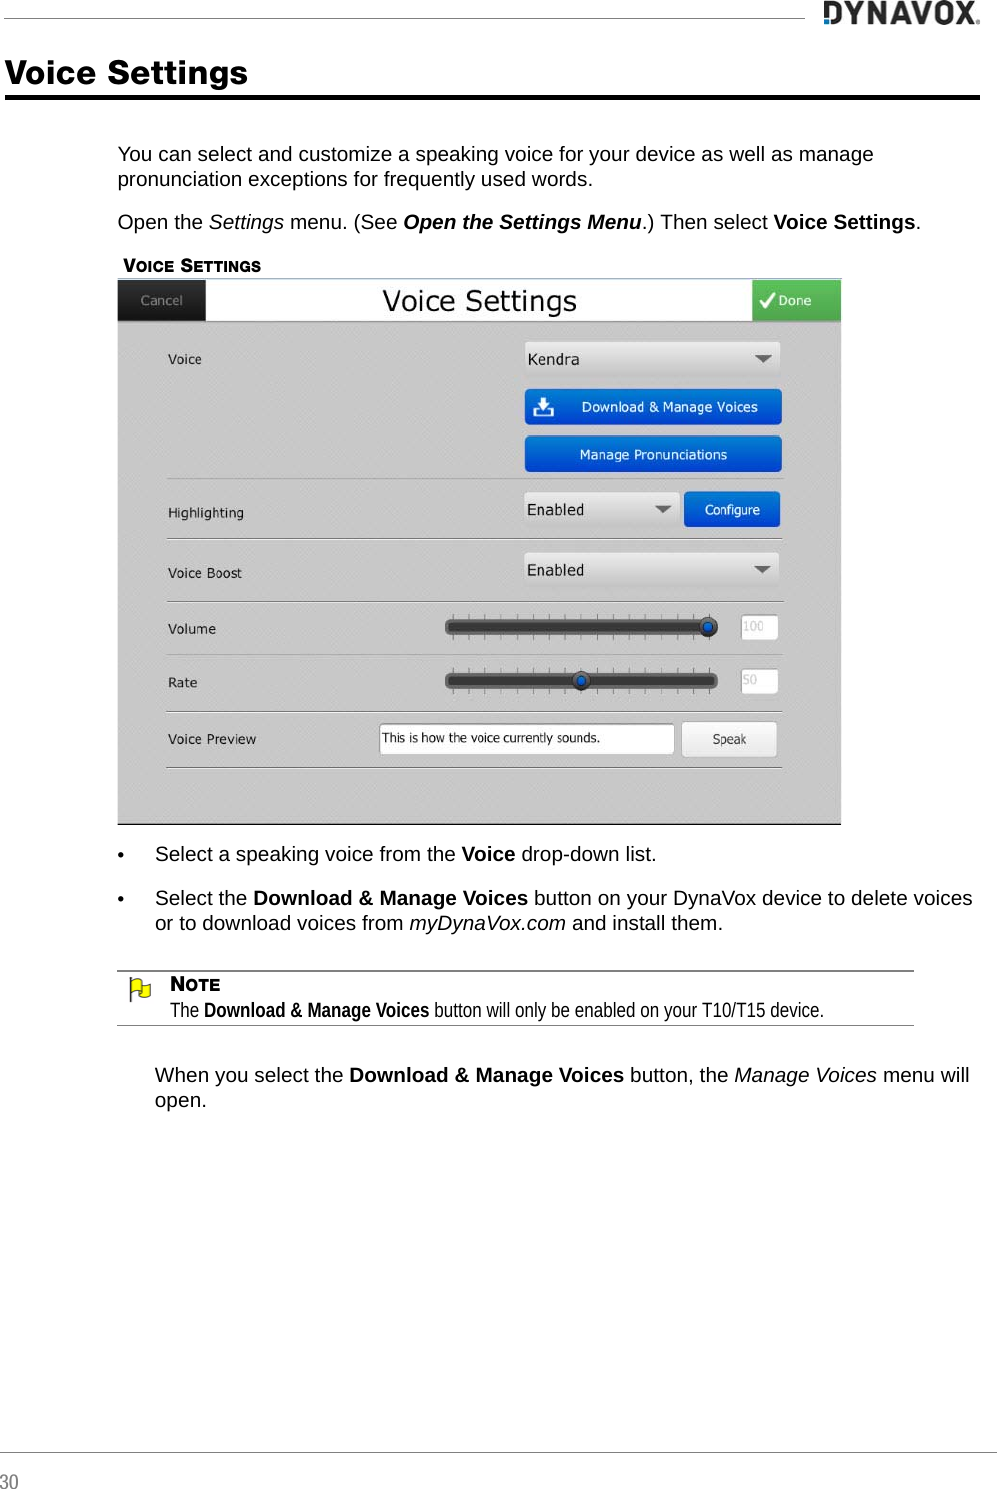
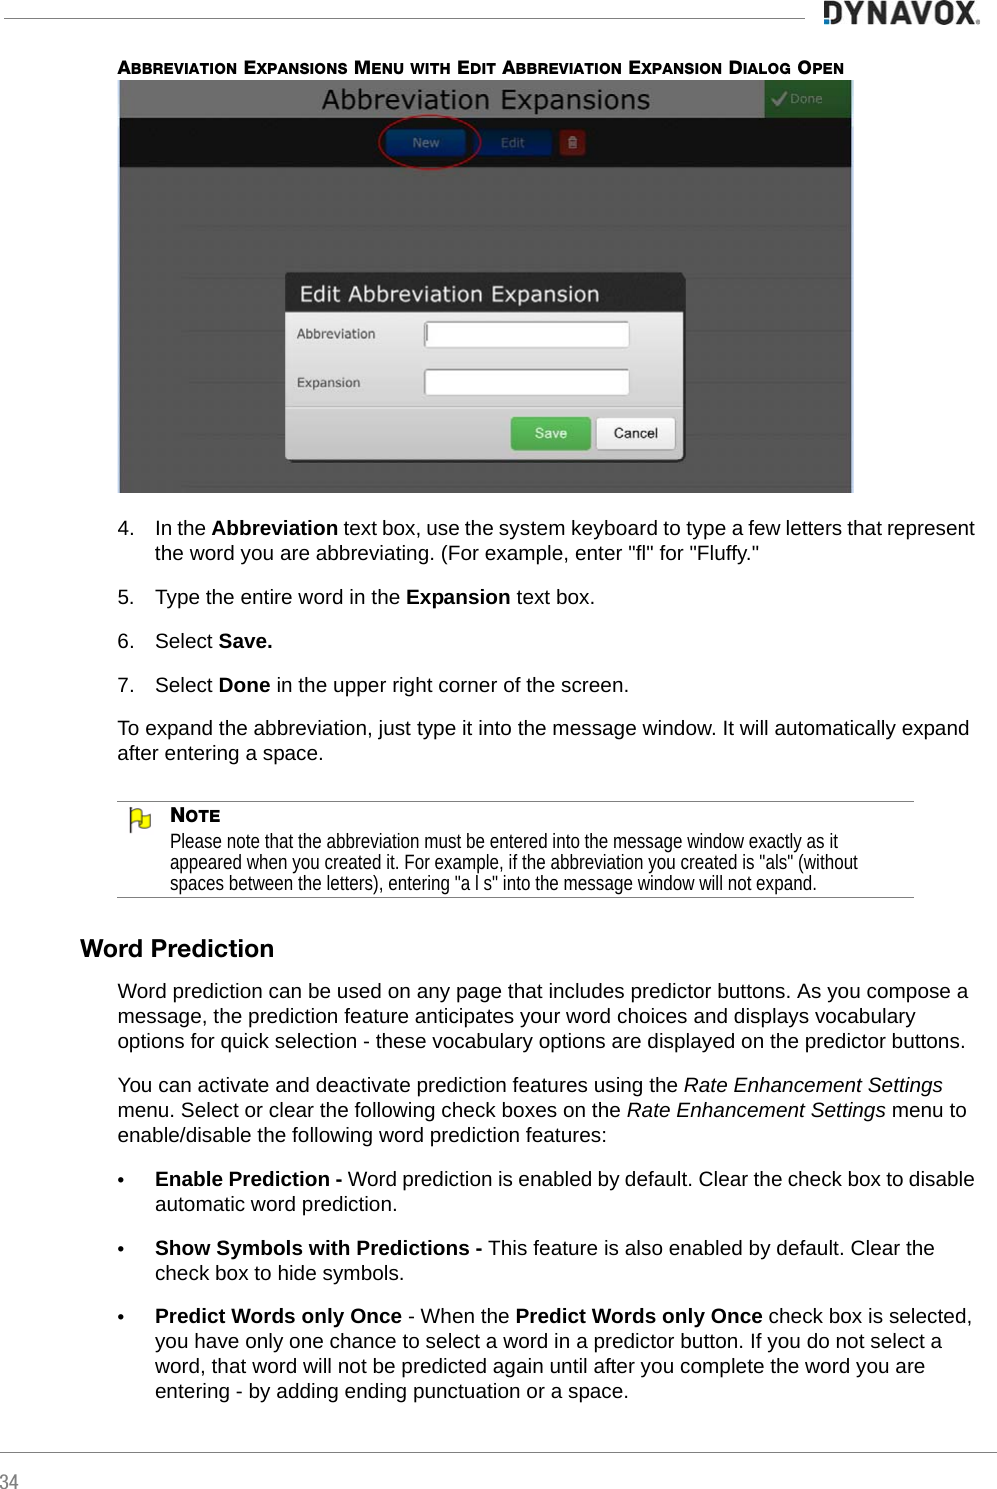
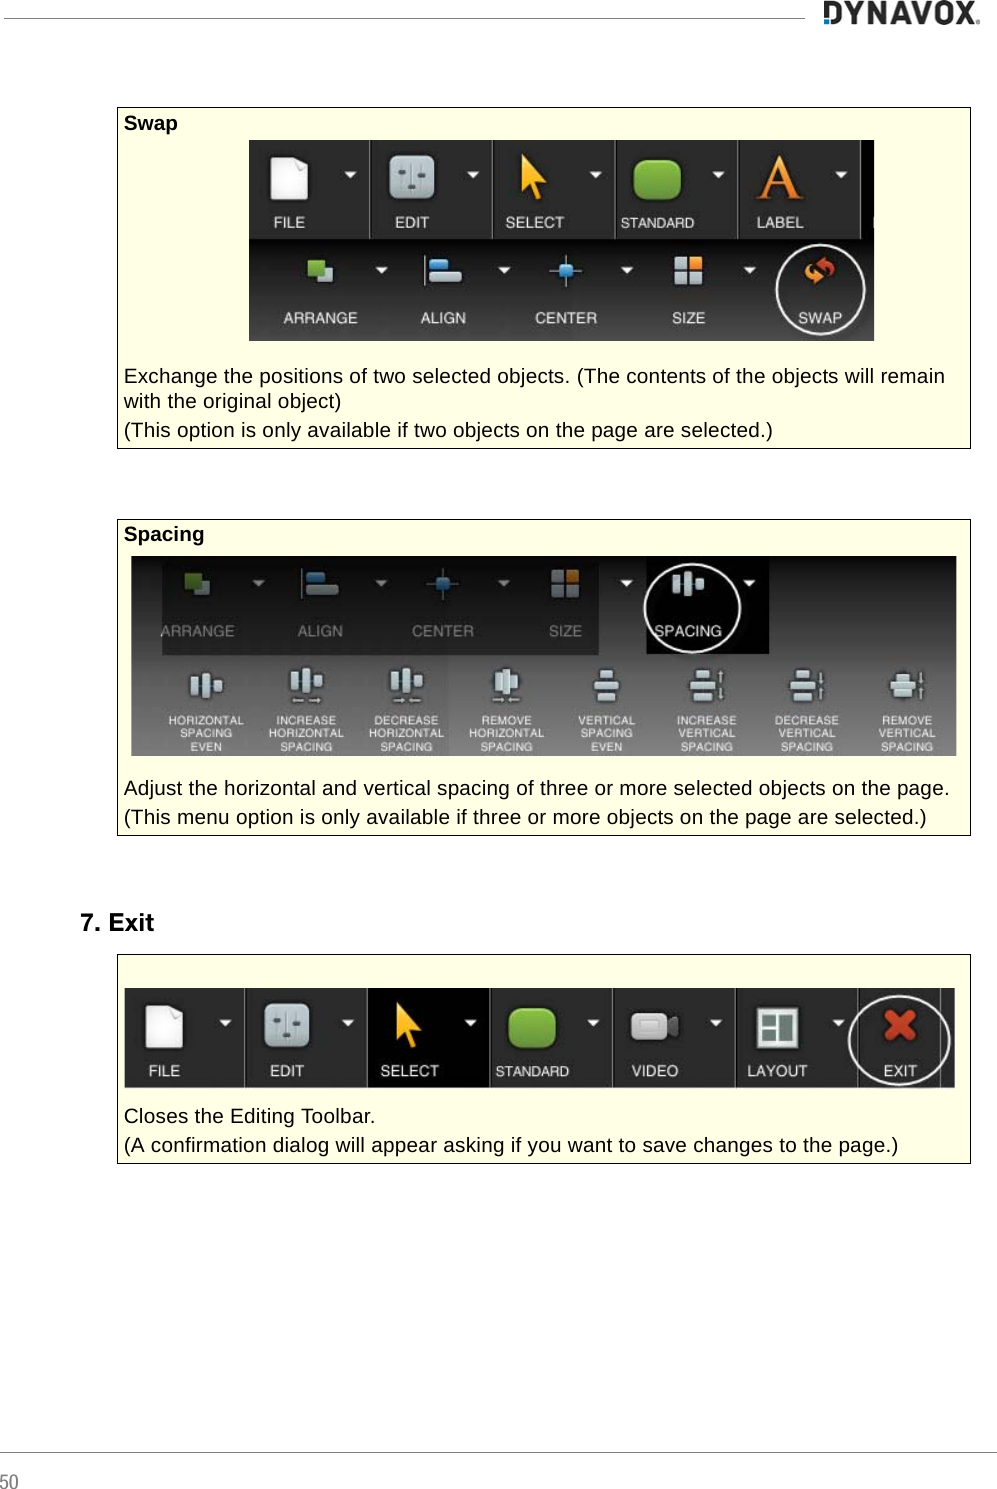
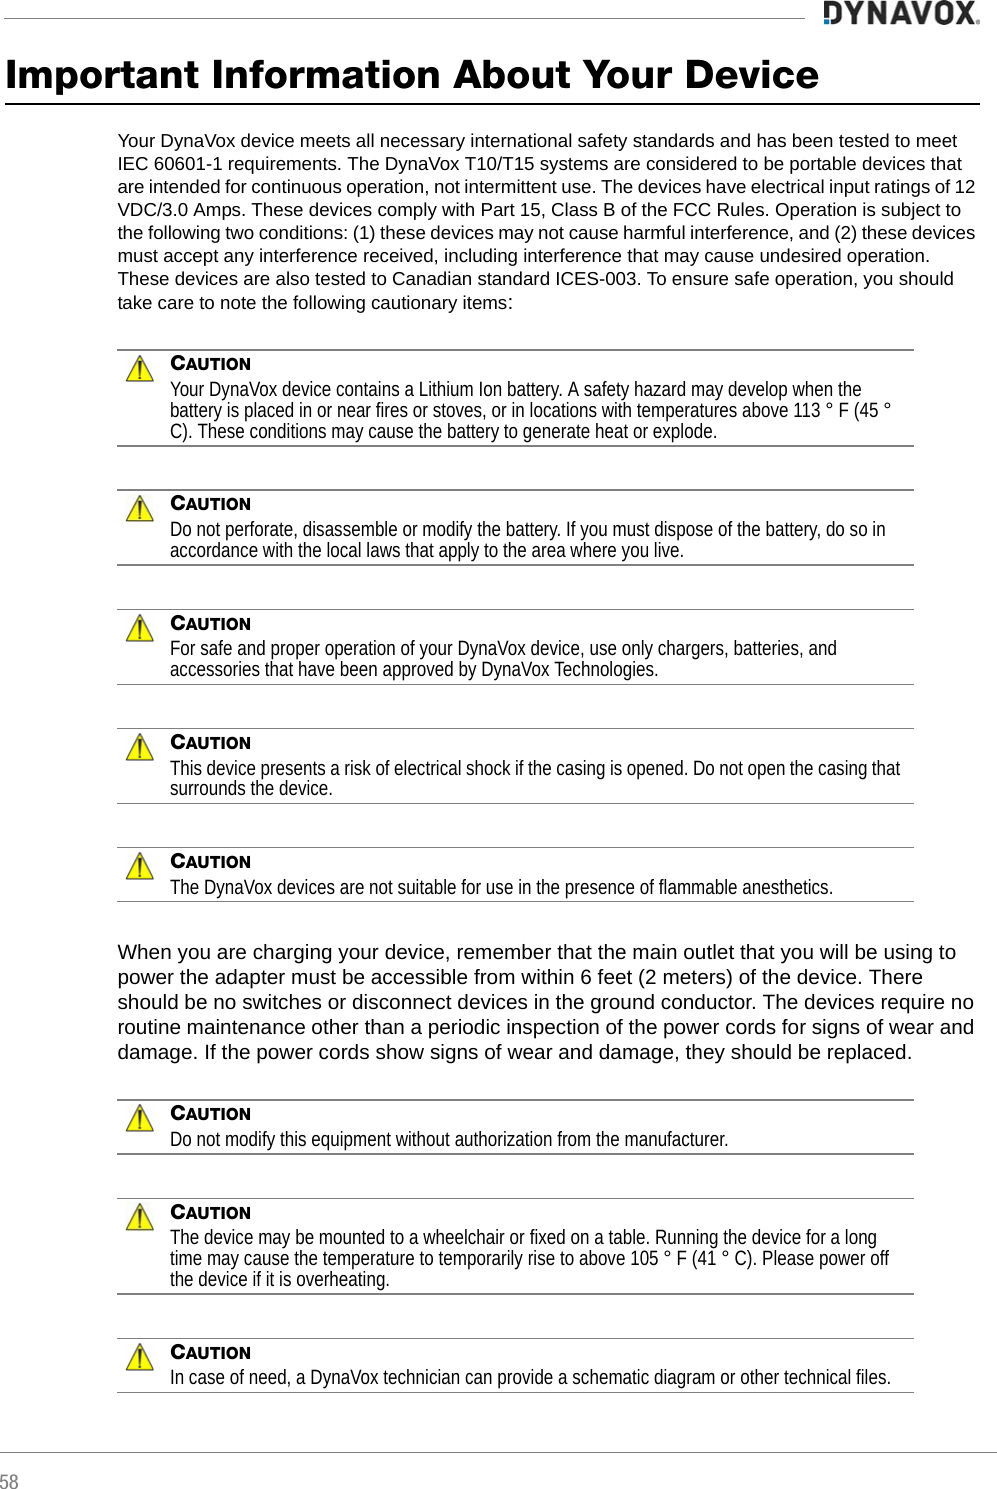
![444. ButtonsTo place a button on the page, simply select the appropriate button tool and then select a location on the page.To draw out a button on the page, touch the screen and use your finger (or mouse if using the editing software) to draw out the button.To resize the button, select it, and then move your finger (or mouse) over the edge or corner of the button until a double arrow appears. Drag until the button is the size and shape you want.After you have drawn the button, select it, then select the Properties button in the top left corner of the button. (See the illustration below.)Standard Place a "standard" (rectangular) button.Group Place a group button. (A group button is a button into which you can place other objects [a "multi-object" button]).Word Predictor Place a word predictor button. (A word predictor button anticipates the user’s word choices as a message is composed in the message window.)Phrase Predictor Place a phrase predictor button. (A phrase predictor button works on the same principle as a word predictor button but will predict a phrase.)Rectangular Hotspot Place a rectangular hot spot. (Hot spots are usually placed over portions of images or visual scenes on a page. Then the hot spot is programmed so that when it is selected, an action will be performed.)Invisible Hotspot Place an invisible hot spot. (An invisible hot spot can have actions assigned to it, but it has no borders, color, symbol, or other visible characteristics.) Freeform Button Draw a button of any shape you want. (Touch the screen and move your finger [or mouse if using the editing software] around the page until the button is the size and shape you want.)](https://usermanual.wiki/Tobii-Dynavox/T15/User-Guide-2288521-Page-48.png)
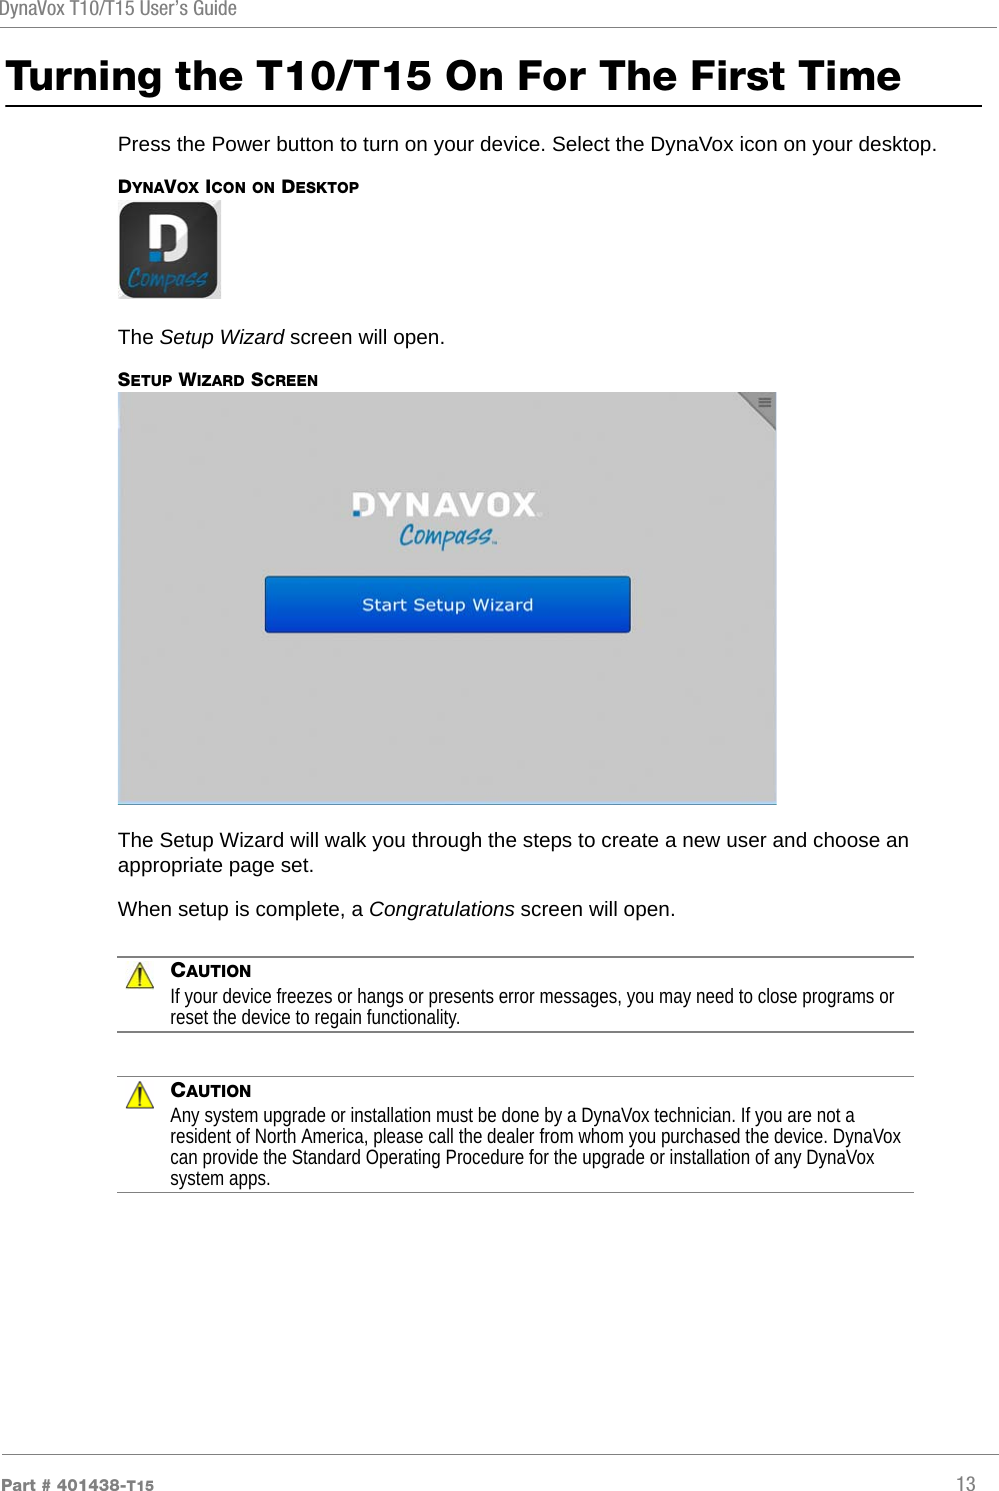
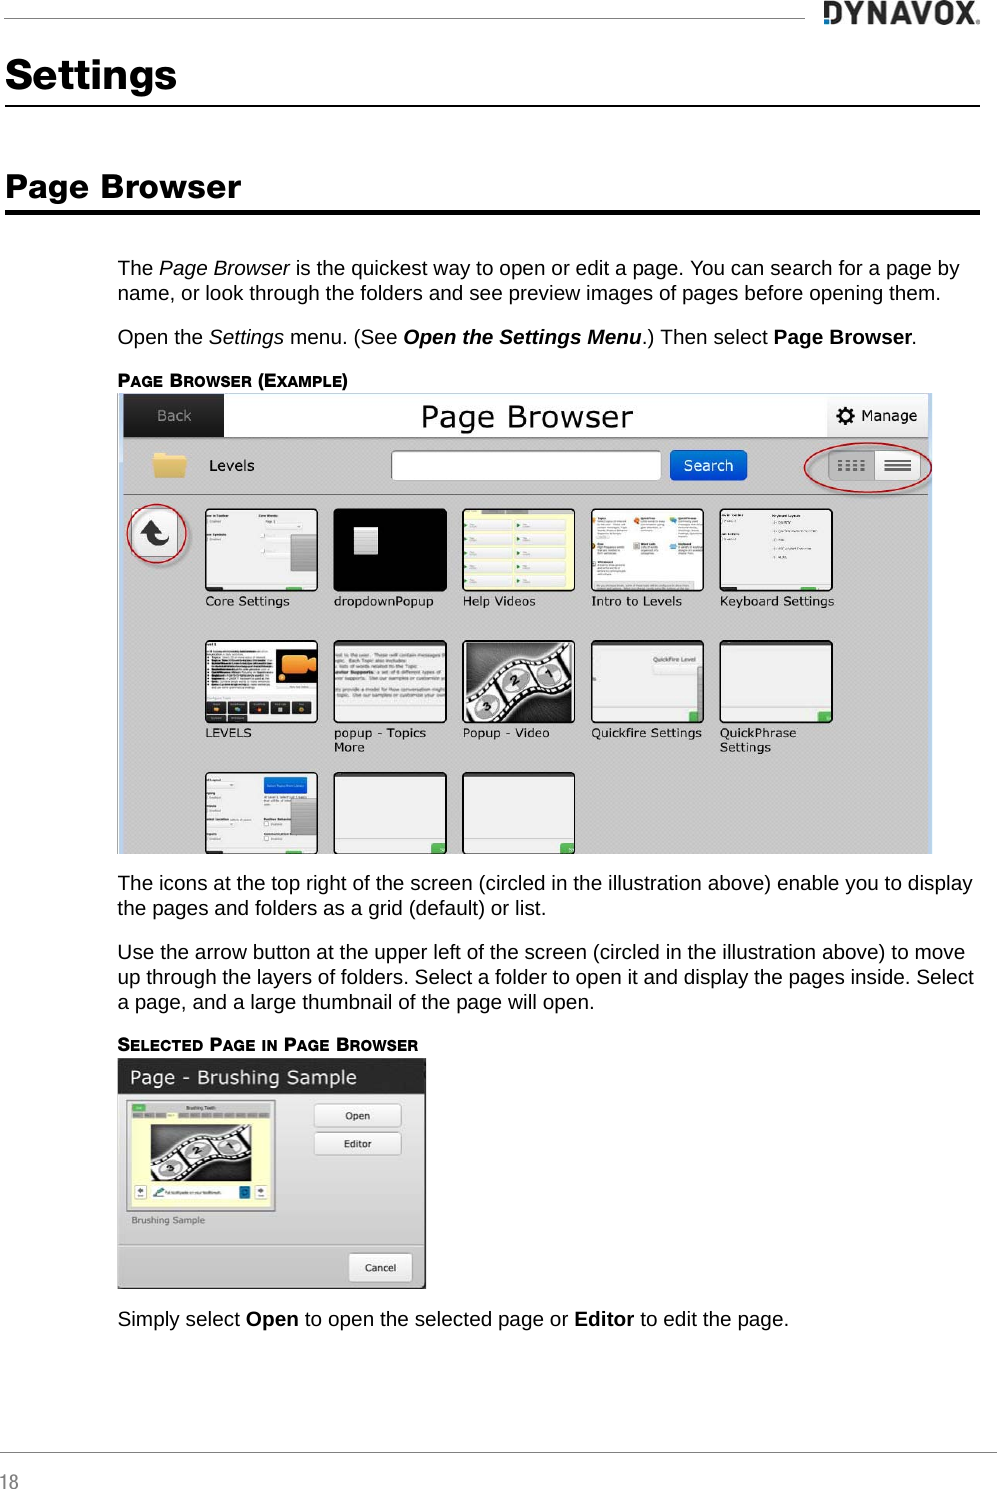
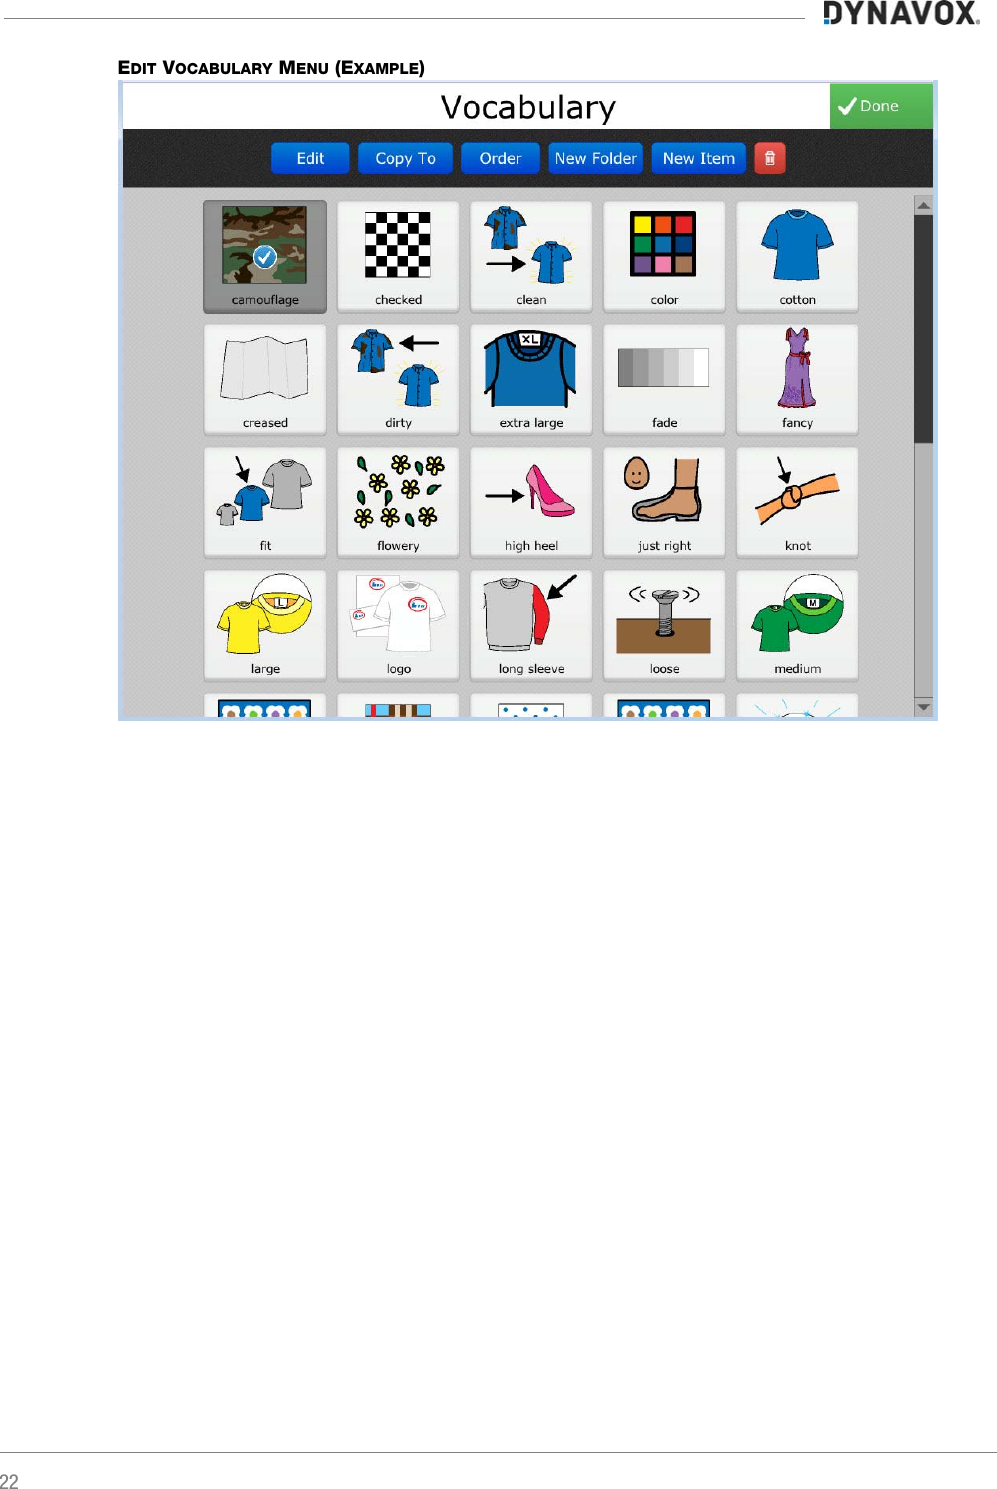
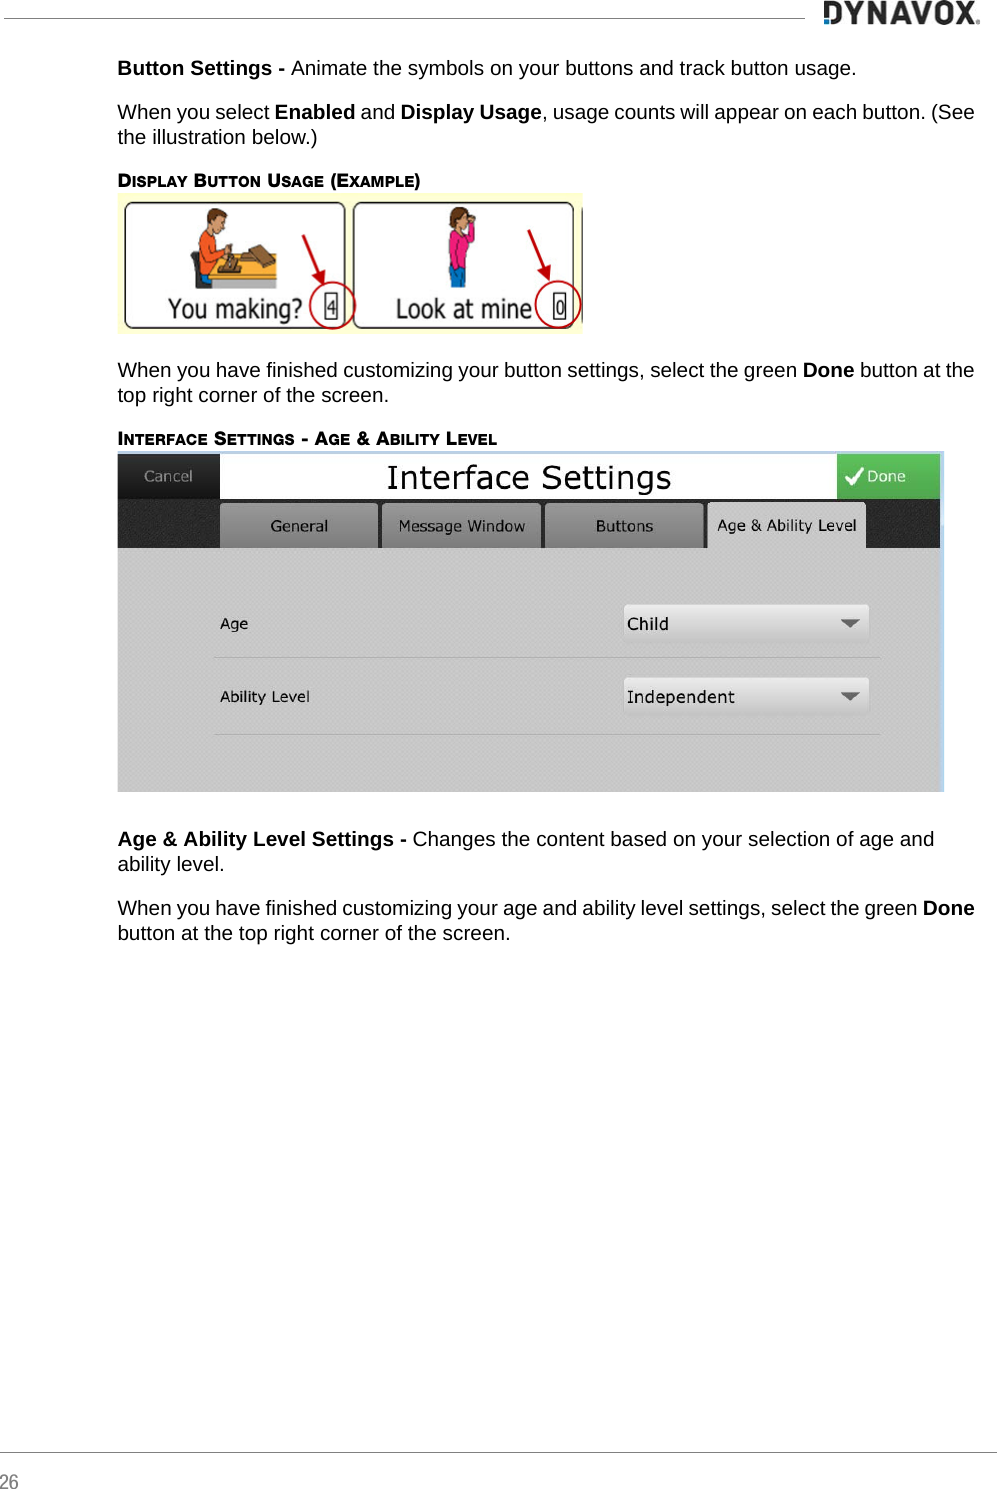
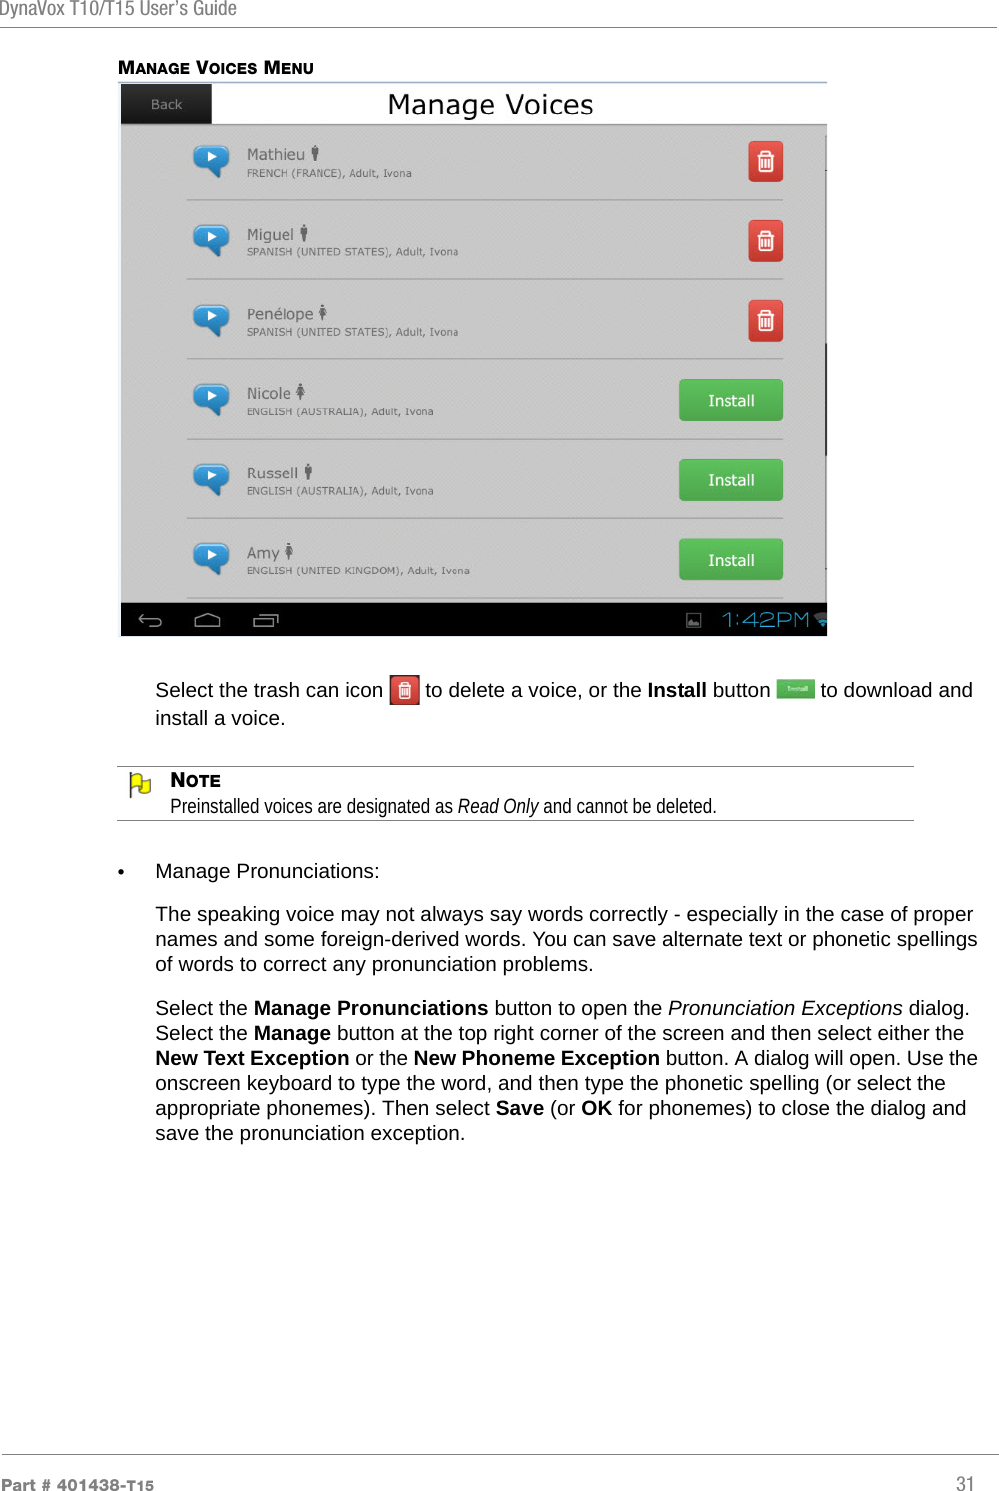
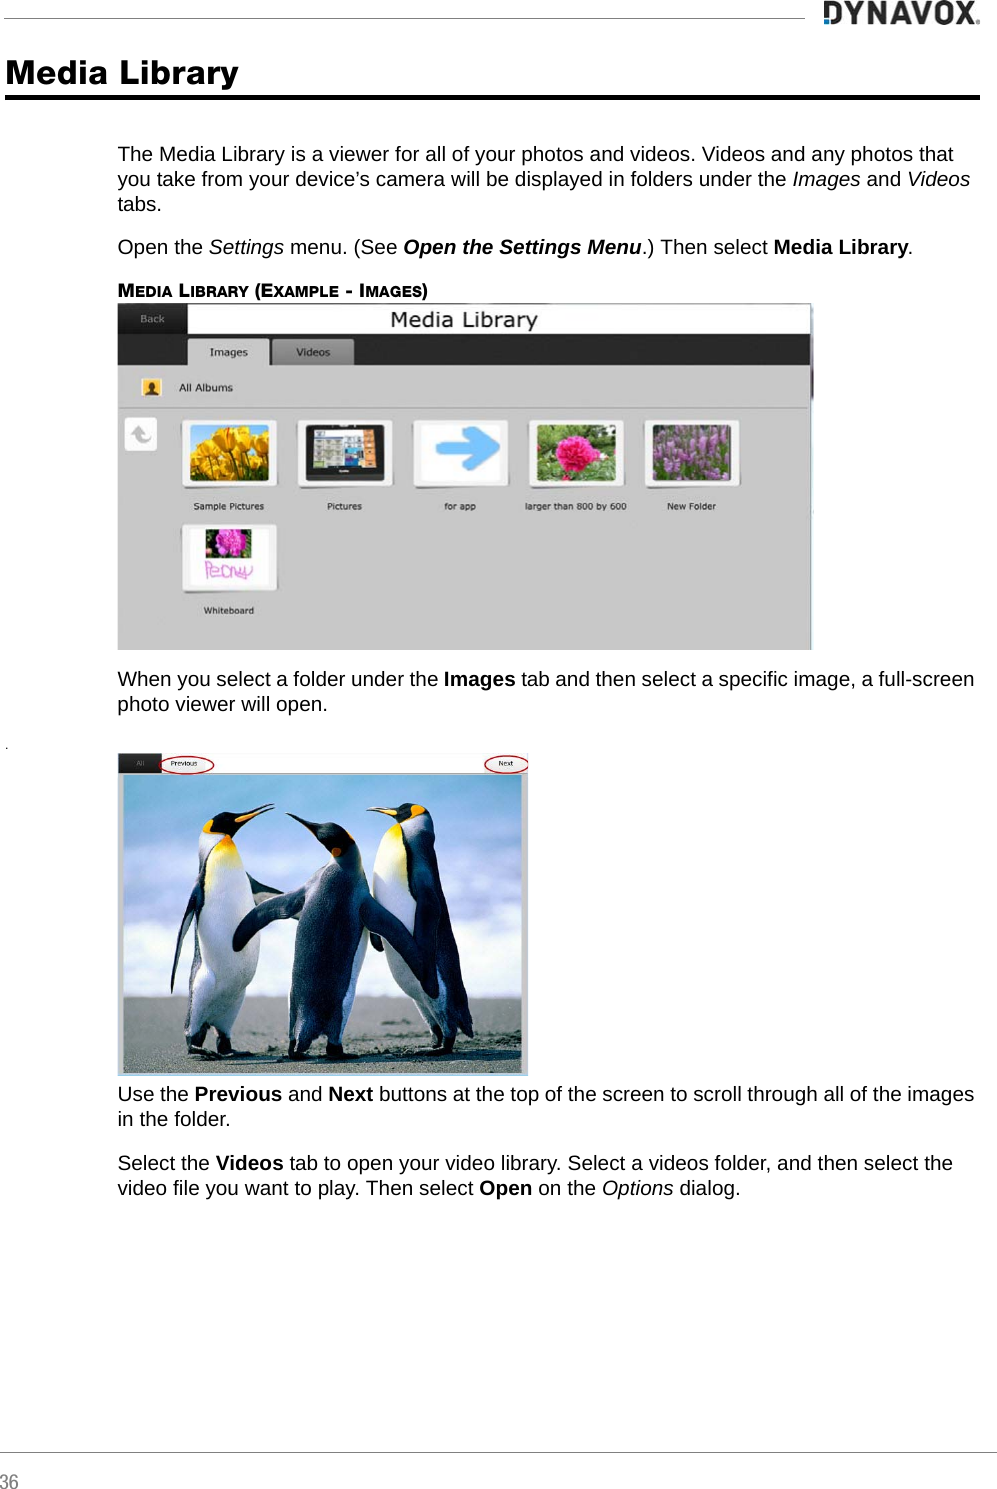
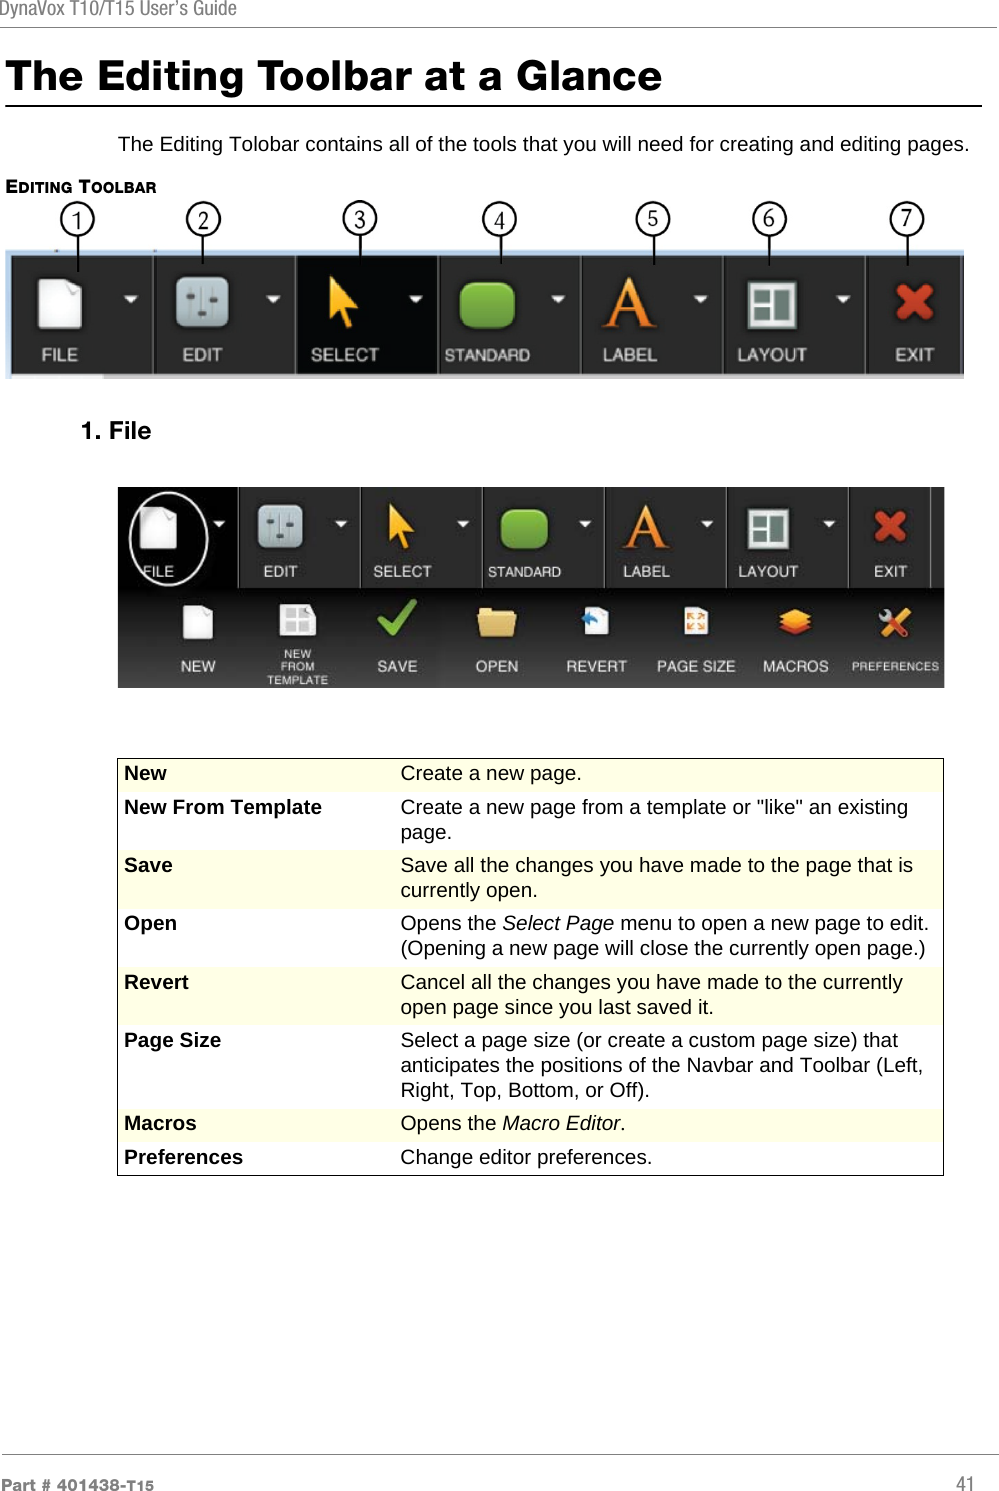
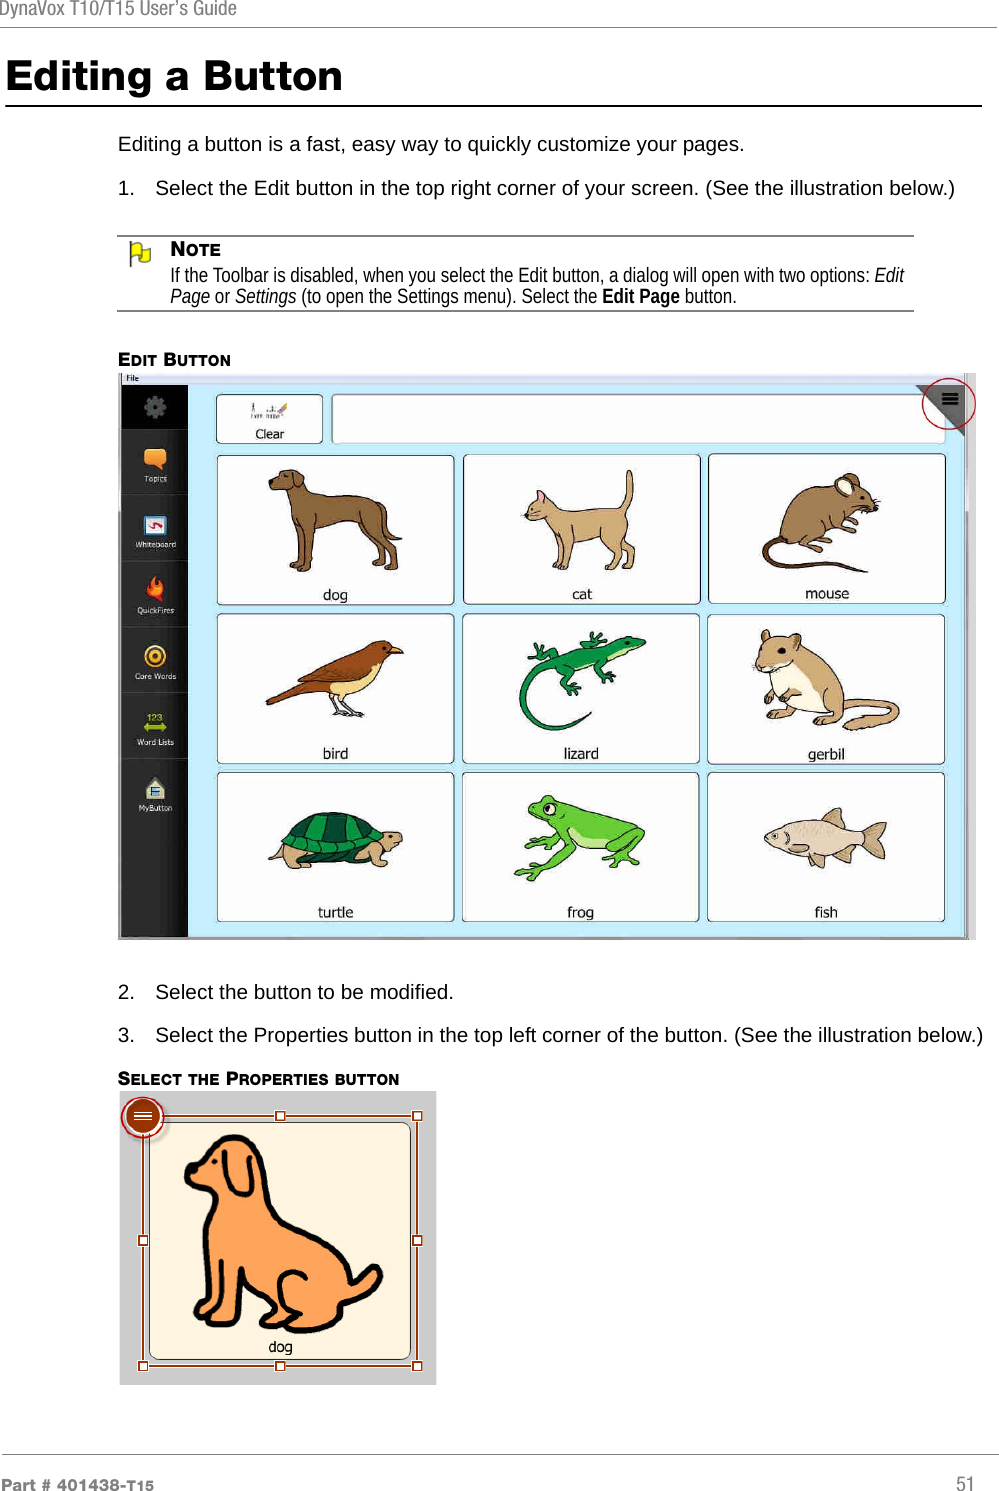
![DynaVox T10/T15 User’s GuidePart # 401438-T15 45PROPERTIES BUTTONThe Button Properties panel will open. Use the Button Properties panel to assign a label, message, and symbol to the button, change its appearance, and apply actions. See Editing a Button.5. Label (Non-button Objects)Label Place text anywhere on the page. Symbol Place a symbol anywhere on the page. After you have placed the symbol - a bounding box (or "placeholder") will appear on the page - select the Properties button in the top left corner of the bounding box. The Symbol Properties panel will open and enable you to select the symbol you want.Message Window Place a message window on the page.Tab Control Place a tab control. (To add additional tabs, select the tab control. Then select Edit > New Tab.)Group Box Place a group box on the page. (A group box acts as a "container" for groups of buttons, check boxes, radio buttons, or other objects.)Vocabulary Grid Place a vocabulary grid on the page. After you have placed the vocabulary grid, select the Properties button in the top left corner of the grid to browse for and select a vocabulary source.Video Place a video object on the page. After you have placed the video object, select the Properties button in the top left corner of the object to select a video.Line Place a line on the page. (To draw out a line on the page, touch the screen and use your finger [or mouse if using the editing software] to draw out the line).](https://usermanual.wiki/Tobii-Dynavox/T15/User-Guide-2288521-Page-49.png)
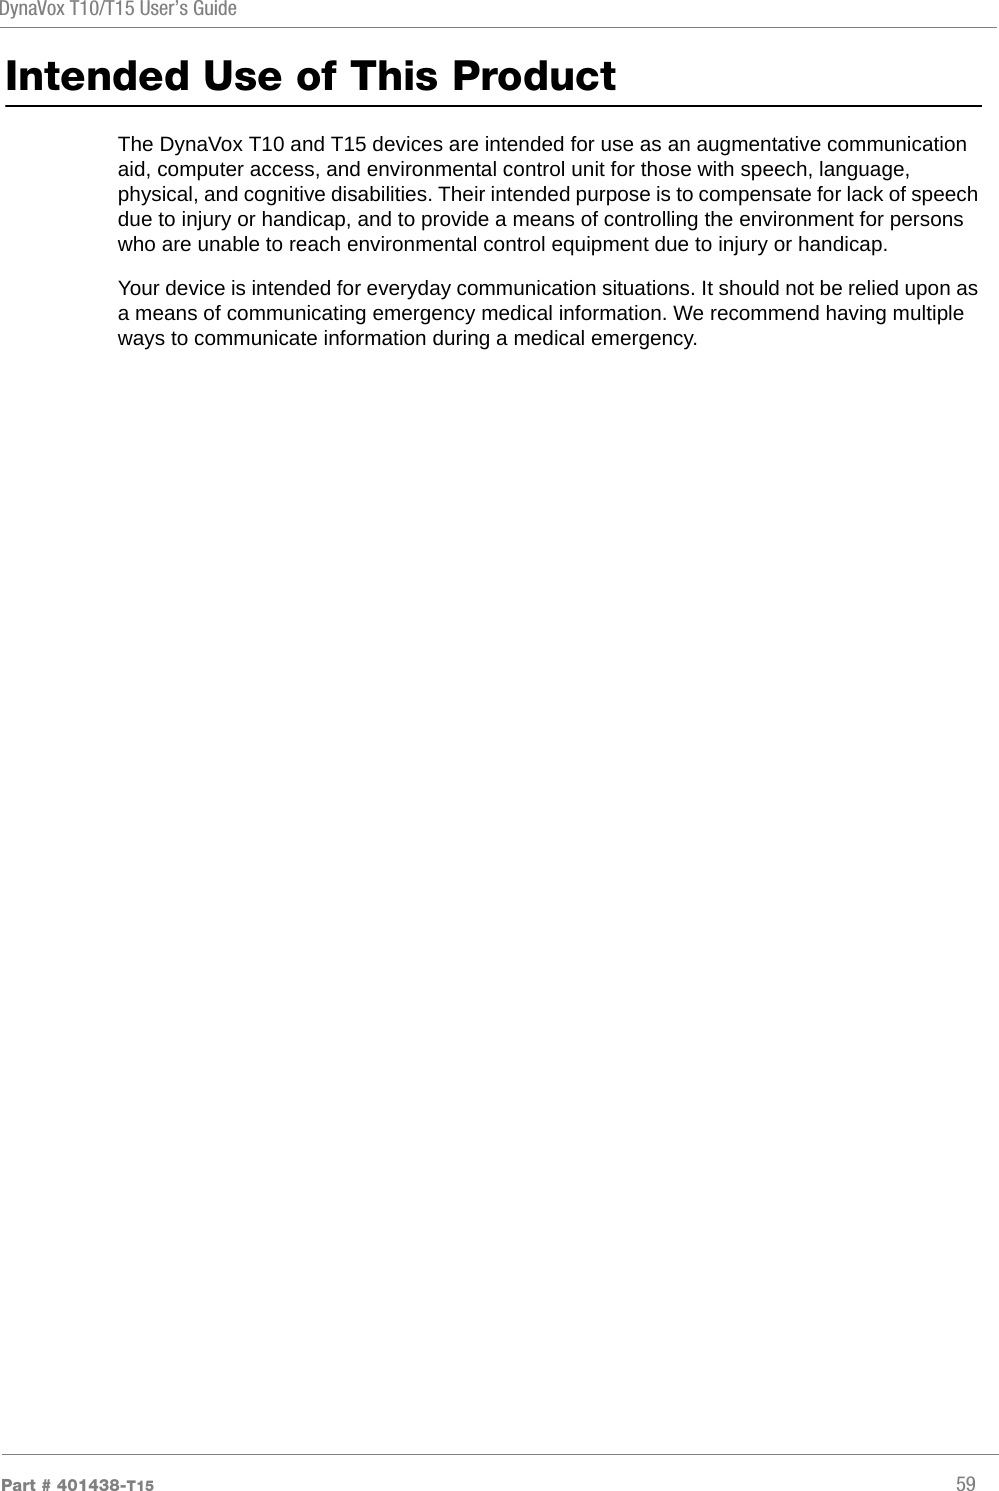
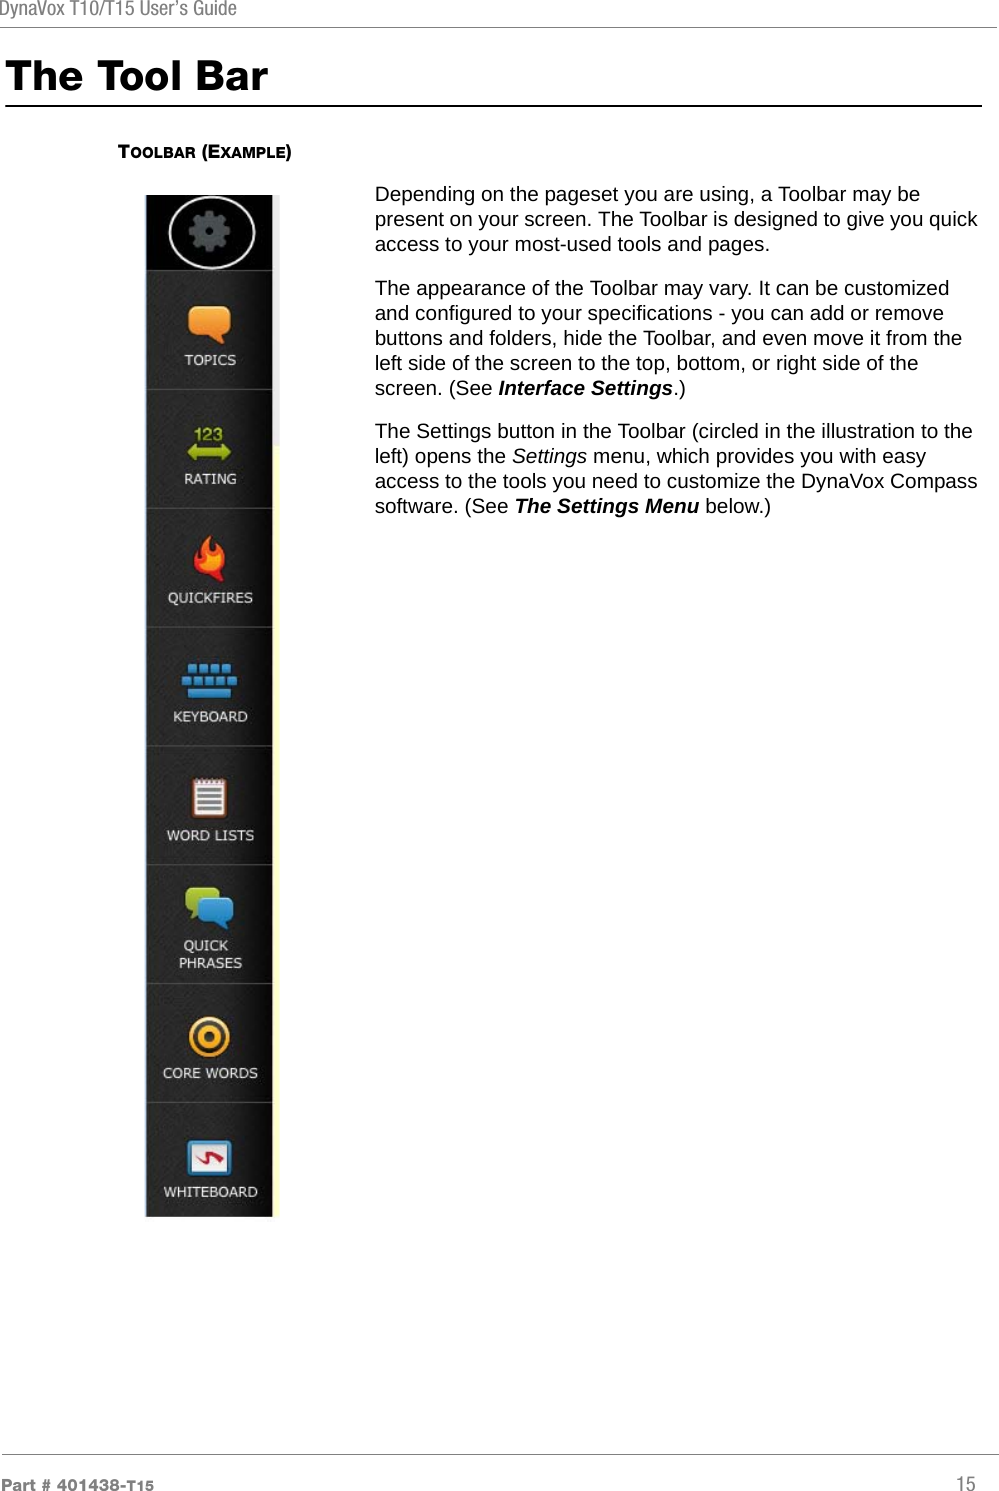
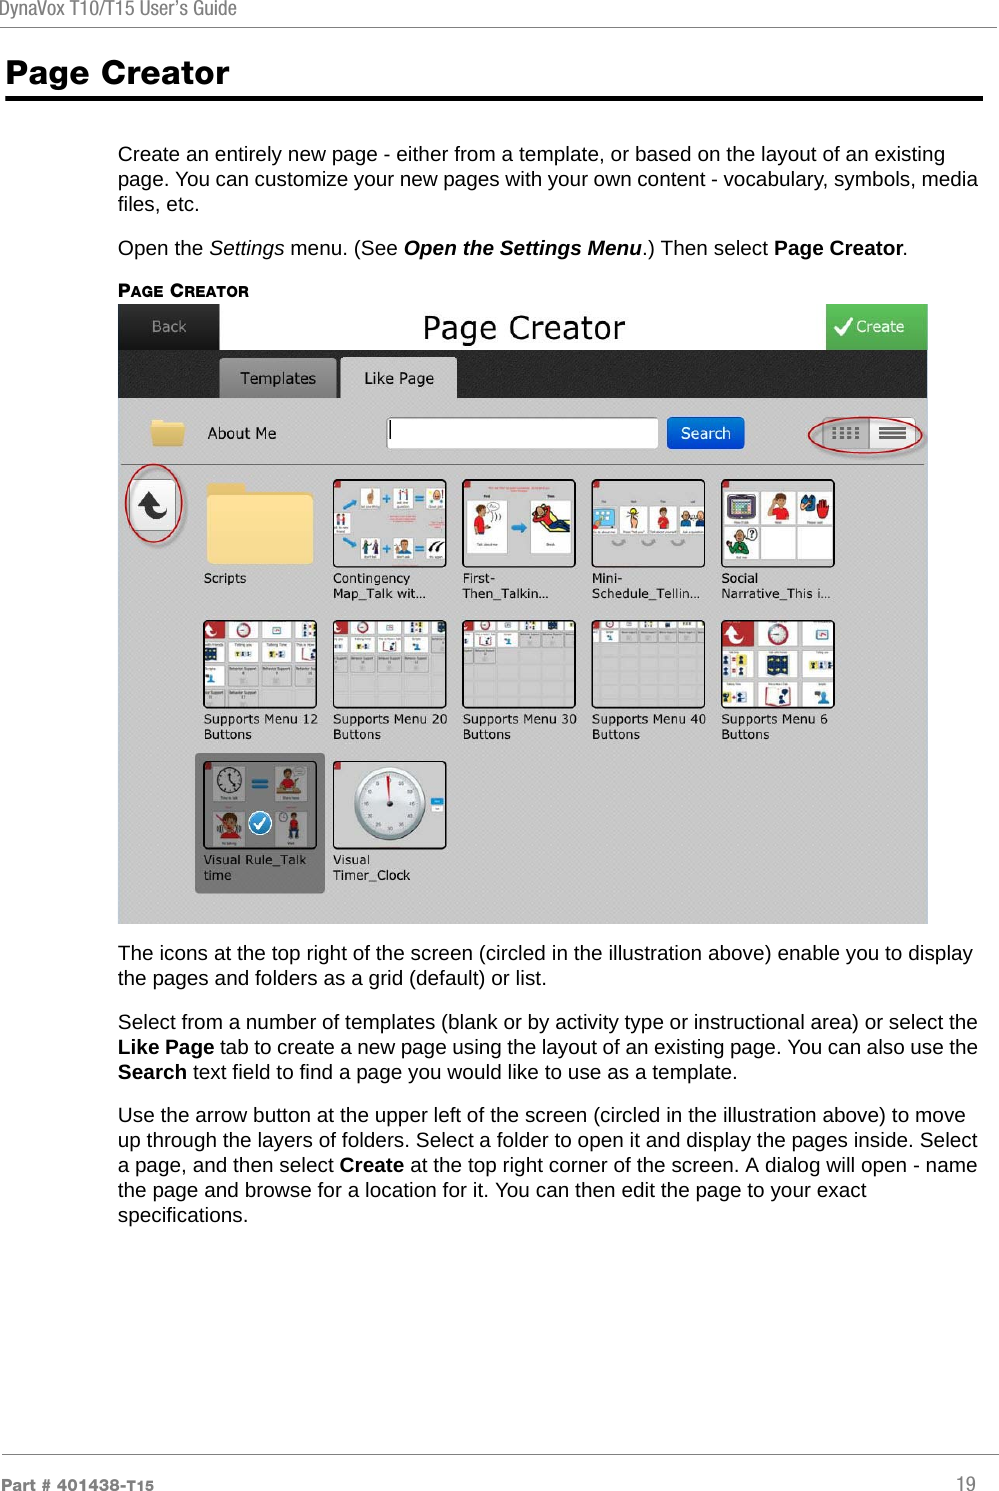
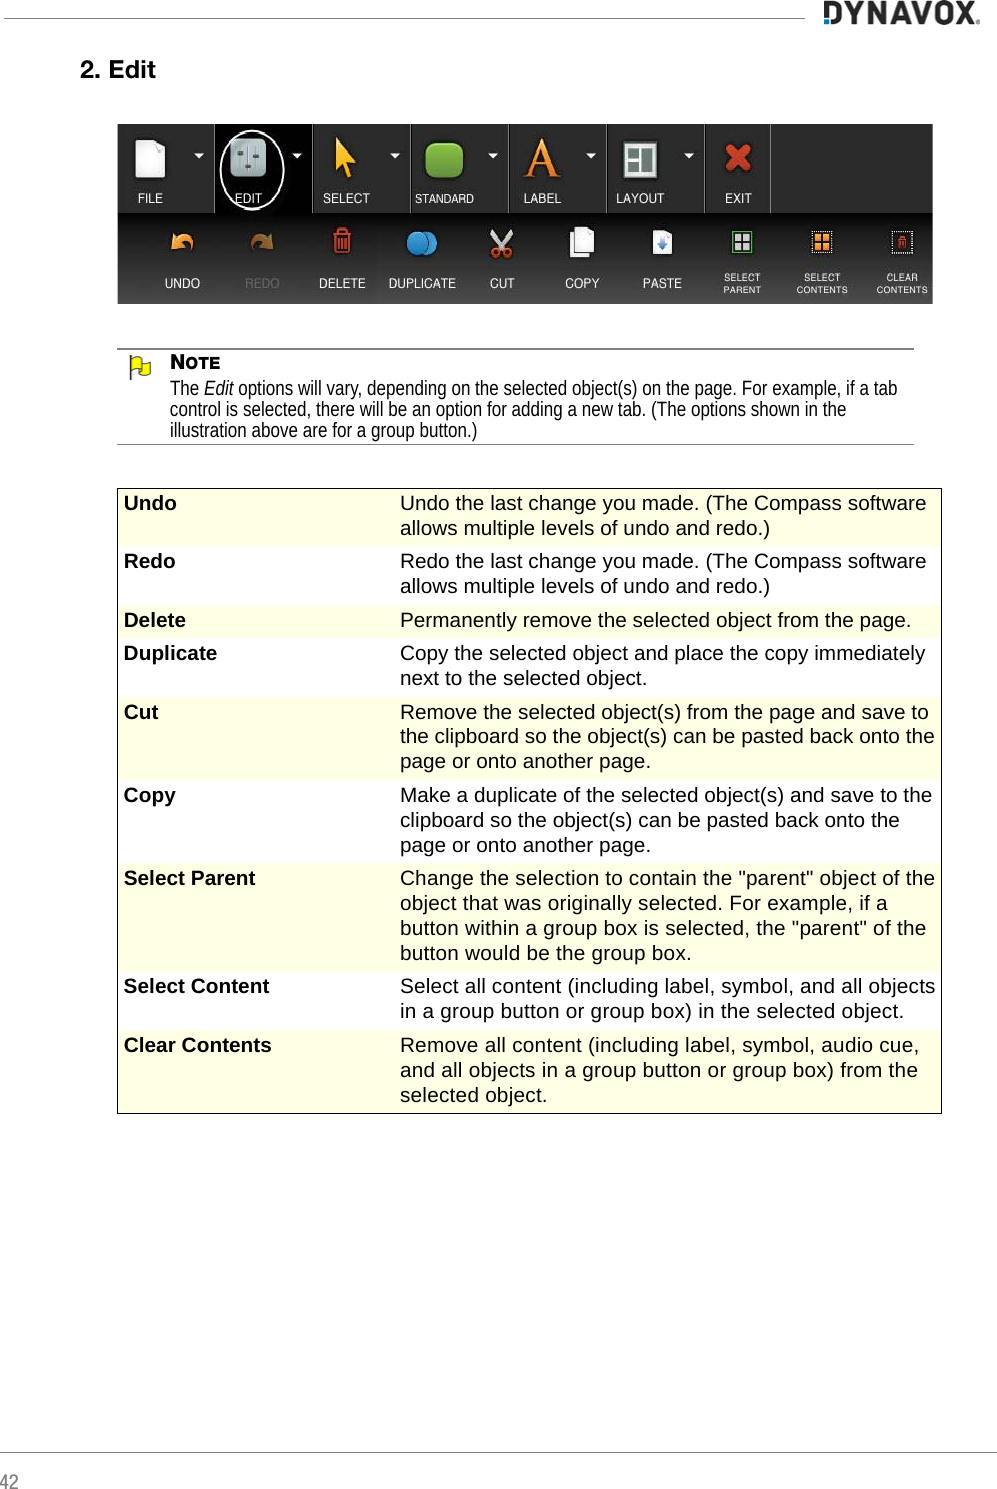
![60CautionFCC WarningThis device complies with Part 15 of the FCC Rules. Operation is subject to the following two conditions: (1) this device may not cause harmful interference, and (2) this device must accept any interference received, including interference that may cause undesired operation.Changes or modifications not expressly approved by the party responsible for compliance could void the user's authority to operate the equipment.Note: This equipment has been tested and found to comply with the limits for a Class B digital device, pursuant to Part 15 of the FCC Rules. These limits are designed to provide reasonable protection against harmful interference in a residential installation. This equipment generates, uses and can radiate radio frequency energy and, if not installed and used in accordance with the instructions, may cause harmful interference to radio communications. However, there is no guarantee that interference will not occur in a particular installation. If this equipment does cause harmful interference to radio or television reception, which can be determined by turning the equipment off and on, the user is encouraged to try to correct the interference by one or more of the following measures:•Reorient or relocate the receiving antenna.•Increase the separation between the equipment and receiver.•Connect the equipment into an outlet on a circuit different from that to which the receiver is connected.•Consult the dealer or an experienced radio/TV technician for help.RF Warning for Portable device: The device has been evaluated to meet general RF exposure requirement. The device can be used in portable exposure condition without restriction. FCC RF Exposure StatementThe exposure standard for wireless devices employs a unit of measurement known as the Specific Absorption Rate (SAR). The SAR limit set by the FCC is 1.6 W/kg. The highest SAR level measured for this device is <0.425W/kg, so this device meets the FCC Requirement.IC WarningEnglish:This device complies with Industry Canada license-exempt RSS standard(s). Operation is subject to the following two conditions: (1) this device may not cause interference, and (2) this device must accept any interference, including interference that may cause undesired operation of the device.French:Le présent appareil est conforme aux CNR d'Industrie Canada applicables aux appareils radio Exempts de licence. L'exploitation est autorisée aux deux conditions suivantes : (1) l'appareil ne doit pas produire de brouillage, et (2) l'utilisateur de l'appareil doit accepter tout brouillage radioélectrique subi, même si le brouillage est susceptible d'en comprom ettre le fonctionnement.Declaration of Conformity[DynaVox Systems LLC] hereby declares that this [T15] is in compliance with the essential requirements and other relevant provisions of Directive 1999/5/EC.](https://usermanual.wiki/Tobii-Dynavox/T15/User-Guide-2288521-Page-64.png)