Technicolor Connected Home USA DCI401GEU2 wirelessly controlled converter box User Manual Manual Part 1
Technicolor Connected Home USA LLC wirelessly controlled converter box Manual Part 1
Contents
- 1. Manual Part 1
- 2. Manual Part 2
- 3. Manual Reg Part
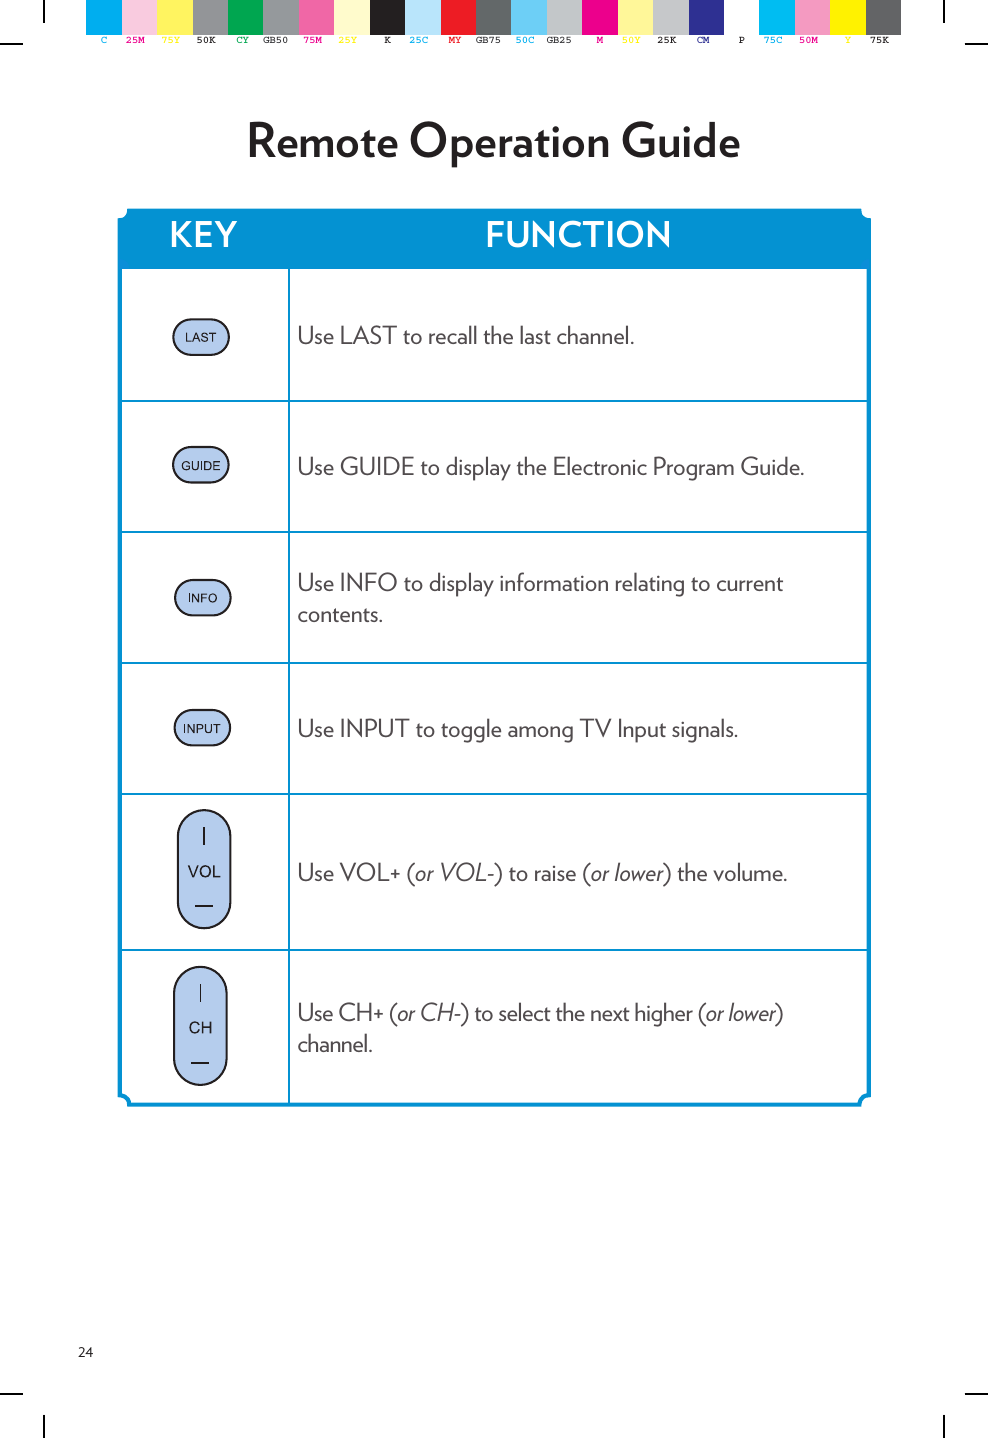
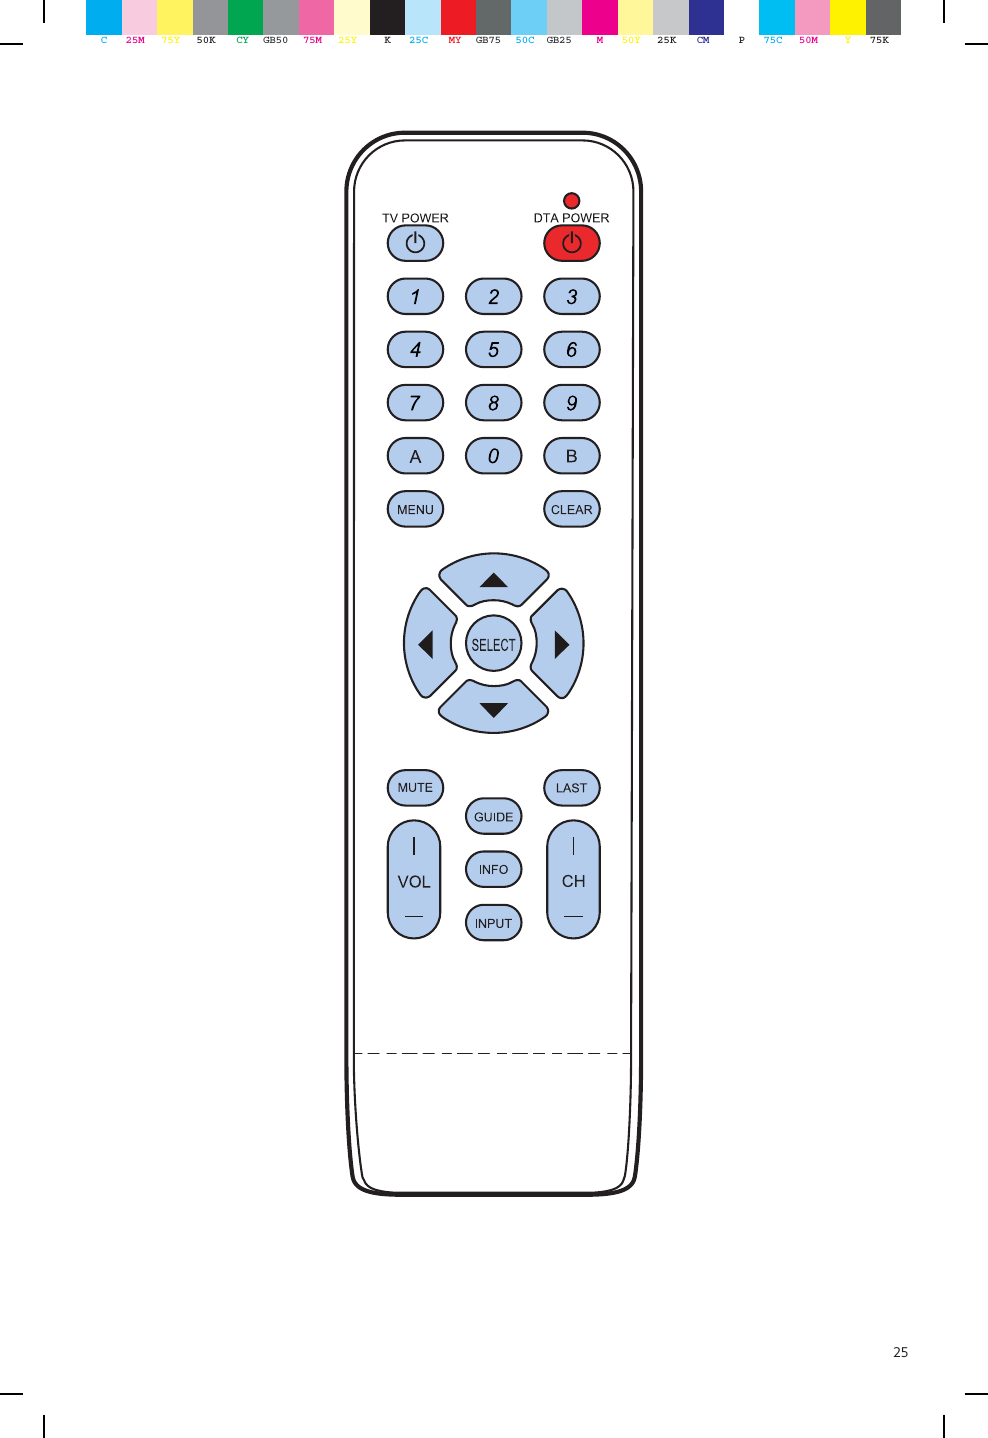
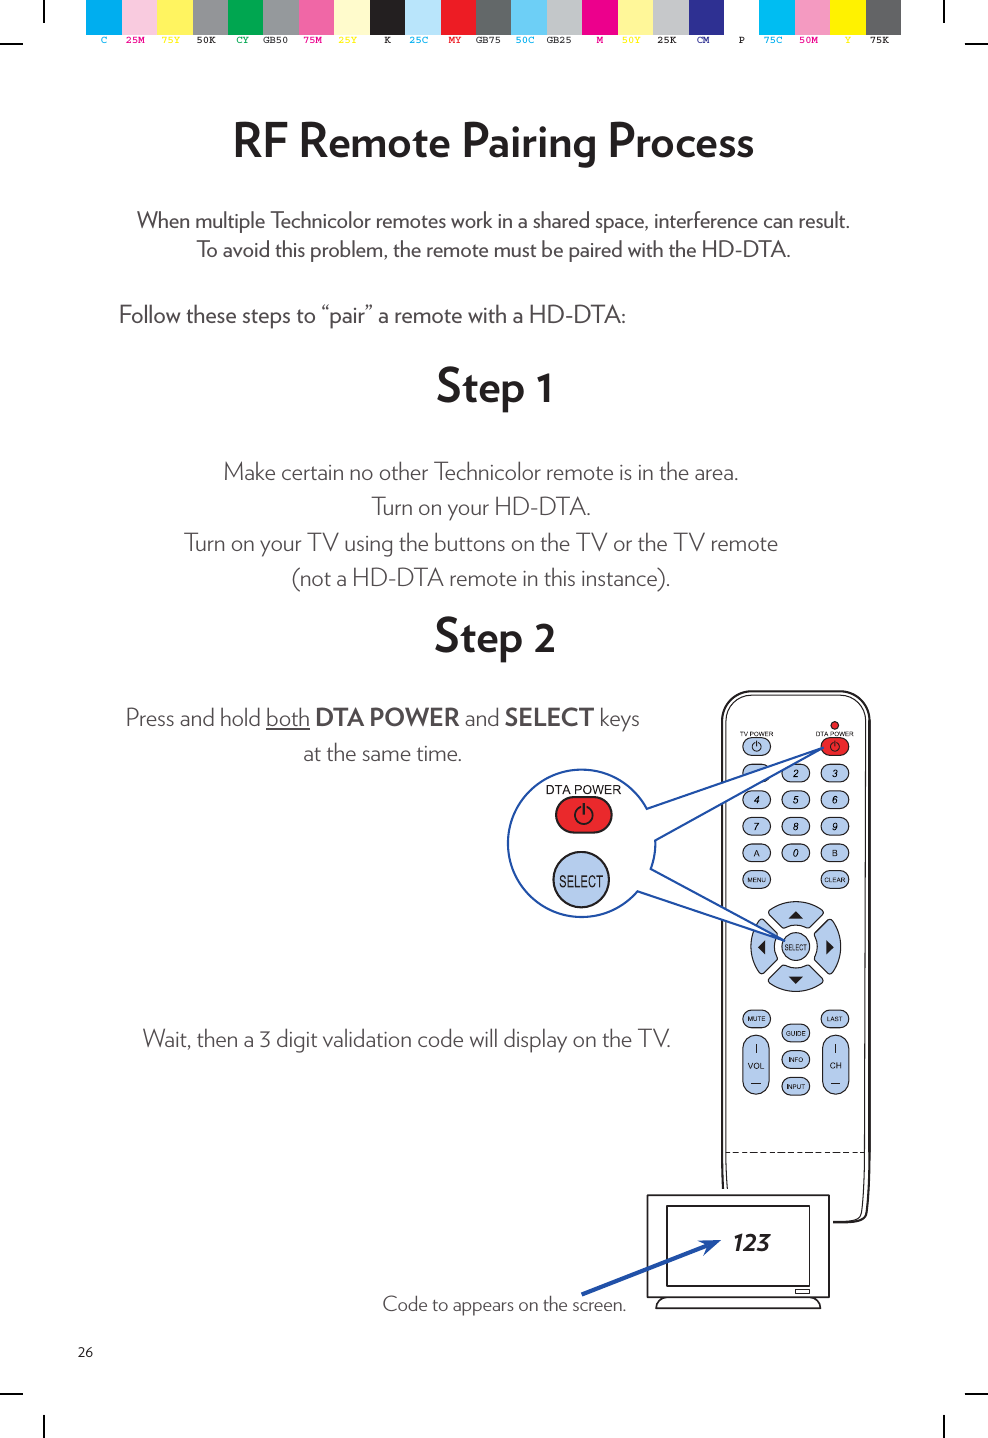
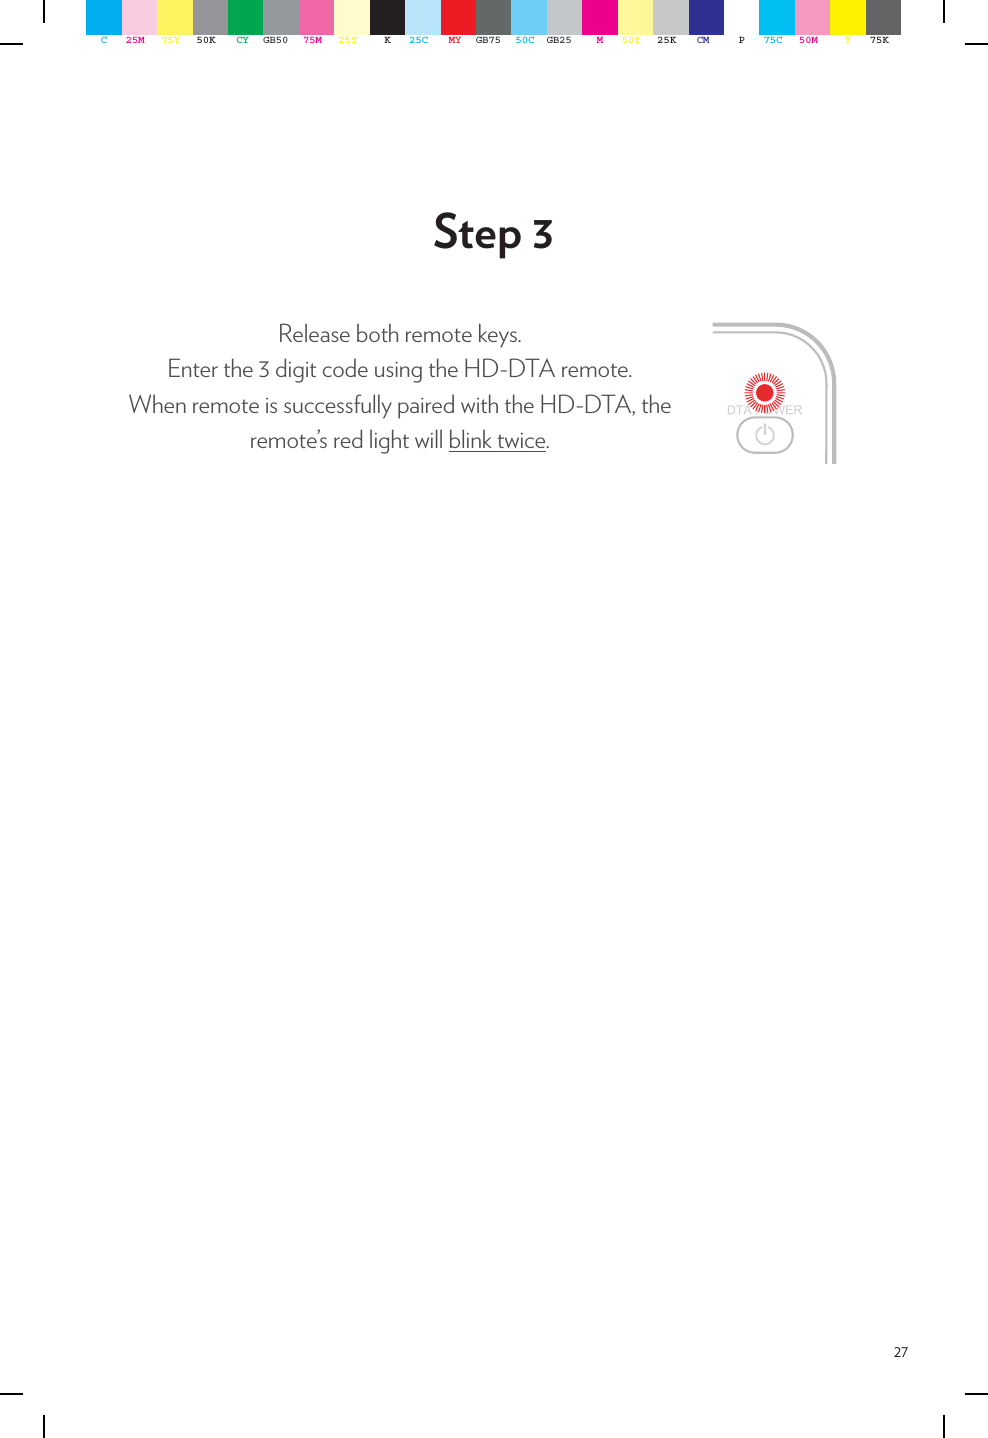
Manual Part 1