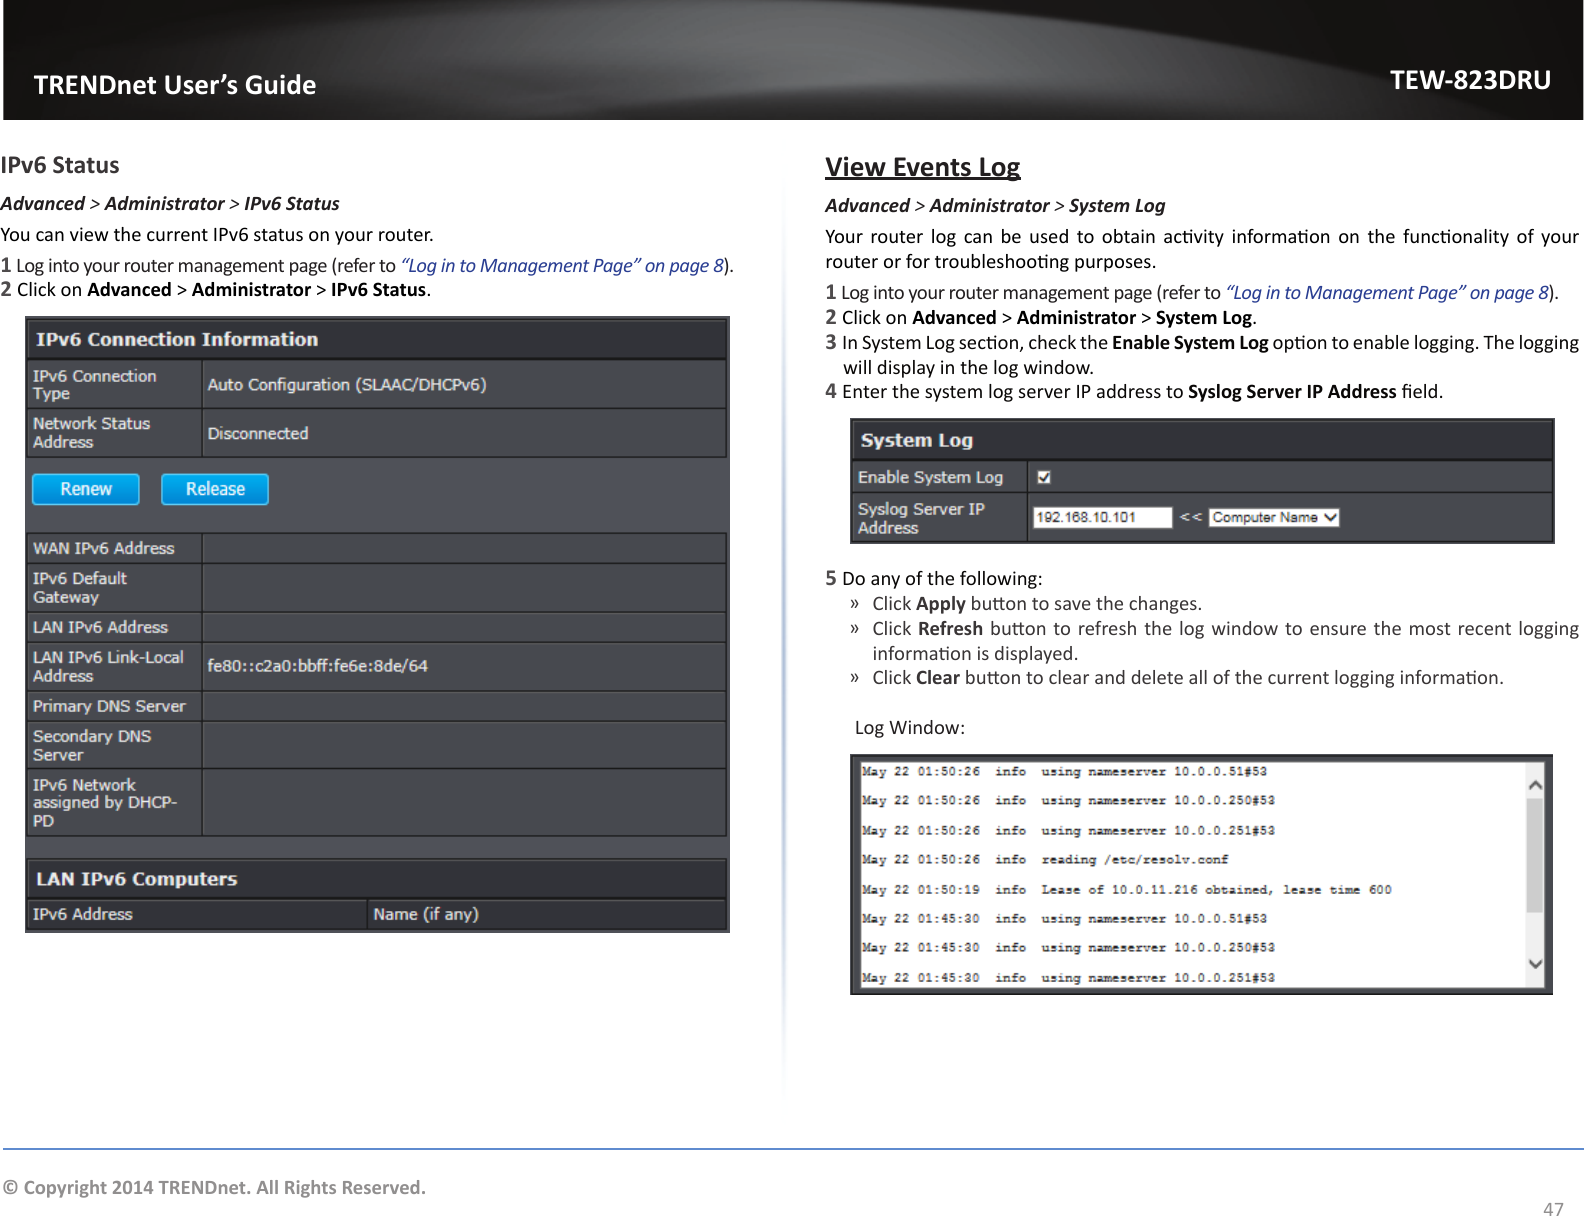
TRENDNET TEW823824 AC1750 Dual Band Wireless Router, AC1750 Dual Band Wireless Router with StreamBoostTM Technology User Manual
TRENDNET, Inc. AC1750 Dual Band Wireless Router, AC1750 Dual Band Wireless Router with StreamBoostTM Technology
TRENDNET >
User Manual.pdf


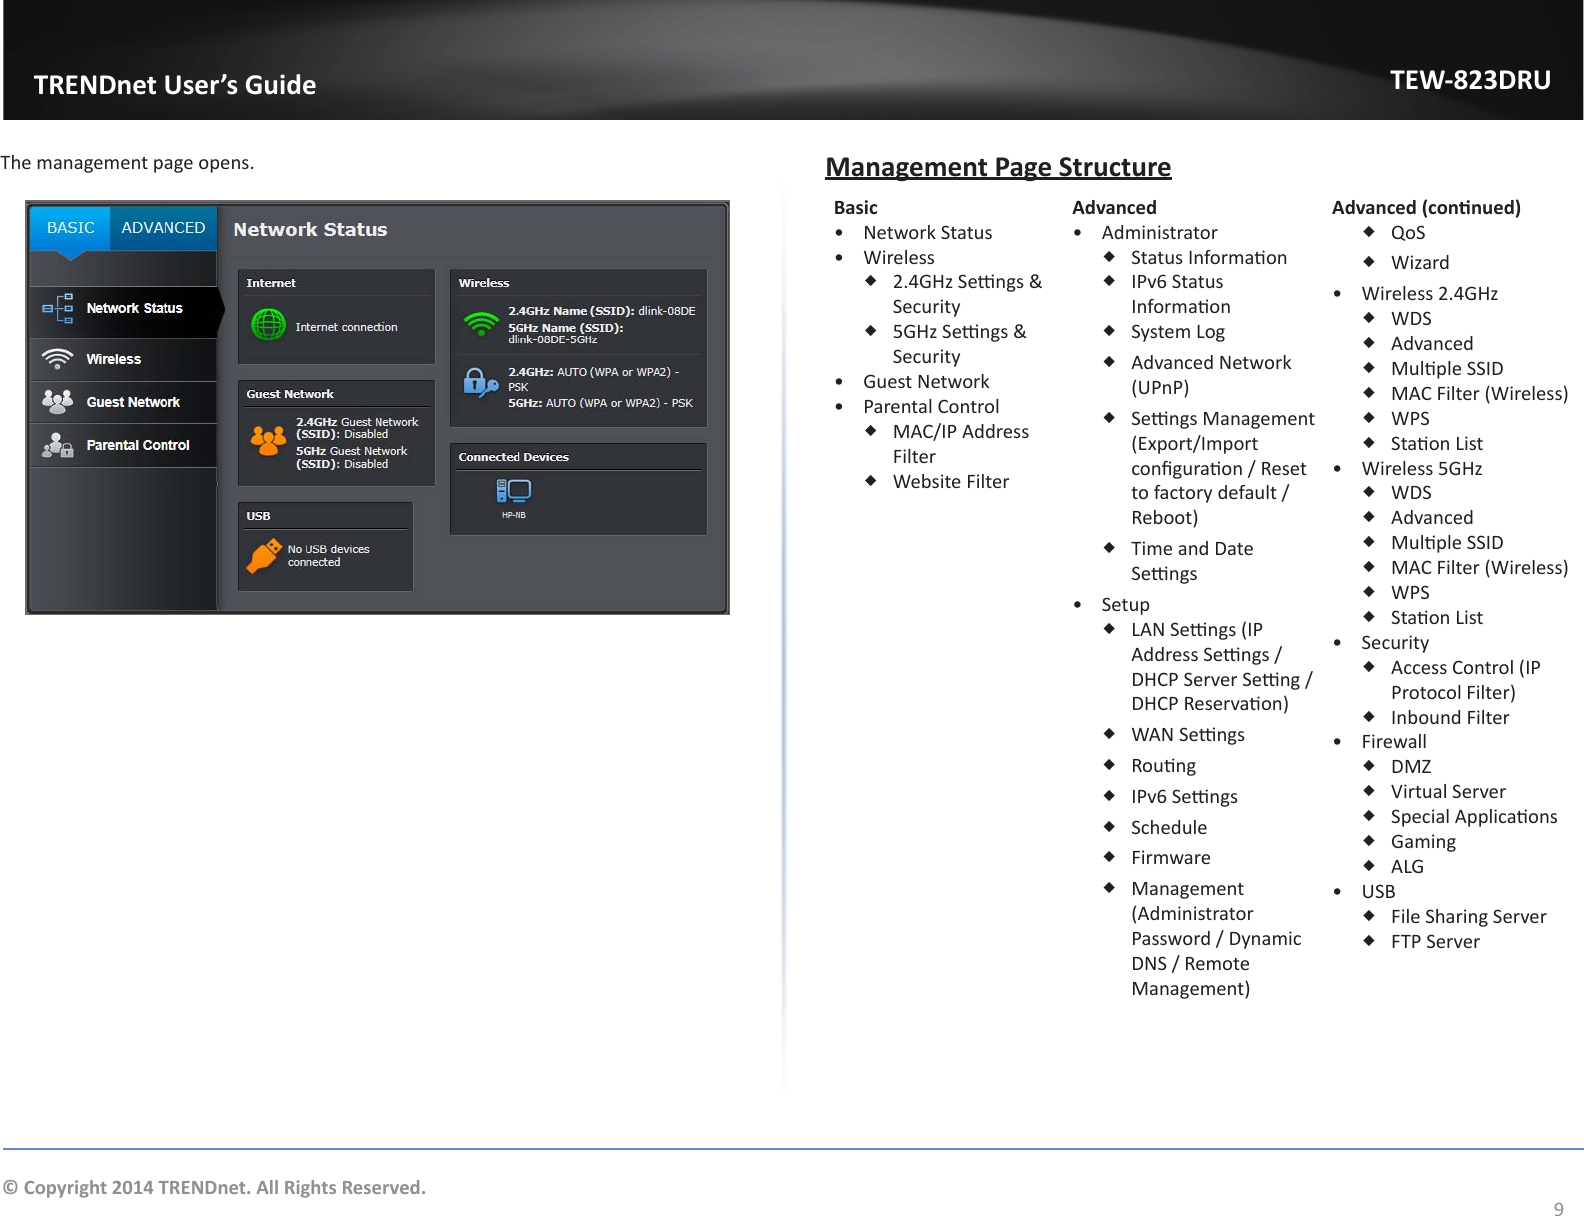

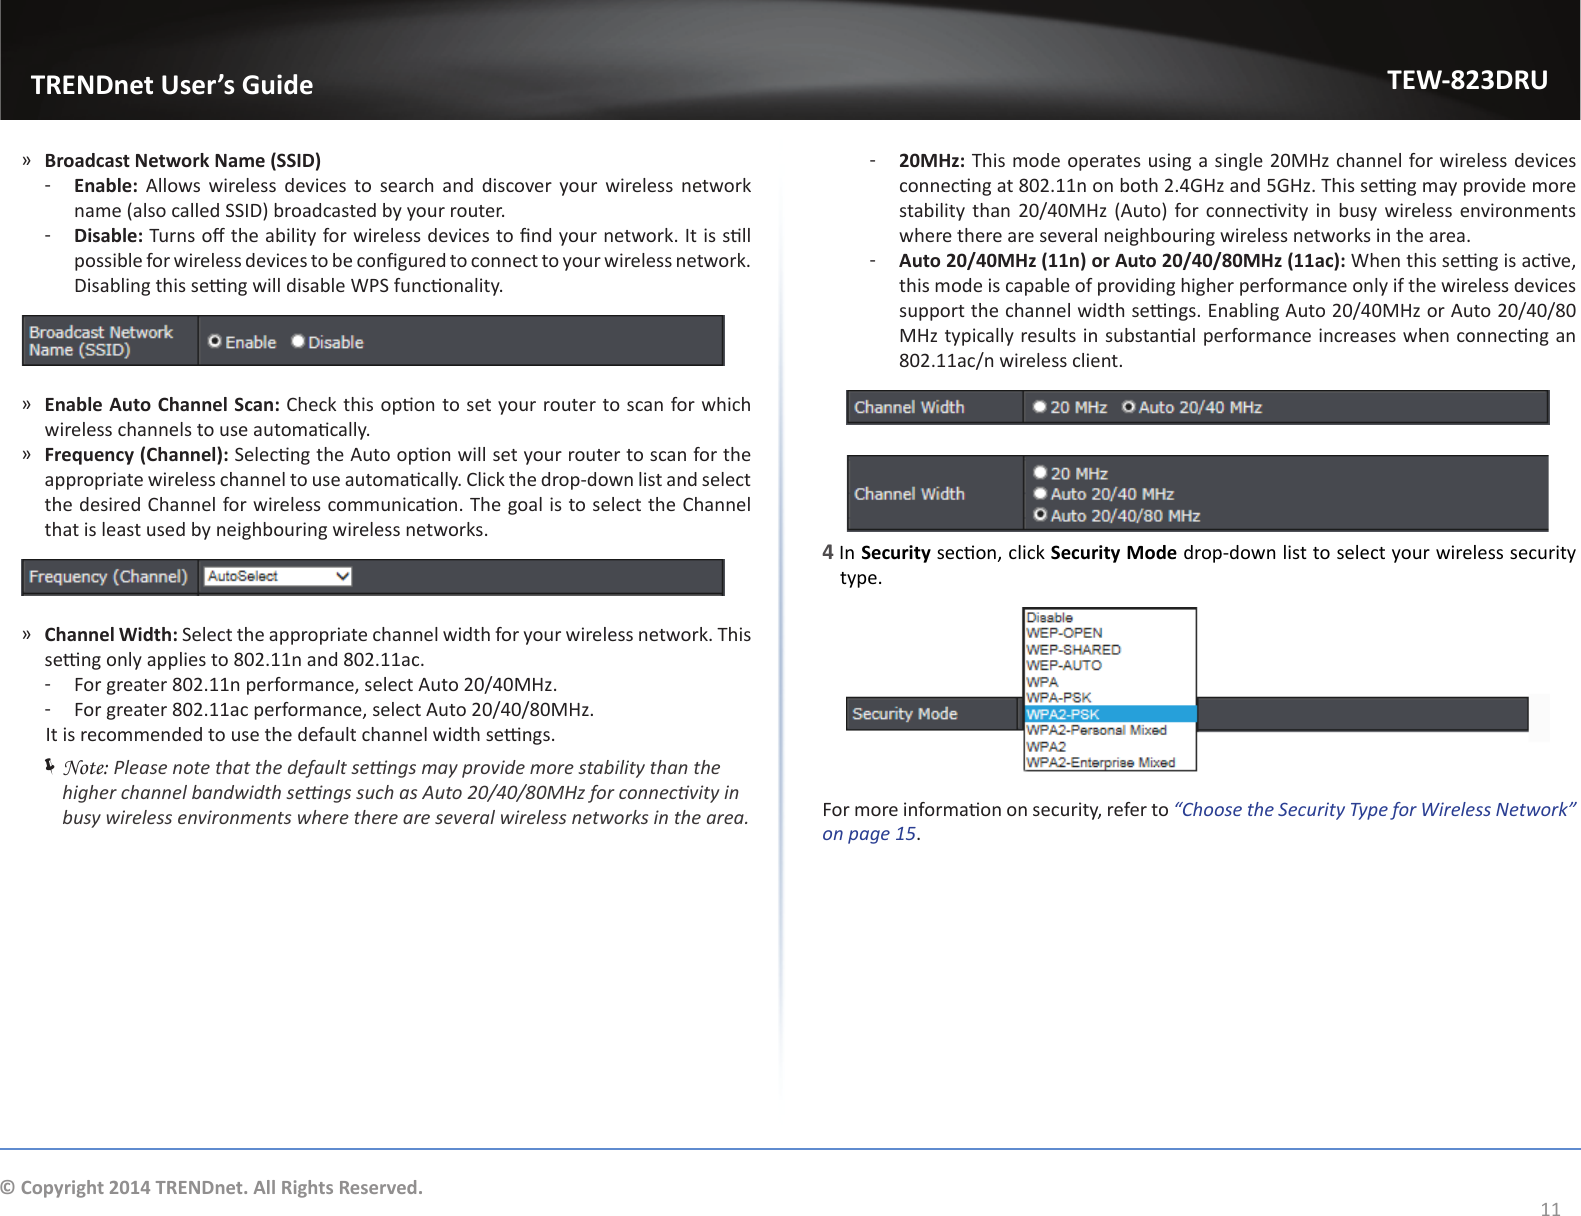
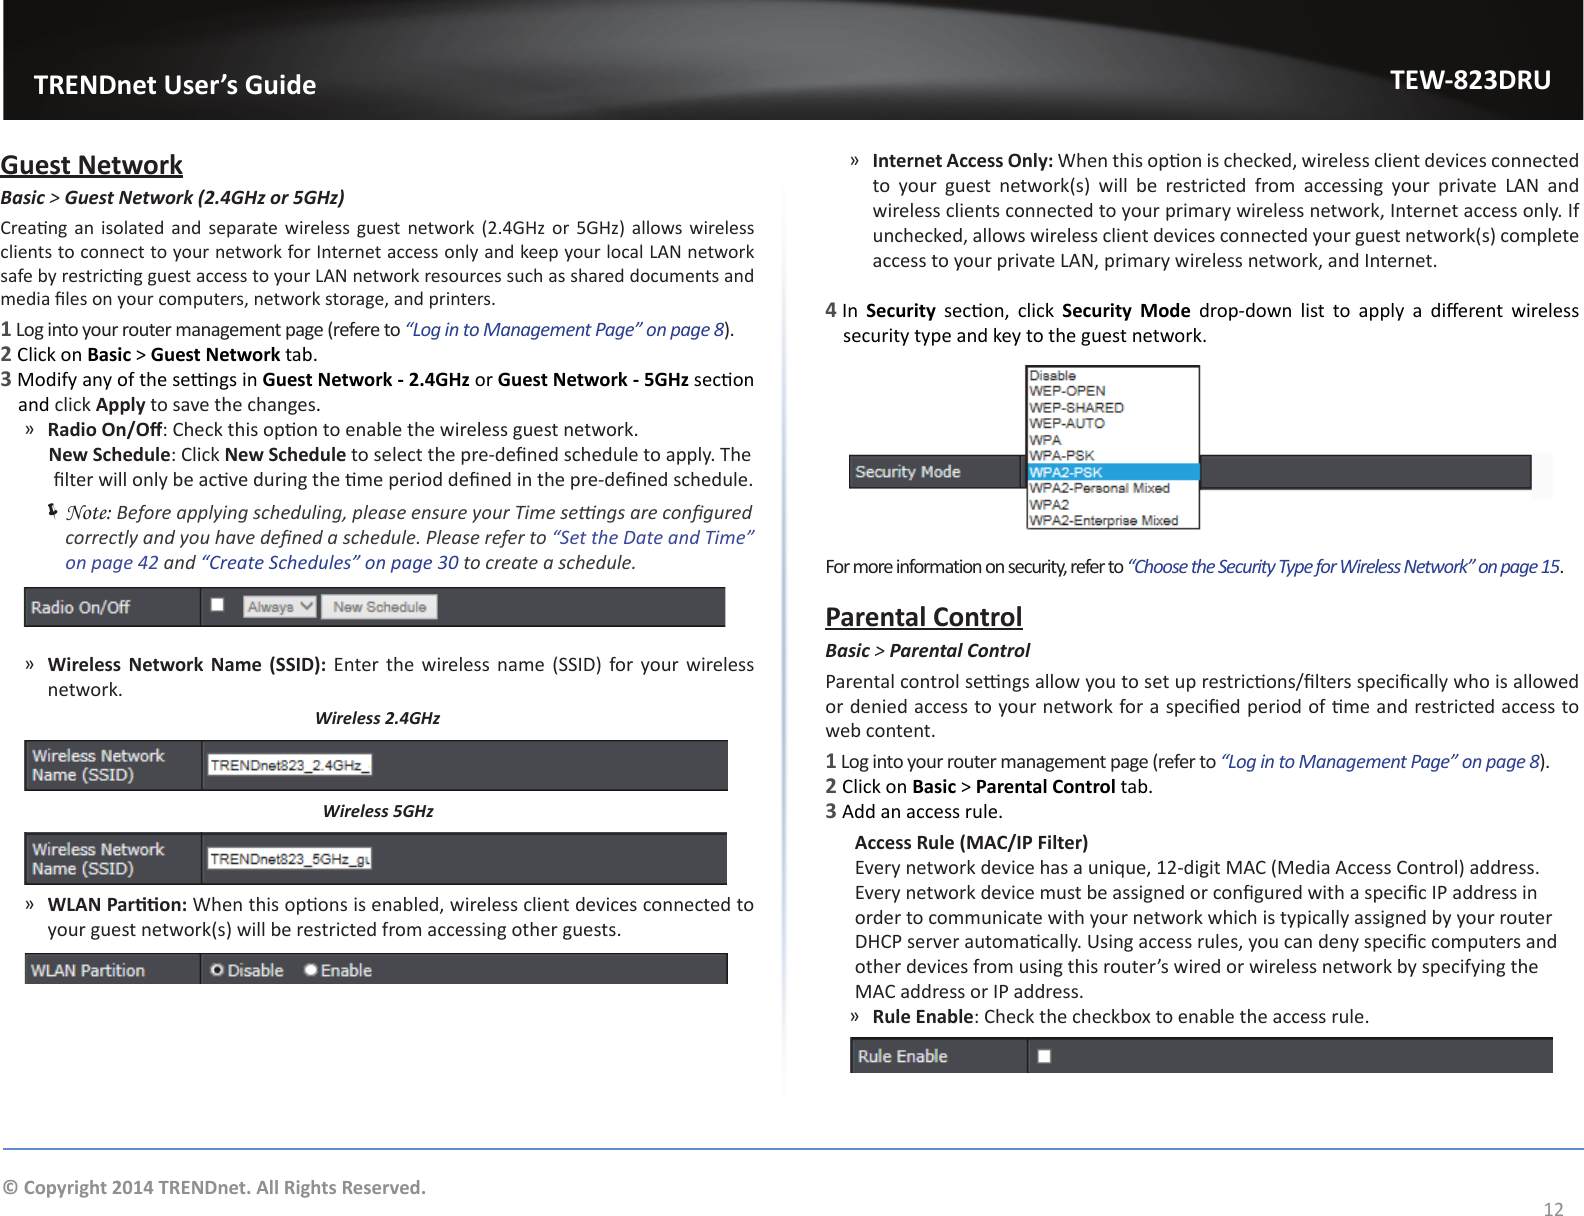
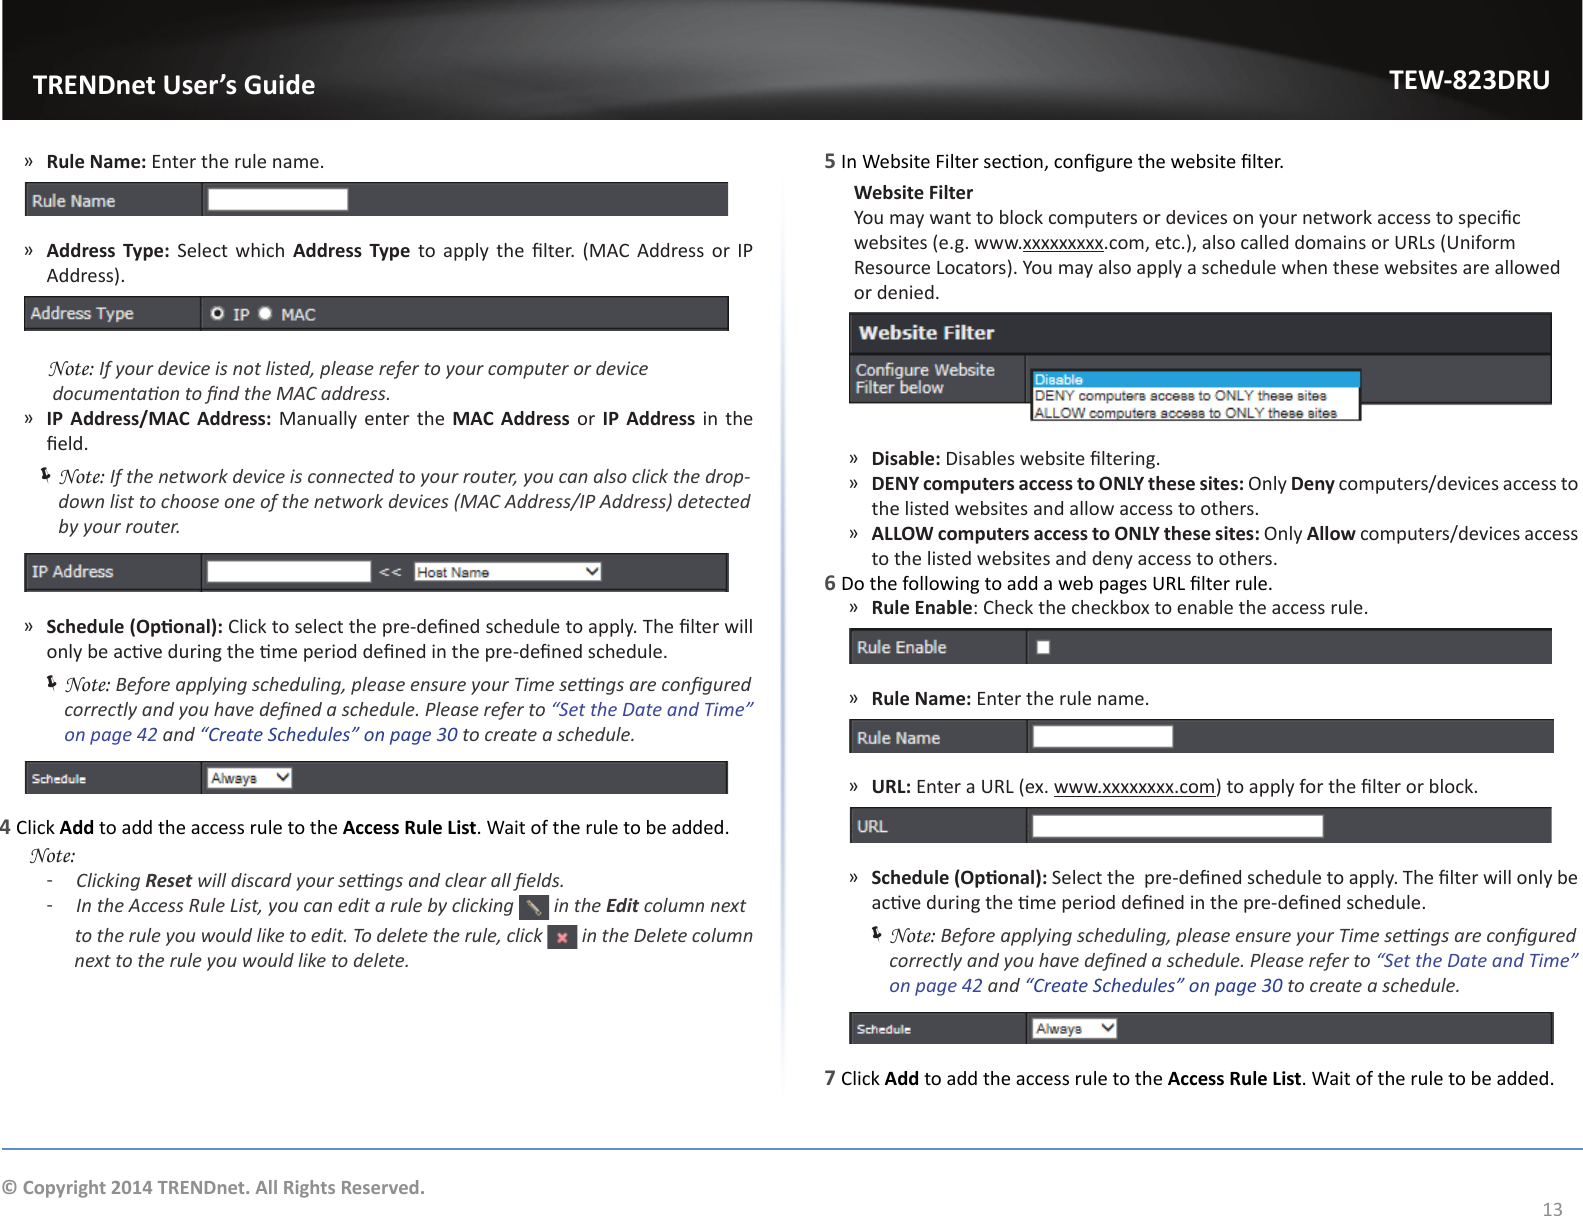

![TRENDnet User’s GuideTEW-823DRU49© Copyright 2014 TRENDnet. All Rights Reserved. Česky [Czech]TRENDnet mto prohlašuje, že tento TEW-823DRU je ve shodě se základními požadavky a dalšími příslušnými ustanoveními směrnice 1999/5/ES, 2006/95/ES, a 2009/125/ES. Dansk [Danish]Undertegnede TRENDnet erklærer herved, at følgende udstyr TEW-823DRU overholder de væsentlige krav og øvrige relevante krav i direkv 1999/5/EF, 2006/95/EF, og 2009/125/EF. Deutsch [German]Hiermit erklärt TRENDnet, dass sich das Gerät TEW-823DRU in Übereinsmmung mit den grundlegenden Anforderungen und den übrigen einschlägigen Besmmungen der Richtlinie 1999/5/EG, 2006/95/EG und 2009/125/EG bendet. Ees [Estonian]Käesolevaga kinnitab TRENDnet seadme TEW-823DRU vastavust direkivi 1999/5/EÜ, 2006/95/EÜ ja 2009/125/EÜ põhinõuetele ja nimetatud direkivist tulenevatele teistele asjakohastele sätetele. EnglishHereby, TRENDnet, declares that this TEW-823DRU is in compliance with the essenal requirements and other relevant provisions of Direcve 1999/5/EC, 2006/95/EC, and 2009/125/EC. Español [Spanish]Por medio de la presente TRENDnet declara que el TEW-823DRU cumple con los requisitos esenciales y cualesquiera otras disposiciones aplicables o exigibles de la Direcva 1999/5/CE, 2006/95/CE, 2009/125/CE y. Ελληνική [Greek]ΜΕ ΤΗΝ ΠΑΡΟΥΣΑTRENDnet ΔΗΛΩΝΕΙ ΟΤΙTEW-823DRUΣΥΜΜΟΡΦΩΝΕΤΑΙ ΠΡΟΣ ΤΙΣ ΟΥΣΙΩΔΕΙΣ ΑΠΑΙΤΗΣΕΙΣ ΚΑΙ ΤΙΣ ΛΟΙΠΕΣ ΣΧΕΤΙΚΕΣ ΔΙΑΤΑΞΕΙΣ ΤΗΣ ΟΔΗΓΙΑΣ 1999/5/ΕΚ, 2006/95/ΕΚ, 2009/125/ΕΚ και. Français [French]Par la présente TRENDnet déclare que l’appareil TEW-823DRU est conforme aux exigences essenelles et aux autres disposions pernentes de la direcve 1999/5/CE, 2006/95/CE, 2009/125/CE et. Italiano[Italian]Con la presente TRENDnet dichiara che questo TEW-823DRU è conforme ai requisi essenziali ed alle altre disposizioni pernen stabilite dalla direva 1999/5/CE, 2006/95/CE e 2009/125/CE. Latviski [Latvian]AršoTRENDnetdeklarē, ka TEW-823DRU atbilstDirekvas 1999/5/EK, 2006/95/EK, un 2009/125/EK būskajāmprasībām un ciemar to saistajiemnoteikumiem. Lietuvių [Lithuanian]Šiuo TRENDnet deklaruoja, kad šis TEW-823DRU anka esminius reikalavimus ir kitas 1999/5/EB, 2006/95/EB ir 2009/125/EB Direktyvos nuostatas. Nederlands [Dutch]Hierbij verklaart TRENDnet dat het toestel TEW-823DRU in overeenstemming is met de essenële eisen en de andere relevante bepalingen van richtlijn 1999/5/EG, 2006/95/EG, en 2009/125/EG. Mal [Maltese]Hawnhekk, TRENDnet, jiddikjara li dan TEW-823DRU jikkonforma mal-ħġijiet essenzjali u ma provvedimen oħrajn relevan li hemm d-Dirreva 1999/5/KE, 2006/95/KE, u 2009/125/KE. Magyar [Hungarian]Alulíro, TRENDnet nyilatkozom, hogy a TEW-823DRUmegfelel a vonatkozó alapvetõ követelményeknek és az 1999/5/EK irányelv, a 2006/95/EK és a 2009/125/EK irányelv egyéb elõírásainak. Polski [Polish]Niniejszym TRENDnet oświadcza, że TEW-823DRU jest zgodny z zasadniczymi wymogami oraz pozostałymi stosownymi postanowieniami Dyrektywy 1999/5/WE, 2006/95/WE i 2009/125/WE. Português [Portuguese]TRENDnet declara que este TEW-823DRU está conforme com os requisitos essenciais e outras disposições da Direcva 1999/5/CE, 2006/95/CE e 2009/125/CE. Slovensko [Slovenian]TRENDnet izjavlja, da je ta TEW-823DRU v skladu z bistvenimi zahtevami in ostalimi relevantnimi določili direkve 1999/5/ES, 2006/95/ES in 2009/125/ES. Slovensky [Slovak]TRENDneýmtovyhlasuje, že TEW-823DRUspĺňazákladnépožiadavky a všetkypríslušnéustanoveniaSmernice 1999/5/ES, 2006/95/ES, a 2009/125/ES. Suomi [Finnish]TRENDnet vakuuaa täten eä TEW-823DRU tyyppinen laite on direkivin 1999/5/EY, 2006/95/EY ja 2009/125/EY oleellisten vaamusten ja sitä koskevien direkivin muiden ehtojen mukainen. Svenska [Swedish]Härmed intygar TRENDnet a denna TEW-823DRU står I överensstämmelse med de väsentliga egenskapskrav och övriga relevanta bestämmelser som framgår av direkv 1999/5/EG, 2006/95/EG och 2009/125/EG.](https://usermanual.wiki/TRENDNET/TEW823824/User-Guide-2371636-Page-49.png)