TOA WM-3210-3220 VHF-FM Wireless Microphone User Manual WM 3210
TOA Corporation VHF-FM Wireless Microphone WM 3210
UserManual.wiki
>
TOA
>
WM 3210 3220 User Manual
Users Manual
Navigation menu
Upload a User Manual
Namespaces
Wiki Guide
HTML
PDF
Info
Views
User Manual
Discussion / Help
Navigation
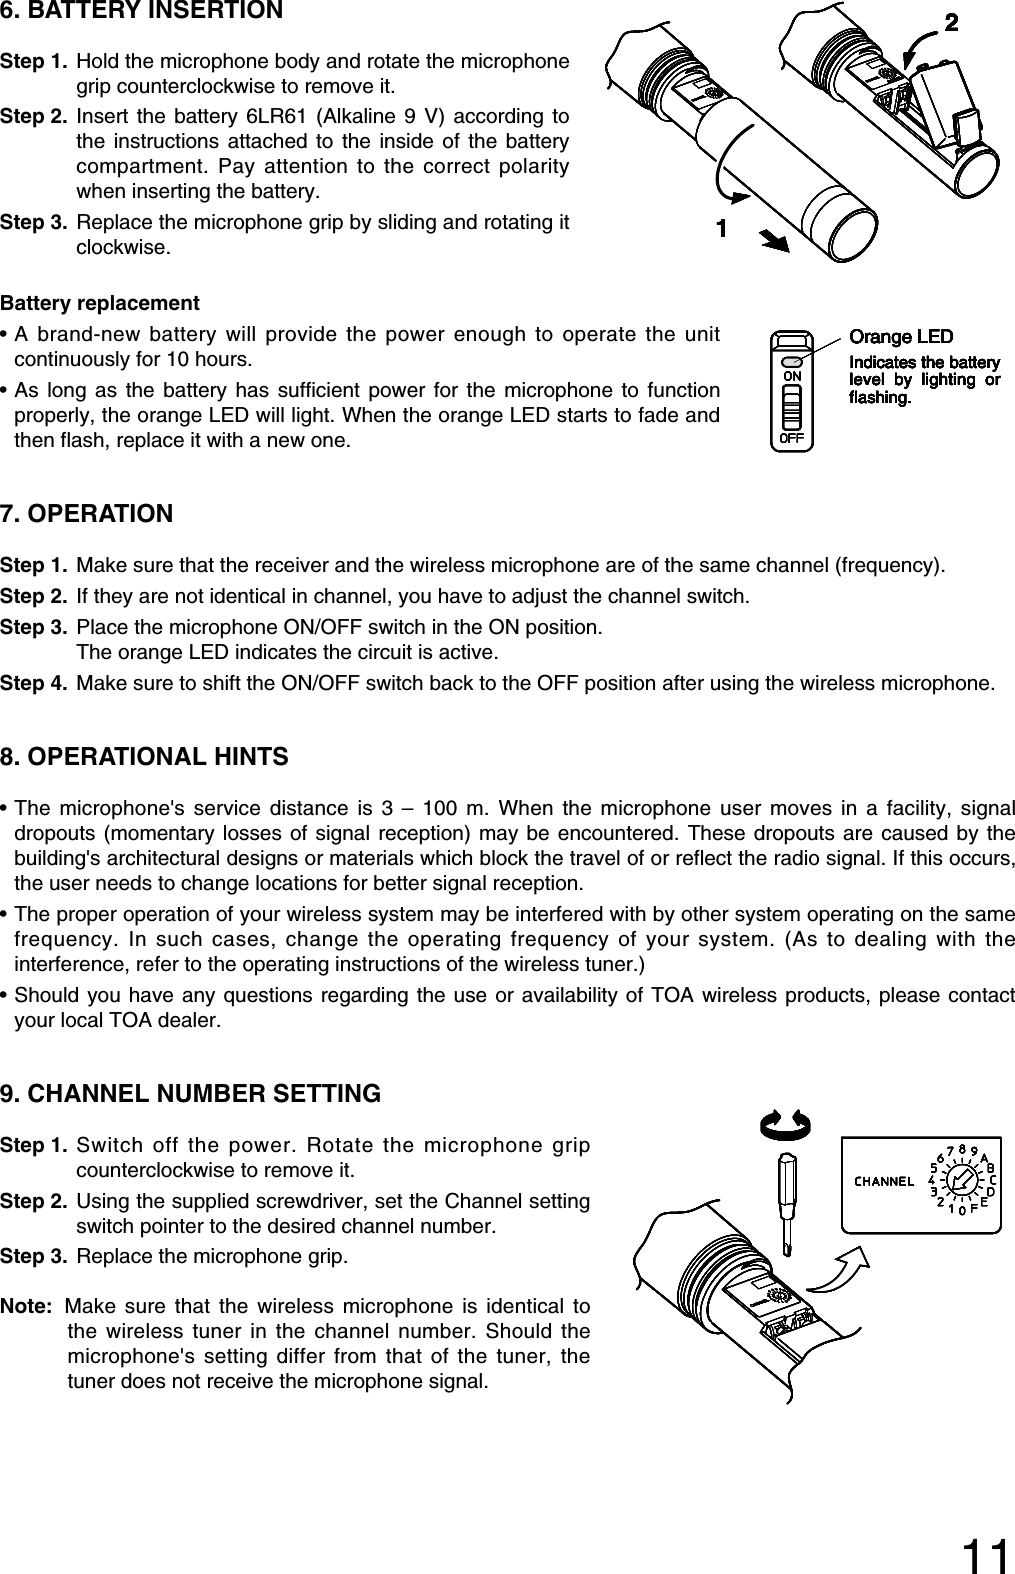
![102. GENERAL DESCRIPTIONThe WM-3210 Wireless Microphone employs a dynamic microphone element and is suitable for vocalapplications.The WM-3220 Wireless Microphone employs an electret condenser microphone element and is suitable forspeech applications.3. FEATURES• One frequency can be selected from 6 operating frequencies of 169 – 216 MHz.• An optimized PLL-synthesizer minimizes the oscillation frequency drift resulting from the ambienttemperature or voltage fluctuation. • Battery lamp indicates battery consumption to prevent the unit from malfunctioning when the battery levelremarkably decreases.4. HANDLING PRECAUTIONS • Do not expose the unit to rain or an environment where it may be splashed by water or other liquids, asdoing so may result in unit failure. • Never open nor remove the unit case to modify the unit. Refer all servicing to your nearest TOA dealer.• Take care not to drop the unit onto the floor nor bump it against a hard object as the unit could fail.• Do not place the unit in locations of high temperature (ex. in a car parked in summer) or high humidity as theunit could fail.• Do not use the unit in locations where it is exposed to seawater.• To clean, use a dry cloth. When the unit gets very dirty, wipe lightly with a cloth damped in a dilute neutralcleanser, then wipe with a dry cloth. Never use benzine, thinner, or chemically-treated cleaning towel.• Avoid using a mobile telephone near the wireless microphone in use. Noise could be picked up.5. NOMENCLATURE [WM-3210] [WM-3220]Power ON/OFF switchPower/Battery lamp(Orange LED)Channel select switchBattery clip[WM-3210] [WM-3220]Power ON/OFF switchPower/Battery lamp(Orange LED)Channel select switchBattery clip[WM-3210] [WM-3220]Power ON/OFF switchPower/Battery lamp(Orange LED)Channel select switchBattery clip[WM-3210] [WM-3220]Power ON/OFF switchPower/Battery lamp(Orange LED)Channel select switchBattery clip[WM-3210] [WM-3220]Power ON/OFF switchPower/Battery lamp(Orange LED)Channel select switchBattery clip[WM-3210] [WM-3220]Power ON/OFF switchPower/Battery lamp(Orange LED)Channel select switchBattery clip[WM-3210] [WM-3220]Power ON/OFF switchPower/Battery lamp(Orange LED)Channel select switchBattery clip[WM-3210] [WM-3220]Power ON/OFF switchPower/Battery lamp(Orange LED)Channel select switchBattery clip](https://usermanual.wiki/TOA/WM-3210-3220/User-Guide-160602-Page-2.png)