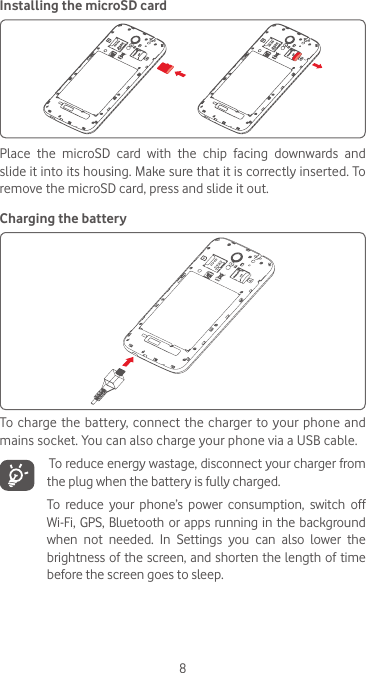
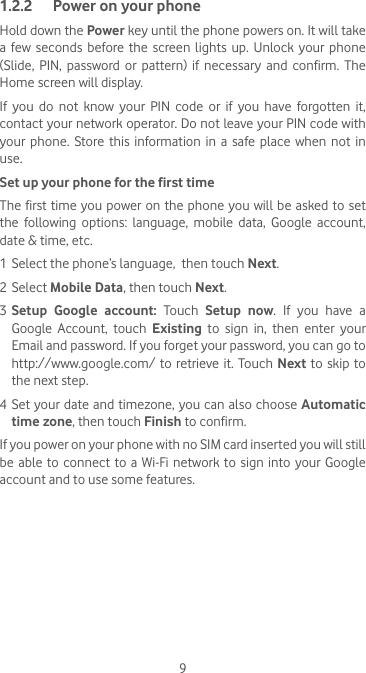
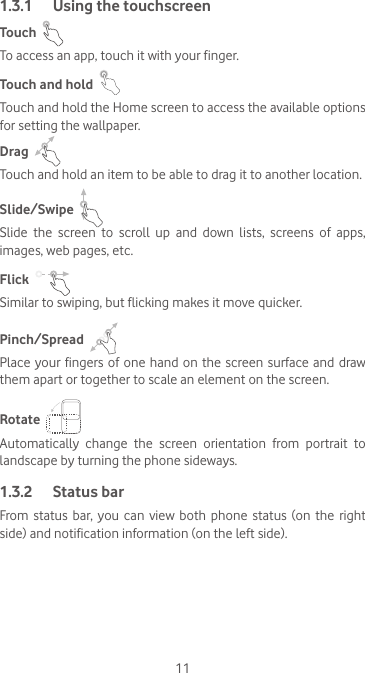
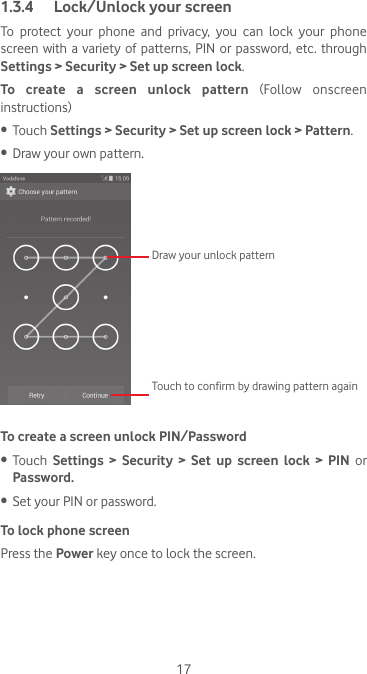
TCT Mobile 487 HSUPA/HSDPA/UMTS dual-band / GSM quadbands/LTE penta bands mobile phone User Manual IP4907 VF985 UM USA 06 140523 No HAC
TCT Mobile Limited HSUPA/HSDPA/UMTS dual-band / GSM quadbands/LTE penta bands mobile phone IP4907 VF985 UM USA 06 140523 No HAC
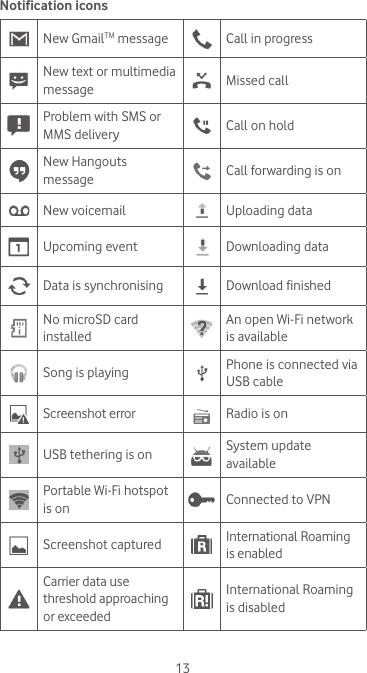
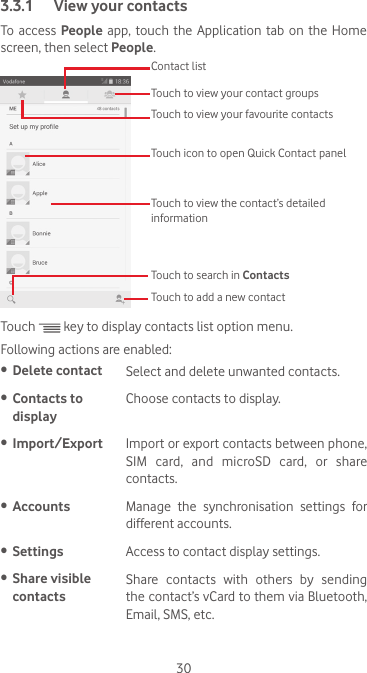
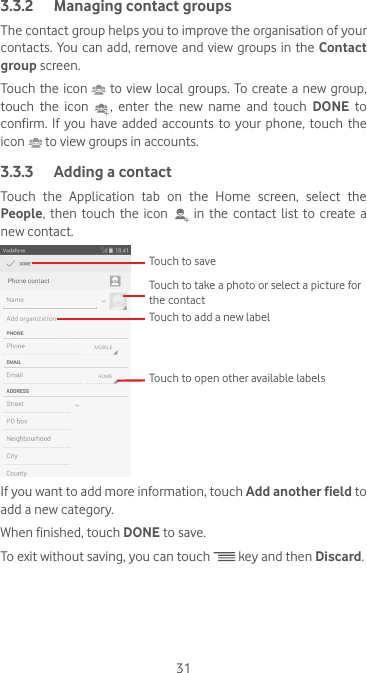
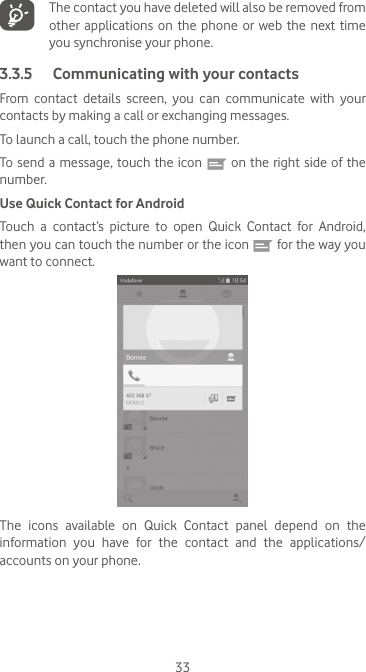
Contents
- 1. IP4907_VF985_UM_USA_06_140523 1-20
- 2. IP4907_VF985_UM_USA_06_140523-No HAC
IP4907_VF985_UM_USA_06_140523-No HAC