TCL Technoly Electronics SB000018 SOUND BAR User Manual
TCL Technoly Electronics (Huizhou) Co., Ltd. SOUND BAR
UserManual.wiki
>
TCL Technoly Electronics
>
SB000018 User Manual
User Manual
Navigation menu
Upload a User Manual
Namespaces
Wiki Guide
HTML
PDF
Info
Views
User Manual
Discussion / Help
Navigation


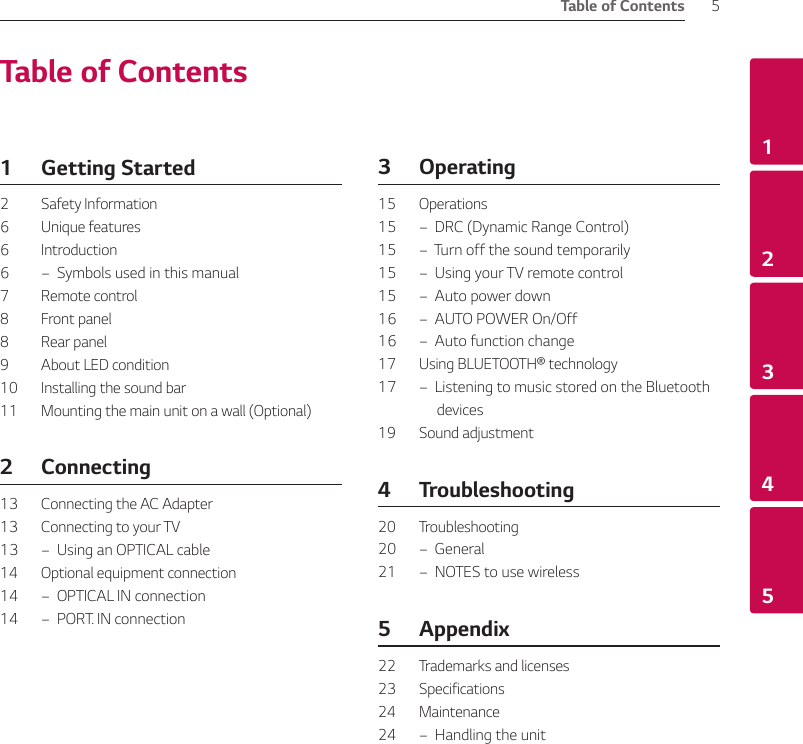
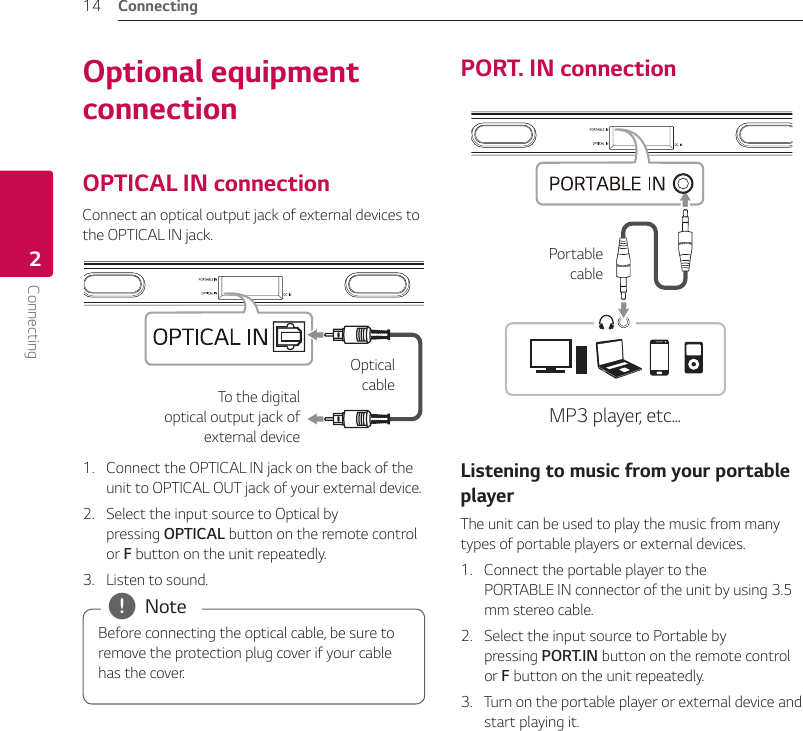
![2 ConnectingConnecting 13Connecting2Connecting the AC AdapterConnect the speaker to the power supply with the supplied AC adapter.1. Connect the supplied AC power cord to the AC adapter.2. Connect the AC adapter cable to DC IN adapter input.3. Plug the AC power cord into an AC outlet.Only use the AC adapter supplied with this device. Do not use a power supply from another device or manufacturer. Using any other power cable or power supply may cause damage to the device and void your warranty. > CautionConnecting to your TVUsing an OPTICAL cable1. Connect the OPTICAL IN jack on the back of the unit to OPTICAL OUT jack on the TV using an OPTICAL cable.Optical cable2. Select the input source to Optical by pressing OPTICAL button on the remote control or F button on the unit repeatedly. yBefore connecting the optical cable, be sure to remove the protection plug cover if your cable has the cover. yYou can enjoy the TV audio through the speakers of this unit. In the case of some TV models, you must select the external speaker option from the TV menu. (For details, reference your TV user manual.) ySet up the sound output of TV to listen to the sound through this unit : TV setting menu [ [Sound] [ [TV Sound output] [ [External speaker (Optical)] yDetails of TV setting menu vary depending on the manufacturers or models of your TV. , Note](https://usermanual.wiki/TCL-Technoly-Electronics/SB000018/User-Guide-3505134-Page-13.png)
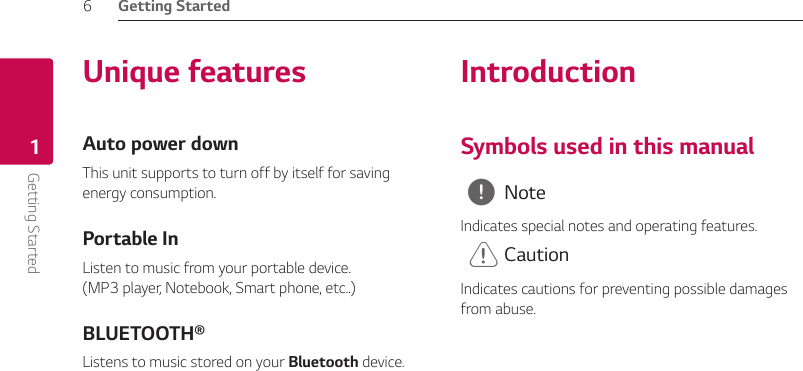
![3 OperatingOperating 15Operating3OperationsDRC (Dynamic Range Control)Make the sound clear when the volume is turned down and prevent sudden increase of sound (Dolby Digital only). This function turns on or off you press DRC ON/OFF.Turn off the sound temporarilyPress (Mute) to mute your unit. To cancel it, press (Mute) again on the remote control or change the volume level.Using your TV remote controlYou can control some functions of this unit by your TV remote control even by other company’s product. Controllable functions are volume up/down and mute.Press and hold DRC ON on the remote control for about 2 seconds. To turn off this function, press and hold DRC OFF about 2 seconds. ySupported TV brandsLG Panasonic Philips SamsungSharp Sony Toshiba Vizio yMake sure that the sound output of your TV is set to [External speaker]. yDepending on the remote control, this function may not work well. yThis function does not operate on LG TV's magic remote control. , NoteAuto power downThis unit will turn itself off to save electric consumption if the main unit is not connected to an external device and has not been used for 15 minutes.This unit also turns off after six hours if the Main unit has been connected to another device using the analog input. (Ex : Portable, etc..)How to disconnect the wireless network connection or the wireless devicePress p button on the unit and AUTO POWER OFF button on the remote control for more than 5 seconds at the same time.](https://usermanual.wiki/TCL-Technoly-Electronics/SB000018/User-Guide-3505134-Page-15.png)
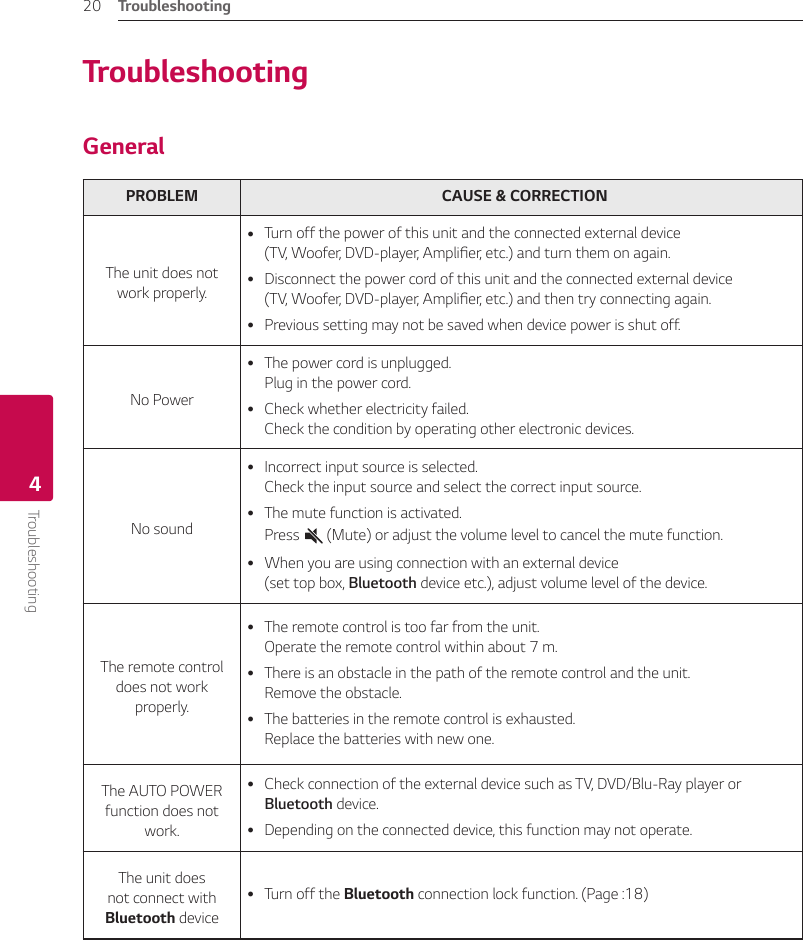
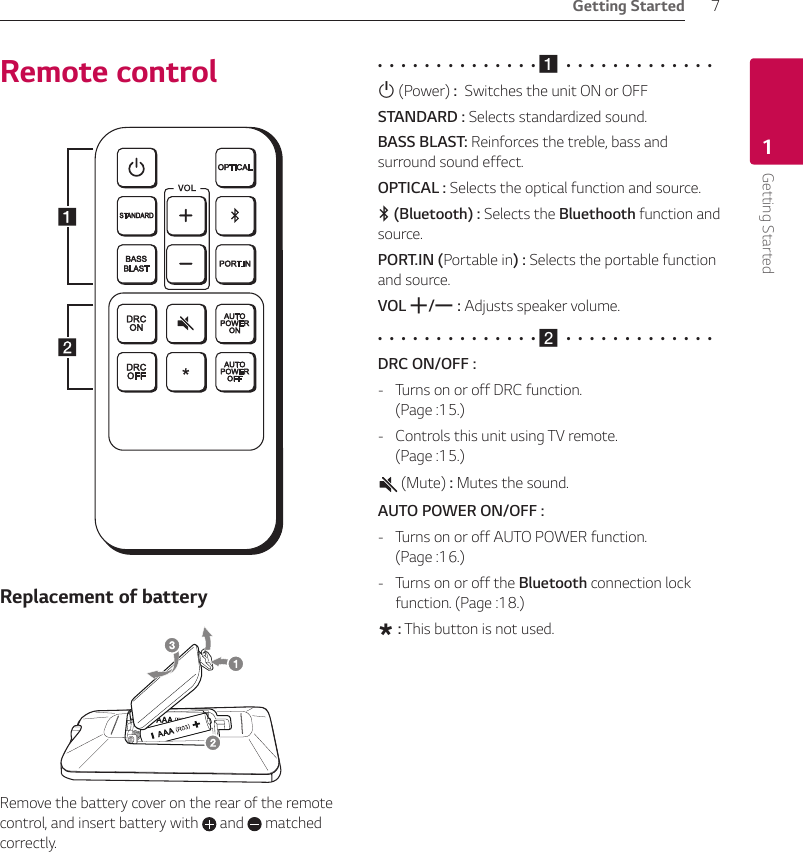
![Troubleshooting 21Troubleshooting4PROBLEM CAUSE & CORRECTIONWhen you feel the output sound of the unit is low.Check the details below and adjust the unit according to them. ySwitch [ON] state of DRC function to [OFF] by using remote controller. yChange Audio DRC setting on connected device setup menu to [OFF] state. yWith the sound bar connected with TV, change the AUDIO DIGITAL OUT setting on TV Setup Menu from [PCM] to [AUTO] or [BITSTREAM]. yWith the sound bar connected with Player, change the AUDIO DIGITAL OUT setting on Player Setup Menu from [PCM] to [PRIMARY PASS-THROUGH] or [BITSTREAM].NOTES to use wireless PROBLEM CAUSE & CORRECTIONThis device may have wireless interference. yWireless may not operate normally in weak signal area. yDo not install the device on metal furniture for optimum performance.Bluetooth device may malfunction or make noise in the following cases. yWhen any part of your body contact the transceiver of the Bluetooth device or sound bar. yWhen there is an obstacle or wall or the device is installed in a secluded spot. yWhen there is a device (a wireless LAN, a medical equipment or a microwave) using same frequency, make the distance between the products as far away as possible each other. yWhen to connecting the device to the Bluetooth device, make the distance between the products as close as possible each other. yWhen the device gets too far from the Bluetooth device, the connection is disconnected and also malfunction may occur.](https://usermanual.wiki/TCL-Technoly-Electronics/SB000018/User-Guide-3505134-Page-21.png)