Systems and Technology STAVL1629 GPS Vehicle Tracking Device User Manual Part 2
Systems & Technology Corp. GPS Vehicle Tracking Device Part 2
UserManual.wiki
>
Systems and Technology
>
STAVL1629 User Manual
>
User Manual Part 2
Contents
1.
User Manual Part 1
2.
User Manual Part 2
User Manual Part 2
Navigation menu
Upload a User Manual
Namespaces
Wiki Guide
HTML
PDF
Info
Views
User Manual
Discussion / Help
Navigation

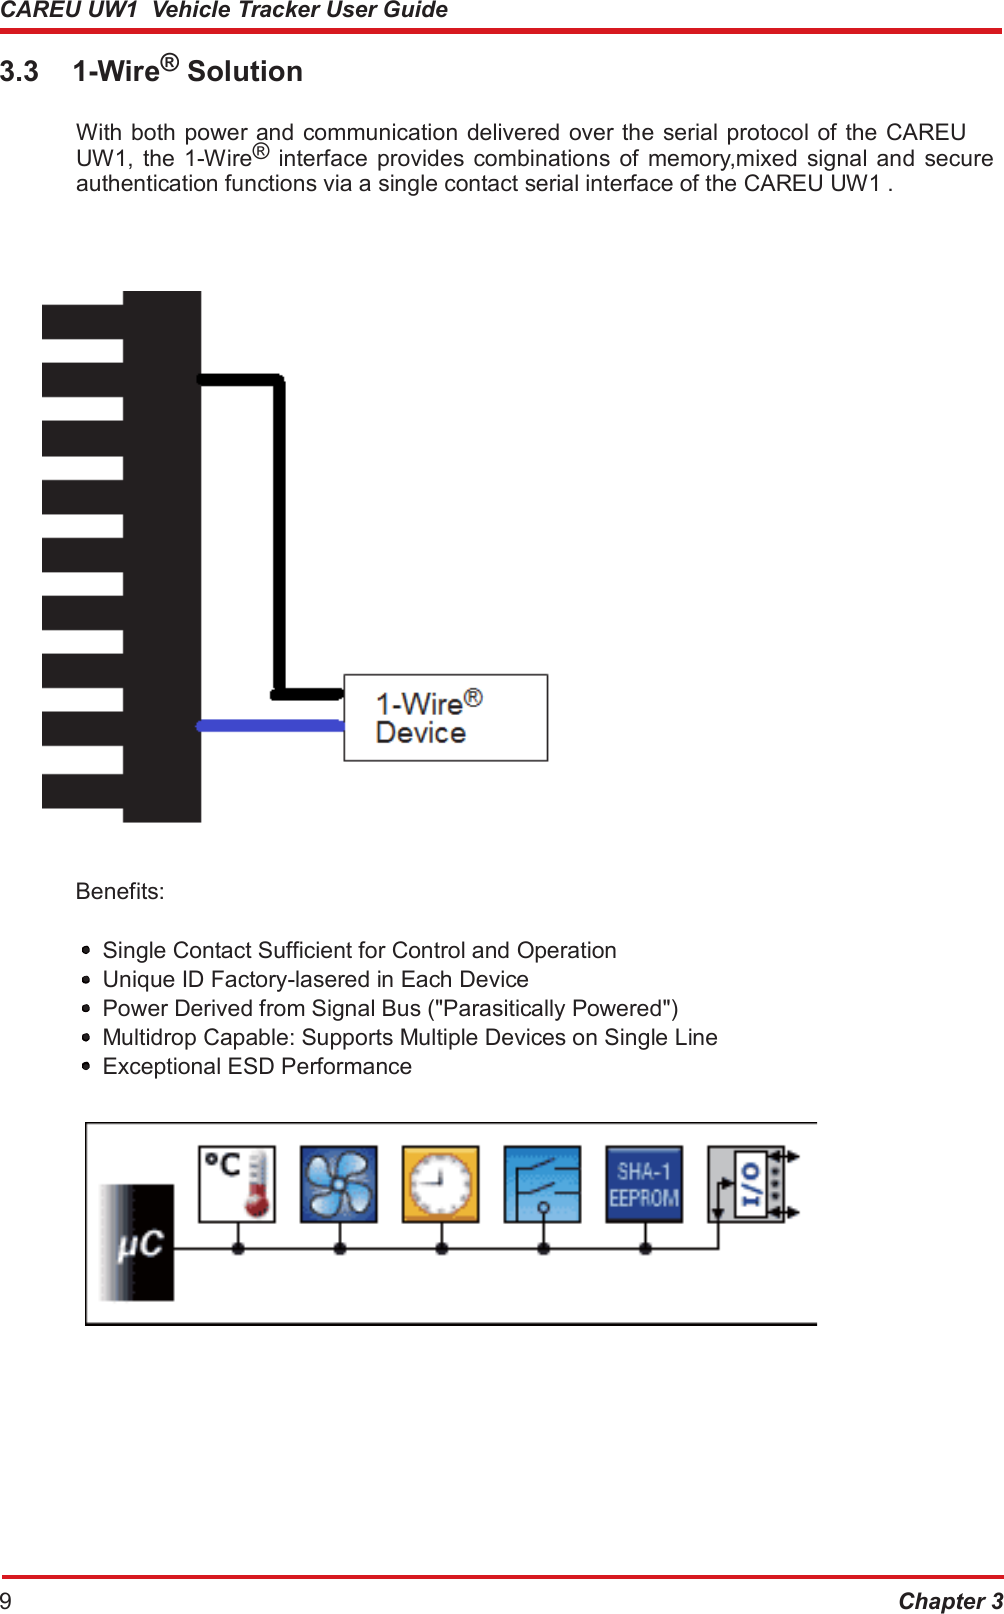
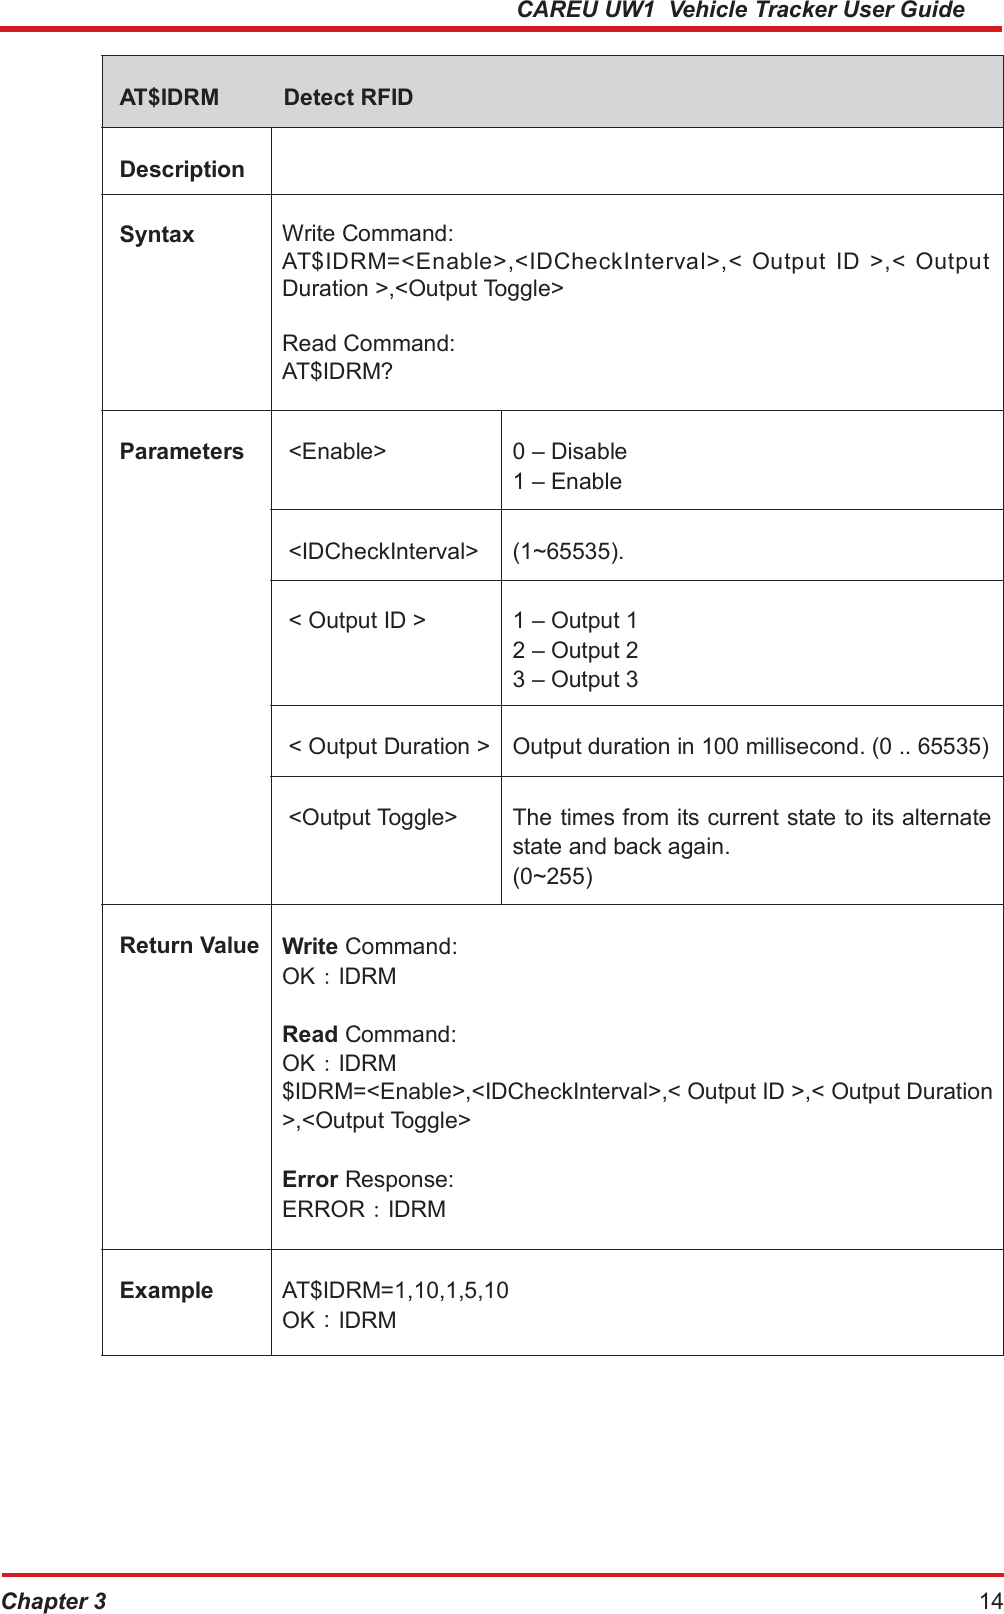
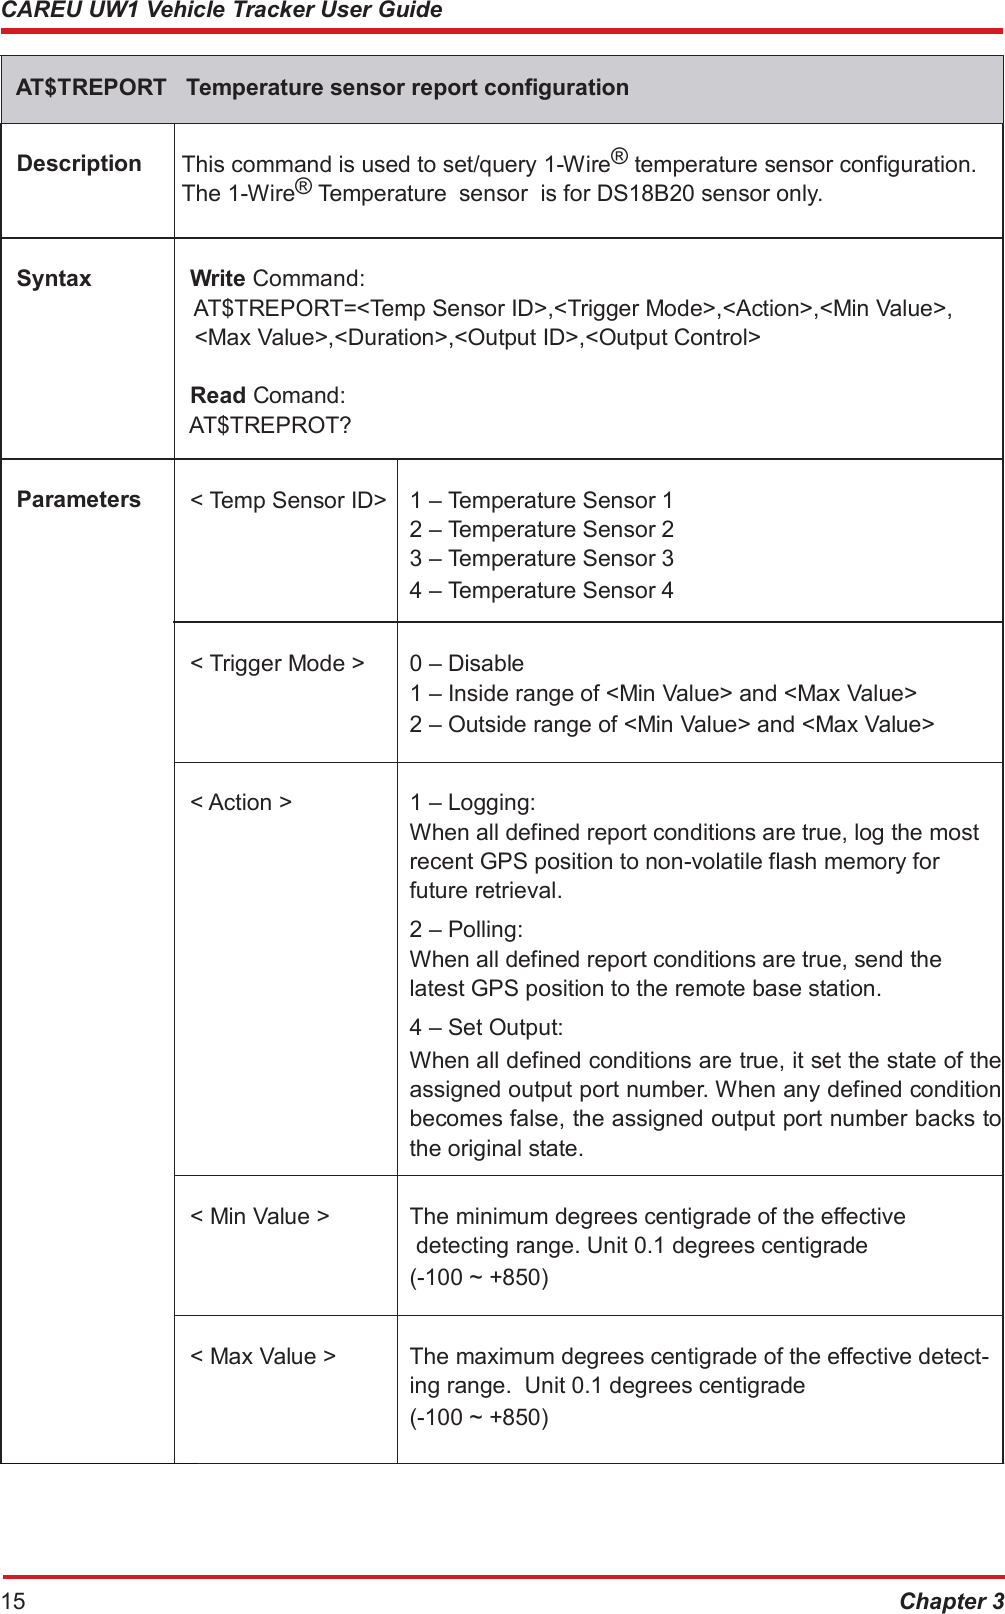
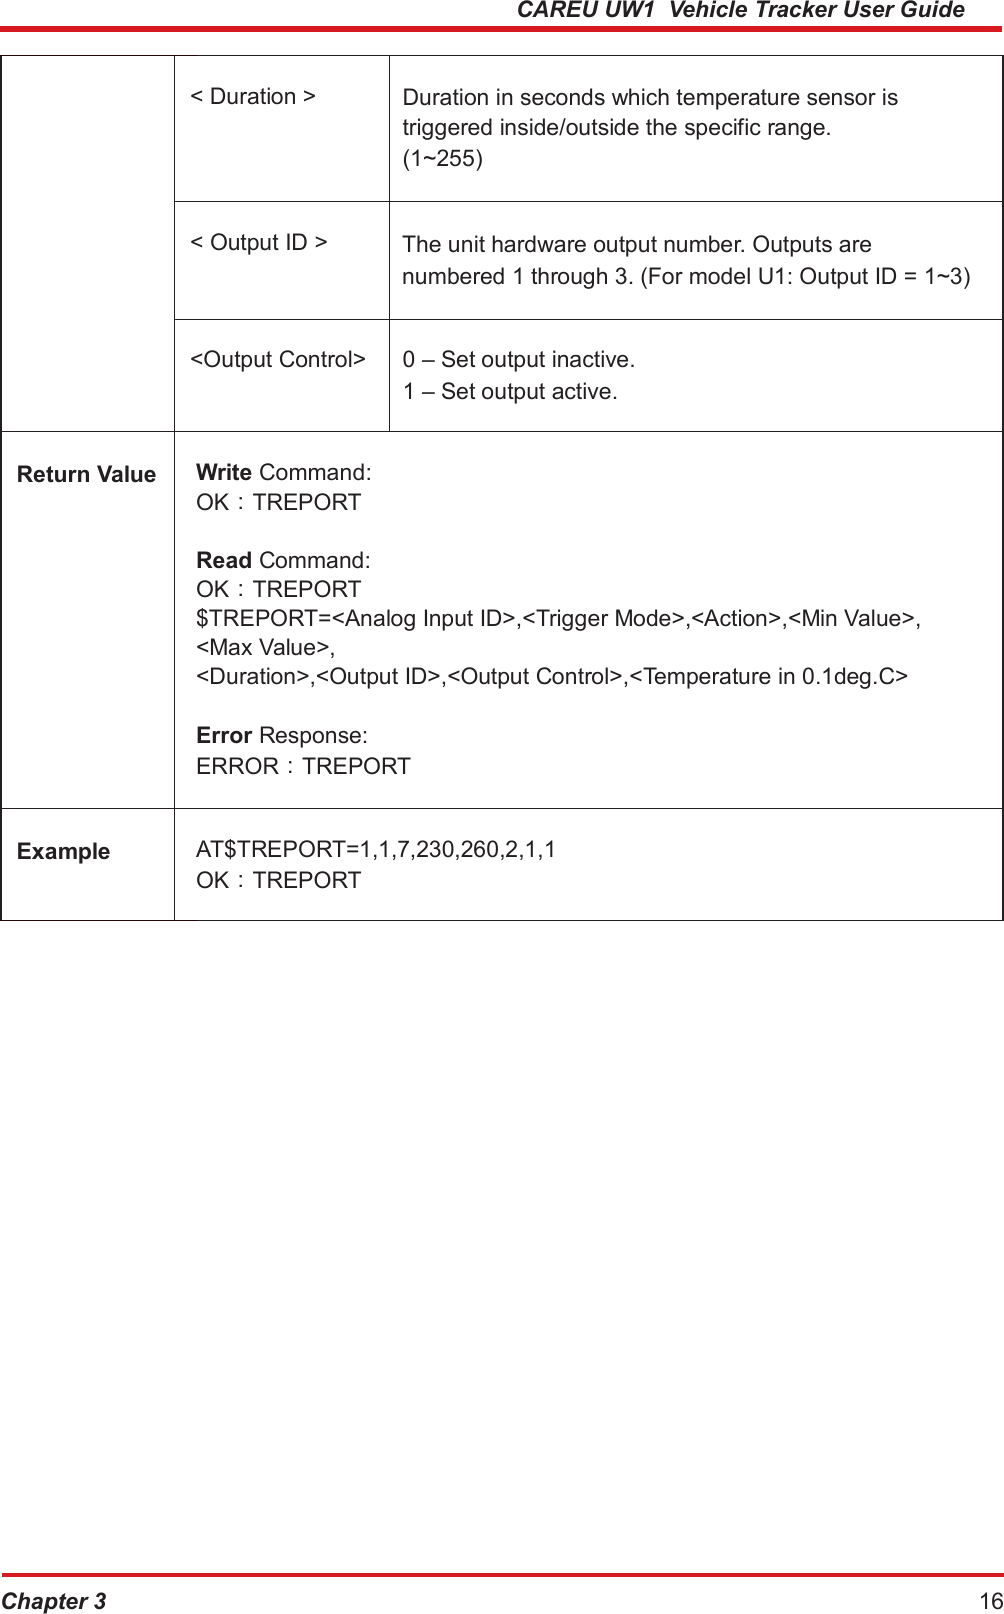
![CAREU UW1 Vehicle Tracker User Guide 4. The Commands to Configure and Operate Accessory Operation 13 Chapter 3 AT$RFIDC RFID control Description This command is used to set/query RFID control configuration. Once the RFID reader senses the tag and Input 1 (Ignition) is ON, the <Output ID> will keep ON until Input (Ignition) OFF for <Delay Time>. Syntax Write Command: AT$RFIDC=<Action>[,<Output ID>,<Delay Time>] Parameters <Action> 1 – Logging When the alert condition is true, log the most re- cent GPS position to non-volatile flash memory for future retrieval. 2 – Polling When the alert condition is true, send the latest GPS position to the remote base station. 4 – Output Control When the RFID sense the tag, the specific out- put port would be enabled. <Output ID> Output ID 1 – Output 1 2 – Output 2 3 – Output 3 4 – Reserve 5 – Reserve 6 – Reserve 7 – Reserve 8 – Reserve <Delay Time> Delay time in 100ms for Output control (1~255) Return Value Write Command: OK:RFIDC Read Command: OK:RFIDC $RFIDC=<Action>,<Output ID>,<Delay Time> Error Response: ERROR:RFIDC Example T$RFIDC=3,1,10 OK:RFIDC Note RFID Report Format: Asynchronous Position Message + <RFID Data>](https://usermanual.wiki/Systems-and-Technology/STAVL1629.User-Manual-Part-2/User-Guide-3648744-Page-7.png)
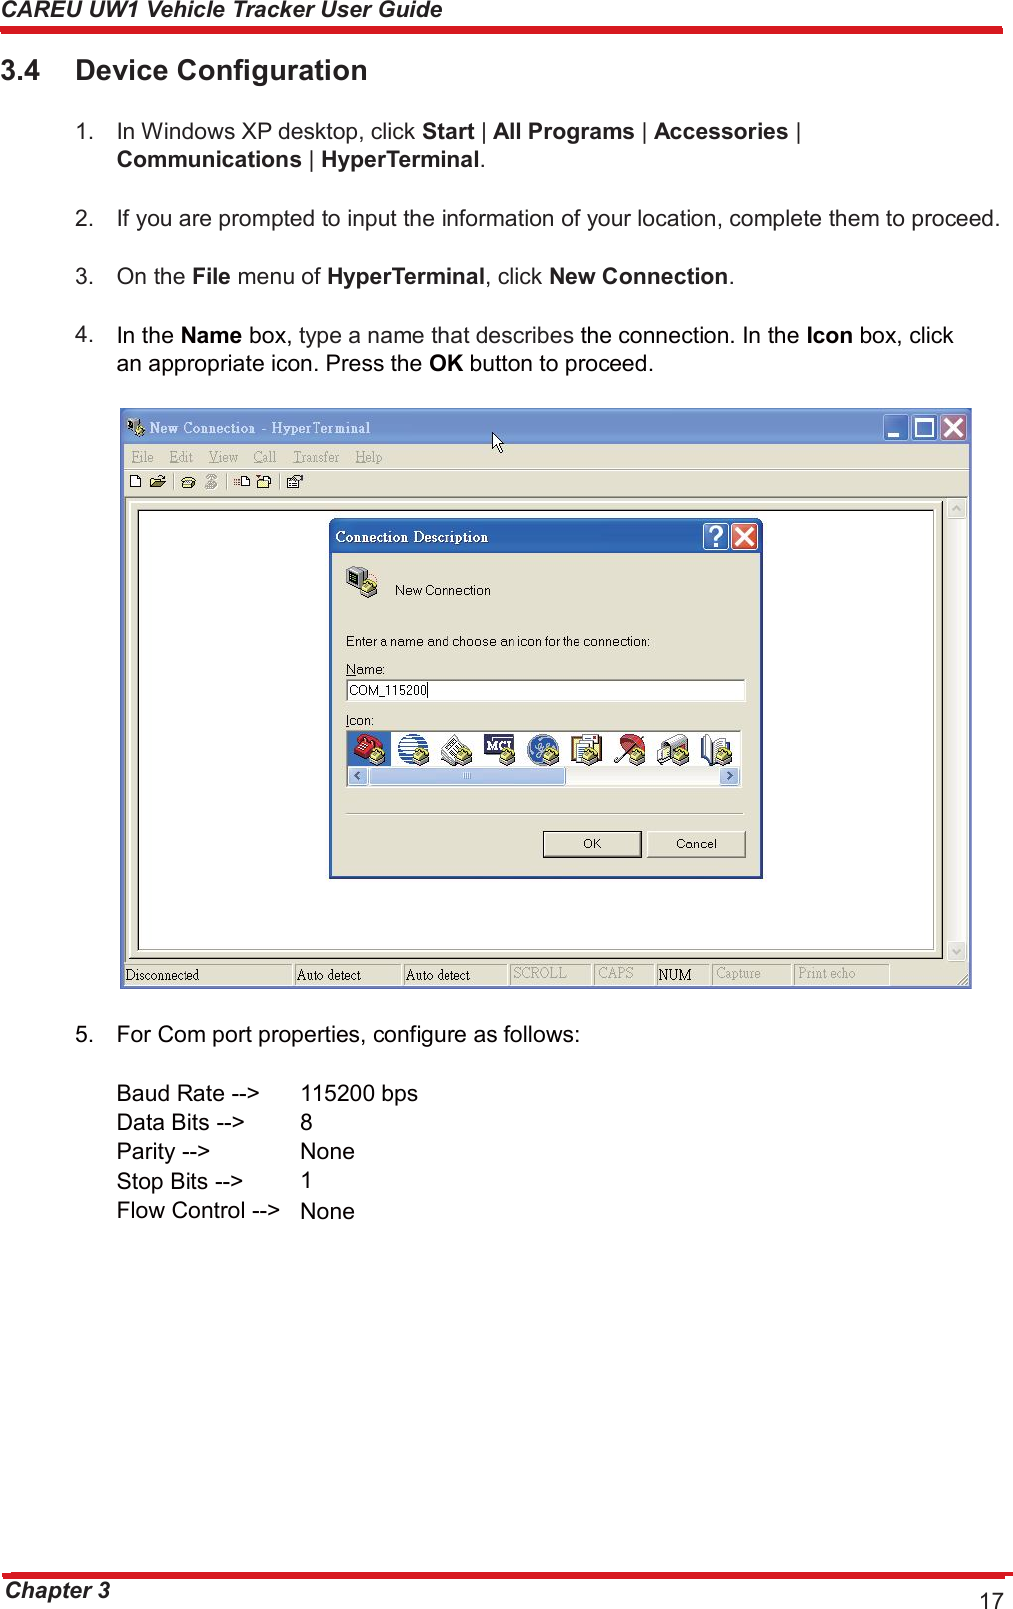
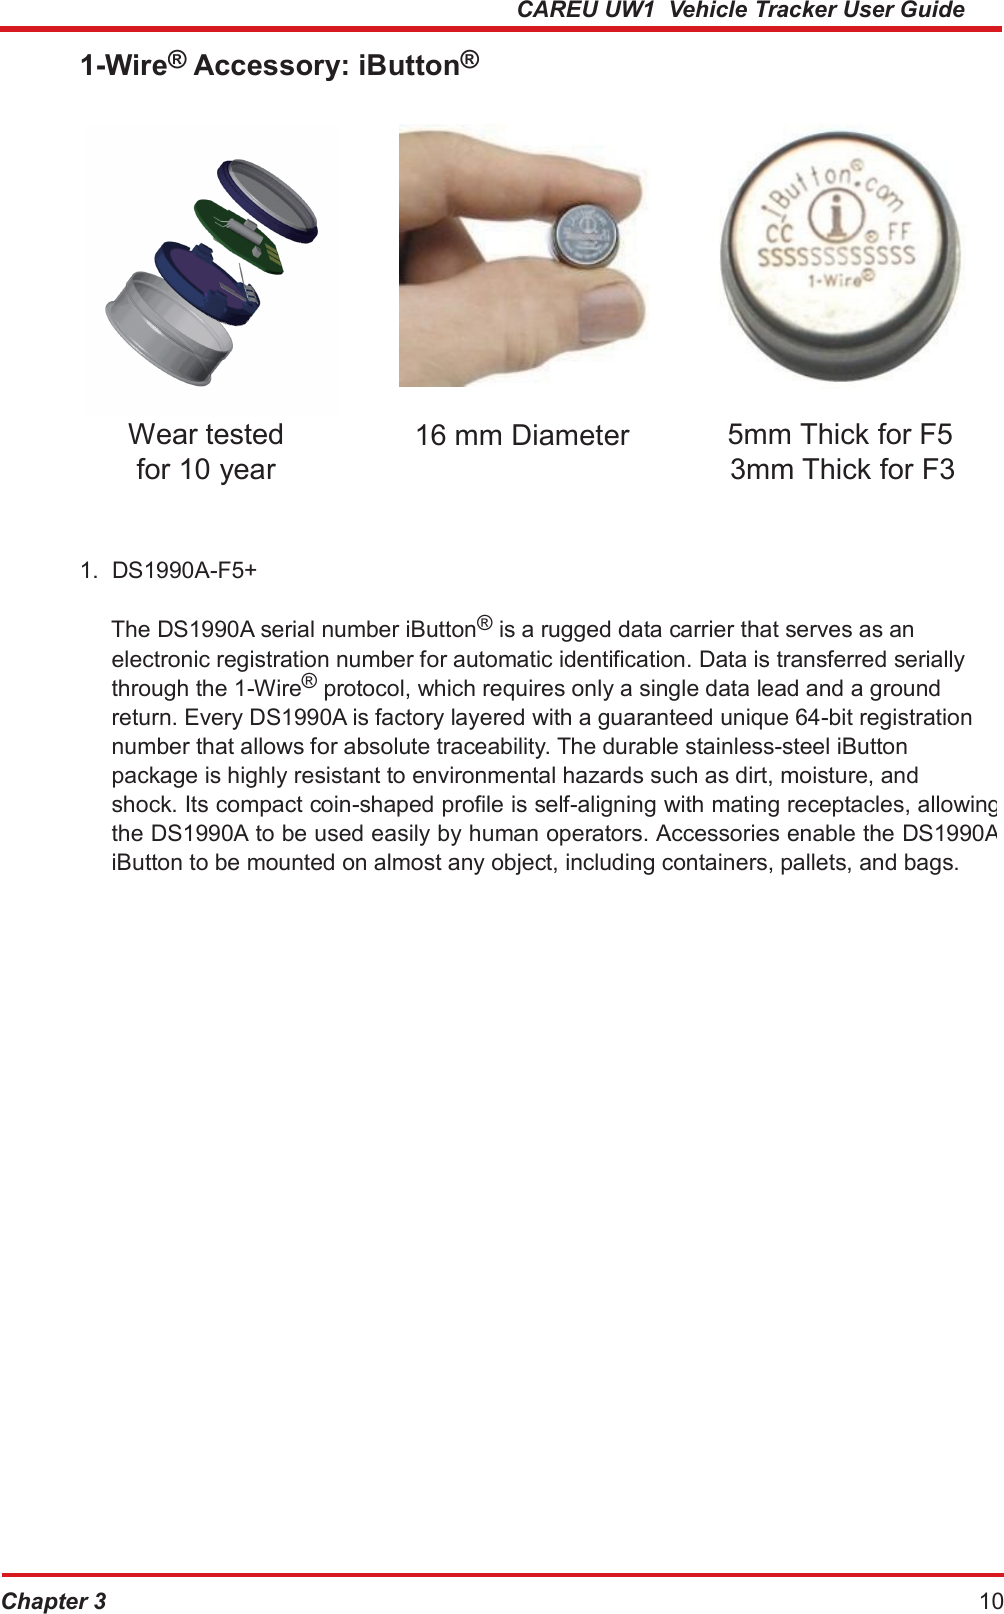
![CAREU UW1 Vehicle Tracker User Guide 6. In the connection that you have just set up, click File | Properties. Select the [Connect To] tab. From the [Connect using] drop down list, select the correct com port by checking it up at Windows XP's [DeviceManager] as previously mentioned on page 9. Go there by clicking Start | Control Panel | System | Hardware | Device Manager. Chapter 3 18](https://usermanual.wiki/Systems-and-Technology/STAVL1629.User-Manual-Part-2/User-Guide-3648744-Page-12.png)
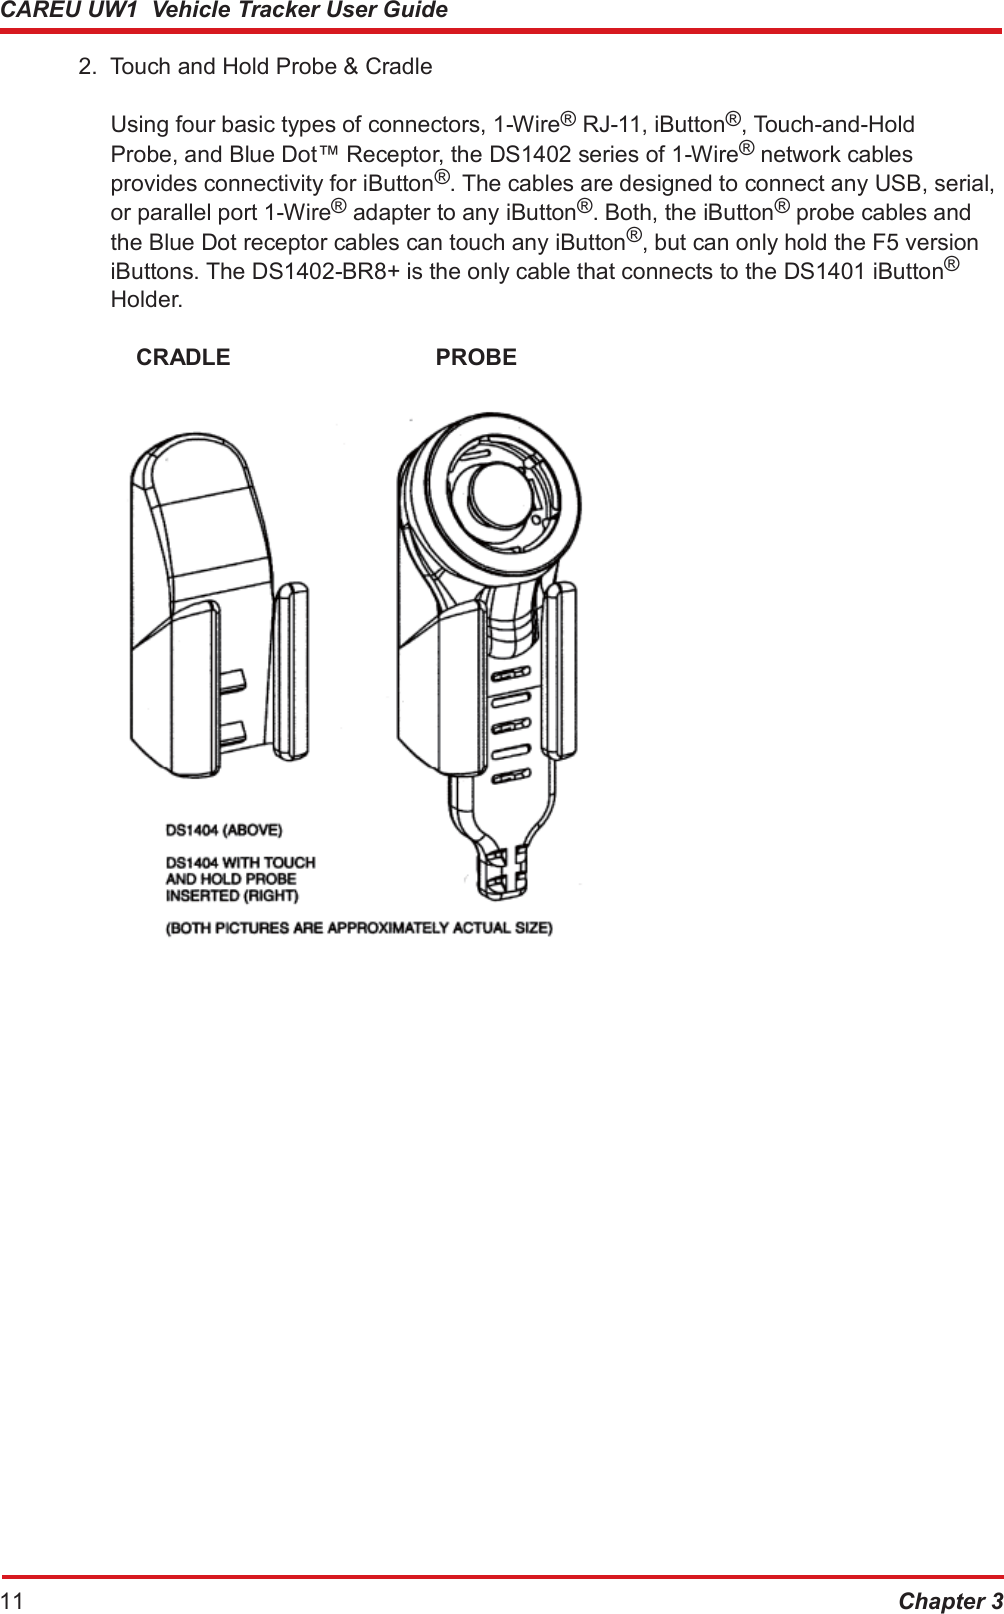
![CAREU UW1 Vehicle Tracker User Guide 7. In the File menu, click Properties. Click the [Settings] tab. Press the ASCII Setup button. 8. In the [ASCII Sending] group box. Select both Send line ends with line feeds and Echo typed characters locally. Press the OK button. 19 Chapter 3](https://usermanual.wiki/Systems-and-Technology/STAVL1629.User-Manual-Part-2/User-Guide-3648744-Page-13.png)
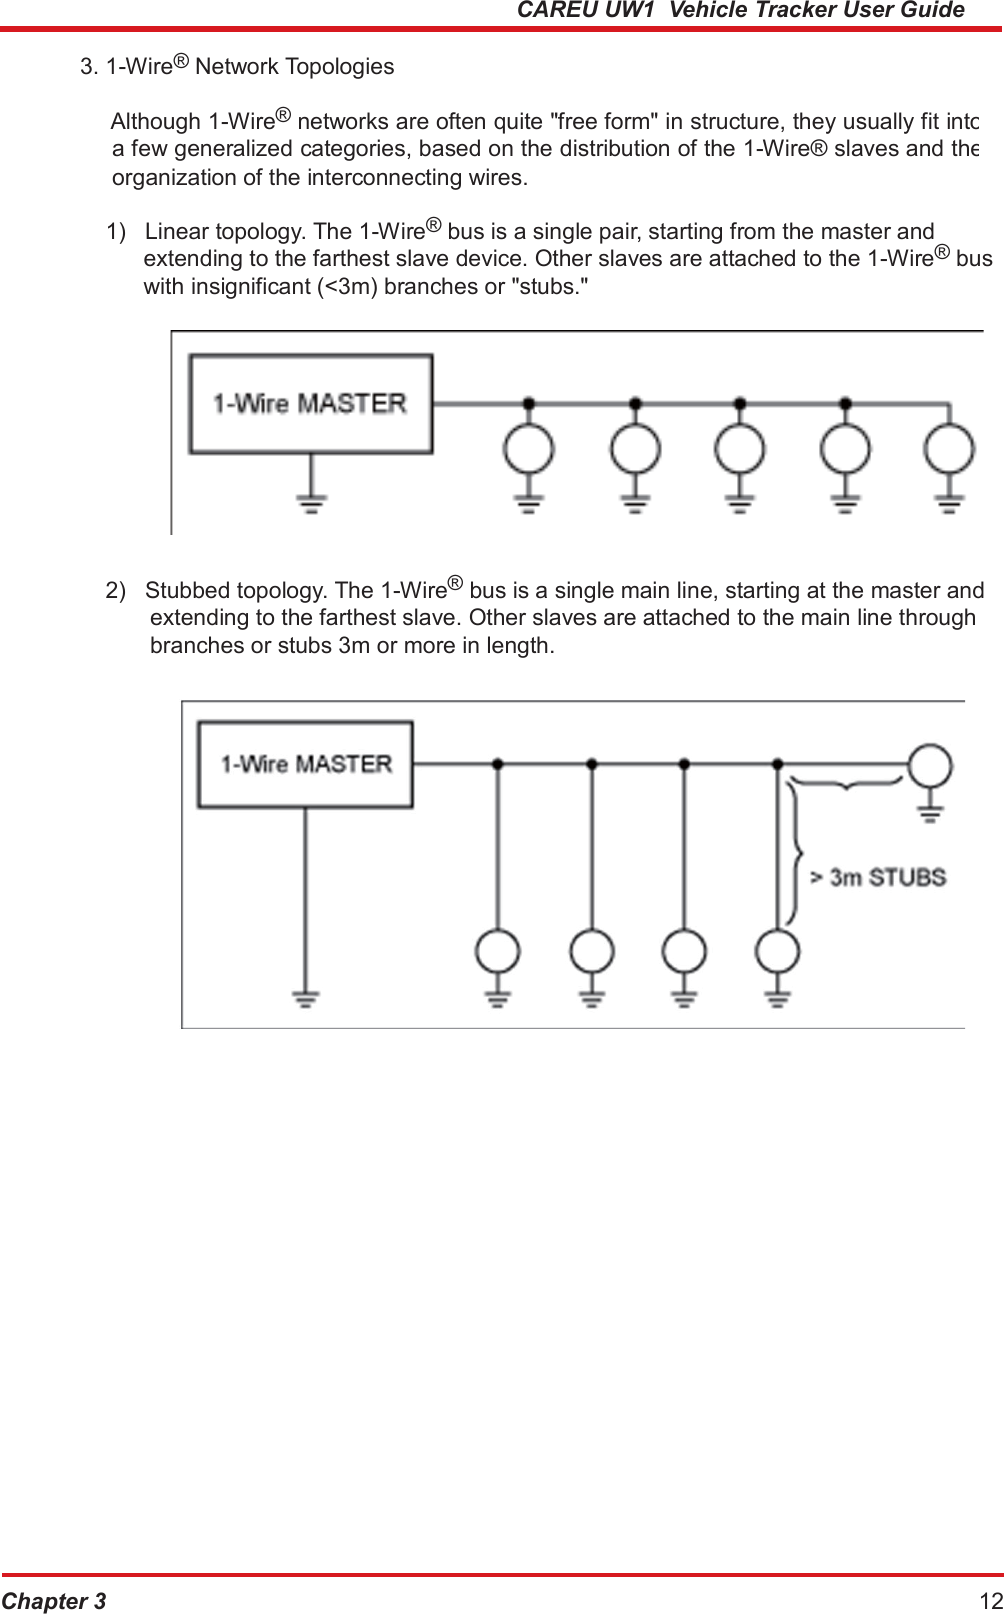
![CAREU UW1 Vehicle Tracker User Guide 9. Connect your the CAREU U1 PLUS device to power as mentioned in Power, RS- 232, and I/O Cable Connection on page 9. The device startup message will be displayed. 10. In [HyperTerminal] window, type in the command "AT$VERSION?" and press the Enter key. The hardware and firmware version will show. As long as your [HyperTerminal] window appears as the screenshot below, a connection between the device and your system has already been built up and working. It is time to send all configuration commands. Chapter 3 20](https://usermanual.wiki/Systems-and-Technology/STAVL1629.User-Manual-Part-2/User-Guide-3648744-Page-14.png)