Systems and Technology STAVL1520 Personal Tracker User Manual PT IT P1 00 1310UEN indd
Systems & Technology Corp. Personal Tracker PT IT P1 00 1310UEN indd
UserManual.wiki
>
Systems and Technology
>
STAVL1520 User Manual
User Manual
Navigation menu
Upload a User Manual
Namespaces
Wiki Guide
HTML
PDF
Info
Views
User Manual
Discussion / Help
Navigation

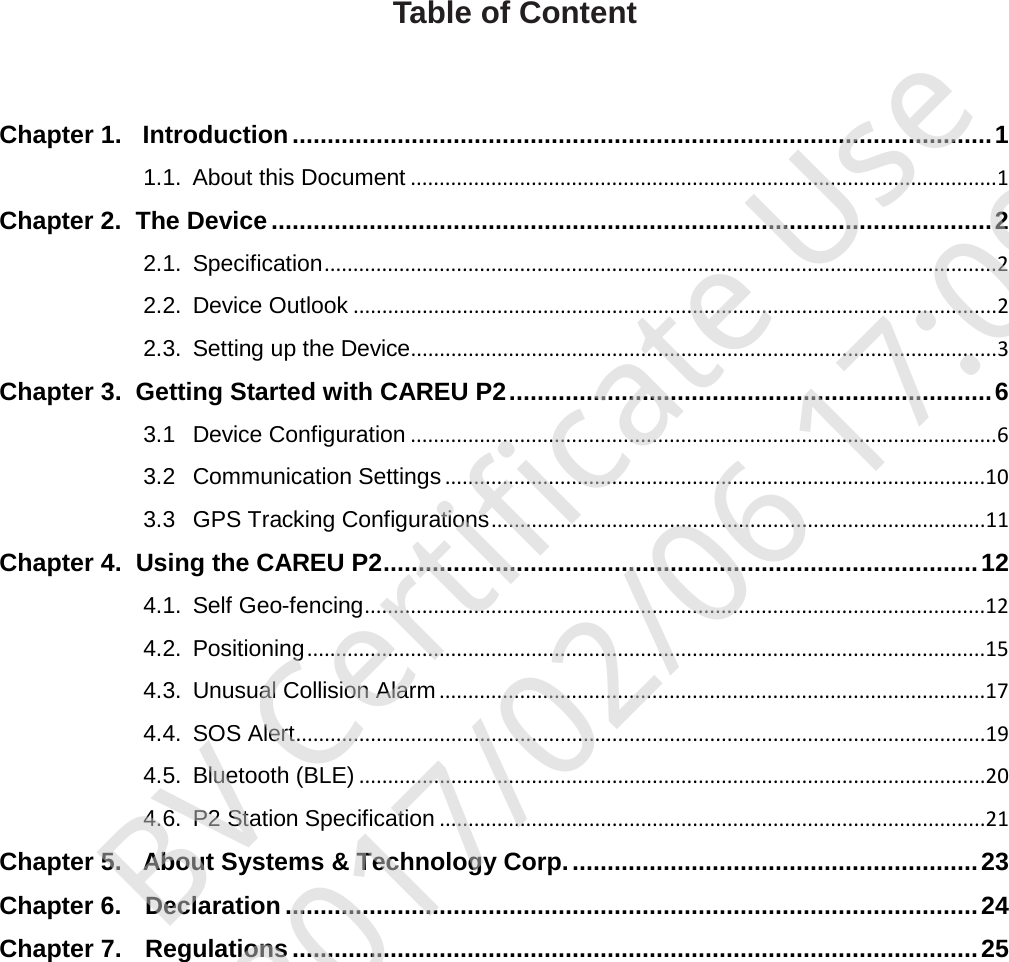

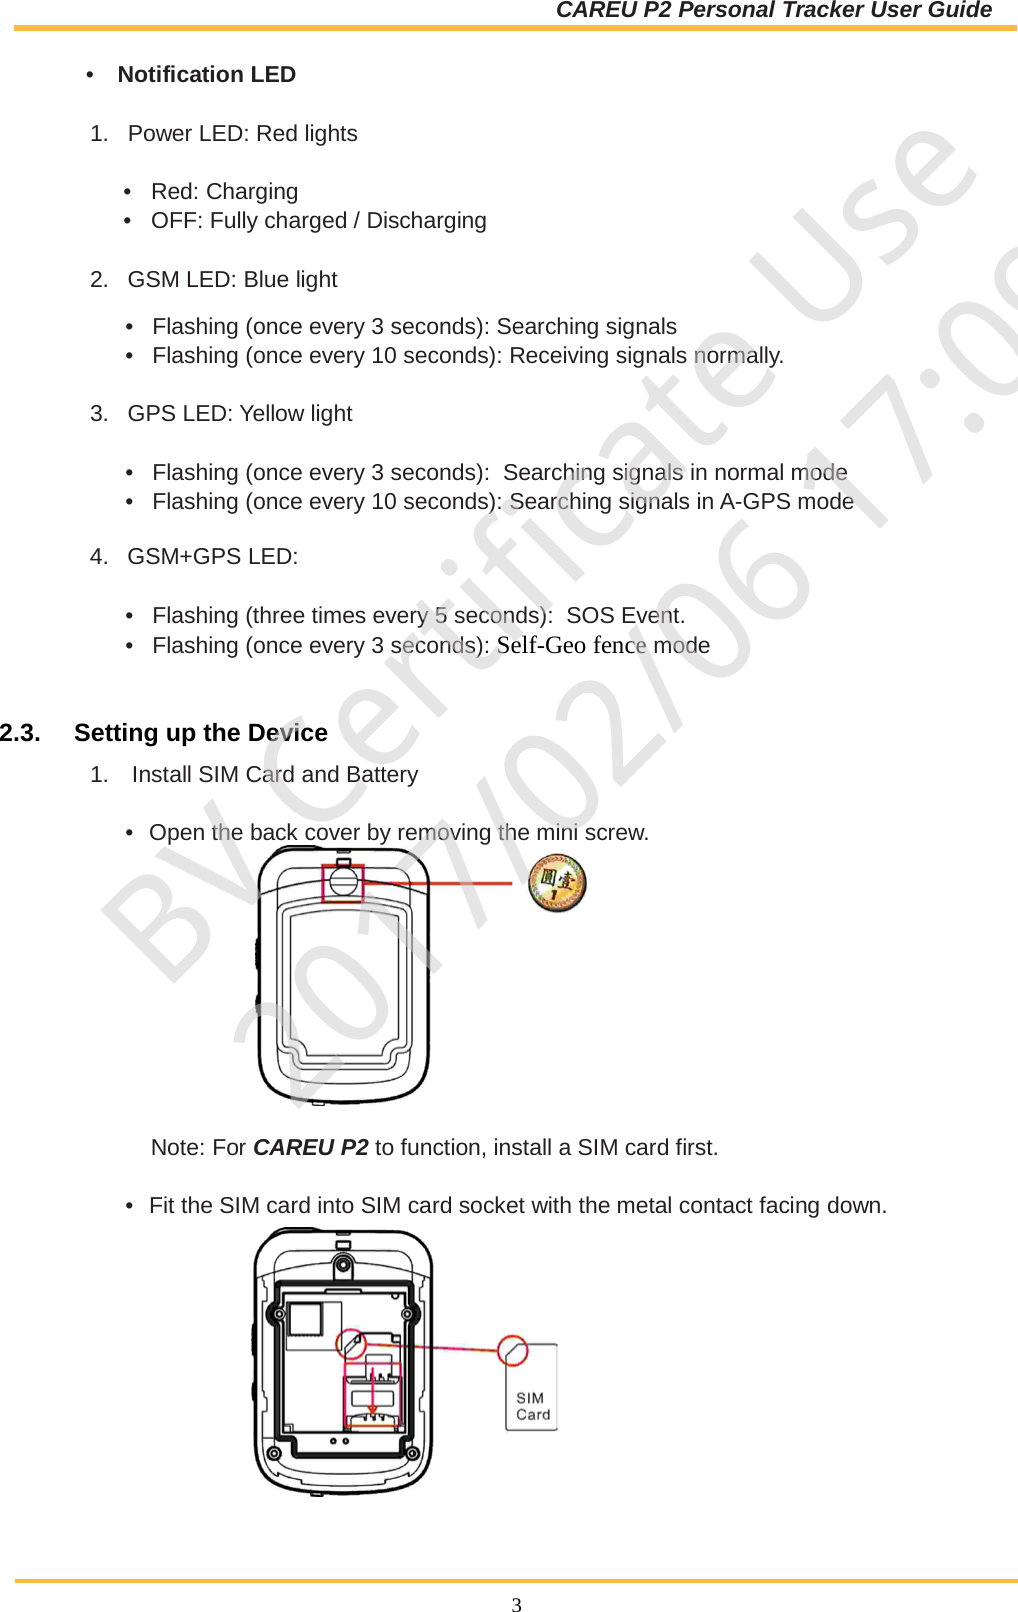


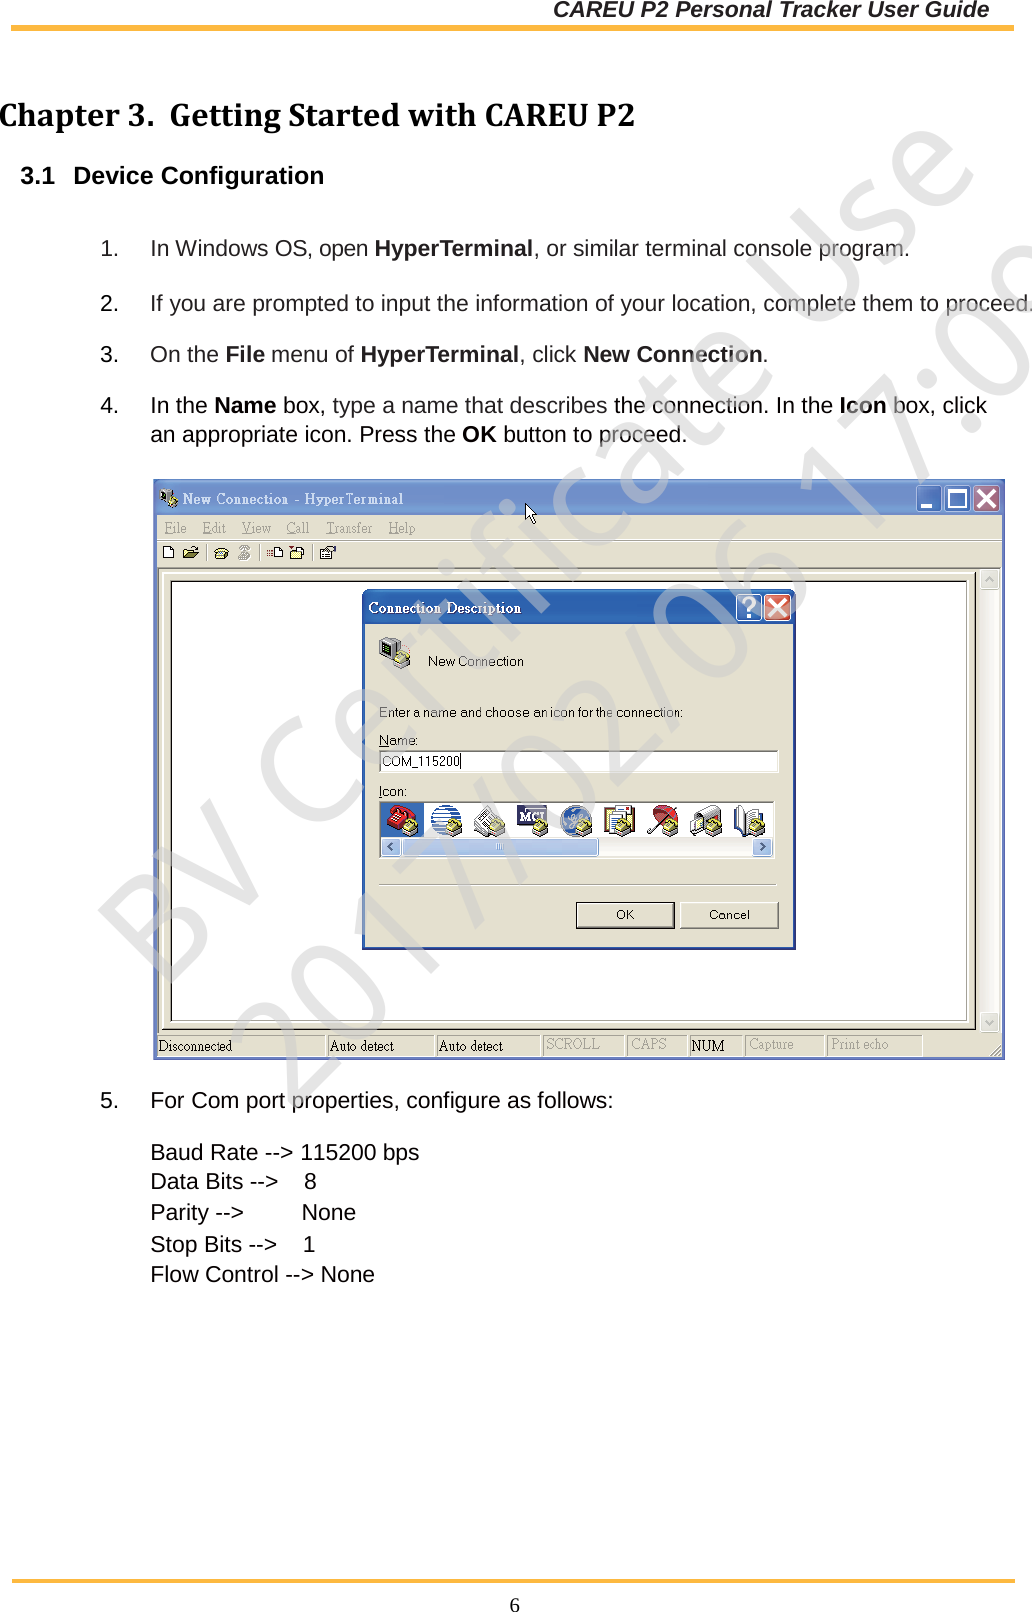
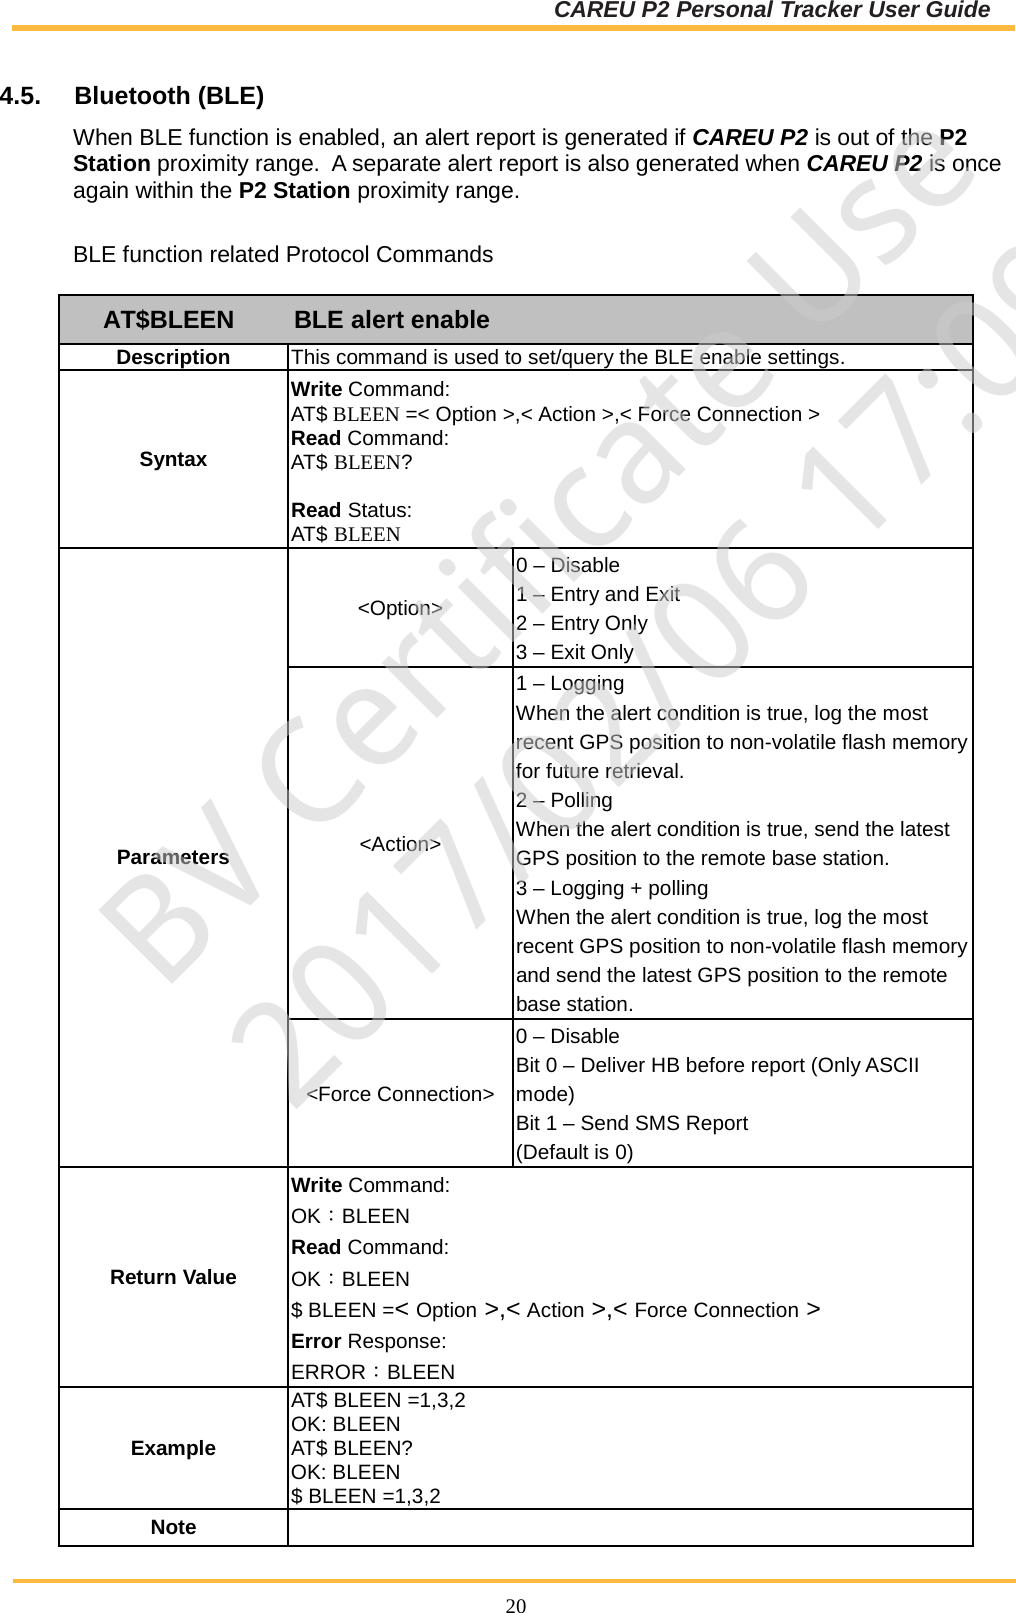
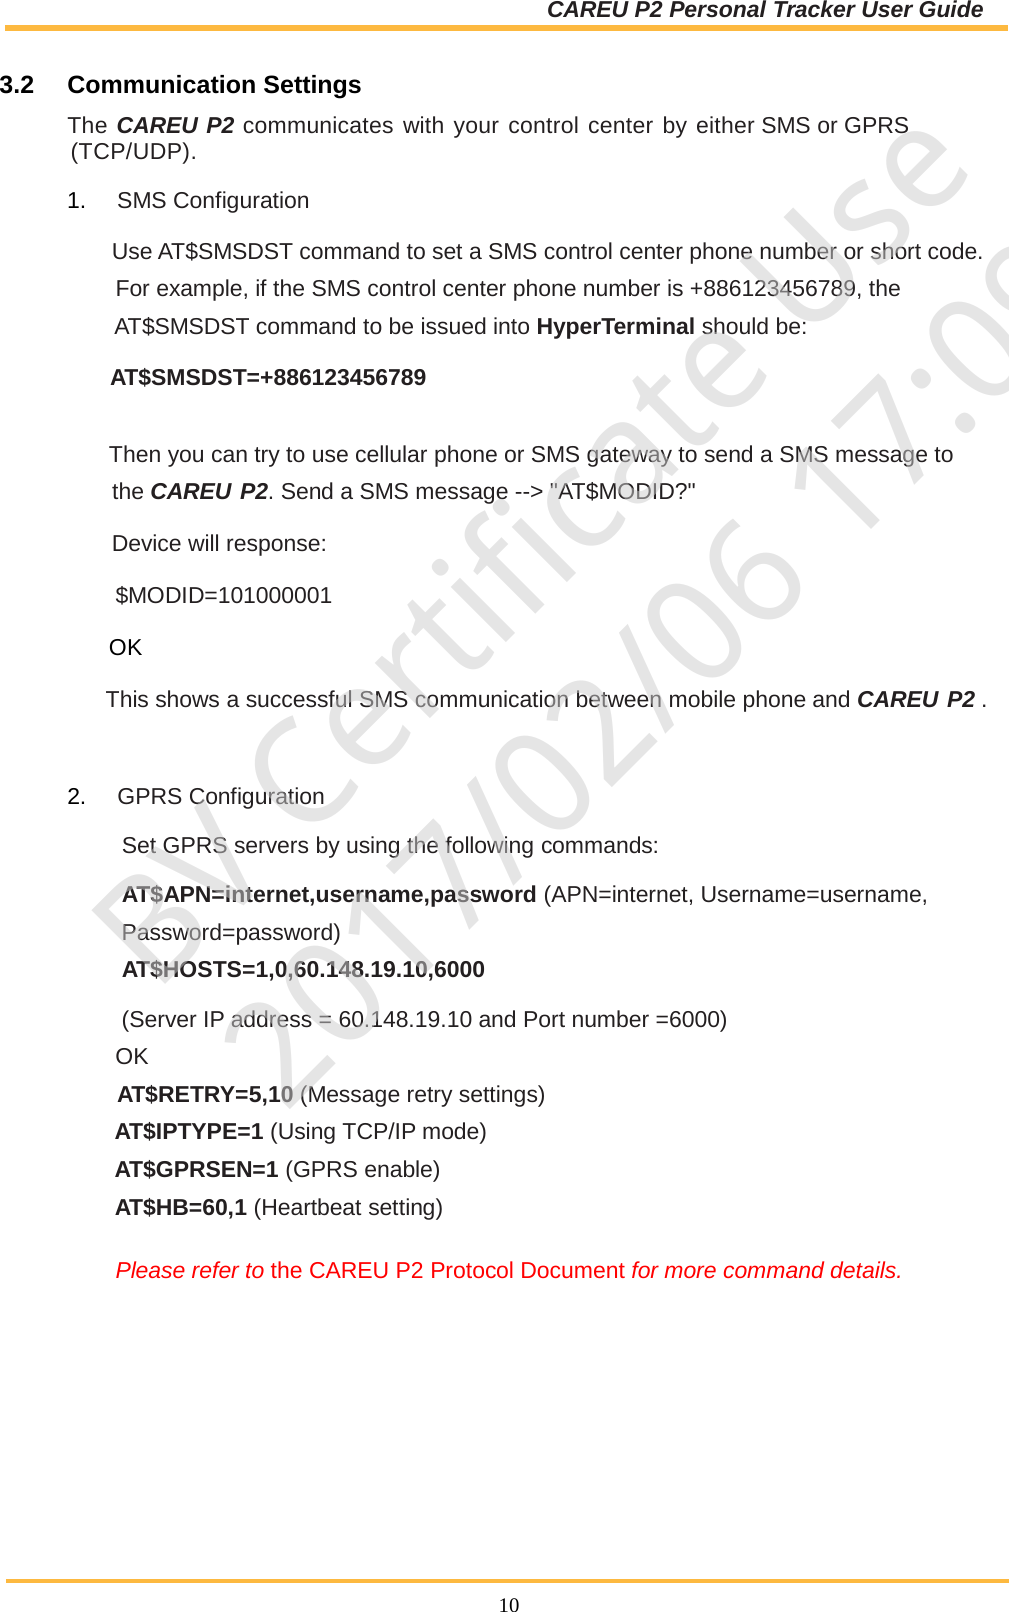
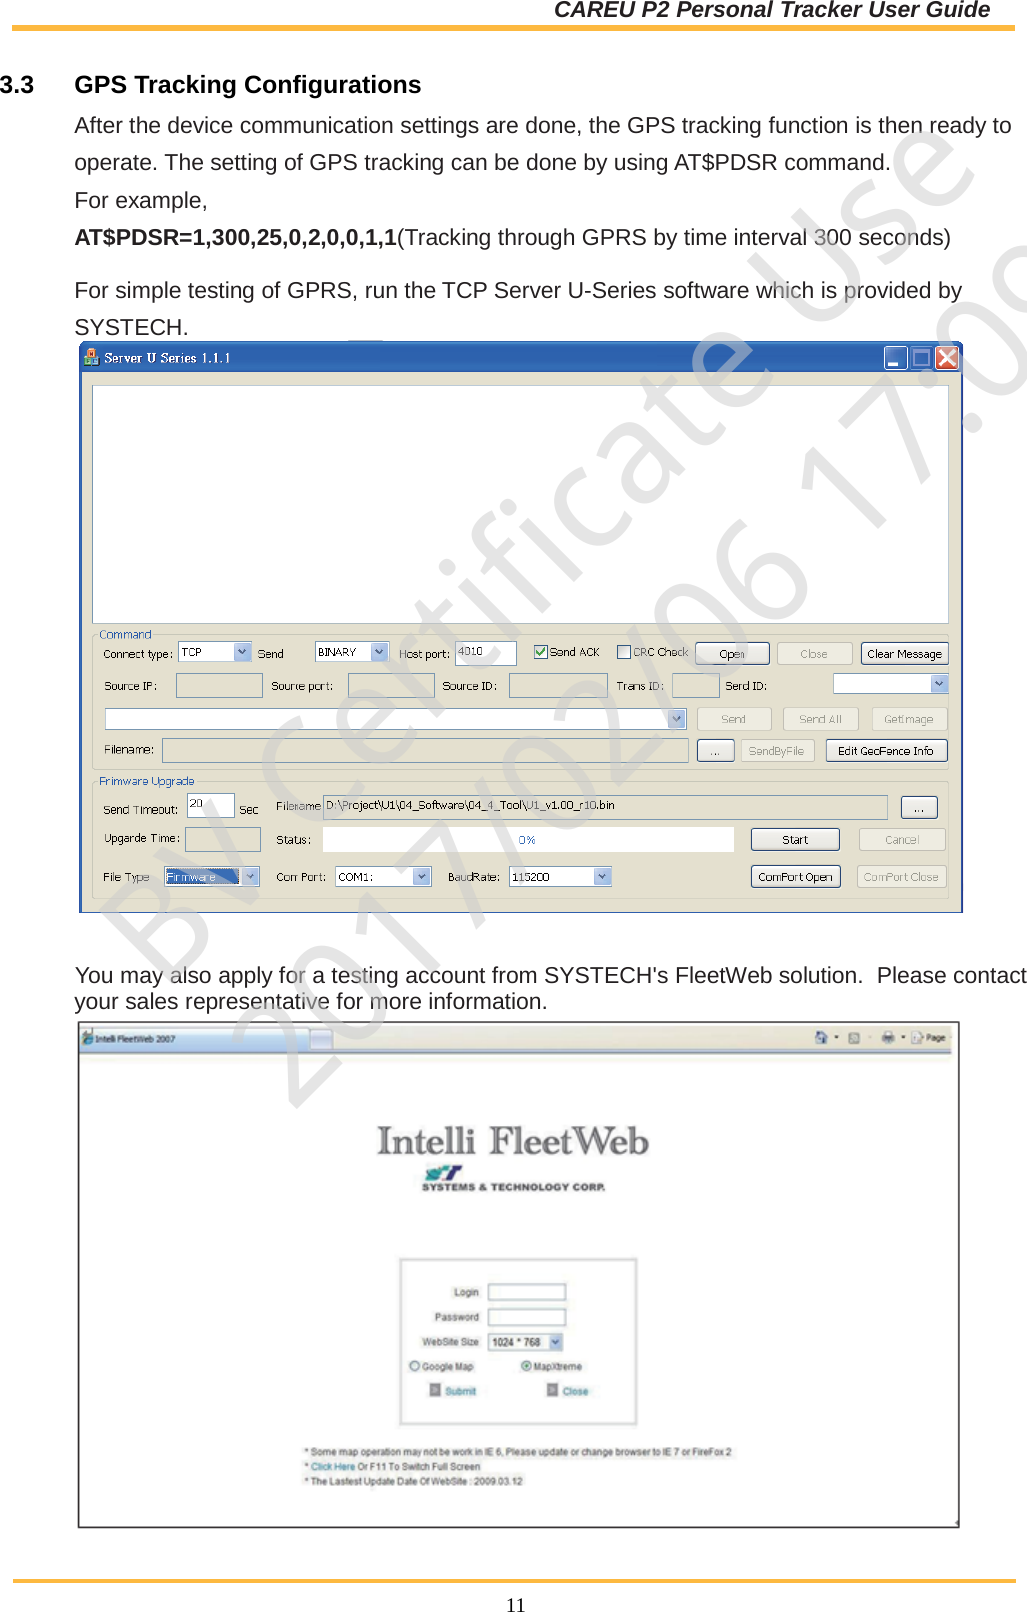
![CAREU P2 Personal Tracker User Guide 7 6. In the connection that you have just set up, click File | Properties. Select the [Connect To] tab. From the [Connect using] drop down list, select the correct com port by checking Window’s [DeviceManager]. BV Certificate Use2017/02/06 17:09](https://usermanual.wiki/Systems-and-Technology/STAVL1520/User-Guide-3379264-Page-10.png)
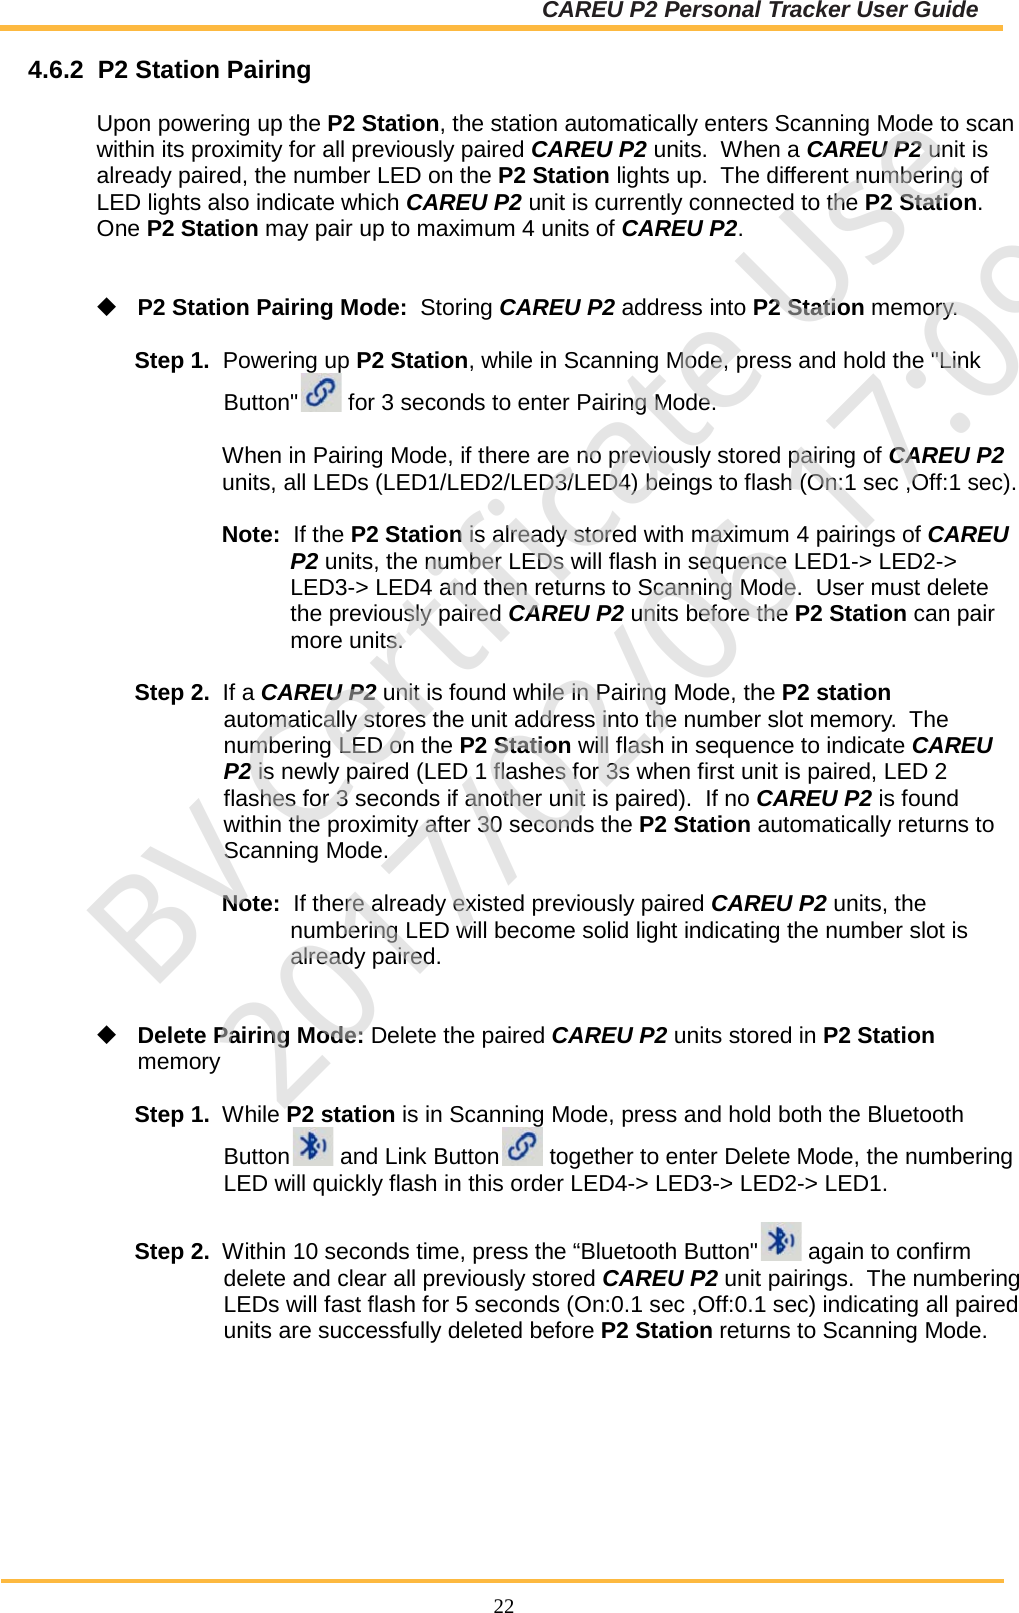
![CAREU P2 Personal Tracker User Guide 8 7. In the File menu, click Properties. Click the [Settings] tab. Press the ASCII Setup button. 8. In the [ASCII Sending] group box. Select both Send line ends with line feeds and Echo typed characters locally. Press the OK button. BV Certificate Use2017/02/06 17:09](https://usermanual.wiki/Systems-and-Technology/STAVL1520/User-Guide-3379264-Page-11.png)
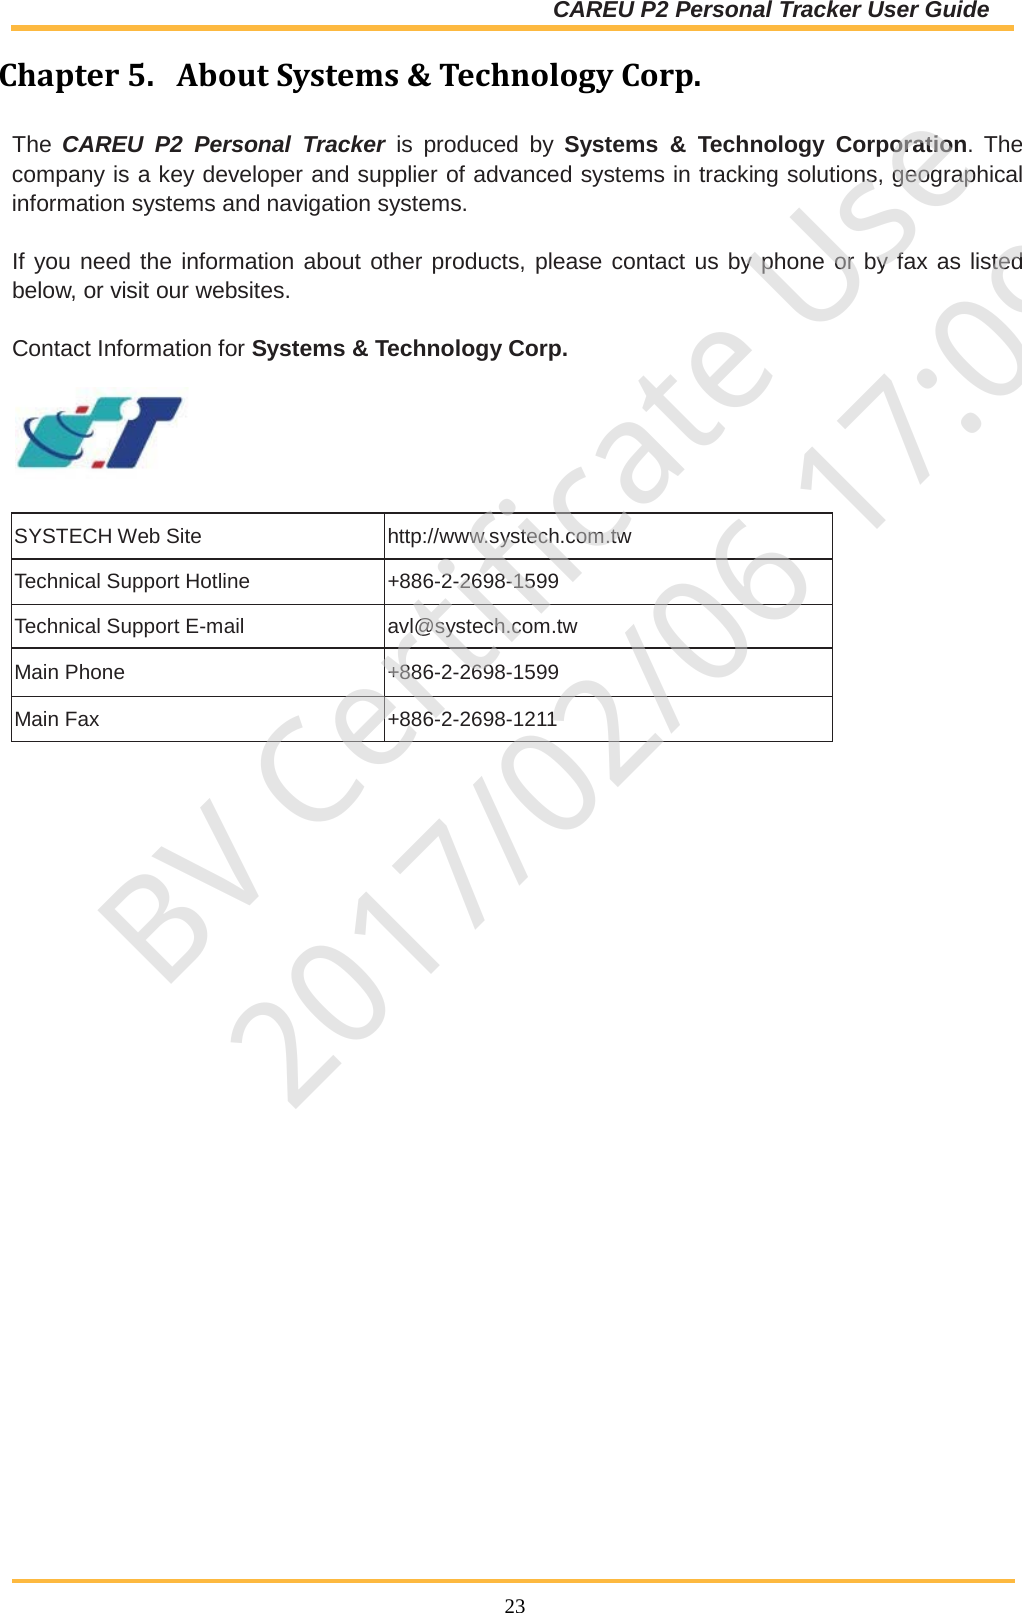
![CAREU P2 Personal Tracker User Guide 9 9. Connect CAREU P2 and Power ON. 10. In the [HyperTerminal] window, type in the command "AT$VERSION?" and press the Enter key. The hardware and firmware version will show. As long as your [HyperTerminal] window appears as the screenshot below, a connection between the device and your system has already been built up and working. It is time to send all configuration commands. BV Certificate Use2017/02/06 17:09](https://usermanual.wiki/Systems-and-Technology/STAVL1520/User-Guide-3379264-Page-12.png)
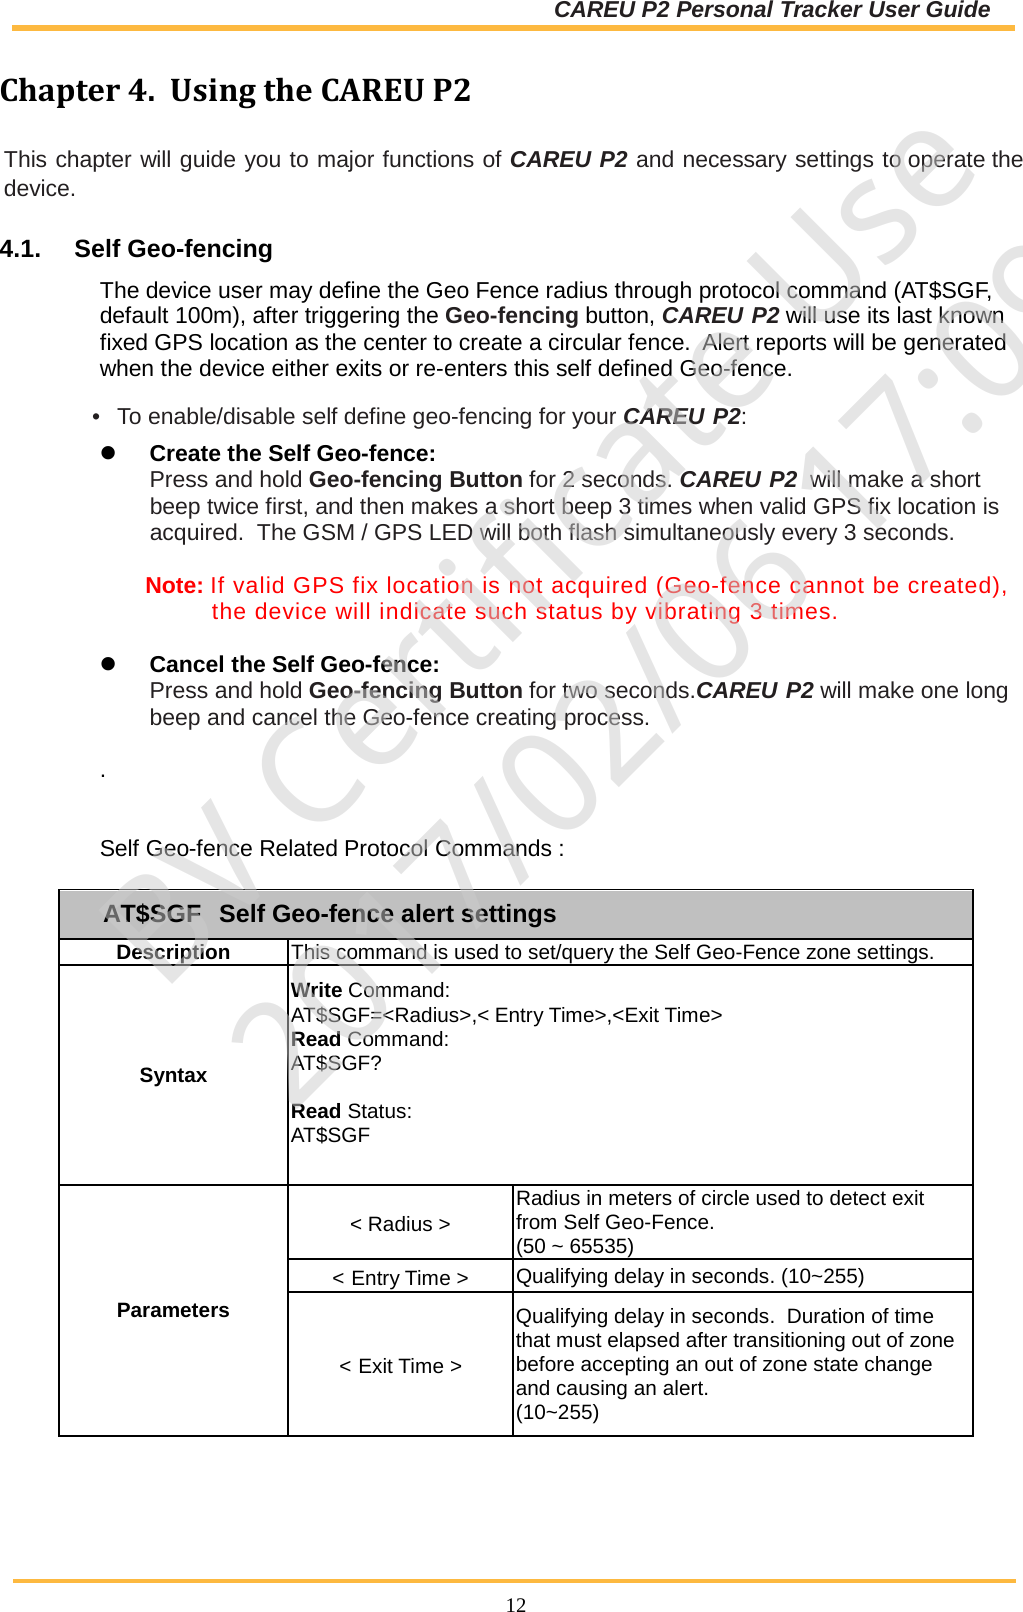
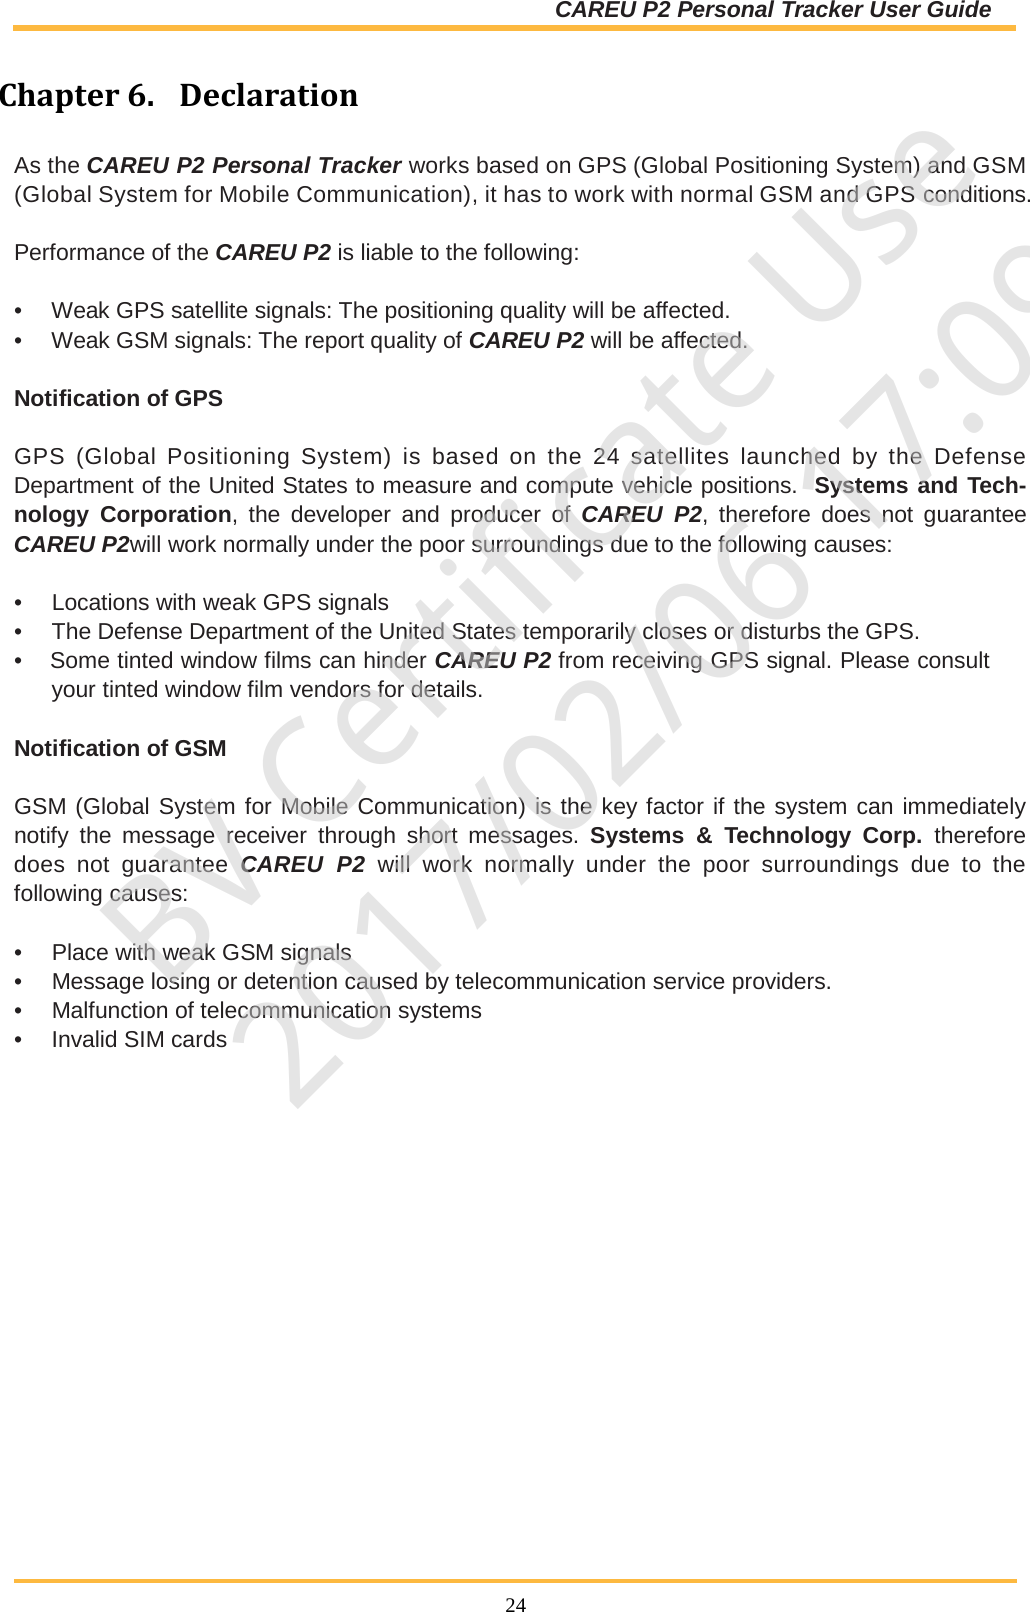
![CAREU P2 Personal Tracker User Guide 15 4.2. Positioning Setting regular timed interval or distance travelled interval reports. AT$PDSR Position and device status reporting settings Description Position and data shall be reported when the device is moving. Reporting shall be based upon satisfying a minimum time requirement and minimum distance requirement Syntax Write Command: AT$PDSR=<Mode>,<Min. Time>,<Min. Distance>,< Reserve >, [<Destination>,< Reserve >,<Reserve>,<Time Multiplier>,<IgnoreGPS>] Read Command: AT$PDSR? Parameters <Mode> 0 – Disable Bit 0(2^0 = 1) – Time Mode Bit 1(2^1 = 2) – Distance Mode Bit 2(2^2 = 4) – Reserved Bit 3(2^3 = 8) –Reserved Bit 4(2^4 = 16) – Time or Distance Mode You can set two or more conditions like 3(1+2) for ignition on and time conditions. Bit 4 can’t be set with Bit 0 or Bit1 simultaneously. <Min. Time> Minimum Time in seconds that must elapse before reporting next position. (1 – 65535) <Min. Distance> Minimum Distance in meters that must be traveled before reporting next position. (25 – 50000) <Reserve> 0 <Destination> Bit 0 – Log to Data Queue Bit 1 – Transmit GPRS Bit 2 – Reserved Bit 3 – Transmit SMS < Reserve > 0 <Reserve> 0 <Time Multiplier> 1 – The PDSR Log and GPRS messages will be sent according to the <Min. Time> setting. n – The PDSR Log messages will be performed according to the <Min. Time> setting, the PDSR GPRS messages will be sent according to <Min. Time> times n. (2 – 65535) <IgnoreGPS> 0 – Continuously tracking regardless of GPS signal. 1 – Ignore no GPS signal tracking report. BV Certificate Use2017/02/06 17:09](https://usermanual.wiki/Systems-and-Technology/STAVL1520/User-Guide-3379264-Page-18.png)