Stormblue USD3300 Upgradeable Universal Smart Drive User Manual Manual
Stormblue Co., Ltd. Upgradeable Universal Smart Drive Manual
UserManual.wiki
>
Stormblue
>
USD3300 User Manual
users manual
Navigation menu
Upload a User Manual
Namespaces
Wiki Guide
HTML
PDF
Info
Views
User Manual
Discussion / Help
Navigation
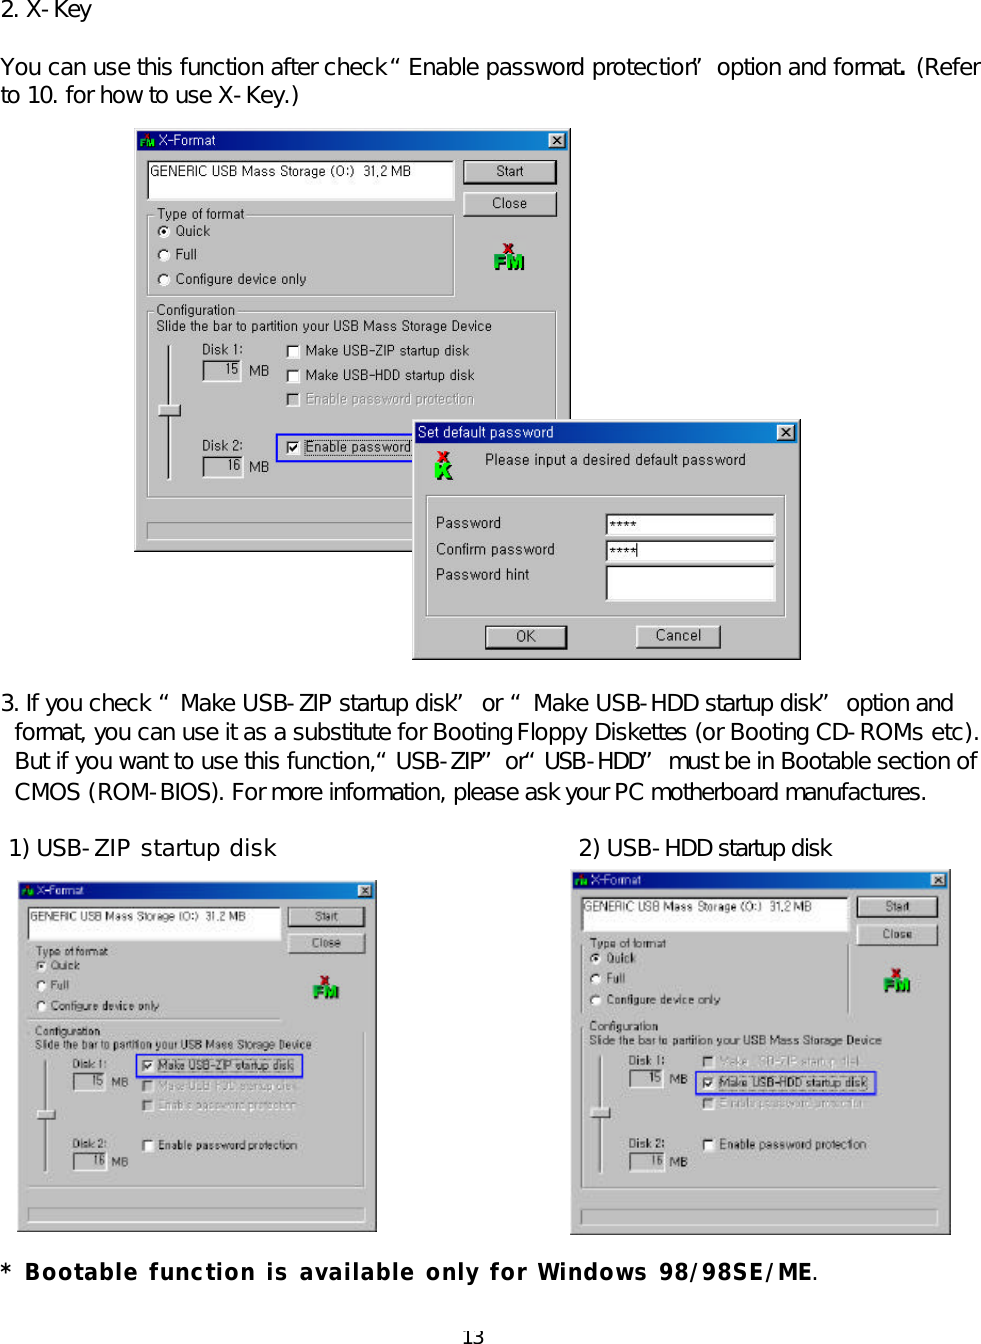
![7 2. Linux Operating System The USB DISK supports Linux kernel versions 2.4.x or higher. The following installation instructions have been documented below regarding Linux commands for the USB DISK. Please note that when disconnecting the USB DISK, we suggest that you un-mount the USB DISK before removing. Linux Instructions for the USB Disk: [Installation] 1. Install Linux kernel version 2.4.x or higher. 2. Login as “root”. 3. Open terminal window after booting with X-Window. 4. Connect the USB DISK to the USB port. 5. Enter the following commands in the terminal window (shell input mode). [Access to USB SCSI devices] 1. # ls /proc/scsi/usb-storage-0 The numbers of USB SCSI device are displayed (0, 1, 2,....). 2. # cat /proc/scsi/usb-storage-0/0 The information of the firmware related to the USB DISK is displayed. [Set Partitions or format mode] 1. # fdisk /dev/sda You can use the “fdisk” function in Linux (Look for the fdisk manual for mor e details). [DOS format] 1. # mkfs.msdos /dev/sda1 You can format with DOS/FAT(note: You cannot format when the USB DISK is mounted). [Mount] 1. # mkdir /mnt/usd Make a directory where the USB DISK will be mounted. 2. # mount /dev/sda1 /mnt/usd Mount the USB DISK to “/mnt/usd” directory. (The USB DISK will be linked to “/mnt/usd” if there is no special message.) [Unmount] 1. # umount /dev/sda1 Release mount. [Tips] 1. The command to un-mount the USB DISK is “umount”. 2. If you’re in “/mnt/usd” directory, the USB DISK cannot be un-mounted. 3. We recommend you mount the USB DISK with “/etc/fstab” and “/dev/sda1 /mnt/usd auto defaults 0 0” in the text editor. 4. In Red Hat Linux, you can use “Disk Management (User Mount Tool)” in “GNOME” for Mount management. 5. You should unmount the USB DISK before you disconnect the drive; ensure the LED turns from blinking to lighting, which may take a few seconds.](https://usermanual.wiki/Stormblue/USD3300/User-Guide-309619-Page-7.png)
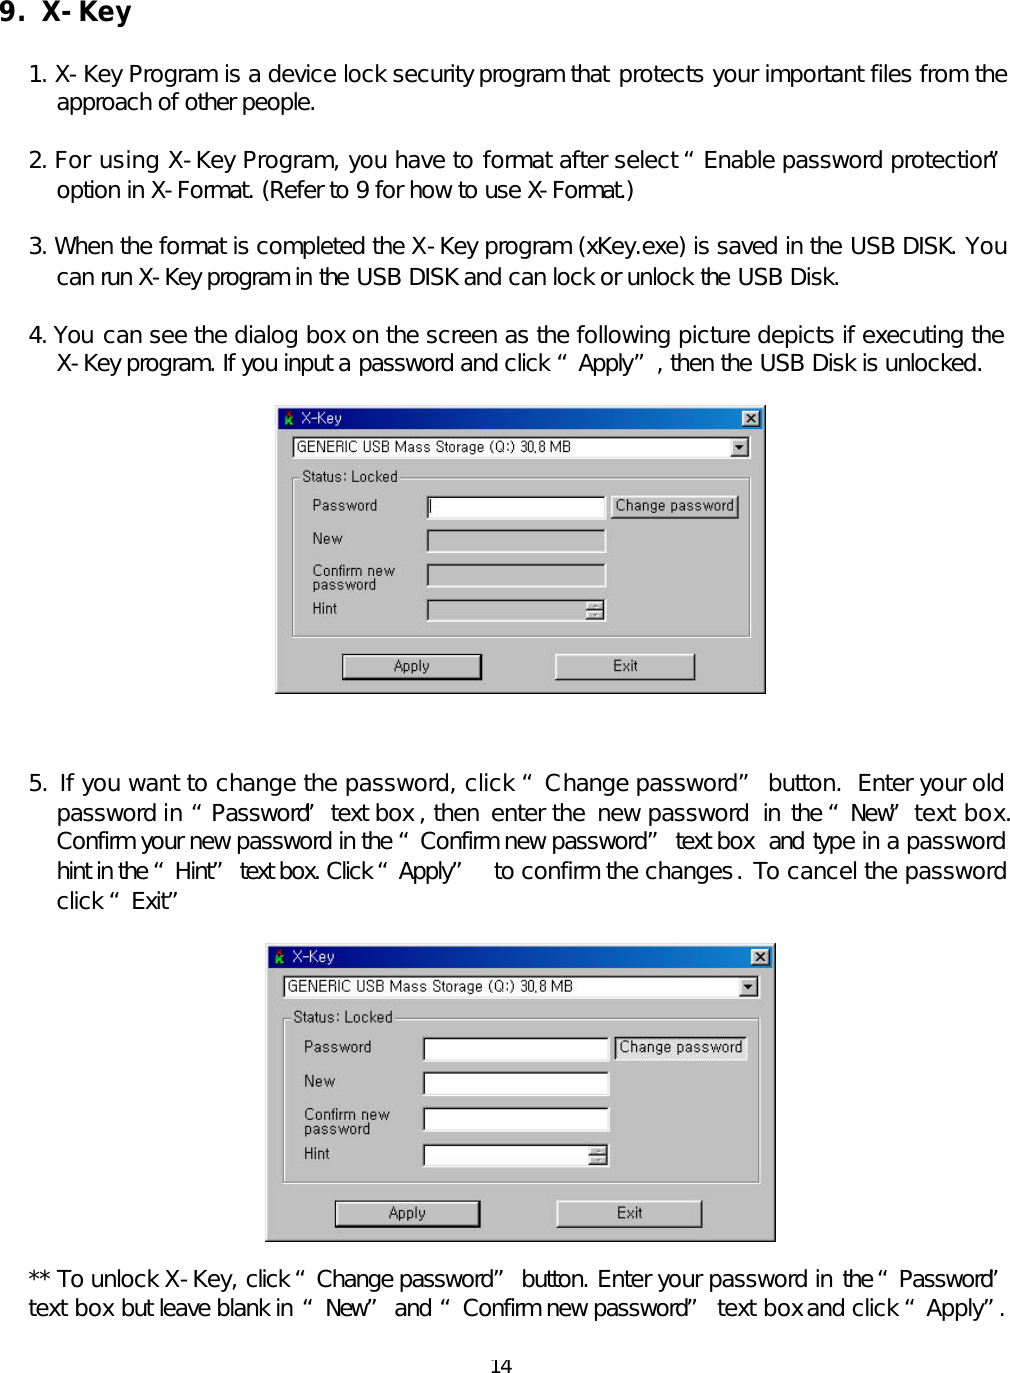
![8 6. CD Auto-run Program (only for Windows’ users) Auto-run program is executed automatically when you insert the CD-ROM in your PC. You can install required software through this program. ① Windows 98/SE Device Drivers : USB Disk format program. Refer to “7.1 Auto Installation” ② X-Format : Refer to “8. X-Format” ③ X-Key [Device Lock] : USB Disk device Lock. Refer to “9. X-Key” ④ X-File Security[File Lock] : File Encryption program. Refer to “X -Series Utility” Manual ⑤ X-Lock [PC Lock]: PC Lock program. Refer to “X-Series Utility” Manual ⑥ X-Autorun : USB Disk file automatic-running program. Refer to “X -Series Utility” Manual ⑦ X-Mailer : No SMPT Mobile e-mailer program. Refer to “X -Series Utility” Manual](https://usermanual.wiki/Stormblue/USD3300/User-Guide-309619-Page-8.png)

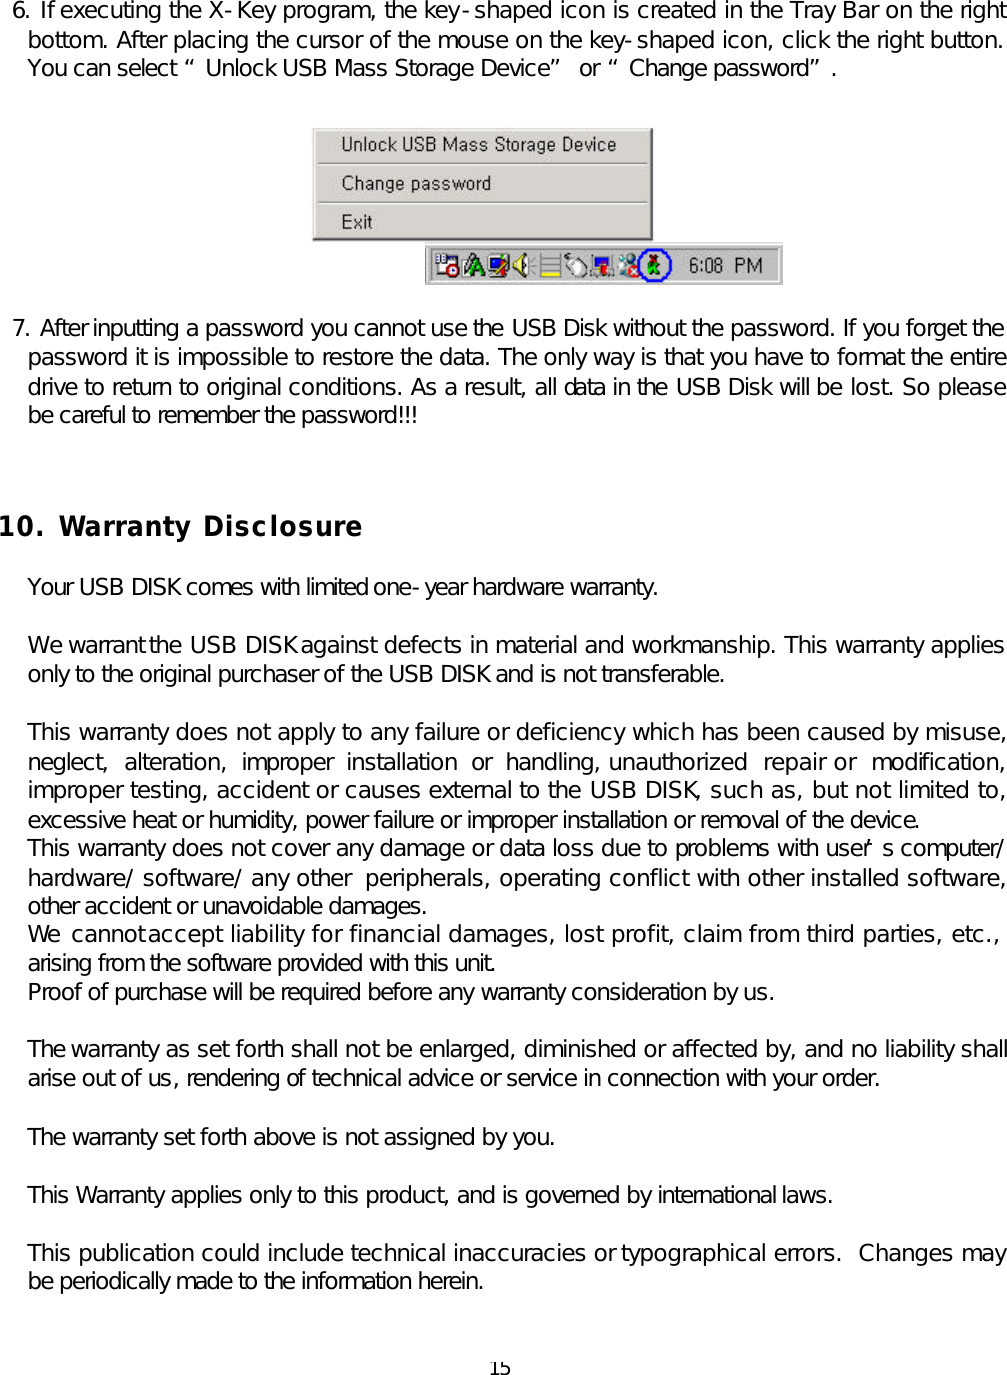
![12 8. X-Format * The USB Disk has been formatted at the Factory without the X-Key program and without the Bootable disk program. You may format the drive again before using the above programs with your operating system. After format is completed, unplug and reconnect the USB Disk to the USB port. 1. Open the X-Format program window, you can choose one of three types of formats as the following picture depicts [(a) in Pic]. 1) Quick Format: As Logical Format, it’s similar to Windows Format. 2) Full Format: As Physical Format, it makes all sectors of the memory clean, but it takes longer. 3) Configure device only: It will perform “Configuration” [(b) in Pic.] such as “Make startup disk” or “Enable password protection” without checking or formatting the disk. Click “Start” button then execute format. [(c) In Pic.] 2. Partition setting 1) You can divide Disk (partition*) moving up and down the slide bar in left side of X-format window and control each capacity. [box (d)] - Disk 1; normal partition / Disk 2; password partition(X-Key) (Partition* divide : It means you divide one physical drive into several logical drives.) **In a case such as below, you must do “Full Format”. 1) The Fatal Exception error or BSOD (Blue Screen Of Death) appears during writing and reading. (It is caused by bad sectors being created inside the memory chip probably because of misuse.) 2) Windows (or DOS) Format is not working. * Formatting will erase all the data in the device.](https://usermanual.wiki/Stormblue/USD3300/User-Guide-309619-Page-12.png)