Sony A3880003 Licensed transmitter User Manual 08 user guide part 2
Sony Mobile Communications Inc Licensed transmitter 08 user guide part 2
UserManual.wiki
>
Sony
>
A3880003 User Manual
>
08 user guide part 2
Contents
1.
08 user guide part 1
2.
08 user guide part 2
08 user guide part 2
Navigation menu
Upload a User Manual
Namespaces
Wiki Guide
HTML
PDF
Info
Views
User Manual
Discussion / Help
Navigation
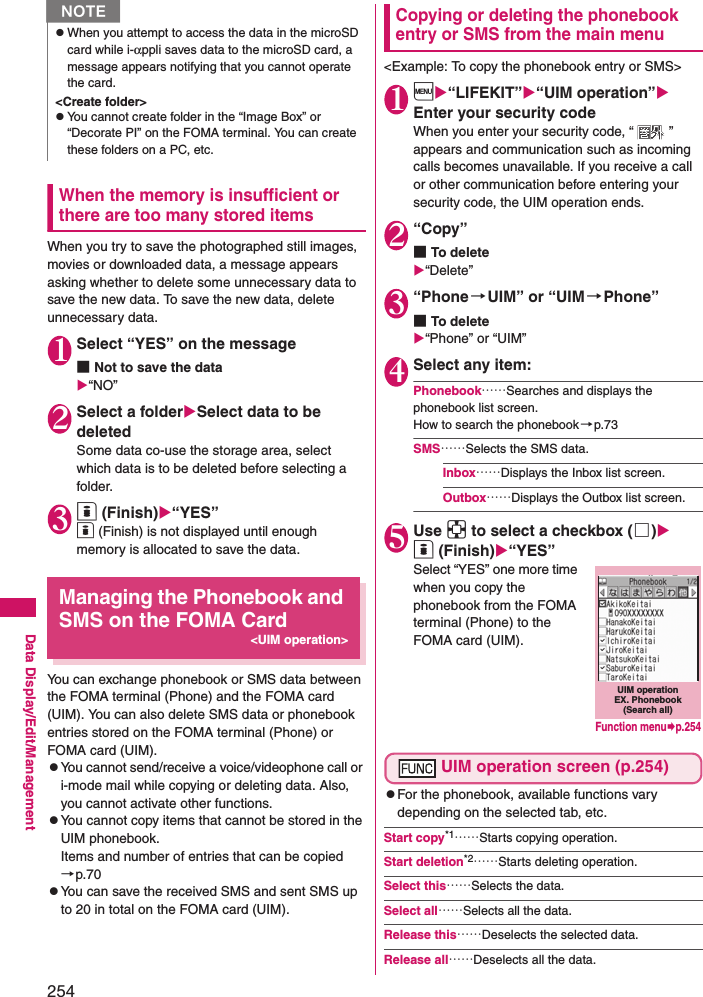

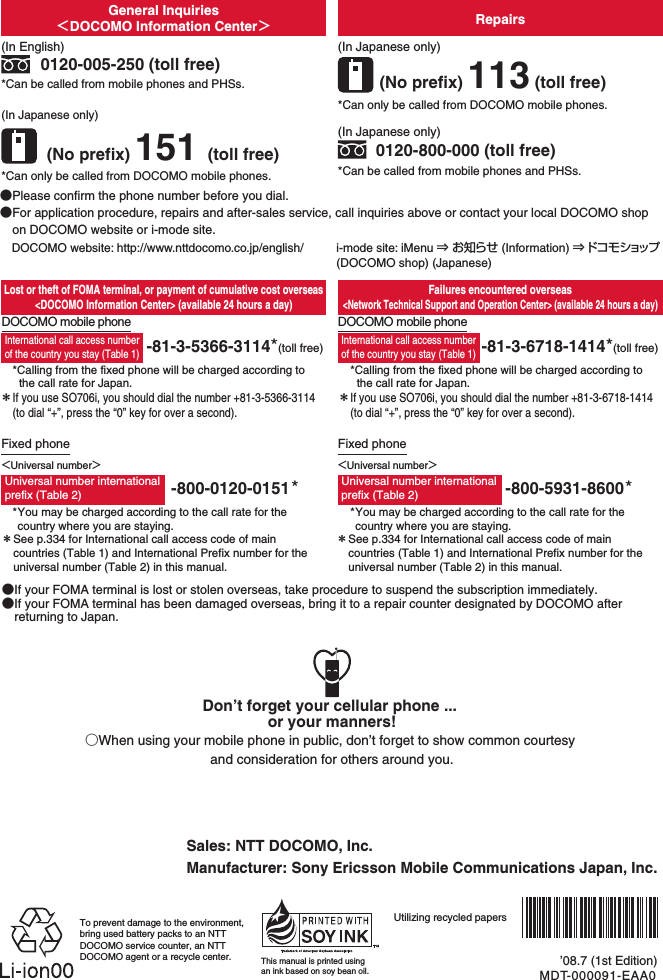
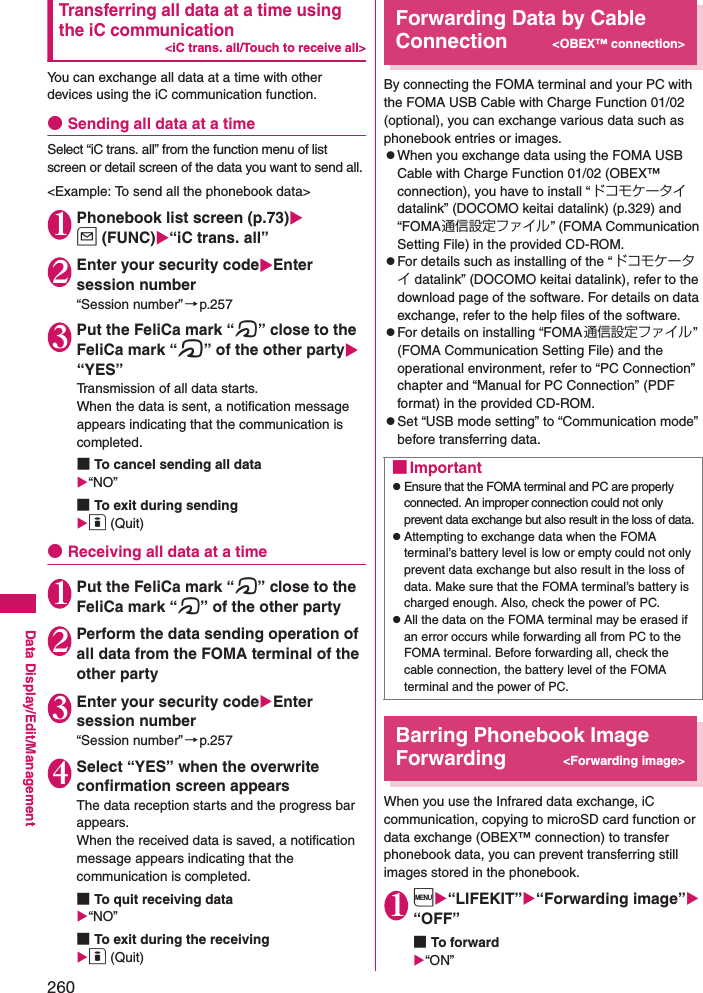
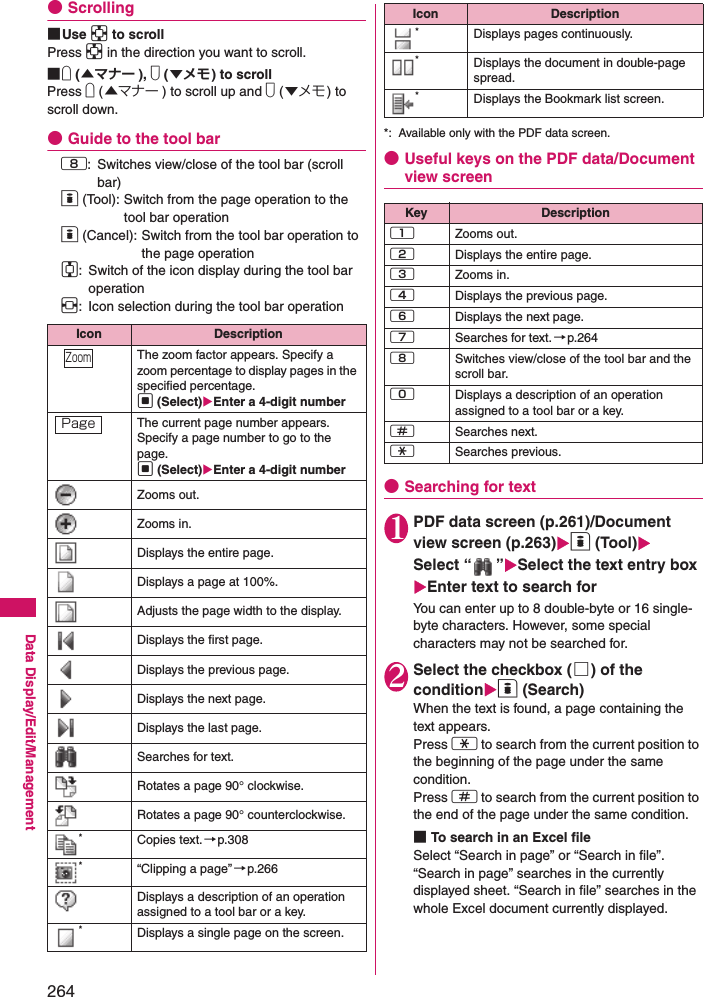
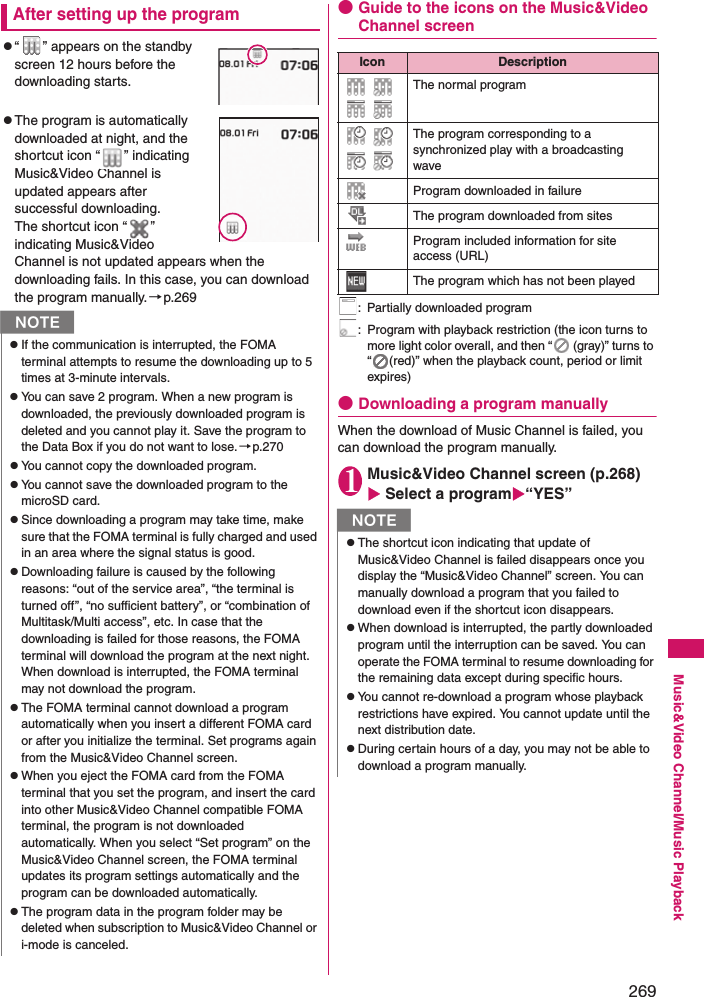
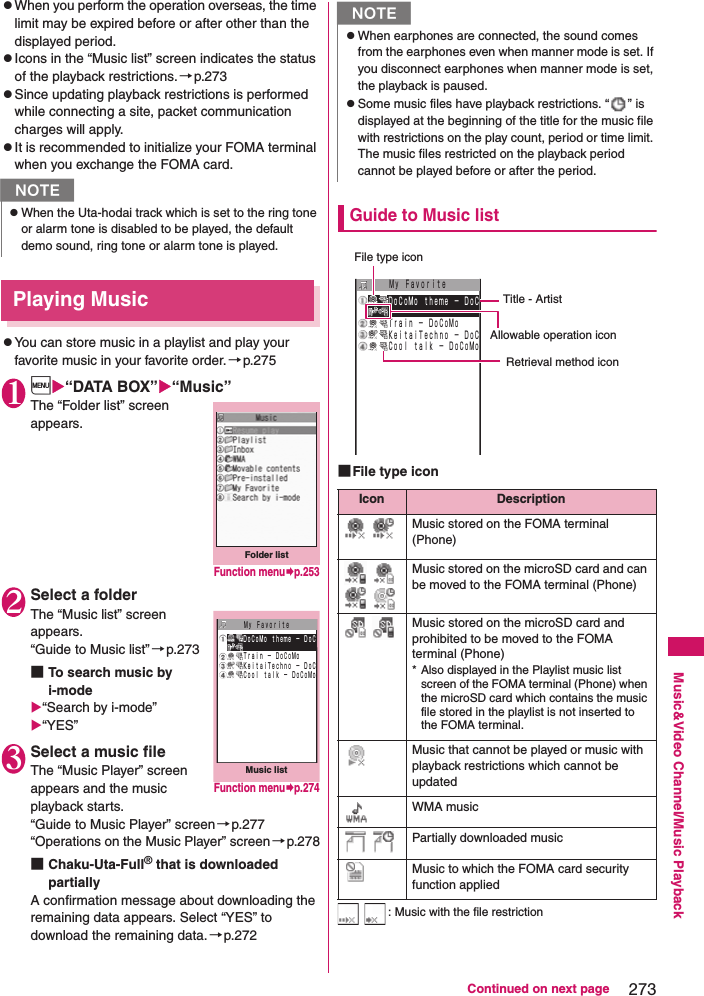
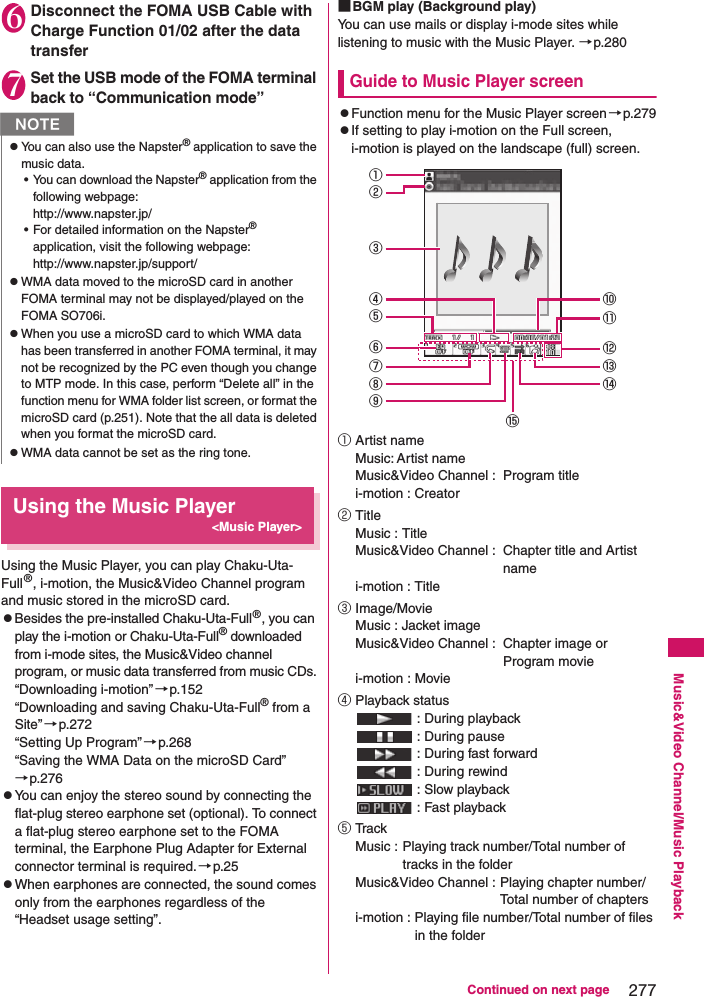
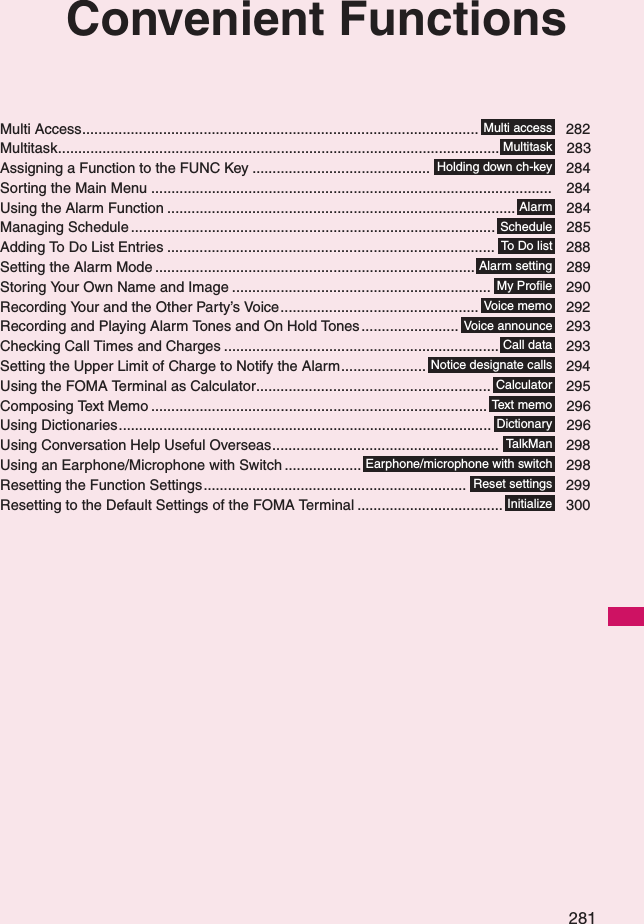
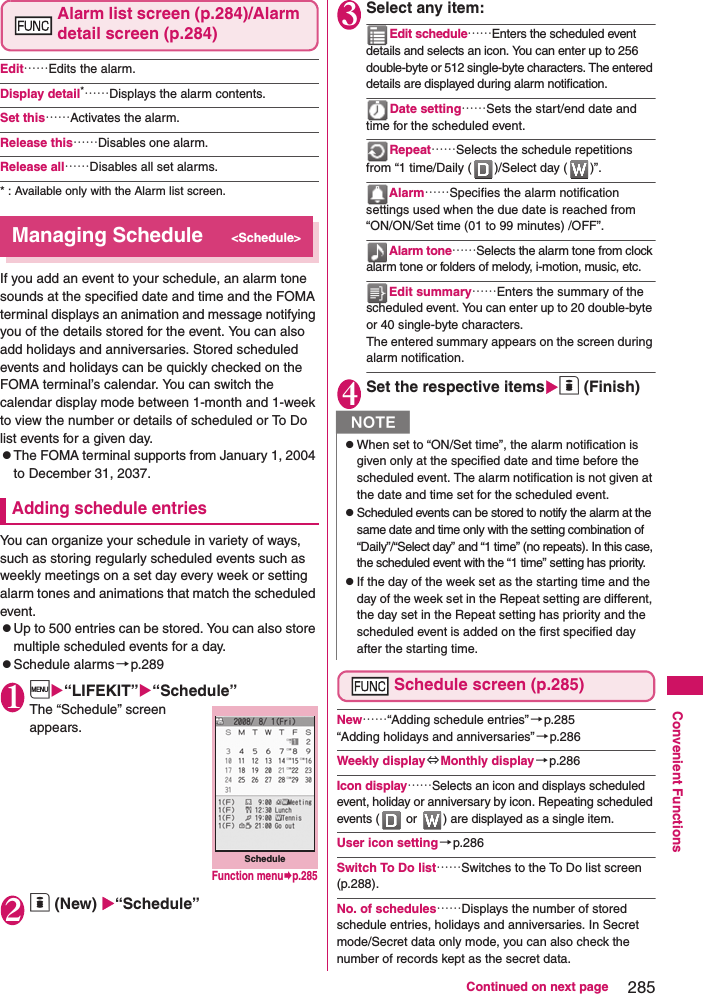
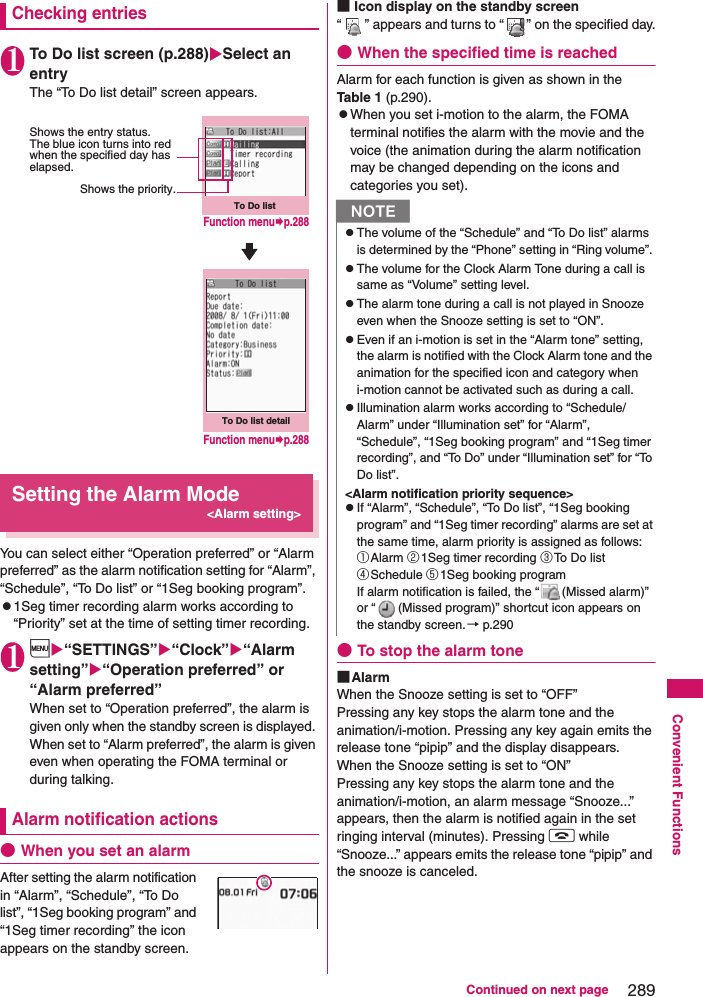
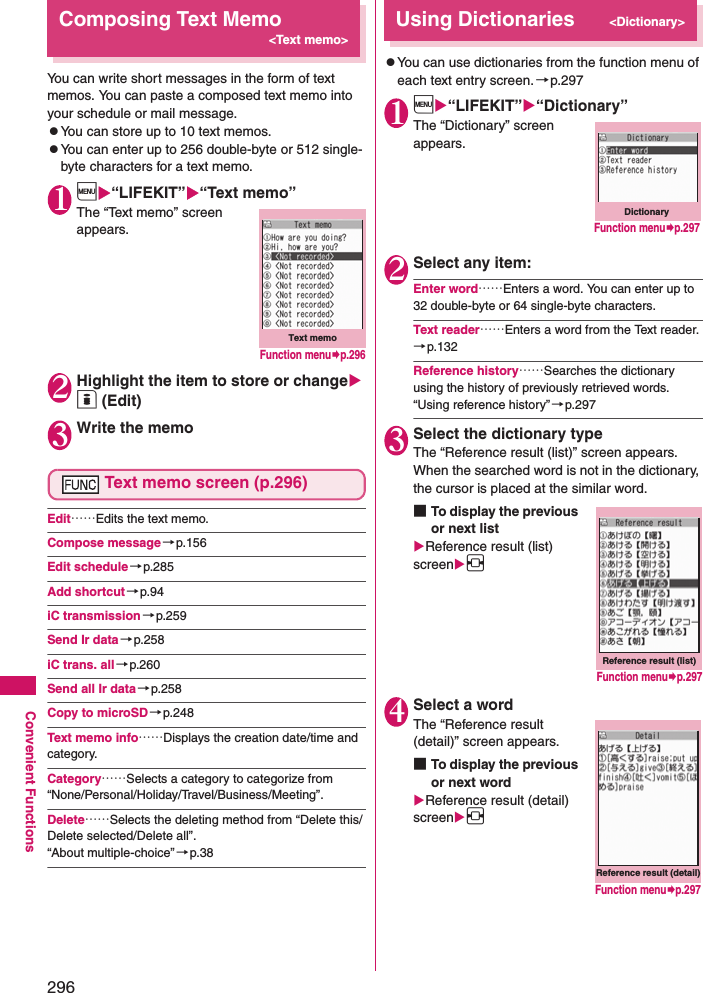
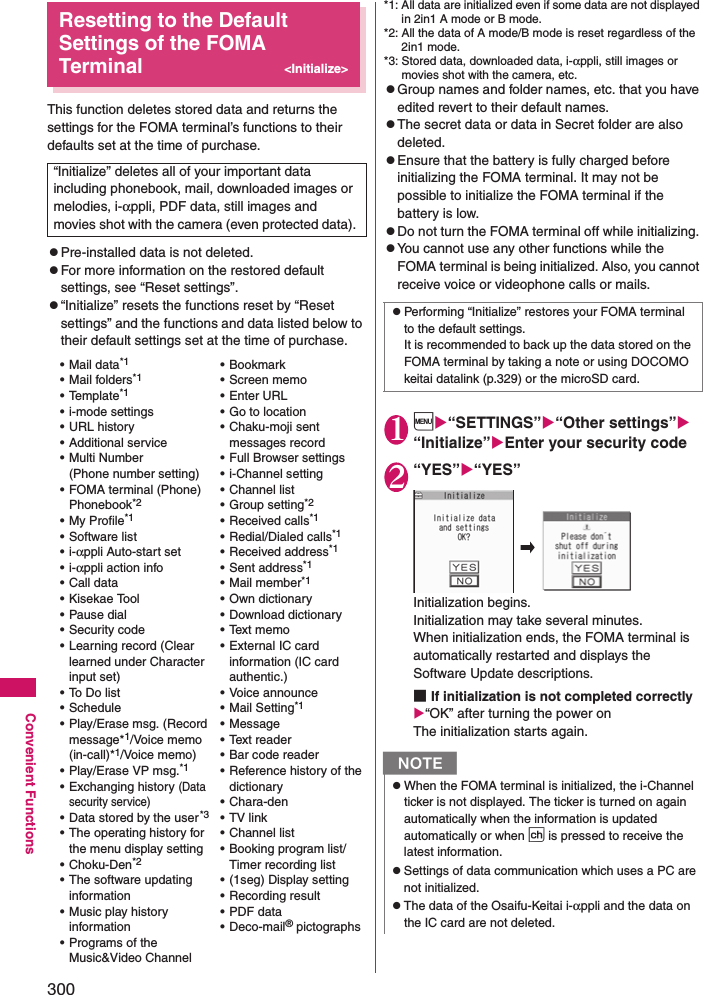
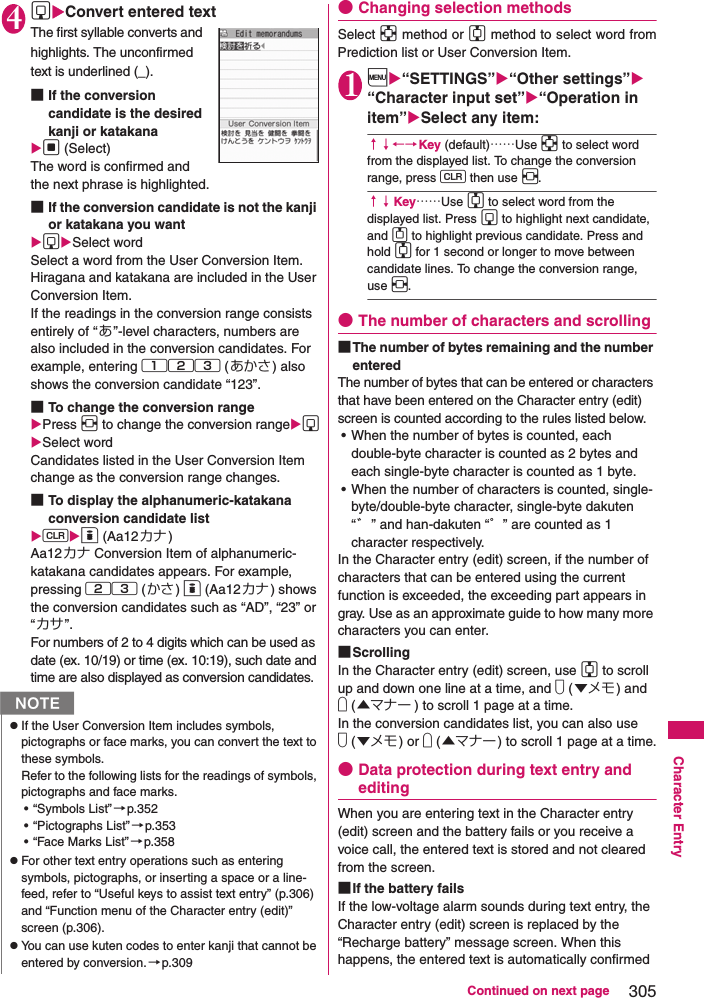
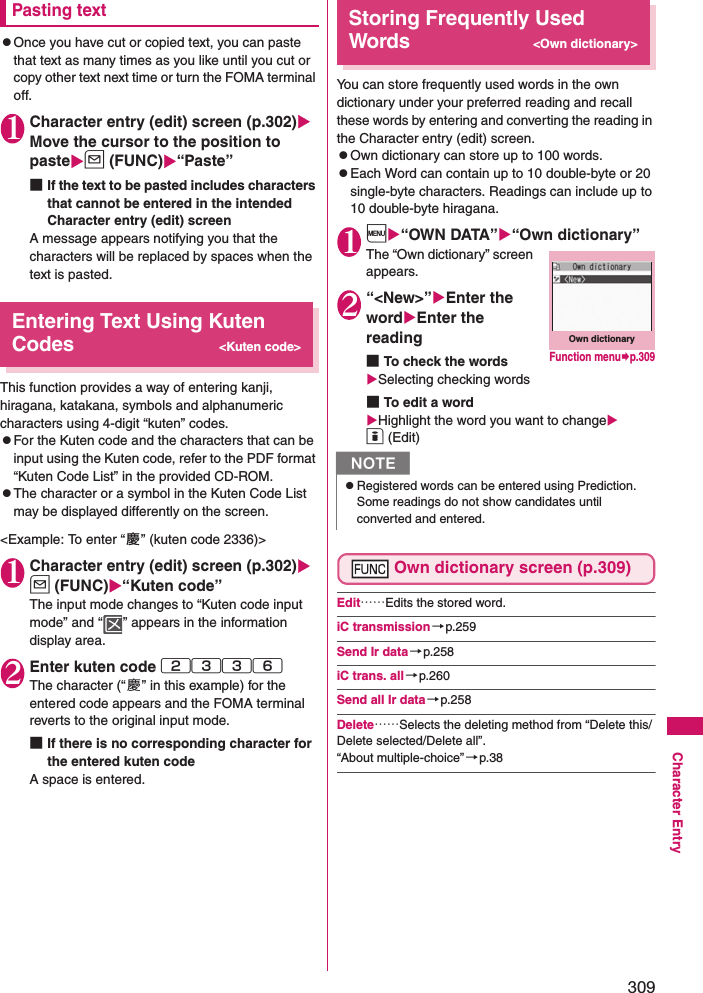
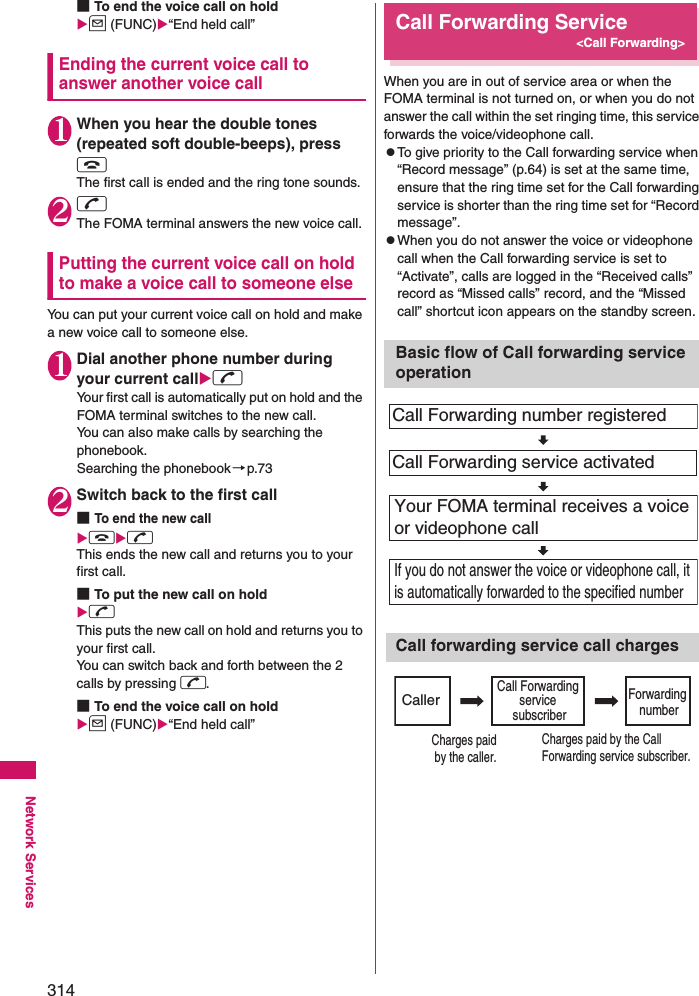
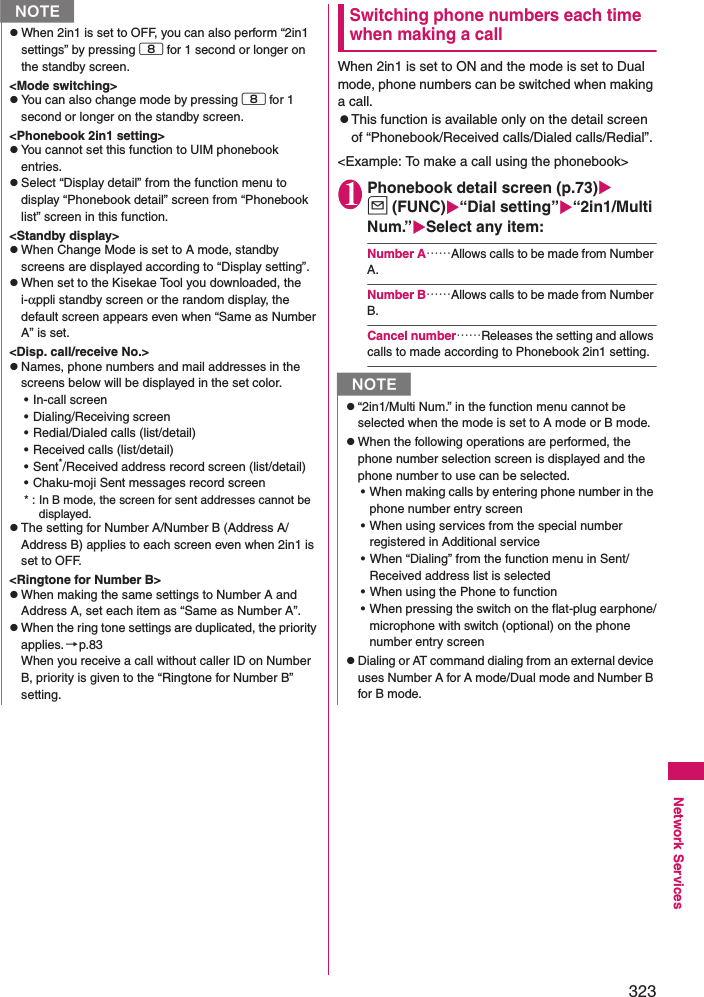
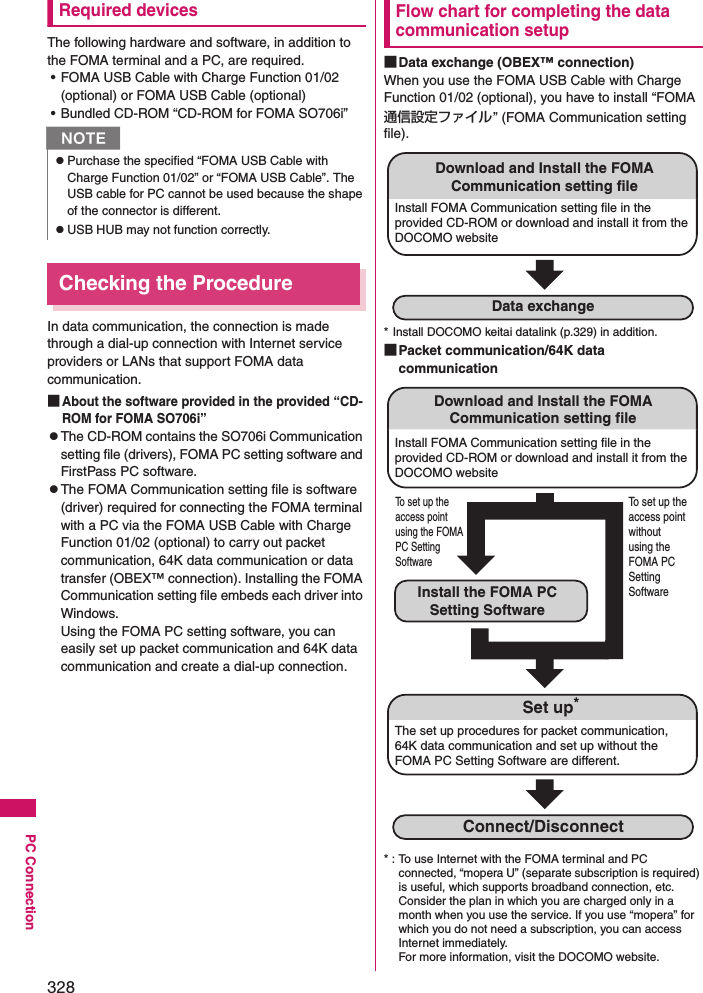
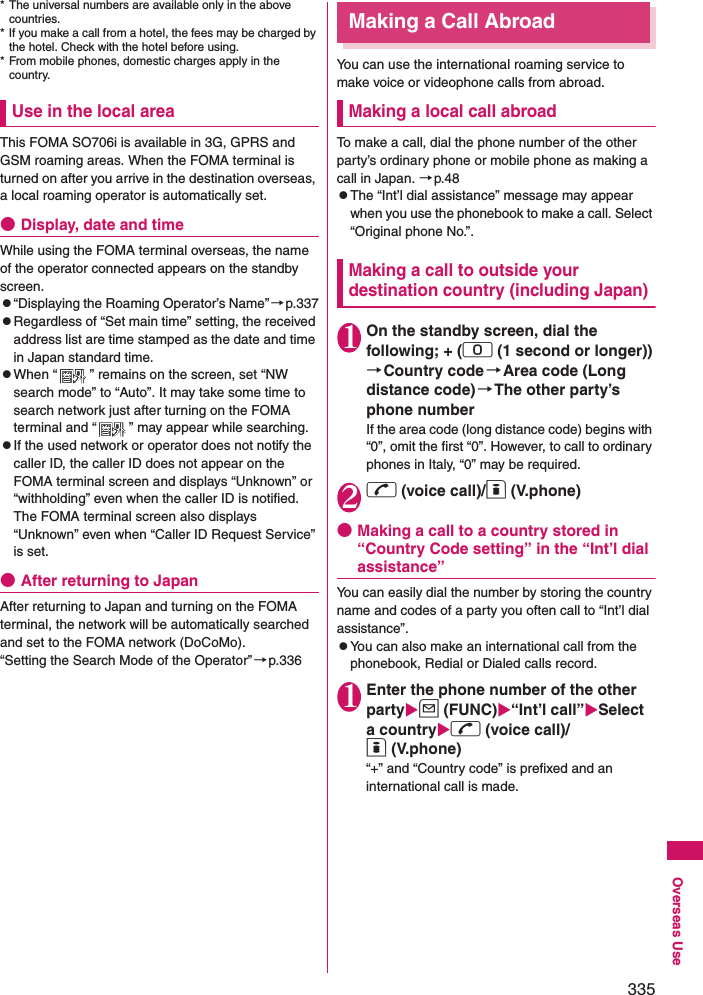
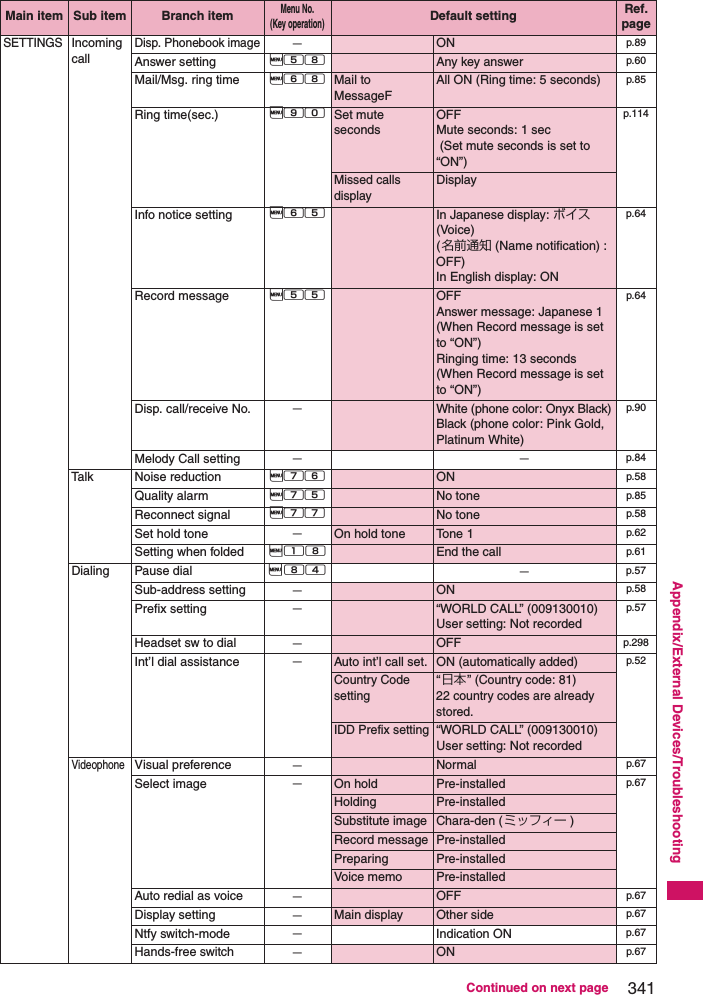
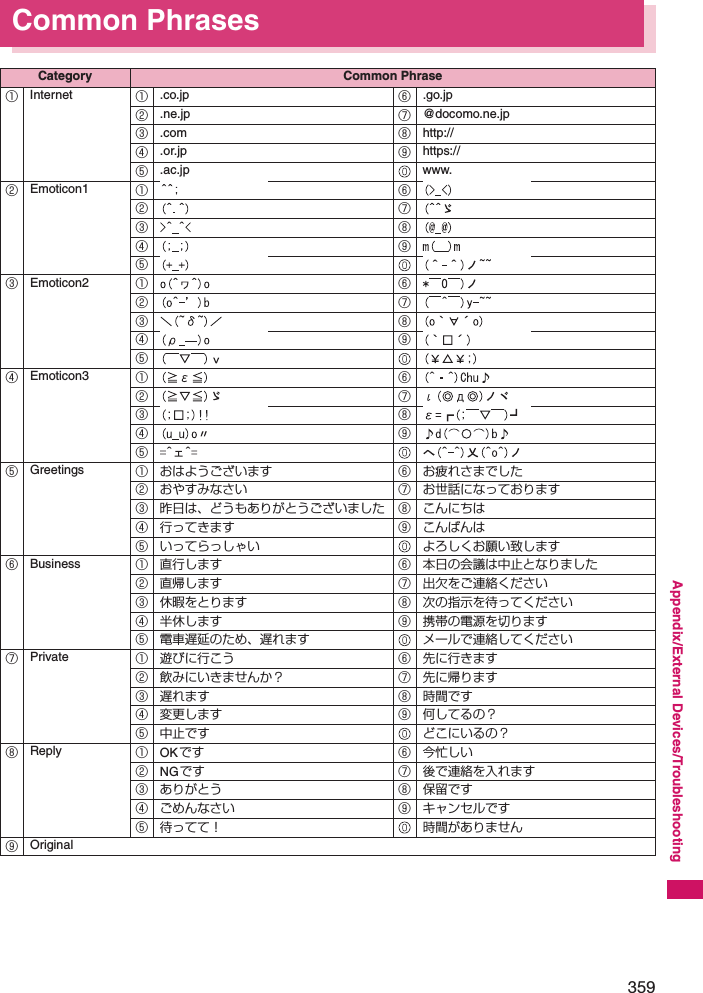
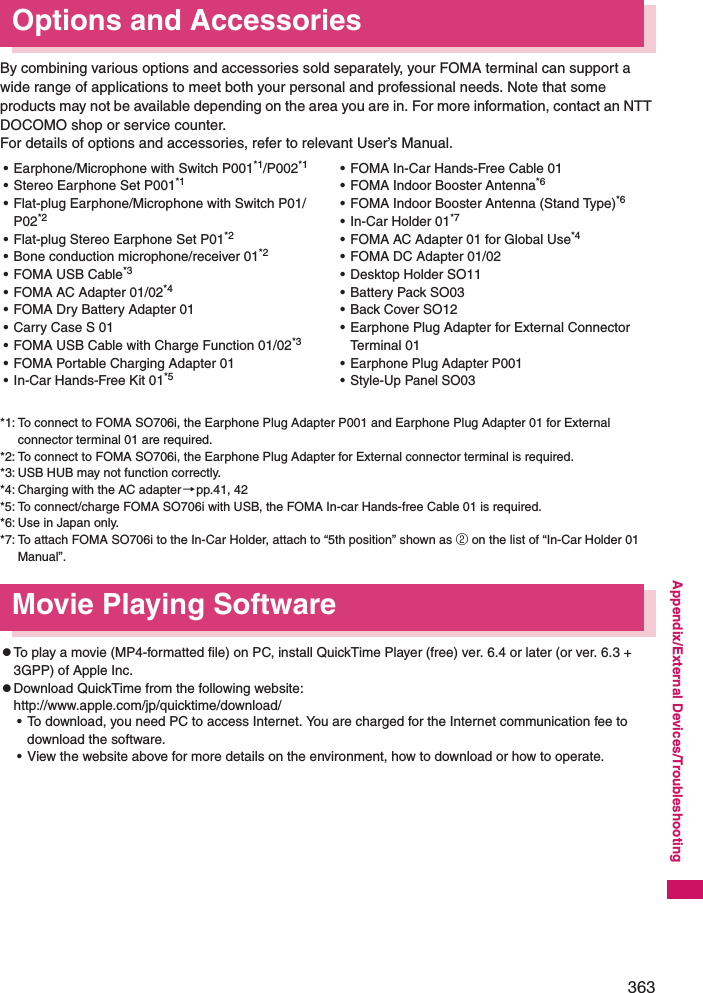
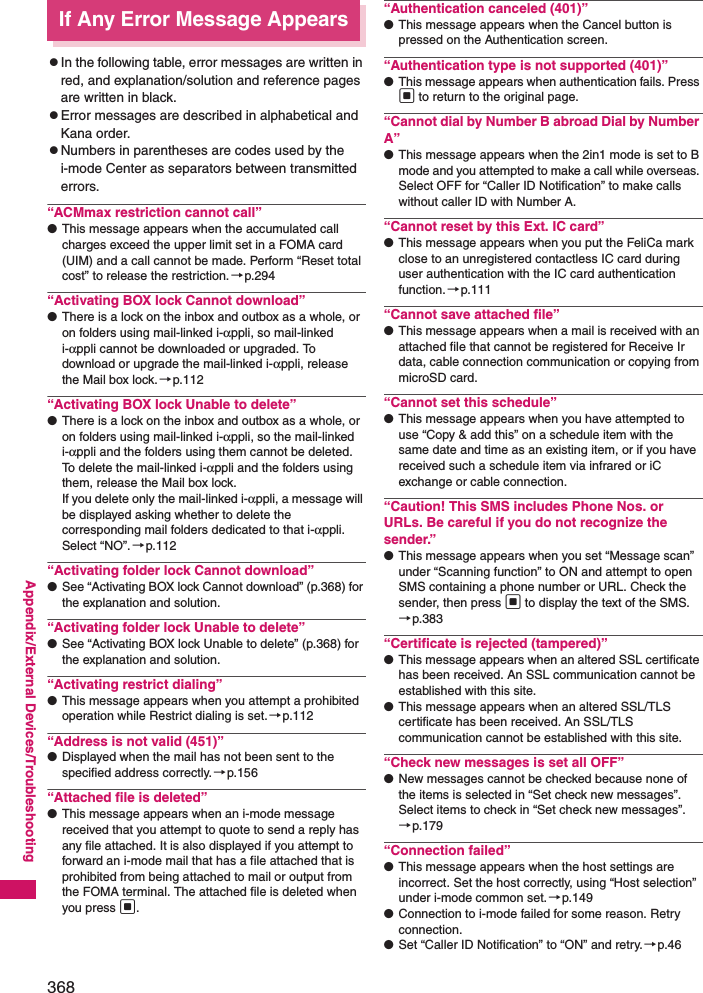
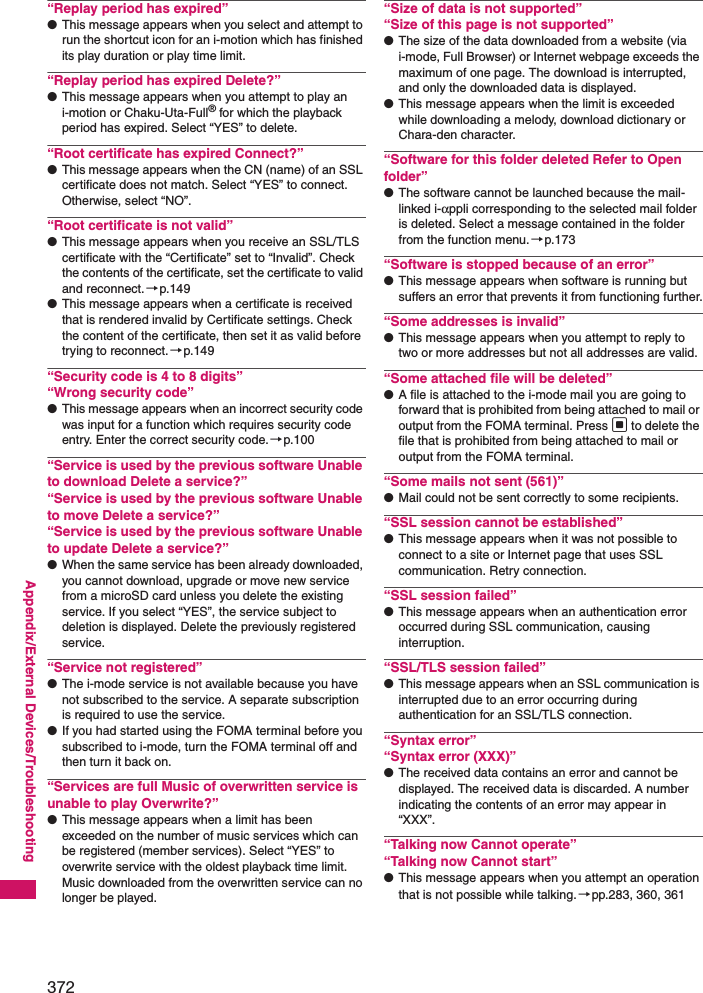
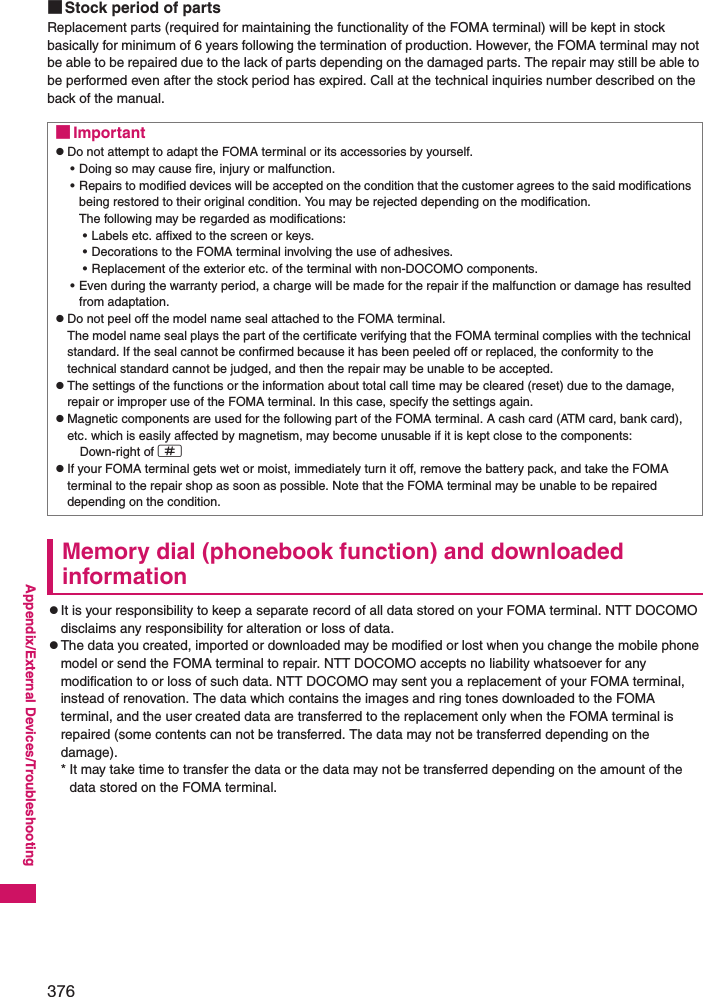
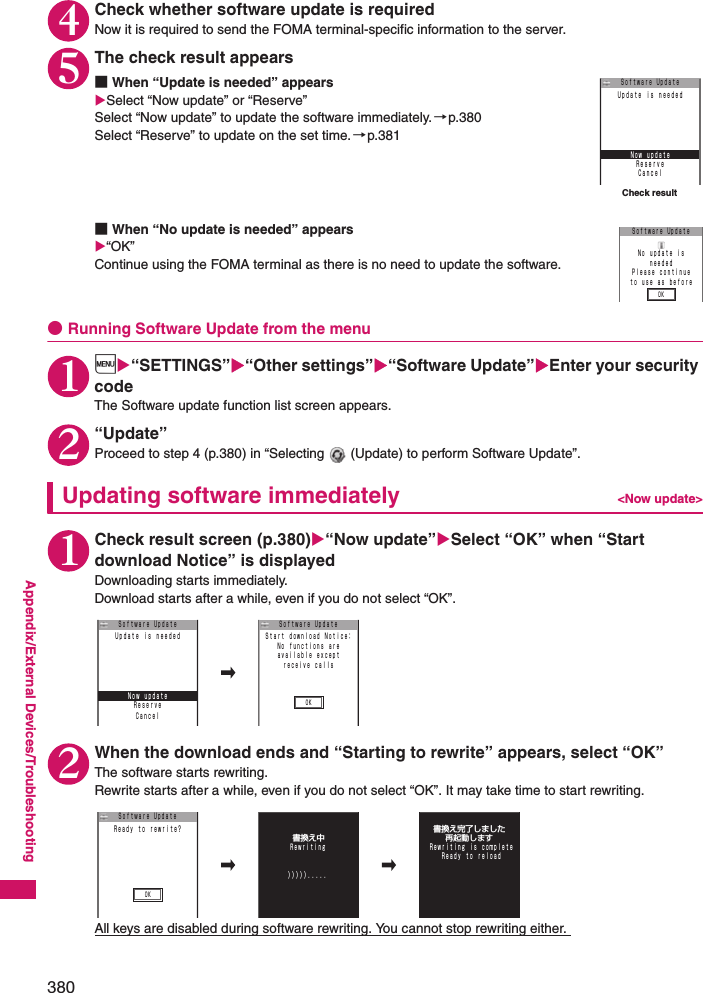
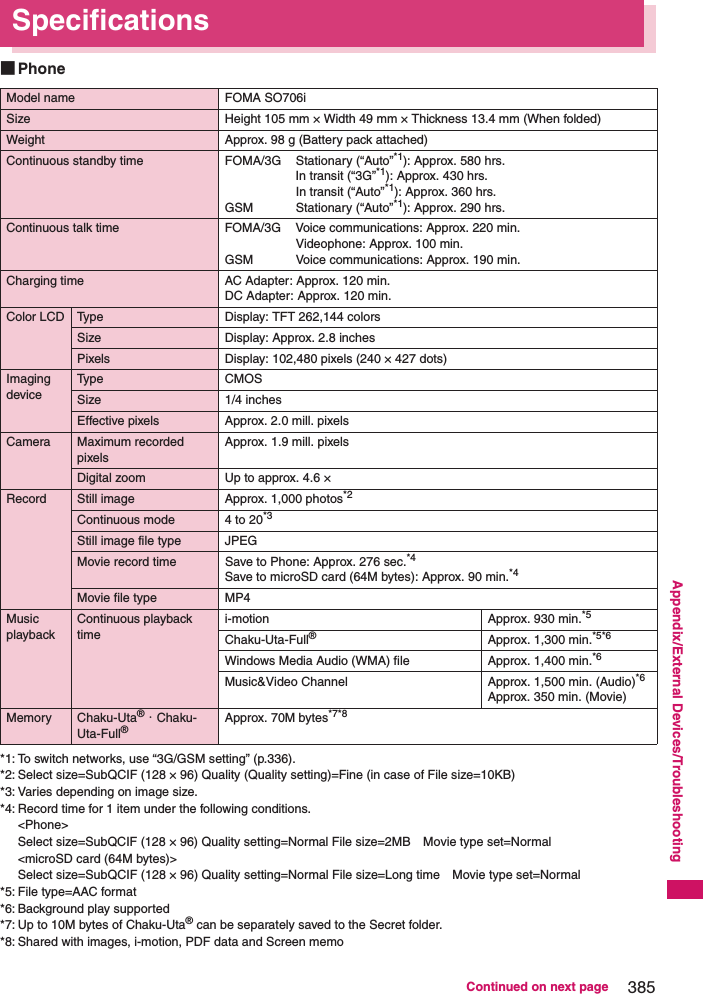
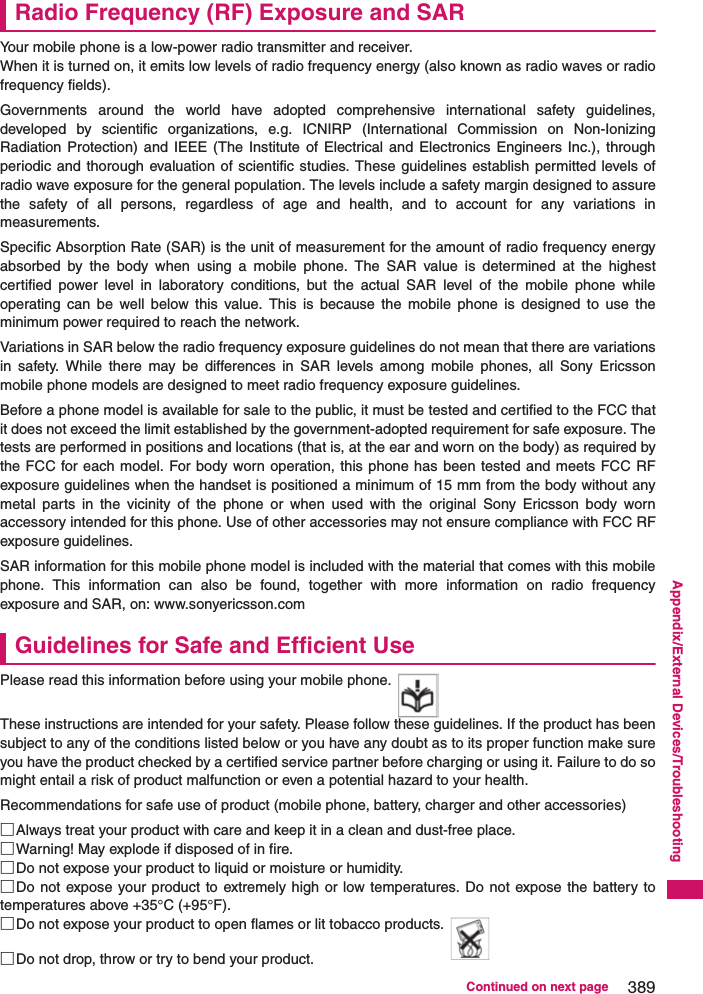
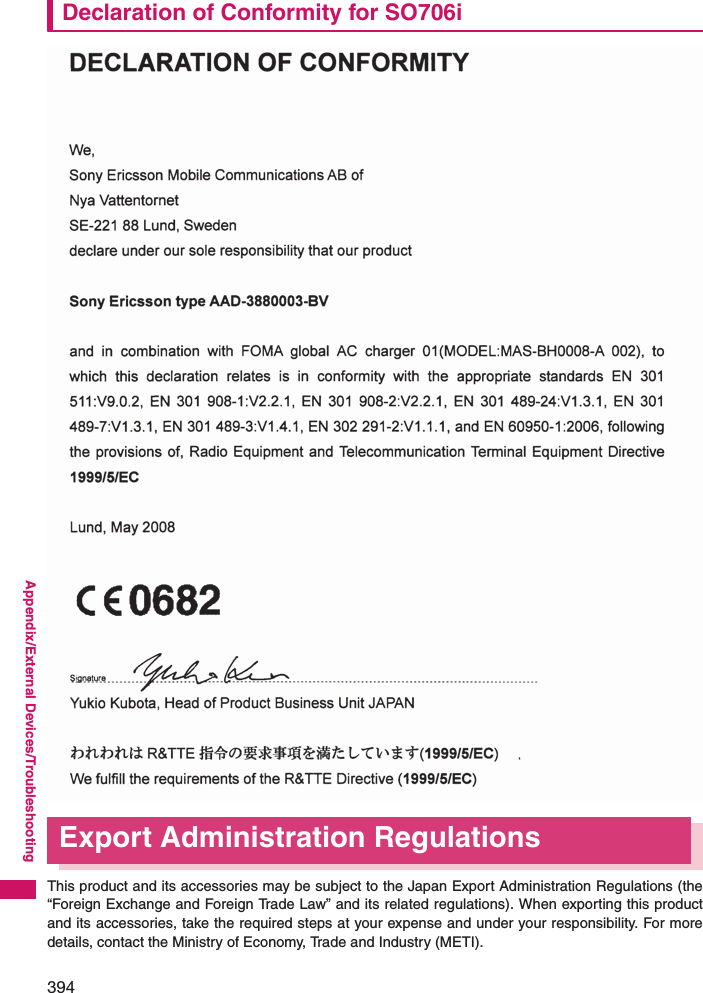
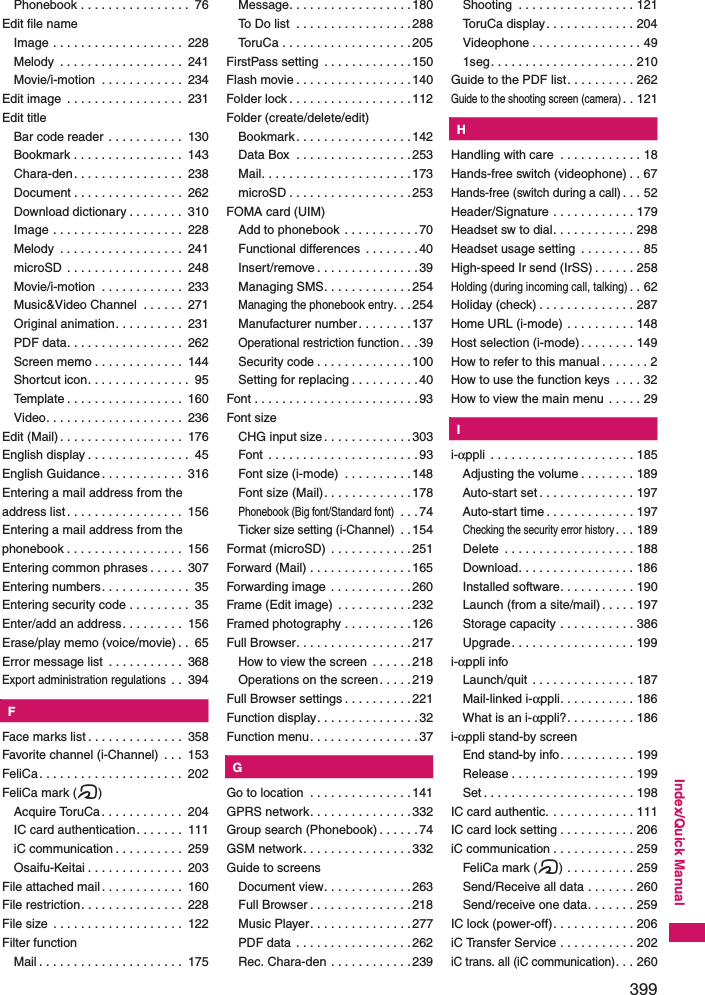
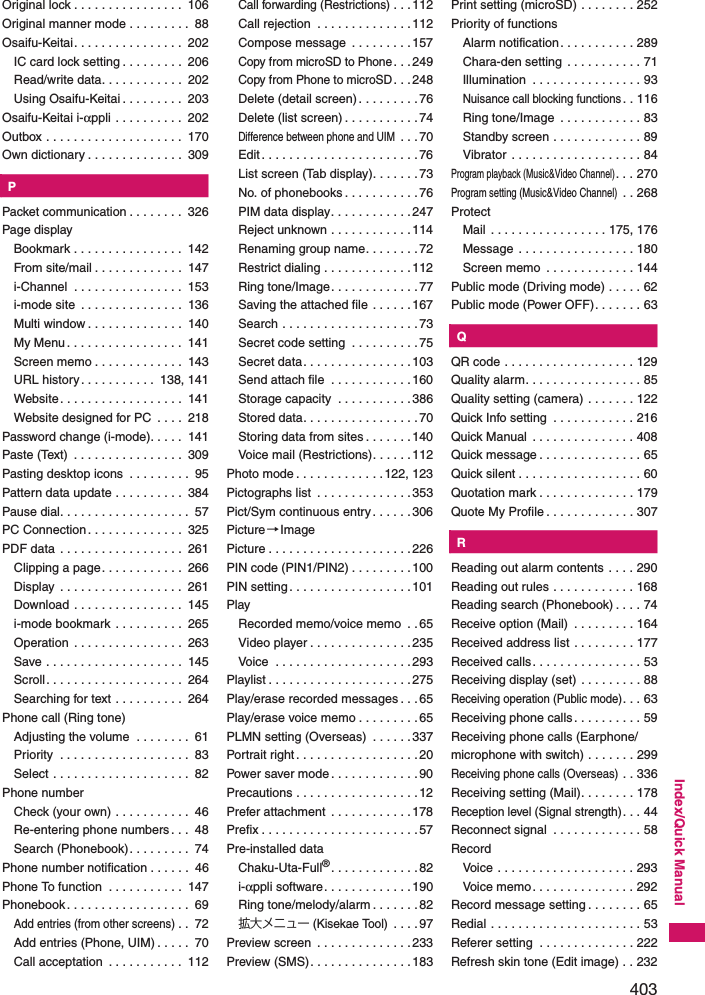
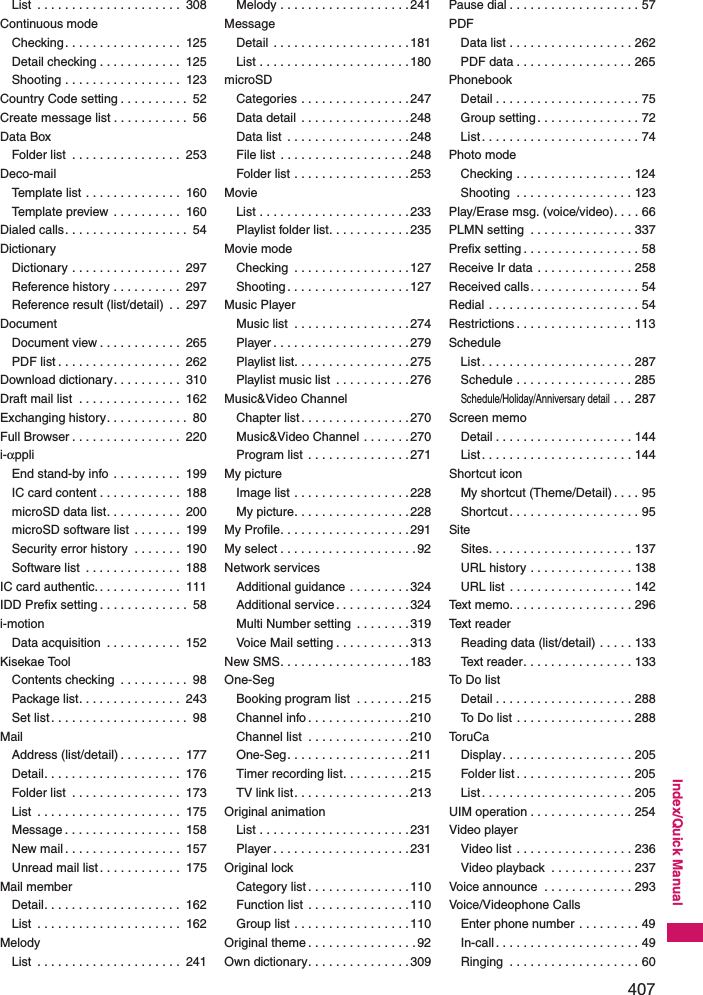
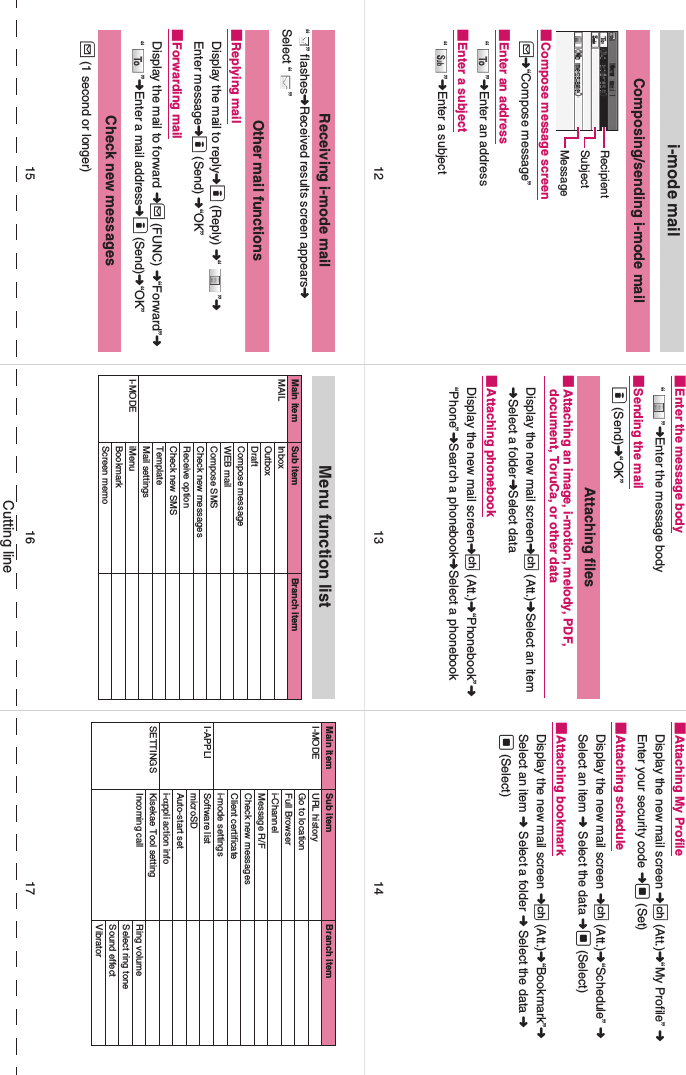
![256Data Display/Edit/ManagementNote on forwarding datazYou cannot forward data while Dial lock, Self mode, Omakase Lock or Keypad lock is set. Also, you cannot use the iC communication when IC card lock is set. zYou cannot receive the phonebook data while Restrict dialing is set. However, you can send the phonebook data which is set to “Restrict dialing” and personal data of My Profile when sending the phonebook data. zYou may not be able to forward data depending on the status of the other party’s device. Also, depending on the model of the other party’s device, it may not reflect the settings of the received mail or bookmark folder tree, or it may not receive the Deco-mail® correctly. zThe FOMA terminal is set to Out of Area during the data exchange, which means you cannot make/receive a voice/videophone call or use i-mode, i-mode mail, packet communication or 64K data communication. Also, the FOMA terminal may remain the status of Out of Area for a while after the data exchange. zIt may take time to exchange data depending on the amount of data. Also, you may not be able to receive data. zThe progress bar indicates the number of sent data. A large amount of data may slow down the progress indicator or it may look different between the parties even when the data are being exchanged successfully. Sent/received datazThe data received on the FOMA terminal is saved as shown in the Table 2 (p.256). zThe FOMA terminal may not properly receive some symbols or pictographs entered in mail or phonebook. zYou cannot send or receive: • UIM phonebook, SMS• Frame or stamp data (can be received only)• Melody, still image, movie, i-motion and PDF data with FOMA card security• Data in the Secret folderzYou cannot receive: • Neither JPEG, GIF nor SWF Flash movie• Movie other than MP4 or 3GP• Still image, movie, i-motion, melody and PDF data whose image size or file size exceeds the capacity of the FOMA SO706i[Table 2] Where to store the forward and received dataData Receive one Receive allStill image, melody The first in the Inbox folder (Cannot send all at once)Movie (i-motion), PDF dataIn date order in Inbox folder (Cannot send all at once)ToruCa, ToruCa (detail) The first in the ToruCa folder Replaced with ToruCa of the senderPhonebook, My ProfileThe smallest memory number available between “010” and “999” (If none of the numbers above is available, it is saved under the smallest memory number available between “000” and “009”)Replaced with Phonebook of the sender (My Profile data is sent, and the data stored in “My Profile” (except for the phone number) is replaced)Schedule In the date order of the received schedules Replaced with Schedule of the senderTo Do list The first in the To Do list Replaced with To Do list of the senderReceived mail, Sent mail The Inbox/Outbox folder in the date order of mailsReplaced with Outbox/Inbox of the senderDraft mail The Draft box in the date order of mails Replaced with Draft of the senderText memo The first <Not recorded> Replaced with Text memo of the senderCommon phrases The first <Not recorded> Replaced with Common Phrases of the senderOwn dictionary The first in the Own dictionary Replaced with Own dictionary of the senderBookmark (i-mode, Full Browser)The first in the Bookmark folder Replaced with Bookmark of the sender](https://usermanual.wiki/Sony/A3880003.08-user-guide-part-2/User-Guide-951151-Page-6.png)
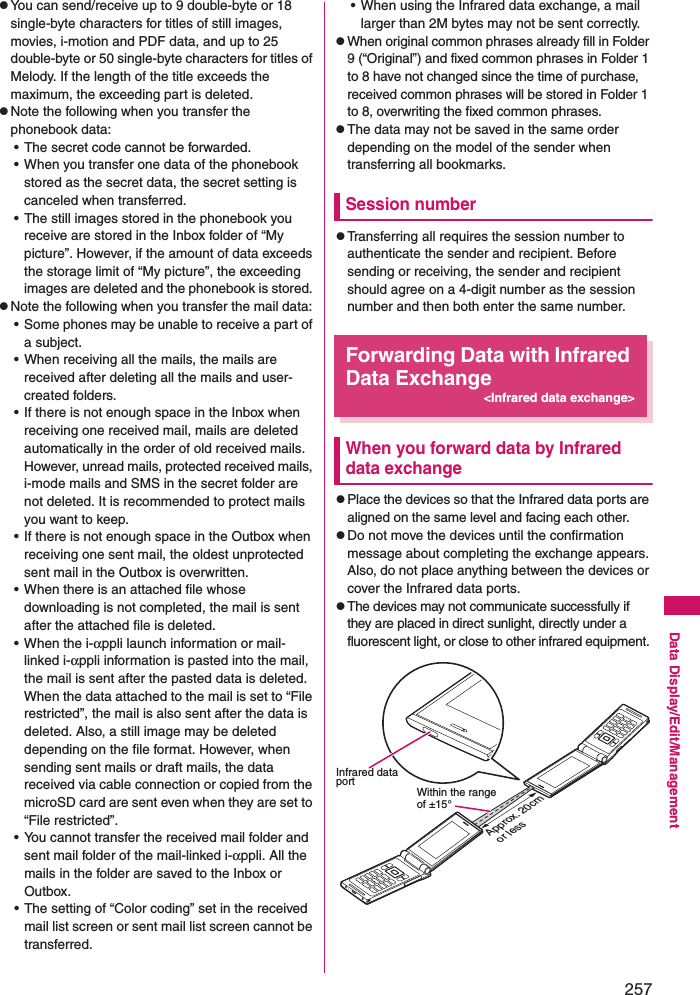
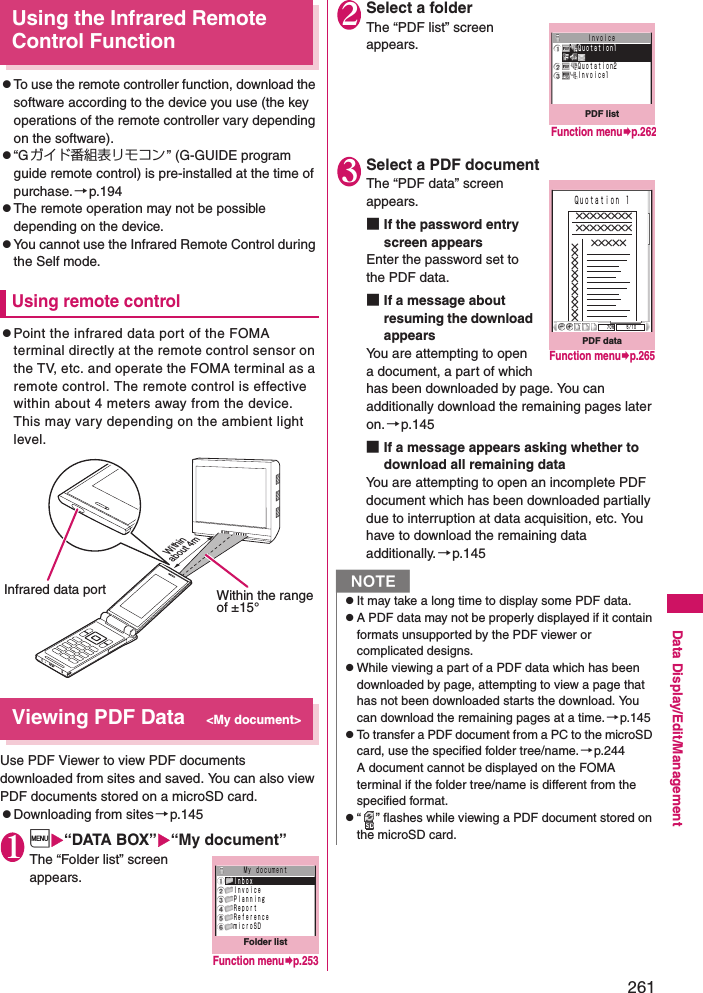
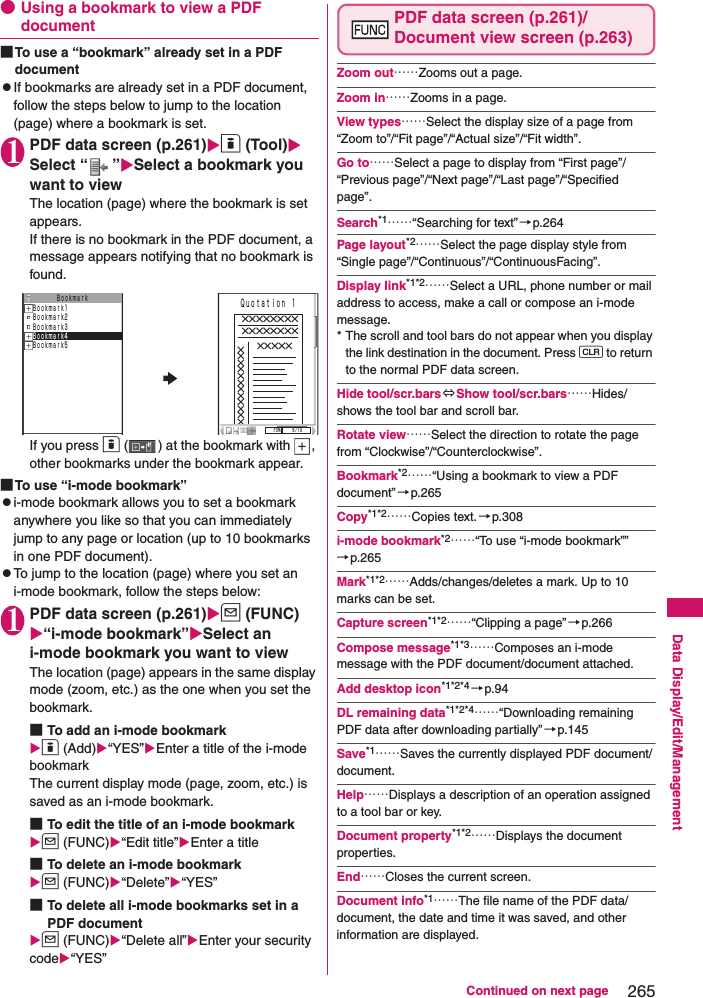
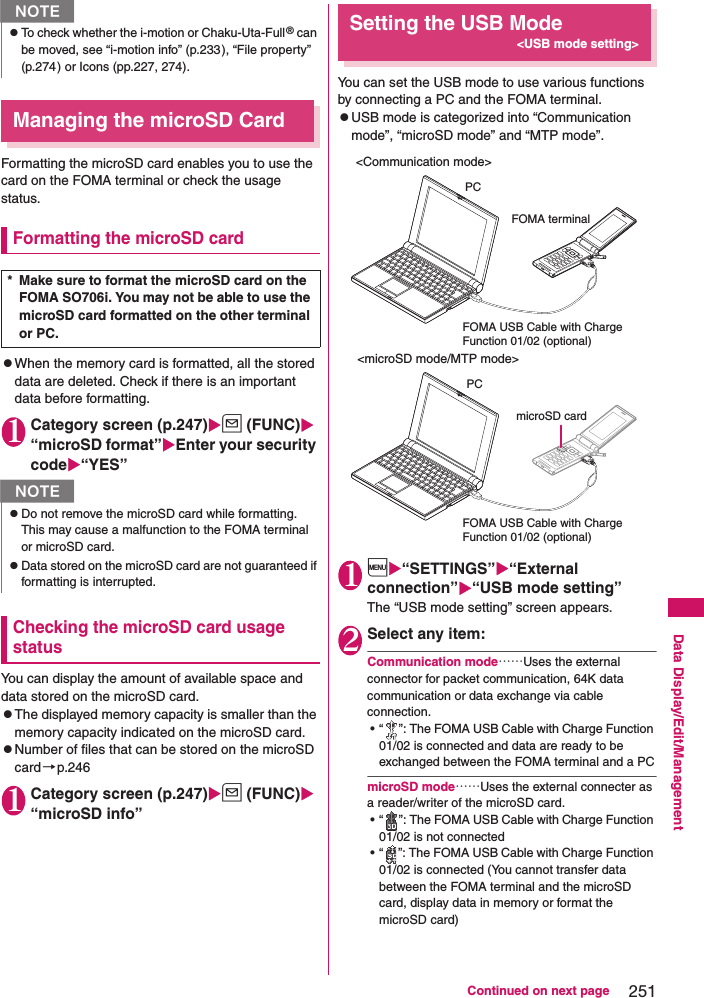
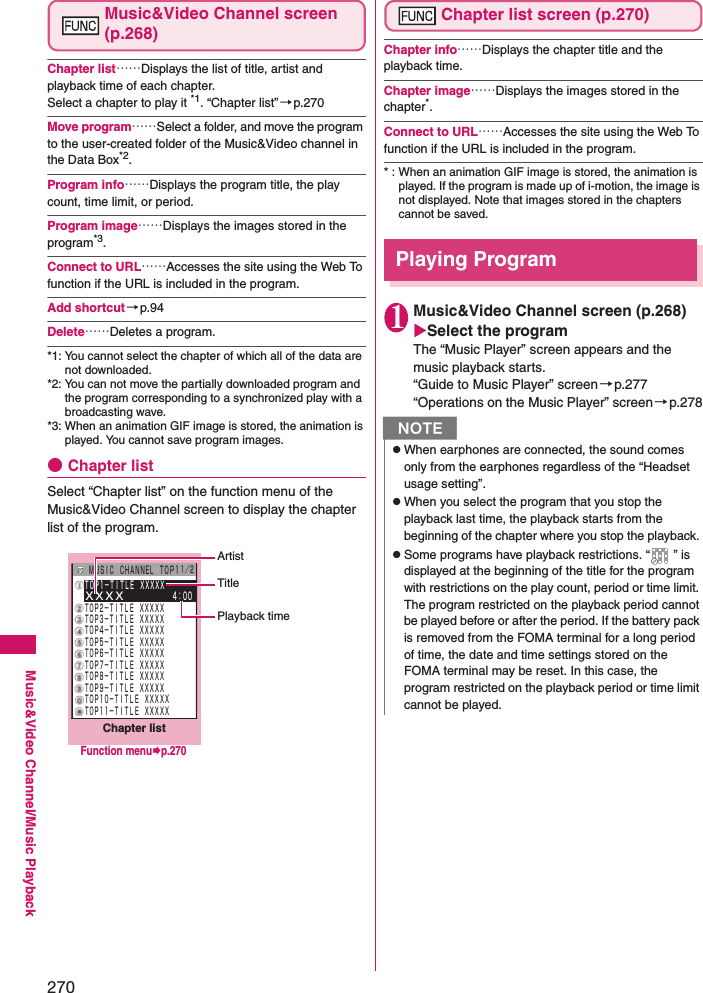
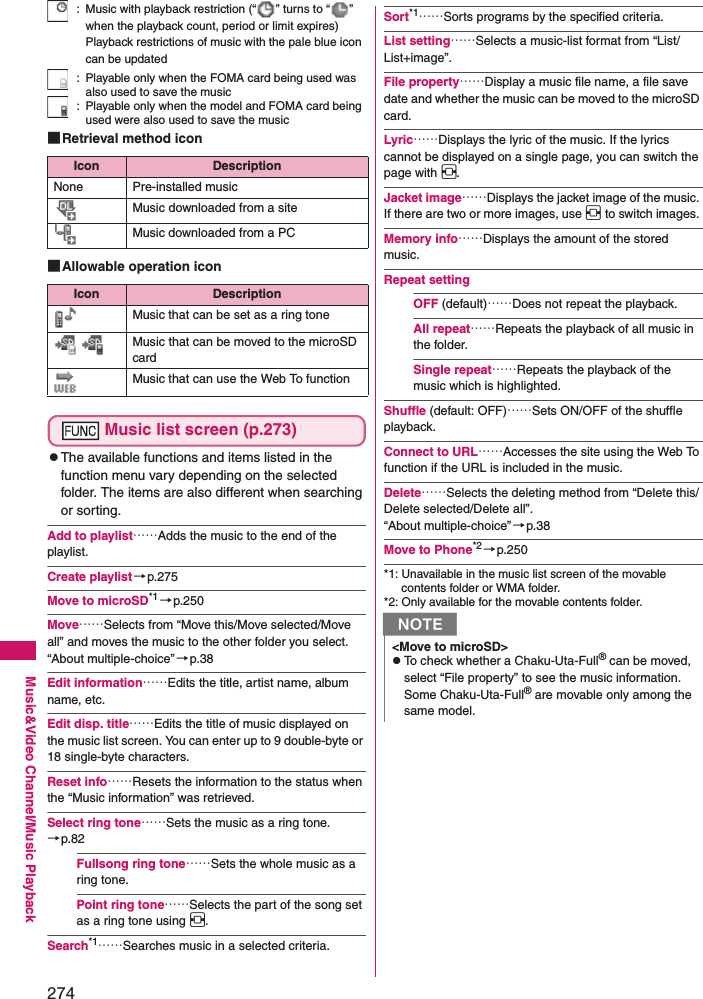
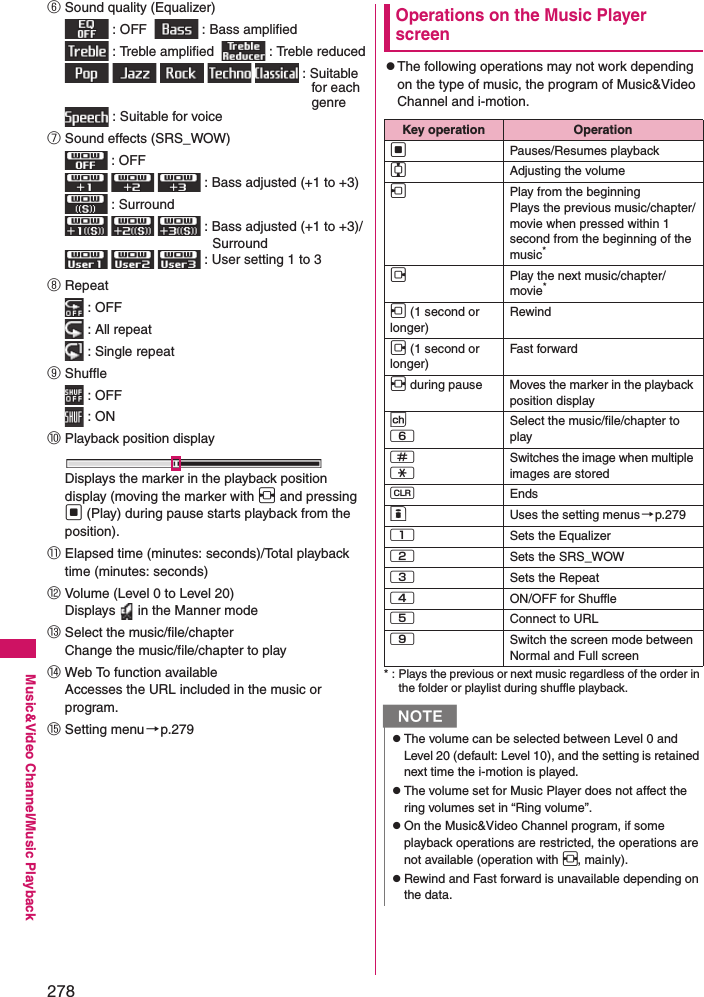
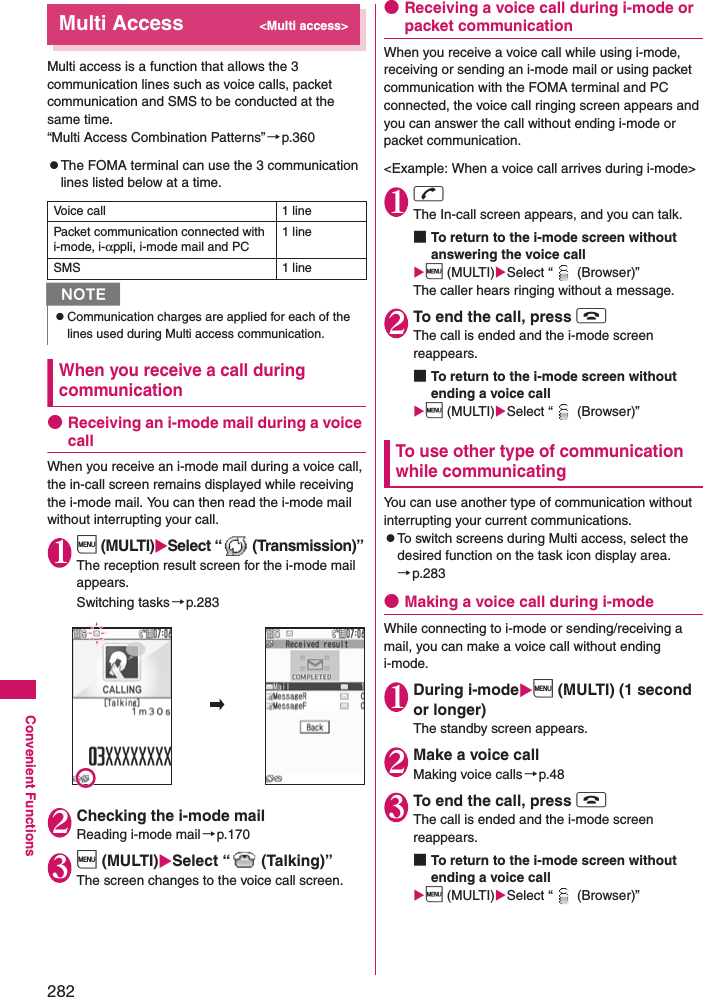
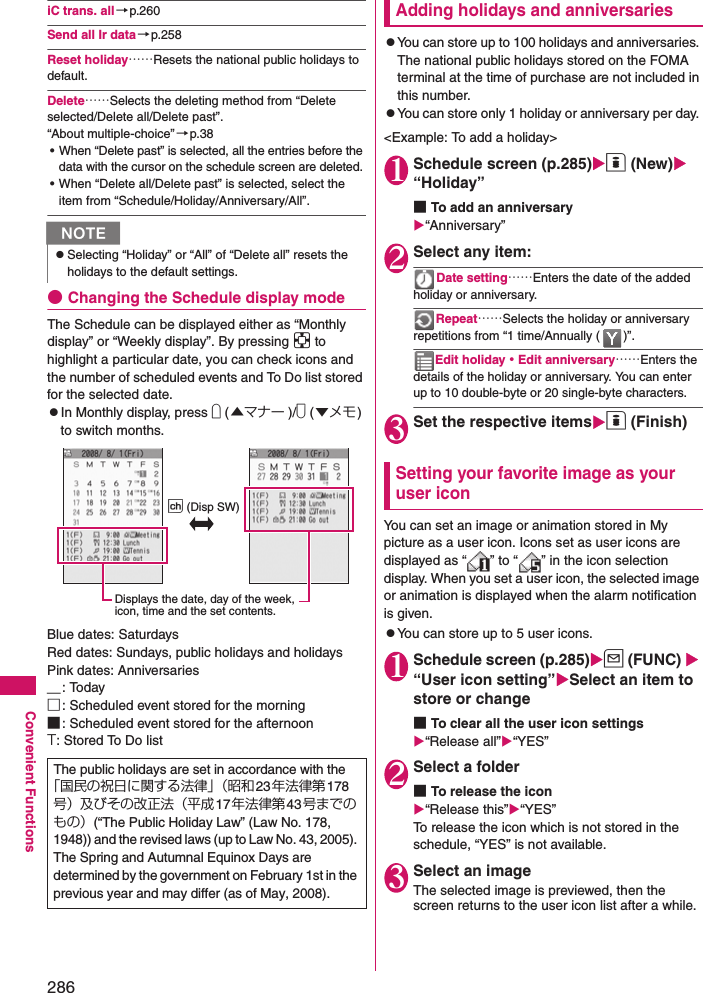
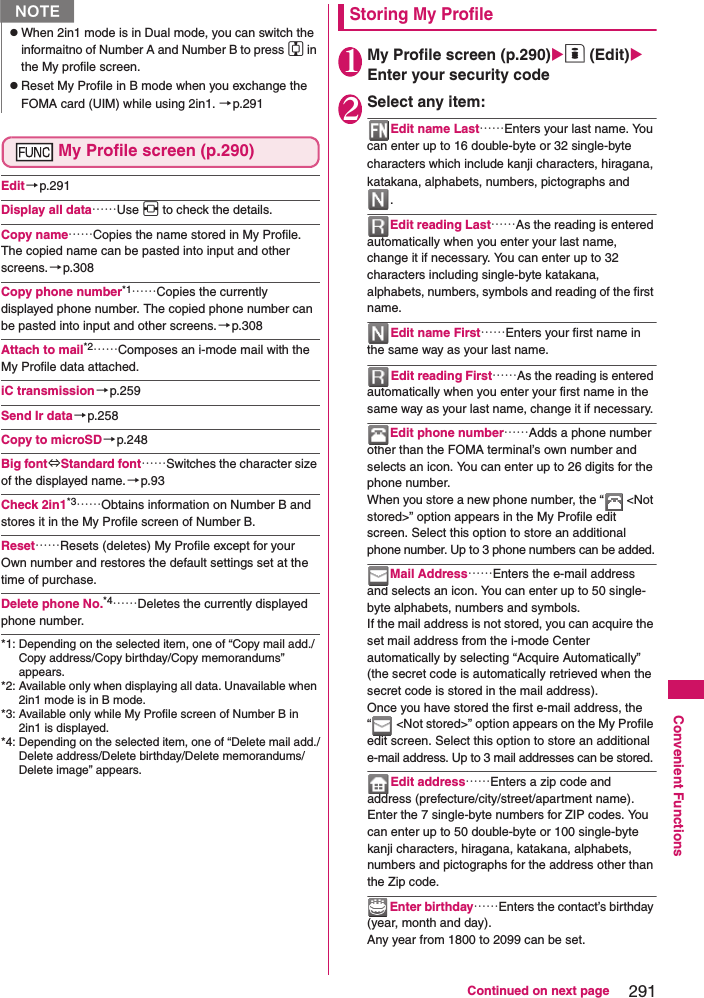
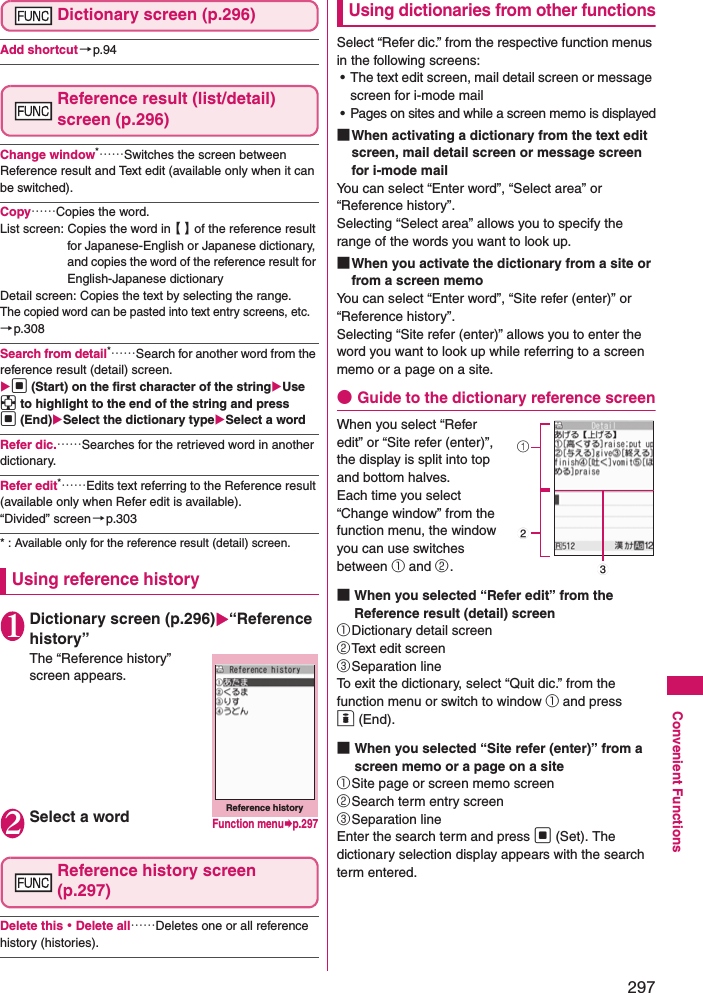
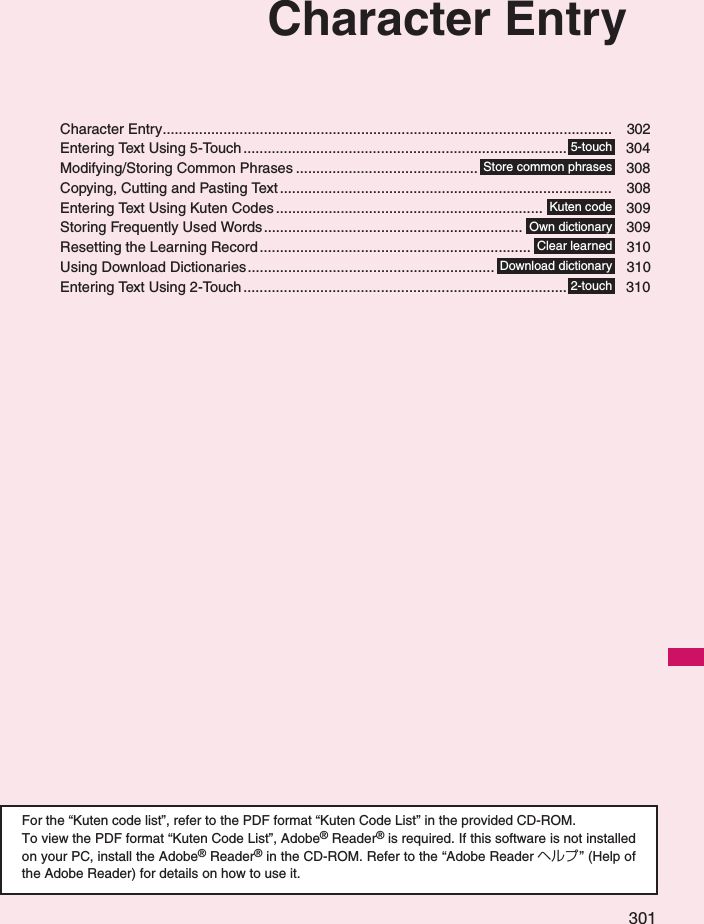
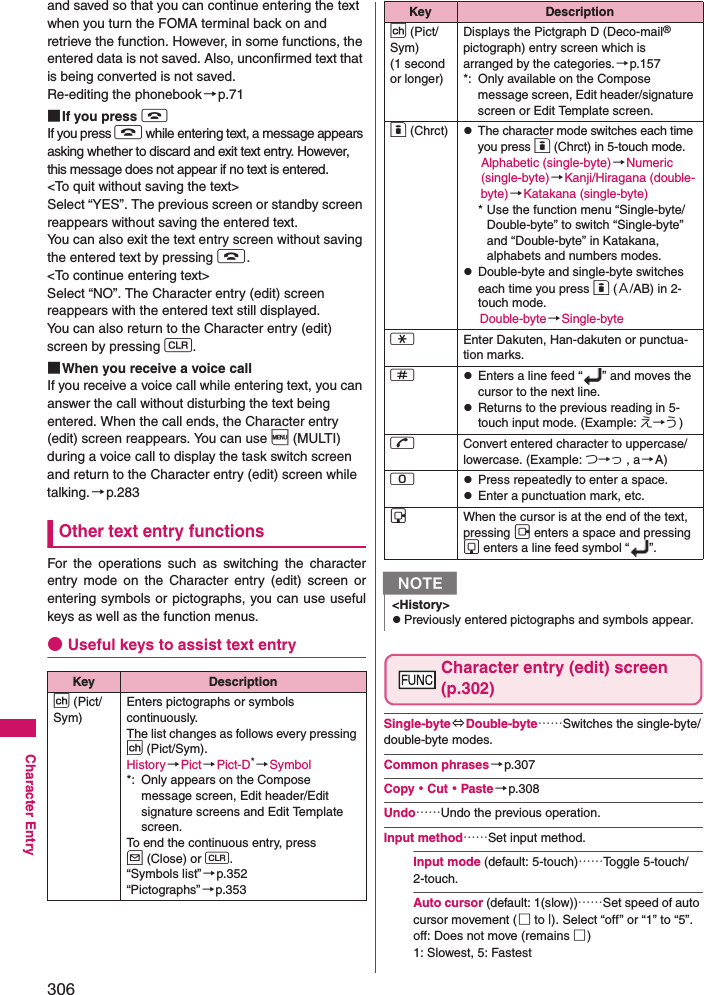
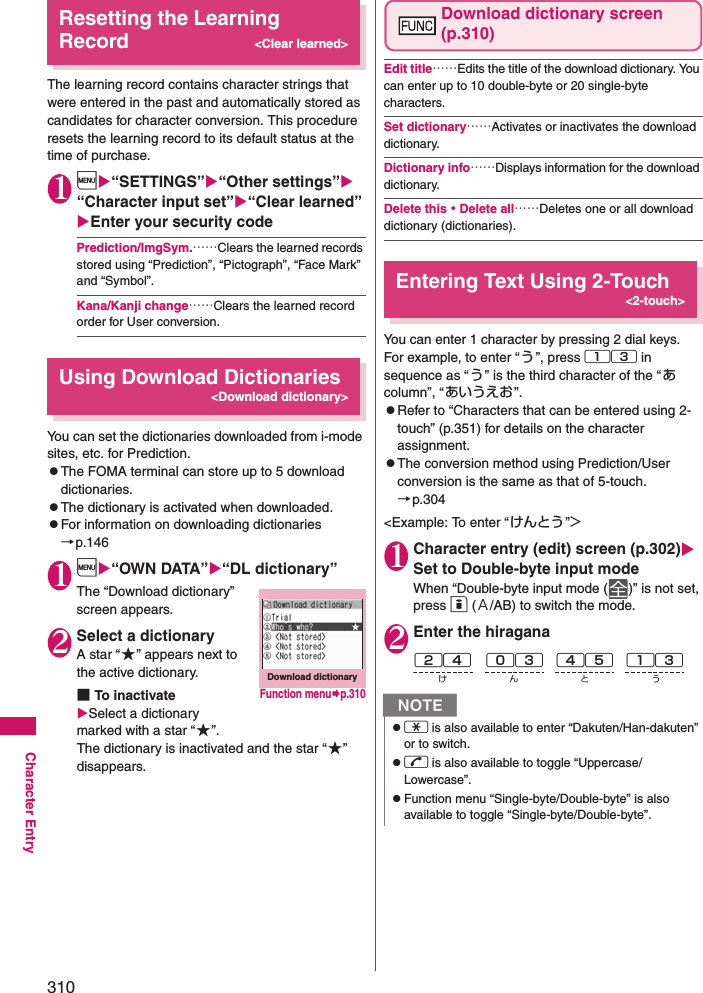
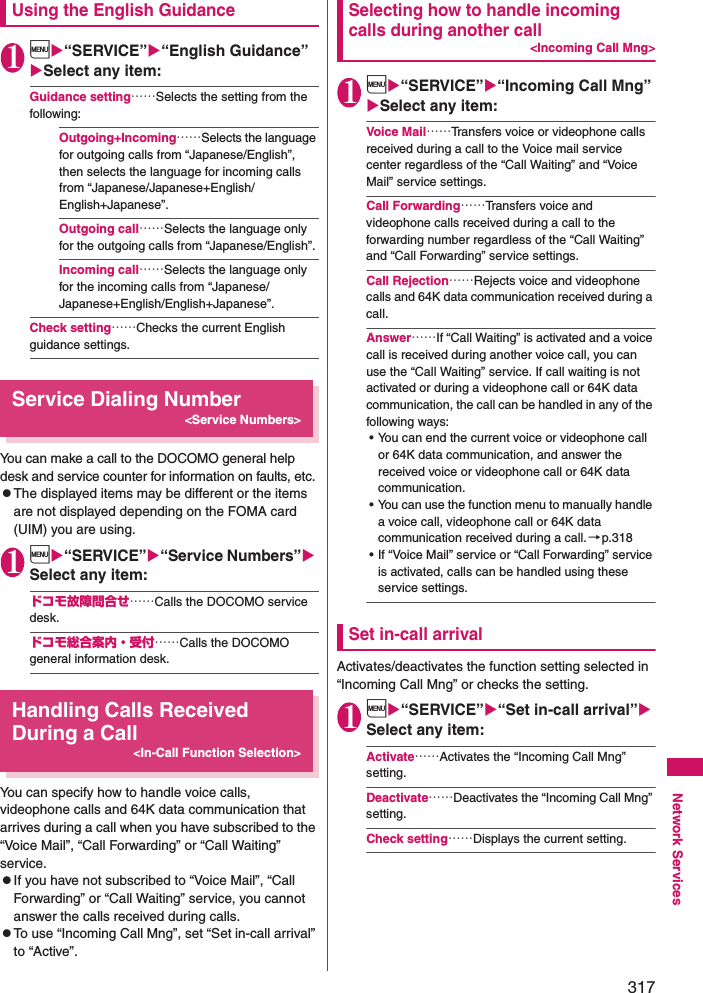
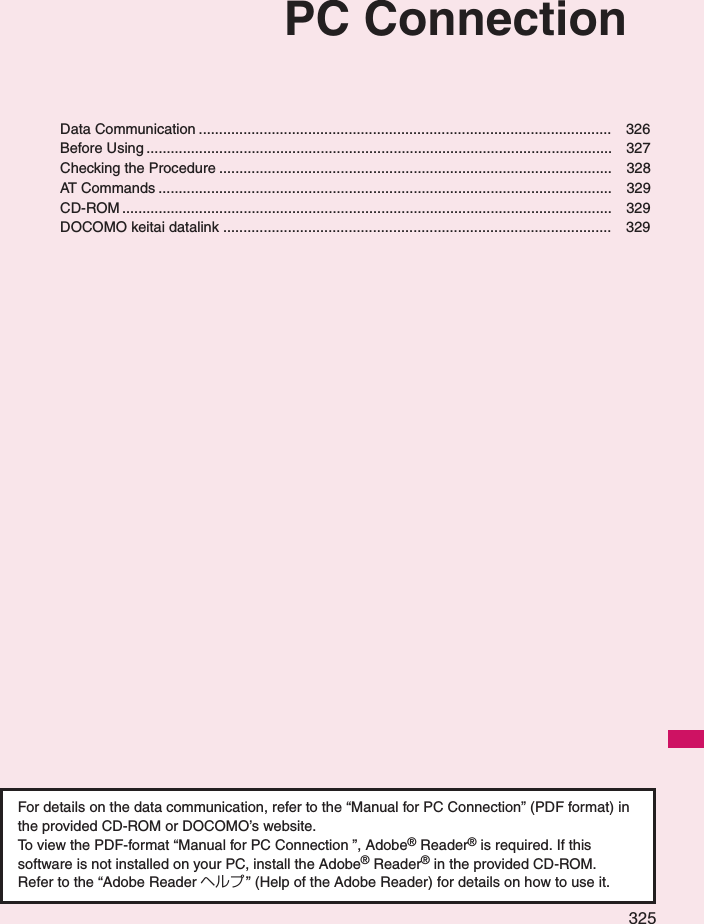
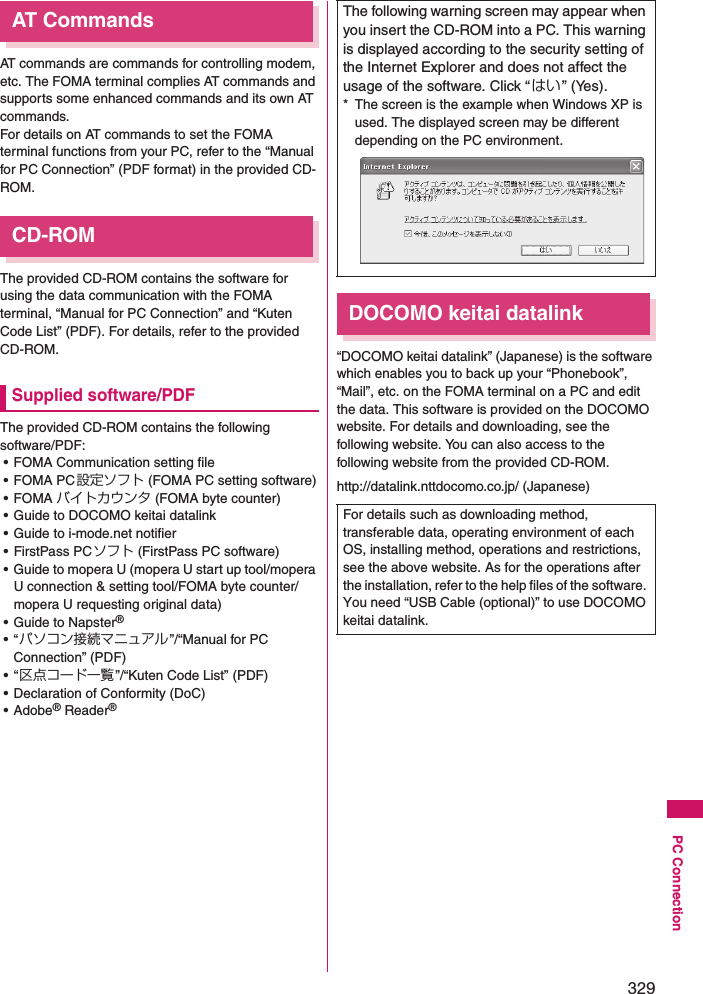
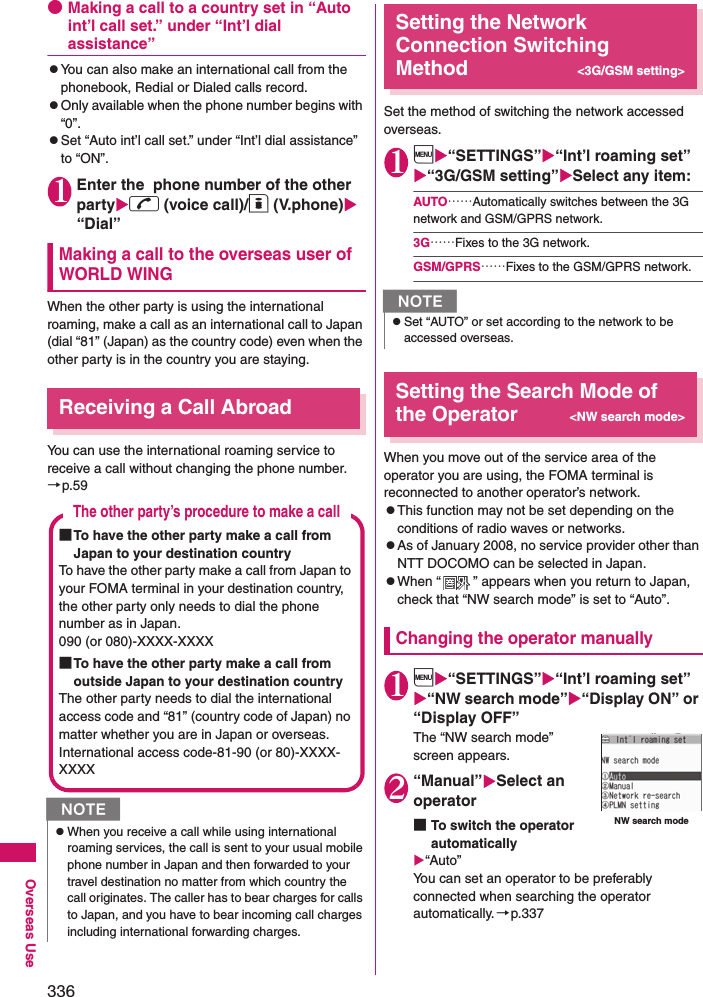
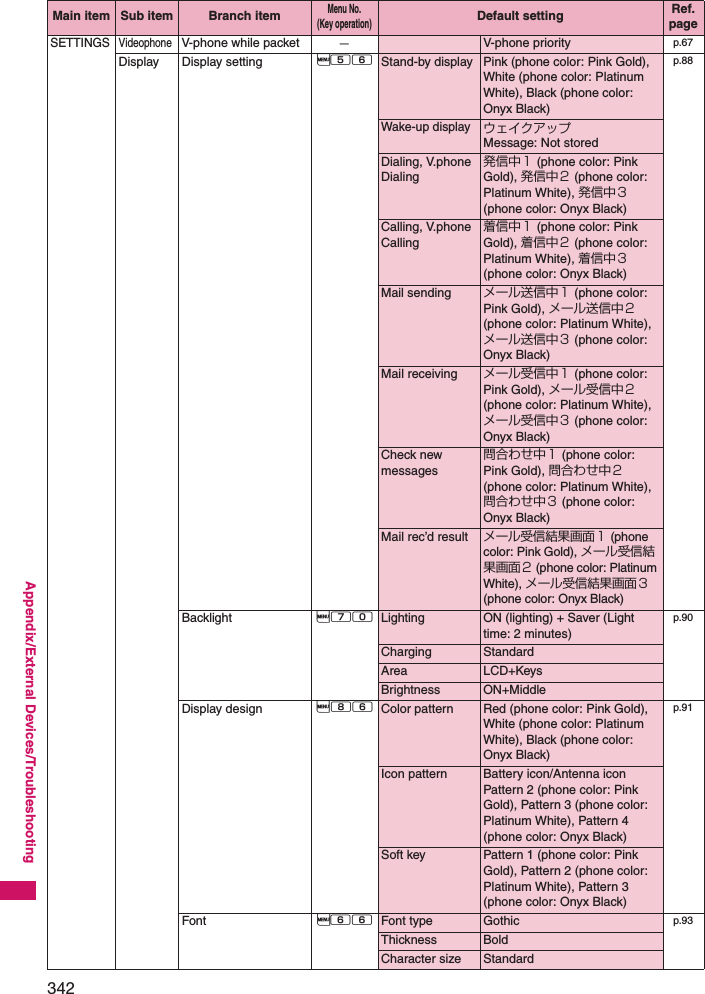
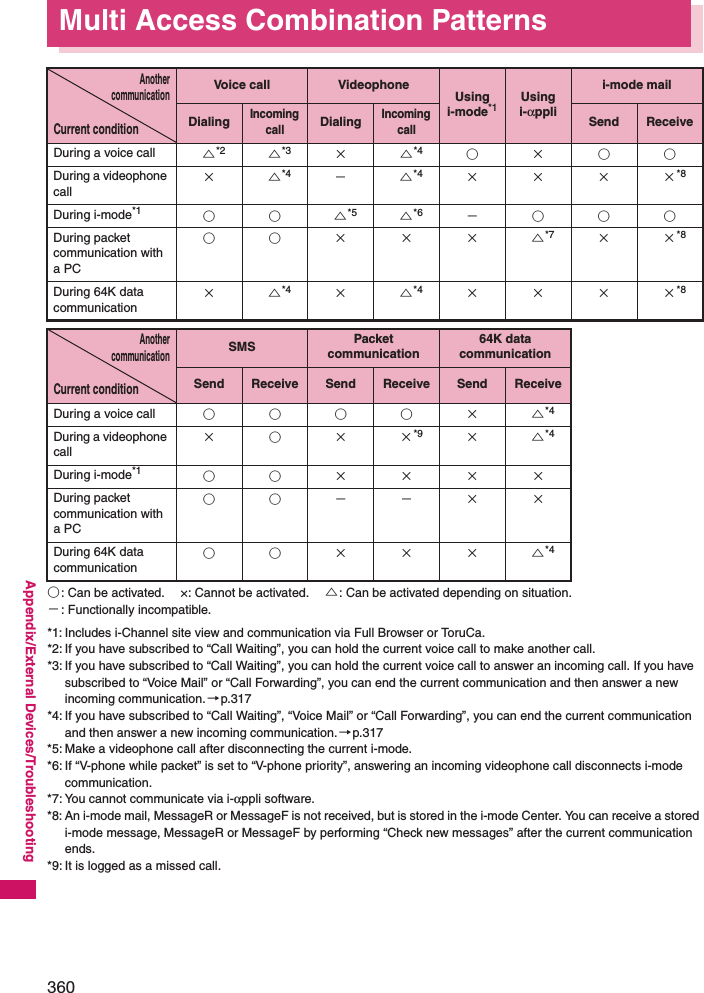
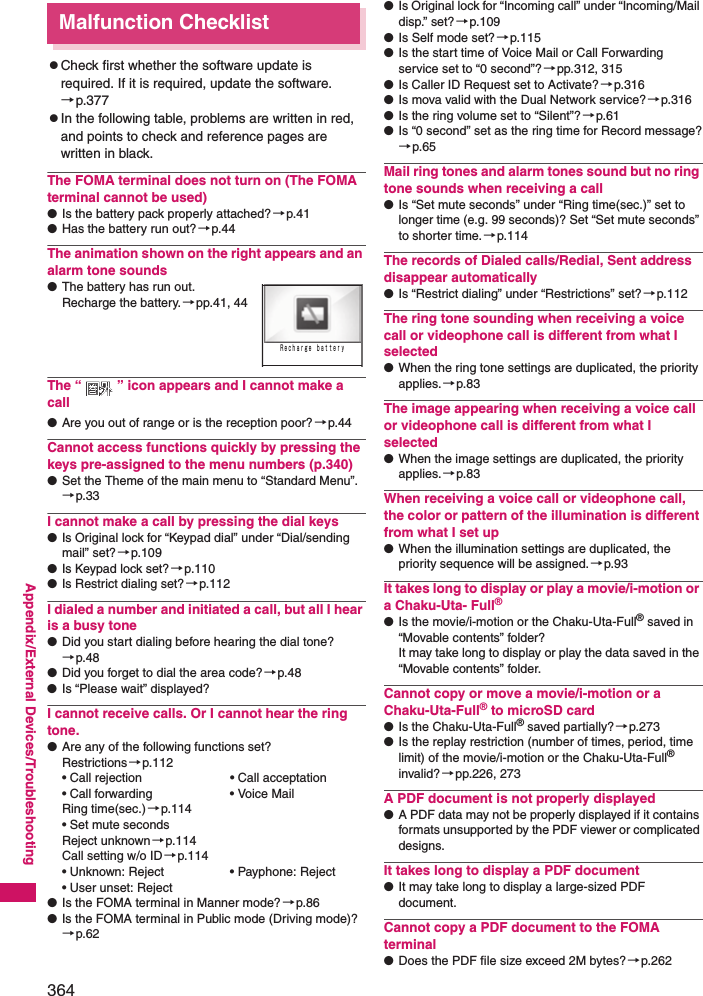
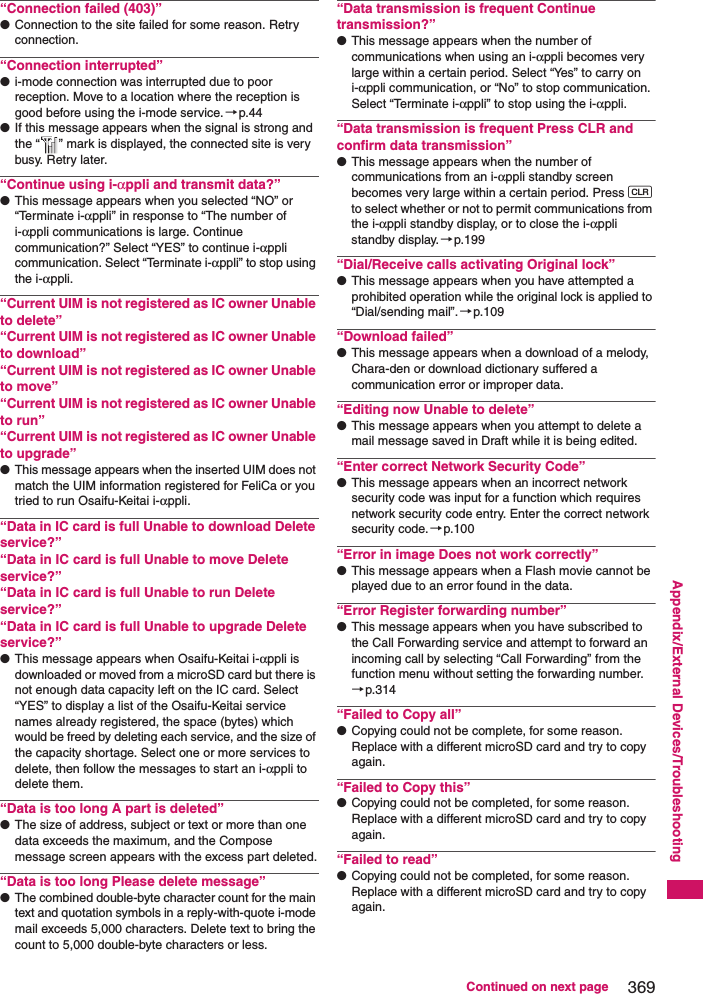
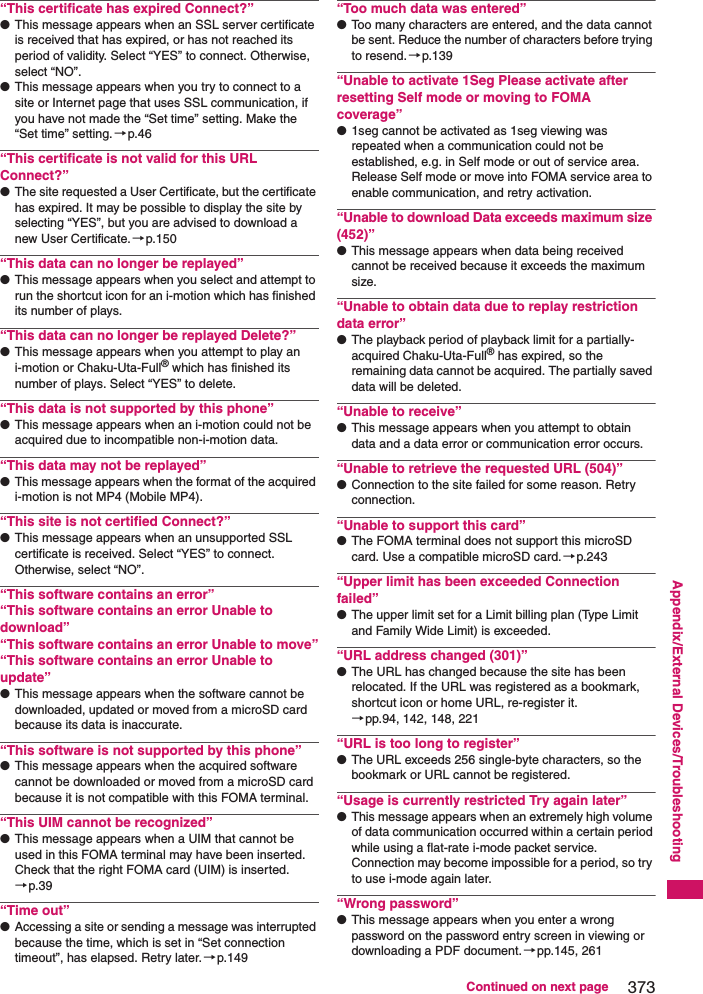
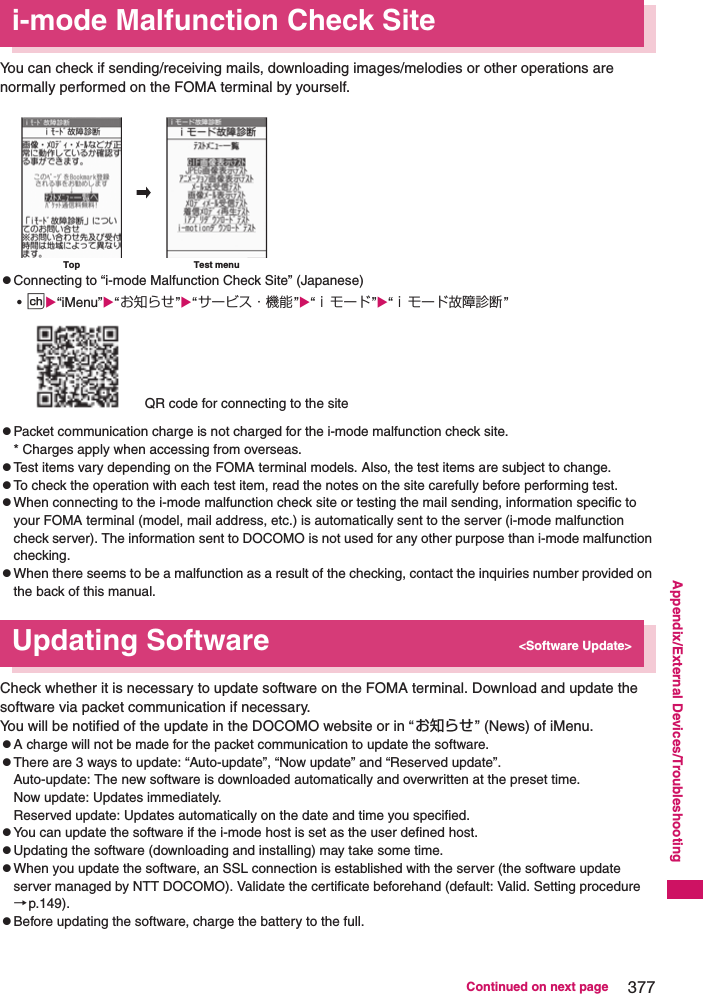
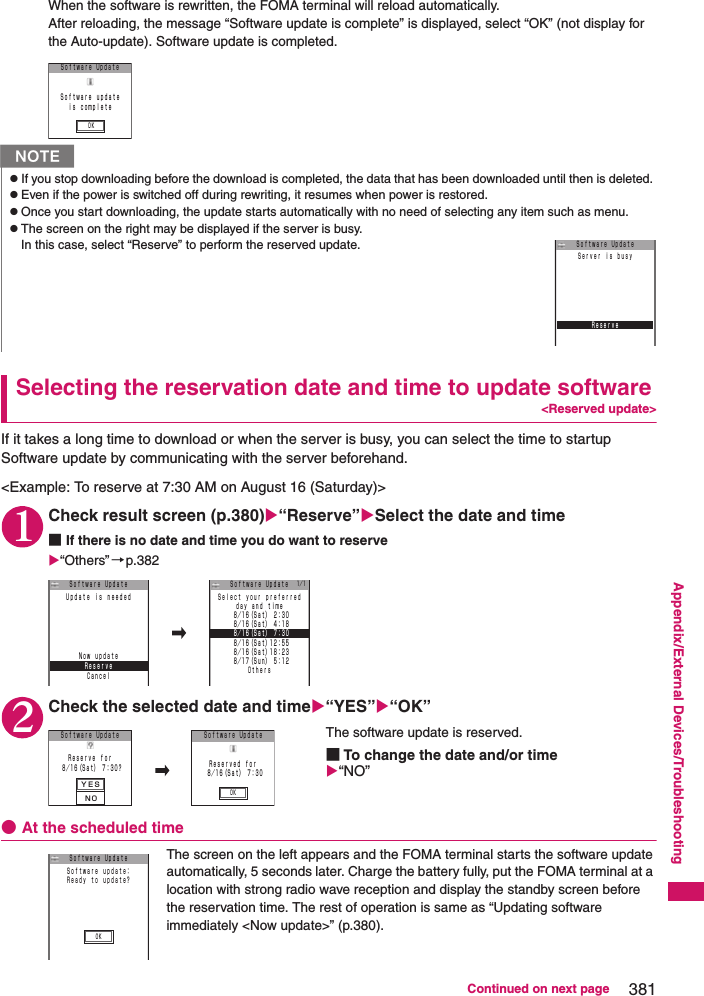
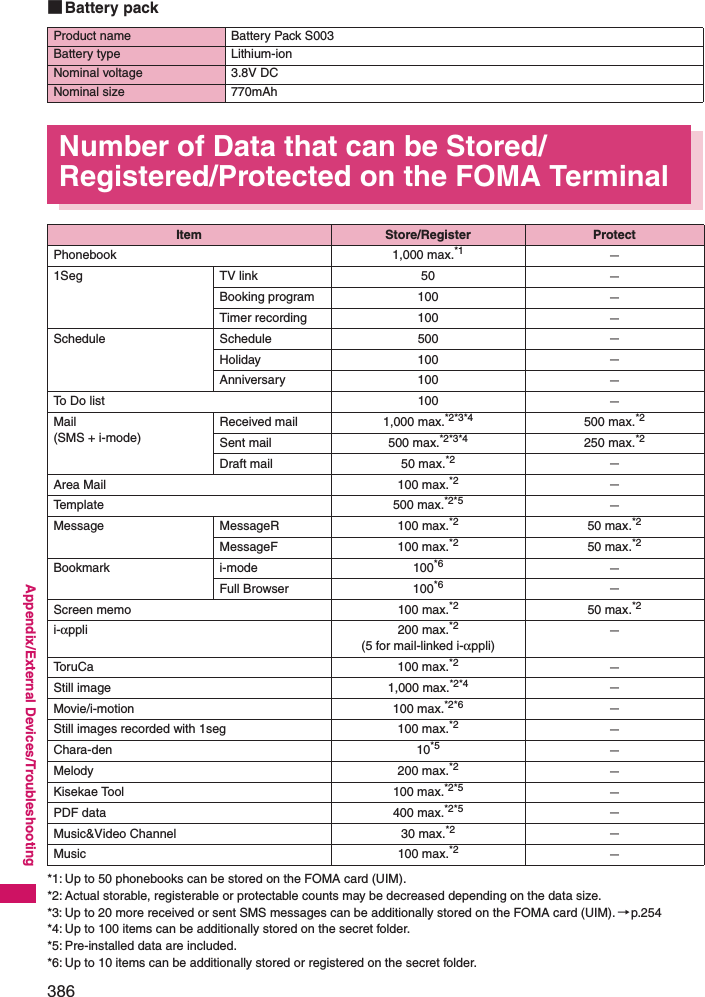
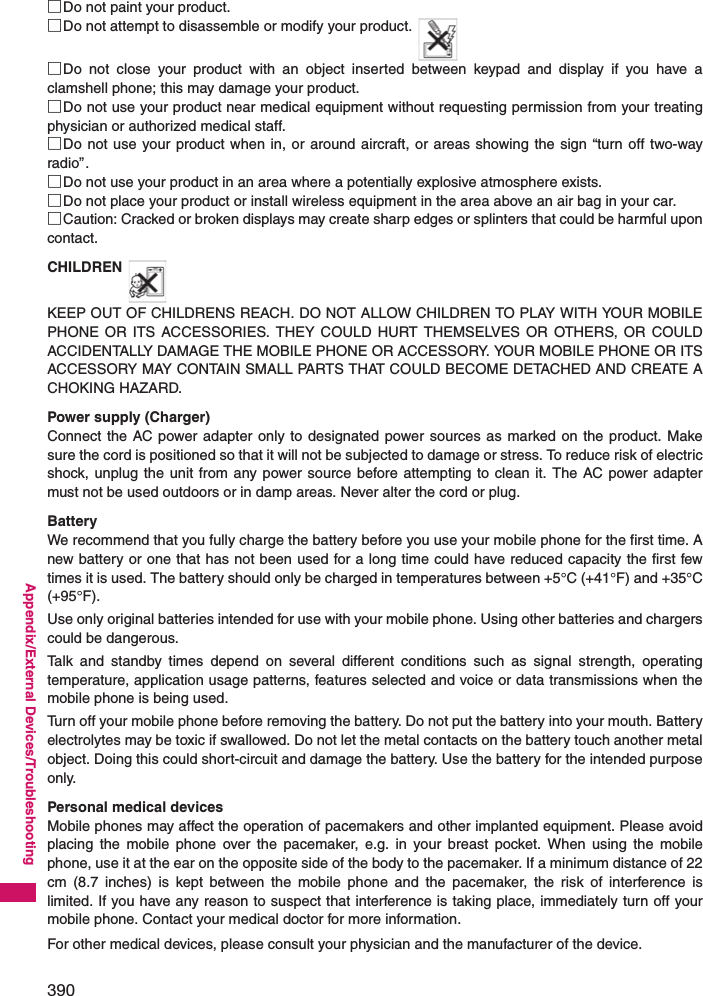
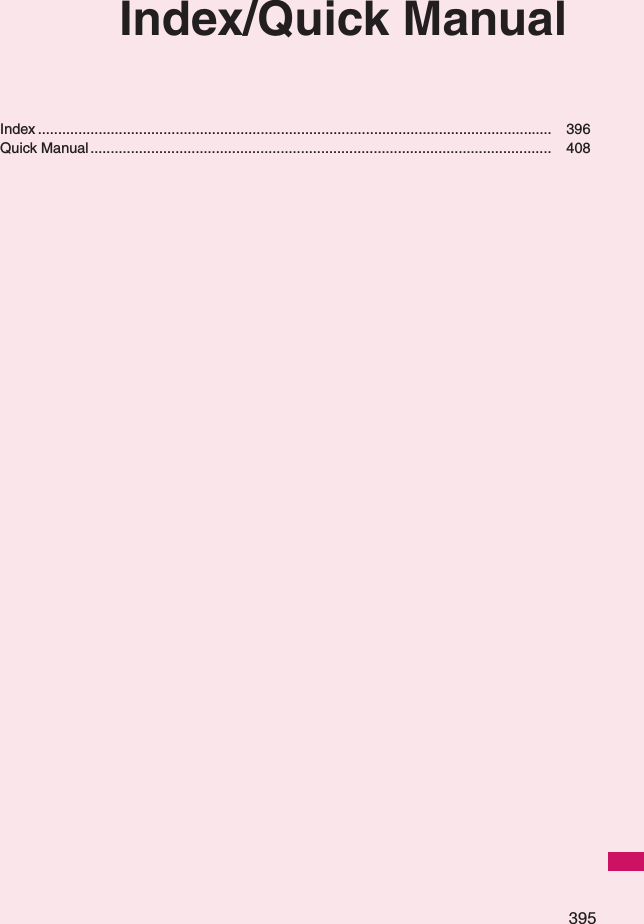
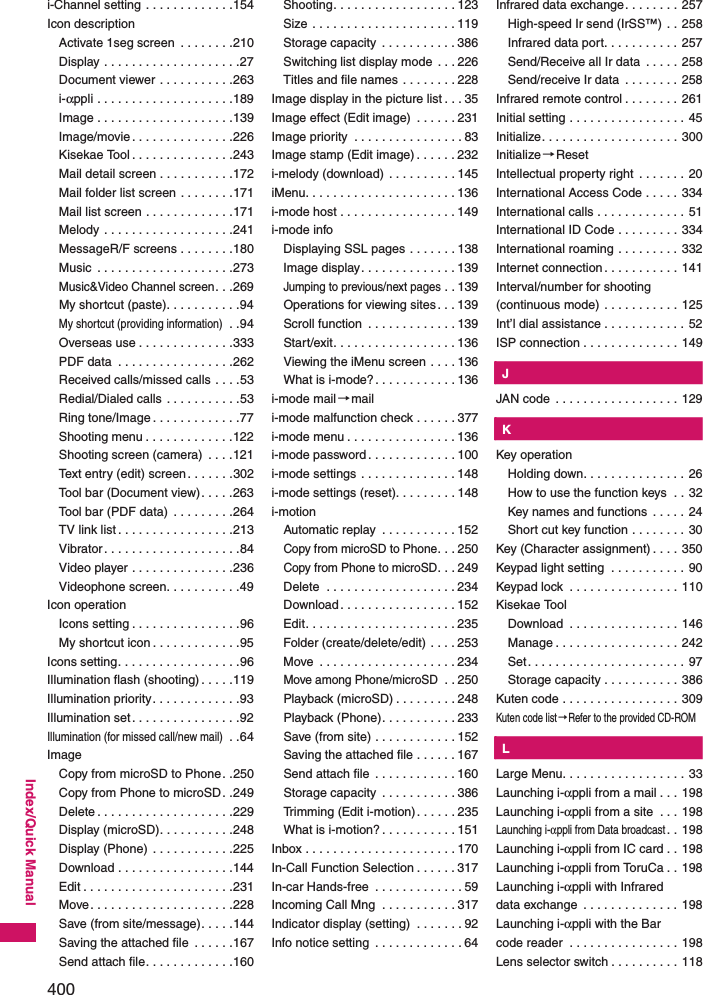
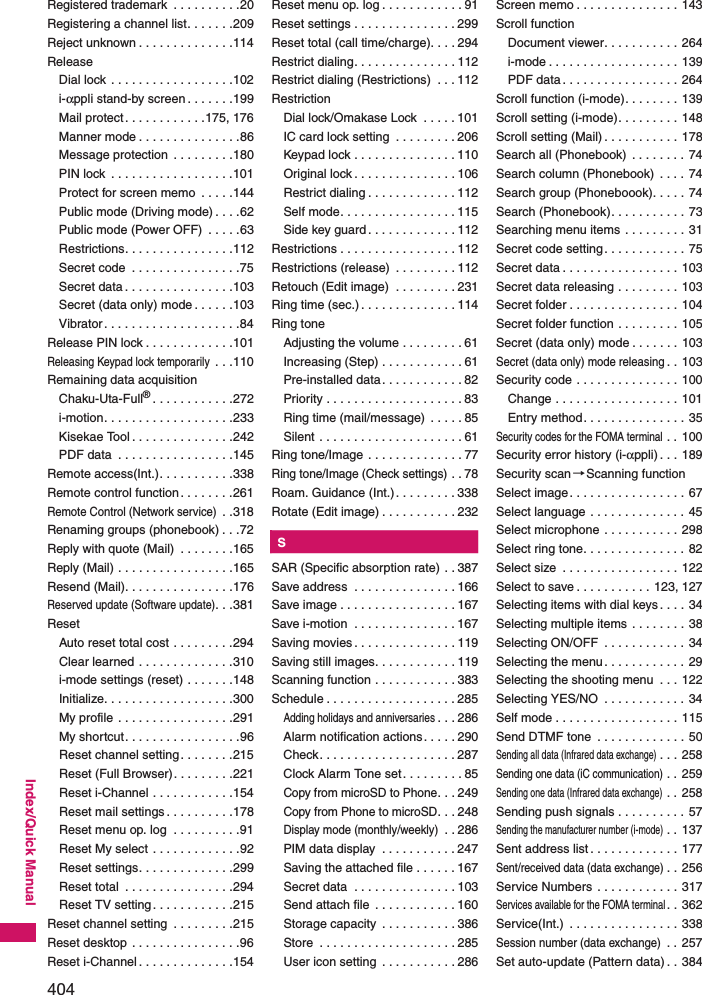
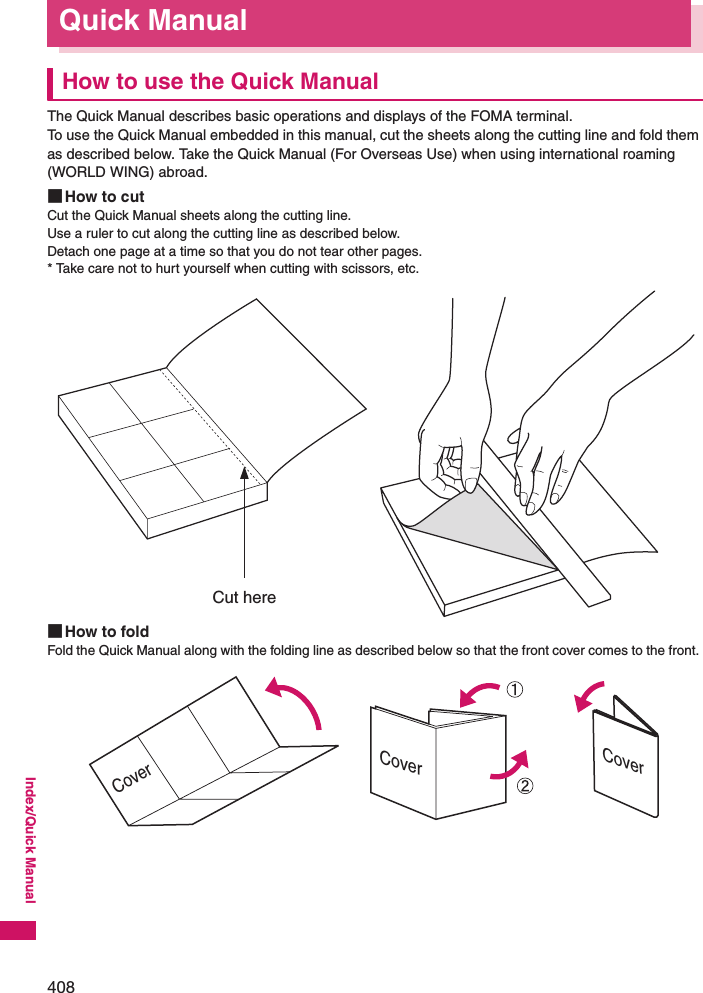
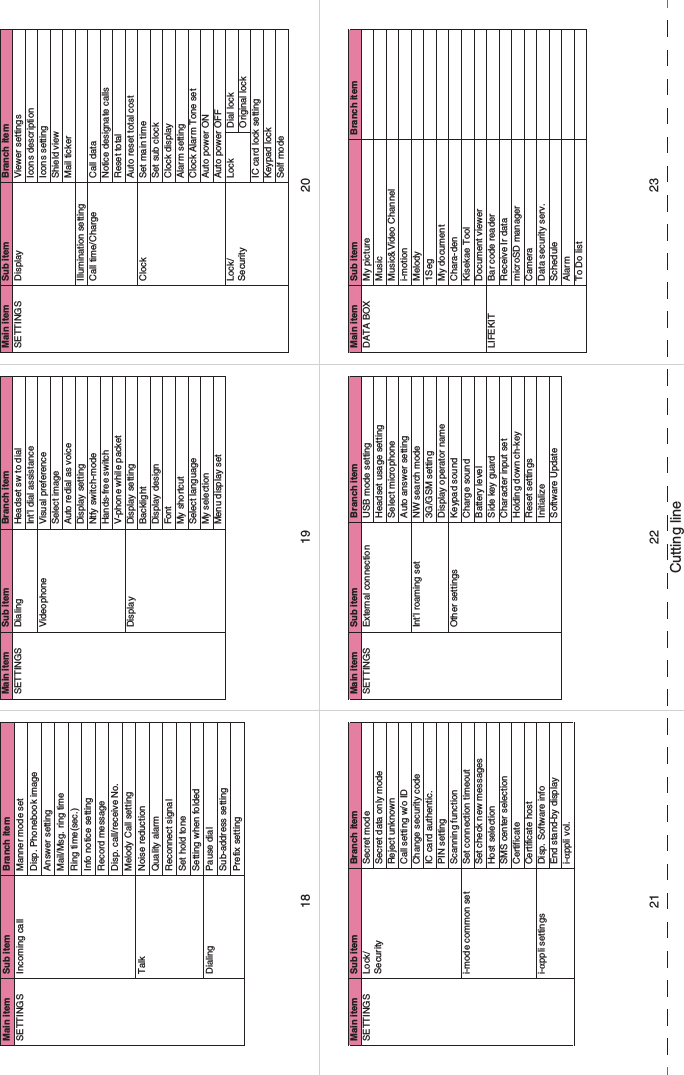
![268Music&Video Channel/Music PlaybackMusic&Video ChannelMusic&Video Channel is a service that a music program of up to 1 hour is automatically distributed during the night only by setting your favorite channel in advance. You can also enjoy the movie programs in high quality of up to 30 minutes. The program is updated regularly and you can enjoy the distributed program anytime such as during commuting time to work or school. ■Notes on using Music&Video Channel• Music&Video Channel is a pay service you need subscription (you need to subscribe to i-mode and Pake-Houdai/Pake-Houdai full beforehand). • Some programs may charge you an information fee besides the Music&Video Channel service charge. • For details on Music&Video Channel, refer to “Mobile Phone User’s Guide [i-mode] FOMA version”. • After you subscribe to the Music&Video Channel service, when inserting the FOMA card to a Music&Video Channel incompatible FOMA terminal, you cannot use the service. Even in this case, note that you would be charged the service fee unless you unsubscribe from the Music&Video Channel. • You cannot set or download Music Channel during international roaming*. Stop the distribution before you go abroad. Restart the distribution service after you come back. For details, refer to “Mobile Phone User’s Guide [i-mode] FOMA version”. * : Note that the packet communication charges for the i-mode connection when you attempt to set or download programs during international roaming. ■BGM play (Background play)You can view i-mode sites or mails while playing a Music&Video Channel program.→p.280Setting Up ProgramWhen you set a desired program beforehand, the program data is automatically delivered at night. 1i“MUSIC”“Music&Video Channel”The “Music&Video Channel” screen appears. 2“Set program”Follow on-screen instructionsFor details, refer to “Mobile Phone User’s Guide [i-mode] FOMA version”. ●Checking/canceling the program setting1Music&Video Channel screen (p.268) “Set program”Follow on-screen instructionsFor details, refer to “Mobile Phone User’s Guide [i-mode] FOMA version”. NzYou can set 2 program for Music Channel at a time. zYou need to add a site providing Music&Video Channel programs to My Menu (p.141) before setting a program. zWhen you have not subscribed to the Music&Video Channel service, the message notifies you that the service is not subscribed. When you select “Music&Videoチャネルのお申し込みへ” (Subscribe to the Music&Video Channel) on the screen, you can subscribe to the Music&Video Channel service. NzResetting the program does not delete the added My Menu. Music&Video ChannelMusic&Video ch ○○ランキングSet programProgram listAbout this service ○○ヒットチャートFunction menup.270](https://usermanual.wiki/Sony/A3880003.08-user-guide-part-2/User-Guide-951151-Page-18.png)
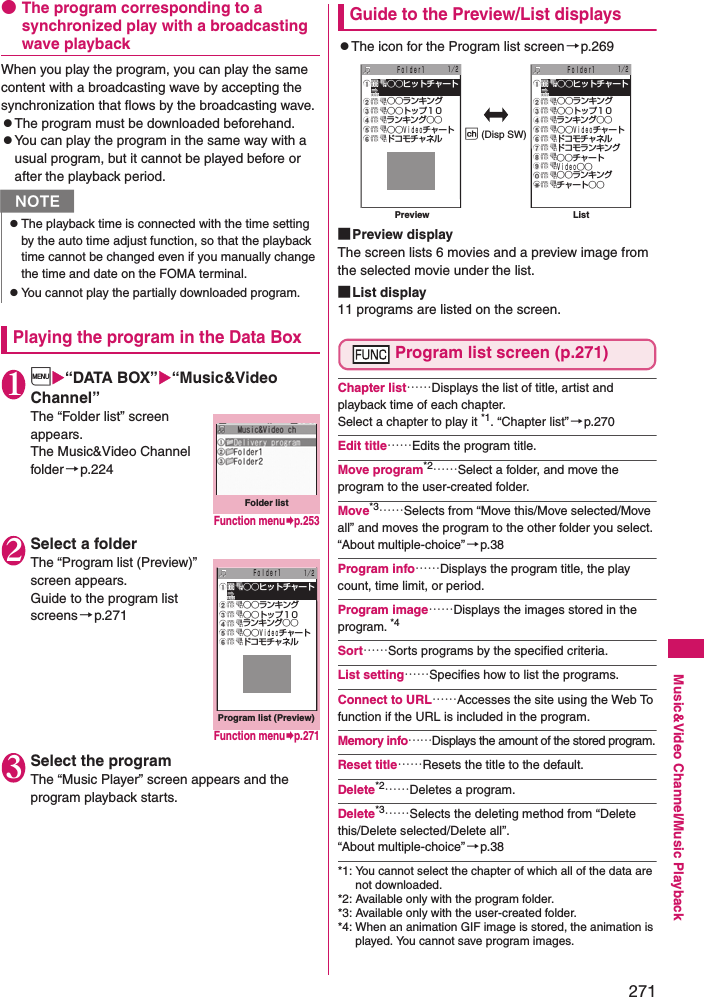
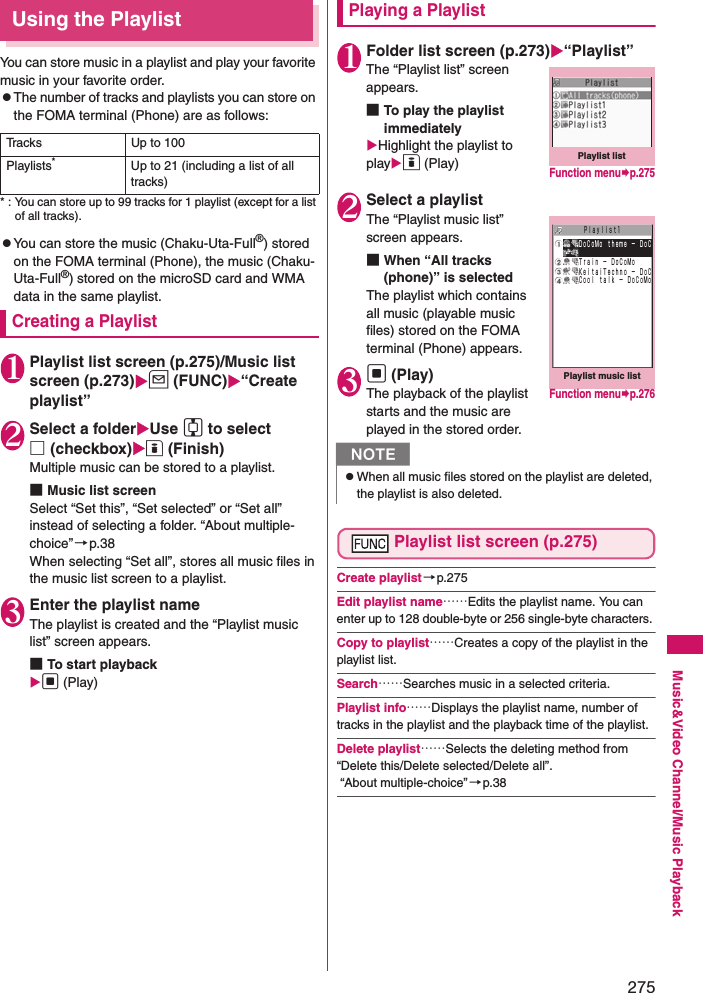
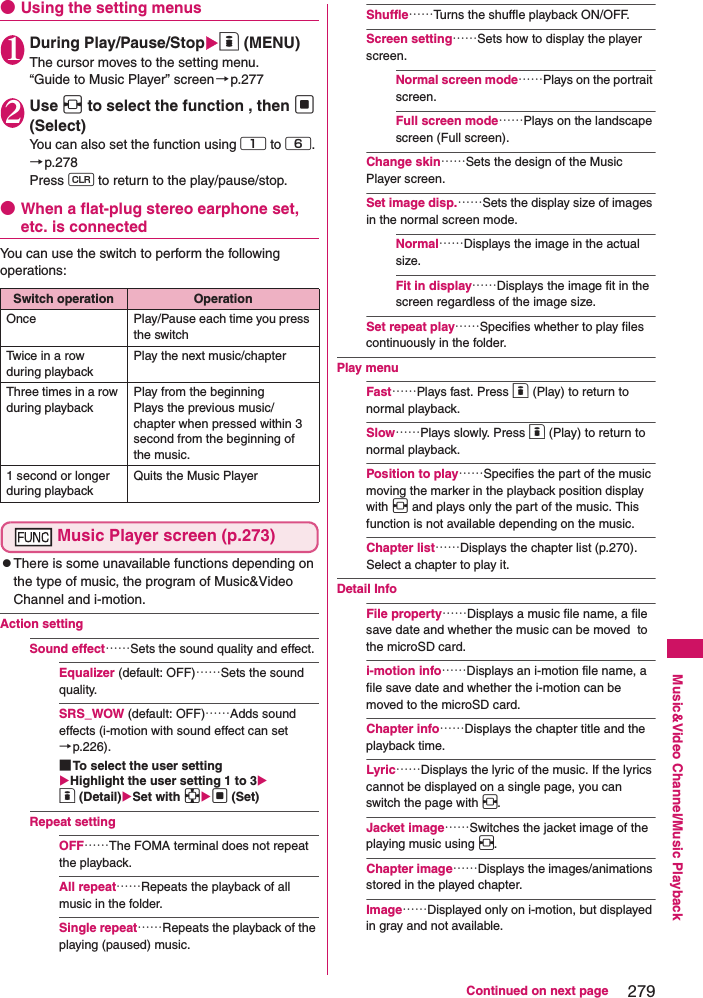
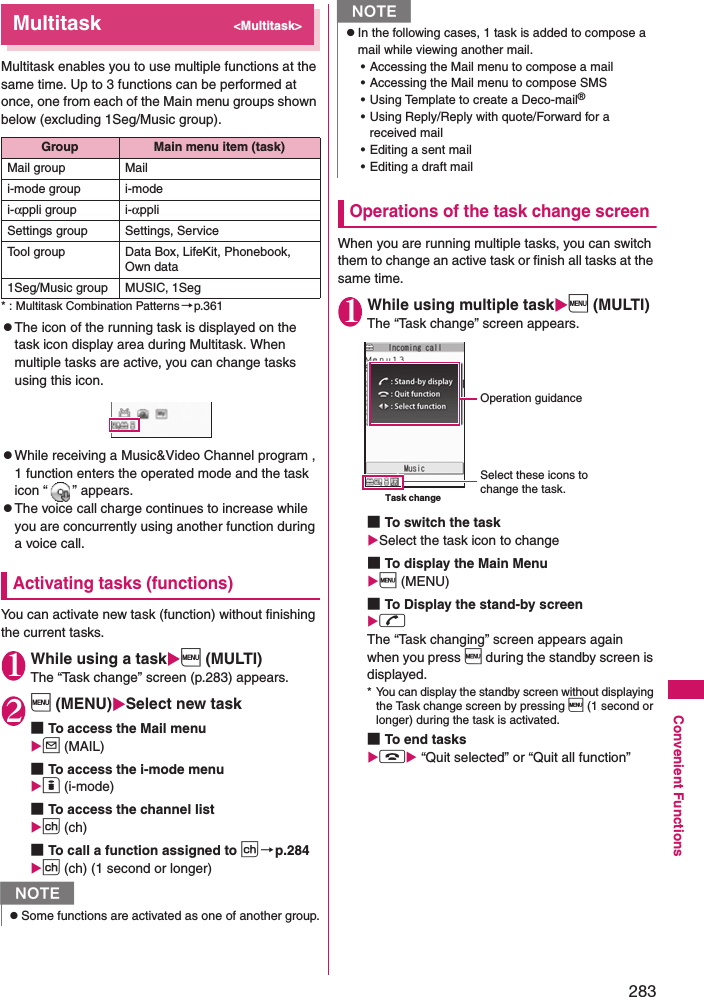
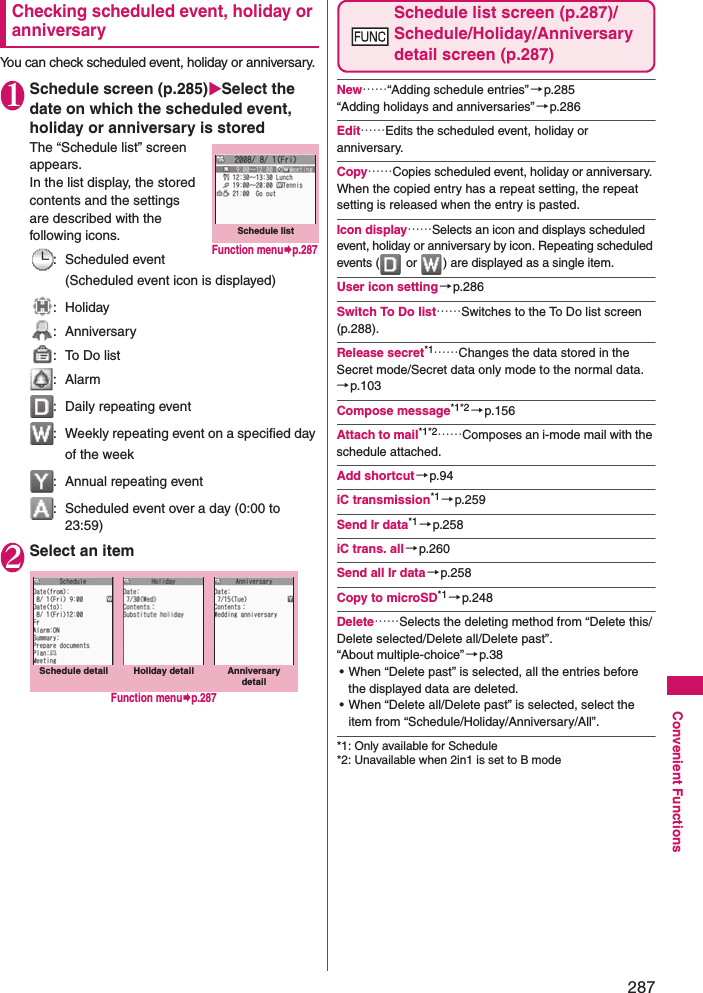
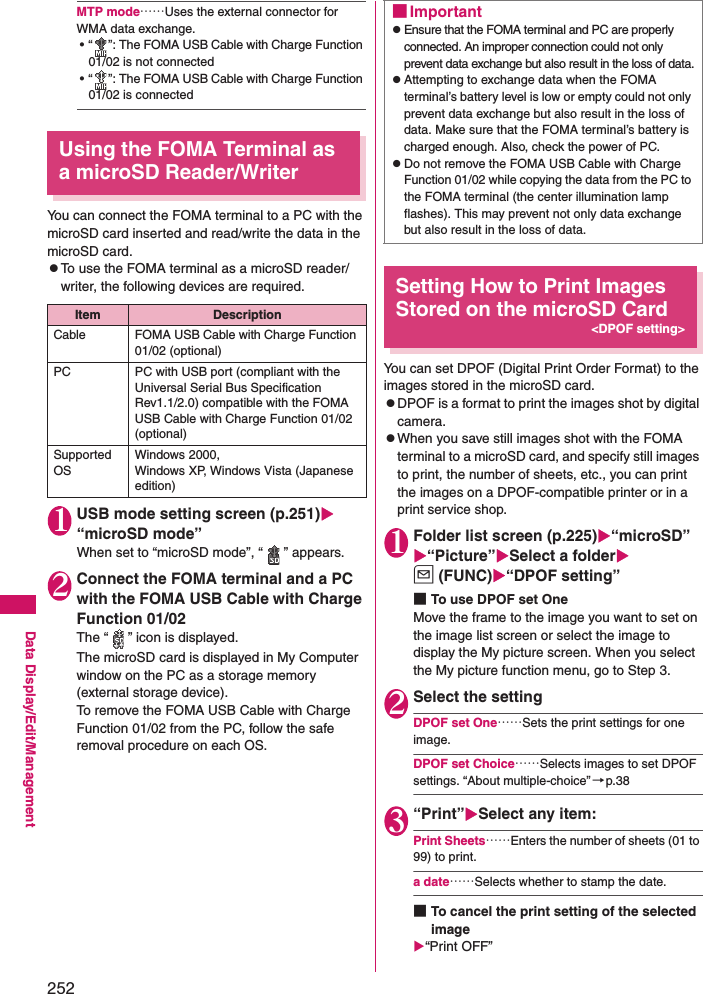
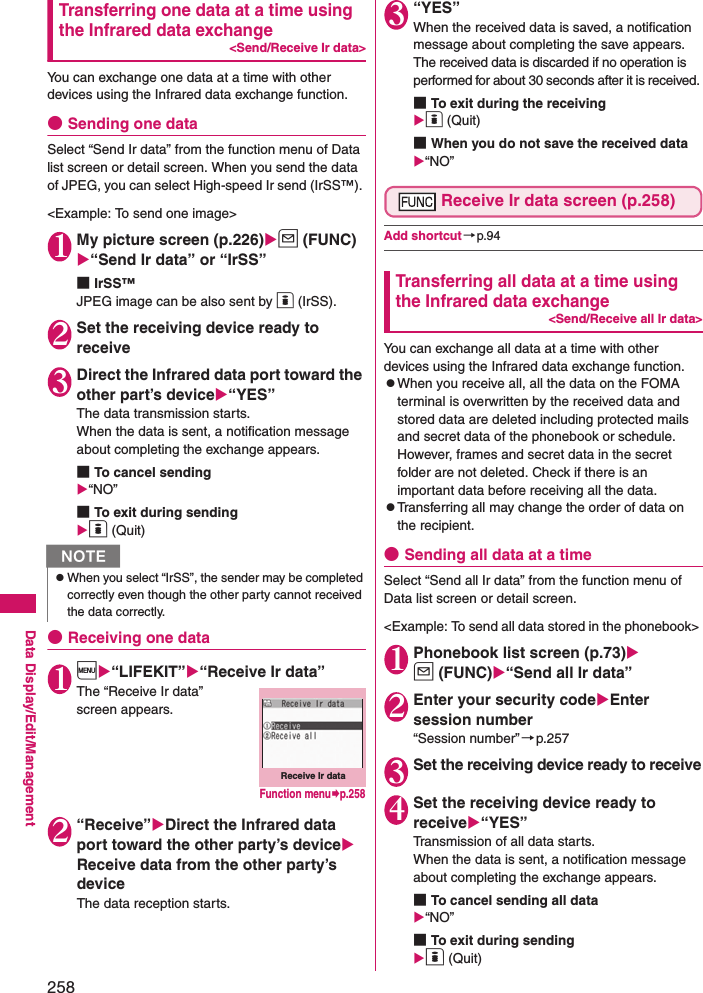
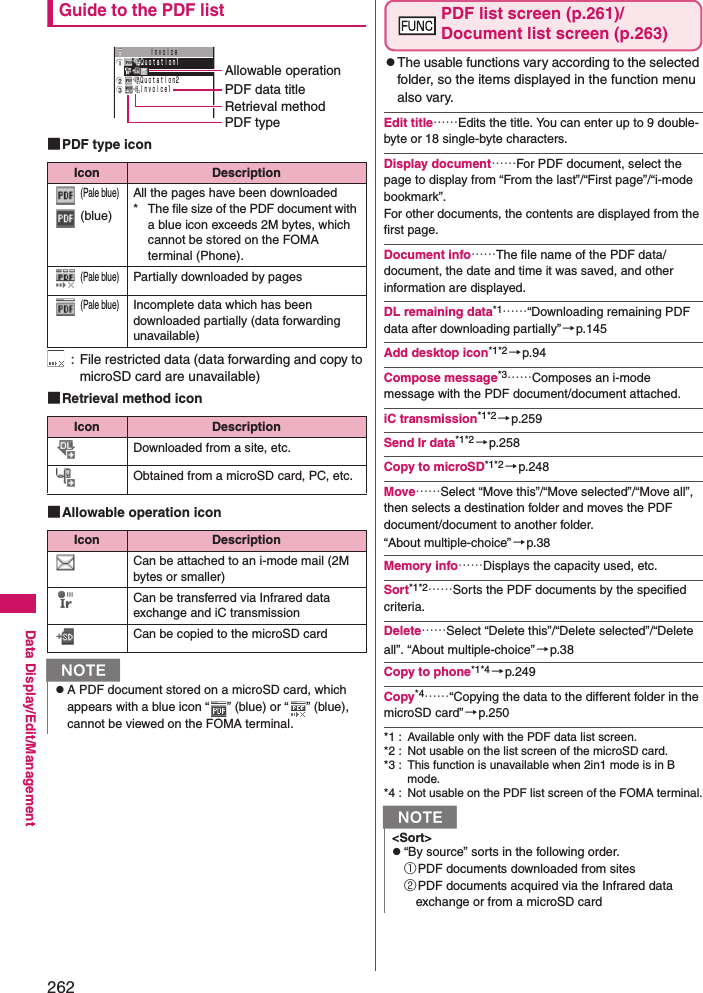
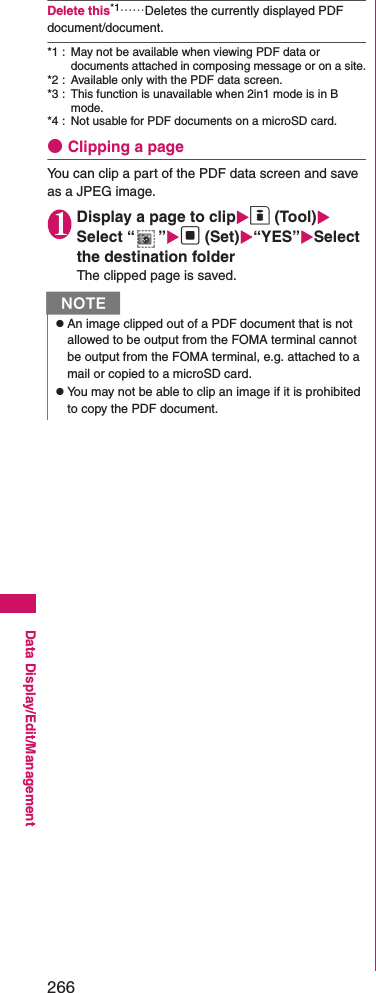
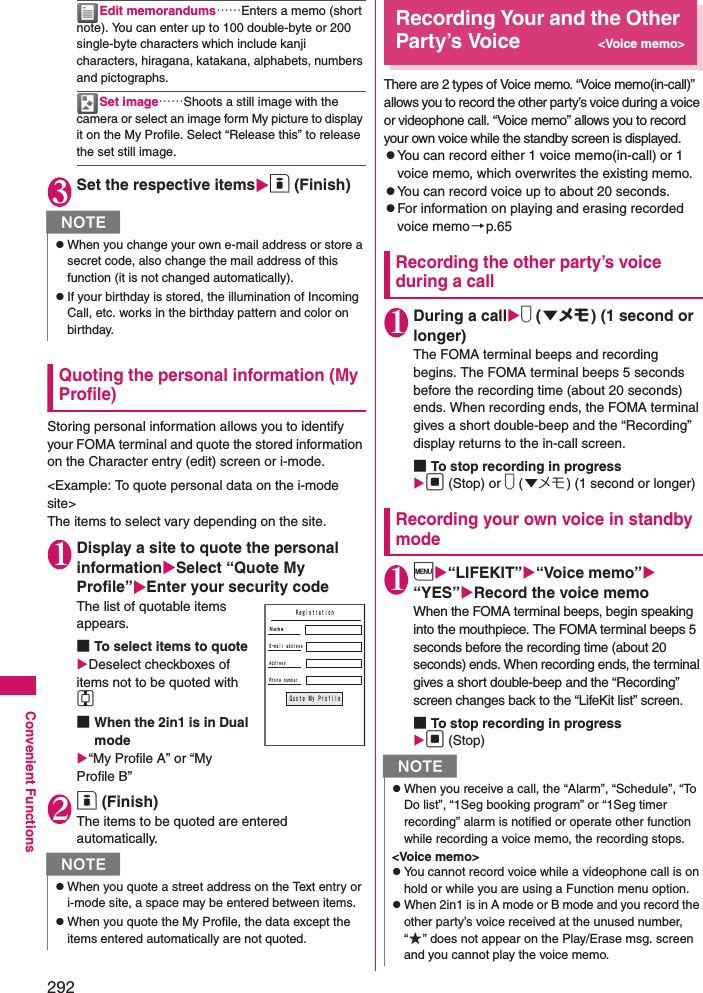
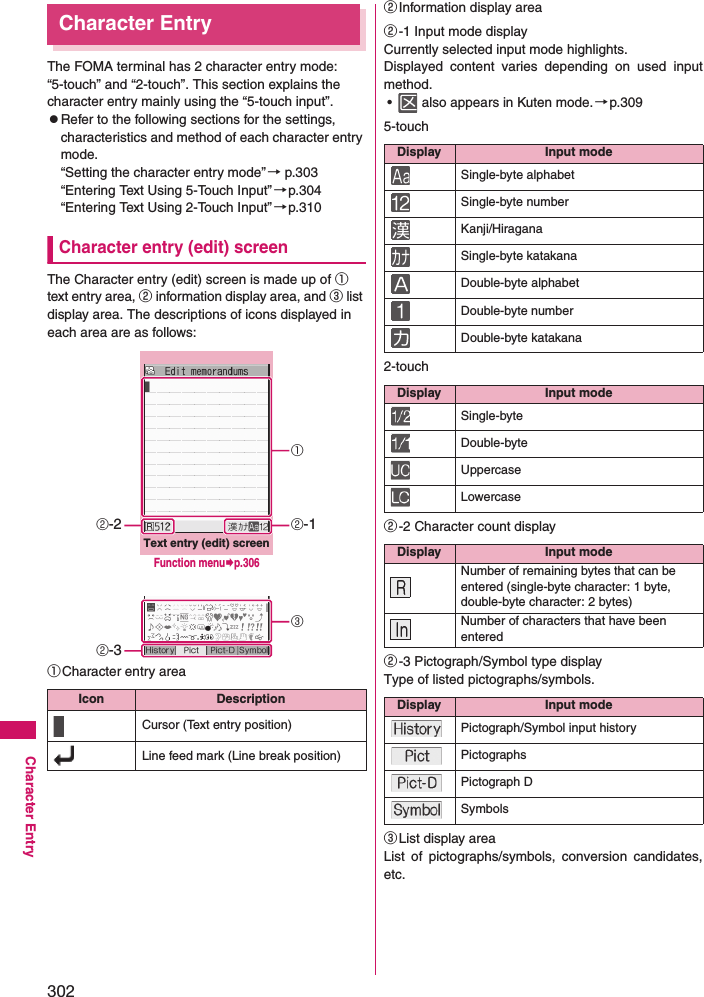
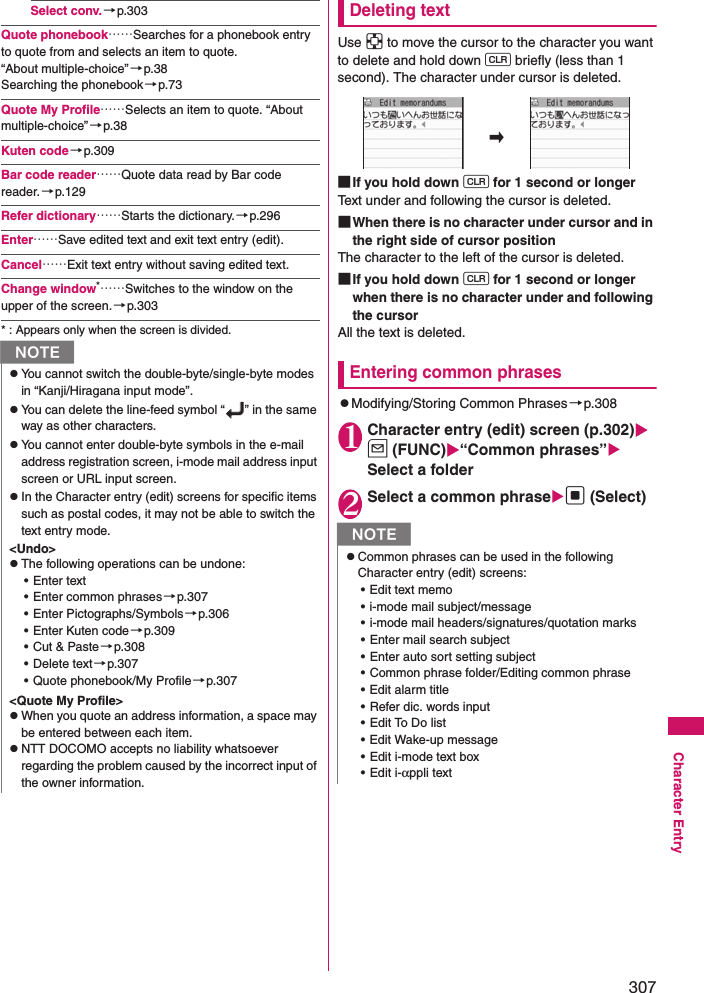
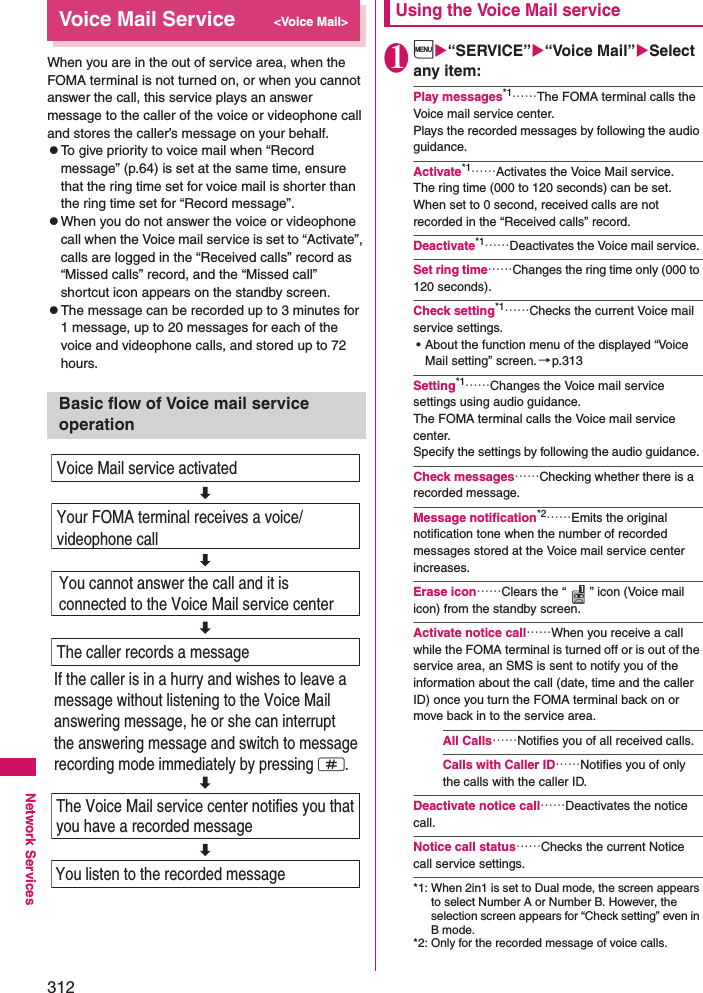
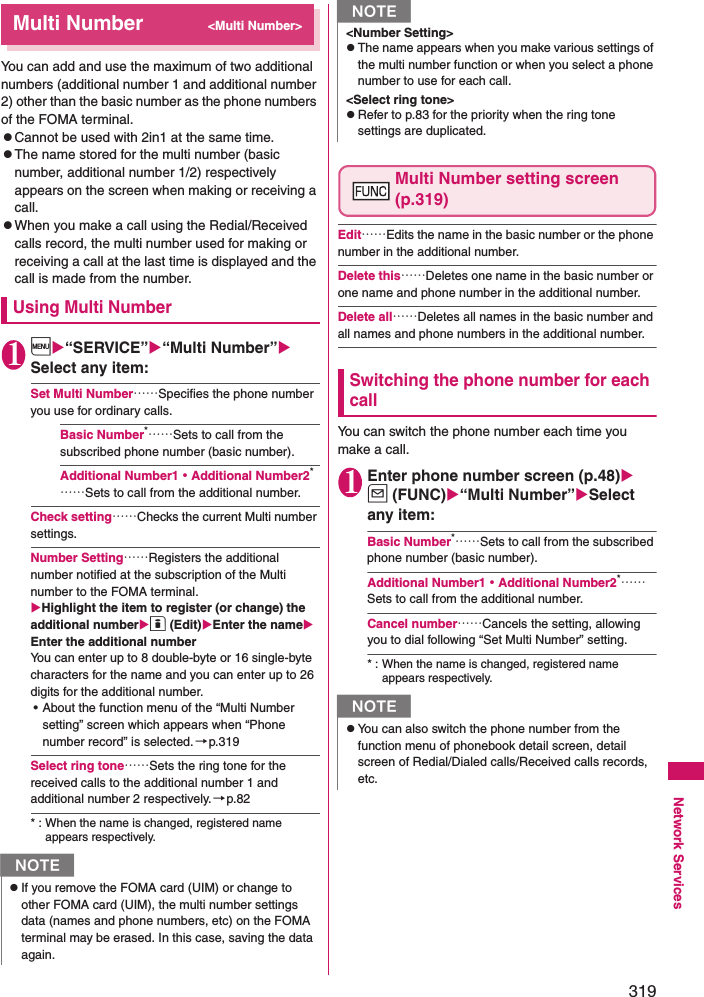
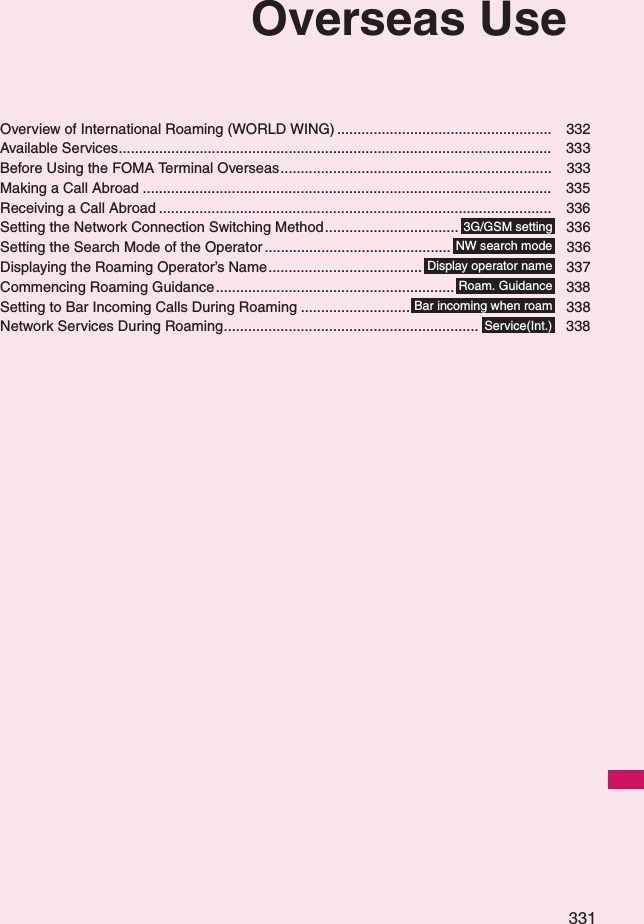
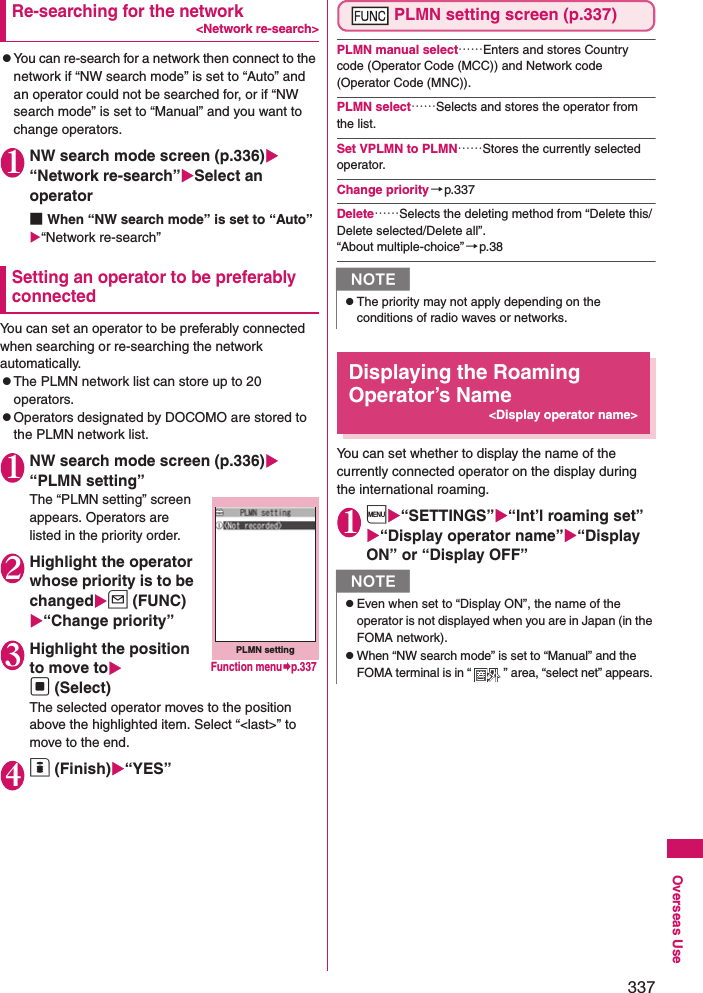
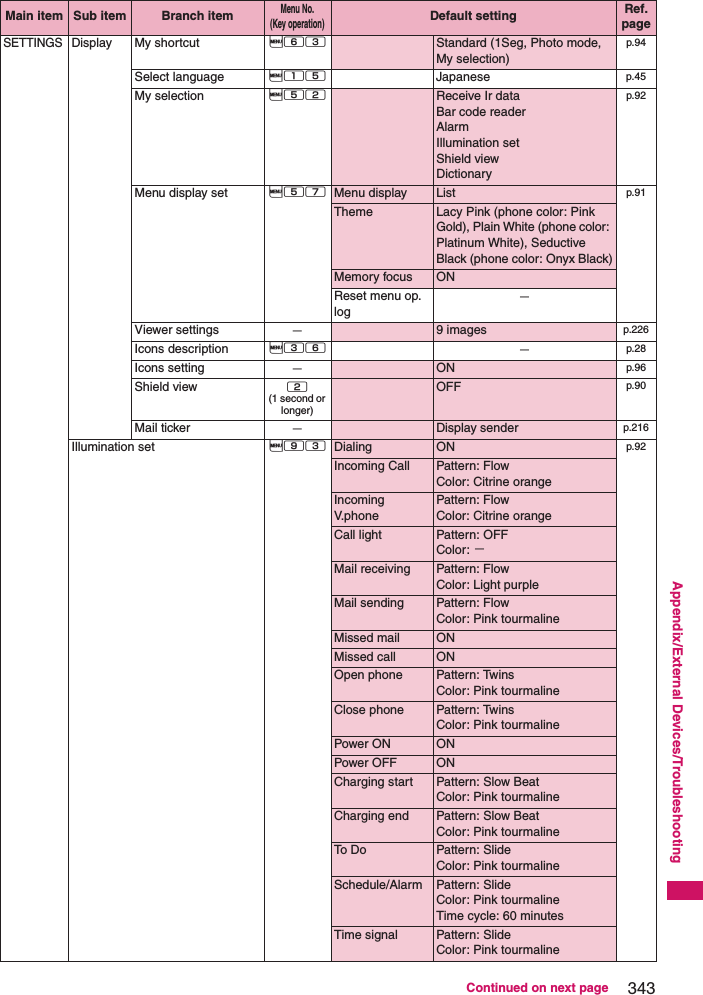
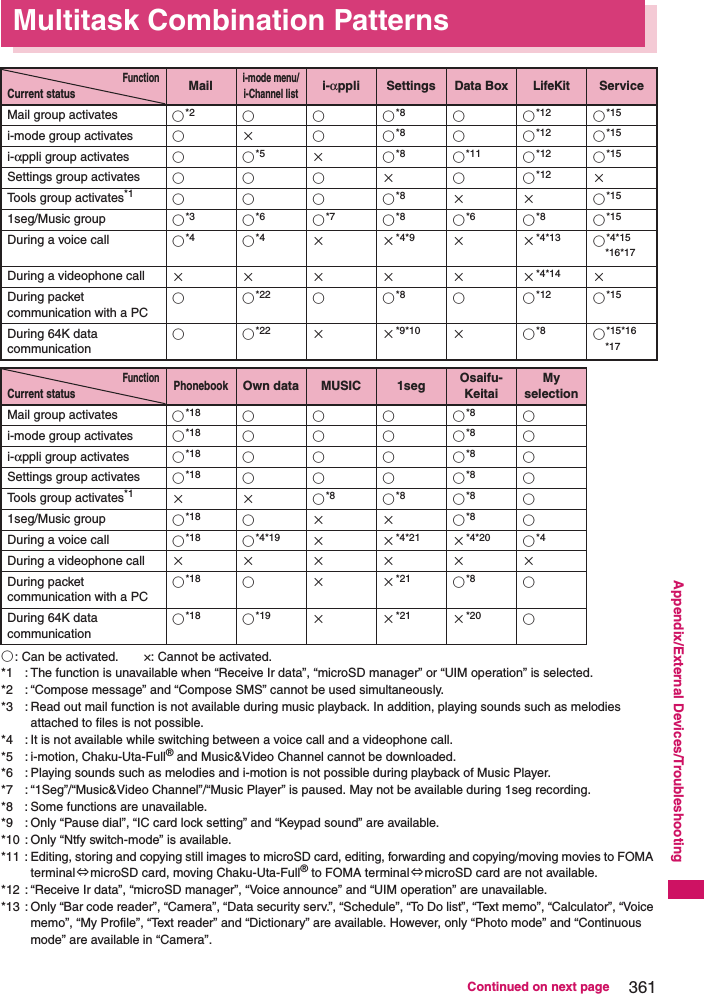
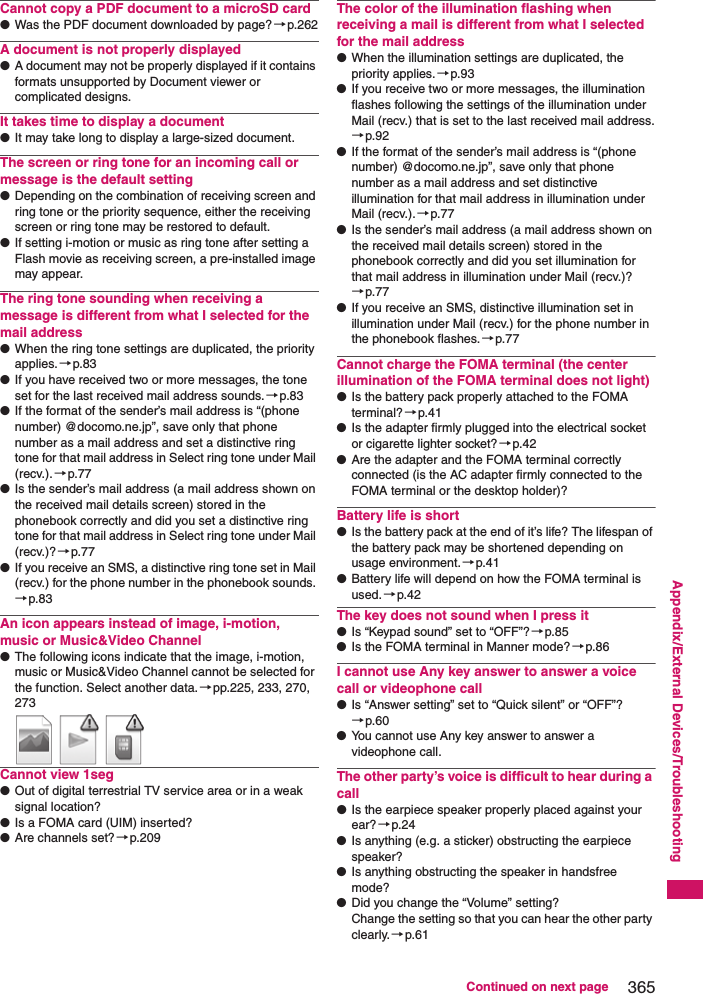
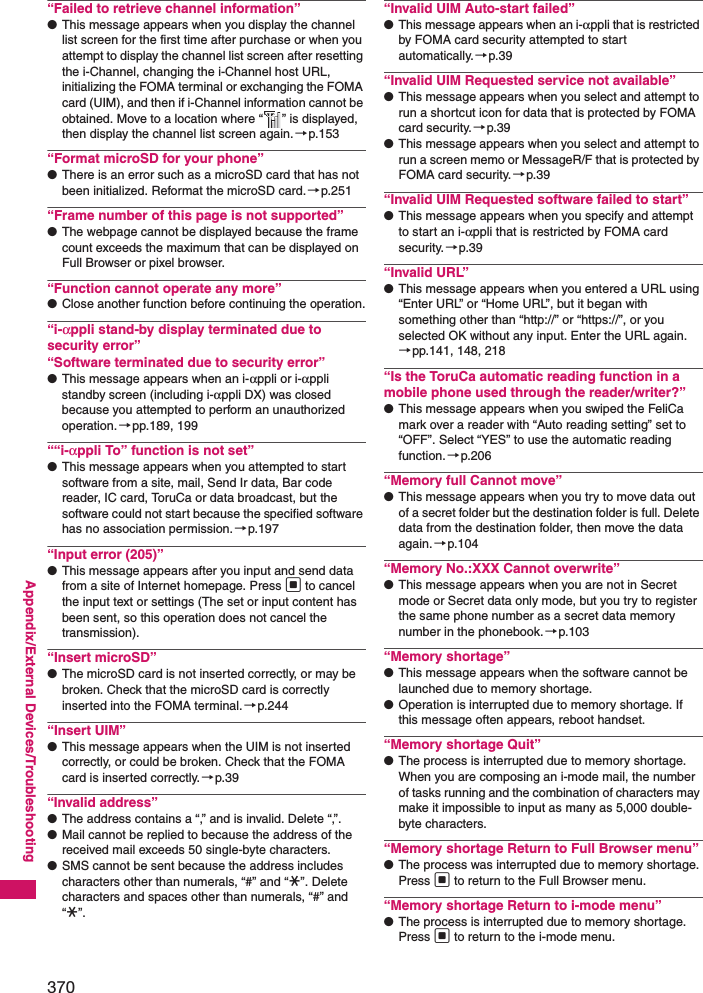
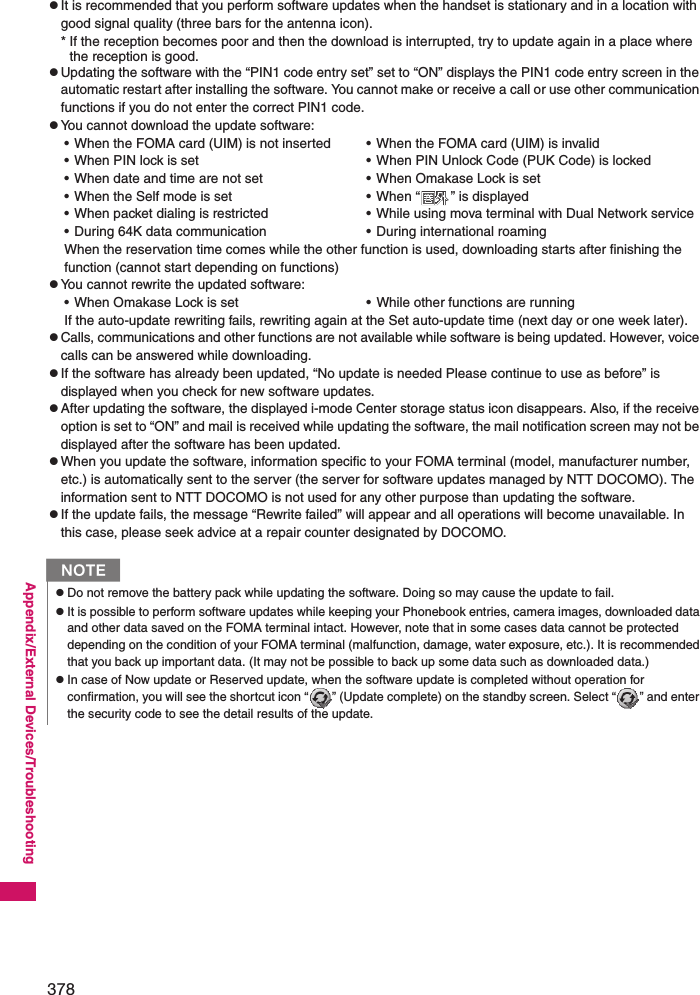
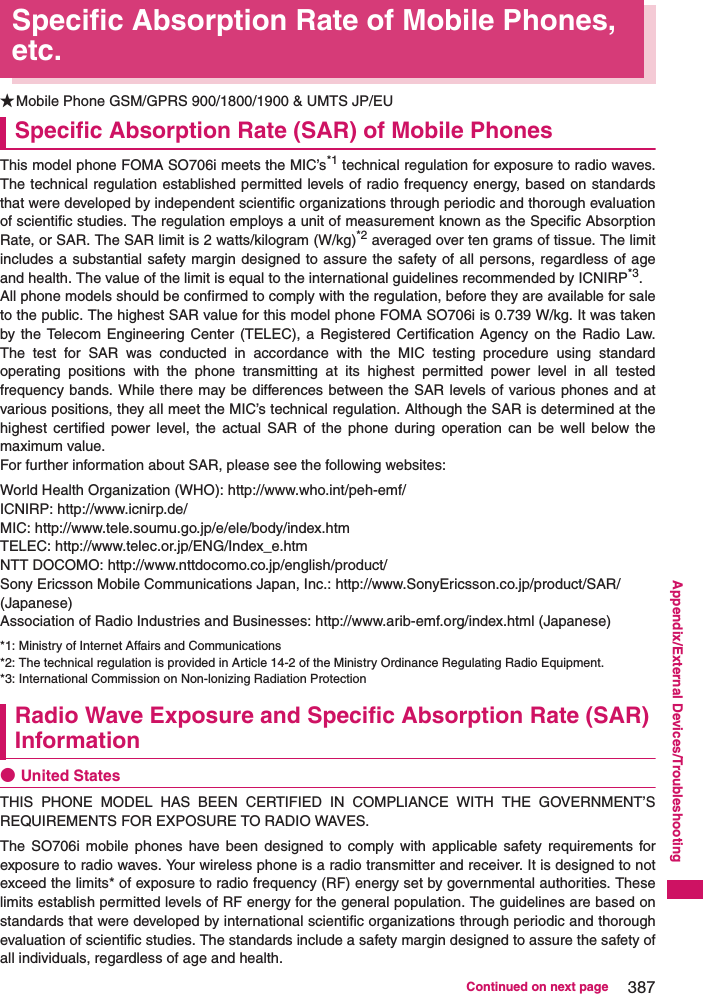
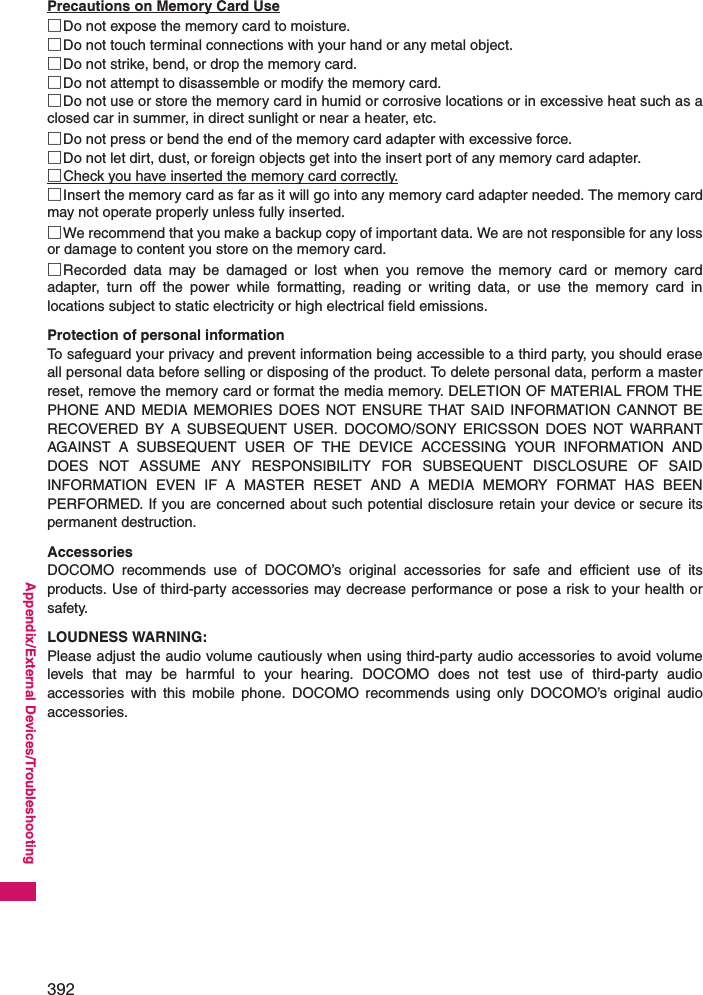
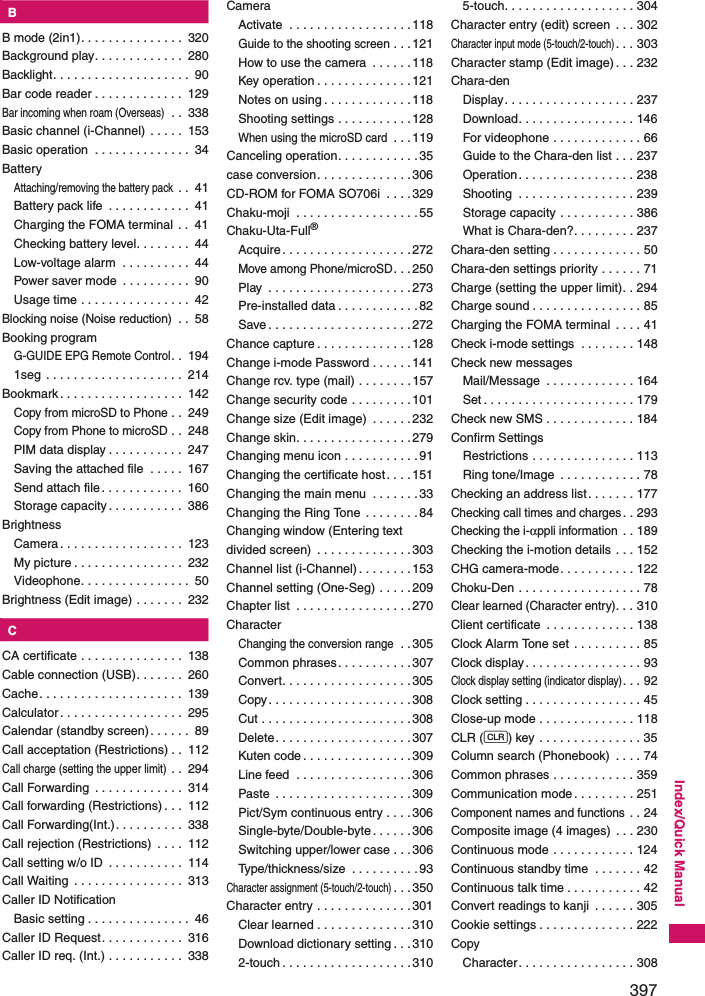
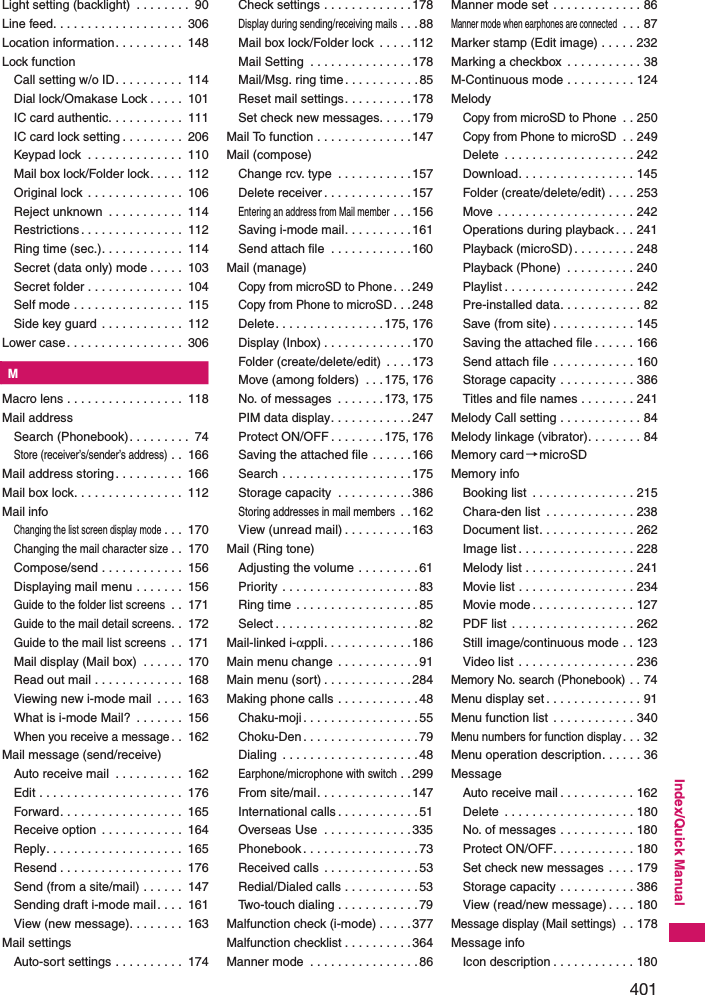
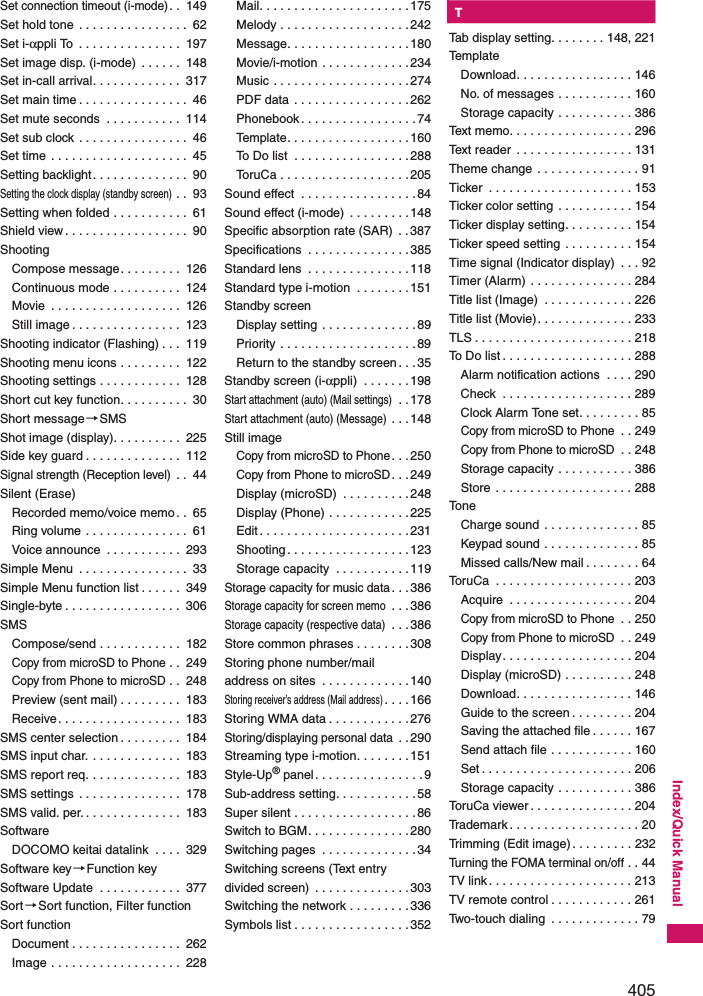
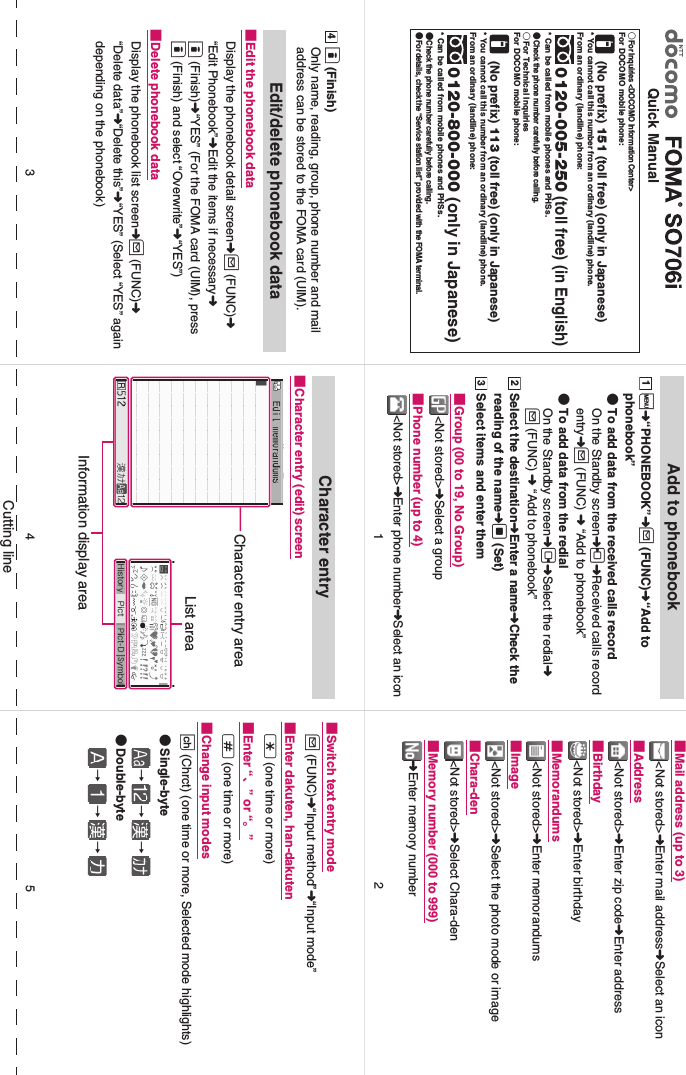
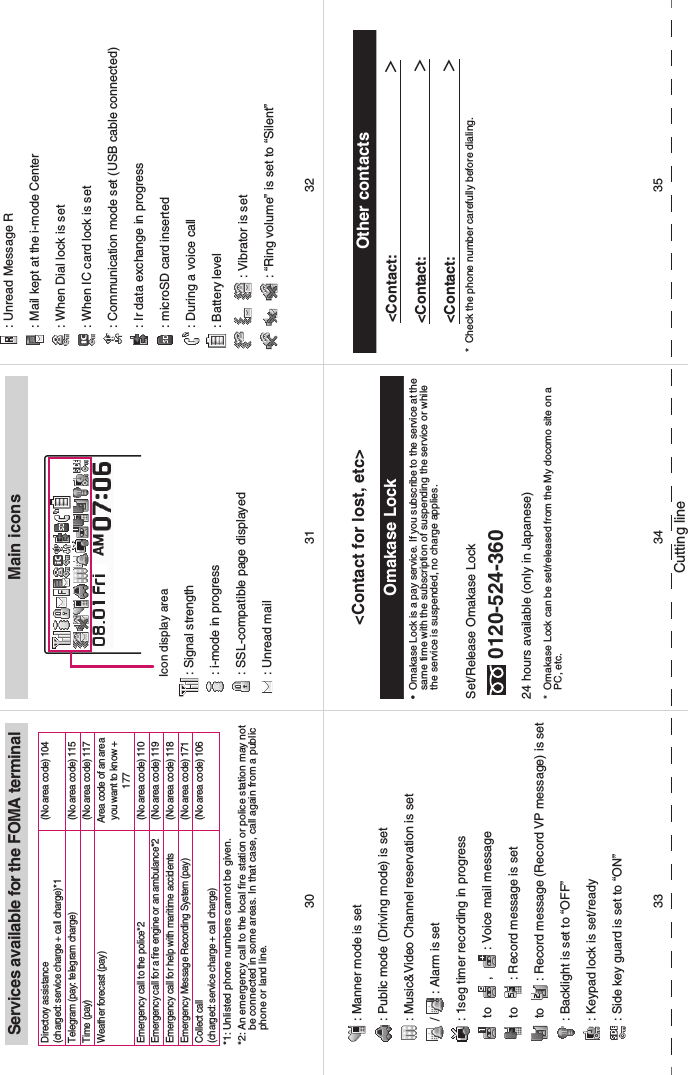
![290Convenient Functions■Other alarm tonesPressing any key stops the alarm tone, freezes the animation or i-motion and the alarm message remains displayed. Pressing any key again clears the alarm message (When “Activate TV w/ alarm” is set to “OFF” for 1Seg booking program). However, if you press the side key when the FOMA terminal is folded, the alarm notification display is not cleared. ■If you receive a call during alarm notificationAlarm notification stops and the FOMA terminal receives the call. The “Alarm” Snooze setting is also canceled.Checking alarm details when notification failsIf the alarm notification fails, the “ (Missed alarm)” or “ (Missed program)” shortcut icon appears on the standby screen. You can check the details of the missed alarm (Missed alarm info) from the shortcut icon.1On the standby screendSelect “ (Missed alarm)” or “ (Missed program)”The Missed alarm info appears. ■To clear the shortcut icont (1 second or longer)Once you clear the shortcut icon, you can no longer check the missed alarm information. 2Check the detailsThe standby screen reappears by pressing t, and the shortcut icon disappears. Storing Your Own Name and Image<My Profile>You can store your own personal information such as your name, home phone number and e-mail address. Stored personal information provides the FOMA terminal with a way of confirming that you are the owner and can also be quoted in the Character entry (edit) screen.zYou cannot change or delete the FOMA terminal’s own phone number. zItems other than Own number are stored on the FOMA terminal. If you insert another FOMA card (UIM), the data stored on the FOMA terminal are displayed.Displaying My ProfileWhen this function is activated, it displays only your name, the FOMA terminal’s own phone number and the first e-mail address. 1i“LIFEKIT”“My Profile”The “My Profile” screen appears. If you have stored your personal data such as your home phone number or address, you can display all the data by selecting “Display all data” from the function menu and entering security code. [Table 1] Alarm notification actions* : Operations when “Alarm preferred” is set. When “Operation preferred” is set, the “ (Missed alarm)” or “ (Missed program)” shortcut icon appears on the standby screen. Status Alarm Schedule/To Do list/1Seg booking program/1Seg timer recordingOn standby screen using i-mode/sending or receiving mail*Notifies you the alarm with the operation you set. Animations appear on the display.The alarm tone rings repeatedly about 5 minute. Animations appear on the display. For 1Seg timer recording, alarm sounds for about 2 seconds, one minute before start time. A confirmation screen appears, then the 1seg screen appears.When Power is OFF The setting of “Auto power ON” is applied. When you select “OFF” in “Auto power ON”, the shortcut icon does not appear after the FOMA terminal is turned on. The alarm is not notified. The shortcut icon does not appear after the power is turned on. 1Seg timer recording does not start if the power is off about one minute before start time.During a call*The alarm tone rings through the FOMA terminal earpiece. Animations appear on the display. Earphone/microphone is connectedAlarm notification is the same as for the “Standby screen displayed”. The alarm tone sounds from the earphone or speaker according to the “Headset usage setting”. Dial lock/Omakase Lock is setThe alarm is not notified. The shortcut icon appears after each lock is released. 1Seg timer recording does not start if locks are not released about one minute before start time.Original lock is set Alarm, Schedule and To Do list alarms do not work. The shortcut icons appear. 1Seg booking program/1Seg timer recording alarms work.My ProfileFunction menup.291](https://usermanual.wiki/Sony/A3880003.08-user-guide-part-2/User-Guide-951151-Page-40.png)
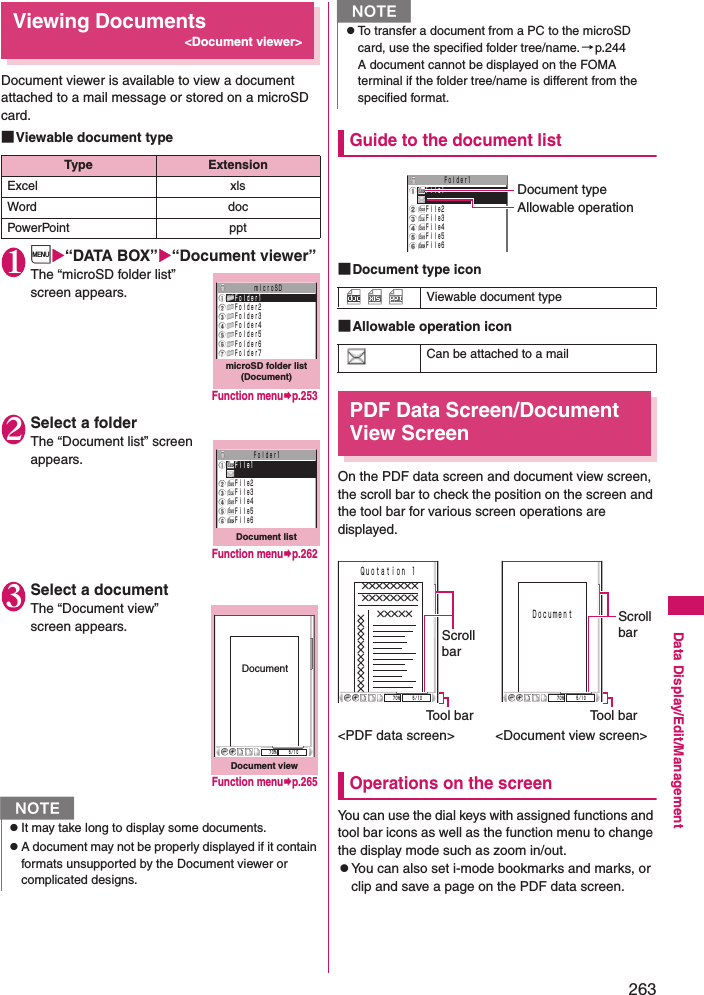
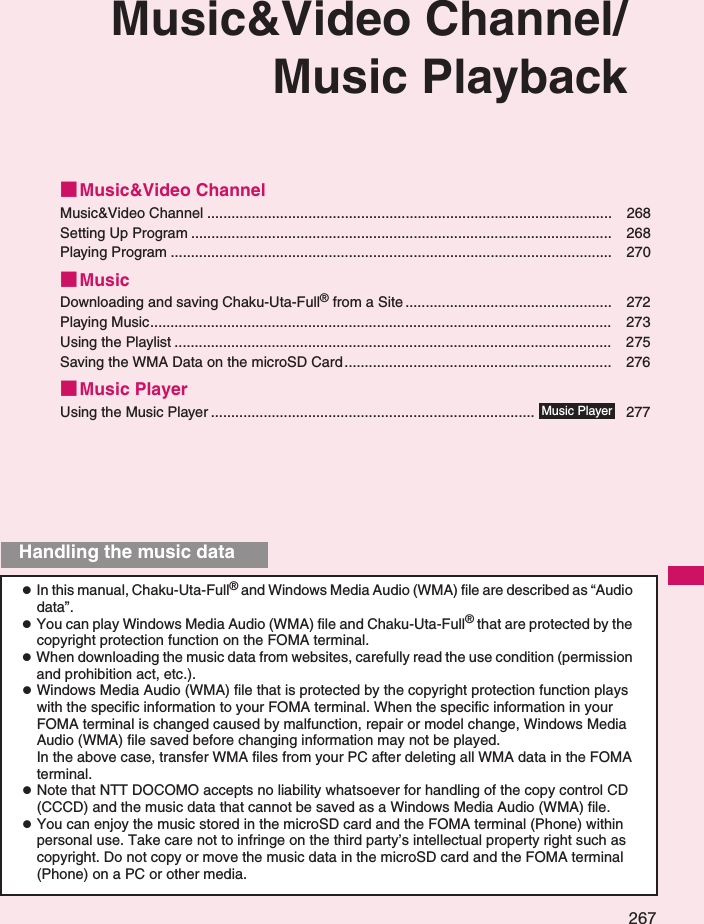
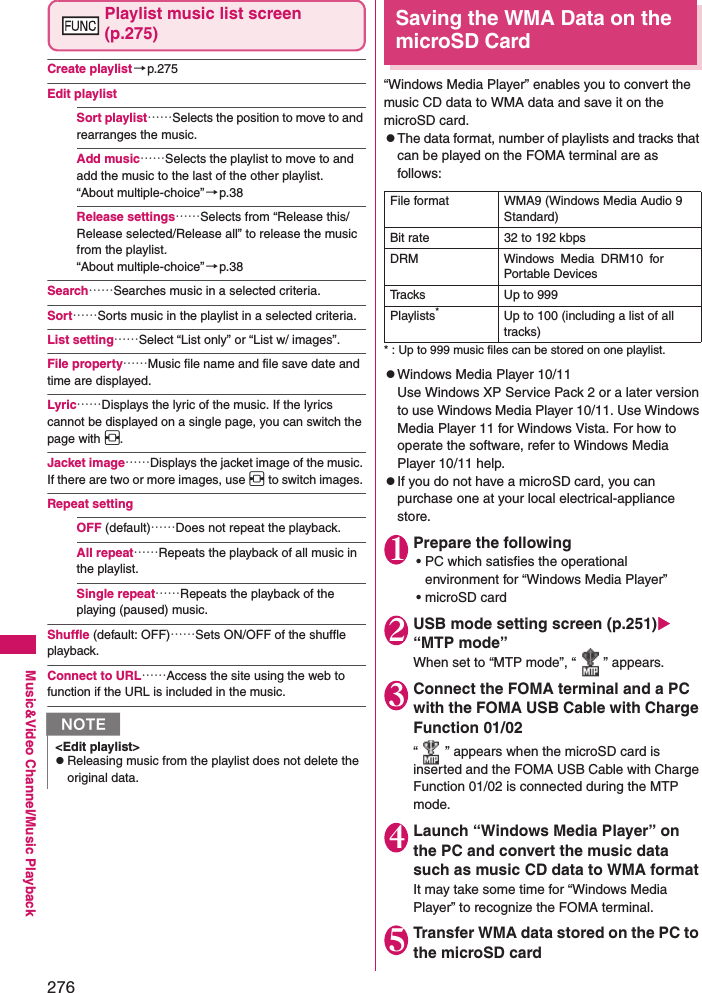
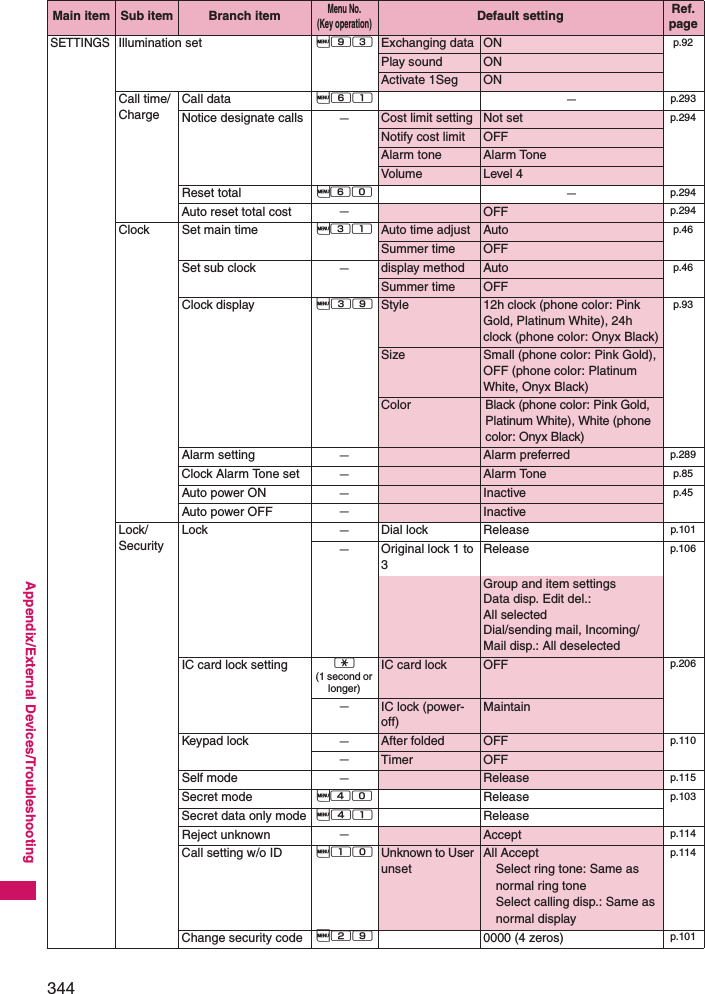
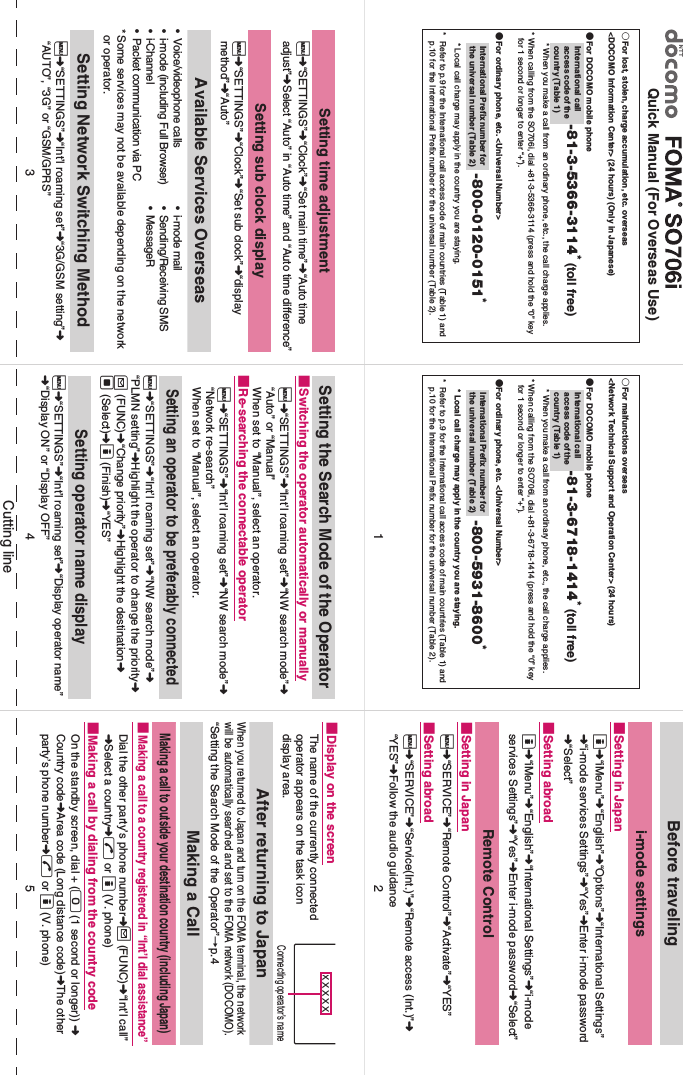
![294Convenient FunctionszDisplayed call times and charges may differ from the actual figures. Consumption tax is not included in the call charges. zIf you have subscribed to the 2in1, the total amount of Number A/B appears as the Total calls duration and Total calls cost. 1i“SETTINGS”“Call time/Charge” “Call data”Resetting the total call time and total call charges<Reset total>You can reset the Total calls duration or Total calls charge displayed in the “Call data” to zero. 1i“SETTINGS”“Call time/Charge”“Reset total”Enter your security codeSelect any item: Reset total duration……Resets the accumulated duration. Reset total cost……Enters PIN2 code and resets the accumulated charge. PIN2 code→p.100Resetting charges automatically<Auto reset total cost>You can set the FOMA terminal to reset the Total calls cost displayed in “Call data” to zero automatically on the 1st day every month, at 0:00. 1i“SETTINGS”“Call time/Charge”“Auto reset total cost”Enter your security code2“Auto reset”“ON”Enter PIN2 codePIN2 code →p.100■Not to set Auto reset“OFF”Setting the Upper Limit of Charge to Notify the Alarm<Notice designate calls>When accumulated charge displayed at “Call data” exceeds the cost limit set in this function, you are notified on the standby screen or with alarms. zThe alarm notification works only once when the accumulated charge exceeds the set cost limit. zExceeding the limit does not prevent you from making a call. 1i“SETTINGS”“Call time/Charge” “Notice designate calls”Enter your security code2Select any item: Cost limit setting……Sets the cost limit between 10 and 100,000 by 10 units. Notify settingNotify cost limit……Specifies whether to notify the cost limit. Alarm tone……Selects an alarm tone. Vol ume……Sets the alarm tone volume with c. NzIf the last or total voice or digital calls duration exceeds “199h59m59s”, the call count returns to “0s”. zThe time and charge of i-mode or packet communication, and the charge of sending Chaku-moji are not counted. To check i-mode communication charges, see the “Mobile Phone User’s Guide [i-mode] FOMA version”. zThe time taken to pick up a call, or for the other party to pick up a call, and the time for switching a voice call and a videophone call are not counted. zWhen the FOMA terminal is turned off, the duration and charge for the last call reverts to “0s” and “¥∗∗” respectively. zTurning the FOMA terminal off does not affect the total duration and charge. zThe international call charge for WORLD CALL is counted. For other international call services, the charge is not counted. NzSetting Auto reset total cost to “ON” and changing the month in “Set main time” resets the Total calls cost. zThe Auto reset total cost is reset to “OFF” when: • The FOMA terminal is turned on without the FOMA card (UIM) inserted•t is pressed on the PIN2 code input screen which appears when the FOMA terminal is turned on• The PIN2 code is locked→p.100• An error occurs on the FOMA card (UIM)](https://usermanual.wiki/Sony/A3880003.08-user-guide-part-2/User-Guide-951151-Page-44.png)
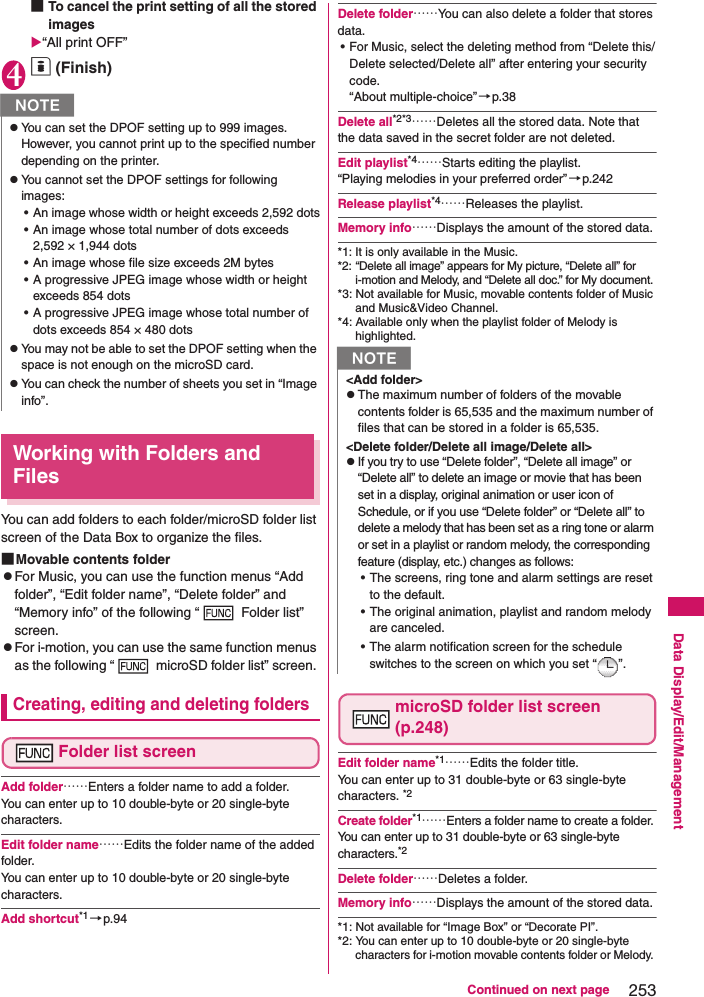
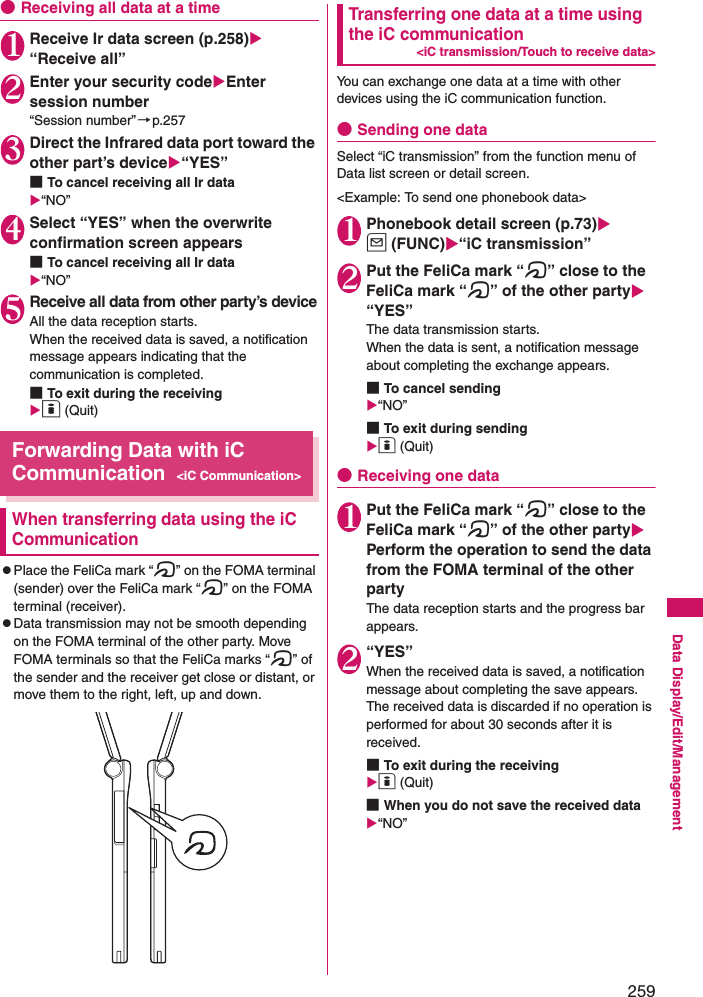
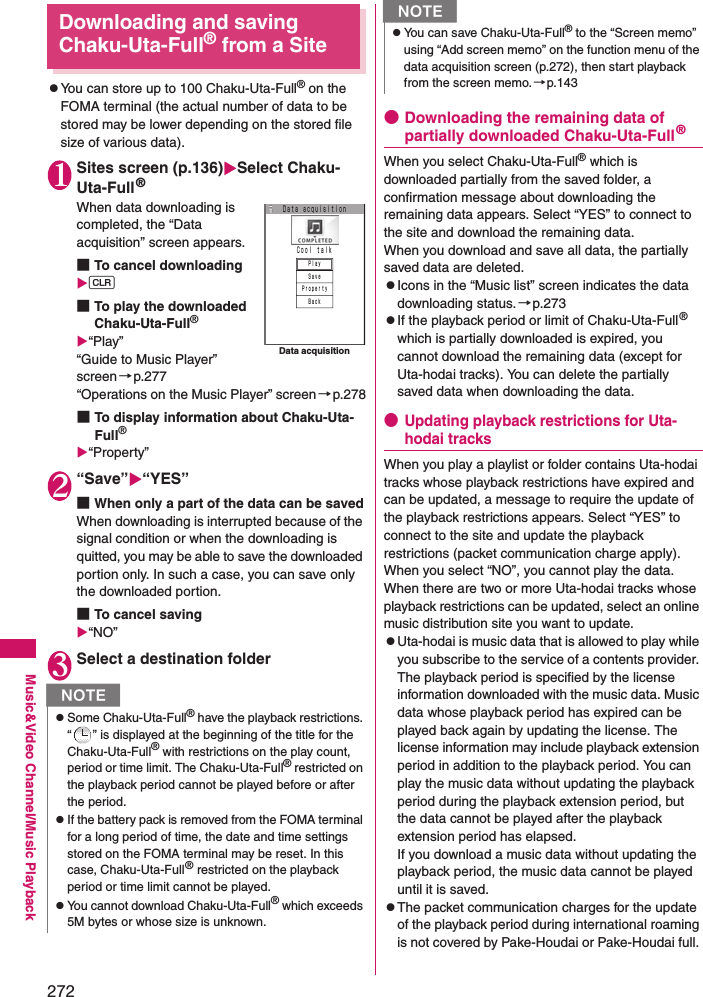
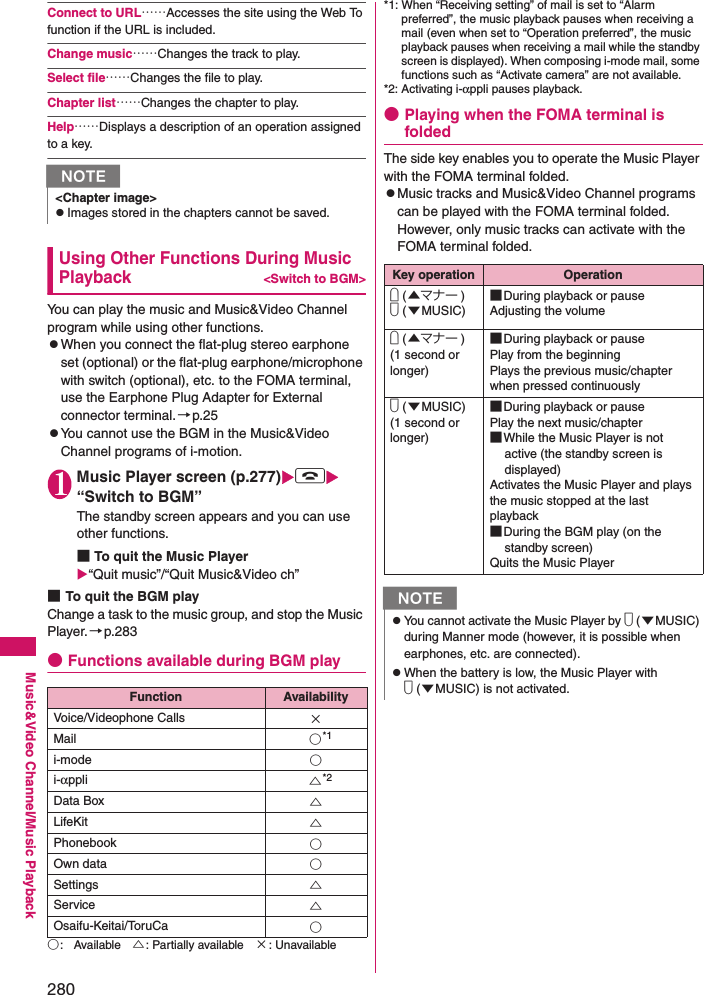
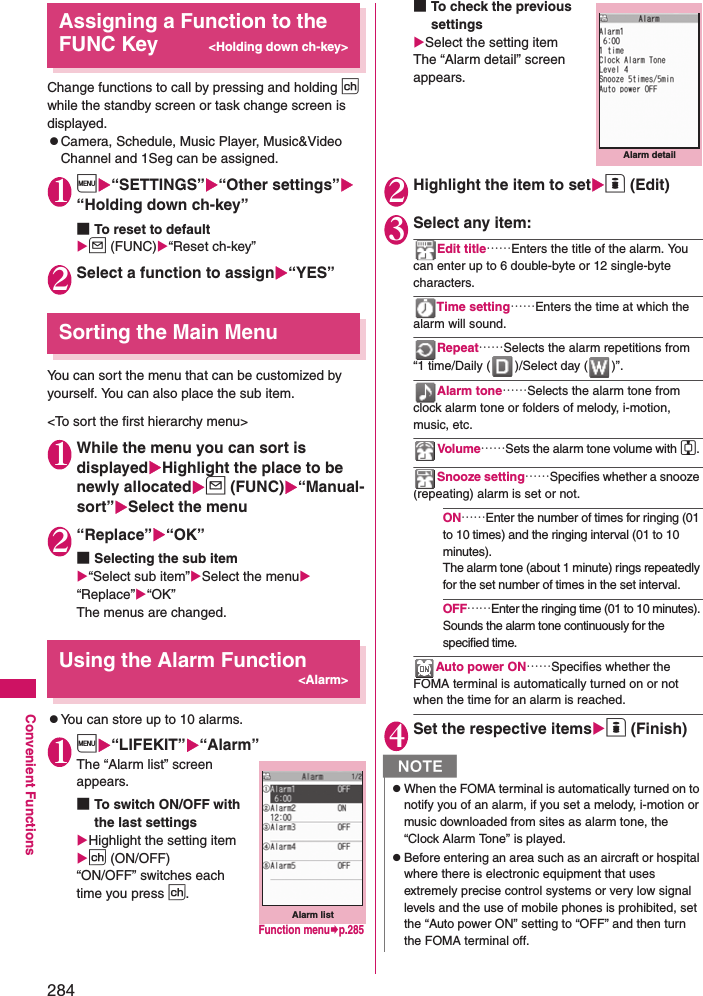
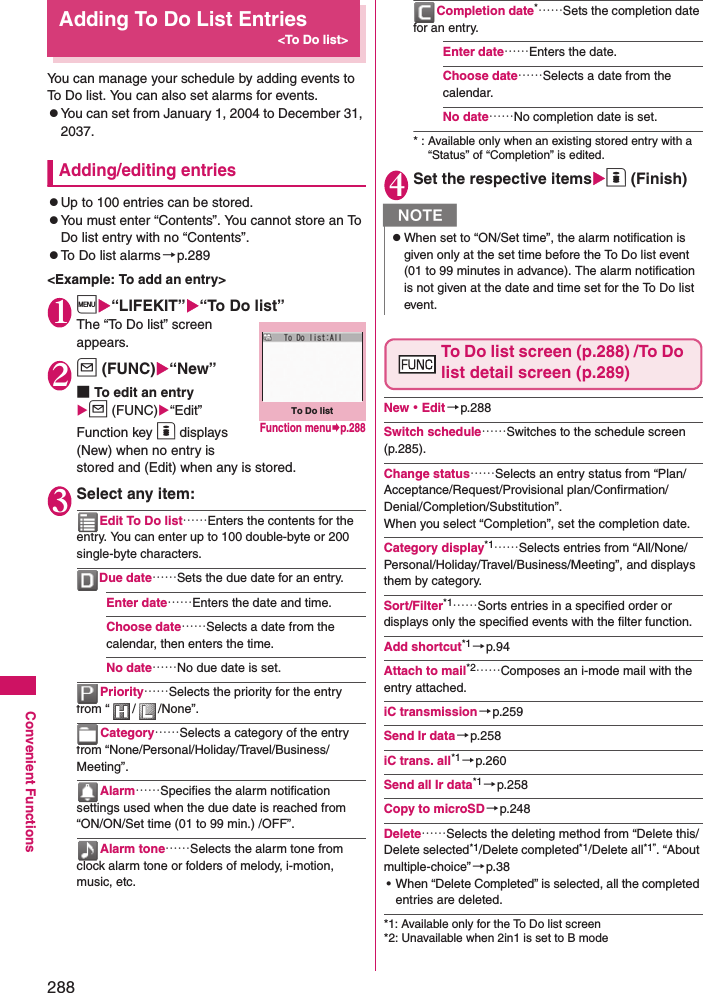
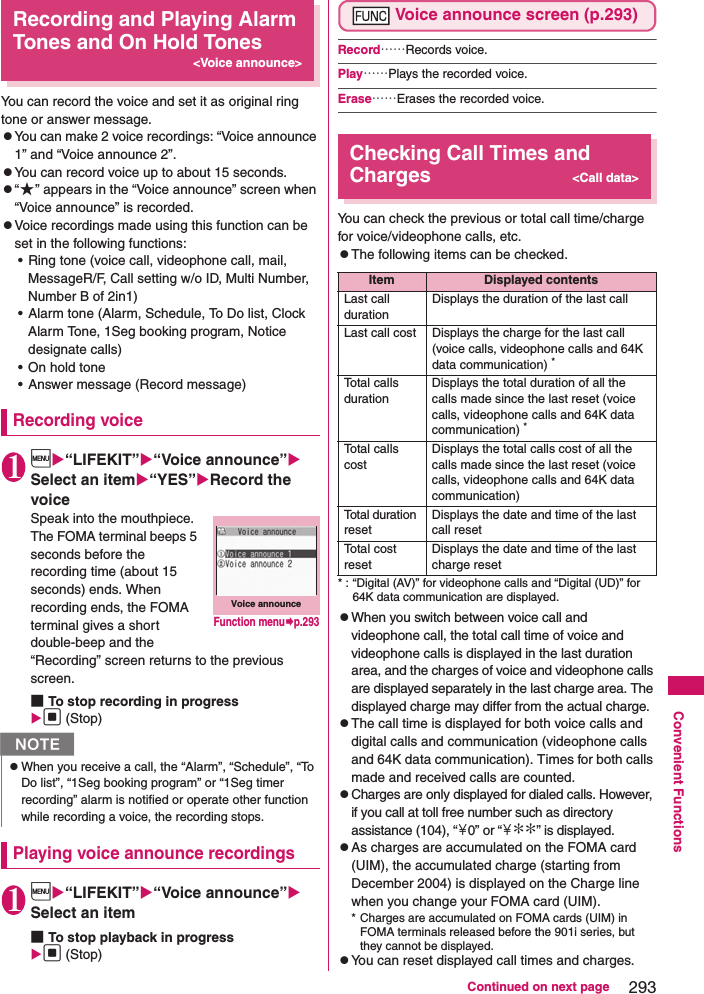
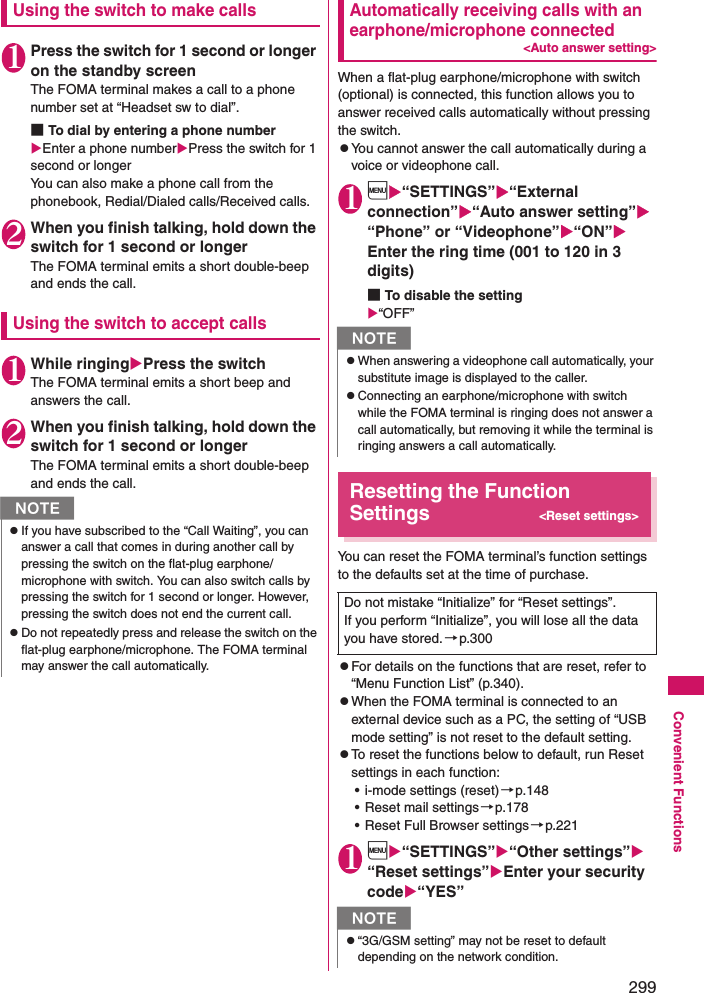
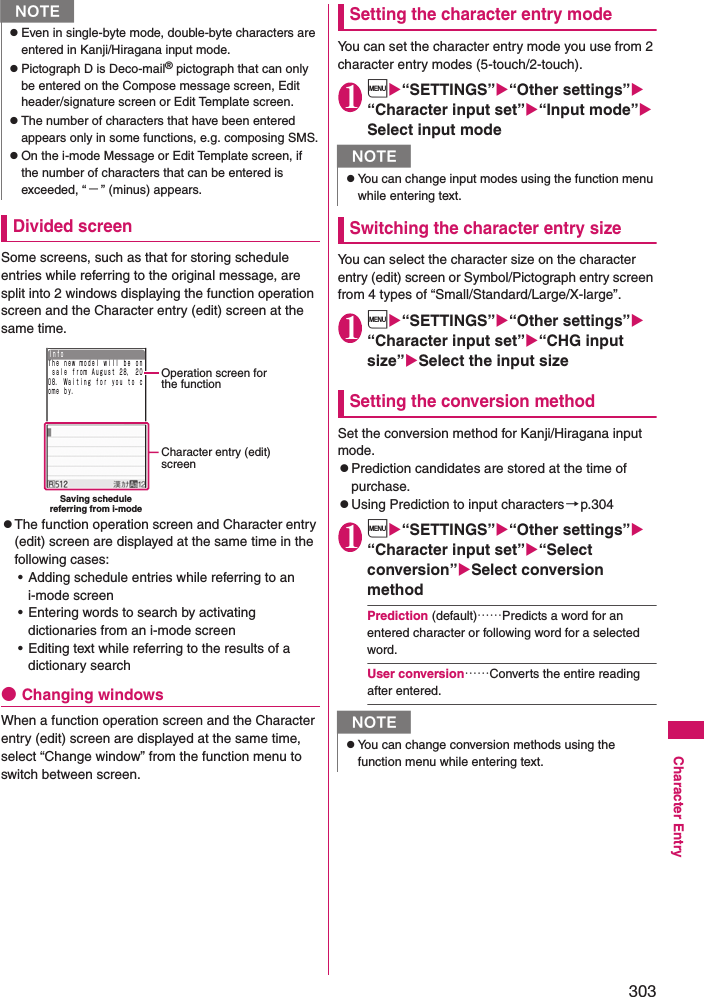
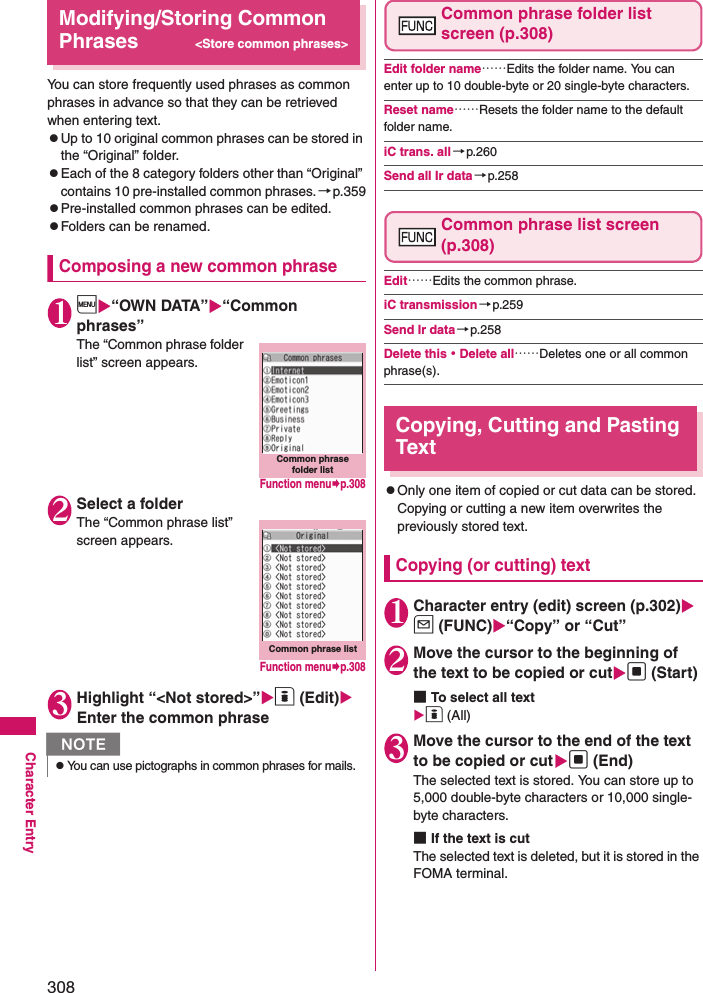
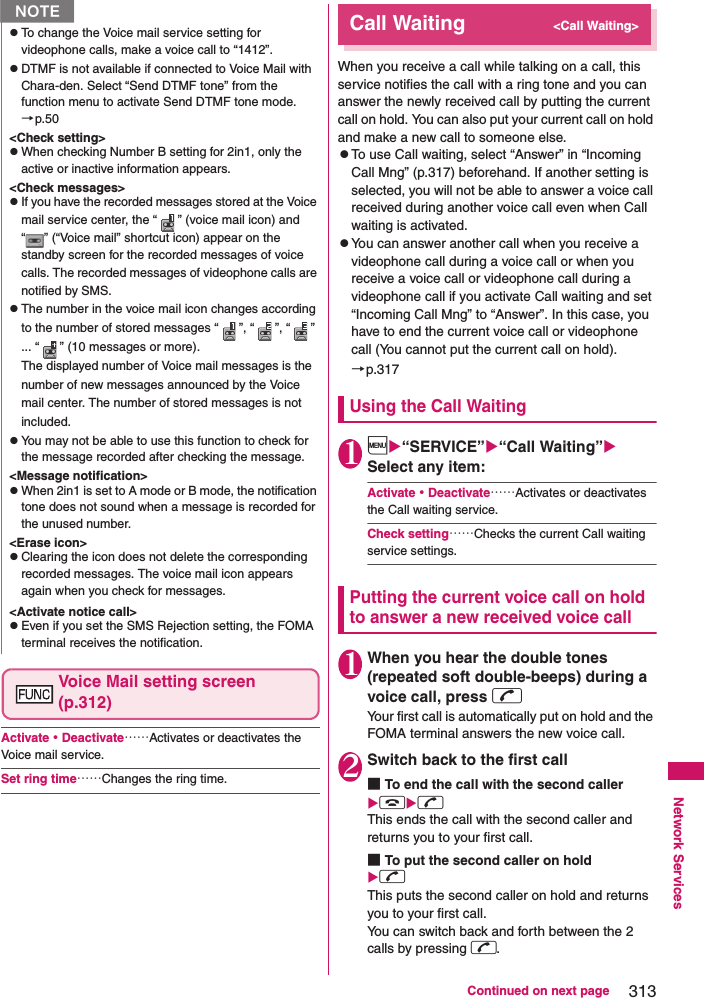
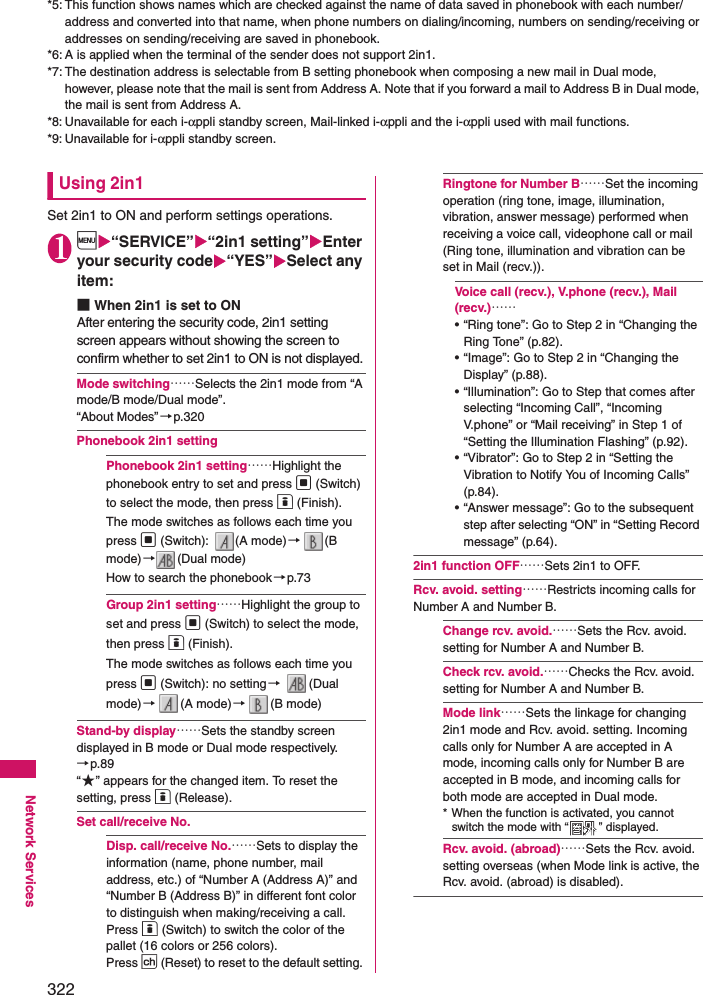
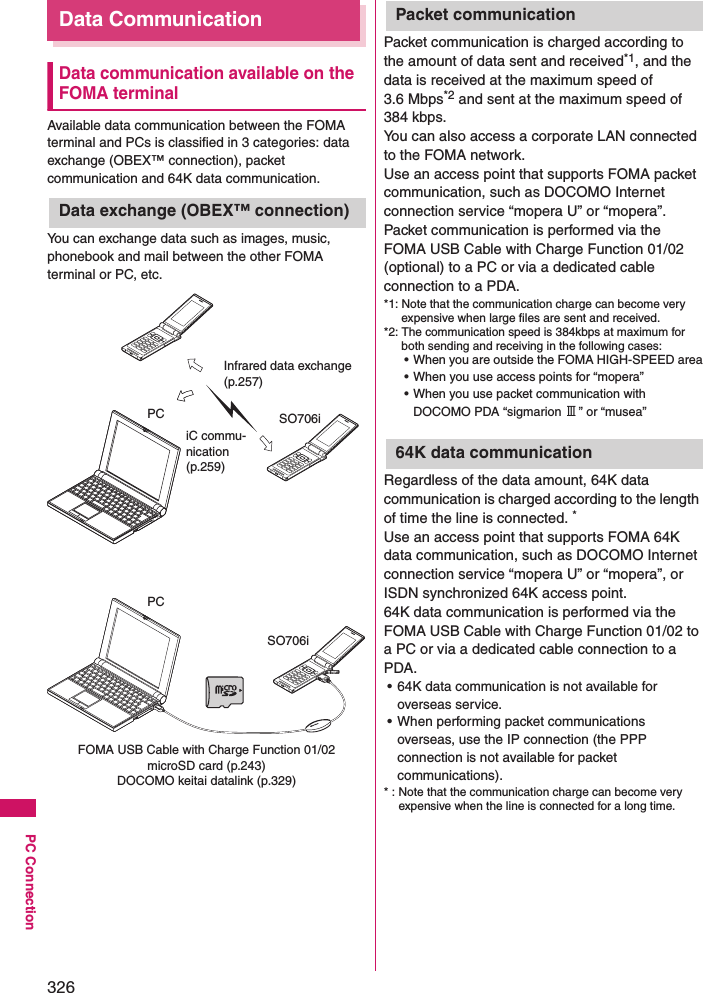
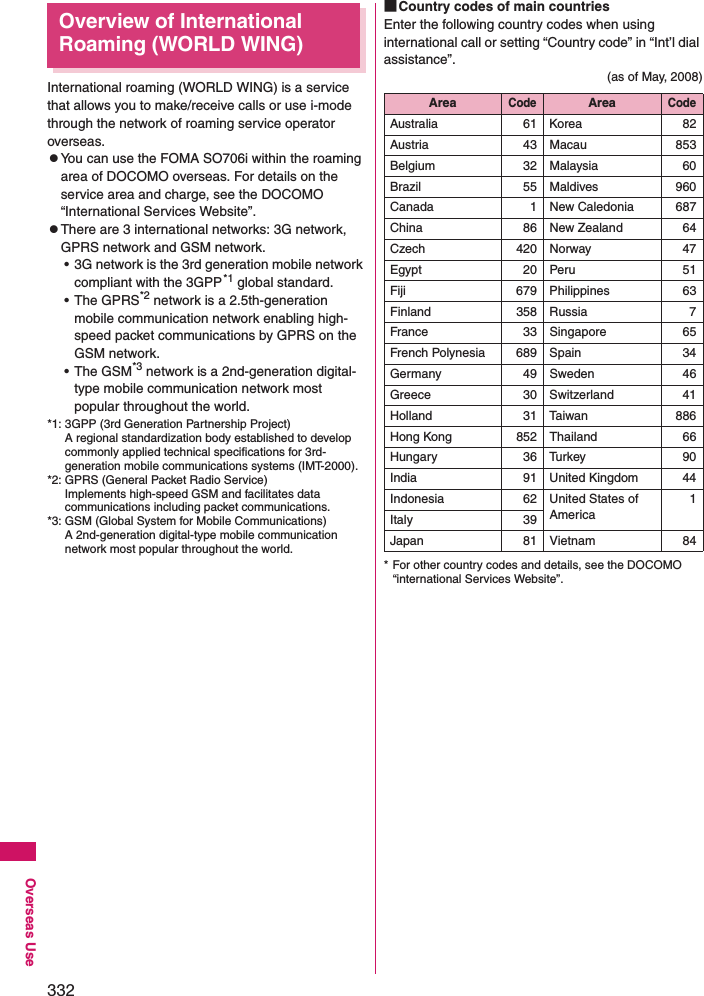
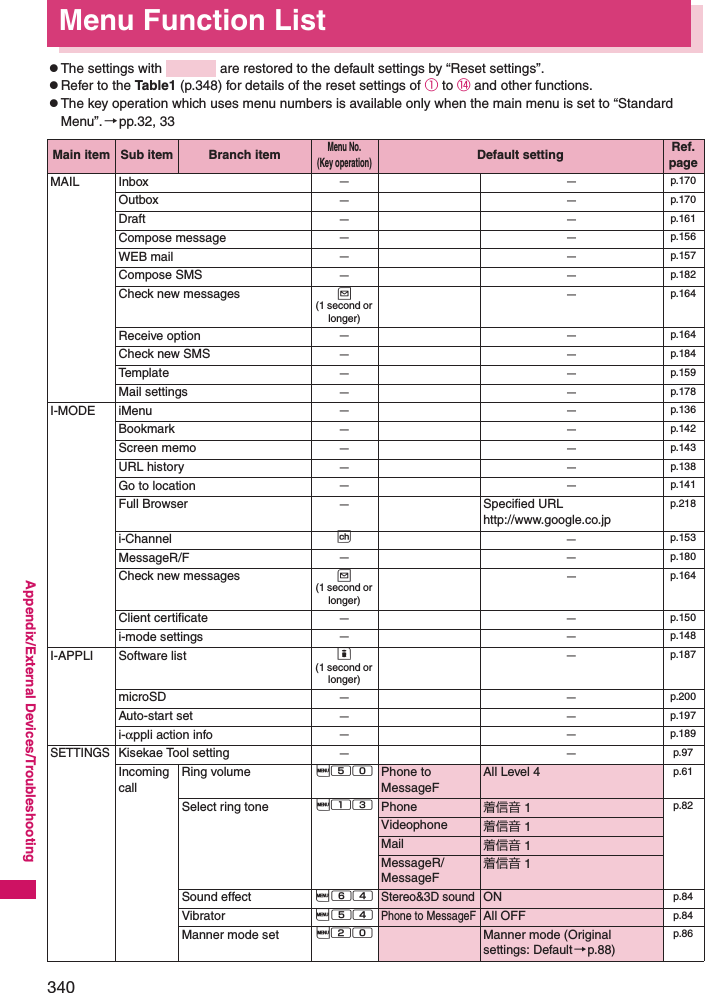
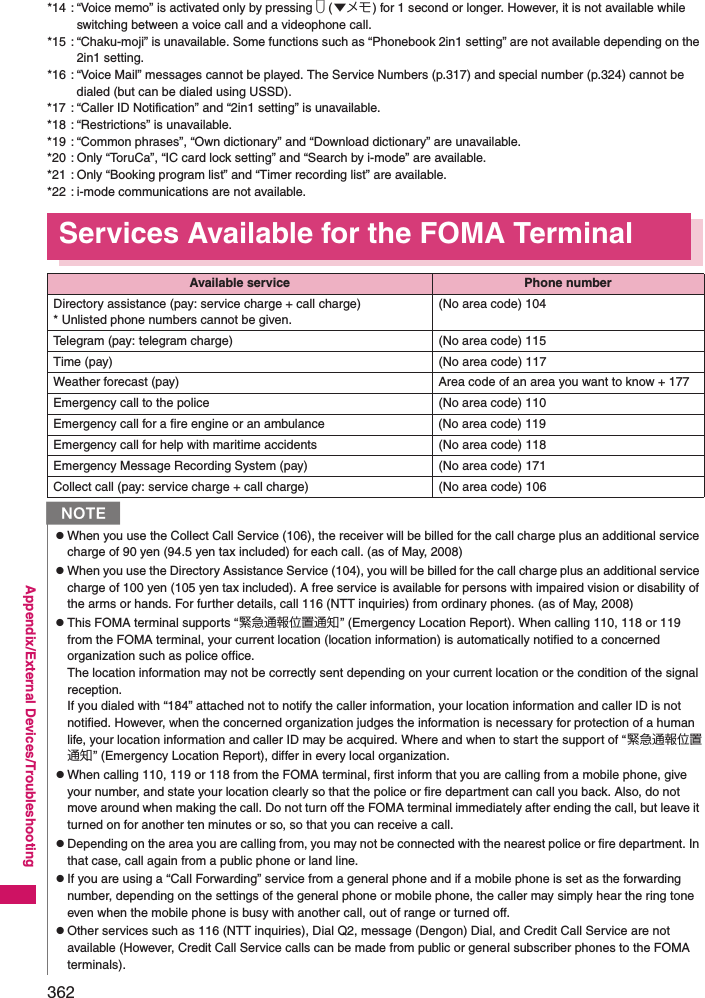
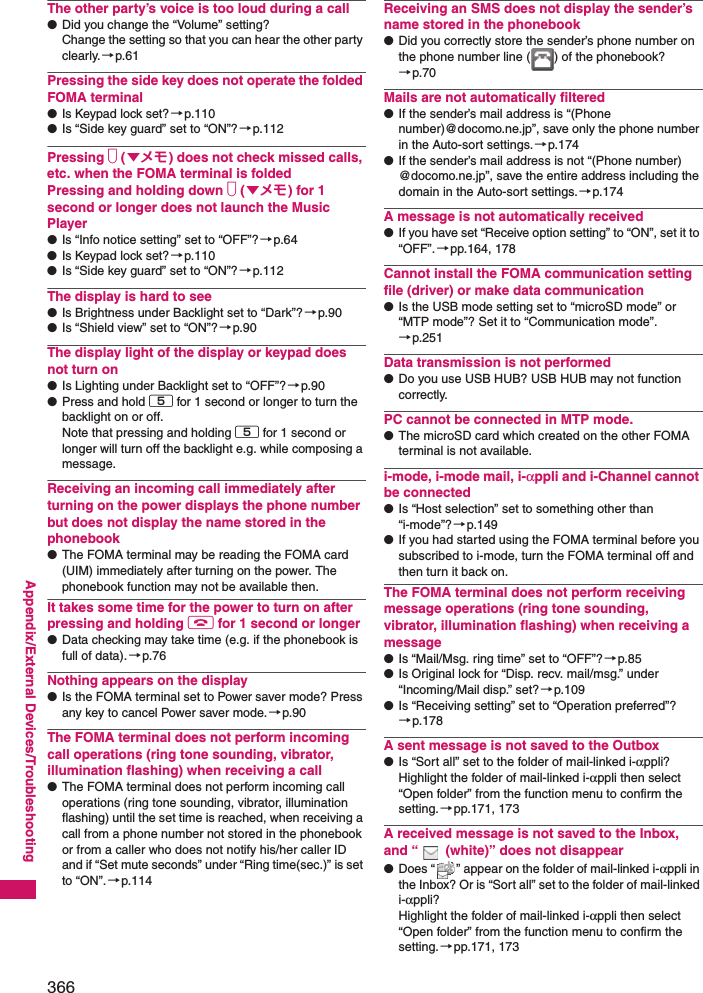
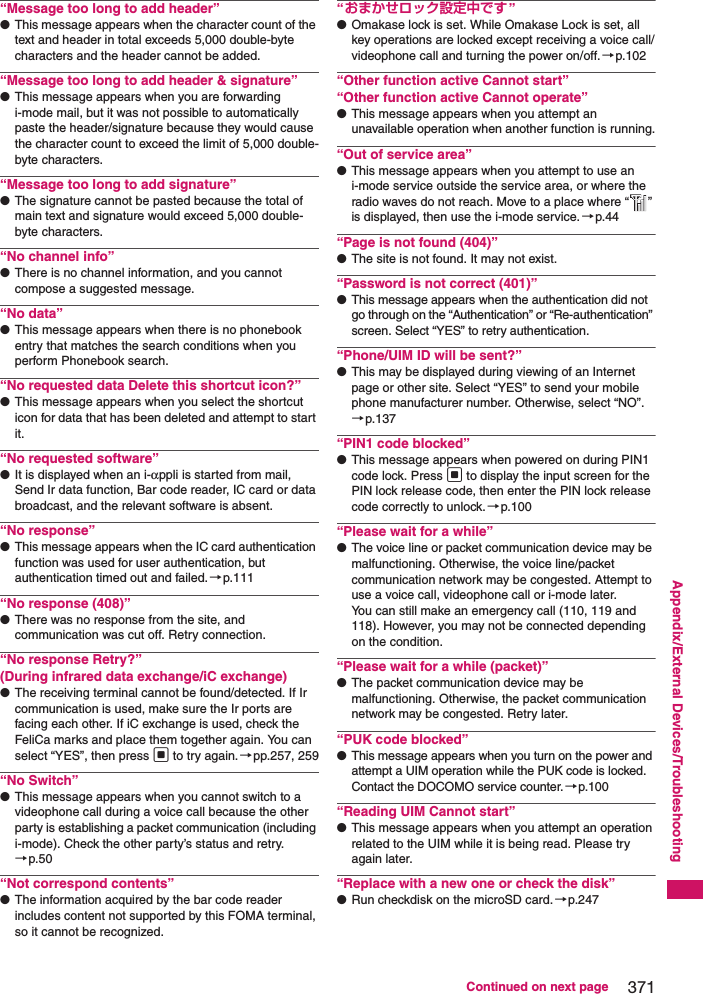
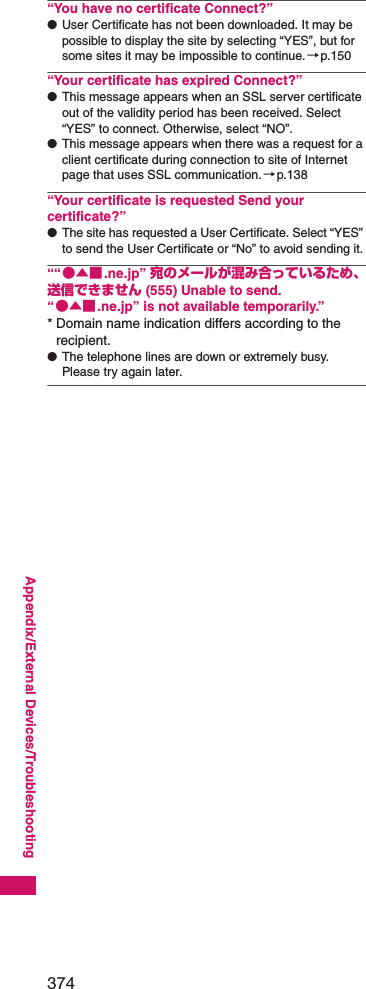
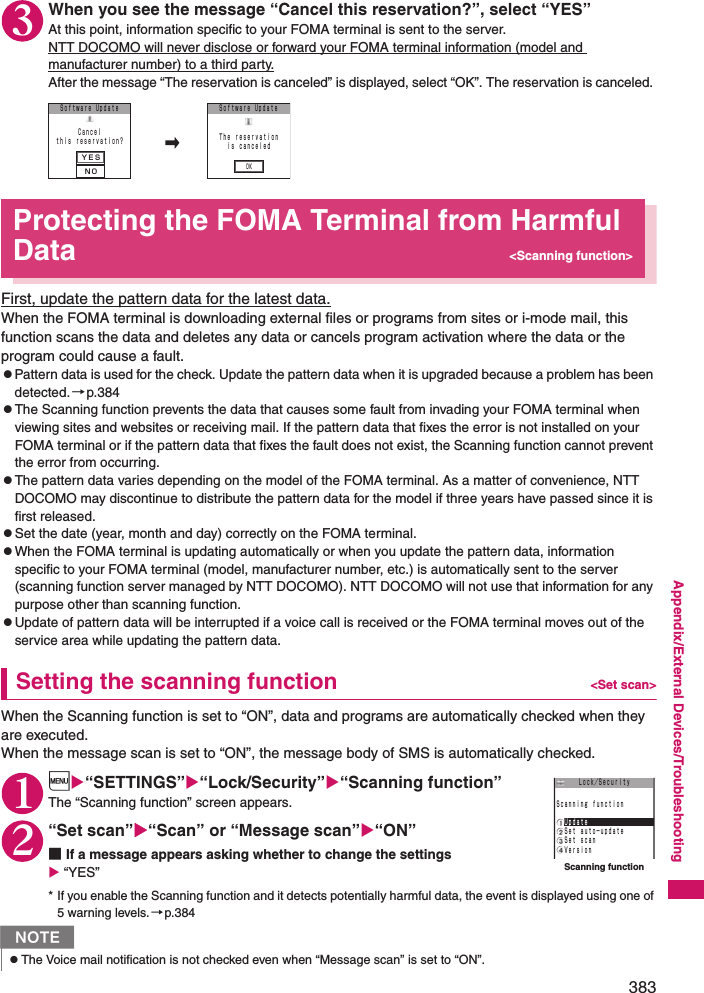
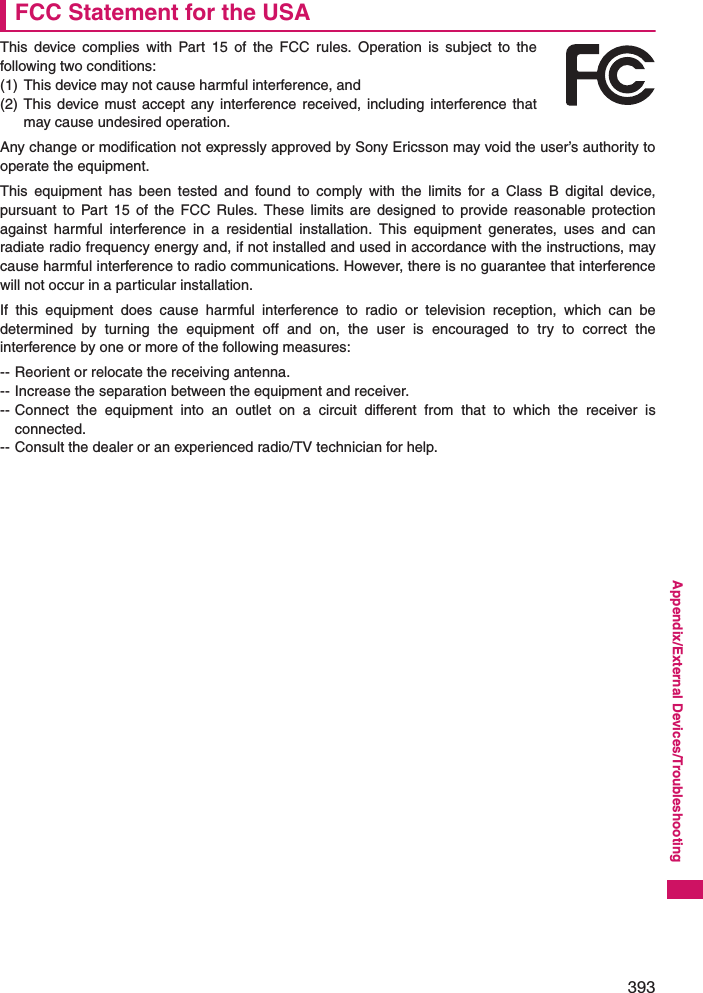
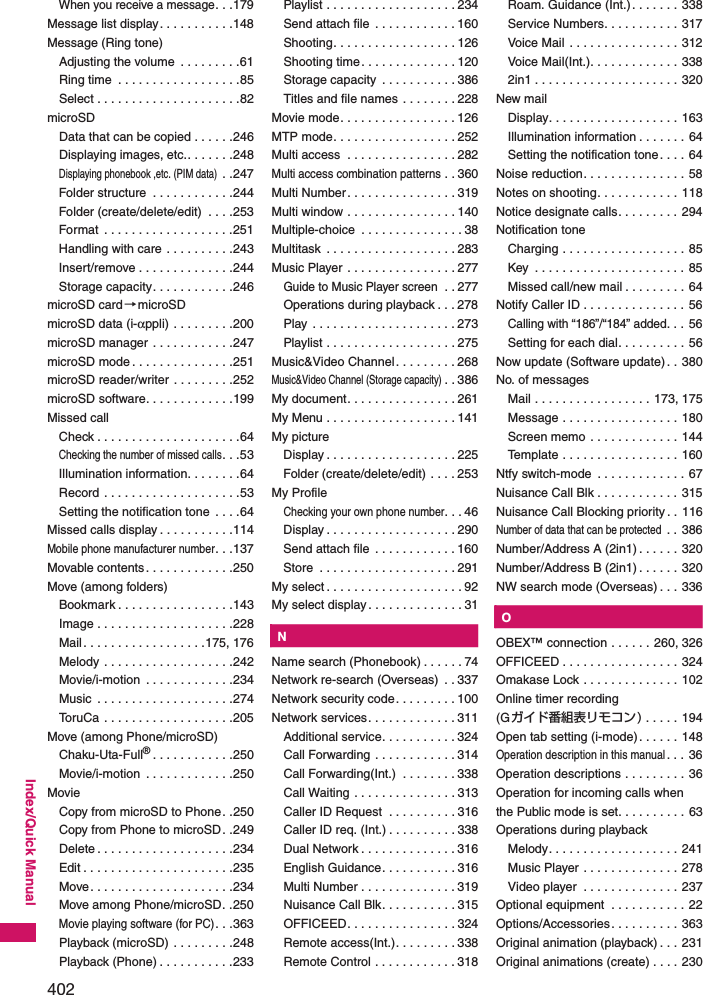
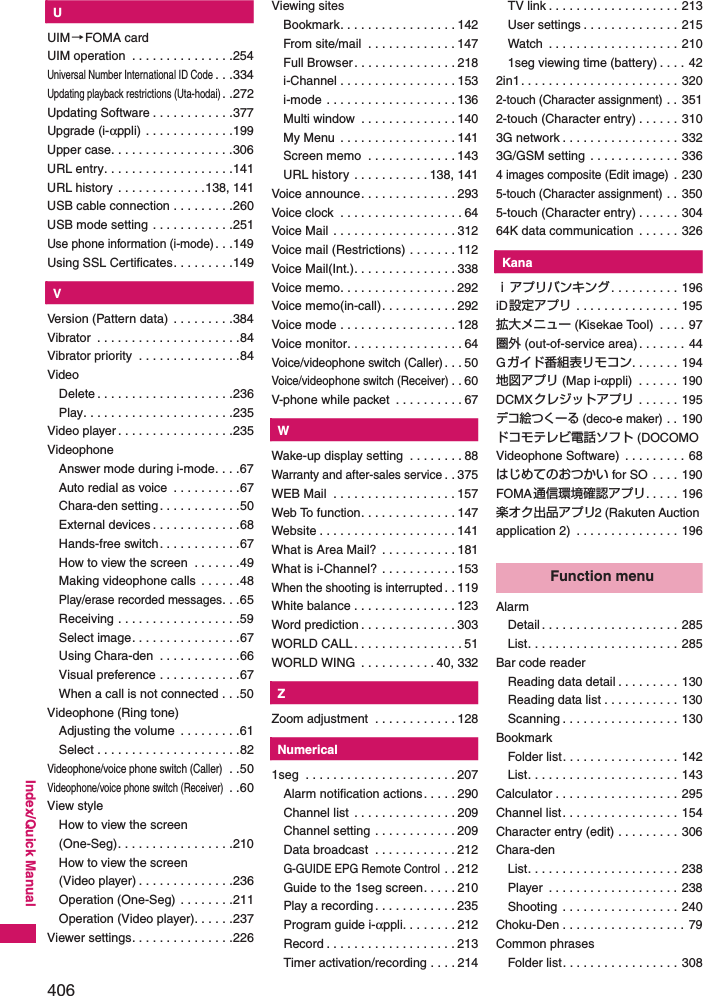
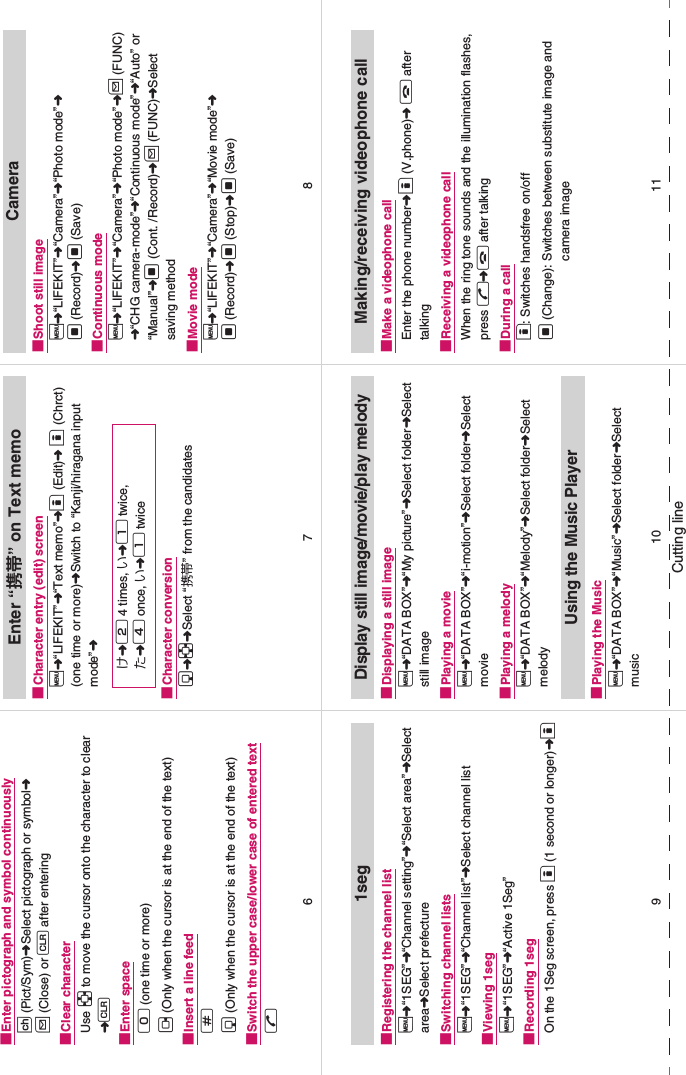
![295Convenient Functions3Set the respective itemso (Finish)●Alarm notification actionsAfter ending a call, the function notifies you with the following methods when accumulated charges exceed the cost limit. ■When Notify cost limit is set to “ON” and alarm tone is set to other than “OFF”When the accumulated charge exceeds the preset cost limit, the alarm tone sounds for about 5 minutes starting 3 seconds after finishing the call, and the notification screen appears. To stop the alarm tone, press any key. After the notification, pressing t or y displays “ ” (Notice designate calls) shortcut icon on the standby screen. ■When Notify cost limit is set to “ON” and alarm tone is set to “OFF”When the accumulated charge exceeds the preset cost limit, “ ” (Call billing) shortcut icon appears on the standby screen. ●Checking details of “ ” (Notice designate calls)The details of Notify cost limit is displayed by selecting “ (Notice designate calls)” shortcut icon on the standby screen. 1On the standby screendSelect “ (Notice designate calls)”Enter your security codeThe details of “Notice designate calls” are displayed. 2Check the detailsd (OK)The standby screen reappears and “ ” (Notice designate calls) disappears. Using the FOMA Terminal as Calculator<Calculator>You can use the FOMA terminal to perform 4 different types of arithmetical calculations (addition, subtraction, multiplication and division). zThe number can be displayed up to 10 digits. Below the decimal point, up to 9 digits can be displayed. zIf the result of a calculation exceeds 10 digits, “.E” is displayed. 1i“LIFEKIT”“Calculator” Calculate■To calculate “23 + 57” 2 3 + 5 7 =2 3 j 5 7 d■To use negative numbers in a calculationTo calculate using negative amounts, simply insert “-” before the first digit. − 2 3 + 5 7 =h 2 3 j 5 7 d Calculator screen (p.295)Add shortcut→p.94NzThe charges for i-mode or packet communication, and the charges for sending Chaku-moji are not included in this function. To check i-mode communication charges, see the “Mobile Phone User’s Guide [i-mode] FOMA version”. 8/ 1 7:06¥3000Set−up cost limitis exceededCost limitDateNzt ( or ) can be used in the following cases. • After pressing +,−,×,÷,=, is displayed. You can start calculation from the beginning by pressing t. • While inputting numbers or decimal points, is displayed. You can delete wrong numbers or decimal points by pressing t. CalculatorFunction menup.295](https://usermanual.wiki/Sony/A3880003.08-user-guide-part-2/User-Guide-951151-Page-45.png)

![311Network ServicesVoice Mail Service ........................................................................................... 312Call Waiting.................................................................................................... 313Call Forwarding Service........................................................................... 314Nuisance Call Blocking Service ............................................................. 315Caller ID Request Service ..................................................................... 316Dual Network Service ................................................................................. 316English Guidance................................................................................... 316Service Dialing Number ......................................................................... 317Handling Calls Received During a Call ....................................... 317Setting up Remote Control ...................................................................... 318Multi Number.....................................................................................................3192in1 .......................................................................................................................... 320OFFICEED ............................................................................................................ 324Adding and Using Services ................................................................... 324zYour FOMA terminal provides you with access to a range of useful DOCOMO network services. For the outline and the details on the services, refer to the reference pages in the following table. zFor the service used by connecting to the Network Service Center, you cannot operate the service with “ ”. zFor the application and questions, contact the inquiries number provided on the back of this manual. zThis section explains the overview of the network services using the menus on the FOMA terminal. For more details, see “Mobile Phone User’s Guide [Network services]”.z“OFFICEED” is a fee-based service and requires a subscription. For details, visit DOCOMO Website for corporates (http://www.docomo.biz/d/212/) (Japanese).Voice MailCall WaitingCall ForwardingNuisance Call BlkCaller ID RequestDual NetworkEnglish GuidanceService NumbersIn-Call Function SelectionRemote ControlMulti Number2in1OFFICEEDAdditional serviceAvailable Network ServicesService nameSubscriptionMonthly usage feesRef. pageVoice MailServiceRequired Charged p.312Call Waiting Required Charged p.313Call ForwardingServiceRequired Free p.314Nuisance Call BlockingNot requiredFree p.315Caller ID NotificationNot requiredFree p.46Caller ID RequestNot requiredFree p.316Public mode(Driving mode)Not requiredFree p.62Public mode(Power OFF)Not requiredFree p.63Dual Network ServiceRequired Charged p.316English GuidanceNot requiredFree p.316Multi Number Required Charged p.3192in1 Required Charged p.320OFFICEED Required Charged p.324Melody call Required Charged p.84Service nameSubscriptionMonthly usage feesRef. page](https://usermanual.wiki/Sony/A3880003.08-user-guide-part-2/User-Guide-951151-Page-61.png)
![315Network ServicesUsing the Call Forwarding service1i“SERVICE”“Call Forwarding” Select any item: Activate*1……Set the forwarding number and the ring time, then select “Activate”. Register fwd number……Enter the forwarding number. Once you set the number, a star “★” appears next to “Register fwd number”. • You can use f or g to enter the number by searching the phonebook. How to search the phonebook→p.73Set ring time……Enter the ring time (000 to 120 seconds). Once you set the number, a star “★” appears next to “Set ringing time”. When set to 0 second, received calls are not recorded in the “Received calls” record. Activate……Activates the Call forwarding service. Deactivate*1……Deactivates the Call forwarding service. Change forwarding No……Enter a phone number to set a new forwarding number.When you select “Change No.+Activate”, you can also set the Call Forwarding Service to “Activate” at the same time. Fwd number busy*2……When the forwarding number is busy, received calls are transferred to the Voice mail service center. Check setting*1……Checks the current Call forwarding service settings. *1: When 2in1 is set to Dual mode, the screen appears to select Number A or Number B. However, the selection screen appears for “Check setting” even in B mode. *2: The subscription to the “Voice Mail service” is required. Setting or canceling the call forwarding guidance message1On the standby screen142 9r• Set the call forwarding guidance message by following the audio guidance message. • For more information, refer to the “Mobile Phone User’s Guide [Network Services]”. Nuisance Call Blocking Service<Nuisance Call Blk>This service enables you to reject receiving “Nuisance calls”. Once you store the number to reject, calls from the number are automatically rejected and answered by a message. zThe ring tone does not sound even when you receive a call from the number stored to reject. Also, the call is not recorded in “Received calls” record. Using the Nuisance Call Blocking service1i“SERVICE”“Nuisance Call Blk” Select any item: Register Caller……Registers the number of the last caller you answered as a barred numbers. Register number……Registers the phone number by using the dial keys or quoting from the phonebook or Received calls record, etc. • You can use f or g to enter the number by searching the phonebook. Searching the phonebook→p.73• You can use h to search the Received calls record and j to search the Redial record. Delete last entry……Deletes the last registered phone number. By repeating the same procedure, you can delete the stored barred number one by one from the last one. Delete all entries……Deletes all the barred numbers. The number of entries……Checks the number of call barring entries. N<Activate>zWhen 2in1 is set to B mode, you cannot select “Register fwd number” and “Set ring time”. <Change forwarding number>zWhen 2in1 is set to B mode, you cannot select “Change No. + Activate”. <Check setting>zWhen checking Number B setting for 2in1, only “Active” or “Inactive” appears.](https://usermanual.wiki/Sony/A3880003.08-user-guide-part-2/User-Guide-951151-Page-65.png)
![316Network ServicesCaller ID Request Service<Caller ID Request>When you receive a voice/videophone call from a caller who do not provide his or her phone number (caller ID), the call is answered by a message requesting the Caller ID, then the call automatically ends. zCalls rejected by the Caller ID request service are not logged in the “Received calls” record and no “Missed call” shortcut icon appears. Using the Caller ID Request service1i“SERVICE”“Caller ID Request” Select any item: Activate・Deactivate……Activates or deactivates the Caller ID request service. Check setting……Checks the current Caller ID Request service settings. Dual Network Service<Dual Network>This service enables you to use the mova terminal with the phone number of your FOMA terminal. You can switch between the FOMA network and the mova network depending on the service area. zYou cannot use the FOMA terminal and the mova terminal at the same time. zSwitch the Dual network service from the terminal which is not using the service. zFor details on how to access the service from a mova terminal, refer to the “Mobile Phone User’s Guide [Network Services]”. Overview of Dual Network serviceUsing the Dual Network service1i“SERVICE”“Dual Network” Select any item: Dual Network switching……The network security code is required to switch. Network security code→p.100Check setting……Checks whether the FOMA terminal can access the services or not. English Guidance<English Guidance>You can set English as the language used in guidance messages for setting network services such as the “Voice Mail” service or the audio message such as the out of area warnings. *: Some services are not available.・ Switching Dual Network Service from the FOMA terminal switches to the FOMA network.・ Switching Dual Network Service from the mova terminal switches to the mova network.Same phone numberFOMA networkmova network*FOMA terminal mova terminalNzIf you use Dual Network Service on the mova terminal in Japan after using the FOMA terminal overseas, turn on the FOMA terminal before use. <Dual Network switching>zTo switch networks, end communication from the terminal that is currently able to access services before making the switch. Item Language GuidanceOutgoing(including the guidance for the settings of the network services)Japanese Plays in Japanese. English Plays in English. Incoming(guidance messages played to callers)Japanese Plays in Japanese. Japanese+EnglishPlays in Japanese first and then in English. English+JapanesePlays in English first and then in Japanese. NzCaller’s setting has priority over receiver’s setting between DOCOMO’s handsets.](https://usermanual.wiki/Sony/A3880003.08-user-guide-part-2/User-Guide-951151-Page-66.png)
![318Network ServicesEnding the current call or 64K data communication to answer a received call●When the current call and incoming call are the same type<Example: To end the current voice call to answer an incoming voice call> 1When you hear the double tones (repeated soft double-beeps), press yThis ends the current call and the FOMA terminal starts ringing. ■For videophone or 64K data communicationThe ringing call screen appears. y 2rThis accepts the incoming voice call. ■For 64K data communicationReceive the call on a PC●When the current call and incoming call are different typesIf you receive a videophone call or 64K data communication during a voice call, if you receive a voice call or 64K data communication during a videophone call, or if you receive a voice or videophone call during 64K data communication, use this procedure to end your current call or 64K data communication to answer the incoming call. <Example: To end the current videophone call to answer an incoming voice call> 1You hear the double tones (repeated soft double-beeps) and the voice call ringing screen appearsWhen you receive a 64K data communication, the double tones (repeated soft double-beeps) do not sound. 2r■For 64K data communicationyReceive the call on a PCManually rejecting calls or connecting to the Call Forwarding or Voice Mail service<Example: When Set in-call arrival is set to “Activate” and Incoming Call Mng is set to “Answer”> 1When you hear the double tones (repeated soft double-beeps), press u (FUNC)2Select how to handle the received call■To reject a received call“Call Rejection”■To forward a received call to the forwarding number“Call Forwarding”■To transfer a call to the Voice mail service center“Voice Mail”With any of the above procedures, you can return to your first call. Setting up Remote Control <Remote Control>You can operate the “Voice Mail” or “Call Forwarding Service”, etc. from push-key-type ordinary phones, payphones, DOCOMO mobile phones, etc. zTo use the “Voice Mail” or “Call Forwarding” service overseas, set Remote Control beforehand. zFor details on operating network services from a payphone, etc., refer to the “Mobile Phone User’s Guide [Network Services]”. 1i“SERVICE”“Remote Control” Select any item: Activate・Deactivate……Activates or deactivates the Remote control. Check setting……Checks the current Remote control settings.](https://usermanual.wiki/Sony/A3880003.08-user-guide-part-2/User-Guide-951151-Page-68.png)
![320Network Services2in1<2in1>You can separately use 2 phone numbers and 2 mail addresses on your FOMA terminal as if you have 2 terminals. zIn this function, your phone number and mail address is called “Number A and Address A” and the additional phone number and mail address is “Number B and Address B”. zCannot be used at the same time as Multi Number. About ModesIn 2in1, modes can be set to “A mode”, “B mode” or “Dual mode”. zSee Table 1(p.320) for the details of available services in each mode. [Table 1] Services available for each modezOnly the functions with different operations depending on the mode are listed. (Those which operate in the same way as A mode are omitted.)NzInformation of Number B and Address B can be obtained with the following operation. • Number B: Run “Check 2in1” from the function menu in the My Profile screen for Number B→p.291• Address B: Run “Acquire Automatically” for the mail address when registering My Profile for Number B→p.291zFor details on 2in1, refer to “Mobile Phone User’s Guide [2in1]”. Mode DescriptionA mode You can dial with your phone number (Number A), send i-mode mails with Address A, or browse related data. B mode You can dial with 2in1 phone number (Number B), access to sites where WEB mail is available with Address B, and browse related data. Dual modeThe mode that supports both functions of A and B mode. NzMail transmission for Address B is executed in the specified WEB mail site. zPacket communication in B mode is available while subscribing to the i-mode service. zSet A mode before you replace a FOMA card with the subscription to 2in1 service to the FOMA card without subscription. Service A mode B mode Dual modeVoice call/VideophoneDialing Number A Number B Selectable on making a call*1Receiving*2 AllPhonebook*3 Display*4 A: Common B: Common AllName conversion*5 A: Common B: Common All2in1 setting on a new entry A B AReceives all data through infrared data port/iC/microSD cardCopies Phonebook 2in1 setting in the original source*6Receives one data through infrared data port/iC/microSD cardAB AFOMA CardPhonebookCopy to UIM Phonebook 2in1 setting is commonCopy to phone A B ARedial Display Dials with Number A Dials with Number B AllReceived callsDisplayReceives with Number A Receives with Number BAll](https://usermanual.wiki/Sony/A3880003.08-user-guide-part-2/User-Guide-951151-Page-70.png)


![333Continued on next pageOverseas UseAvailable ServiceszSome services may not be available depending on the operator or area. zFor details on communication services available during international roaming, refer to the international service guide such as “Mobile Phone User’s Guide [World Services]”. ■Available communication services overseas*1: Outgoing calls using Number B of 2in1 is not available (when receive a call for Number B, some operators cannot recognized to which number the call was made). You cannot make a call from the additional number of multi number. *2: International videophone calls are available with users of specific roaming operators overseas or FOMA terminals in Japan. *3: The automatic update will be automatically paused when a roaming operator is connected. To resume the i-Channel automatic update, it is required to set the i-Channel setting again. However, you are charged for the packet communication in addition to the monthly charge. In addition, when you automatically update information on “Basic Channel”, the packet communication charges will apply.■Displayed iconsA network in use and its status appear in the task icon display area (p.27).Before Using the FOMA Terminal OverseaszBefore using the FOMA terminal overseas, also refer to the “Mobile Phone User’s Guide [Network Services]” and “Mobile Phone User’s Guide [World Services]”. zFor the customers who have subscribed to the FOMA service on September 1, 2005 or after, a separate subscription is not necessary. However, customers who declared that they did not require this service at the FOMA service subscription or who unsubscribe from this service need a separate subscription. zFor the customers who have subscribed to the FOMA service on August 31, 2005 or before without subscribing to “WORLD WING”, a separate subscription is necessary. zTo use the international roaming service, the FOMA card (other than blue) which is compatible with WORLD WING must be inserted. zThis service is not available in some payment plans.zUsage charges for the overseas services are included in your monthly bill of FOMA services. However, it may be charged in subsequent month due to the conditions of the roaming operator overseas.zThe call charge in “Call data” includes both incoming and outgoing calls. However, the displayed call charge may differ from the actual one, or “¥**” may be displayed.■Battery pack charging• Precautions for handling the AC adapter→p.19“Handling the Adapter (including the Charger)”• Charging with the AC adapter→p.41“Charging”Network3G GPRS GSMMake/Receive a voice call○*1○*1○*1Make/Receive a videophone call○*1*2××Use i-mode (including Full Browser)○○×Receive MessageR ○○×Send/Receive i-mode mail○○×Packet communication via PC○○×Send/Receive SMS ○○○i-Channel ○*3○*3×NzDuring international roaming, you cannot receive MessageF, receive Area Mail, send/receive Chaku-moji, “Pattern data update” and “Set auto-update” of Scanning function, update software, use 64K data communication connected with a PC or ON in 2in1 setting. Icon Meaning/ Only dialing available/Only packet transmission available, when using the domestic FOMA network/ / Only dialing available/Only packet transmission available/Both dialing and packet transmission available, when using the overseas 3G network/ / Only dialing available/Only packet transmission available/Both dialing and packet transmission available, when using the overseas GSM/GPRS network](https://usermanual.wiki/Sony/A3880003.08-user-guide-part-2/User-Guide-951151-Page-83.png)
![334Overseas Use■Viewing i-mode sitesTo view i-mode sites from overseas, set “International Settings” from “iMenu” beforehand.• For details, refer to “Mobile Phone User’s Guide [i-mode] FOMA version”. ■Network ServicesYou can also use network services such as the Voice Mail service and Call Forwarding service if you have subscribed to these network services. zBefore using the network services overseas, “Remote Control” (p.318) must be set to “Activate”. zEven when the operation such as Activate or Deactivate is available, the services may be restricted or unavailable. For details, refer to the “Mobile Phone User’s Guide [Network Services]” and the international service guide such as “Mobile Phone User’s Guide [World Services]”, etc. ■SMSThis service allows you to exchange text messages with subscribers to overseas carriers other than DOCOMO.zTo send an SMS to a user of a roaming operator overseas, enter “+” and the country code in front of the phone number (when the phone number begins with “0”, omit the first “0”). You can also send SMS by entering “010”, the country code, the other party’s phone number in this order. (To reply to received SMS from overseas, enter “010”.)zWhen sending a SMS to a user of a roaming operator overseas and a character contained in SMS is not supported by the other party’s mobile phone, the character may not be properly displayed. See international service guides such as “Mobile Phone User’s Guide [World Services]” for details. ●Inquiries overseasFor inquiries overseas such as lost, stolen, charge accumulation or malfunction, refer to “For lost, stolen, accumulated amount settlement overseas” or “For malfunction overseas” on the back cover of this manual. Note that you are charged for the call and communication even after the FOMA terminal is lost or stolen.zFor the latest information, see the DOCOMO “International Services Website”.■International call access code of main countries (Table 1)(as of March, 2008)* Charges apply for calls made to Japan.■International Prefix number for the universal number (Table 2)(As of March, 2008)* Note that the universal numbers may not be available from mobile phones, public phones or hotels. Area Code Area CodeAustralia 0011 Macau 00Belgium 00 Malaysia 00Brazil 0021/0014Monaco 00New Zealand 00Canada 011 Norway 00China 00 Philippines 00Czech 00 Poland 00Denmark 00 Portugal 00Finland 00 Russia 810France 00 Singapore 001Germany 00 Spain 00Greece 00 Sweden 00Holland 00 Switzerland 00Hong Kong 001 Taiwan 002Hungary 00 Thailand 001India 00 Turkey 00Indonesia 001United Arab Emirates00Ireland 00 United Kingdom 00Italy 00 United States of America011Korea 001Luxemburg 00 Vietnam 00Area Code Area CodeArgentina 00 Korea 001Australia 0011 Luxemburg 00Austria 00 Malaysia 00Belgium 00 New Zealand 00Brazil 0021 Norway 00Bulgaria 00 Peru 00Canada 011 Philippines 00China 00 Portugal 00Colombia 009 Singapore 001Denmark 00 South Africa 09Finland 990 Spain 00France 00 Sweden 00Germany 00 Switzerland 00Holland 00 Taiwan 00Hong Kong 001 Thailand 001Hungary 00 United Kingdom 00Ireland 00 United States of America011Israel 014Italy 00](https://usermanual.wiki/Sony/A3880003.08-user-guide-part-2/User-Guide-951151-Page-84.png)
![338Overseas UseCommencing Roaming Guidance<Roam. Guidance>You can set the FOMA terminal to notify the other party that you are roaming internationally when you receive a voice call or videophone call during international roaming. zMake the setting in Japan. 1i“SERVICE”“Roam. Guidance” Select any item: Activate・Deactivate……Activates or deactivates the roaming guidance. Check setting……Checks the setting. Setting to Bar Incoming Calls During Roaming<Bar incoming when roam>zDepending on the operator overseas, the setting may be unavailable.1i“SERVICE”“Bar incoming when roam”Select any item: Activate……Selects from “Bar All incoming” (bars all incoming calls) or “Data calls Barring” (bars incoming videophone calls and 64K data communications*) The network security code (p.100) is required for the setting. Deactivate……Deactivates the barring of incoming calls when roaming. The network security code (p.100) is required for deactivating. Check setting……Checks the setting. * : 64K data communication is not available on FOMA SO706i during international roaming. Network Services During Roaming<Service(Int.)>zYou can use some network services such as “Voice Mail” or “Call Forwarding” overseas. zTo use “Voice Mail(Int.)” or “Call Forwarding(Int.)”, the subscription to “Voice Mail” or “Call Forwarding” is required beforehand. Also, “Remote Control” must be set beforehand. zYou cannot perform the setting when “ ” is displayed. zWhen you perform the operation overseas, you must bear the international call charges of the country you are staying. zFor details on the network services, refer to the “Mobile Phone User’s Guide [Network Services]” and “Mobile Phone User’s Guide [World Services]”, etc. 1i“SERVICE”“Service(Int.)”Select any item: Voice Mail(Int.)Activate・Deactivate・Play messages・Set ring time・Setting……Follow the audio guidance to specify the setting. Call Forwarding(Int.)Activate・Deactivate・Setting……Follow the audio guidance to specify the setting. Roam. Guidance(Int.)……Specify the settings by following the audio guidance. Remote access(Int.)……Specify the settings by following the audio guidance. Caller ID req.(Int.)……Specify the settings by following the audio guidance. NzEven when the guidance is not set, the other party hears the ring tone set by the operator. zThe caller may hear the guidance in a foreign language depending on the conditions of the operators overseas.](https://usermanual.wiki/Sony/A3880003.08-user-guide-part-2/User-Guide-951151-Page-88.png)

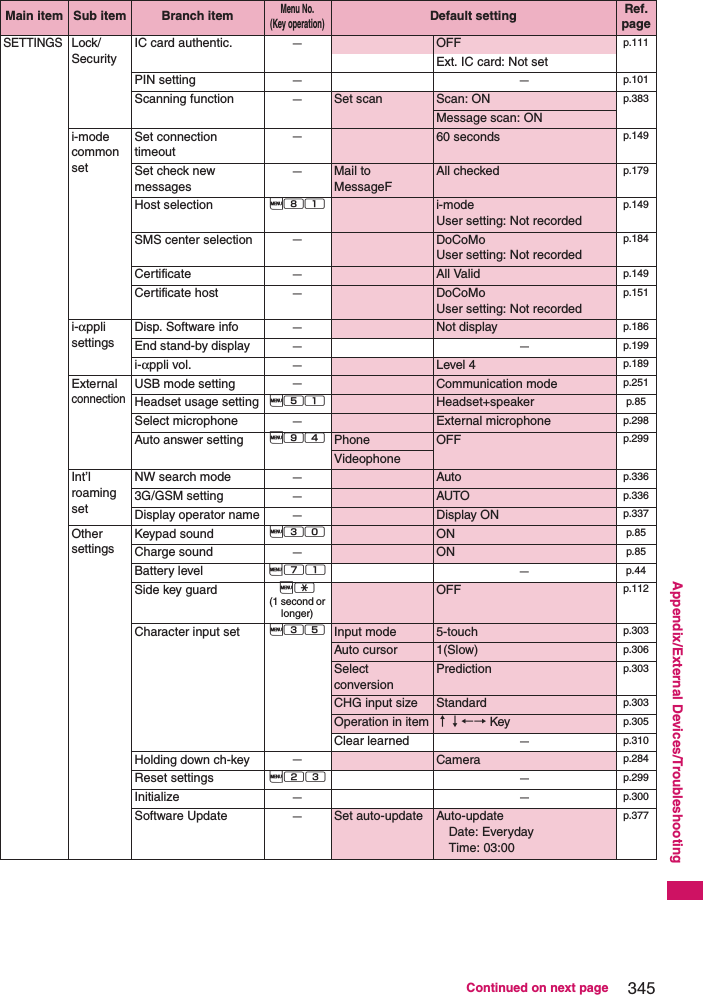
![348Appendix/External Devices/Troubleshooting[Table 1] Other reset setting functionsOSAIFU-KEITAIIC card lock setting w(1 second or longer)IC card lock OFF p.206−IC lock(power-off)MaintainSetting −ToruCa settings Receive from R/W: AcceptRepetition check: YesAuto reading setting: ONScroll: 1 linep.206IC card IlluminationON p.206Check IC owner −−p.203Change IC ownerSearch by i-mode −−−Main item Sub item Branch itemMenu No. (Key operation)Default setting Ref. pageFunction Default setting①My picture Sort: Chronological ↑Set image disp.: Normal②Music List setting: ListResume play: No data③Music&Video ChannelSort: Chronological↑List setting: List+imagePlayback start position: Beginning④i-motion Sort: Chronological ↑List setting: List+image (FOMA terminal), Name+image (microSD)Playback start position: No data⑤Music PlayerSound effectEqualizer: OFFSRS_WOW: OFFRepeat setting: OFFShuffle: OFFVolume: Level 10Screen setting: Normal screen modeSet image disp.: NormalChange skin: Lacy Pink (phone color: Pink Gold), Plain White (phone color: Platinum White), Seductive Black (phone color: Onyx Black)Set repeat play: OFF⑥Melody Sort: Chronological ↑Set repeat play: OFF⑦My documentSort: Chronological ↑⑧Chara-den Substitute image: ミッフィーSet image disp.: Fit in displayRec. Chara-den: Photo modeSelect size: QCIF (176 × 144)Movie type set: Video + voiceStorage setting (movie): NormalStorage setting (image): FineFile size setting: 2MB⑨Kisekae To o lSort: Chronological ↑⑩Camera Movie modeSelect size: QCIF (176 × 144)File size setting: 2MBQuality setting: NormalCamera SettingsPhoto mode: PortraitWhite balance: AutoFlicker: AutoShutter sound: Sound 1Select to save: Phone (Camera folder)Voice modeShutter sound: Sound 1Select to save: Phone (Camera folder)Photo modeSelect size: Screen (240 × 427)Quality setting: Super FineCamera SettingsPhoto mode: AutoWhite balance: AutoFlicker: AutoShutter sound: Sound 1Select to save: Phone (Camera folder)Movie mode/Photo modeAuto timer: OFF (Delay time: 10 seconds)Auto save set: OFFFile restriction: File unrestrictedContinuous mode→p.124⑪Schedule Display: Monthly displayUser icon setting: Not recorded⑫My Profile Big font⇔Standard font: Standard fontFunction Default setting](https://usermanual.wiki/Sony/A3880003.08-user-guide-part-2/User-Guide-951151-Page-98.png)
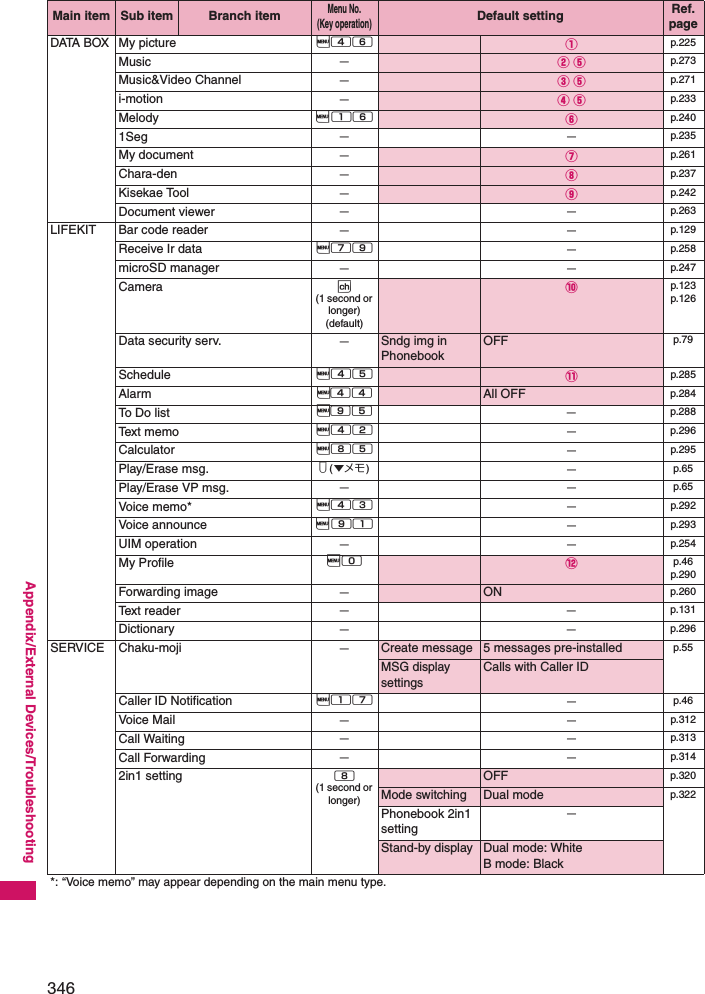
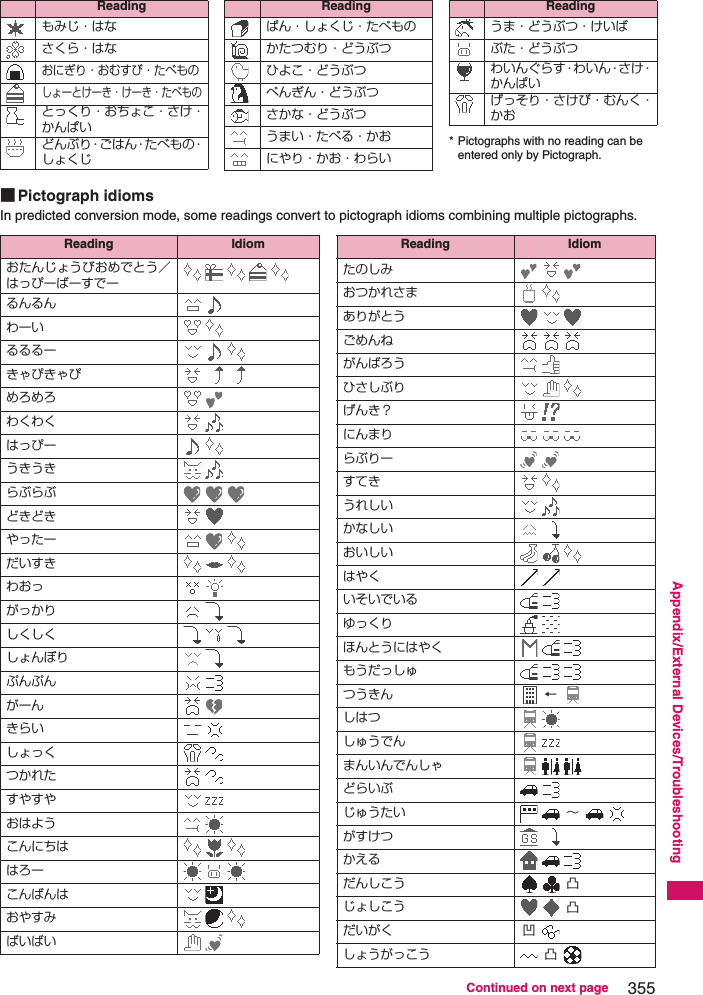
![352Appendix/External Devices/TroubleshootingSymbols and Special Characters■Double-byte symbols■Single-byte symbols■Symbols reading for conversionEnter and convert “きごう”, and some symbols are displayed as conversion candidates. Entering reading as follows enables conversion to the corresponding symbol:* The space at the first character is a “Double-byte space”. * When entering the message of SMS, and appear at the end of the list. * The space at the first character is a “Single-byte space”. Reading Symbolあっと、あっとまーくいこーるえんおすおなじおなじくおんぷかけるかっこ@=¥々〃♪×() 〔〕 [] {} 〈〉《》 「」 『』 【】 ‘’“” () 〈〉 [] {} 「」Reading Symbolからこめころんこんまさんかくしゃせんしかくしめたすどうぱーせんと∼※:,△▲▽▼/\□■◇◆+ヽヾゝゞ〃々%Reading Symbolひくひしがたほしまるむげんめすやじるしゆうびんるーとわる−◇◆☆★○●◎∞♀→←↑↓〒√÷♂](https://usermanual.wiki/Sony/A3880003.08-user-guide-part-2/User-Guide-951151-Page-102.png)
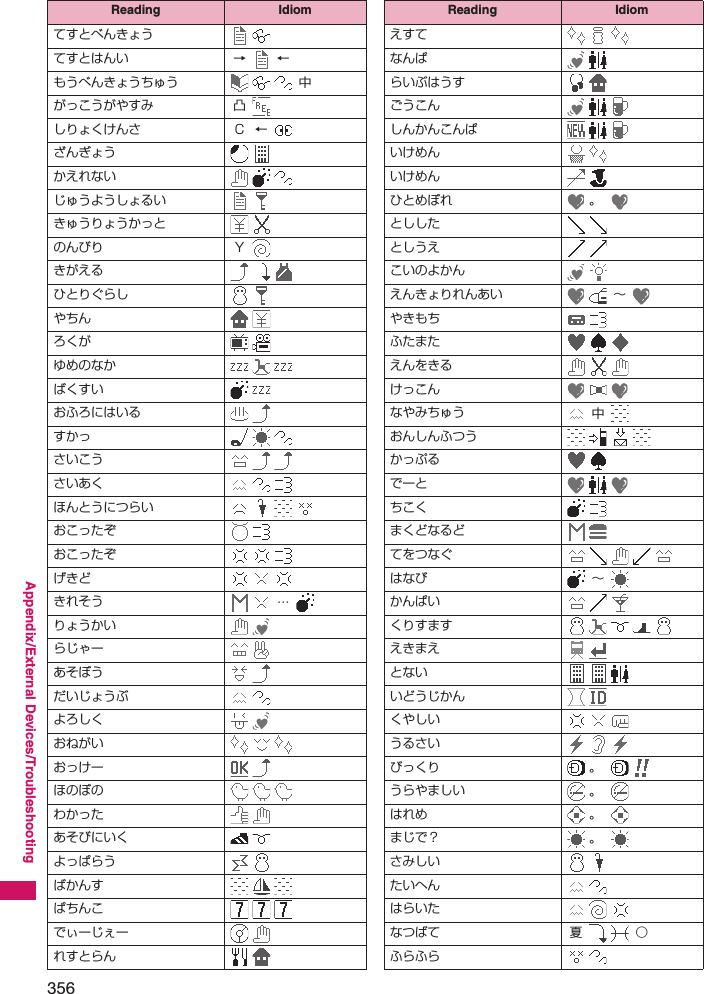
![367Appendix/External Devices/TroubleshootingI was disconnected while sending a message, then received an SMSA message appears when I retry●SMS interrupts communication and notifies you that a large amount of data is being transferred within a given time. Follow the contents of SMS and the displayed message.Images taken with camera are flickered●When you take pictures indoors, flickering may appear due to the effect of fluorescent lighting, etc. Changing the “Flicker” setting may suppress flickering.→p.123Still images or movies shot with camera look too bright●You may shoot them outside or in a bright place with “Flicker” set to “Mode 1(50Hz)” or “Mode 2(60Hz)”. Restore the “Flicker” setting to “Auto”.→p.123Still images or movies look blurred●Move the lens selector switch of the lens to the ● position (standard lens) for normal shooting or to the position (macro lens) to switch to the close-up mode for close-up shooting.→p.118●Set a mode suited to the scene being shot.→p.122When I attempt to display the image or play for demonstration or see a preview, “ ” appears●“ ” may appear when the image data is corrupted.The terminal operates slowly when any keypads are pressed●It may occur if a large amount of data is stored on the FOMA terminal or if you exchange large data by using the microSD reader/writer function. Chance capture shooting shortens the shooting time●Chance capture shooting saves control data together with movie data, which may shorten the shooting time.Chokkan game cannot be used●Is Original lock set to Camera?→p.106■For overseas use“ ” or “select net” does not disappear from the screen, and international roaming service cannot be used●Are you out of international roaming service area or is the reception poor? ●See the international service guide such as “Mobile Phone User’s Guide [World Services]” to check if the area or operator is available. ●Turn off the FOMA terminal then turn it back on the first time you use the service after you move from Japan to overseas. ●Launch “NW search mode” to search for a compatible operator.→p.336A voice call or videophone call cannot be received●Is “Bar incoming when roam” set to “Activate”?→p.338●Is “V-phone while packet” set to something other than “V-phone priority”? →p.67●Videophone is not available while using GSM/GPRS network.The other party’s caller ID is not notified. The notified caller ID is not the other party’sThe FOMA terminal does not perform operations using phonebook data or Caller ID Notification●If the used network or operator does not notify the caller ID, the caller ID does not appear on the FOMA terminal screen even when the caller ID is notified. Depending on the used network or operator, the notified caller ID may be different from the other party’s.](https://usermanual.wiki/Sony/A3880003.08-user-guide-part-2/User-Guide-951151-Page-117.png)
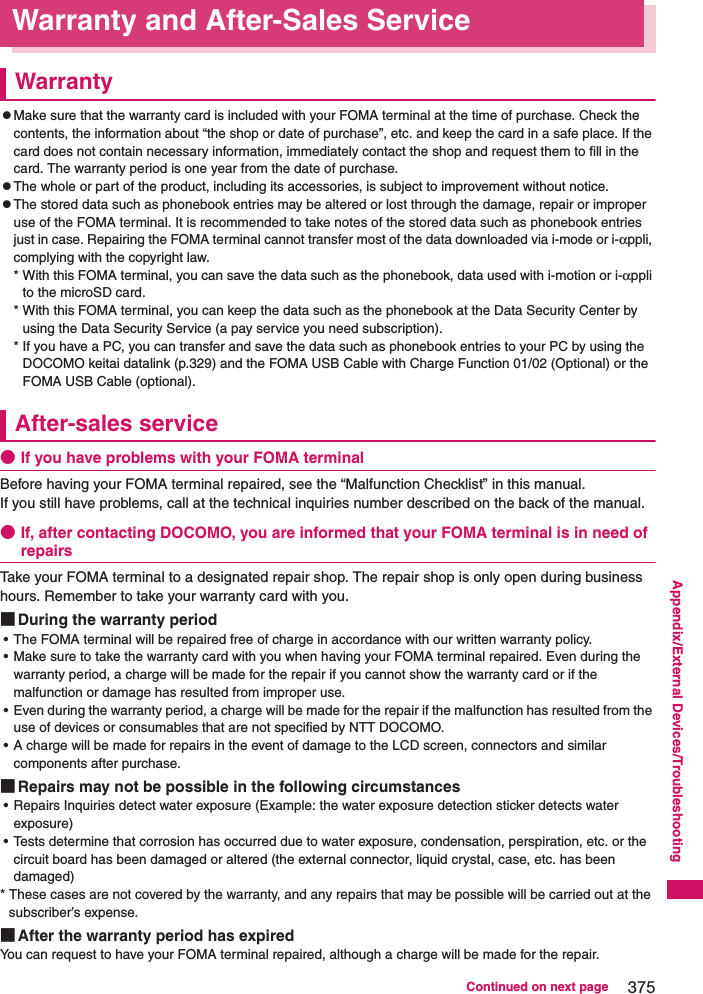
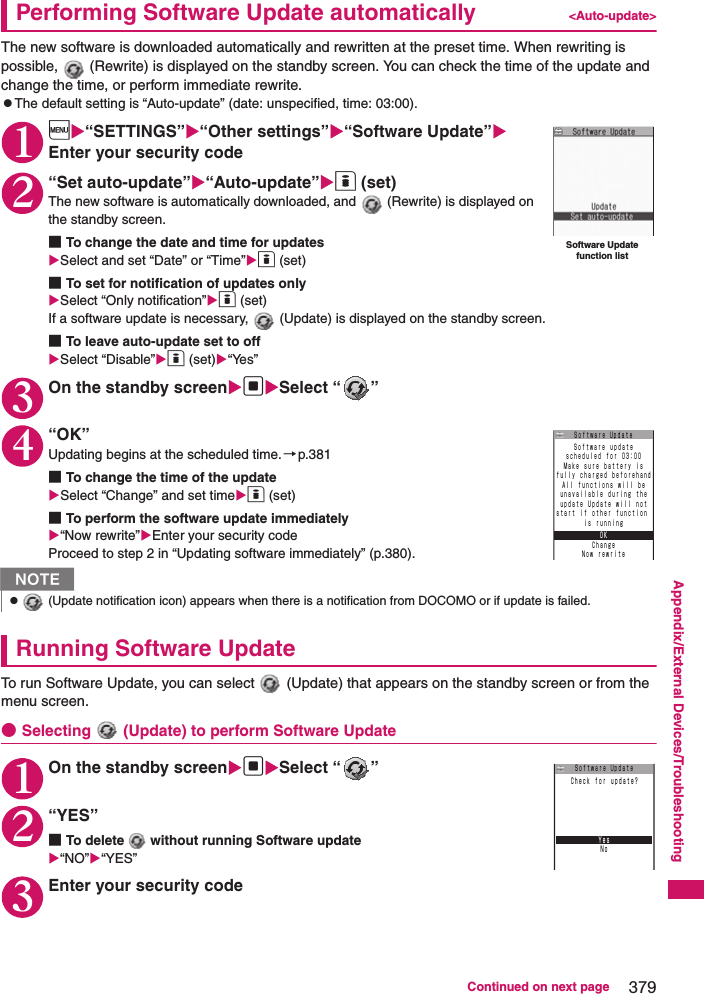
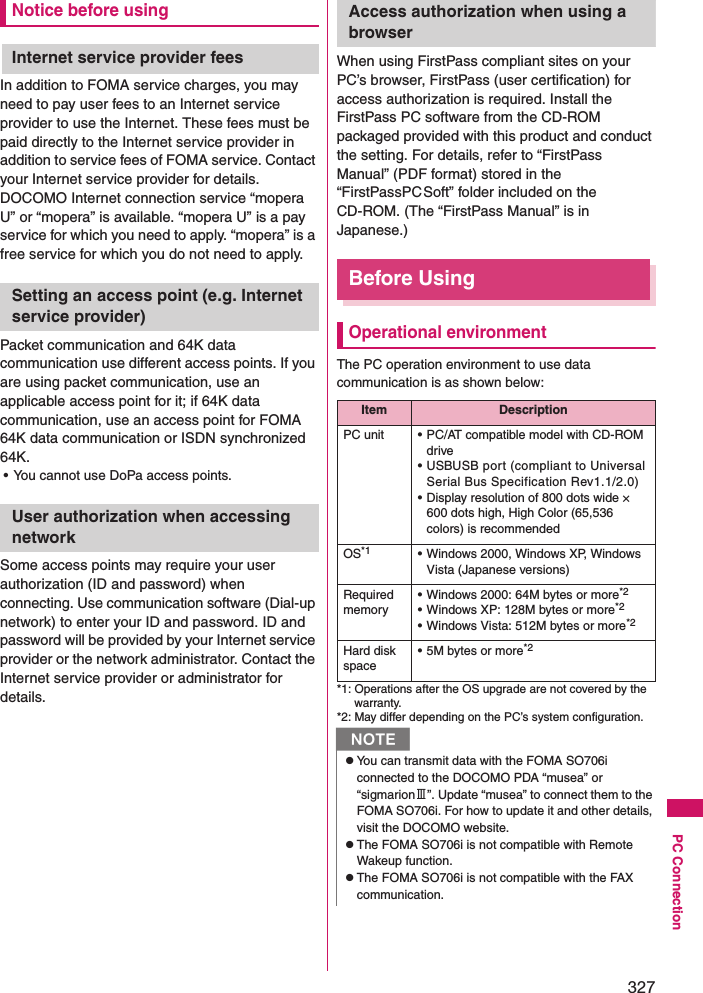
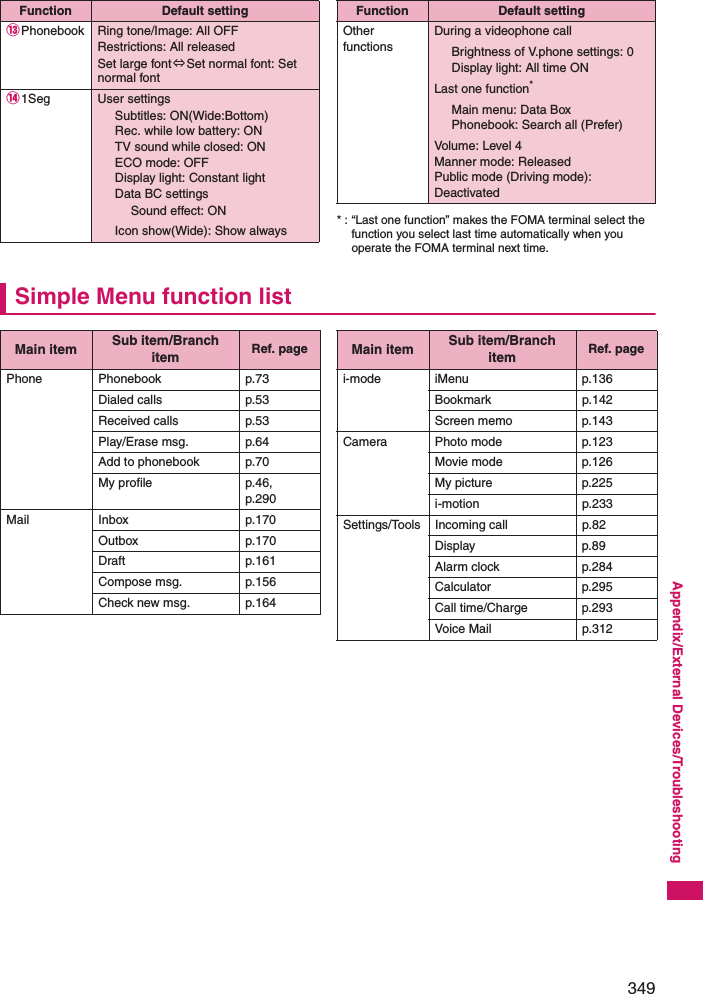
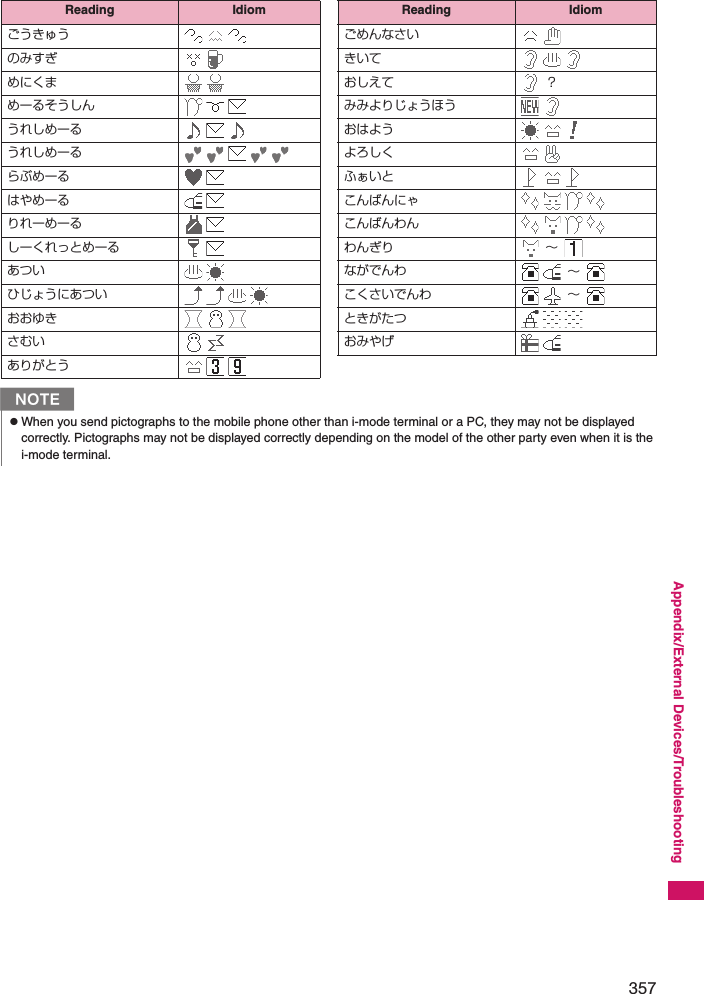
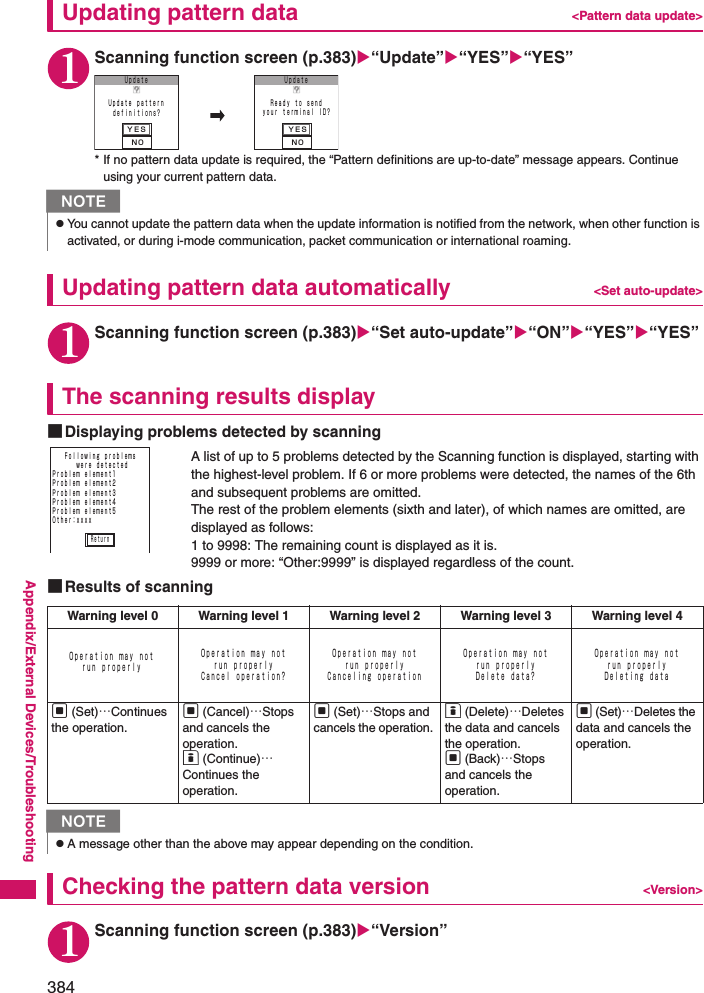
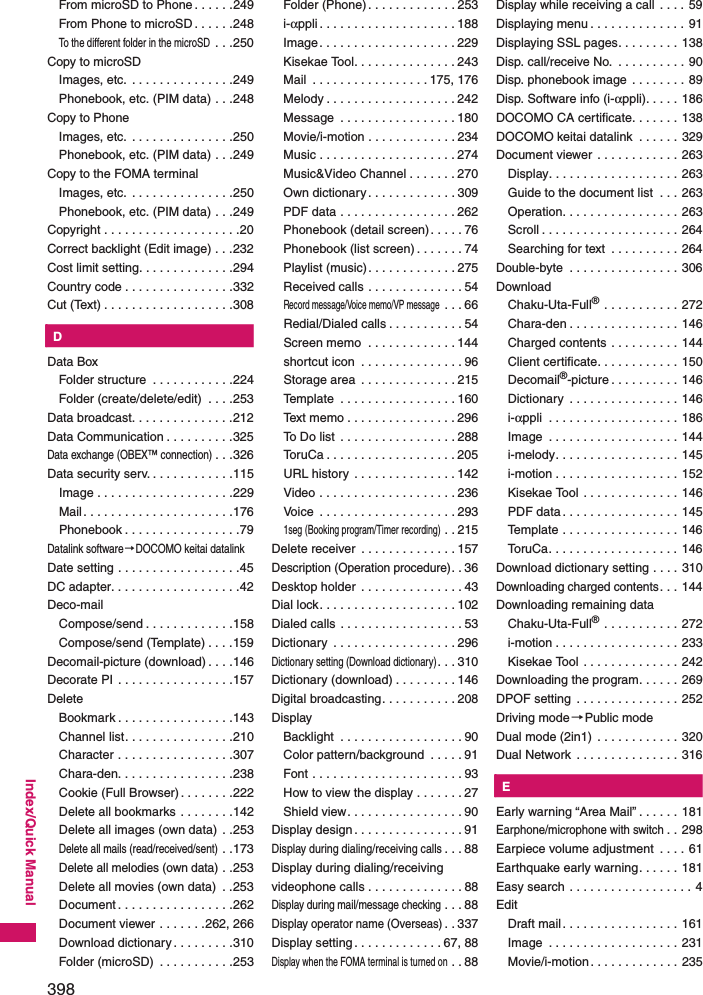
![382Appendix/External Devices/Troubleshooting●If you select “Others”You can select the desired date and period of time after communicating with the server if you select “Others” at step 1 in p.381. 1Select a desired dateIn the date selection display, you will see the update availability represented as shown below: ○: Available△: Almost fullNone : Full2Select an hourIn the time selection display, you will see the update availability represented as shown below: ○: Available△: Almost full×: FullSelect the period of time to display the candidates for the reservation time by communicating with the server again. 3Confirm the software update date and timeIf you check the selected date and time and select “YES”, you will communicate with the server again. The software update is reserved. ●Checking/Changing/Canceling the reservation date and time<Example: To cancel the reservation after checking it> 1i“SETTINGS”“Other settings”“Software Update”Enter your security code“Update”2“Cancel”■To accept the reservation date and time“OK”■To change the reservation date and time“Change”Once information specific to your FOMA terminal has been sent to the server, follow the procedure used when “Others” is selected.→p.382NzThe reservation time for the software update will be based on the server’s time. zWhen the reservation time for the software update is the same as the alarm notification time, priority is assigned to the software update. zWhen the reservation time comes while the other function is used, updating starts after finishing the function. zIf you perform “Initialize” after the reservation procedure is complete, the software update does not start at the scheduled time. Reschedule the time for update. SMTWTFSSelect preferred day[2008/ 8/17(Sun)]AvailableSoftware Update23456781910 11 12 13 14 15182519 20 21 2226 27172431162328 29 301/3time−slotSelect your preferred2:00 − 2:59 ○3:00 − 3:59 ○1:00 − 1:59 △5:00 − 5:59 △6:00 − 6:59 ×7:00 − 7:59 △4:00 − 4:59 △Software Update0:00 − 0:59 ○YESNOSoftware Update8/17(Sun) 0:23?Reserve forCancelOKAlready reserved for 8/23(Sat) 7:30Software UpdateChange](https://usermanual.wiki/Sony/A3880003.08-user-guide-part-2/User-Guide-951151-Page-132.png)


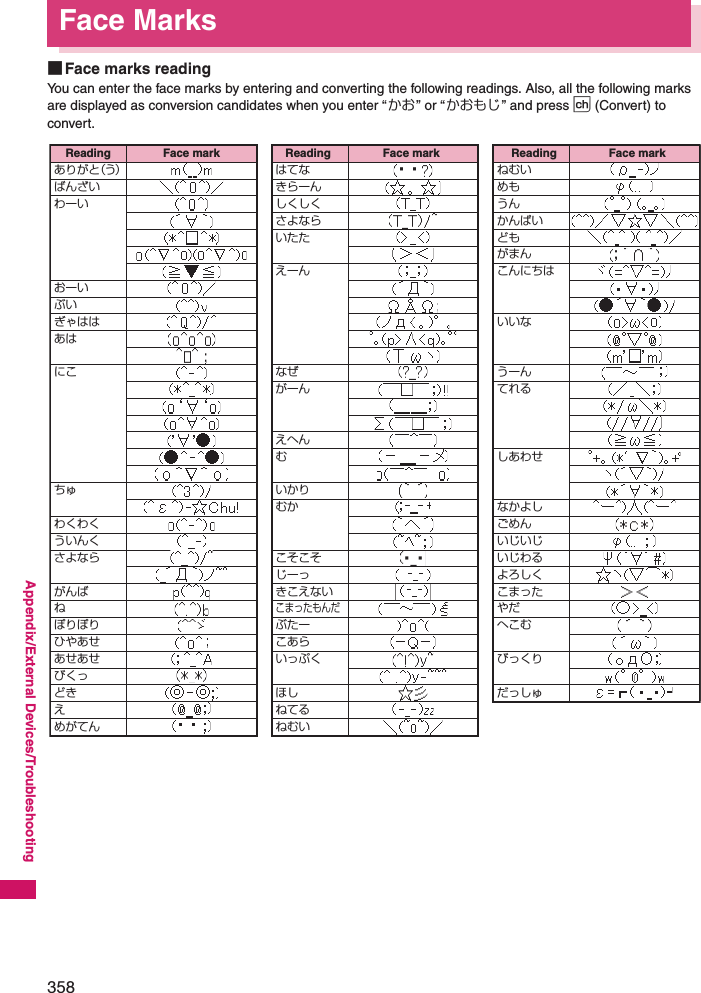
![Cutting lineMaking a local call abroadDial the other party’s phone number➜r or o (V.phone)Receiving a callWhen you receive a voice/videophone call, press rNetwork servicesBefore using the network services overseas, you have to set “Remote Control”.Roam. Guidance• Make the setting in Japan. i➜“SERVICE”➜“Roam. Guidance”➜“Activate” or “Deactivate”➜“YES”Bar incoming when roam• Depending on the operator overseas, the setting may be unavailable. i➜“SERVICE”➜“Bar incoming when roam”➜“Activate” or “Deactivate”When set to “Activate”, select the setting from “Bar All incoming” or “Data calls Barring”➜“YES”➜Enter your network security codeVoice Mail (Int.)i➜“SERVICE”➜“Service(Int.)”➜“Voice Mail(Int.)”➜Select the service➜“YES”➜Follow the audio guidanceCall Forwarding (Int.)i➜“SERVICE”➜“Service(Int.)”➜“Call Forwarding (Int.)”➜Select the service➜“YES”➜Follow the audio guidanceRoam. Guidance (Int.)i➜“SERVICE”➜“Service(Int.)”➜“Roam. Guidance (Int.)”➜“YES”➜Follow the audio guidanceRemote access (Int.)i➜“SERVICE”➜“Service(Int.)”➜“Remote access (Int.)”➜“YES”➜Follow the audio guidanceCaller ID req. (Int.)i➜“SERVICE”➜“Service(Int.)”➜“Caller ID req. (Int.)”➜“YES”➜Follow the audio guidanceCountry codes of major countriesEnter the following country codes when using international call or setting “Int’l dial assistance”. (As of May, 2008)* For other country codes and details, see the DOCOMO “International Services Website”. AreaCodeAreaCodeAreaCodeAustralia 61 Holland 31 Peru 51Austria 43 Hong Kong 852 Philippines 63Belgium 32 Hungary 36 Russia 7Brazil 55 India 91 Singapore 65Canada 1 Indonesia 62 Spain 34China 86 Italy 39 Sweden 46Czech 420 Japan 81 Switzerland 41Egypt 20 Korea 82 Taiwan 886Fiji 679 Macau 853 Thailand 66Finland 358 Malaysia 60 Turkey 90France33 Maldives 960 United Kingdom 44French Polynesia689New Caledonia687 United States of America1Germany 49New Zealand64Greece 30 Norway 47 Vietnam 84International call access code of main countries (Table 1)(As of March, 2008)* For the latest information, see the DOCOMO “International Services Website”. Area Code Area Code Area CodeAustralia 0011 Hungary 00 Portugal 00Belgium 00 India 00 Russia 810Brazil 0021/0014Indonesia 001 Singapore 001Ireland 00 Spain 00Canada 011 Italy 00 Sweden 00China 00 Korea 001 Switzerland 00Czech 00 Luxemburg 00 Taiwan 002Denmark 00 Macau 00 Thailand 001Finland 00 Malaysia 00 Turkey 00France 00 Monaco 00United Arab Emirates00Germany 00New Zealand00 United Kingdom 00Greece 00Norway00 United States of America011Holland 00Philippines00Hong Kong 001 Poland 00 Vietnam 00International Prefix number for the universal number (Table 2)(As of March, 2008)* Note that the universal numbers may not be available from mobile phones, public phones or hotels. * For the latest information, see the DOCOMO “International Services Website”. Area Code Area Code Area CodeArgentina 00 Holland 00 Portugal 00Australia 0011 Hong Kong 001 Singapore 001Austria 00 Hungary 00 South Africa 09Belgium 00 Ireland 00 Spain 00Brazil 0021 Israel 014 Sweden 00Bulgar 00 Italy 00 Switzerland 00Canada 011 Korea 001 Taiwan 00China 00 Luxemburg 00 Thailand 001Colombia 009 Malaysia 00 United Kingdom 00Denmark 00 New Zealand 00 United States of America011Finland 990 Norway 00France 00 Peru 00Germany 00 Philippines 00InquiriesFor inquiries overseas such as lost, stolen, charge accumulation or malfunction, refer to “For lost, stolen, charge accumulation, etc. overseas” on the front cover of the Quick Manual (For Overseas Use) or “For malfunctions overseas” in p.1. • When dialing to the inquiries numbers, “International call access code (Table 1)” or “International Prefix number for the universal number (Table 2)” assigned to your destination country is required. For details, refer to the “Mobile Phone User’s Guide [World Services]”. * Note that the universal numbers may not be available from mobile phones, public phones or hotels. 10 119786](https://usermanual.wiki/Sony/A3880003.08-user-guide-part-2/User-Guide-951151-Page-166.png)
![Using your FOMA Terminal PolitelyWhen using your FOMA terminal, do not forget to consider the feelings of people around you.Turn off your FOMA terminal when you are:■In a place where it is prohibited to use a mobile phone.It is prohibited to use a mobile phone in some places. Turn off your FOMA terminal in: ・An airplane ・A hospital* There is not only a person in a ward who uses medical electrical equipment.Turn off your FOMA terminal even in a lobby or waiting room.■DrivingThe penalty shall be imposed on use of a handset held in your hand while driving.* If you are obliged to receive a call, tell the other to call back later in handsfree mode and stop the car at a secure location for dialing.■In a crowded place such as rush-hour train, where somebody nearby may be using an implantable cardiac pacemaker or implantable cardioverter-defibrillatorRadio waves may affect the operation of implantable cardiac pacemakers or implantable cardioverter-defibrillators. ■In a public place such as theater, cinema, or museumUsing the FOMA terminal in a public place, where you need to be quiet, annoys people around you.Mind where you use your FOMA terminal and the loudness of your voice or the ring tone■If you use your FOMA terminal in a quiet place such as restaurant or hotel lobby, mind the loudness of your voice is, etc. ■Take care not to disturb other people when you use your FOMA terminal in a public place. Respect privacyPlease be considerate of the privacy of individuals around you when taking and sending photos using camera-equipped mobile phones. These functions enable you to be well-manneredYour FOMA terminal is equipped with useful functions not to answer an incoming call or to mute the sounds of the FOMA terminal.This manual is bound in consideration of recycling. When this manual becomes unnecessary, we appreciate your cooperation of taking this manual out to the collection or recycling. Access DOCOMO e-site for procedures to change your address or billing plan and for request of information materials.iMenu ⇒ 料金&お申込・設定 (Charges & Applications/Setting) ⇒ 各種手続き (ドコモeサイト) (Application procedure (DOCOMO e-site)) My docomo (http://www.mydocomo.com/) ⇒ 各種手続き (ドコモeサイト ) (Applicationprocedure (DOCOMO e-site))* You will need your “network ID” to access e-site from i-mode.* No packet communication charges are incurred when accessing e-site from i-mode. Accessing from overseas will incur charges.* You will need your “docomo ID/password” to access e-site from PC.* If you do not have or you have forgotten your “network ID” or “docomo ID/password”, contact the DOCOMO information Center listed on the back cover of this manual.* DOCOMO e-site may not be available depending upon the content of your subscription.* You may not be able to access e-site services due to system maintenance, etc.[Manner mode/Original manner mode]→p.86Manner mode mutes the sounds of the FOMA terminal such as the keypad sounds and the ring tone. You can customize Manner mode by changing the settings of the Record message function, vibrator or ring tone (Original manner mode). However, neither Manner mode nor Original manner mode can mute the shutter sound of the camera. [Public mode (Driving mode/Power OFF)] →pp.62, 63The FOMA terminal announces to the caller that you cannot answer the call because you are driving, or you are in the place you have to refrain from calling or you have to turn off the mobile phone. [Vibrator]→p.84The FOMA terminal vibrates to notify you of an incoming call. [Record message]→p.64When you cannot answer a call, the caller can leave a message. You can also use optional services such as the Voice Mail service (p.312) and Call Forwarding service (p.314). From i-modePacket communication charges freeFrom PC](https://usermanual.wiki/Sony/A3880003.08-user-guide-part-2/User-Guide-951151-Page-167.png)