Samsung Electronics Co NP-Q1 Mobile PC User Manual SAMSUNG Q1
Samsung Electronics Co Ltd Mobile PC SAMSUNG Q1
UserManual.wiki
>
Samsung Electronics Co
>
NP-Q1 User Manual
>
Users Manual 1b
Contents
1.
Users Manual 1a
2.
Users Manual 1b
3.
Users Manual 2
Users Manual 1b
Navigation menu
Upload a User Manual
Namespaces
Wiki Guide
HTML
PDF
Info
Views
User Manual
Discussion / Help
Navigation
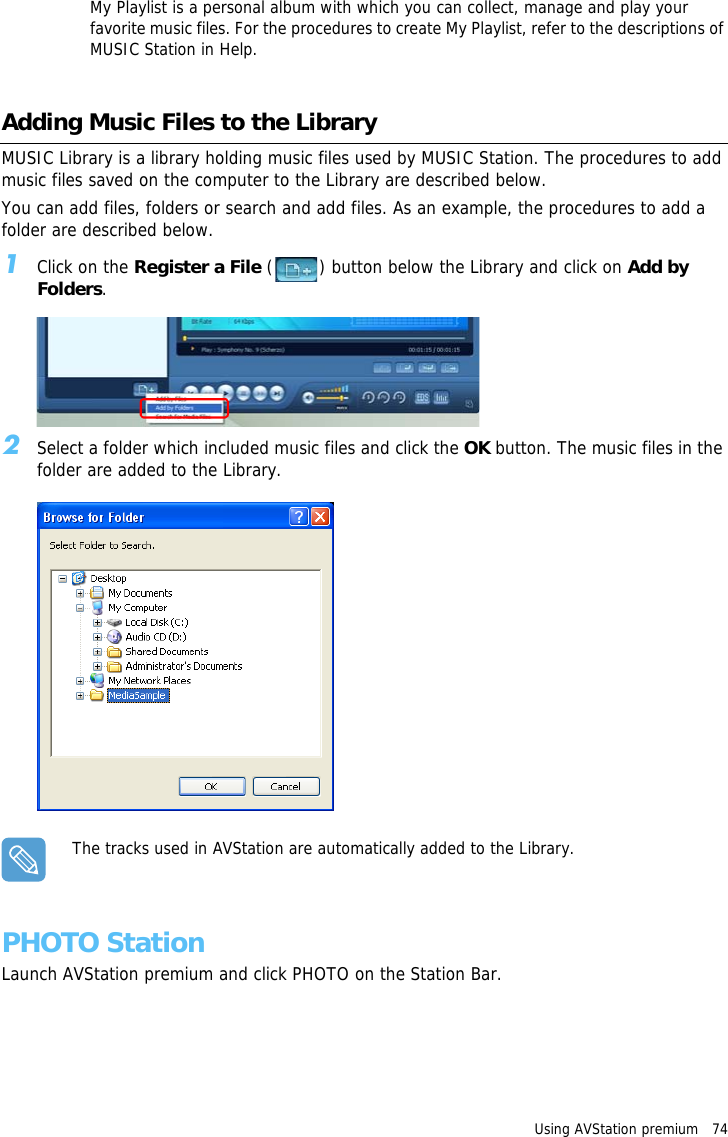


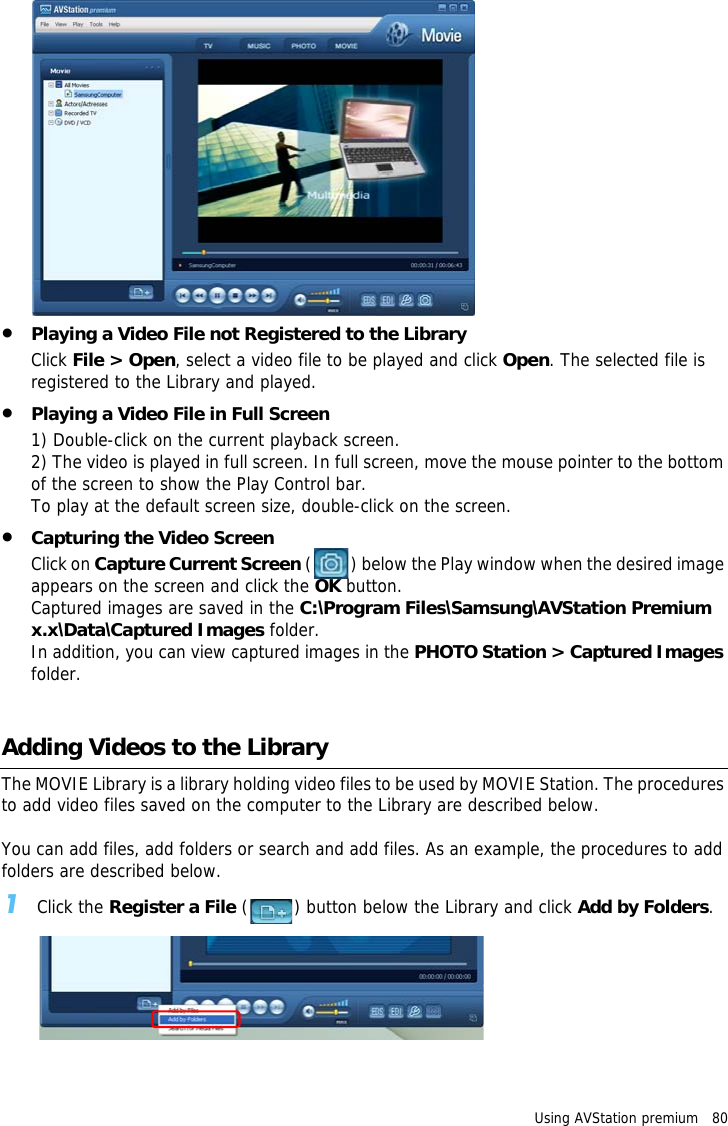
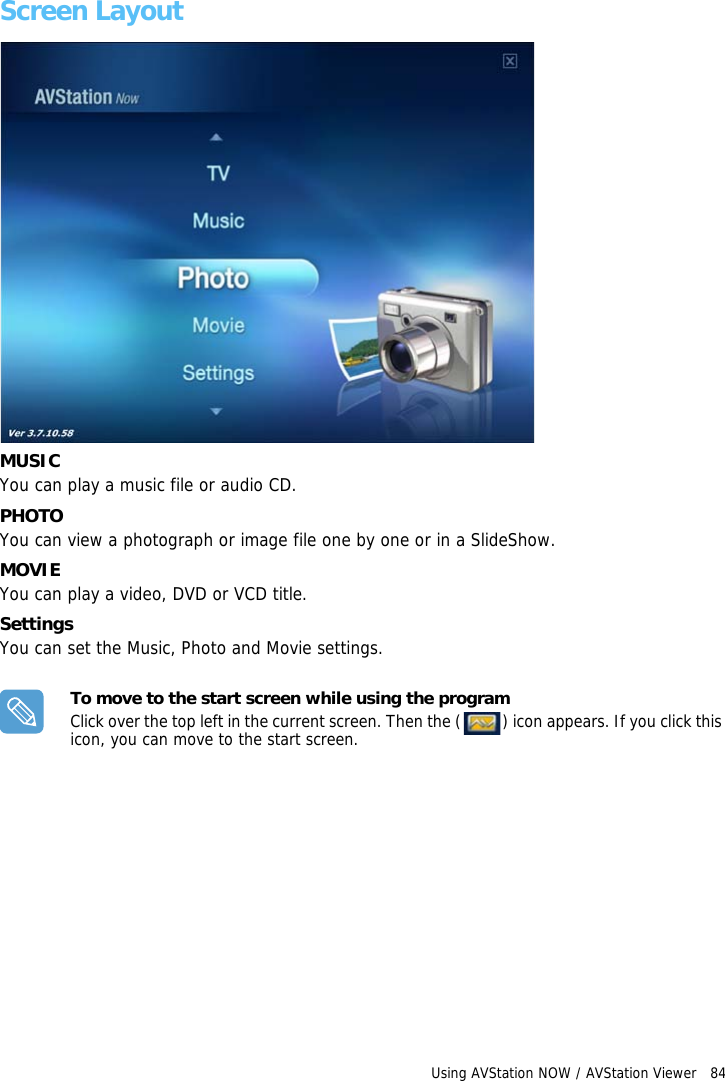
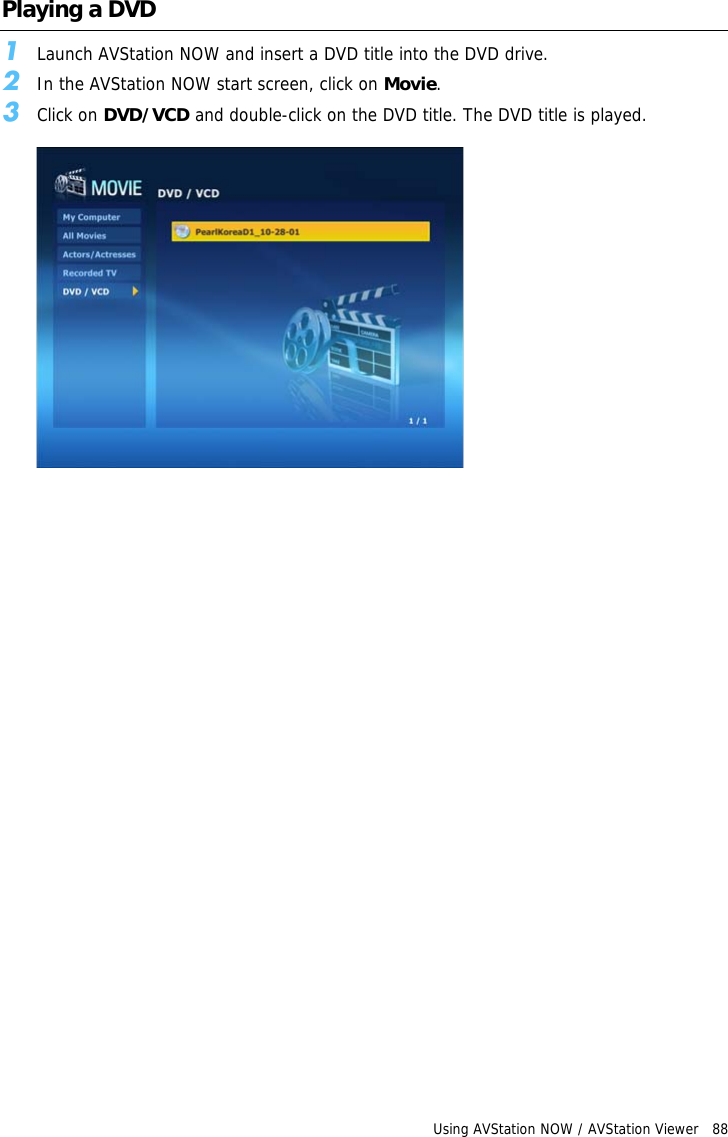
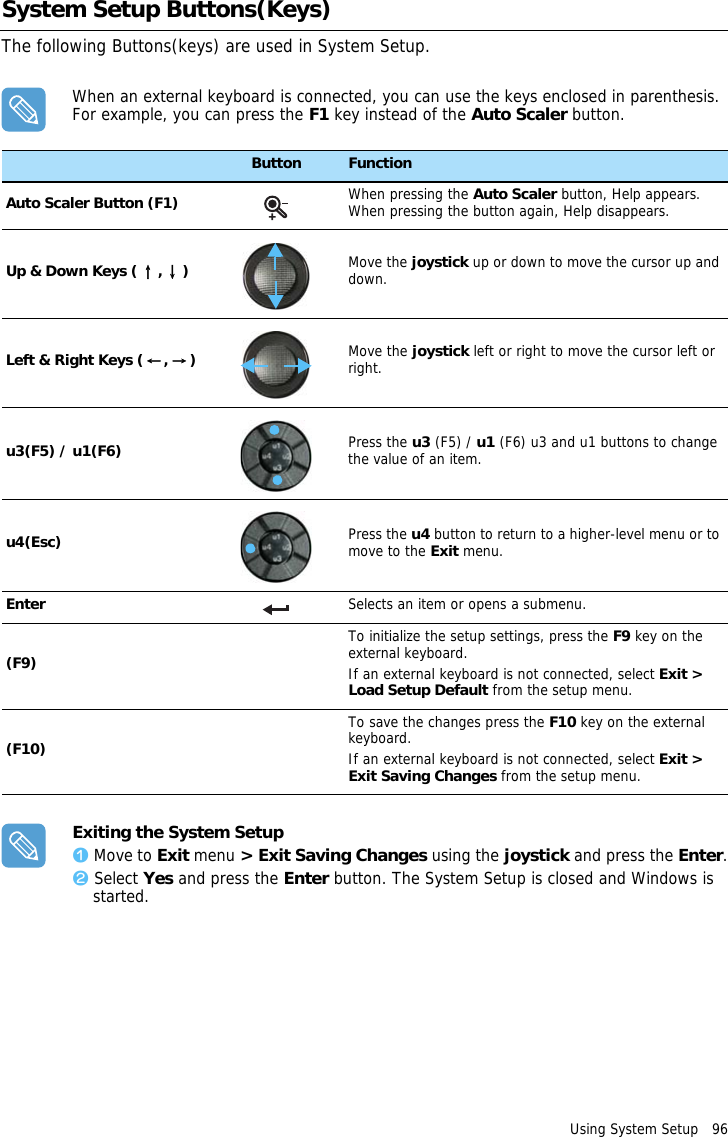
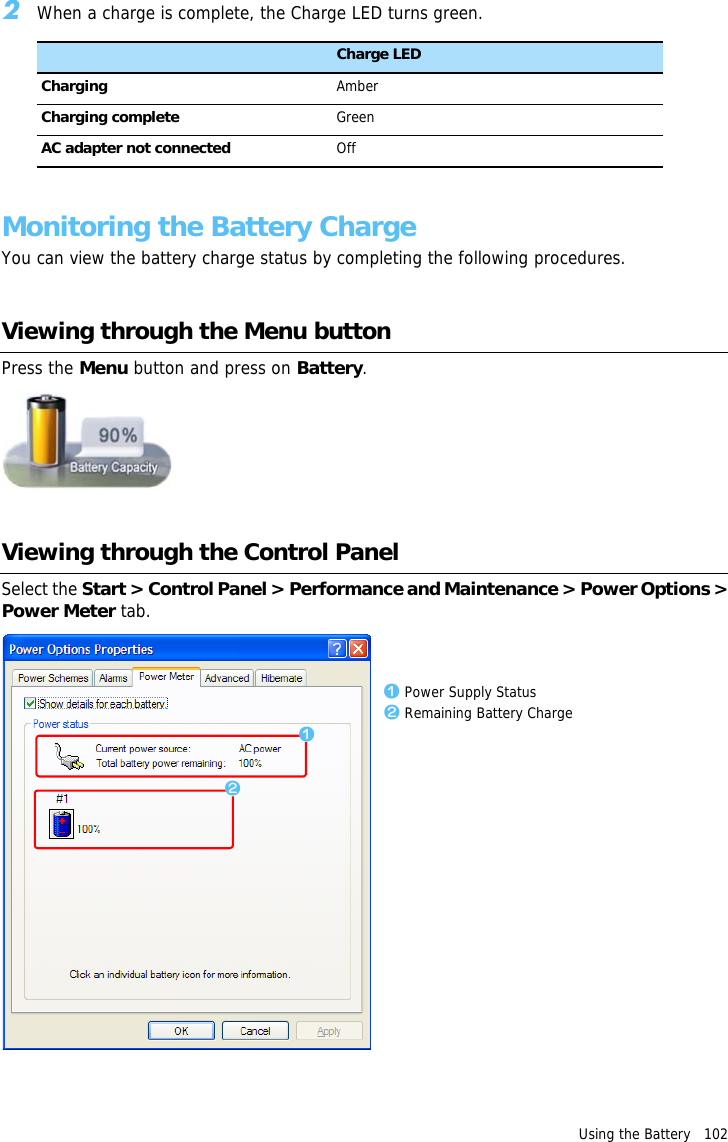
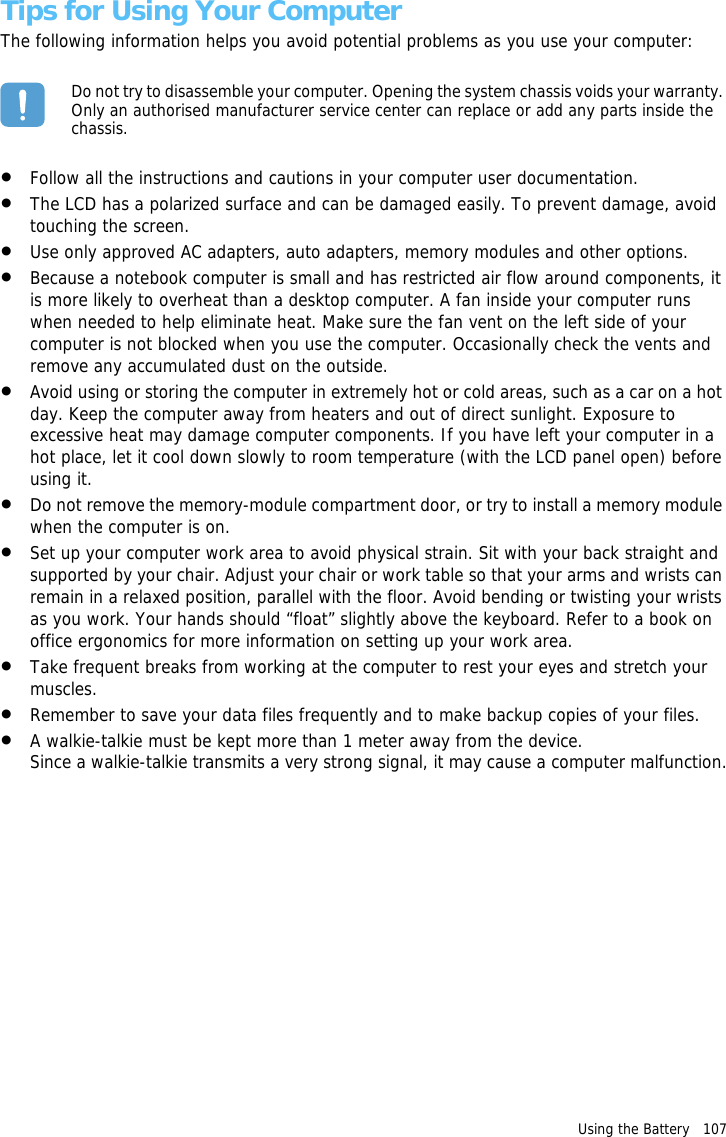
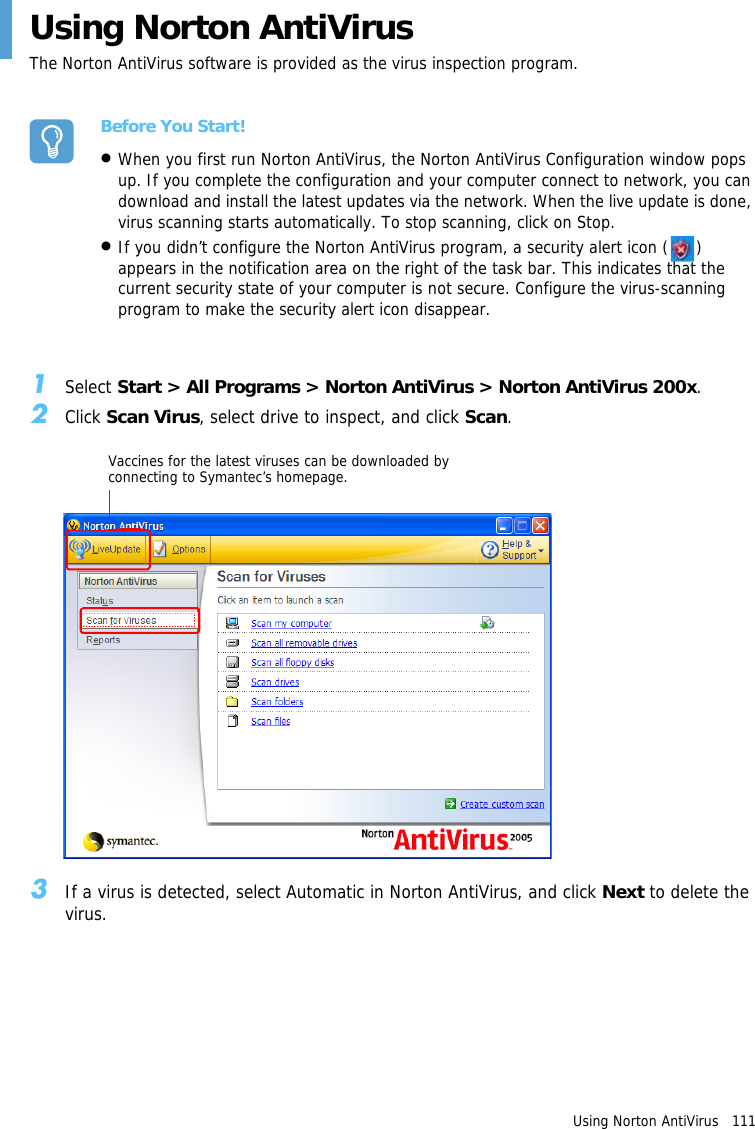
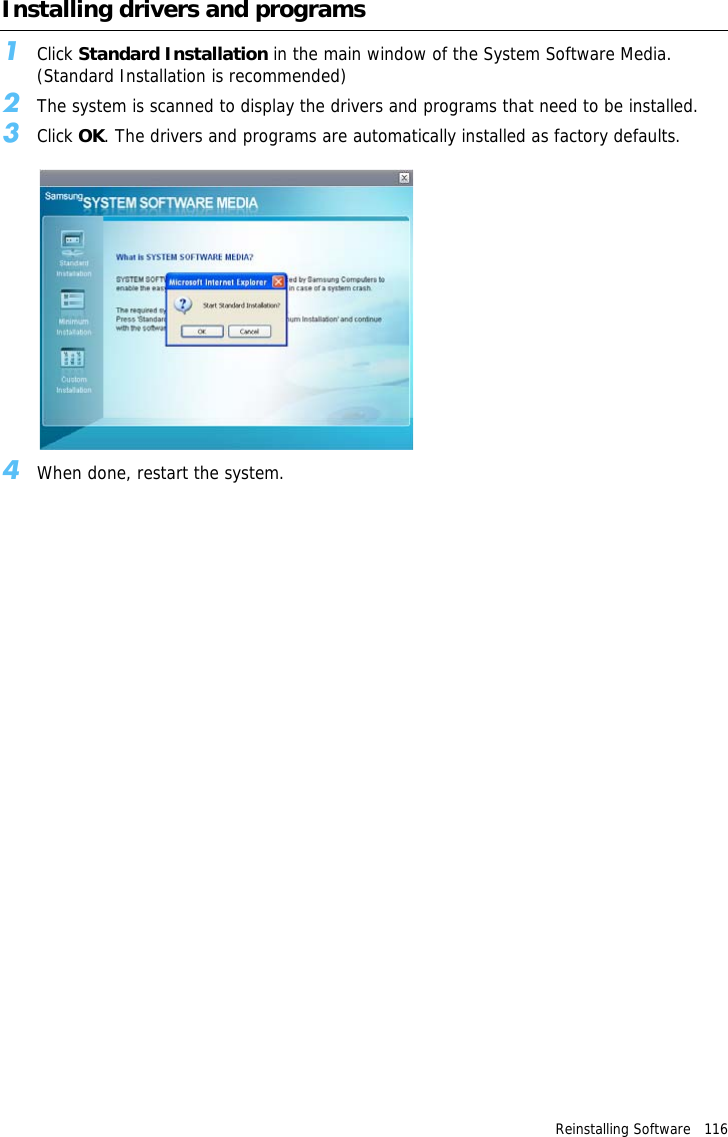
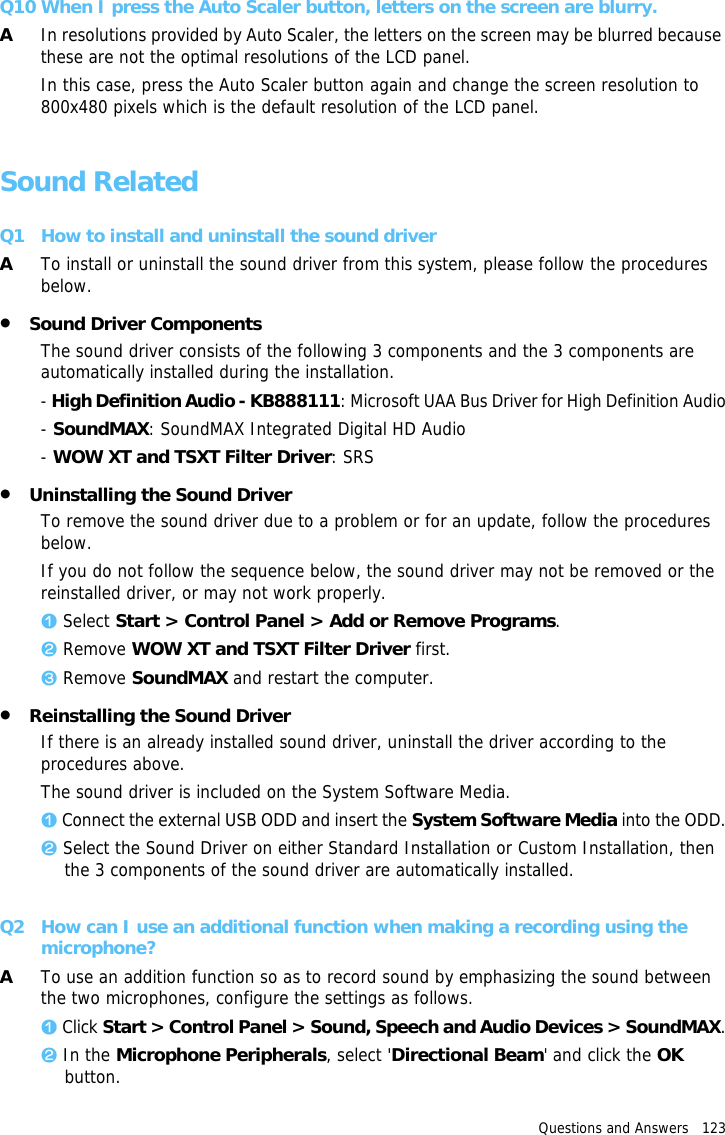
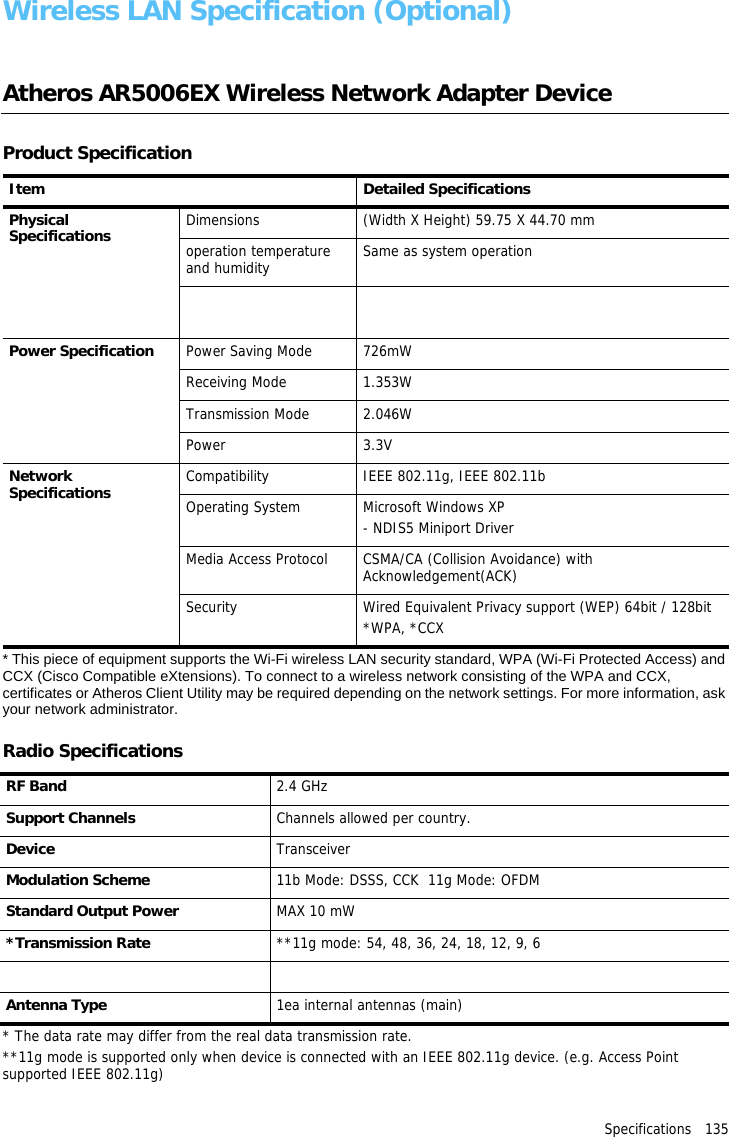
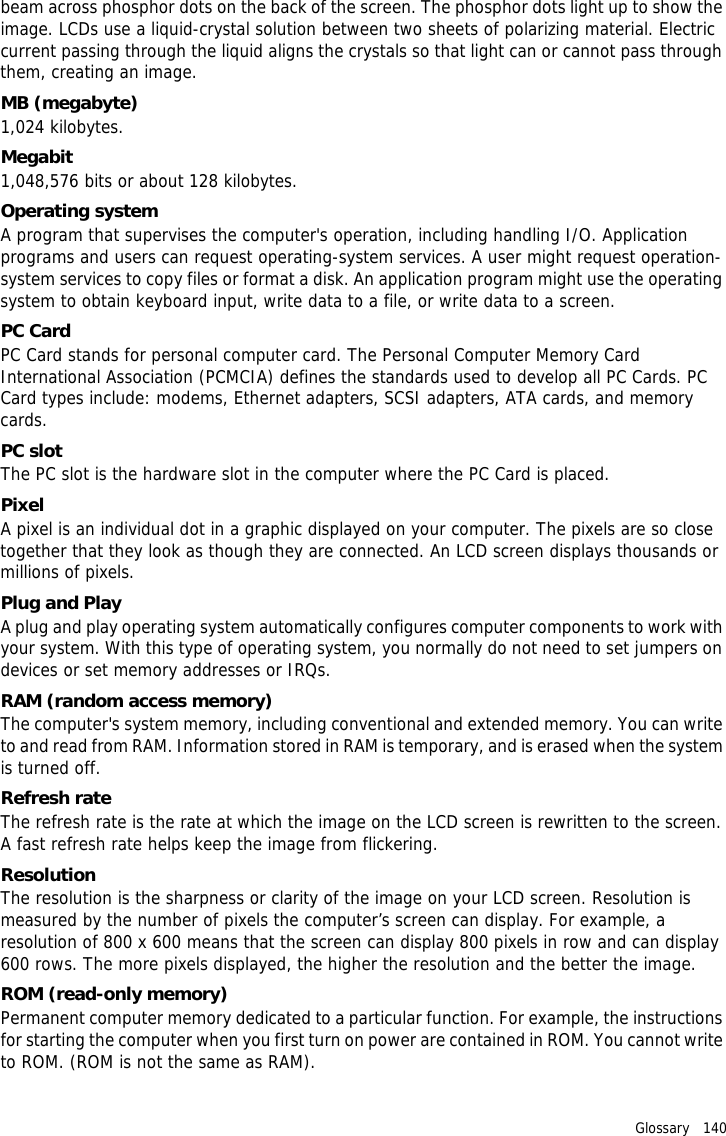
![Setting a Booting Password 98 3On the screen, the password setting buttons are described.You can set a password by entering numbers between 1 and 4 with the joystick.Since the u2 button is used as Delete (BackSpace) and the u4 button is used as Cancel (Esc), enter the password using the joystick.Up: 1Right: 2Next: 3Left: 4Enter a password, press <Enter>, re-enter the password for confirmation, and press <Enter> again.4When a message confirming the password configuration appears in the [Setup Notice] window, press <Enter>.The supervisor password has been set. The supervisor password is required to turn the computer on or to enter System Setup.Setting a User PasswordUsers can start the system with their user password, but cannot enter the System Setup.Before configuring a user password, a supervisor password must have been configured. Deactivating the supervisor password also deactivates the user password.However, please note that deactivating a user password does not deactivate the supervisor password.In the Set User Password item, press <Enter> and complete the procedures of Step 3 of Setting a Supervisor Password.Activating the Booting PasswordBefore activating the booting password, a supervisor password must have been configured.Set the Password on boot option to Enabled. From now on, system booting will not proceed without the password.](https://usermanual.wiki/Samsung-Electronics-Co/NP-Q1.Users-Manual-1b/User-Guide-641549-Page-28.png)
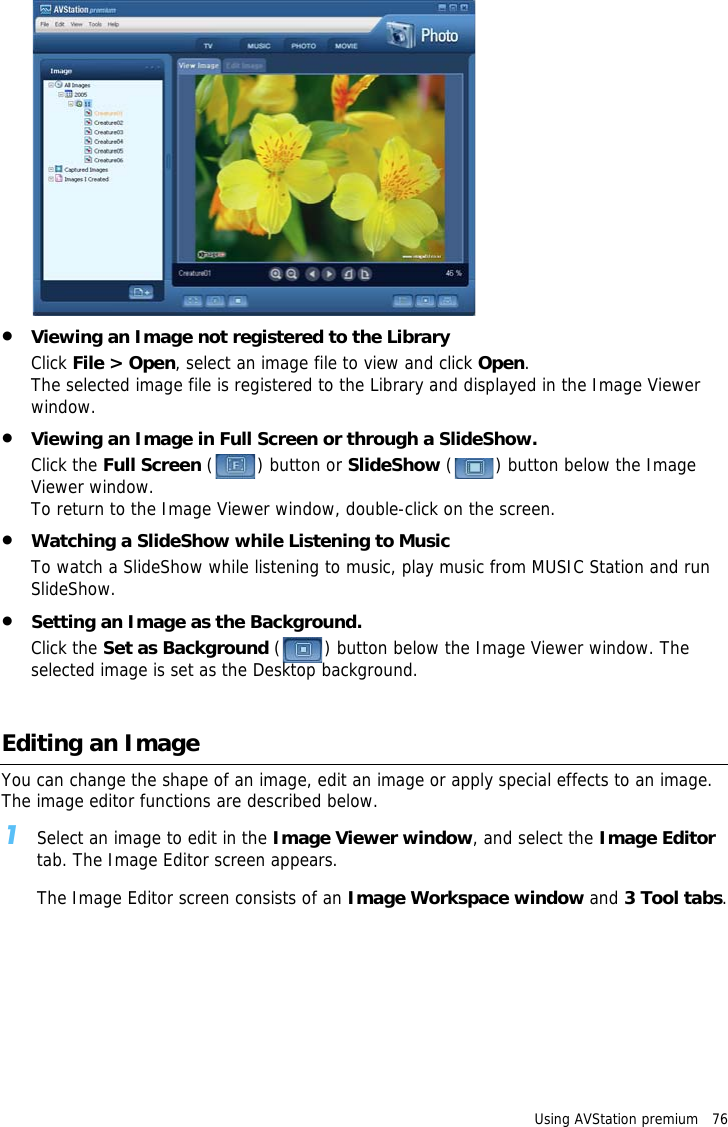
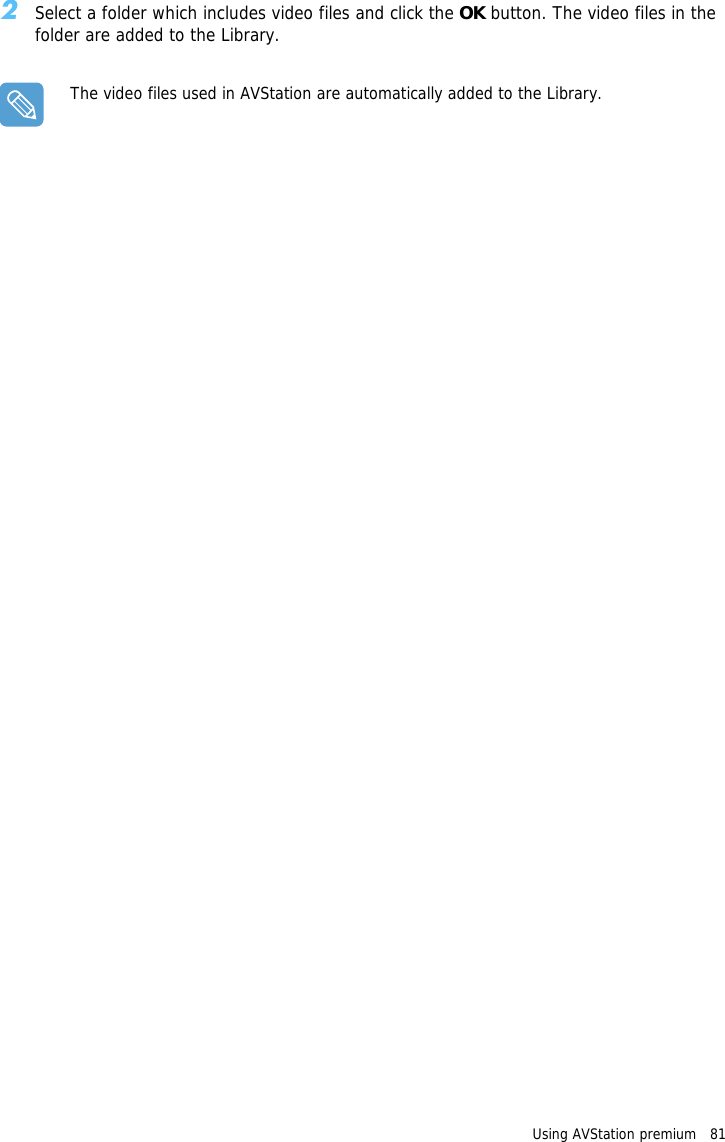
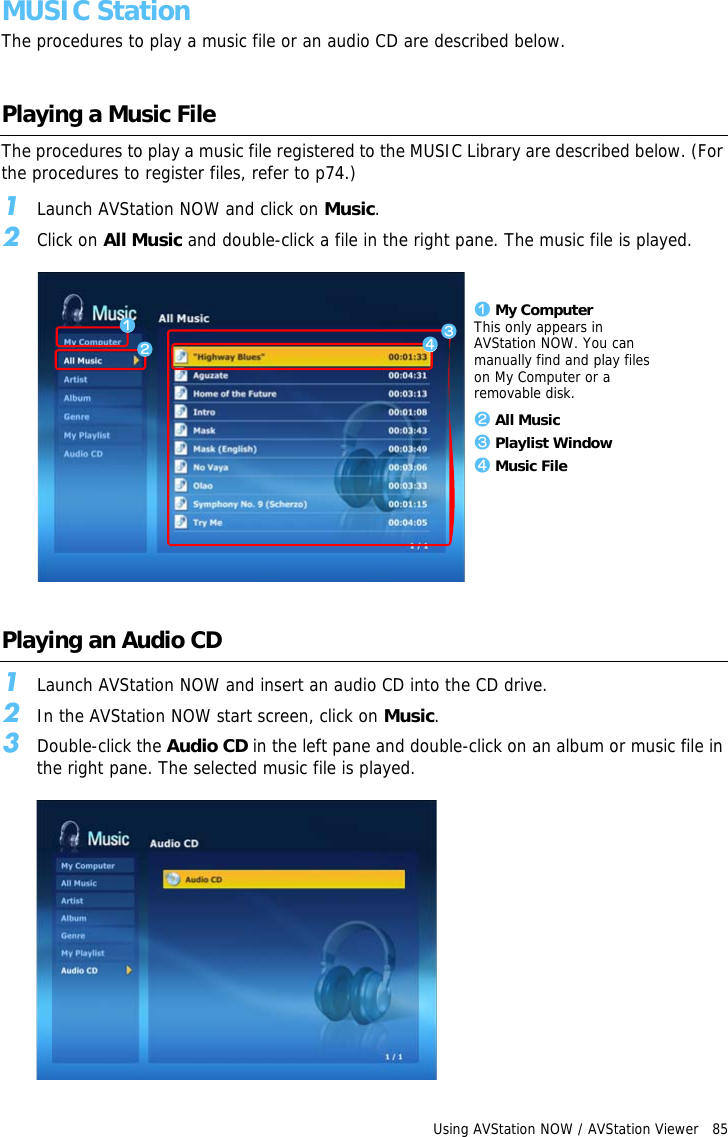
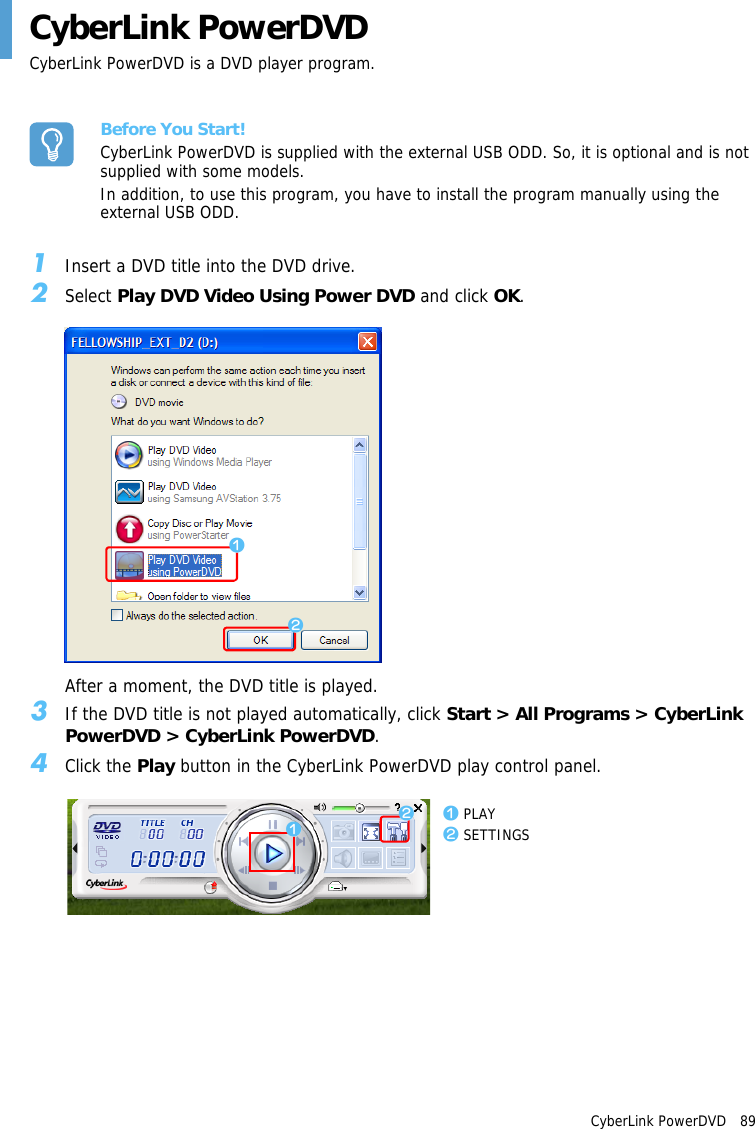
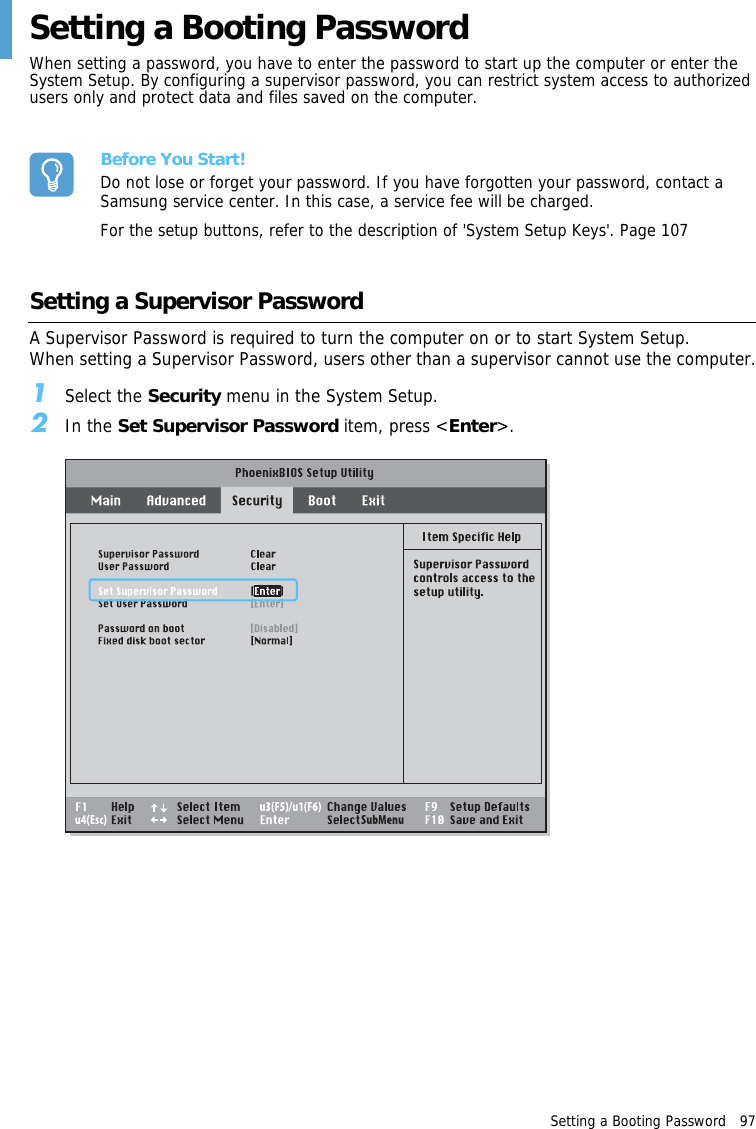
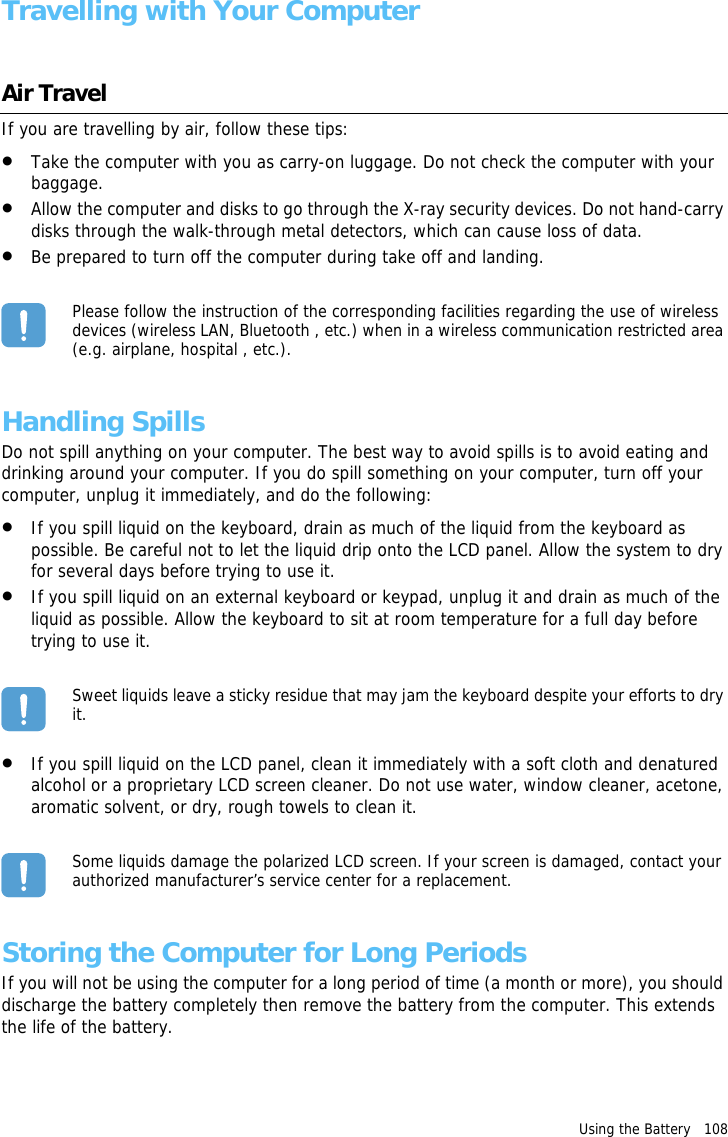
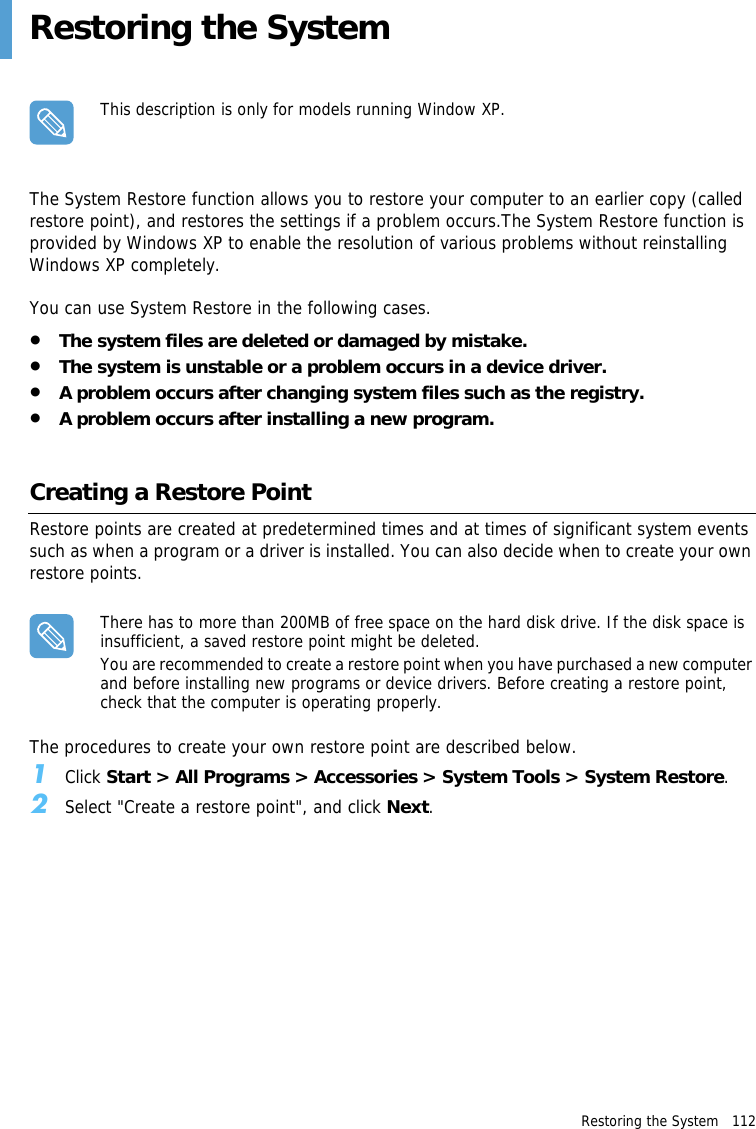
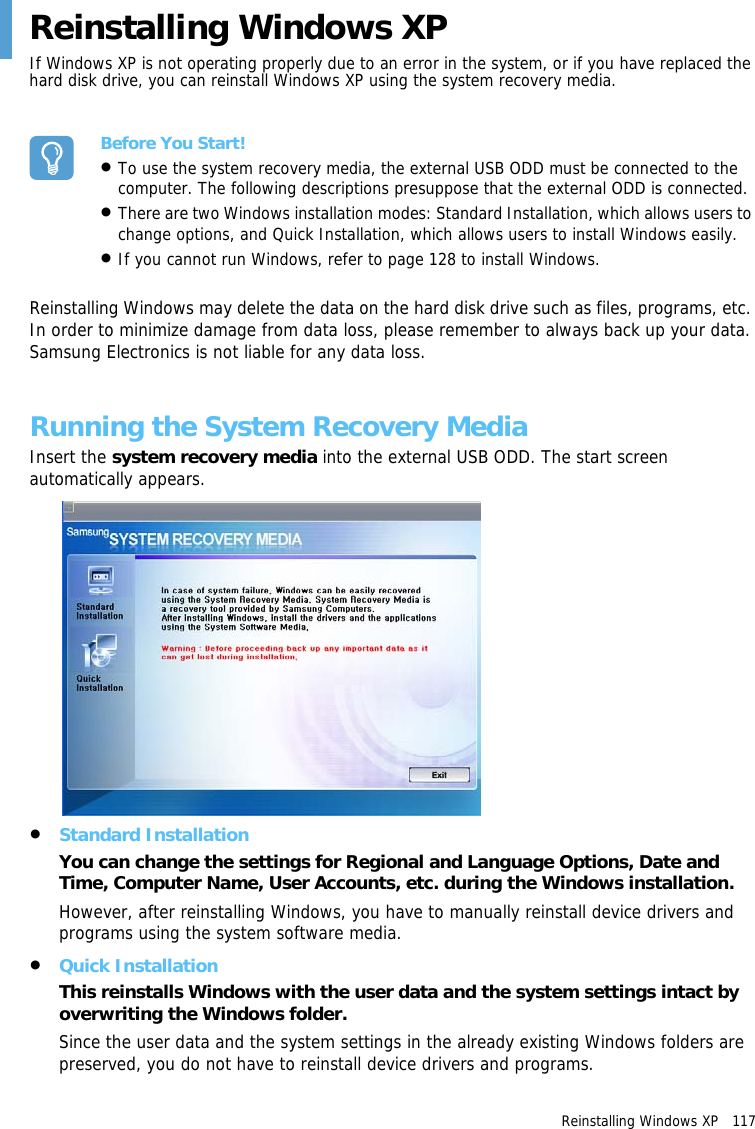
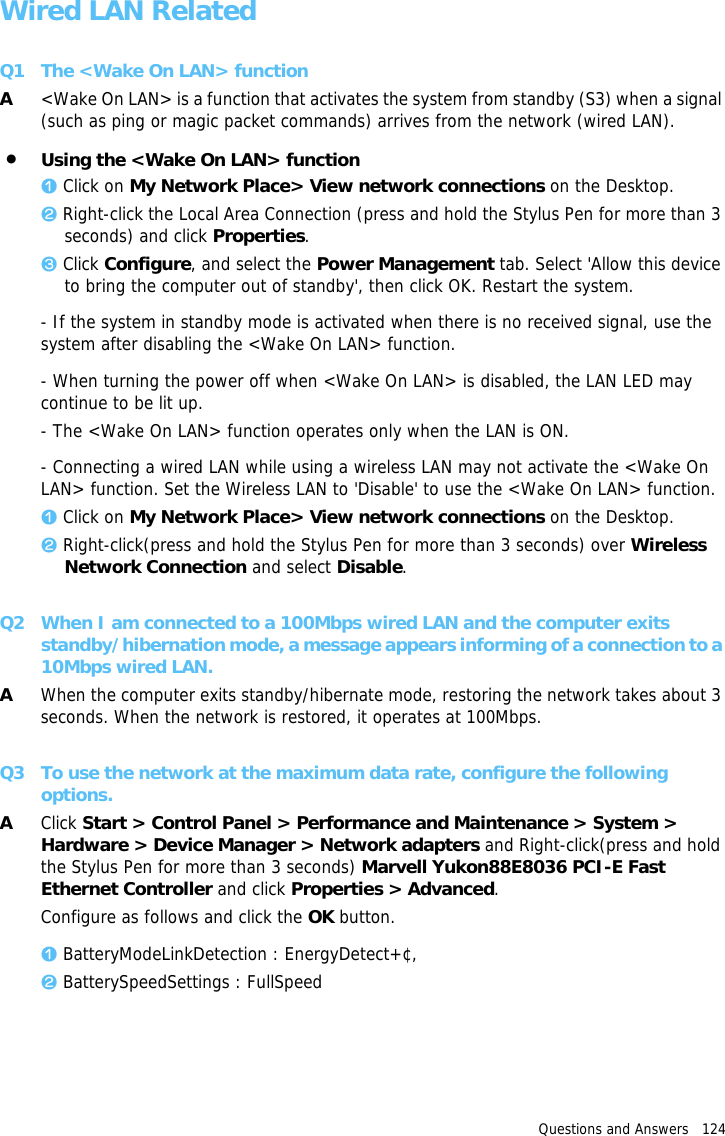
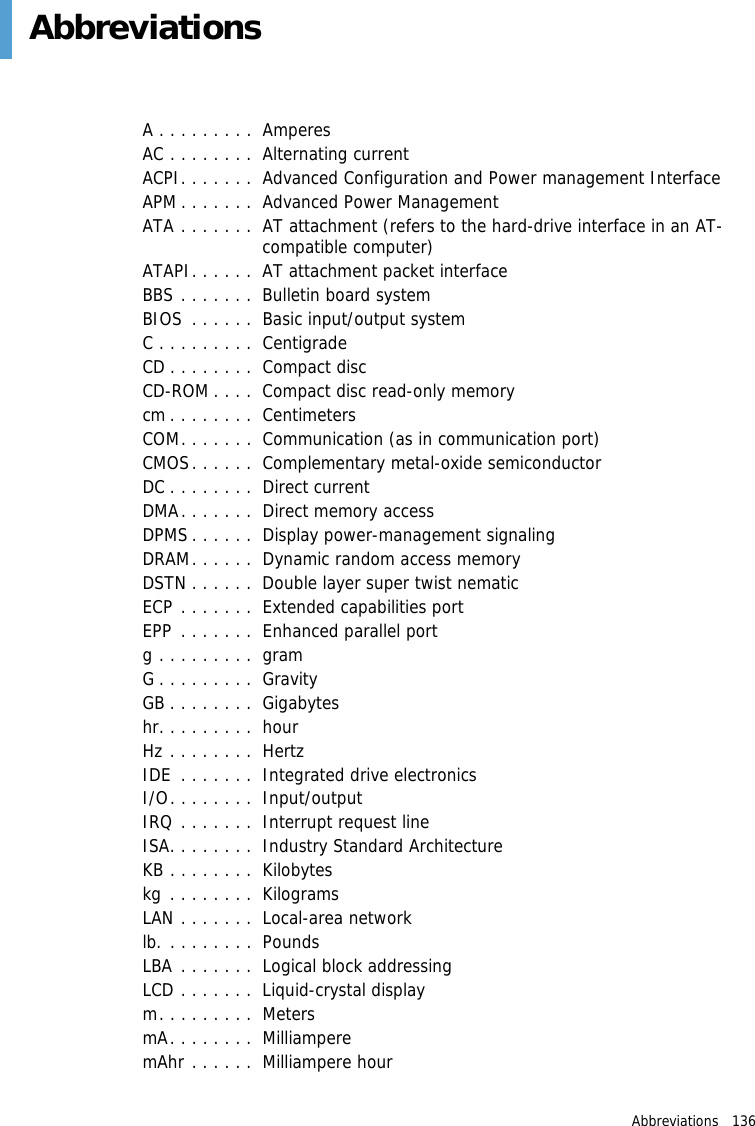
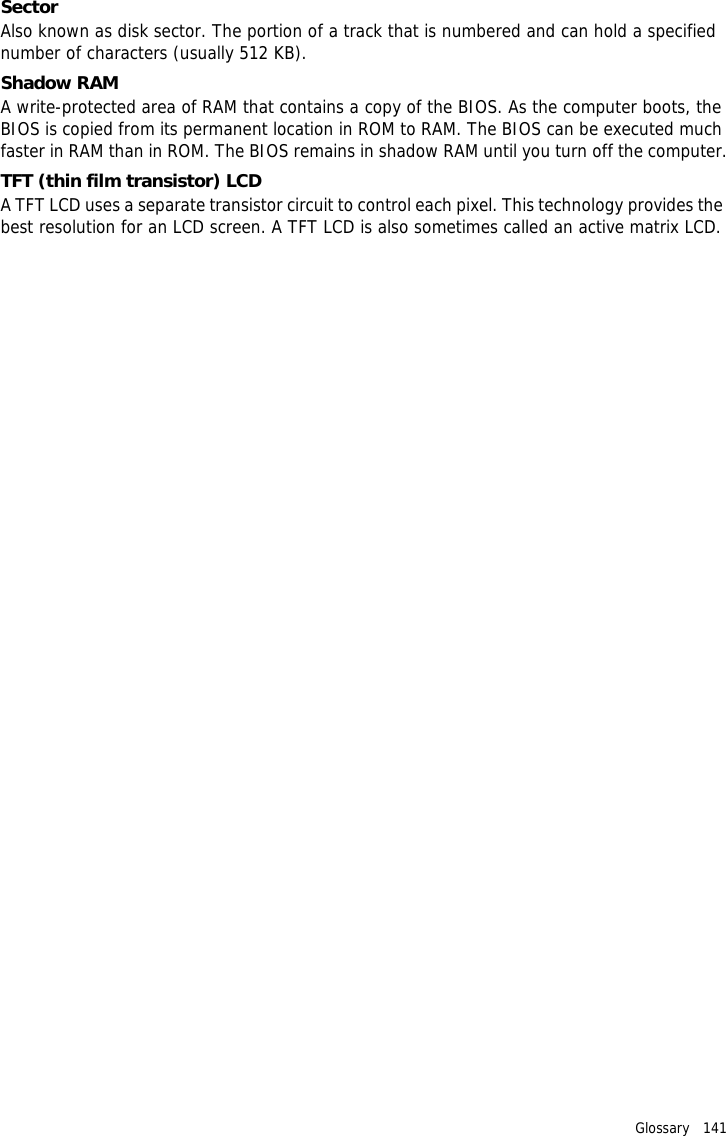
![Setting a Booting Password 99 Deactivating the Password1On the password to be deactivated, press <Enter>. For example, to deactivate a supervisor password in the Set Supervisor Password item, press<Enter>.2In the Enter Current Password item, enter the currently configured password and press <Enter>. 3Leave the Enter New Password item field empty, and press <Enter>.4Leave the Confirm New Password field empty, and press <Enter>.5In the [Setup Notice] window, press <Enter>.The password is deactivated.](https://usermanual.wiki/Samsung-Electronics-Co/NP-Q1.Users-Manual-1b/User-Guide-641549-Page-29.png)
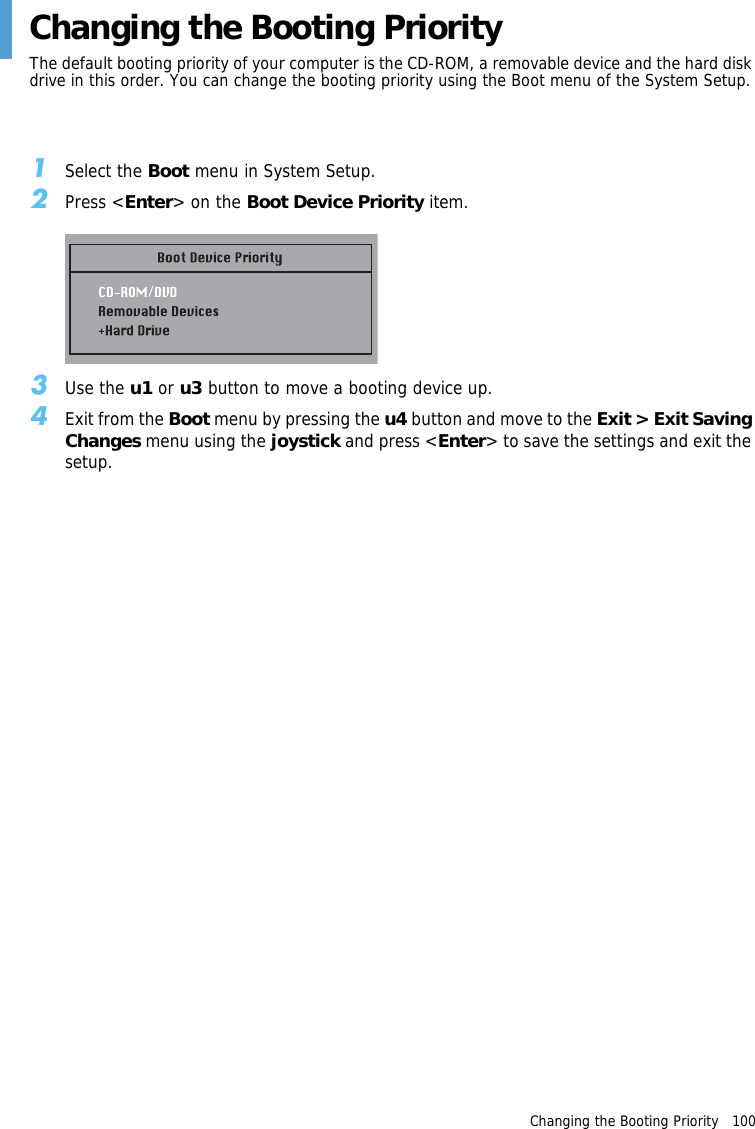
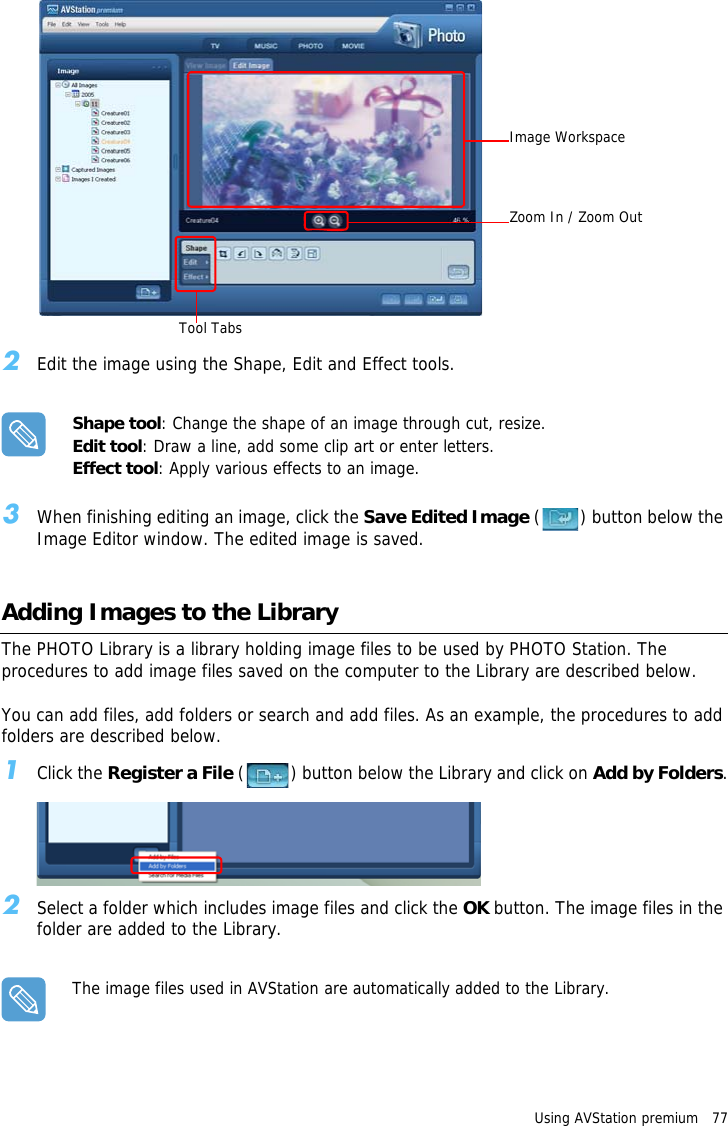
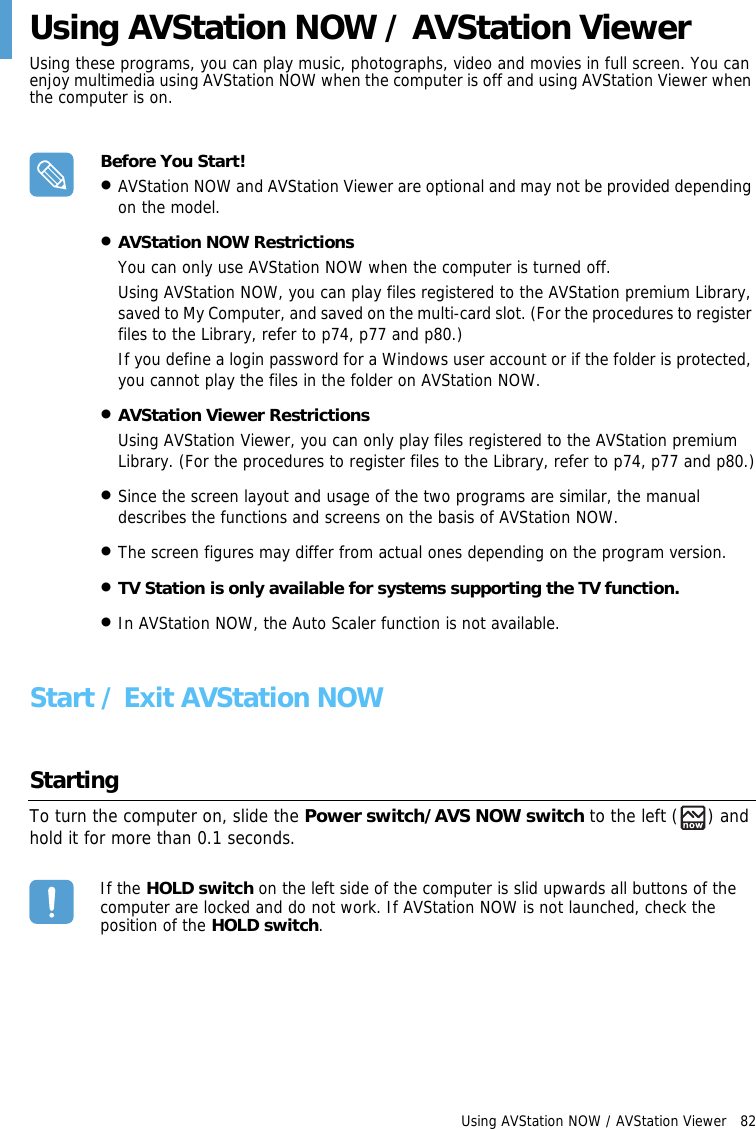
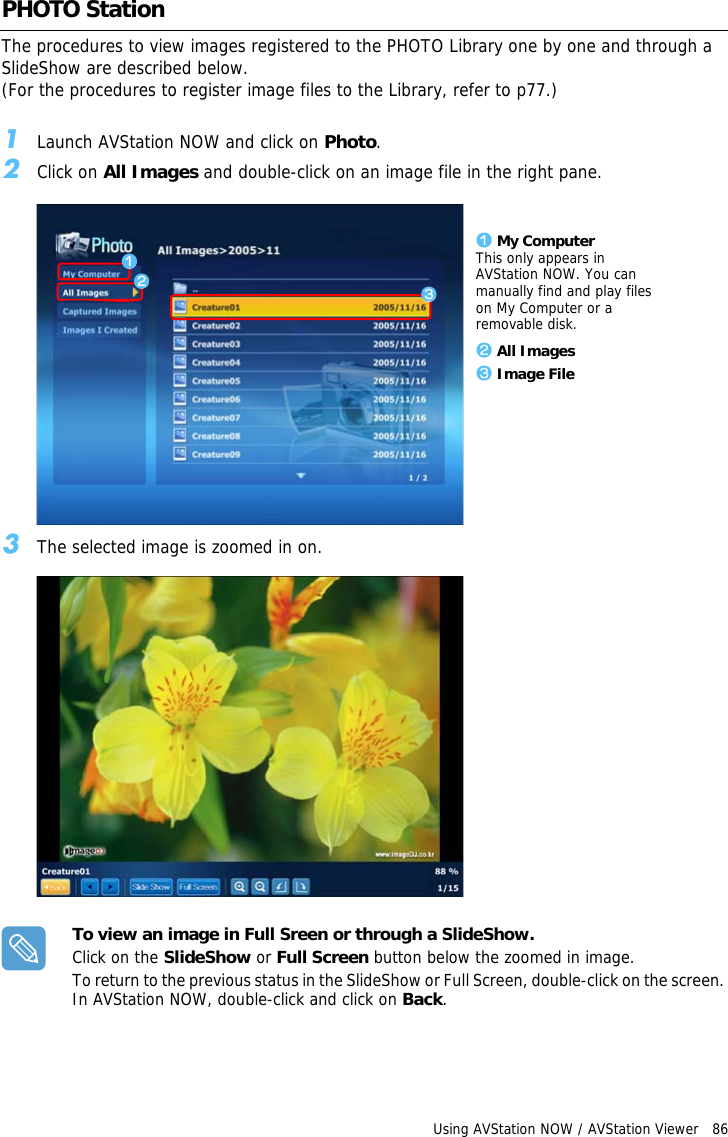
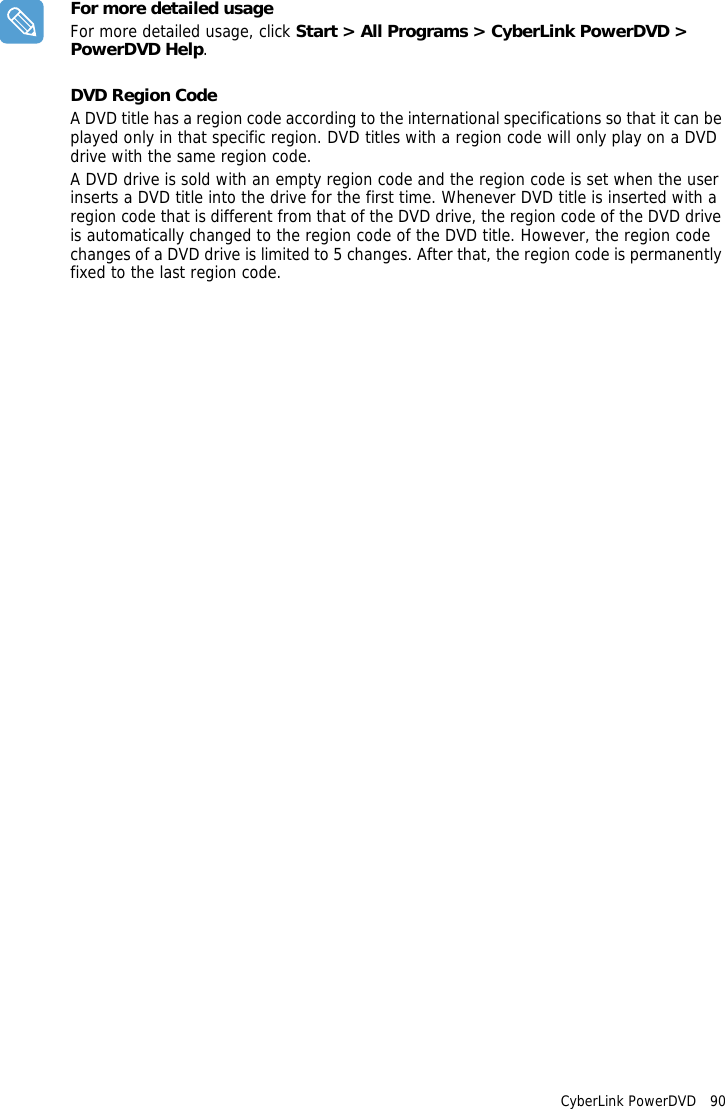
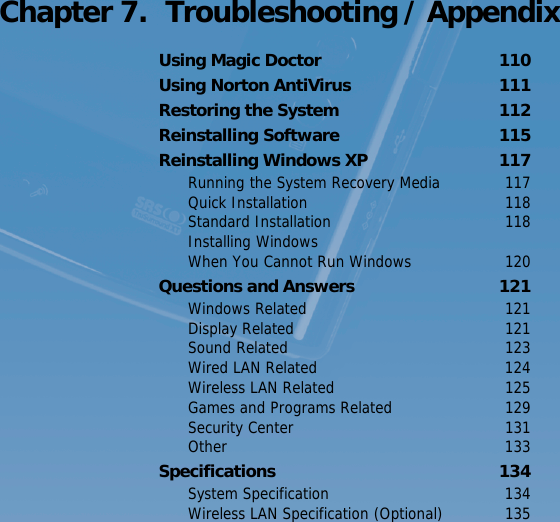
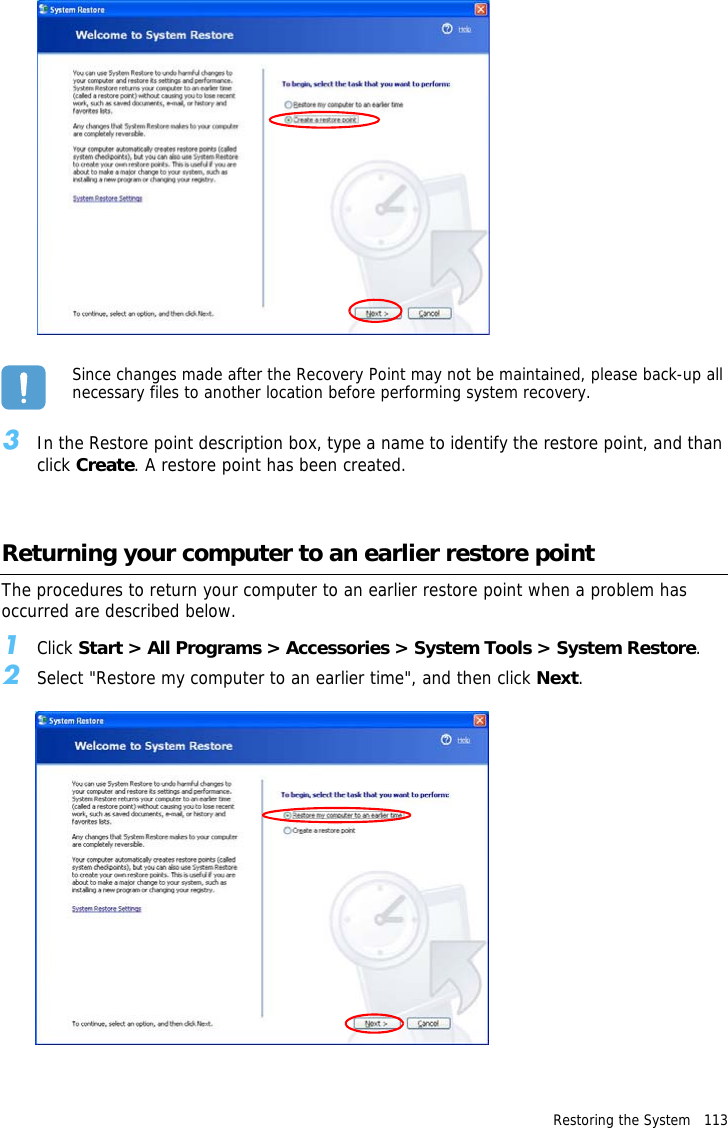
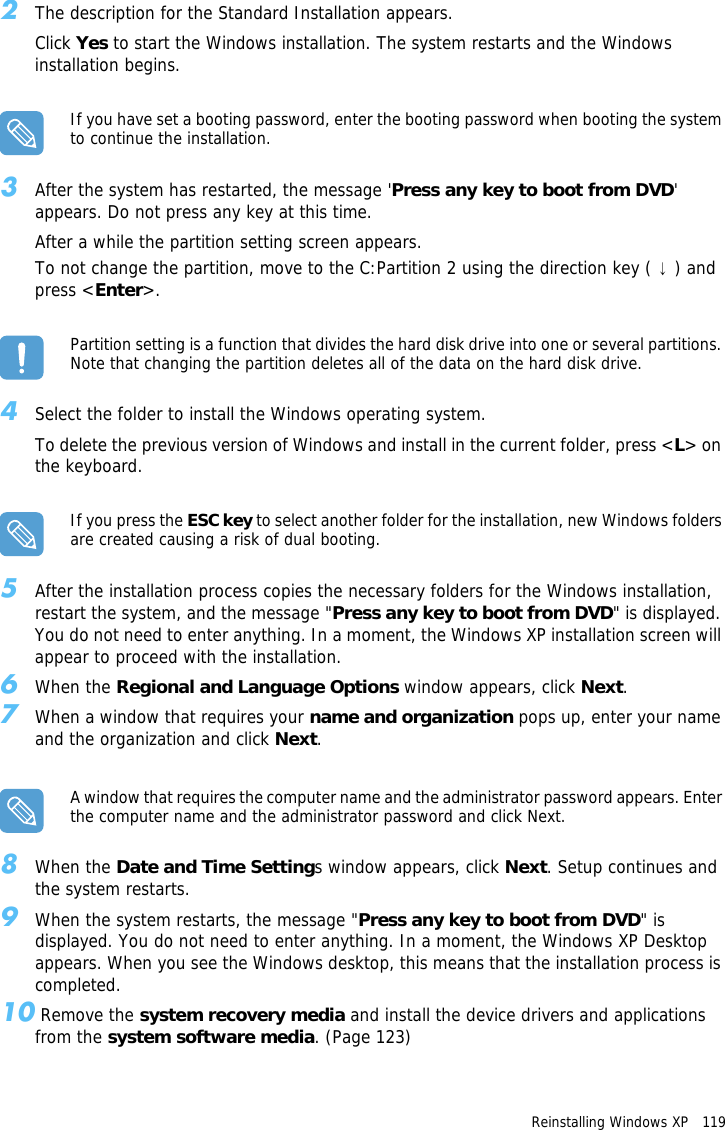
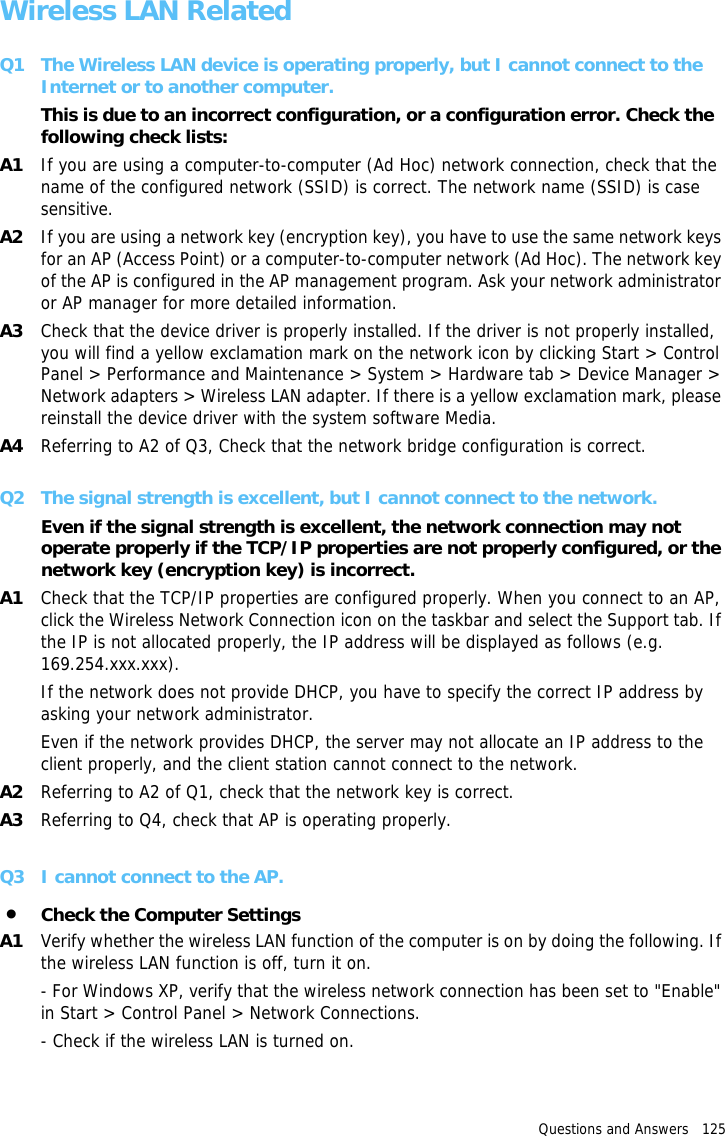
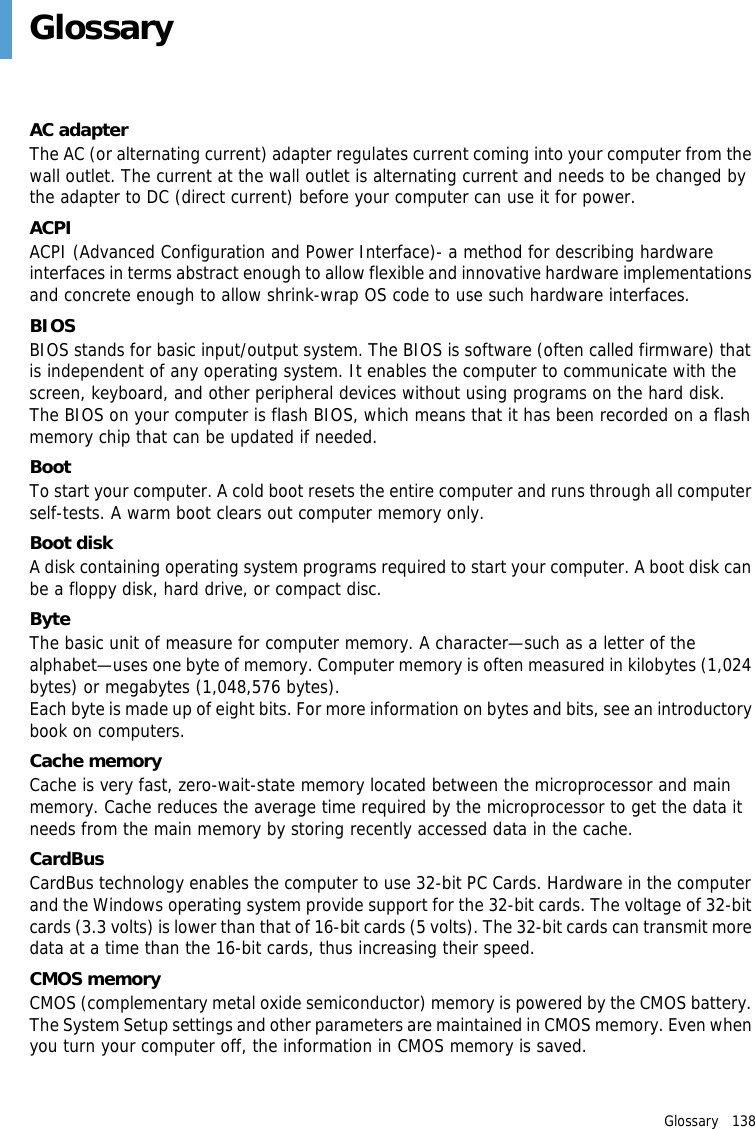
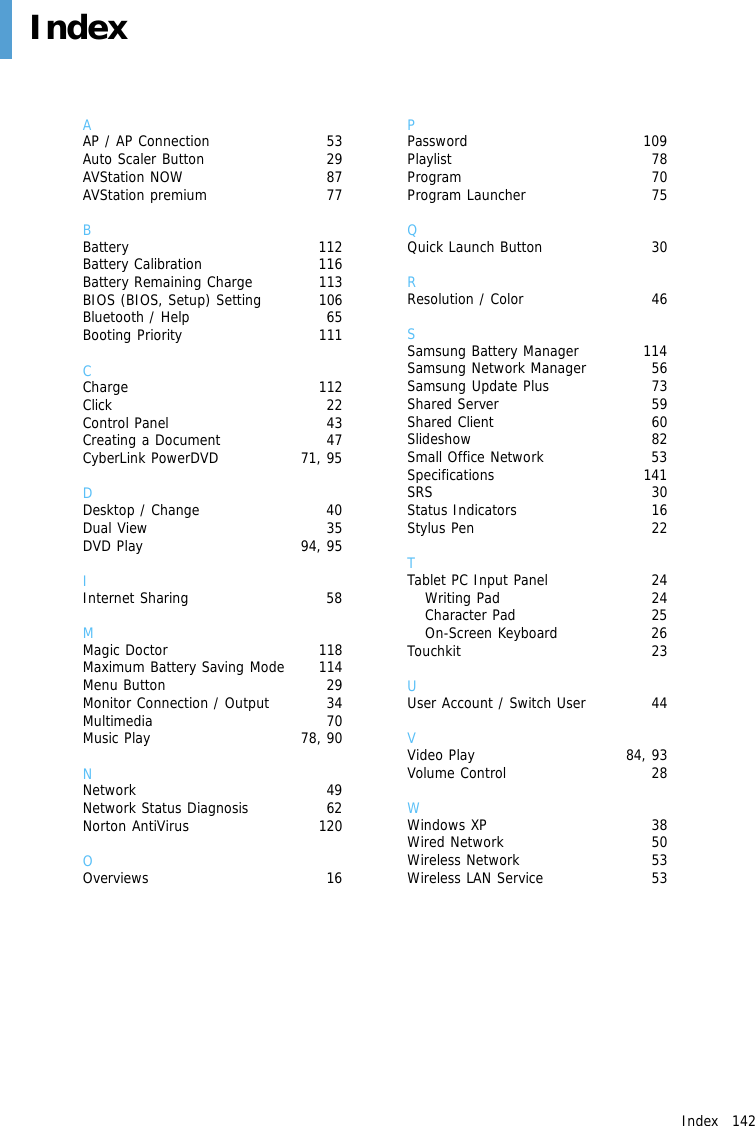
![Using the Battery 106 Battery CalibrationWhen charging/discharging the battery repeatedly for only a short time, the battery usage time may be reduced by the difference between the actual battery charge and the remaining charge display. In this case, the actual battery charge and the remaining charge display will be the same by discharging the battery completely using the Battery Calibration function, and then recharging it again.1Disconnect the AC power adapter after turning off the system.2Restart your computer and press the Menu button when the SAMSUNG logo appears, to start System Setup.3Using the arrow keys, select Smart Battery Calibration in the Boot menu and press Enter.4Highlight Yes in the [Battery Calibration Confirmation] window and press Enter.The Battery Calibration function is activated and the battery is discharged by force. To stop the operation press the u4 (Esc) button.This operation requires 3~5 hours depending on the battery capacity and the remaining battery charge.](https://usermanual.wiki/Samsung-Electronics-Co/NP-Q1.Users-Manual-1b/User-Guide-641549-Page-36.png)
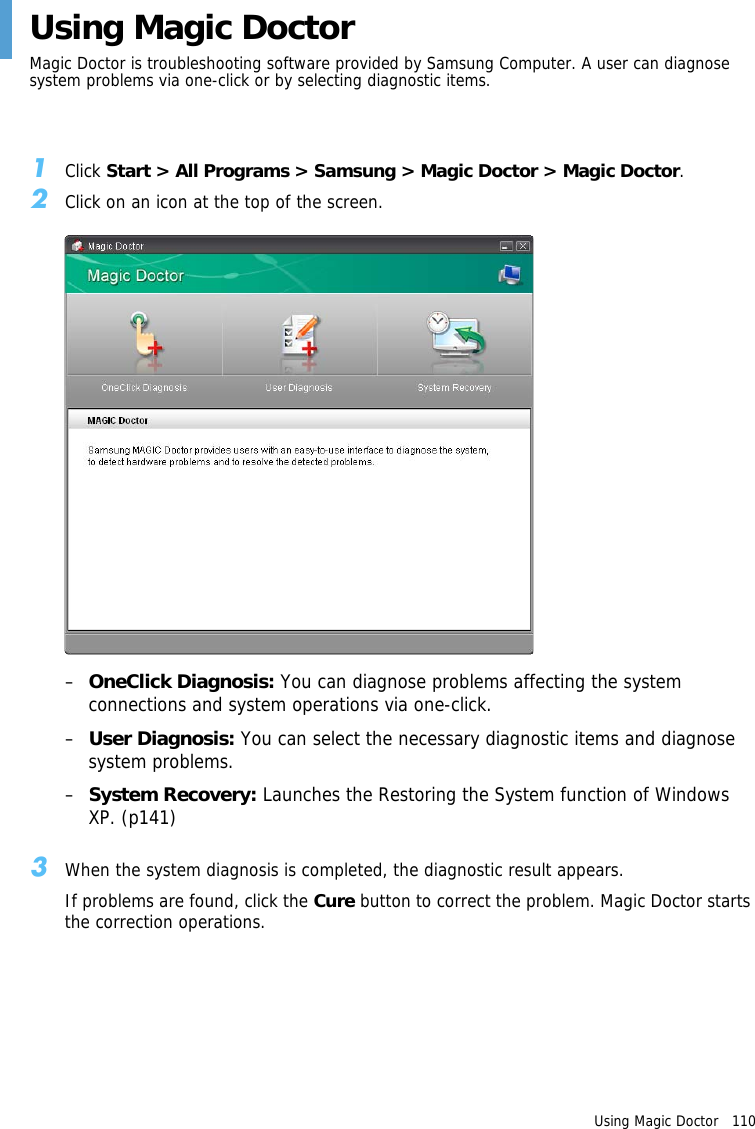
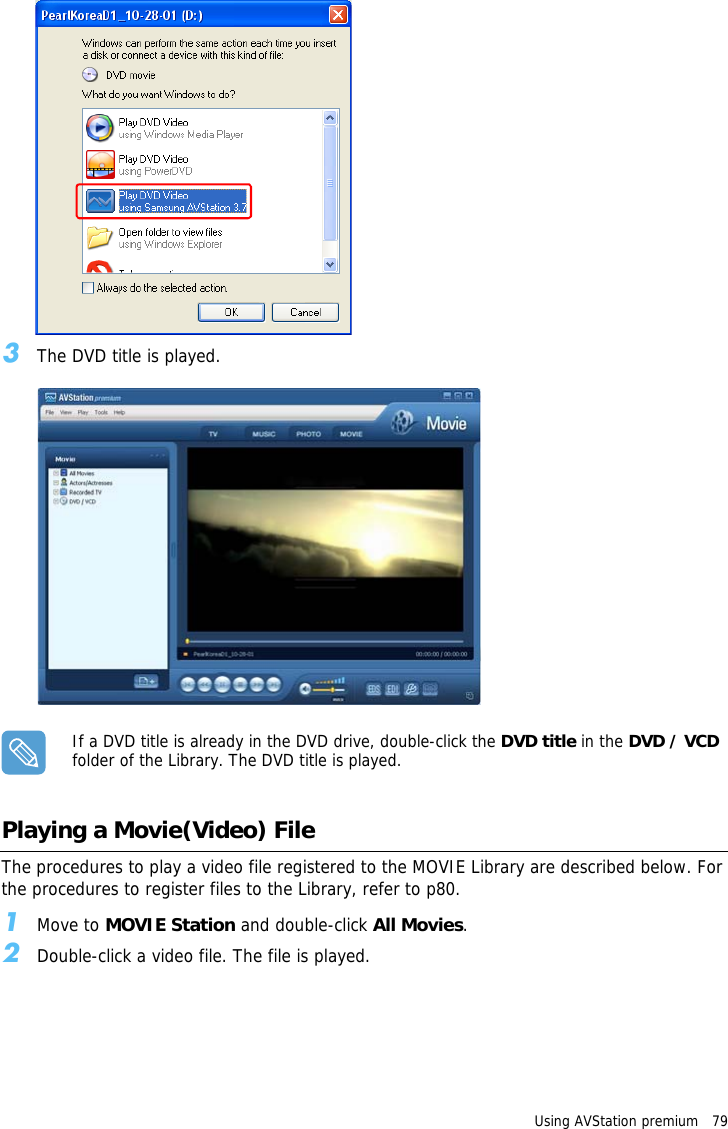
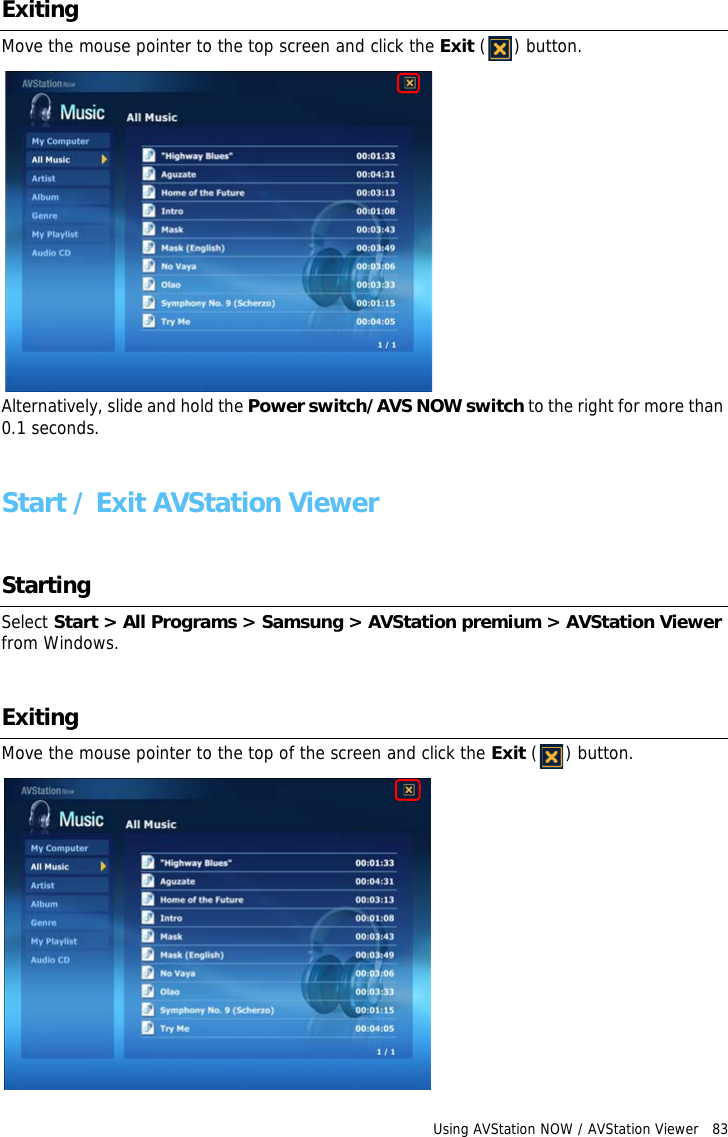
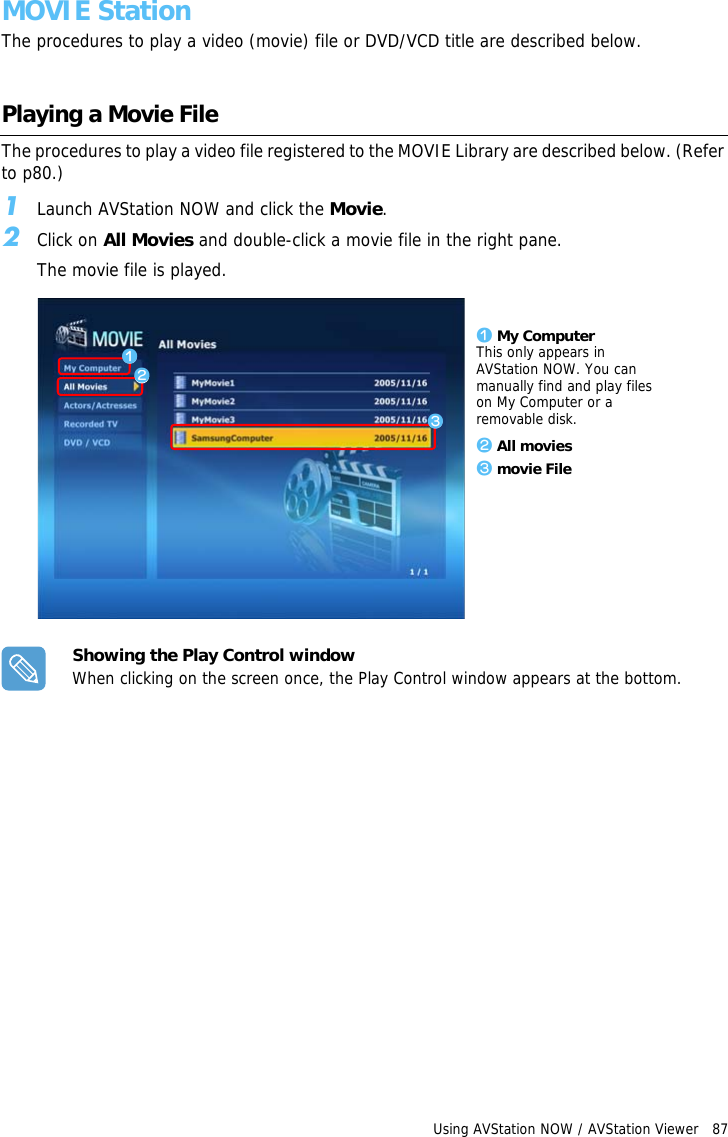
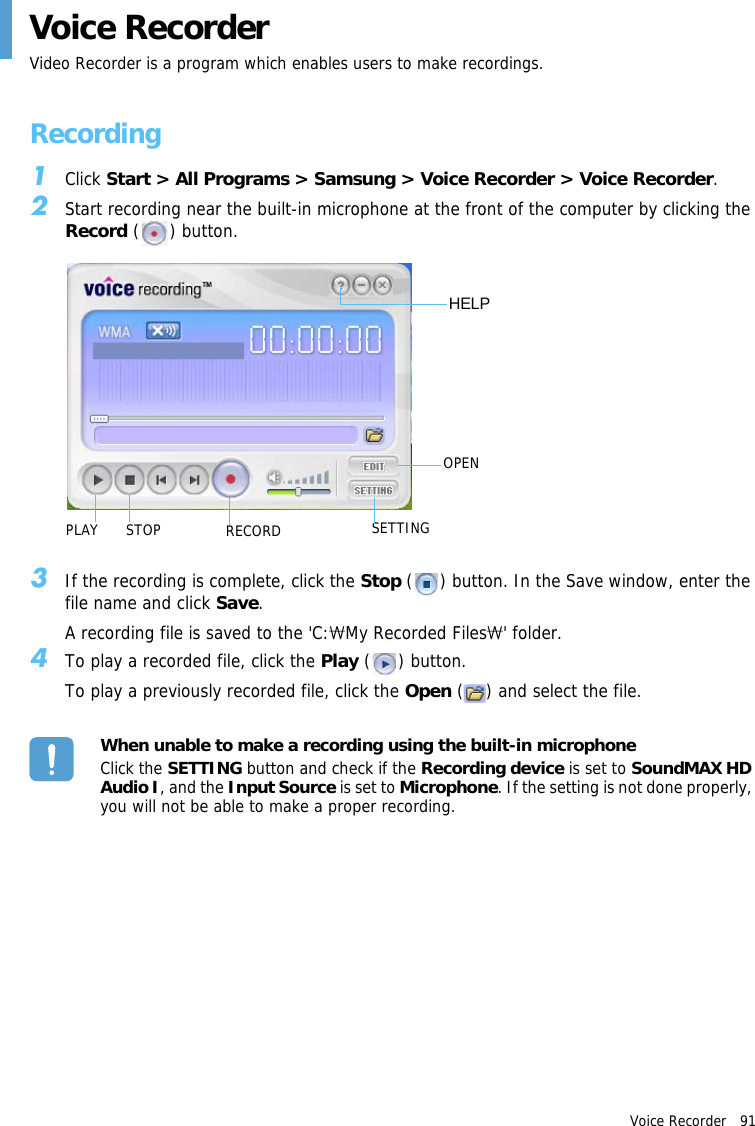
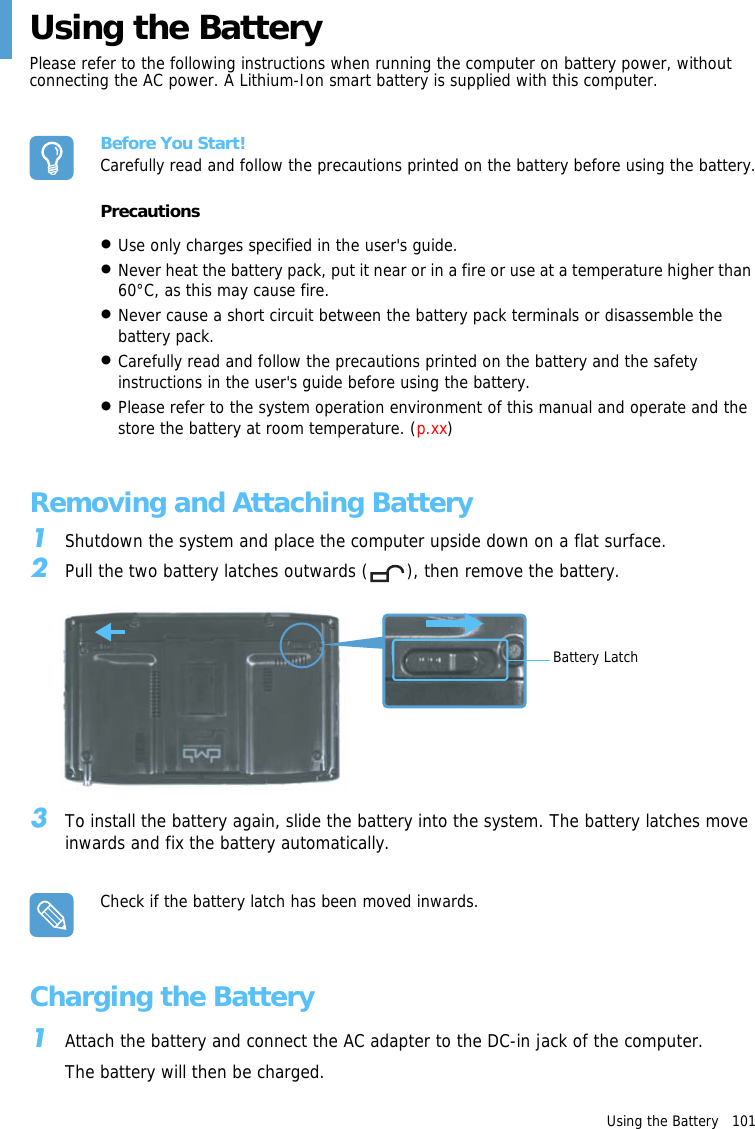
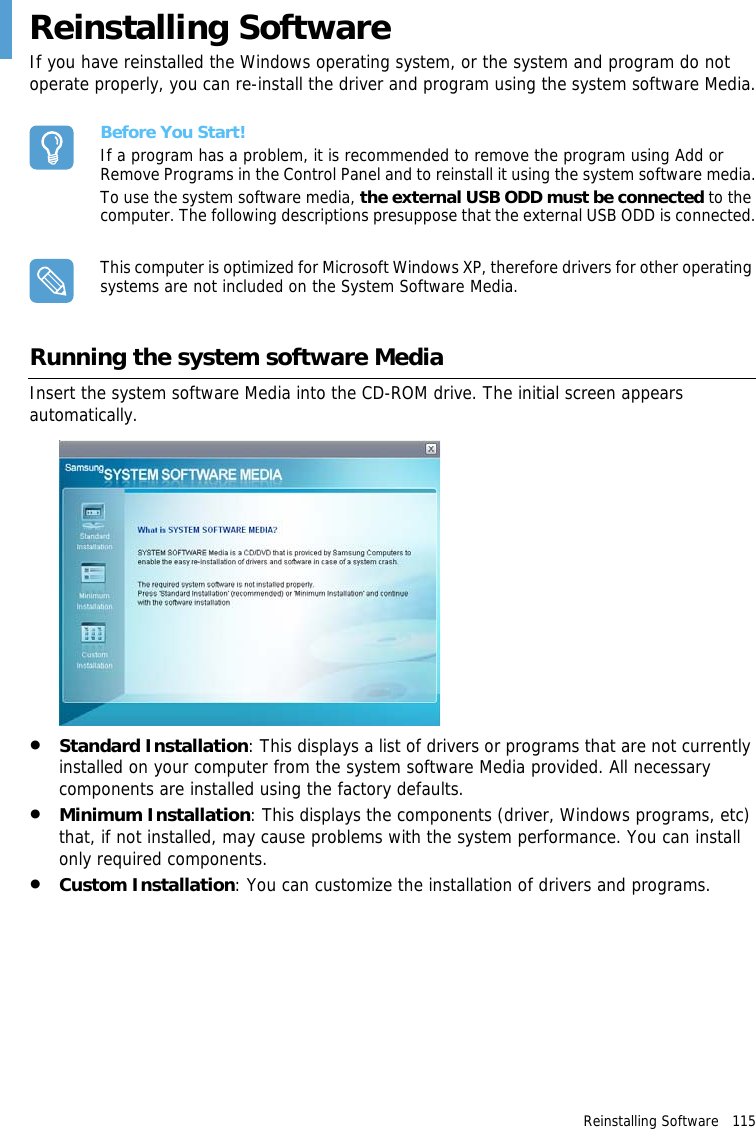
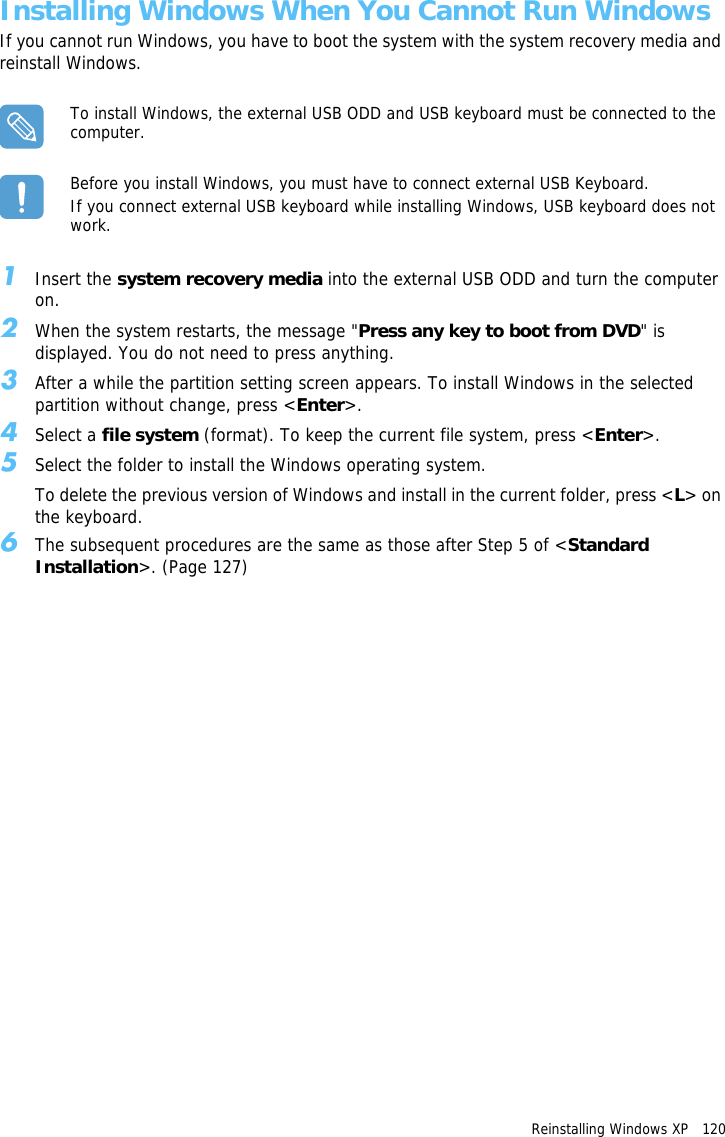
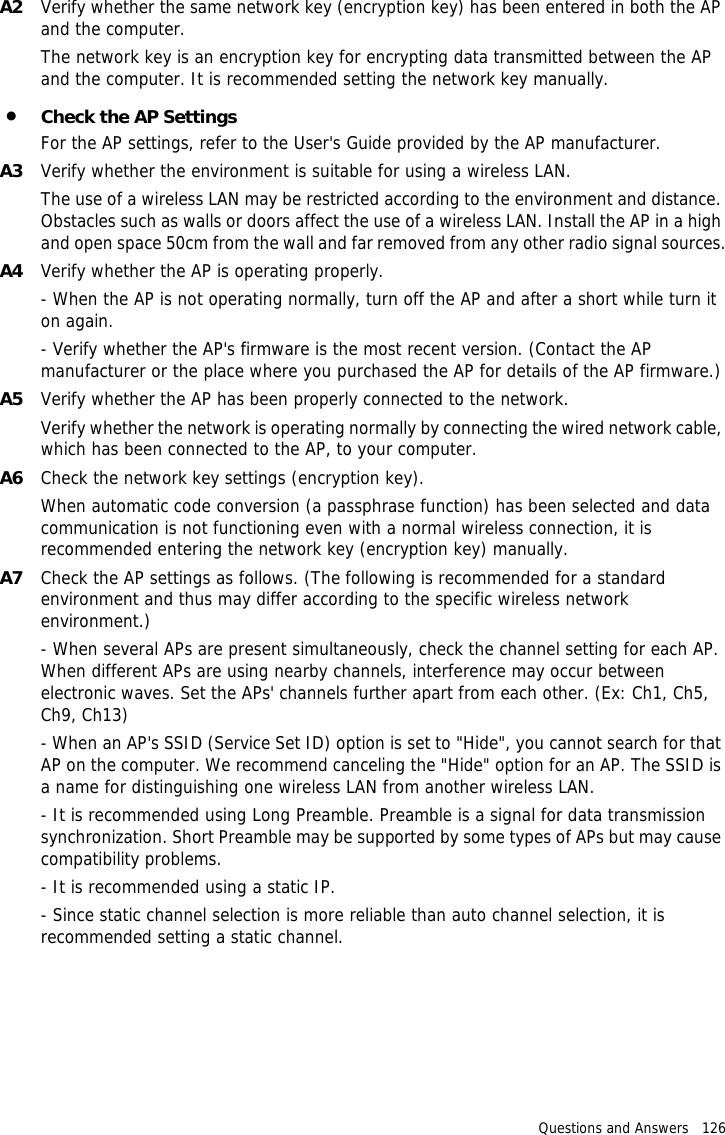
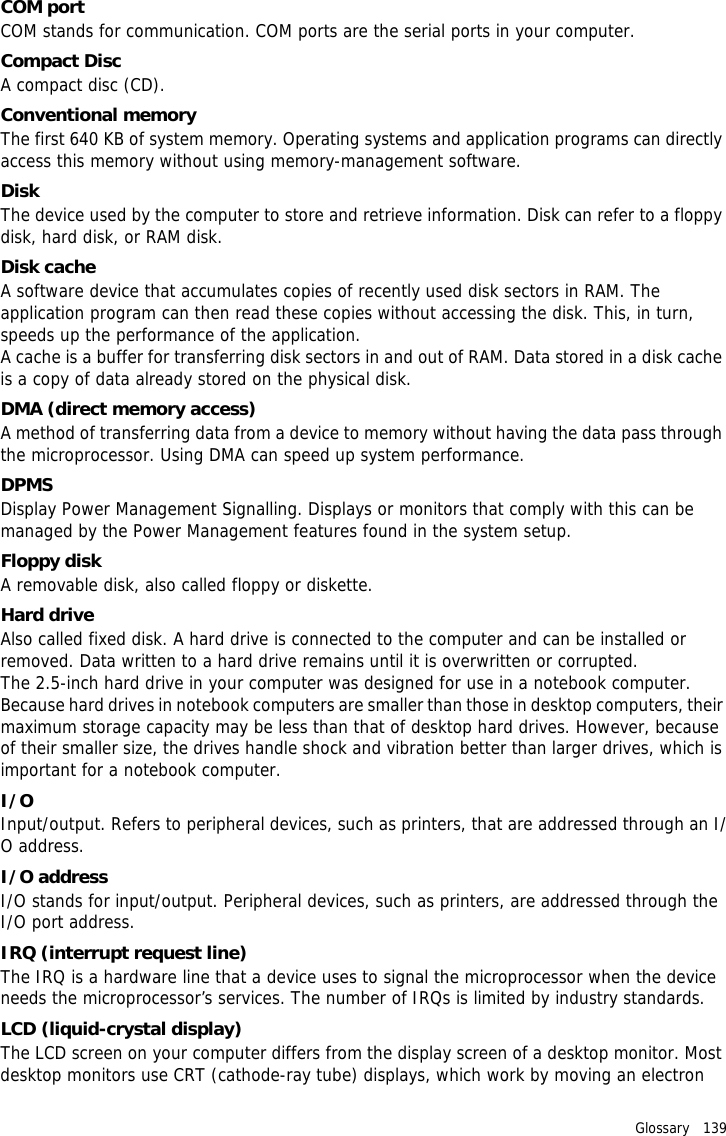
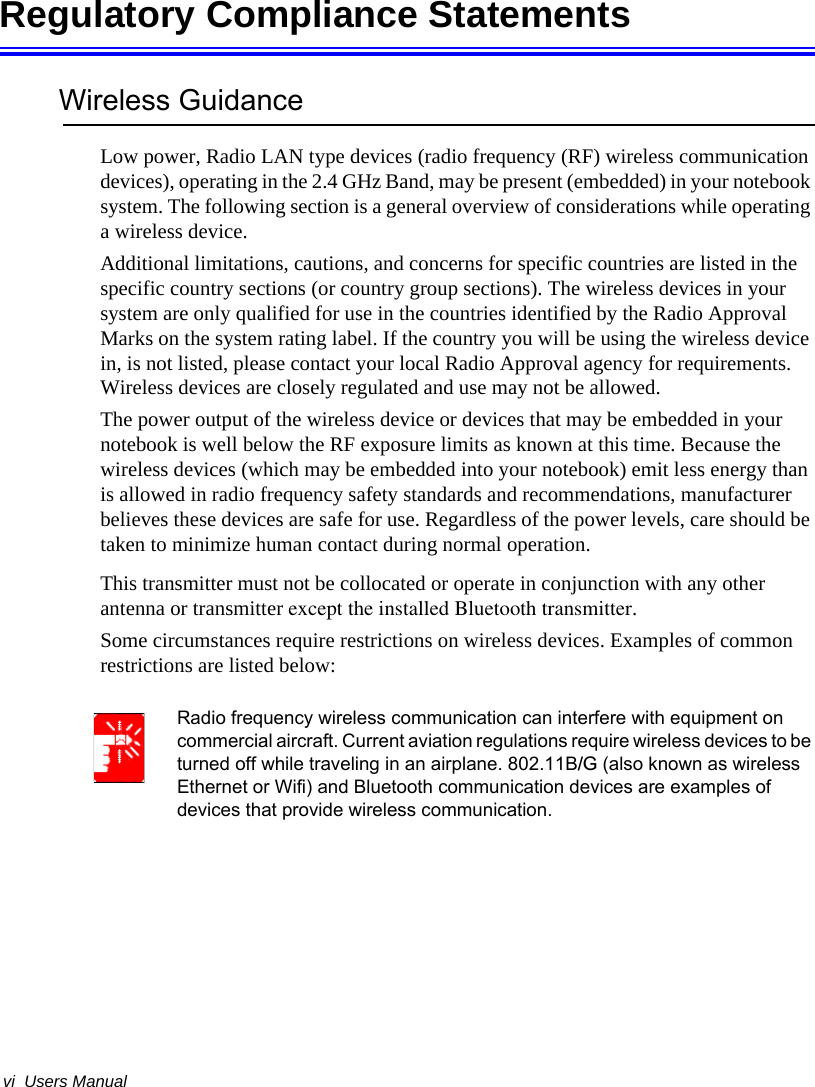
![Restoring the System 114 3Select the desired restore date from the calendar restoration and select the desired restore point from the list, and then click Next.The date of the restore point is displayed in bold font.4Confirm the selected restore point and click Next. System Restore shuts down Windows, and starts the restoration processes. 5After the restoration is complete, Windows restarts. In the [System Restore completed] dialog, click OK.Your computer has been restored to the selected restore point.Undoing the last restorationThe procedures to undo a restoration are described below.1Click Start > All Programs > Accessories > System Tools > System Restore.2Select "Undo my last restoration", and then click Next. 3Confirm the restoration information to undo, and than click Next. System Restore shuts down Windows and starts undoing the restoration. 4After the undo restoration is complete, Windows restarts. In the [Undo the last restoration completed] dialog, click OK.Your computer has been restored to the point prior to the last restoration.](https://usermanual.wiki/Samsung-Electronics-Co/NP-Q1.Users-Manual-1b/User-Guide-641549-Page-44.png)

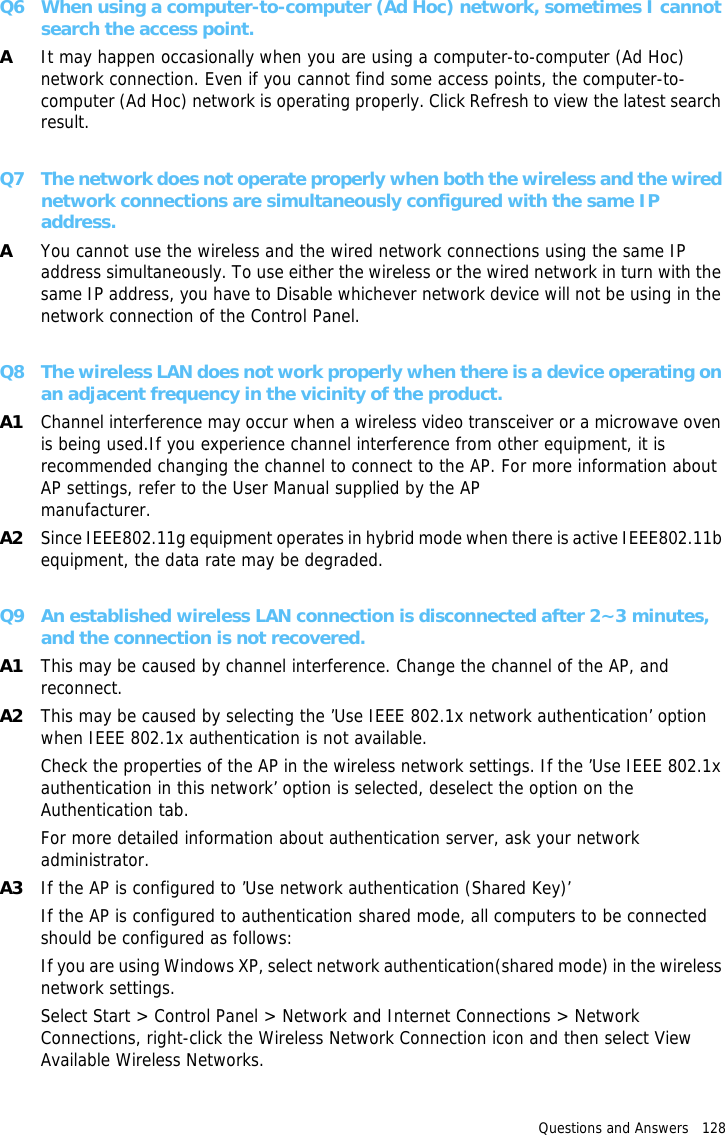
![Questions and Answers 121 Questions and AnswersThis section provides information on possible problems, solutions and other references for system use.Windows RelatedQ1 The system does not shutdown properly.AWhen the system does not shutdown normally, press and hold the Power button until the system manually shuts off. If the Power-Saving Mode is configured into the Power button, press and hold for more than 4 seconds to shut the system off. When the system is turned on after such manual shutdown, Scandisk will run to check errors in the system.Q2 The system freezes during program operationA1 There is an error with the program currently being used. Press the <Ctrl>, <Alt>, and <Del> keys simultaneously and click End Task in the [Windows Task Manager] window.A2 There is an error with the Windows OS. Reboot the system by using the Power button.Display RelatedQ1 The LCD screen is too dark or too brightAAdjust the LCD brightness. Press the Menu button and click on Brightness UP or Brightness Down.Q2 The screen saver disturbs Media Player playing a movie or video clip after the screen saver is activated while Media Player is playing.AUnselect Tools > Options > Player > Allow screen saver during playback in the Media Player.Q3 In the following cases, the screen blinks or displays noise for a short timeClick the Graphics Related tab, Change Resolution, Change Display Device, Remove the AC Adapter, Restart the System, Change Power Mizer level.)AThis may happen while the video driver is examining the connected device. While busy detecting, any connected display devices may blink or some noise may occur.In addition, pressing the Auto Scaler button, the screen may blink or display noise for a short time while the resolution changes or the Down Scale (resolution zoom out) function operates.](https://usermanual.wiki/Samsung-Electronics-Co/NP-Q1.Users-Manual-1b/User-Guide-641549-Page-51.png)
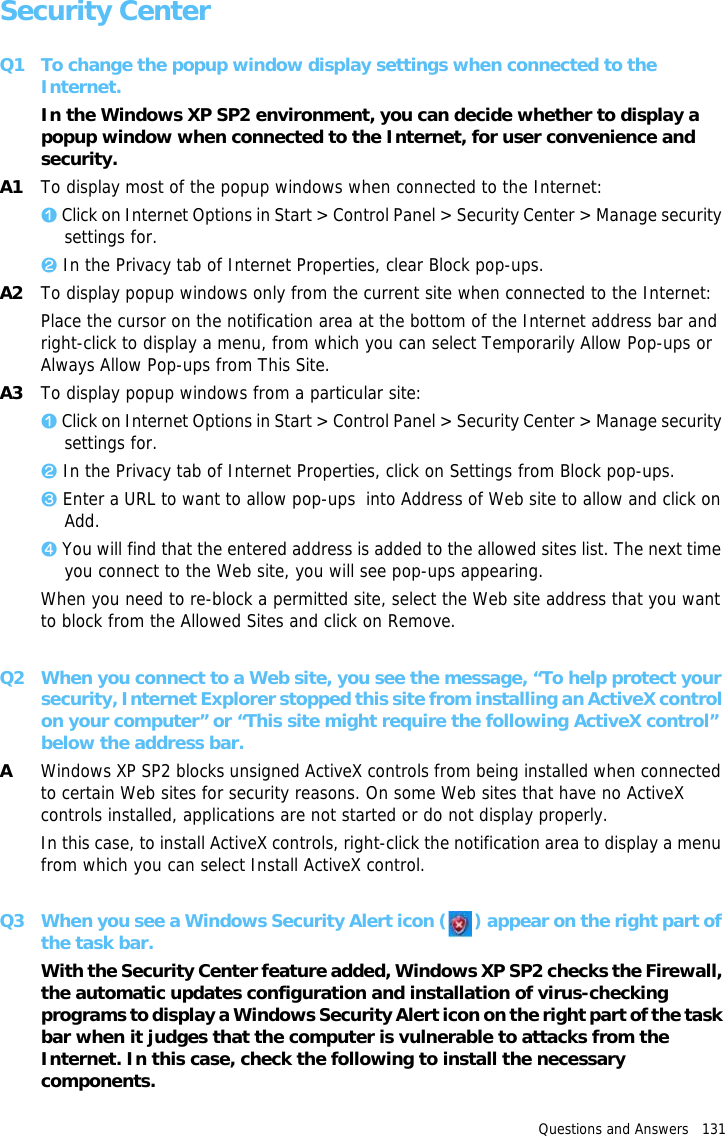
![Questions and Answers 122 Q4 When I connect a projector, and change the settings to display the screen image on both the LCD and the projector by pressing the Menu button, the screen is not displayed properly.APress the Menu button and press the LCD/CRT twice to select LCD+CRT. If the screen image or some part of it is not displayed on the screen, this is because the LCD resolution is low or the current resolution is too wide and cannot be supported by the projector. Press the Auto Scaler button and change the resolution to 800x600 pixels.Q5 The shortcut icons are not displayed on the screen.AThe shortcut icons only appear when both the Magic Keyboard and Samsung Display Manager programs are installed.Q6 When I connect an external monitor and select the monitor, no screen image is displayed (Clone Mode).AThis may happen when the current resolution is inappropriate or Dual View (Extended Mode) is selected. Try the following methods.1. When the current resolution is inappropriateThis computer supports the 800x480 WVGA resolution. Since this resolution is lower than that of the operating system, the above symptom may appear when the external monitor cannot support this resolution. Change the resolution to 800x600 pixels, press the Menu button and press the LCD/CRT twice to select LCD+CRT.2. When Dual View (Extended mode) is selectedWhen Dual View is selected, the Clone Mode is not supported. In this case, unselect the Dual View, press the Menu button to select the Clone Mode.For the procedures to unselect the Dual View, refer to (page 36).Q7 In the Display Properties window, resolution starts from 800x600.AEven if the current resolution is 800x480 pixels, it may be represented as 800x600 in the Display Properties. This is because the lowest resolution of the operating system is 800x600 and is unable to show the 800x480 resolution in the Display Properties window.Q8 Pressing [Start] displays a [Some items cannot be shown] message.AThis message appears when all start menu items cannot be displayed in the default resolution (800x480 pixels). In this case, change the resolution to 1024x600Q9 The whole screen image is not displayed on the screen.AThis may happen when a program or game is designed for at least 800x600 pixels. In this case, press the Auto Scaler button and change the resolution. Whenever the button is pressed, the screen resolution changes to 800X480 > 800x600 >1024x600 pixels, in this sequence.](https://usermanual.wiki/Samsung-Electronics-Co/NP-Q1.Users-Manual-1b/User-Guide-641549-Page-52.png)
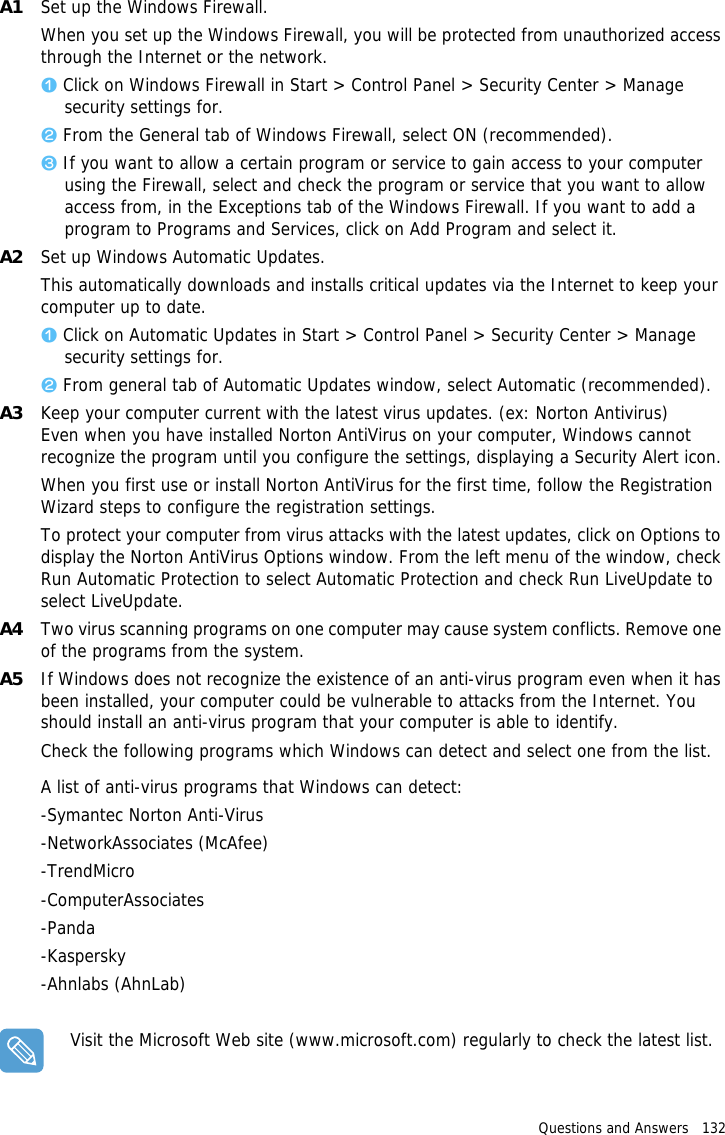
![Questions and Answers 127 Q4 In the Windows XP 'Available wireless networks' window, the Wireless Network Connection is displayed as 'Not Available'.A1 Check if the wireless LAN is turned on.A2 Check if there is additional program for a wireless LAN connection installed. Windows XP supports wireless LAN connections through the Wireless Zero Configuration (WZC) service. Therefore, an additional program for wireless LAN connection is not required, unless the network requires a specific program. However, installation of some wireless LAN related programs may sometimes disable the [View Available Wireless Networks] window supported by WZC service. Exit the wireless LAN related program then check whether the window is enabled.A3 Initialize the device driver.Click Start > Control Panel > Performance and Maintenance > System > Hardware tab > Device Manager > Network adapters, and select the wireless LAN adapter. Right-click the network adaptor and select 'Disable'. Then right-click over the network adaptor and select 'Enable' after a short wait to check that the device is operating properly.A4 Right-click the My computer icon, and select Manage. When the Computer Management window appears, double-click Services and Applications on the left, and then click Services from the sub menu tree. Select the Standard tab in the right pane, double-click Wireless Zero Configuration and check that Startup Type is configured to Automatic, and the Service status is Started.A5 In the case of Windows XP, click Advanced in the [Wireless Network Connection] dialog box (see "Connecting to an Access Point (AP)" (p44)) and make sure that 'Use Windows to configure my wireless network settings' is selected.This may happen when a third-party wireless network setup program (e.g. PROSet) other than Windows XP default program is installed. For setting up a wireless network using the Windows XP program, this option should be selected.Q5 When connecting to a computer-to-computer (Ad Hoc) network, I cannot connect to another computer connected to the same computer-to-computer network. A1 Make sure that the security settings and network name of the computer-to-computer (Ad Hoc) network is correct.A2 Check the TCP/IP properties of the computers to be connected through the computer-to-computer (Ad Hoc) network. All of the computers to be connected through a computer-to-computer (Ad Hoc) network should be configured so that their IP addresses are within the same subnet range.- If the TCP/IP Settings are configured to DHCP, the address is automatically configured to an address within the subnet IP range. This will take about 2~3 minutes.- If the IP address is configured to static IP in TCP/IP properties, select Use the following IP address in the TCP/IP properties of the wireless adapter, configure IP address:10.0.0.1~10.0.0.254, and Subnet mask: 255.255.0.0, and then try again.- A fixed IP is recommended for a small-size network.](https://usermanual.wiki/Samsung-Electronics-Co/NP-Q1.Users-Manual-1b/User-Guide-641549-Page-57.png)
![Questions and Answers 129 Select Change Advanced Settings from the left menu, select an AP from Preferred networks window in the Wireless Networks tab, and click the Properties button. Select Shared Mode in the Network Authentication field of the Association tab, and then click the OK button.If the Preferred networks window in the Wireless Network tab is empty, click View Wireless Networks, select an AP to connect to, and select Shared Mode in the Network Authentication field of the Connection Information tab as described above. For more detailed network authentication procedures, ask your AP (Access Point) administrator.Q10 After Wireless LAN Setup Program is installed, The “AEGIS Protocol (IEEE 802.1x) v2.2.1.0” appears in the [Local Area Connection Properties] window.AThe AEGIS Protocol is a security authentication protocol that is automatically installed when Wireless LAN Setup Program is installed and does not affect the operation of other programs.Q11 I want to use the Wireless LAN power saving function to extend the system battery use time.AYou can configure this in the Samsung Battery Manager program. Run the Samsung Battery Manager and select Options > Wireless LAN Power Saving > On from the menu.However, this setting may affect the performance of the Wireless LAN.In addition, the wireless LAN connection might be disconnected while configuring this.Games and Programs RelatedQ1 3D game is not executed, or some functions are not working.AChange the graphic setting of the game to '2D' or 'Software Renderer', then execute the program again.Q2 While playing a game, pressing the Menu button or pressing the LCD/CRT item does not work or the screen is not properly displayed.ASome games and 3D application programs may change the display device control. Therefore, pressing the Menu button and clicking the LCD/CRT item may terminate the running program or may display an abnormal screen.Press the Menu button and press the LCD/CRT item before launching a program and do not press these buttons while running the program.Q3 Running speed of a game is too slow or fast.AChange the setting of Power Schemes to 'Always On'.(Click Start > Control Panel > Performance and Maintenance > Power Options > Power Schemes tab, then configure the Power schemes field to 'Always On'.)](https://usermanual.wiki/Samsung-Electronics-Co/NP-Q1.Users-Manual-1b/User-Guide-641549-Page-59.png)
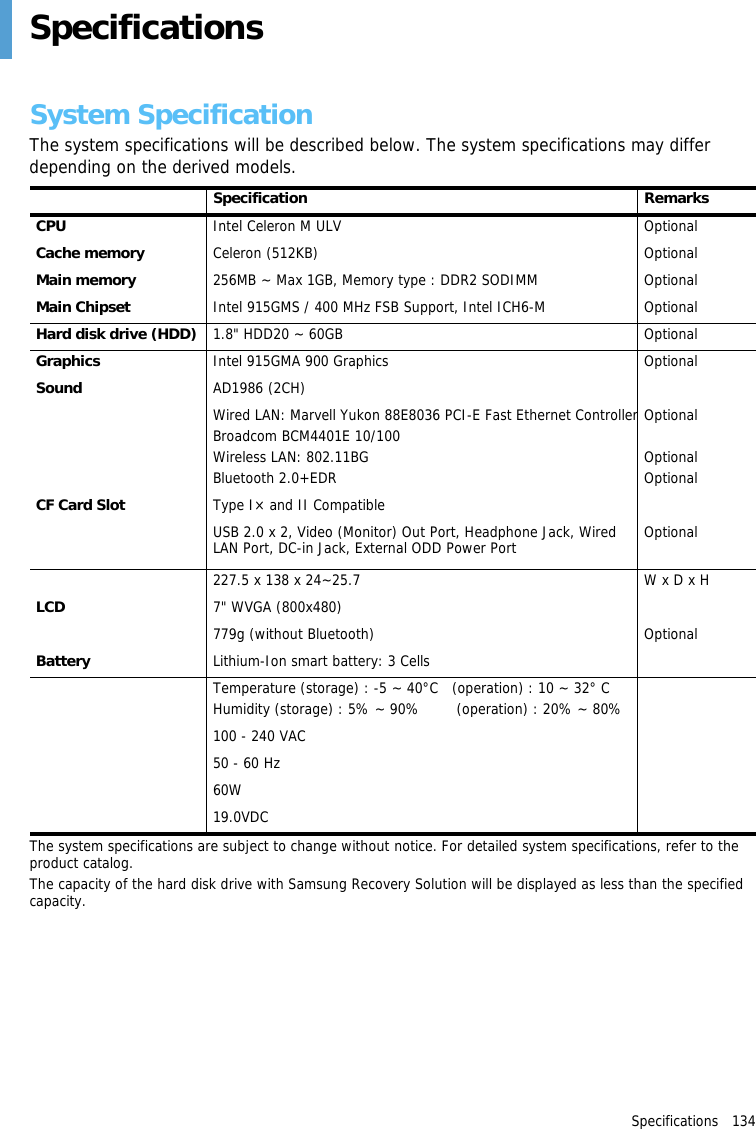
![Questions and Answers 130 Q4 Some part of a game image is not displayed or is displayed in black.AThis may happen when running a game designed for DirectX 8.1, such as NHL 2003, MVP Baseball 2003, etc.Q5 The game screen is displayed small.Az Right-click on the Desktop and select Properties from the pop-up menu.x In the [Display Properties] window, select the Settings tab > Advanced > Intel Graphics Media Accelerator Driver for Mobile tab.c Select the Display Device menu and click on 'Notebook' in the 'Single Display' field.v Select the Display Setting menu, click 'Full Screen' in the Extended Display field and click the Apply button.Q6 The picture is not displayed properly for some games.ASome games such as 'Harry Potter and the Sorcerer's Stone', 'Harry Potter and the Chamber of Secrets', etc. may not display the picture properly when the screen resolution is set to 1024x768 and the color quality is set to 32 bit.For these games, set the screen resolution to 1024x768, and the color quality to 16 bit.Q7 Game play is not displayed smoothly on the screen.AFor 3D games, the texture data for the 3D screen display is saved to the system memory. If there is insufficient system memory, the data is saved to the hard disk drive and loaded to memory when required. This operation may temporarily stop displaying the picture on the screen.In this case, lower the game resolution or the screen settings. (For Delta Force: Black Hawk Down, Medal of Honor, Battle Field, 1942, etc.)Q8 If I run a program, an error message appears or the program does not launch.AThis may happen when the program does not support the 800x480 pixels resolution.This is caused by a program that is designed for a minimum resolution of 800x600 pixels and fails to support a resolution lower than its minimum resolution.In this case, change the screen resolution to 800x600 pixels or press the Auto Scaler button to change the resolution.](https://usermanual.wiki/Samsung-Electronics-Co/NP-Q1.Users-Manual-1b/User-Guide-641549-Page-60.png)
![Questions and Answers 133 OtherQ1 I cannot run any functions.A1 This may happen when the computer is in the HOLD status. In the HOLD status, the Charging LED blinks for a moment. Slide the HOLD switch downwards and try again.A2 If the computer is running on battery power, check the battery charge status.Q2 The [Power Switch] and the [AVStation now] switch do not work.A1 This may happen when the computer is in the HOLD status. In the HOLD status, the Charging LED blinks for a moment. Slide the HOLD switch downwards and try again.A2 To use the switch, you have to slide and hold the switch for more than 0.1 seconds. Slide and hold the switch for more than 0.1 seconds before releasing it.A3 If the computer is running on battery power, check the battery charge status.](https://usermanual.wiki/Samsung-Electronics-Co/NP-Q1.Users-Manual-1b/User-Guide-641549-Page-63.png)

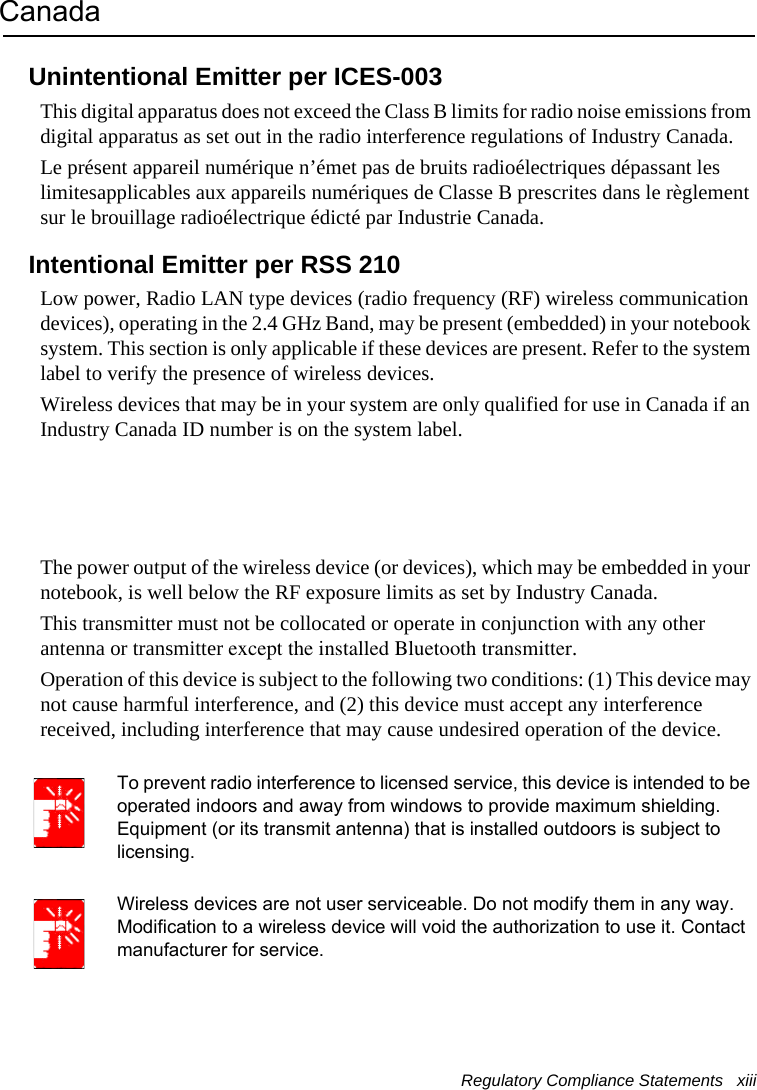
![xvi Users ManualWireless devices that may be in your system are only qualified for use in the European Union or associated areas if a CE mark with the Alert Symbol is on the system label.The power output of the wireless device or devices that may be embedded in you notebook is well below the RF exposure limits as set by the European Commission through the R&TTE directive.See 802.11b and 802.11g restrictions for specific countries or regions within countries under the heading “European Economic Area Restrictions” below.Translated Statements of Compliance[English]This product follows the provisions of the European Directive 1999/5/EC.[Danish]Dette produkt er i overensstemmelse med det europæiske direktiv 1999/5/EC[Dutch]Dit product is in navolging van de bepalingen van Europees Directief 1999/5/EC.[Finnish]Tämä tuote noudattaa EU-direktiivin 1999/5/EC määräyksiä.[French]Ce produit est conforme aux exigences de la Directive Européenne 1999/5/EC.[German]Dieses Produkt entspricht den Bestimmungen der Europäischen Richtlinie 1999/5/EC[Greek]Το προϊόν αυτό πληροί τις προβλέψεις της Ευρωπαϊκής Οδηγίας 1999/5/ΕC.[Icelandic]Þessi vara stenst reglugerð Evrópska Efnahags Bandalagsins númer 1999/5/EC[Italian]Questo prodotto è conforme alla Direttiva Europea 1999/5/EC.[Norwegian]Dette produktet er i henhold til bestemmelsene i det europeiske direktivet 1999/5/EC.[Portuguese]Este produto cumpre com as normas da Diretiva Européia 1999/5/EC.](https://usermanual.wiki/Samsung-Electronics-Co/NP-Q1.Users-Manual-1b/User-Guide-641549-Page-80.png)
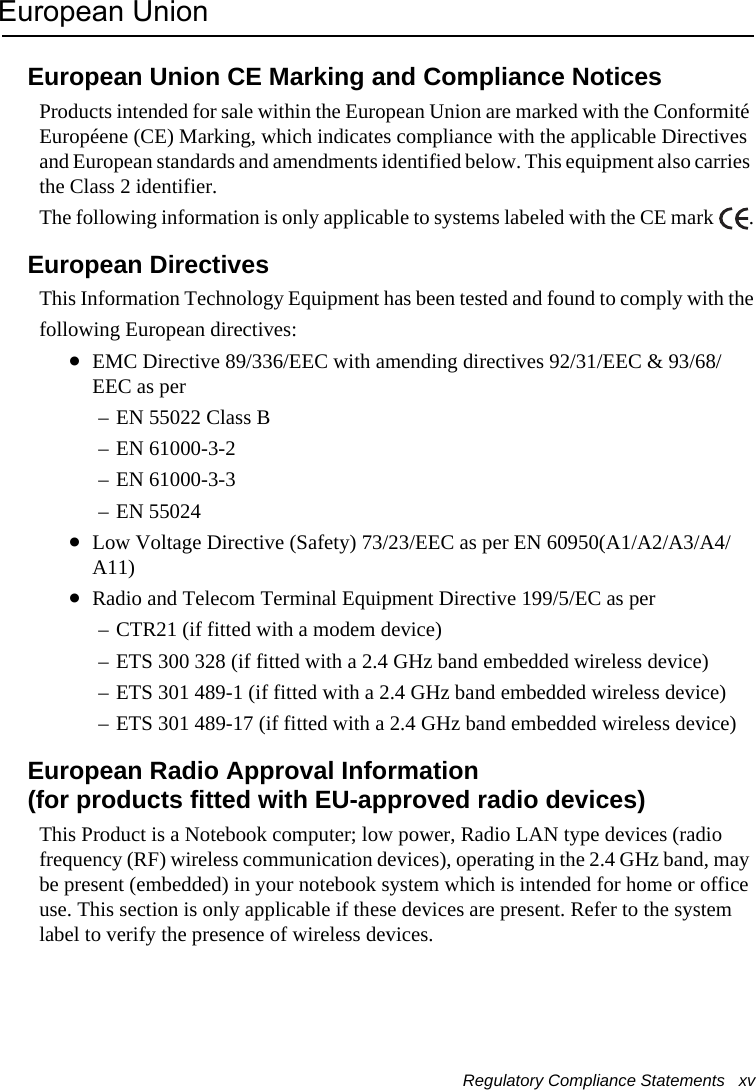
![Regulatory Compliance Statements xvii [Spanish]Este producto cumple con las normas del Directivo Europeo 1999/5/EC.[Swedish]Denna produkt har tillverkats i enlighet med EG-direktiv 1999/5/EC.European Economic Area RestrictionsLocal Restriction of 802.11b/802.11g Radio Usage[Note to integrator: The following statements on local restrictions must be published in all end-user documentation provided with the system or product incorporating the Wireless product.]Due to the fact that the frequencies used by 802.11b/802.11g wireless LAN devices may not yet be harmonized in all countries, 802.11b/802.11g products are designed for use only in specific countries or regions, and are not allowed to be operated in countries or regions other than those of designated use.As a user of these products, you are responsible for ensuring that the products are used only in the countries or regions for which they were intended and for verifying that they are configured with the correct selection of frequency and channel for the country or region of use. Any deviation from permissible settings and restrictions in the country or region of use could be an infringement of local law and may be punished as such.The European variant is intended for use throughout the European Economic Area. However, authorization for use is further restricted in particular countries or regions within countries, as follows:GeneralEuropean standards dictate maximum radiated transmit power of 100 mW effective isotropic radiated power (EIRP) and the frequency range 2400 – 2483.5 MHz.BelgiumThe product may be used outdoors, but for outdoor transmissions over a distance of 300m or more, a license from the BIPT is required.This restriction should be indicated in the manual as follows:Dans le cas d'une utilisation privée, à l'extérieur d'un bâtiment, au-dessus d'un espace public, aucun enregistrement n'est nécessaire pour une distance de moins de 300m. Pour une distance supérieure à 300m un enregistrement auprès de l'IBPT est requise. Pour une utilisation publique à l'extérieur de bâtiments, une licence de l'IBPT est requise. Pour les enregistrements et licences, veuillez contacter l'IBPT.](https://usermanual.wiki/Samsung-Electronics-Co/NP-Q1.Users-Manual-1b/User-Guide-641549-Page-81.png)