SZ DJI TECHNOLOGY WM3231510 Phantom 3 Professional User Manual Part Three
SZ DJI TECHNOLOGY CO., LTD Phantom 3 Professional Users Manual Part Three
Contents
- 1. Users Manual Part One
- 2. Users Manual Part Two
- 3. Users Manual Part Three
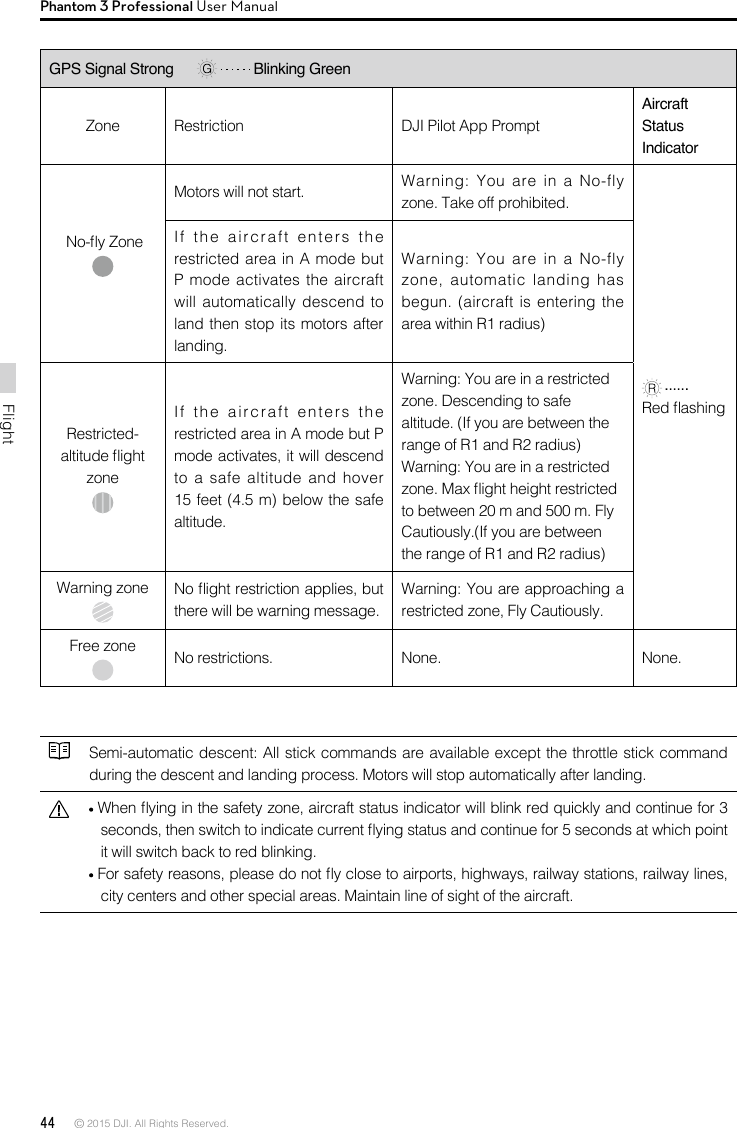
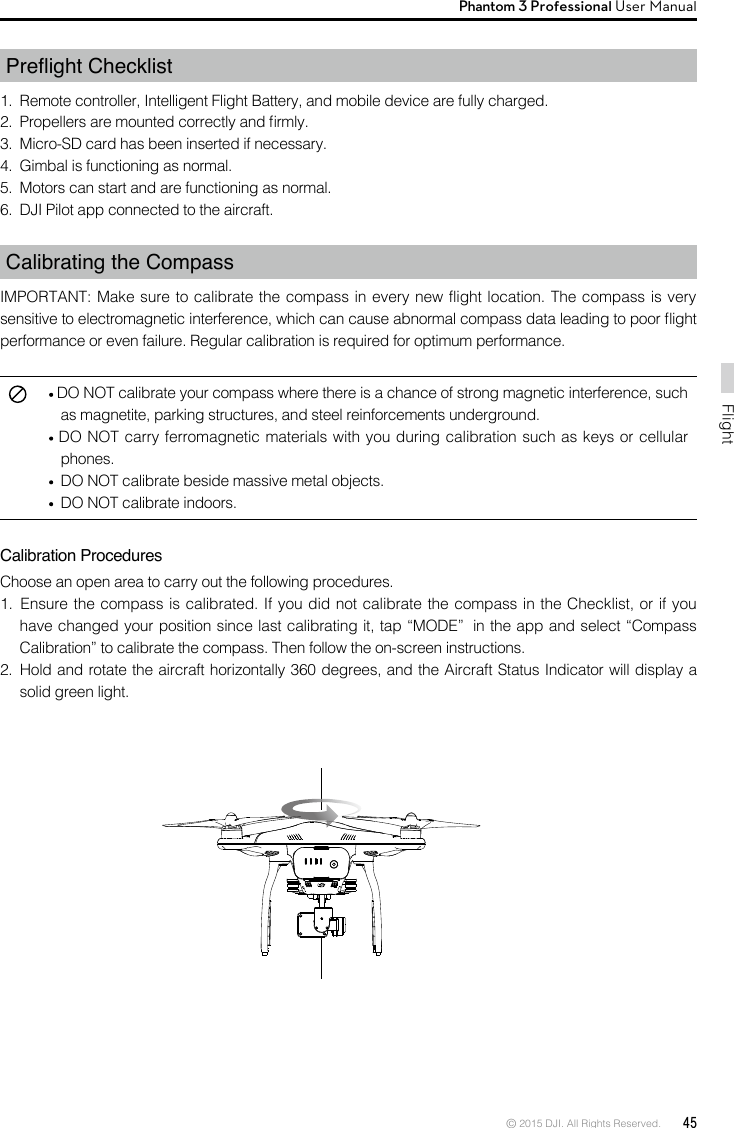
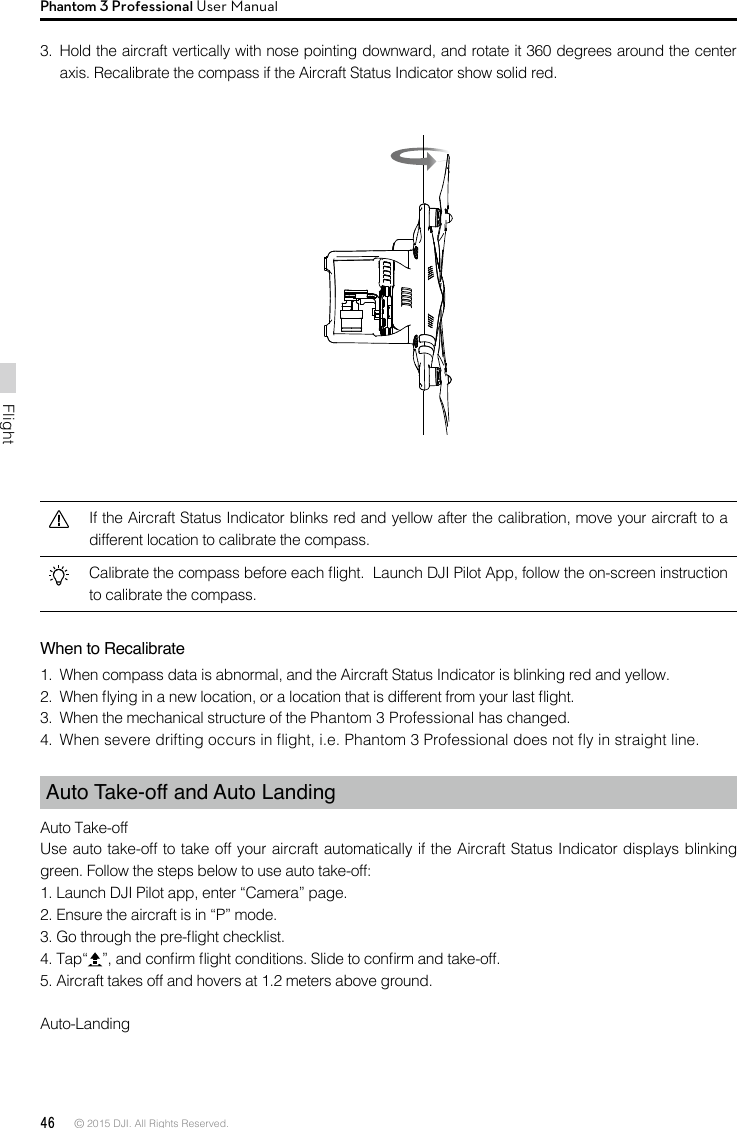
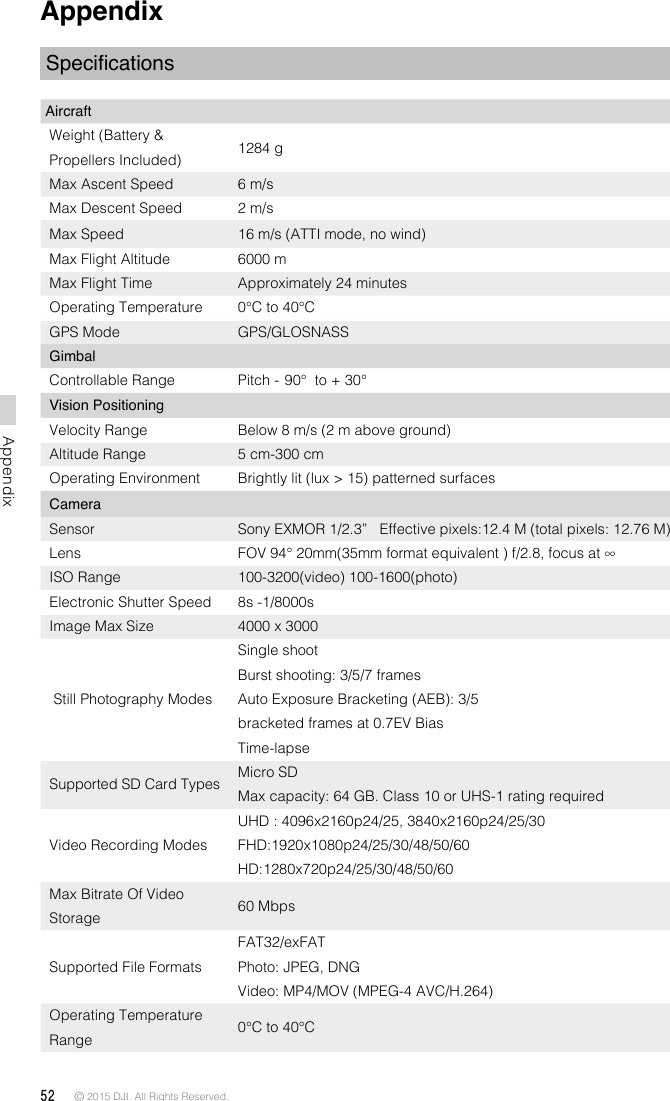
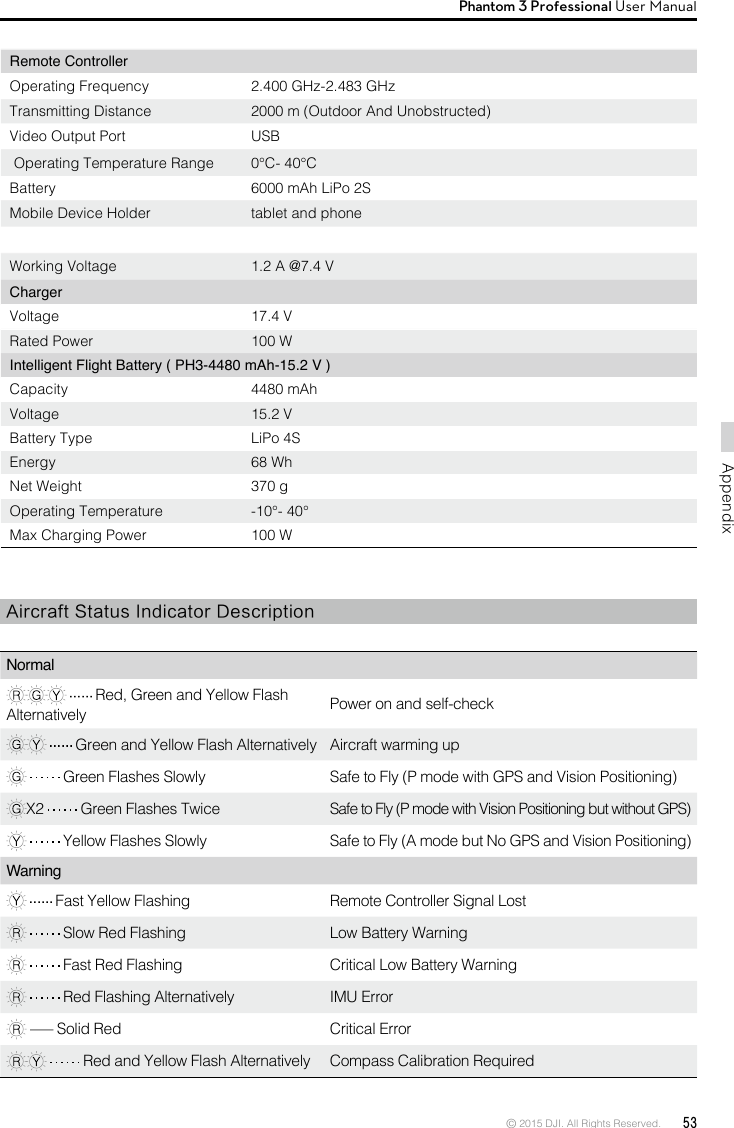
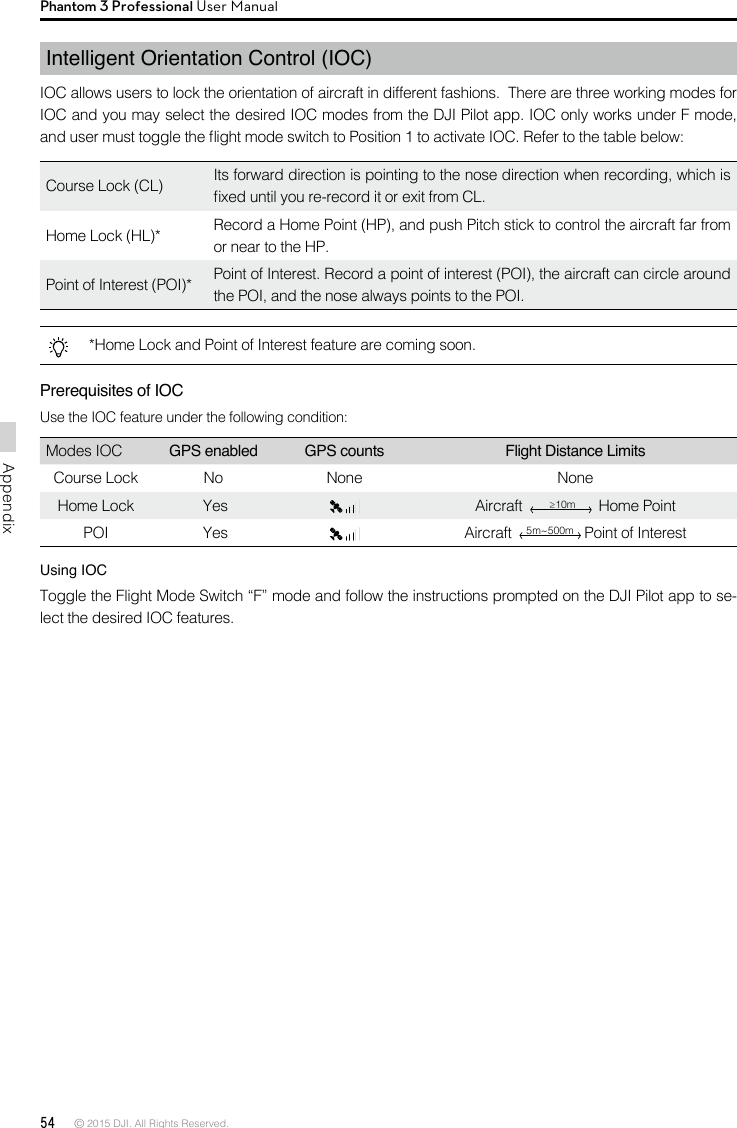
Users Manual Part Three