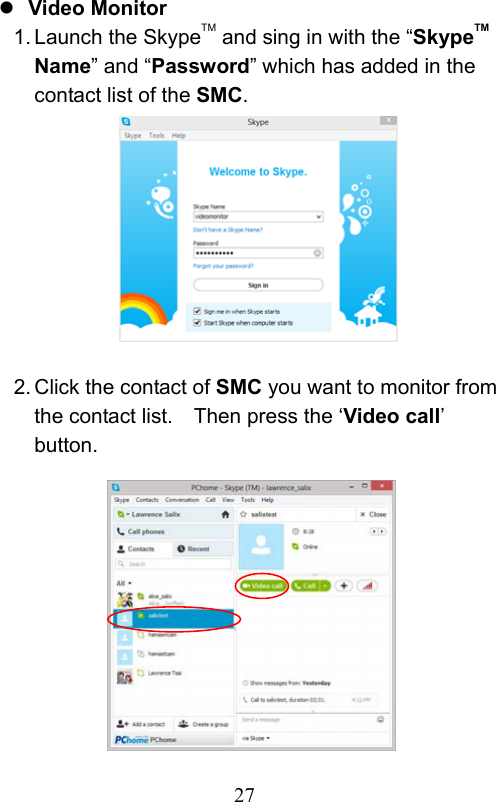
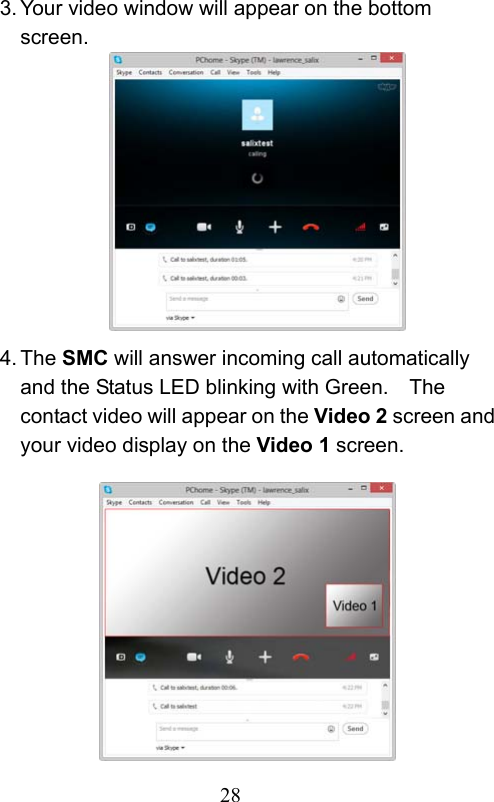
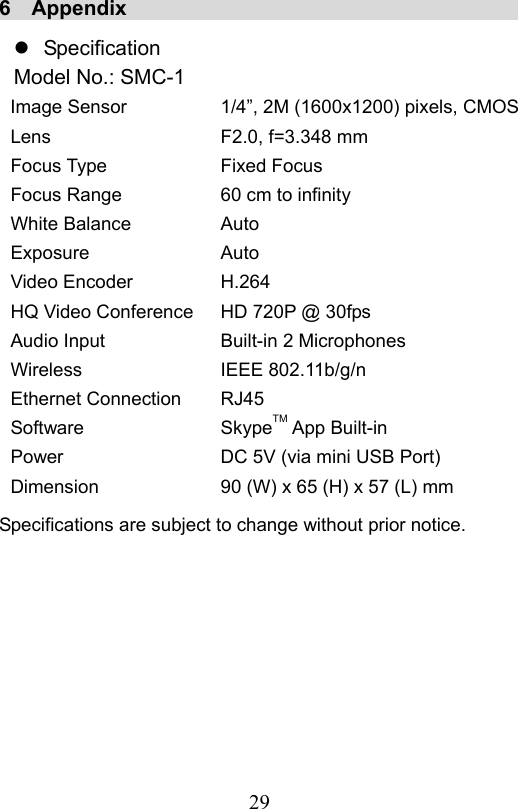
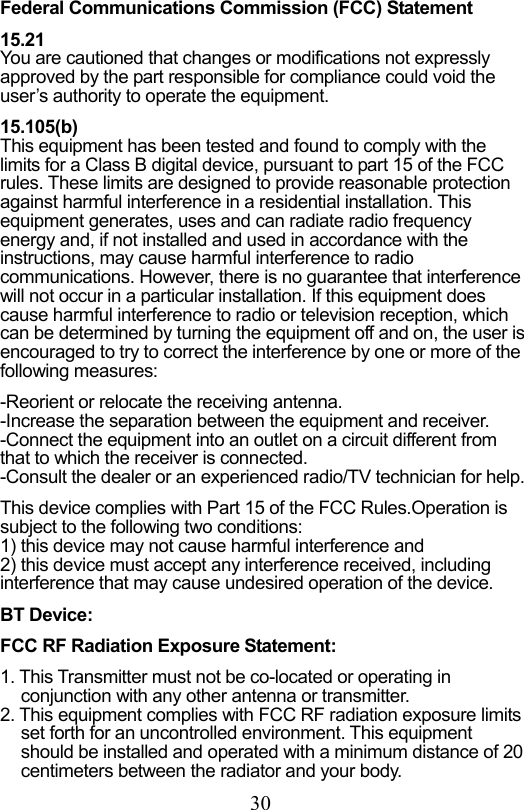
SALIX TECHNOLOGY SMC Monitoring Camera User Manual SMC 1 Manual EG 140128
SALIX TECHNOLOGY CO., LTD. Monitoring Camera SMC 1 Manual EG 140128
UserManual.wiki
>
SALIX TECHNOLOGY
>
SMC User Manual
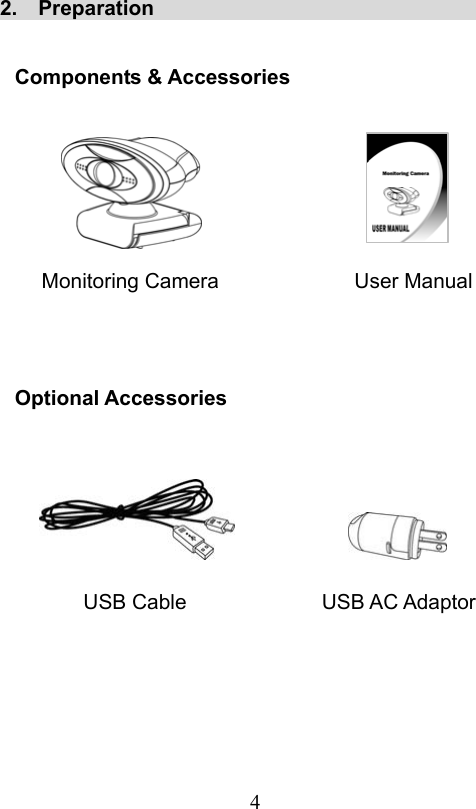
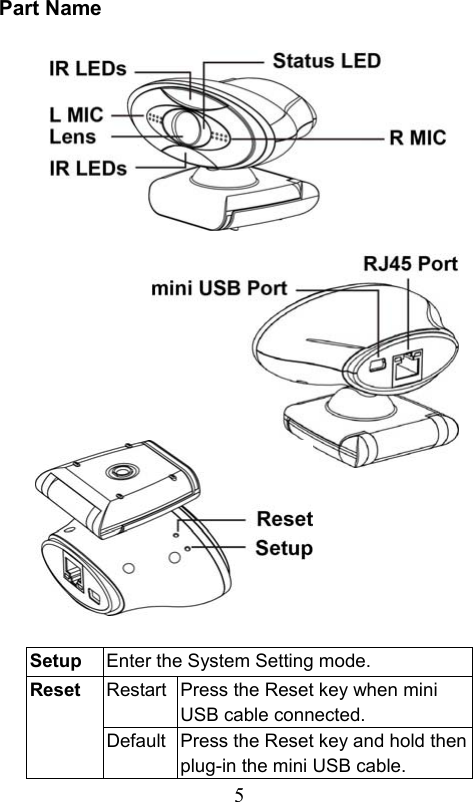
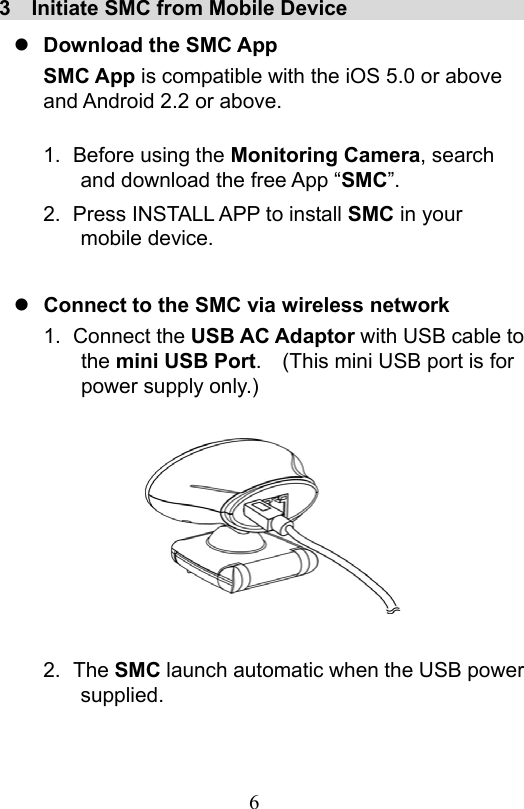
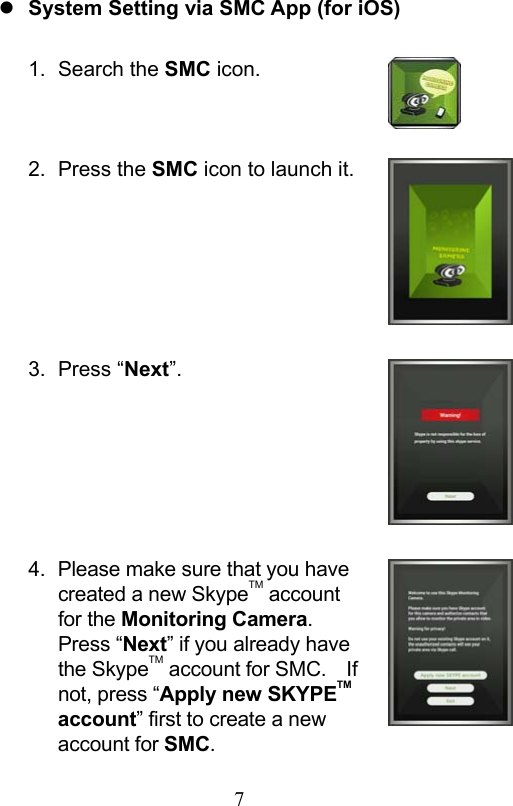
User Manual
Navigation menu
Upload a User Manual
Namespaces
Wiki Guide
HTML
PDF
Info
Views
User Manual
Discussion / Help
Navigation


![31 Notice: 1. Users will automatically receive software upgrade notice when logged on to Skype account with your Skype client software on PC or mobile phone Apps. 2. SkypeTM is a trade mark of SkypeTM Limited or its related companies. This product / application has not been approved or endorsed by SkypeTM Limited, SkypeTM Communications S.a.r.l. or any of their related companies. 3. This product includes SkypeKitTM Version [3.7] Copyright 2003-2013, SkypeTM Limited Patents Pending SkypeTM, associated trade marks and logos are trade marks of SkypeTM Limited. 4. User can logged on to www.sigmadesigns.com for the SMC technical update information. Technical Support: TEL: 886 2 2792 1512 This symbol on the product or in the instructions means that your electrical and electronic equipment should be disposed at the end of its life separately from your household waste. There are separate collection systems for recycling in the EU. For more information, please contact the local authority or your retailer where you purchased the product.](https://usermanual.wiki/SALIX-TECHNOLOGY/SMC/User-Guide-2184078-Page-32.png)