Polycom PS8452 Polycom SpectraLink 8400 Wireless Telephone User Manual Phonenix QSG RevC Proof
Polycom Inc. Polycom SpectraLink 8400 Wireless Telephone Phonenix QSG RevC Proof
Polycom >
Contents
- 1. Manual 1
- 2. Manual 2
- 3. Manual 3
- 4. Manual 4
- 5. Manual 5
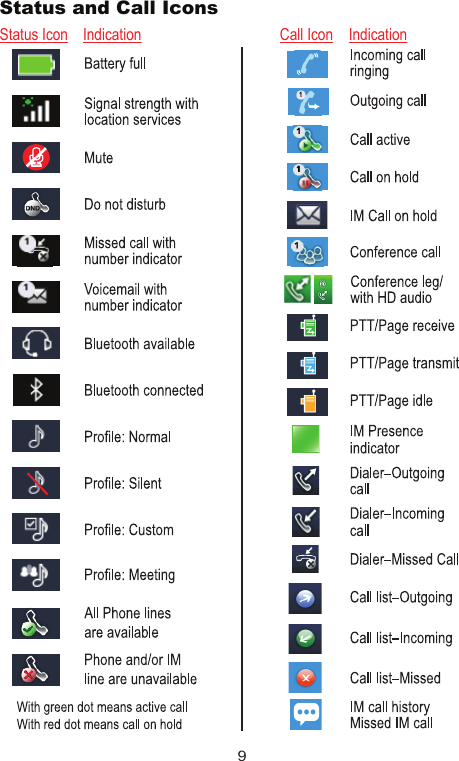
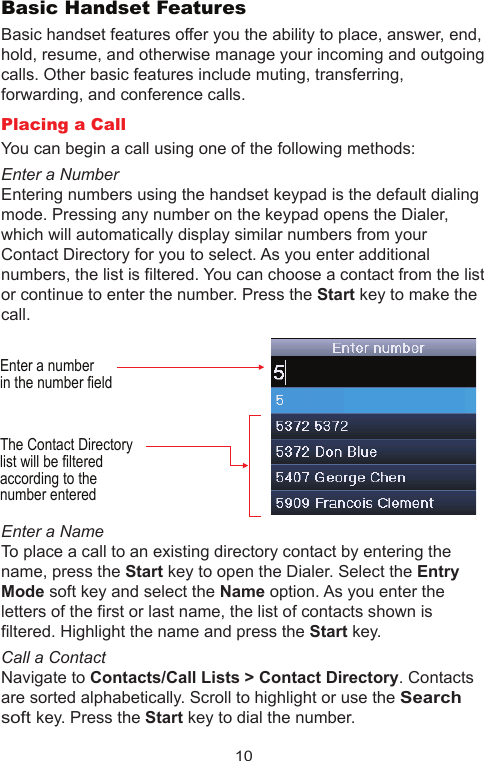
Manual 5


![13Attended Transfer1. Connect to the first party.2. Select the Transfer soft key or Feature option to open the Dialer.3. Place a call to the target party.4. When the party answers, you can explain that you are going to transfer the call to [the party on hold].5. Hang up your end of the call.The other two parties remain in call.If you want to remain on the call, do not hang up. Select the Conference option on the Features flyout and all three parties are now connected.Conference call1. Connect to the first party.2. Select Conference from the Features menu.3. Dial the next party.4. Select the Conference soft key to join all parties in the conference call.You can also conference two separate calls by using the Join option on the Features menu.Conference Behavior• When the Active Conference cell is highlighted, you can use the Mute key to mute your microphone. The Hold and End soft keys affect every participant in the conference call.• When a participant cell is highlighted, you can use FarMute to mute the participant, the End key will disconnect the participant, Hold will place that participant on hold.• Pressing the Feature soft key, Split option will split the conference into two separate held calls.Do Not Disturb (DND)DND sends all calls to Voicemail, if available. Navigate to Settings > Features > Do Not Disturb. Enable or disable as needed.Forward an Incoming CallWhile the handset rings, select the Forward soft key. The Forward-to-Dial screen appears. The screen displays the last number you forwarded calls to (either statically or dynamically). To](https://usermanual.wiki/Polycom/PS8452.Manual-5/User-Guide-1589533-Page-13.png)