Polar Electro Z9 Bluetooth, WLAN or Ethernet Base Station User Manual Team2 SW Help
Polar Electro Oy Bluetooth, WLAN or Ethernet Base Station Team2 SW Help
Users_guide

Team2 SW Help
Table of Contents
Introduction .................................................................................................................................. 1
Quick Steps .............................................................................................................................. 1
About the Help.......................................................................................................................... 1
Water-Resistance..................................................................................................................... 2
Medical Devices In Professional Use....................................................................................... 2
Training Articles........................................................................................................................ 2
Service...................................................................................................................................... 2
Bluetooth .................................................................................................................................. 2
Quick Guide ................................................................................................................................. 3
Quick Guide.............................................................................................................................. 3
PC Requirements ..................................................................................................................... 3
Hardware.................................................................................................................................. 4
Lights and Sounds.................................................................................................................... 4
Wizard ...................................................................................................................................... 7
Care and Maintenance Instructions ....................................................................................... 14
Hardware.................................................................................................................................... 15
Hardware................................................................................................................................ 15
Base Station ........................................................................................................................... 15
Charger................................................................................................................................... 19
Transmitters and Straps......................................................................................................... 20
Bluetooth USB Adapter (USB Dongle)................................................................................... 22
Non-secured transmitter mode............................................................................................... 23
iii
Team2 SW Help
How to... ................................................................................................................................. 24
Software..................................................................................................................................... 36
Introduction to Software ......................................................................................................... 36
Main menu.............................................................................................................................. 37
Training calendar.................................................................................................................... 52
Online training ........................................................................................................................ 64
Training session log ............................................................................................................... 68
Training reports ...................................................................................................................... 73
How to... ................................................................................................................................. 76
PDA software ........................................................................................................................... 121
Introduction to PDA Software............................................................................................... 121
PDA Requirements............................................................................................................... 121
Installation of PDA Software................................................................................................. 122
PDA Software....................................................................................................................... 122
Settings................................................................................................................................. 125
How to... ............................................................................................................................... 128
Troubleshooting ....................................................................................................................... 143
Troubleshooting.................................................................................................................... 143
Connections.......................................................................................................................... 144
Online Training ..................................................................................................................... 147
Sport Zones.......................................................................................................................... 149
Training computer ................................................................................................................ 150
Transfer ................................................................................................................................ 150
iv
Table of Contents
v
Transmitters.......................................................................................................................... 152
USB dongle .......................................................................................................................... 155
Glossary................................................................................................................................... 156
Precautions .............................................................................................................................. 157
Minimizing Possible Risks.................................................................................................... 157
Important Safety Information.................................................................................................... 159
Base Station ......................................................................................................................... 159
AC-Powered Devices ........................................................................................................... 159
Battery-Powered Devices..................................................................................................... 160
Wireless Devices.................................................................................................................. 160
All Devices............................................................................................................................ 161
Regulatory Information............................................................................................................. 161
Base Station ......................................................................................................................... 161
Transmitter ........................................................................................................................... 164
Industry Canada (IC) regulatory information........................................................................ 164
Avis de conformité à la réglementation d’Industrie Canada................................................. 164
Charger................................................................................................................................. 166
Technical Specifications .......................................................................................................... 168
Transmitter ........................................................................................................................... 168
Radio Frequency Technical Specifications .......................................................................... 168
Guarantee and Disclaimer ....................................................................................................... 169
Polar Team2 Pro International Warranty .............................................................................. 169
Disclaimer............................................................................................................................. 169

TEAM2 SW HELP
Introduction
Welcome to Polar Team2! Team2 is a versatile system that allows you to plan your team's
seasons, monitor the training and analyse the data.
Team2 includes software for both a PC and PDA. The PC software is designed for planning,
recording and storage and the PDA software is for online monitoring.
We recommend that you read through this manual before beginning to work with Team2. It is the
easiest way to learn how to use the versatile features of Team2 efficiently in your job as a trainer
or coach. For more visual guidance, see the Team2 tutorial which can be found from the PC
software (Help > Tutorial).
Quick Steps
1. Install PC software from the DVD.
2. Set up the system and software.
3. Give transmitters to the players.
4. Start training and monitoring heart rates online.
5. Analyze data.
6. Report and follow-up.
About the Help
The help is divided into 5 main categories, Quick Guide, Hardware, Software, PDA Software
and Troubleshooting.
Quick guide offers basic information on the product. We strongly recommend that you read at
least the quick guide before beginning to work with Team2. Quick guide and, in particular, the
Wizard instructions are only for the initial introduction of the software. Please read the software
chapter for instructions on the software itself.
Hardware offers information on the hardware that is included in the Team2 set.
1

Team2 SW Help
Software offers information on the PC software that has been installed onto your PC. The Team2
software is the core of Team2. In this section you can find information on all software features.
See the How to... section for instructions on the most common functions.
PDA software offers information on the PDA software that can be installed on a PDA device.
Troubleshooting offers you first-hand help if you have a problem with either the hardware, PC
software or PDA software.
To find necessary information efficiently, use the Search function (go to Search tab).
Water-Resistance
When a product is water-resistant it is protected against splashes while washing, sweat,
raindrops etc. It is not, however, suitable for swimming.
Medical Devices In Professional Use
Professional use sets high standards for the manufacturer, distributor and user of a medical
device. Polar offers user instructions and training for professional users in order to ensure the
safe use of Polar devices.
Training Articles
For more information on the physiological aspects and other features of Polar products, visit the
Polar Collection of Training Articles.
Service
Your Polar Team2 system is designed to help you achieve your personal fitness goals and
indicate the level of physiological strain and intensity during training sessions. No other use is
intended or implied. During the one-year guarantee/warranty period we recommend that you have
service done by an authorized Polar Service Center only. The warranty does not cover damage
or consequential damage caused by service not authorized by Polar Electro. Register your Polar
product at http://register.polar.fi/ to ensure we can keep improving our products and services to
better meet your needs.
Bluetooth
Polar Team2 uses Bluetooth wireless communication between Polar Team2 Transmitters and
Polar Team2 Base station. Bluetooth provides the most reliable and secured technology for
transmitting live data in the sports instrument industry today.
2

Team2 SW help
Quick Guide
Quick Guide
This is Quick guide for Polar Team2. Please read Quick guide through before starting to work with
Team2. Quick guide gives you the basic information on Team2. Quick guide, in particular, Wizard
instructions are only for the first introduction of the software. For instructions on the software itself,
please read the software chapter.
• PC requirements
• Hardware
• Lights and sounds
• Wizard
• Care and maintenance instructions
PC Requirements
For Team2 to work properly and smoothly, your PC has to be powerful enough. In addition to the
requirements listed below, it is recommended that you update system drivers, especially Wi-Fi
adapter drivers. Contact your Wi-Fi adapter manufacturer's web site to find the latest release of
the drivers.
Minimum system requirements are:
• 1.6 GHz processor
• 1 GB RAM
• 1 GB of free hard drive space
• Wireless connection (IEEE802.11b or newer)
• Microsoft Windows XP, Vista or 7
Recommended system requirements are:
• 2 GHz processor
• 2 GB RAM
3
Team2 SW Help
• 1 GB of free hard drive space
• Wireless connection (IEEE802.11b or newer)
• Microsoft Windows XP, Vista or 7
Hardware
Polar Team2 includes the following hardware. For more information, see hardware section.
• Base station
• Charger
• Transmitters and straps
• USB dongle
Lights and Sounds
Base station and transmitters inform the user of their status with a few different lights and sounds.
Base station
Light Function
Charge indicator
Green light is on: Power cable is connected and/or the battery is full.
Red light is on: Battery is low and charging.
Red light is blinking every 5 seconds: Battery is low and not charging.
Red light blinks for 3 seconds and power switches off automatically: Battery is
empty.
Power indicator
Base station is on.
4
Team2 SW help
Blue 1
Base station is ready for use. Takes approx. 1 minute after switching on.
On secondary base stations, the only one that lights up when the base station is ready
for use. Note that also the main base station must be on and ready for use.
Blue 2
PC is connected to the base station and software is running.
Blue 3
At least one transmitter is connected to the base station with Bluetooth.
Blue 4
Lights up on main base station when at least one secondary base station is connected
to the main base station.
NOTE:
• The Bluetooth indicator is not a light, only a label.
Transmitter
Below is a description of lights and sounds during training.
Light/Sound Function
Green led is blinking at
HR.
Transmitter detects the HR signal and is ready for recording.
5

Team2 SW Help
Red led is blinking at HR. Transmitter detects the HR signal and is ready for recording. Memory or battery level is
low.
Start recording sound,
one beep.
Transmitter starts recording.
Green led is blinking
every 3 seconds.
Transmitter is recording.
Stop recording sound, two
beeps.
Transmitter stops recording.
Red led is double blinking
every 5 seconds for 30
seconds.
Stop recording sound.
Recording cannot be started because the battery or memory level is low.
Red led is double-blinking
every 5 seconds for 10
minutes.
Stop recording sound.
Recording has been stopped because the transmitter memory is full or the battery is
empty.
Below is a description of lights and sounds during charging or when a transmitter is inserted into
the charger.
Light/Sound Function
Red led is on for 5
seconds.
Short sound.
Transmitter is properly placed into the charger and is in secured mode.
6

Team2 SW help
Red led is blinking every 5
seconds.
Transmitter is charging.
Green led is blinking
every 10 seconds.
Transmitter's battery is full.
Green led is on. The user can activate the connection between a new transmitter and the system and
activate the transmitter's number while introducing new transmitters to the system.
Red led is on for 5
seconds.
Three short sounds.
Transmitter is properly placed into the charger, but is in not-secured mode. Data
cannot be transferred while the transmitter is in not-secured mode.
To be able to transfer data from the transmitter to the PC or to change the transmitter's
settings, change the mode to secured by removing the transmitter from the charger
and inserting it back after a minimum of 3 seconds. Only one sound should be heard.
Wizard
Wizard launches when the Team2 software is run for the first time. Wizard guides you through the
introduction process step by step. Before you can run Team2 software you have to install it on
your PC.
If you want to run Wizard again at some point, remove all the transmitters from the system
according to the instructions, shut down the software and re-run it. Wizard then launches
automatically.
• Wizard can be stopped at any time by clicking the Cancel button.
• It is possible to shift between the steps by clicking the Next and Back buttons.
NOTE: These instructions apply only to the initialization wizard that launches when the Team2
software is run for the first time. For instructions on the rest of the software, see the software
chapter.
Welcome (Step 1)
7

Team2 SW Help
The first step instructs you on how to connect the hardware correctly. Follow the instructions
below and on the screen. By clicking the numbered steps, help animations are displayed in the
box on the right side of the list.
1. Plug the power cable into the base station.
2. Connect the first (or only) base station to the PC with the network cable.
3. Switch on the first (or only) base station. Wait until (1) and (2) are lit (approx. 1. min).
4. Plug the power cable into the charger.
5. Insert transmitters 1-10 into the charger. Wait until (3) is lit on the base station.
6. Plug the USB dongle into the PC.
Continue to the next step by clicking Next.
NOTE:
• Insert the transmitters into the charger so that so that the P of the Polar logo is not visible.
The led is located next to the R of the Polar logo.
• When the transmitter is inserted correctly into the charger the red led is on for 5 seconds.
At the same time you can hear a short sound.
• It is important that the USB dongle is introduced to the system during Wizard. The dongle
doesn't work later on if this part has been skipped in the beginning. For instructions of
what to do, if the USB dongle is not introduced to the system during Wizard, see How to
introduce USB dongle.
• Do not install the USB dongle drivers from the included CD! The USB dongle works
with the Team2 only if the drivers are not installed. If you have installed the drivers, follow
the instructions in the troubleshooting chapter.
Team (Step 2)
The second step asks you to create the first team and fill in team information. It is also possible to
import team data from a previous Polar software by clicking the link at the bottom of the window.
Compatible data can be imported from the Polar Precision Performance and Polar ProTrainer
software.
1. Type the team name into the Name field. The default name is My Team.
8

Team2 SW help
2. Add the team logo (in *.jpg format) by clicking Click here to add a logo text. This is an
optional feature.
3. Type team details into the Team Details field. This is an optional feature.
Continue to the next step by clicking Next.
NOTE:
• The added logo can be removed by clicking Remove logo at the bottom of the Wizard
window.
• When team data is imported from the previous Polar software, all team data (including
player information) is imported to the system.
Sport Zones (Step 3)
The third step asks to specify your team's sport zones. Sport zones specify how training is
divided into different intensity zones. You can either use the default settings or modify the sport
zones to fit the team's training.
Sport zones can be based on one of three different calculation methods. Wizard offers two of
them to choose from, the player's maximum heart rate (% of HRmax) and the player's threshold
values. A third option is the player's heart rate reserve (% of HRR) which can be taken into use,
in preferences, after Wizard is completed.
1. Select the calculation method that you want the sport zones to be based on.
2. The sport zone settings can be changed after the calculation method is selected. Settings
are given on the right side of Wizard window.
Continue to the next step by clicking Next.
Player's maximum heart rate (% of HRmax)
When the player's maximum heart rate is selected as the sport zone calculation method, sport
zones which the user can determine are specified as a percentage of a player's maximum heart
rate. As the zones are based on percentages of a player's own maximum heart rate, they are
individual for each player. The same percentages are, however, used for the whole team.
Player's threshold values
When the player's threshold values are selected as the sport zone calculation method, the sport
zones are based on the players' threshold values which are determined in the player settings.
Each player has an upper threshold (anaerobic) and a lower threshold (aerobic) value. The
9

Team2 SW Help
coach/trainer can determine how many heart beats the upper threshold zone and the lower
threshold zone differ from the players' upper and lower threshold values. The variances are the
same for the whole team. The threshold values enable the most individual training analysis.
NOTE:
• Default settings can be restored by clicking the Restore default setting link on the
bottom of the window.
• More sport zones can be added by clicking the Add sport zone link on the bottom of the
window.
Activities (Step 4)
The fourth step asks to define the training activities of your team. You can choose a different
color for every activity. This helps you to visualize your team's training calendar.
There are three different types for activities; intermittent, continuous and strength. The type
indicates how exhausting the training activity is. The type you select affects the training load and
recovery time calculations. Select the types carefully and the calculations will be more accurate.
Training activity examples:
Continuous Intermittent Strength
Swimming Football Gym
Walking Ice hockey BodyPump
Skiing Up/Downhill running
Roller-skating Rugby
Running Alpine skiing
1. Fill in your team's training activities and select their types from the drop-down menu.
10
Team2 SW help
2. Select a color for each activity by clicking the color box at the end of each training activity
line. If each training activity or test has its own individual color, it is easier for you to
visualize your team's training calendar. Activities are shown in the calendar as color
boxes.
Continue to the next step by clicking Next.
NOTE:
• Training activities can be modified after Wizard is completed.
• Training activities can be added by clicking Add training activity link at the bottom of the
window.
• Training activities can be added at any time after completing Wizard.
• Training activities can be removed by clicking Remove link at the end of the training
activity line.
Players (Step 5)
The fifth step asks you to fill in your players' information. You can also import players' information
from previous Polar software by clicking the link on the bottom of the window. Player information
is imported one player at a time. Compatible data can be imported from the Polar Precision
Performance and Polar ProTrainer software.
1. Fill in the name and other information of the first player.
2. Click the Add player link below the player list.
3. Fill in the name and other information of the second player.
4. Continue repeating steps 2 and 3 until you have added all the players you wish to add.
Continue to the next step by clicking Next.
NOTE:
• Physiological values are calculated automatically when the date of birth is selected.
Automatic values can be modified.
• A player can be removed from the player list. Click on the player you want to remove and
then click the Remove link on the bottom of the wizard window.
Hardware (Step 6)
11
Team2 SW Help
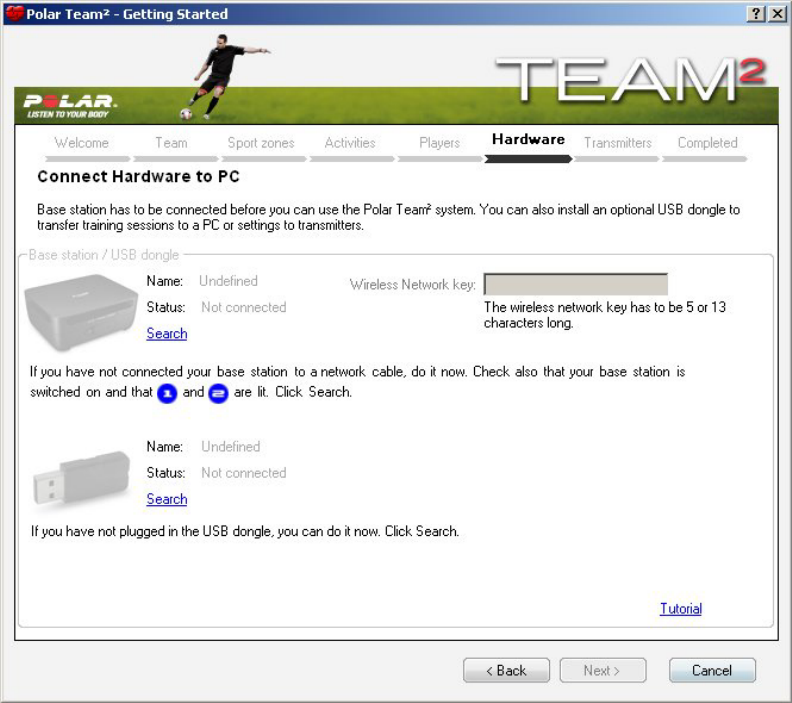
To make sure that the Team2 hardware is plugged in correctly, do the following.
1. Check that you have connected your base station to the PC with the network cable and
that lights 1 and 2 are lit on the base station.
2. Click the Search link below the grayed-out picture of base station.
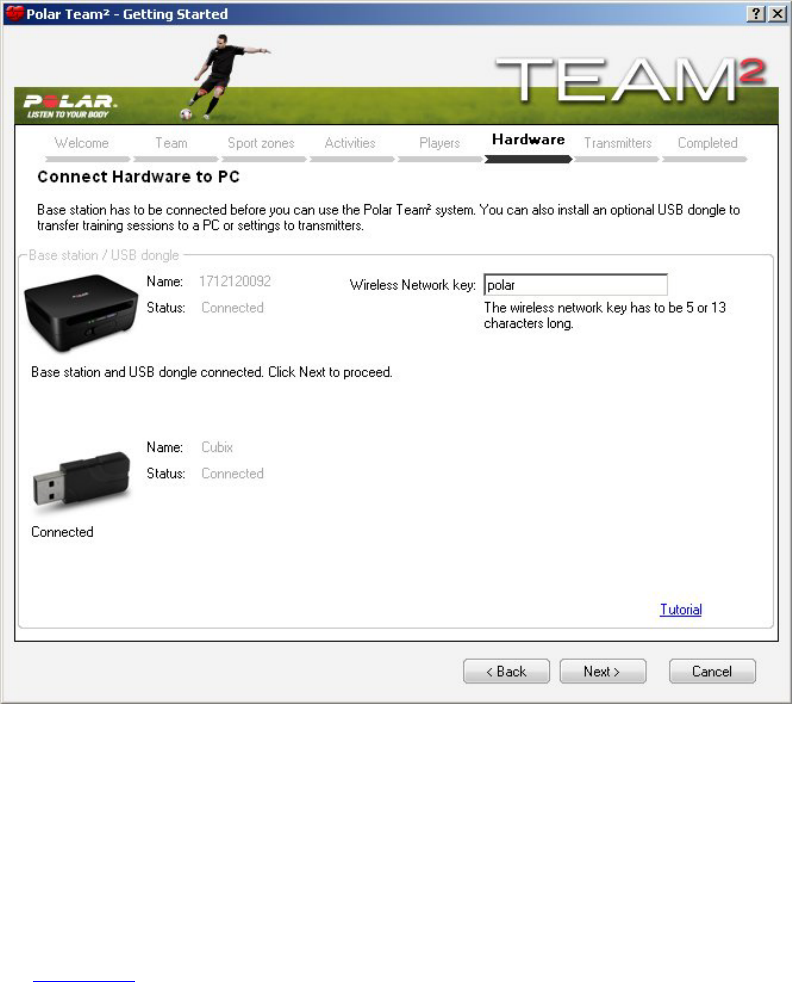
If the connection is ready, the picture fades into black.
3. Choose a wireless network key, i.e. Wi-Fi password, and type it into the Wireless
network key input field.
12
Team2 SW help
4. If you have not plugged in the USB dongle, do it now. Wait for a couple of seconds and
click the Search link below the picture of USB dongle.
Continue to the next step by clicking Next.
NOTE:
• Follow the instructions on the screen when selecting the wireless network key.
• Do not install the USB dongle drivers from the included CD! The USB dongle works
with the Team2 only if the drivers are not installed. If you have installed the drivers, follow
the instructions in the troubleshooting chapter.
Transmitters (Step 7)
Wizard starts to search for the transmitters. If the search doesn't start, click Search. Make sure
the power cable has been plugged into the charger and the transmitters are inserted into the
charger correctly.
13

Team2 SW Help
Wait until the search is done. After the search, Wizard tells you how many of the 10 transmitters it
has found. If Wizard didn't find all the transmitters, make sure that they are inserted correctly. The
correct way is to leave the tip with led light on the outside. A short sound will be heard when a
transmitter is inserted into the charger correctly. There will be a light blinking on the transmitters
that are inserted correctly. Click Search to start the search again.
When Wizard has found all 10 transmitters, select a player for each transmitter from the drop-
down menu. Transmitters are identified by the number label. When a transmitter is assigned,
letter X is added after the player's name.
Continue to the next step by clicking Next.
NOTE:
• More transmitters can be added after Wizard is completed. For more information, see
How to add transmitters.
• If a transmitter was not found during Wizard after a couple of tries, you can add it to the
system using Add New Transmitters feature. For more information, see How to add
transmitters.
• Transmitter-player connections can be modified after Wizard is completed. For more
information, see How to assign transmitter to player.
Completed (Step 8)
Installation is now complete. Polar Team2 is now initialized and ready for use.
End Wizard by clicking the Finish button.
Care and Maintenance Instructions
It is important to follow the care and maintenance instructions to assure the long life of the Team2
hardware. Sweat and moisture can keep the electrodes wet and the transmitter activated, which
shortens battery life.
Team2 Transmitter Straps
• Wash the straps in a washing machine at 40 °C (104°F) after every fifth use. Always use
the washing pouch (included in the Team2 set). NOTE: Detach the transmitter from the
strap before wash!
• Do not use bleach or fabric softener.
• Rinse the straps under running lukewarm water after every use.
14

Team2 SW help
• Store the straps in the Team2 bag, in a pocket with vents.
• Make sure you don’t store straps wet.
Transmitters
• Detach the transmitters from the straps and store separately.
• Rinse the transmitters under running lukewarm water after every use.
• Do not insert wet transmitters into the charger.
• Store transmitters in the charger.
• When the transmitters are not in daily use or are stored for a longer period of time,
recharge the transmitters regularly to prevent a complete exhaustion of the battery in the
transmitter.
Charger and Base Station
• Wipe the base station and the charger with a moist cloth regularly.
Hardware
Hardware
Polar Team2 includes the following hardware:
• Base station
• Charger
• 10 transmitters and straps
• USB dongle
Extra transmitters and Team2 transmitter straps and additional base stations can be purchased
separately. There is also a charger included in the transmitter kit.
Base Station
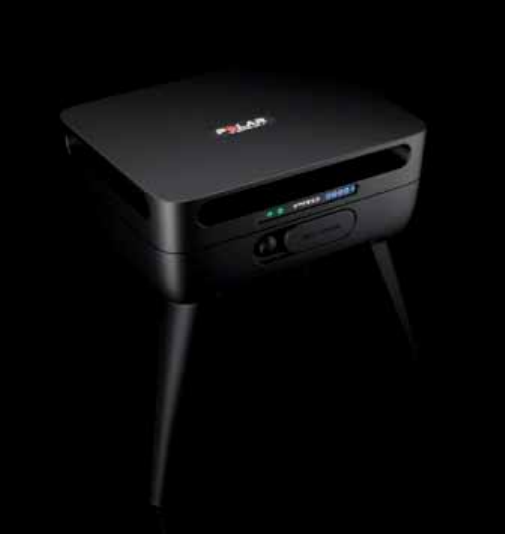
The base station is the device that connects the transmitters with your PC or PDA. There can be
up to three base stations in a Team2 system. The number of transmitters online is determined
based on the number of base stations:
15
Team2 SW Help
• one (main) base station: up to 28 transmitters/players online
• two base stations (main + one secondary base stations): up to 56 transmitters/players
online
• three base stations (main + two secondary base stations): up to 80 transmitters/players
online
The main station does not differ from the secondary base stations on the hardware level. The first
base station you connect/introduce to the system becomes the main base station.
If you are using more than one base station in the Team2 system, only the main base station is
connected to the PC (either wireless or wired connection). The secondary base stations (one or
two) are connected to the main base station wirelessly and automatically after switching on. Light
(4) lights up on main base station when at least one secondary base station is connected to the
main base station.
Front panel
16
Team2 SW help
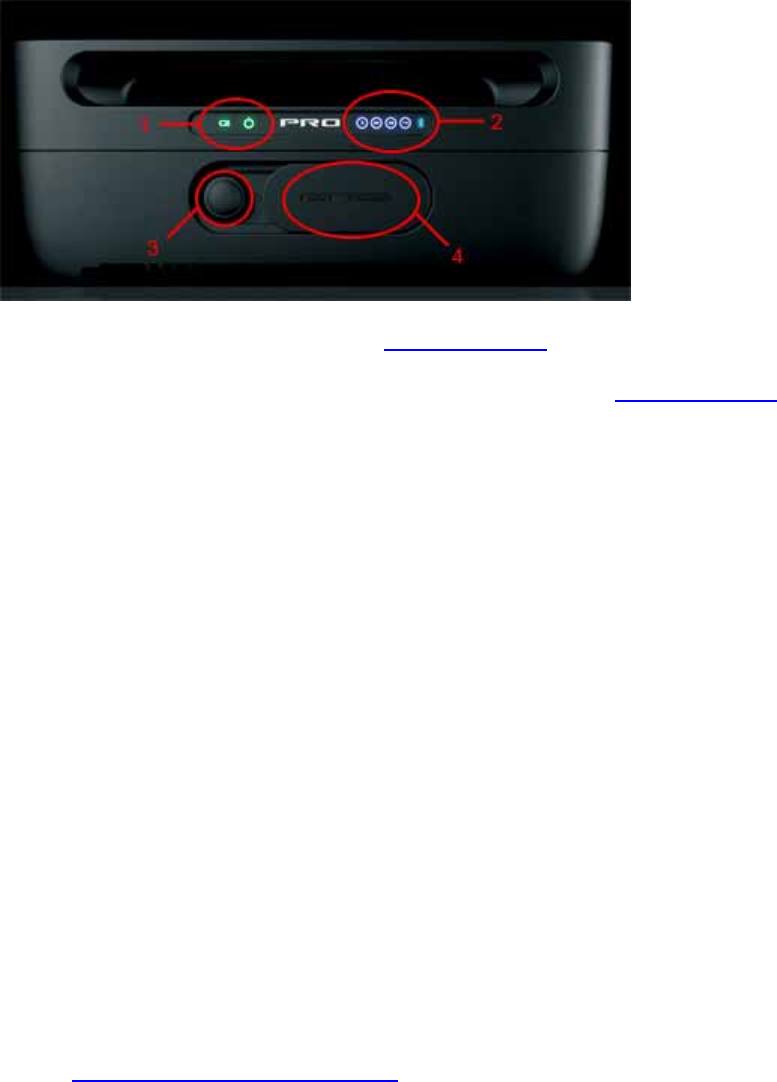
1. Charger and power indicators (see Lights and sounds)
2. Number indicators for connections and a Bluetooth logo (see Lights and sounds)
3. Power button
4. Reset button (red), Ethernet port and power plug under the cover
To connect the main base station to the PC
1. Turn on your PC and open Team2 software.
2. Plug the power cable into the main base station. NOTE that using power cable is only
allowed indoors. During outdoor use, use the battery as power source.
3. Connect the main base station to the PC with the network cable.
4. Switch on the main base station. Wait until (1) and (2) are lit (approx. 1. min).
When the lights (1) and (2) are lit on the main base station, it is ready to communicate with the
PC.
To rename the main base station
The main base station can be renamed. The base station name is the name of the base station's
wireless network.
1. Connect the main base station to PC either with a Ethernet cable or wireless connection.
Wired (Ethernet cable) connection is recommended.
2. Run the Team2 software.
3. Select Tools > Preferences from the main menu.
17

Team2 SW Help
4. Select the Base station/USB Dongle tab.
5. Select the main base station from the base station list. Note that if a secondary base
station is introduced to the system, the base station settings cannot be changed.
6. Type a base station name into the Name input box. The base station name is the name
of the base station's wireless network.
7. End by clicking Save.
To use secondary base stations
In order the secondary base stations work, the main base station must be on and connected to
the PC.
1. Introduce secondary base stations to the system.
2. Turn on the main base station and connect it to the PC and the Team2 software.
3. Turn on the secondary base station(s).
4. Wait until the light (1) is lit on the secondary base station(s) and light (4) is lit on the main
base station. If the secondary base stations are introduced to the system, they connect to
the main base station wirelessly, automatically.
Facts
• The base station is water-resistant so it can be used in the rain as long as the plug is in
place. Always use wireless connection and battery power in the rain!
• Allows you to monitor up to 80 players in real time at the same time.
• Built-in Wi-Fi (IEEE802.11b) so that wireless connection can be used between the
PC/PDA and the base station.
• Built-in Bluetooth (100 m (330 ft) range).
• RJ45 connector for Ethernet connection.
• Secondary base stations connect to the main base station wirelessly.
• Re-chargeable batteries with up to 12 hours stand alone use. Charging time 4 hours.
• AC adapter included. There are four different plugs for the AC adapter included. Choose
the correct plug (according to the country) and place it into the adapter.
18

Team2 SW help
• Operating temperature -20°C - +60°C (-4°F - +140°F).
• The stand must be used when base station is placed on moist ground, e.g., on a wet
lawn.
• When the base station is placed on the wall, the plug must be towards the ground,
especially outdoors.
• During charging the legs of the base station must be used because the bottom heats up.
The bottom of the base station heats up to 60°C (140°F).
• During charging, the maximum operating temperature is 45°C (113°F).
• It is recommended that the base station is placed 2 meters (6.5 ft) above the ground to
optimize the signal.
• Check the range of the signal if the base station is surrounded by metal.
• Wall mount and legs included.
• The sockets that are provided in the wall mounting kit are meant for concrete surfaces.
Charger
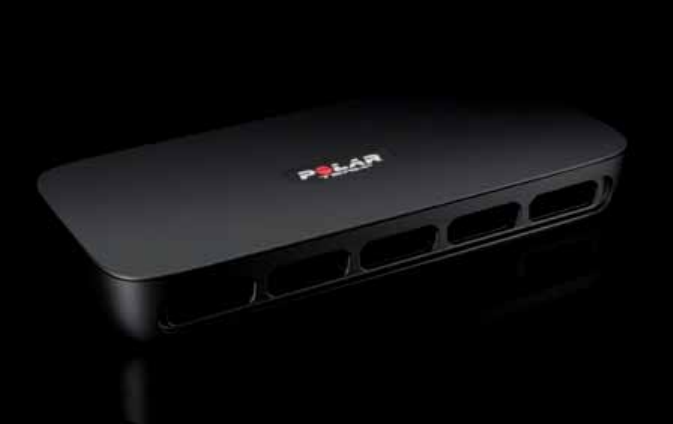
Charger is used to re-charge the batteries of the transmitters. The charger can be used only
indoors. Data transfer (transmitter settings, memory contents) between the transmitters and the
PC is enabled only when the transmitters are inserted into the charger.
To transmit data between transmitters and PC, follow these instructions:
1. Turn on your PC and open Team2 software.
2. Connect the base station to PC according to the instructions.
3. Plug the power cable into the charger.
4. Insert transmitters into the charger. Wait until (3) is lit in the base station.
If the transmitter is inserted correctly into the charger, you hear one short sound and red led is on
for 5 seconds. Software's toolbar shows in the upper right corner how many transmitters are
connected to the base station/USB dongle.
19
Team2 SW Help
Facts
• Up to 10 transmitters can be inserted into the charger at a time.
• The transmitters are inserted into the charger in such a way that the led light is left on the
outside. The led is located next to the Polar Team2 logo's letter R.
• Not water-resistant, for indoor use only.
• AC adapter included. There are four different plugs for the AC adapter included. Choose
the correct plug (according to the country) and place it into the adapter.
• Wall mount included.
Transmitters and Straps
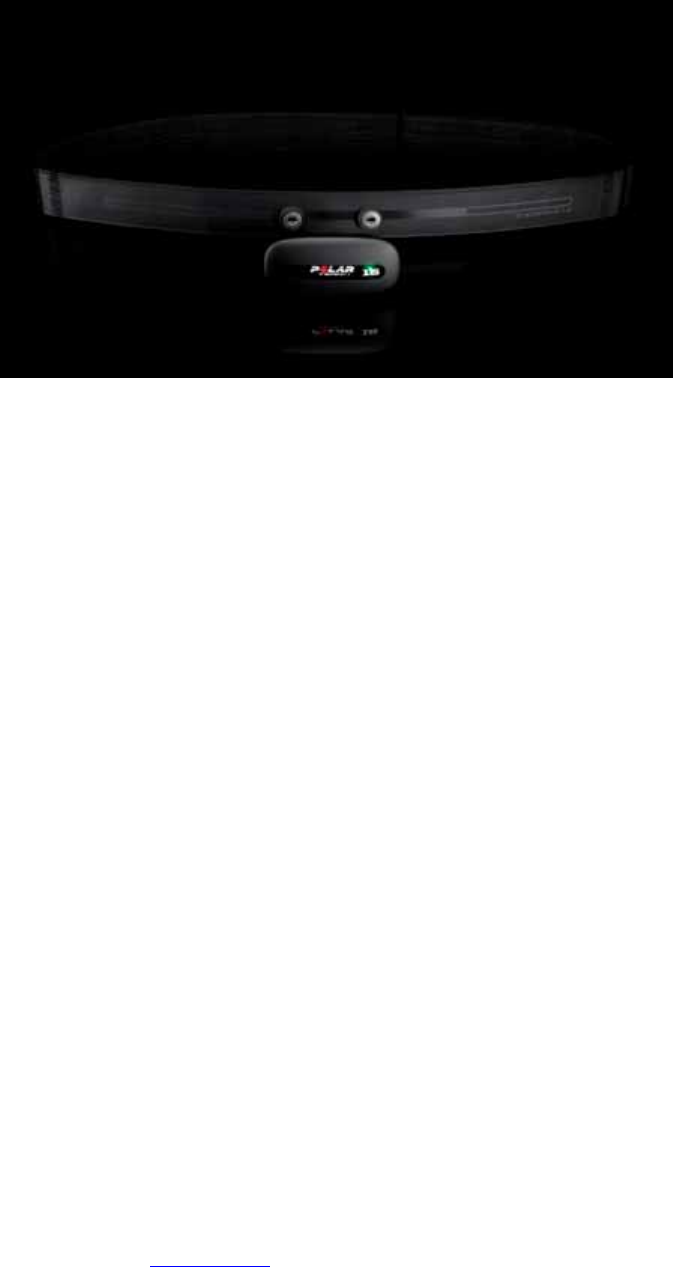
Transmitter records heart rate data and transmits it to the PC using Bluetooth. During training the
heart rate data can also be monitored with a Polar wrist unit. During the training transmitter is
attached to the Team2 transmitter strap and the strap is secured around player's chest. NOTE:
Two electrode areas on the back of Team2 transmitter strap must be made wet under running
water before use.
After training (or after the transmitter have been in off-season use) the data is transferred from
the transmitters to the PC. The transmitters must be inserted into the charger during the data
transfer.
20
Team2 SW help
Facts
• Re-chargeable battery, Polar magnetic communication technology transmitter and built-in
Bluetooth.
• Battery lasts up to 80 hours (in online mode for 24 hours).
• Re-charge takes 24 hours.
• Transmitter memory can record 48 hours of data in online mode and up to 360 hours of
data in off-season mode.
• Training sessions shorter than 30 seconds are not recorded into the transmitter's memory.
• Bluetooth range is 100 meters (330 ft).
• Transmitter is water-resistant.
• When the transmitter is inserted into the charger, the data transfer from the transmitters
to the PC is enabled. Transmitter settings can be changed when the transmitters are in
the charger.
• The transmitter is in the sleep mode if it's not inserted into charger or attached to the
strap.
• If the data transmission ceases in the online mode, the transmitter searches for a new
connection automatically.
• For example, the following Polar training computers can be used with Team2 transmitter:
RS400, RS300X, AXN500 and AXN700. Full list of compatible training computers can be
found at Polar website.
21

Team2 SW Help
• Strap works only with Team2 transmitters.
• See also Non-secured transmitter mode.
For more information, see also How to use transmitters.
Online and Off-Season Modes
Transmitter can be used in two different modes, Online and Off-season. HR data can be
monitored in both modes with a Polar wrist unit.
Online mode is used when training is monitored online using the base station. At that time, the
transmitter transfers heart rate data to the PC via the base station in addition to recording it. In
Online mode the battery lasts up to 30 hours.
Off-season mode can be used when training is not monitored online, e.g., during independent
training season. At the time, in order to save battery, the transmitter is not trying to send data to
PC but only records it. In this mode the battery can last up to 250 hours. Data can be transferred
to the PC afterwards.
The mode can be changed in two places:
• Team properties: Options > Team properties > Players tab > Transmitter tab
• Polar Team2 Preferences: Tools > Preferences > Transmitters tab.
More information about transmitter settings, see the software chapter.
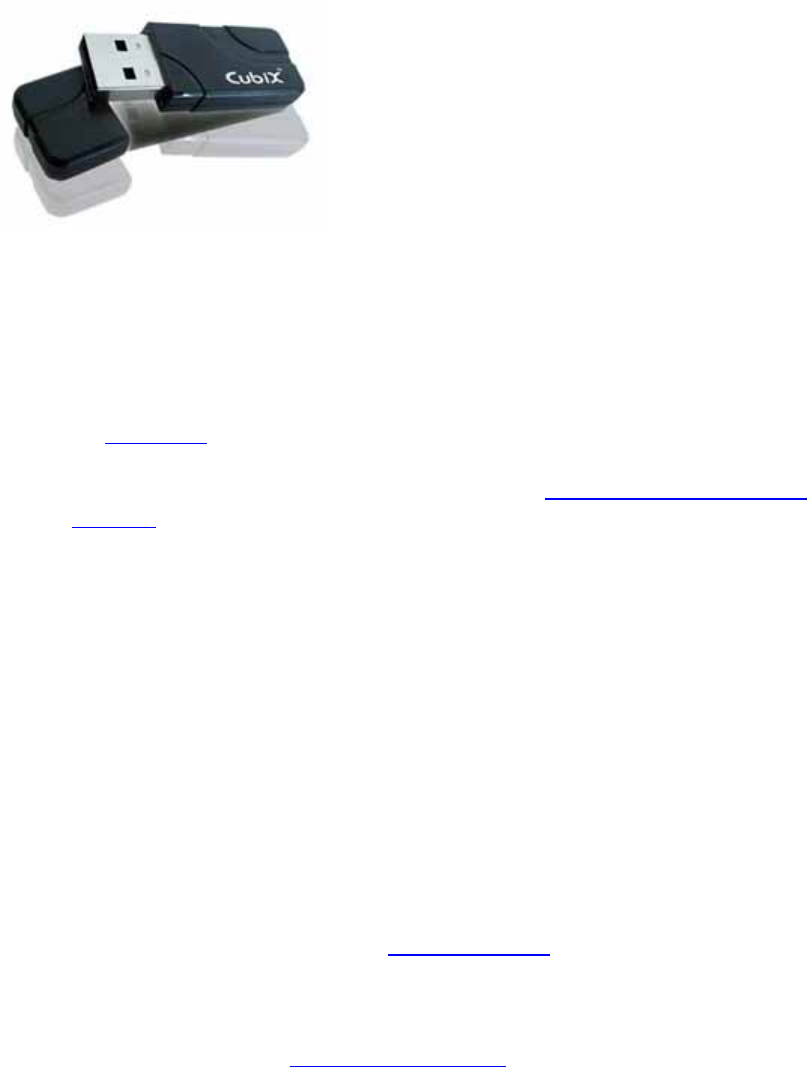
Bluetooth USB Adapter (USB Dongle)
The USB dongle is plugged into the PC's USB port, and it can replace the base station when data
is transferred (transmitter settings, memory contents) between the transmitters and the PC. Data
can be transferred between the transmitters and PC via the USB dongle when the transmitters
are inserted into the charger. Online monitoring cannot be performed via the USB dongle.
The USB dongle has to be introduced to the system during wizard (or separately); otherwise it
won't work properly.
22
Team2 SW help
Facts
• Built-in Bluetooth.
• Do not install the USB dongle drivers from the included CD! The USB dongle works
with the Team2 only if the drivers are not installed. If you have installed the drivers, follow
the instructions in the troubleshooting chapter.
• NOTE that in order the USB dongle to work properly, the discovery feature must be
turned on in the Windows settings.
Non-secured transmitter mode
Transmitters can be either in secured or non-secured mode. Basically these modes mean that:
• in secured mode the transmitter is hidden from Bluetooth devices that do not know it
exists, and
• in non-secured mode the transmitter is visible for all Bluetooth devices.
How to recognize:
The transmitter is in secured mode if only one short sound is heard when it is inserted into the
charger. The transmitter is in non-secured mode if three short sounds are heard when the
transmitter is inserted into the charger. See Lights and sounds.
How to change:
By default, when a transmitter is inserted into the charger it goes into secured mode. Change the
transmitter's mode to non-secured by removing the transmitter from the charger and inserting it
back within 3 seconds while the charger is powered on. If you have several transmitters that you
want to put into non-secured mode, the easier way is to insert all the transmitters into the charger
and then un-plug and re-plug the power cord within 3 seconds.
Usage:
23

Team2 SW Help
Normally the transmitters are always in secured mode. The non-secured mode is used only when:
• the base station combination has been changed and the transmitters must be
synchronized with the new combination, or
• the transmitter has been previously paired with a base station and is now paired with
another.
How to...
How to Connect Base Station to PC
The main base station can be connected to the PC with either a Ethernet cable or wireless
connection. When Team2 is taken into use for the first time, the base station must be connected
to the PC with the Ethernet cable. The first base station you connect/introduce to the system
becomes the main base station.
If you are using more than one base station in the Team2 system, only the main base station is
connected to the PC (either wireless or wired connection). The secondary base stations (one or
two) are connected to the main base station wirelessly and automatically after switching on. Light
(4) lights up on main base station when at least one secondary base station is connected to the
main base station.
To connect the main base station to the PC
1. Turn on your PC and open Team2 software.
2. Plug the power cable into the main base station. NOTE that using power cable is only
allowed indoors. During outdoor use, use the battery as power source.
3. Connect the main base station to the PC with the network cable.
4. Switch on the main base station. Wait until (1) and (2) are lit (approx. 1. min).
5. If you are using the base station with the Team2 system for the first time, make sure the
main base station is introduced to the system: go to software preferences (Tools >
Preferences > Base station/USB dongle tab). The main base station should be on the
base station list. If you want to change base station settings (name or wireless network
key), do it before introducing the secondary base stations.
When the lights (1) and (2) are lit on the main base station, it is ready to communicate with the
PC.
See also How to setup wireless connection.
24
Team2 SW help
To use secondary base stations
In order the secondary base stations work, the main base station must be on and connected to
the PC. Only the main base station connects to the PC, the secondary base stations connect to
the system via the main base station.
1. Introduce secondary base stations to the system.
2. Turn on the main base station and connect it to the PC and Team2 software.
3. Turn on the secondary base station(s).
4. Wait until the light (1) is lit on the secondary base station(s) and light (4) is lit on the main
base station. If the secondary base stations are introduced to the system, they connect to
the main base station wirelessly, automatically, after switching on.
How to Insert Transmitters into Charger
Transmitters are inserted into charger for 4 reasons:
• To recharge the batteries.
• To transfer training data from the transmitters to PC.
• To change the transmitter settings (online/off-season).
• To add new transmitters to the system.
Inserting the transmitters into the charger:
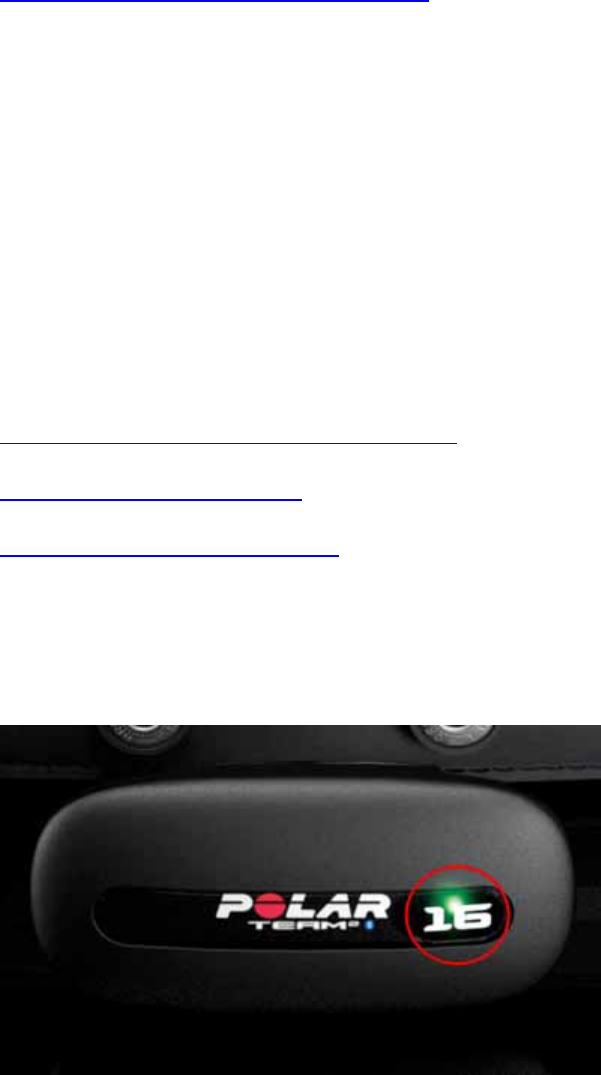
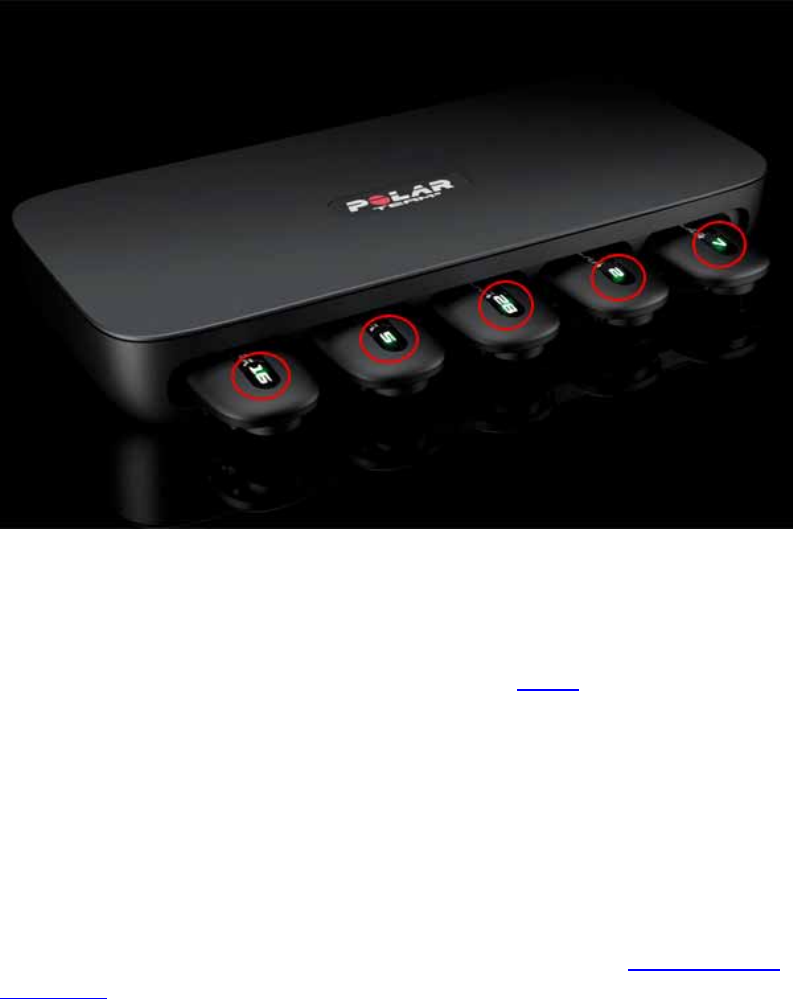
• The transmitters are inserted into the charger so that the P of the Polar logo is not visible.
The led is located next to the R of the Polar logo.
25
Team2 SW Help
• When the transmitter is inserted correctly into the charger the red led is on for 5 seconds.
At the same time you can here a short sound.
How to introduce additional base stations
The base station you introduced to the system first (during or after Wizard) is your main base
station. In order to use more than 28 transmitters simultaneously online, the secondary base
stations must be introduced to the Team2 system. Additional base stations can be purchased as
accessories.
It is recommended that the additional base stations are introduced to the Team2 system using the
Ethernet cable (wired connection).
1. Make sure the main base station is introduced to the system: go to software preferences
(Tools > Preferences > Base station/USB dongle tab). The main base station should
be on the base station list. If you want to change base station settings (name or wireless
network key), do it before introducing the secondary base stations.
2. Switch the main base station off. Keep the Team2 software running.
3. Connect the PC and the first secondary base station with the Ethernet cable.
4. Switch the secondary base station on.
26

Team2 SW help
5. Open software preferences (Tools > Preferences) and select the Base station/USB
dongle tab. Click Add below the base station list, the secondary base station is added to
the base station list. NOTE: It may take up to 1 minute until the Add button is enabled
after the secondary base station is connected to the PC.
6. Switch off the secondary base station and unplug the Ethernet cable, if you want to
introduce another secondary base station. Then follow the steps 3-5.
7. After you have introduced secondary base stations (one or two) to the system, you will
have to synchronize the transmitters with the new base station combination. See
instructions in How to synchronize transmitters with new base stations.
In order the secondary base stations work, the main base station must be on and connected to
the PC. Only the main base station connects to the PC, the secondary base stations connect to
the system via the main base station. If the secondary base stations are introduced to the system,
they connect to the main base station wirelessly, automatically, after switching on.
NOTE: If the base station has been previously introduced to any Team2 or Cardio GX system (as
a main or secondary base station), it must be reset before it can be introduced to the system (as
a main or secondary base station) again. See instructions in How to reset base station.
How to Introduce USB Dongle
If the USB dongle has not been plugged in during Wizard, it cannot be used as an alternative for
the base station because the Team2 doesn't recognize the USB dongle. Before the USB dongle
can be used for transferring data from the transmitters' memory to the PC, it has to be introduced
to the system. It can be done according to the following steps:
1. Open the Team2 PC software.
2. Plug in the USB dongle into the free USB port.
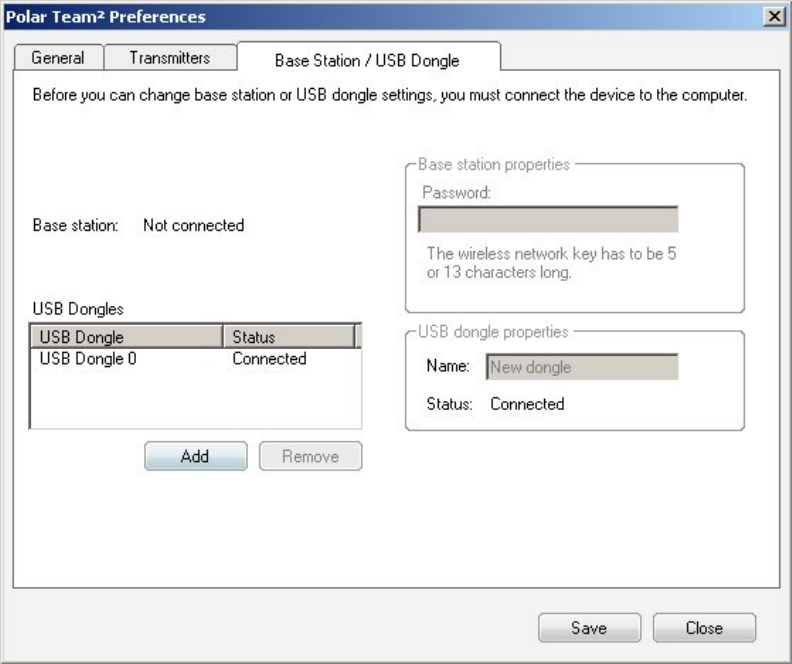
3. Open the base station / USB dongle settings tab in software preferences (Tools >
Preferences > Base station/USB dongle tab).
27
Team2 SW Help
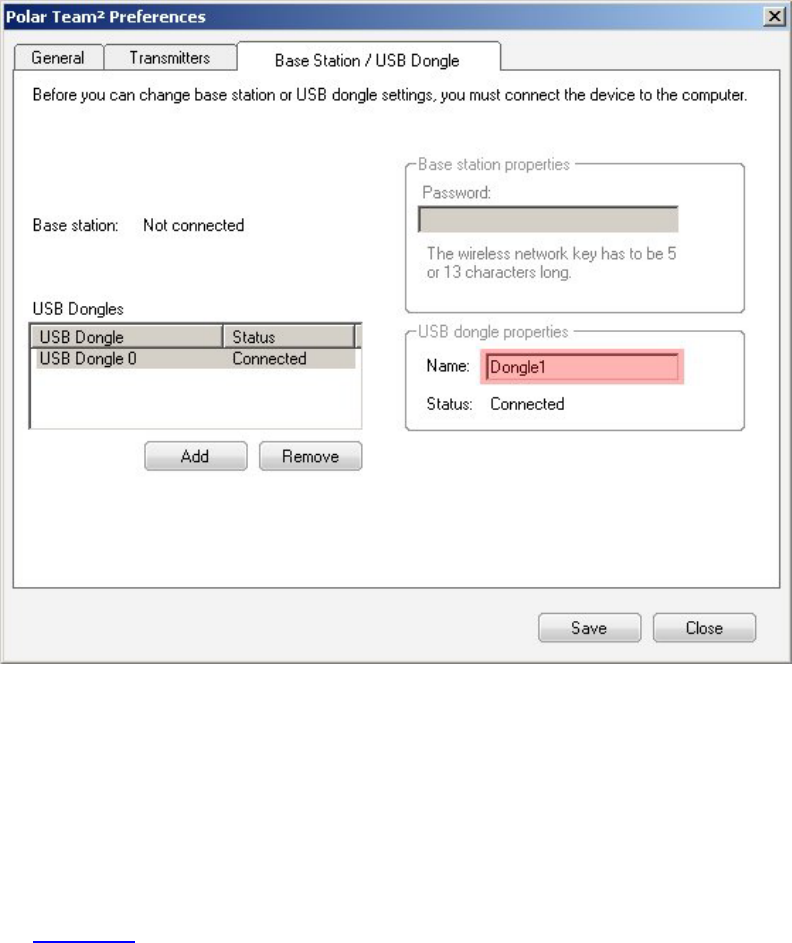
4. Click the Add button below USB Dongles list. A new USB dongle appears in the USB
Dongles list.
28
Team2 SW help
5. To rename the dongle, select the dongle from the list and type in a new name into the
Name field on the right.
6. Connect the main base station to the PC with the network cable.
7. Insert all transmitters into the charger and plug in the power cable.
NOTE:
• Do not install the USB dongle drivers from the included CD! The USB dongle works
with the Team2 only if the drivers are not installed. If you have installed the drivers, follow
the instructions in the troubleshooting chapter.
Turn discovery on
In order the USB dongle to work properly, the discovery feature must be turned on in the
Windows settings. When discovery is turned on, other bluetooth devices (such as Team2
transmitters) can find and connect to your PC.
1. Make sure you have plugged in the USB dongle.
29

Team2 SW Help
2. Select Start (> Settings) > Control Panel.
3. Double-click the Bluetooth Devices icon to open the device settings.
4. Open the Options tab.
5. Check the Turn discovery on check-box.
6. Save changes and close the window by selecting OK.
NOTE: When you are not using the USB dongle, you can turn discovery off by un-checking the
box in the settings.
How to replace main base station
You may need to replace the current main base station, for example if the current main base
station is broken. You may replace the current main base station with a secondary or a new base
station. Follow the steps below to replace the current main base stations with another base
station.
Remove the current main base station from the system:
1. Open software preferences (Tools > Preferences) and select the Base station/USB
dongle tab.
2. Select the main base station from the base station list.
3. Click Remove below the base station list. The whole base station list is cleared.
Reset the base stations:
1. Switch on the first base station, do not connect it with the PC. Make sure the other base
stations are switched off.
2. Wait until light (1) is lit on the base station.
3. Push the reset button on the base station front panel with a pen or pencil. The reset
button can be found under the plug.
4. Switch off the reset base station and switch on the second one. Repeat steps 1-3 until all
the base stations are reset.
Introduce the new base station:
30

Team2 SW help
1. Turn on your PC and open Team2 software.
2. Plug the power cable into the new main base station (reset secondary base station or
brand new). NOTE that using power cable is only allowed indoors. During outdoor use,
use the battery as power source.
3. Connect the new main base station to the PC with the network cable.
4. Switch on the main base station. Wait until (1) and (2) are lit (approx. 1. min).
5. Make sure the main base station is introduced to the system: go to software preferences
(Tools > Preferences > Base station/USB dongle tab). The main base station should
be on the base station list. If you want to change base station settings (name or wireless
network key), do it before introducing the secondary base stations.
6. Introduce the possible secondary base stations according to the instructions (How to
introduce additional base stations).
7. After you have introduced base station(s) to the system, you will have to synchronize the
transmitters with the new base station combination. See instructions in How to
synchronize transmitters with new base stations.
How to reset base station
If the base station has been previously introduced to any Team2 or Cardio GX system (as a main
or secondary base station), it must be reset before it can be introduced to the system (as a main
or secondary base station) again.
1. Switch on the base station, do not connect it with the PC. Make sure the other base
stations are switched off.
2. Wait until light (1) is lit on the base station.
3. Push the reset button on the base station front panel with a pen or pencil. The reset
button can be found under the plug.
4. Repeat for all base stations.
5. Introduce the base station to the system as a main base station (information in How to
connect base station to PC) or as a secondary base station (How to introduce additional
base stations).
How to Setup Wireless Connection
31

Team2 SW Help
The main base station can be connected to the PC with either wired (Ethernet) or wireless (Wi-Fi)
connection. Instructions for creating a wired connection between the base station and PC can be
found here. Wired connection is necessary when Team2 is used for the first time or when the
base station settings are changed.
If you are using more than one base station in the Team2 system, only the main base station is
connected to the PC (either wireless or wired connection). The secondary base stations (one or
two, previously introduced to the system) are connected to the main base station wirelessly and
automatically after switching on. Light (4) lights up on main base station when at least one
secondary base station is connected to the main base station.
Wireless connection requires that there is a Wi-Fi adapter installed into the computer.
• Network key
• Establishing wireless connection
Network key
Wireless connection requires a wireless network key so that it's possible to establish secured
wireless connection. Secured connection prevents an outsider from connecting to the base
station's wireless network. Wireless network key is selected in wizard during the first run of Team2
software. Wireless network key can be changed in preferences. Changing the wireless network
key requires that base station is connected to PC (either with a Ethernet cable or wireless
connection). Wired (Ethernet cable) connection is recommended while changing the base station
settings.
Note that the network key is set only for the main (or only) base station. The network key must be
changed before the secondary base stations are introduced to the system.
Changing the network key:
1. Connect the main base station to PC either with a Ethernet cable or wireless connection.
Wired (Ethernet cable) connection is recommended.
2. Run the Team2 software.
3. Select Tools > Preferences from the main menu.
4. Select the Base station/USB Dongle tab.
5. Select the main base station from the base station list. Note that if a secondary base
station is introduced to the system, the base station settings cannot be changed.
32
Team2 SW help
6. Type a new wireless network key into the Wireless Network key input box. The network
key must be either 5 or 13 characters long. You can also rename the base station by
typing in a base station name into the Name input box. The base station name is the
name of the base station's wireless network.
7. End by clicking Save.
8. Remove the current wireless network profile from the operating system's or wireless
network software's settings and create the wireless connection again with the new
network key.
NOTE: If you have forgotten your wireless network key, connect the base station to the PC with
the Ethernet cable and go through the Changing the network key steps 2 to 7.
Establishing wireless connection
Your computer should remember the wireless connection settings. Therefore, the wireless
connection has to be set only once. Note that if you change the wireless network key, you have to
remove the current wireless network profile from the operating system's or wireless network
software's settings and create the connection again with the new network key.
Windows XP:
1. Switch on the main base station. Wait until the light 1 on the base station is lit.
2. If there's a separate on/off switch for the Wi-Fi adapter (of your PC), make sure that the
adapter is switched on.
3. Open Network Connections by selecting Start > Connect To > Show all connections
on your PC. The alternative way is to open Control Panel (Start > (Setting) > Control
Panel) and select Network Connections.
4. If Wi-Fi adapter is disabled, right-click Wireless Network Connection and select Enable.
5. Right-click Wireless Network Connection and select View Available Wireless
Networks.
6. Wait for couple of seconds while the computer searches the networks. If the main base
station's name (base station's wireless network) doesn't appear on the list, try to refresh
the list by clicking Refresh network list on the left panel.
7. Select the main base station's wireless network from the networks list and click Connect.
8. You are asked to give the network key to finalize the connection. Light 2 on the base
station is lit when Team2 software is running and the connection is OK.
33
Team2 SW Help
Windows Vista:
1. Switch on the main base station. Wait until the light 1 on the base station is lit.
2. If there's a separate on/off switch for the Wi-Fi adapter (of your PC), make sure that the
adapter is switched on.
3. Open Network and Sharing Center by selecting Start > Control Panel > Network and
Sharing Center on your PC.
4. Click View status of the wireless network connection.
5. If the Media State is disabled, click the Enable button at the bottom of the window.
6. Select Start > Connect to.
7. Wait for couple of seconds while the computer searches the networks. If the main base
station's name (base station's wireless network) doesn't appear on the list, try to refresh
the list by clicking Refresh network list on the left panel.
8. Select the main base station's wireless network from the networks list and click Connect.
9. You are asked to give the network key to finalize the connection. Light 2 on the base
station is lit when Team2 software is running and the connection is OK.
NOTE:
• If you are using different software, provided by the PC or Wi-Fi adapter manufacturer, to
manage wireless connections, these instructions do not apply. In that case, you can find
more information from the connection management software's help or web site.
• If you have problems with connecting to the base station:
• Some computers block the Wi-Fi connection automatically if the Ethernet cable is
plugged in even though the Wi-Fi adapter is enabled. If this is the case, remove
the Ethernet cable from the PC connector if it is plugged in.
• Some computers block the Wi-Fi connection automatically if you are using a
docking station. If this is the case, remove the laptop from the docking station if a
docking station is in use.
How to synchronize transmitters with new base stations
After you have introduced secondary base stations (one or two) or replaced the main base station
to the system, you will have to synchronize the transmitters with the new base station
34

Team2 SW help
combination. The Team2 software will inform you with yellow triangles in the Transmitters tab (of
Software Preferences) and in the upper right corner of the Team2 software, if synchronization is
required. To find out the reason for the yellow triangle, take the mouse cursor on the symbol and
a message is displayed.
If you had transmitters taught to the Team2 system before the base station combination changed,
follow the steps below:
1. Connect the main base station with the PC.
2. Go to software preferences (Tools > Preferences > Transmitters tab).
3. Insert transmitters into the charger in non-secured mode. For more information, see the
Non-secured transmitter mode page.
4. Plug the power cable into the charger.
5. As soon as transmitters are synchronized with the new base station combination, the
triangles disappear from the Transmitters tab.
6. Repeat steps 3 to 5 until you have synchronized all the transmitters.
NOTE:
• Similar yellow triangles are displayed also when the transmitters are taught to the system
before the teaching is finalized. To find out the reason for the yellow triangle, take the
mouse cursor on the symbol and a tooltip message is displayed.
• If you teach the connectors to the system after you have introduced all the base stations,
synchronization is not required.
How to Use Transmitters
In order the transmitters to work properly (record and transmit heart rate data), these instructions
must be followed.
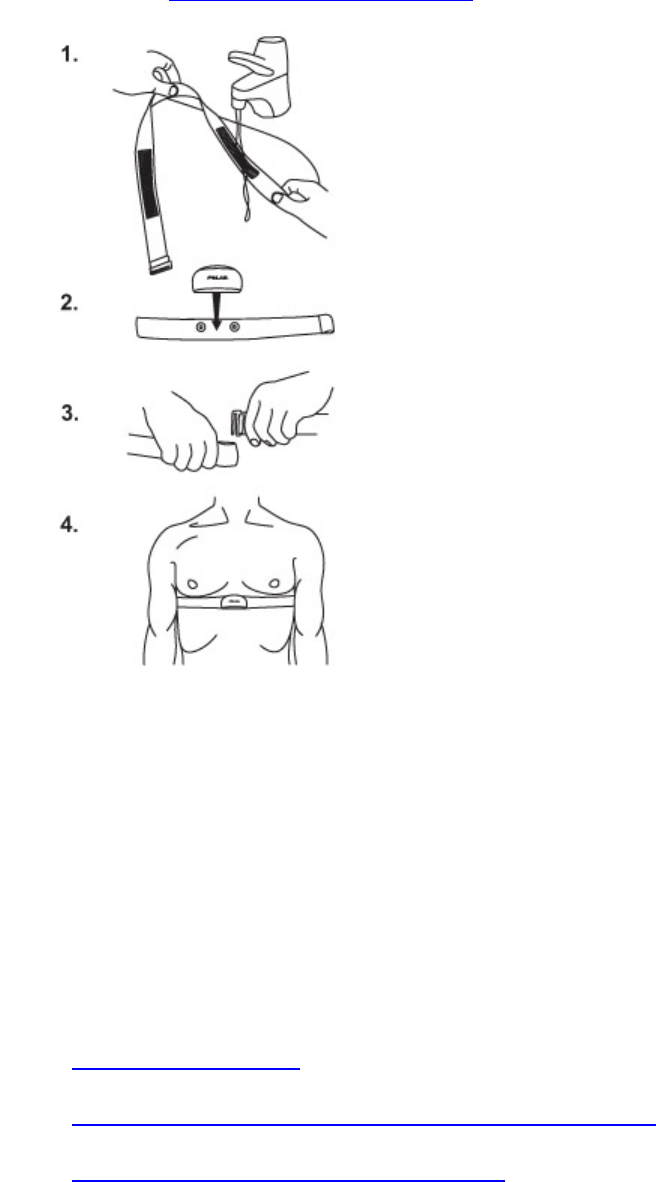
1. Wet the electrode areas of the strap well under running water.
2. Attach the connector to the strap. Adjust the strap length to fit tightly but comfortably.
3. Tie the strap around your chest, just below the chest muscles, and attach the hook to the
other end of the strap.
4. Check that the wet electrode areas are firmly against your skin and that the Polar logo of
the connector is in a central and upright position.
35
Team2 SW Help
5. After training, detach the transmitter from the strap.
6. Follow the care and maintenance instructions.
Software
Introduction to Software
Team2 software is exclusively developed for Polar Team2. The software enables you to utilize all
the features of Polar Team2.
With Team2 software you can:
• Plan your team's seasons.
• Plan your team's training, session by session and phase by phase.
• Monitor players' heart rates online during training.
36

Team2 SW help
• Collect and record heart rate data during online and after off-season training.
• Analyze the heart rate data.
• Produce training data reports.
• Manage tests.
Shortcuts
Function Shortcut Key
Main menu - File Alt + F
Main menu - Edit Alt + E
Main menu - Options Alt + O
Main menu - Tools Alt + T
Main menu - Help Alt + H
Some functions can be found in context menus that appear by right-clicking the item.
Software updates
It is recommended that you download and install software updates regularly. Internet connection
is required for updates. Select Help > Check for Updates to check for software updates.
Download and install the software updates if they are available. The PC may need to be rebooted
during the installation of the updates.
Main menu
Main Menu
The main menu of Polar Team2 software consists of five menus: File, Edit, Options, Tools and
Help. The main menu is located at the top of the software window.
37

Team2 SW Help
• File
• Edit
• Options
• Tools
• Help
The contents of the main menu vary in different situations. Some features are disabled during
certain functions. All the features are introduced in this section.
File
Send E-mail
• Send training information by E-mail either as a picture or as a data file.
• The function opens default E-mail software after selection.
Export
• Export training data into ProTrainer compatible format (hrm/pdd) or text file.
Import Training Data
• Import training data, which has been produced in Team2 or Polar ProTrainer software, to
the system. For more information, see How to import training data.
• Data must be in Polar training files format. Training files that are imported from Polar
ProTrainer can be either in zip package or in *.hrm file format.
Print
• Print the training data.
• In Training Calendar tab software asks which data is to be printed (player list or training
plan selected by date range).
• In the Training Reports tab the current view is printed.
Database Management
• Make backup files from the data or restore data from backup files.
38

Team2 SW help
• Archive database data in the system.
Last used teams (up to 5)
• Quick select another team. The 5 last used teams are listed.
Exit
• Close the software.
Edit
Copy to Clipboard
• Copy selected item(s) to the clipboard. The software asks which data is to be copied.
• In the Training Calendar tab the options are player list or training plan (selected by date
range).
• In the Training Reports tab the options are values and graph.
Add Training Session Manually
• In the training calendar, select a calendar item for a player, select Add Training Session
Manually and add a training session to a player with a training load value and sport zone
durations. For more information, see How to add training session manually.
Delete
• Delete selected item(s).
• The following items can be deleted: a player from the list in Training Calendar, a calendar
item and training period from Training Calendar and a selected player's training in
Training Session Log.
Merge Training Sessions
• Merge two or more training sessions into one in the Training Session Log tab. First select
the training sessions which have to be for the same player, and select Merge Training
Sessions. The software asks you to confirm the merge before continuing.
Move players in to a new session
39

Team2 SW Help
• Move players' training files to a new session in the Training Session Log tab. First select
the files and select Move players in to a new session. The software asks for details
(date, time of day, training activity).
Move players in to an existing session
• Move players' training files to another (existing) training session in the Training Session
Log tab. First select the files and select Move players in to an existing session. The
software asks for details (date, session).
Add Marker
• Add marker during online training or in Training Session Log tab.
Selection Details
• View the details of a chosen selection in Training Session Log tab. Requires that only
one graph is displayed. Selection Details opens a window which contain physiological
information on the selected part of the curve.
Options
Plan Season
• Plan team's seasons in Training Seasons window. The same window opens by clicking
Plan season button (smaller + button) in the Training Calendar tab.
Training Sessions
• Plan training sessions in the Training Sessions window. The same window opens by
clicking Training sessions button (larger + button) in the Training Calendar tab.
• How to plan a training session?
Edit Teams
• Create, delete, edit and import teams or change a currently-used team in Teams window.
All created teams are listed. The current team is selected by checking the box.
Team Properties
• Change the properties of currently used team in the Team Properties window.
• See also more detailed information.
40
Team2 SW help
Tools
Transfer Training Sessions
• Transfer training session data from the transmitters to the system. Transmitters must be
inserted into charger. Data can be transferred from either one or selected transmitters.
• See also How to transfer data from transmitters' memory.
Add New Transmitter
• Add a new transmitter to the system. Insert only new transmitters into charger before
performing this function.
• See also more detailed information.
Synchronize PDA
• Synchronize data from the system to a PDA device. In addition to the currently active
team, all the teams that are not protected with a password are synchronized with the
PDA.
• See also more detailed information.
Change Transmitter's User
• Change transmitter's user with this feature during online training. Opens the Change
Transmitter's User window.
Test Results
• Opens the team's test results sheet during online training if a test is selected as a training
session. The same window opens by clicking test results symbol in the online training
tab.
Preferences
• View and change Team2 preferences. For example the base station, USB dongle and
transmitter preferences can be changed. The language of the software can be changed.
• See also more detailed information.
Help
Polar Team2 Help
41

Team2 SW Help
• Find information and help on Team2 software and hardware.
Product Support
• Get product support via the Polar web site. NOTE: The PC has to be connected to the
Internet.
Polar Web Site
• Visit the Polar web site. NOTE: The PC has to be connected to the Internet.
Tutorial
• Watch Team2 tutorial.
Check for Updates
• Check if Polar has released updates for the software. Updates are installed automatically.
About
• Get information about the Team2 software.
Toolbar
Toolbar is located below the main menu. Toolbar offers information about connected transmitters
and the USB dongle. There are also few icons for common features.
• The number of connected transmitters are shown in the upper right corner of the
software window.
• Next to it, you can see if the USB dongle is connected.
• Icons for the most common features are located in the left end of the toolbar.
Icons
42
Team2 SW help
• Print
• Send by E-mail
• Add Training Session
• Add Marker
• Team Properties
• Transfer Training Files
• Synchronize PDA
Software Preferences
Polar Team2 Preferences can be found from main menu: Tools > Preferences. Preferences can
be changed without selecting a team. There are 3 tabs in Polar Team2 Preferences.
Take the settings into use by clicking Save. Close the window by selecting Close. If the changes
are not saved when Close is selected, the software asks whether the changes are saved or not.
General
Language and training session transfer settings can be found from the General tab.
• To change software's language select correct language from the drop-down list. There
are 7 options: English, German, French, Dutch, Spanish, Italian and Portuguese.
• To take automatic error correction into use check the box in front of Heart rate curve's
automatic error correction. This feature corrects the heart rate data during it's being
transferred from the transmitter's memory or from a wrist unit's memory.
• To take automatic merging of training sessions into use check the box in front of Merge
training sessions if time between training sessions is less than... Select also the
time limit (in seconds) for merging.
43

Team2 SW Help
Transmitters
Transmitter settings can be modified in the Transmitters tab. Transmitter settings can be modified
either one by one or as a group. Before modifying transmitter settings, transmitters must be
inserted into the charger and connected to the system. Connected and not connected
transmitters are listed separately on the transmitter list.
• To change transmitter settings, open the Transmitters tab, select a transmitter from the
list, select the correct radio button (Online or Off-season) and click the Transfer button.
• Selected transmitter settings can be transferred to all connected transmitters at once by
clicking the Transfer to all button.
Off-season mode has two additional settings. These settings are enabled when Off-season is
selected.
• Recording rate setting has two options, Every beat and Every 5 seconds. This setting
affects memory capacity.
• When Every beat is selected, the transmitter can record data up to 48 hours.
• When Every 5 seconds is selected, the transmitter can record data up to 360
hours.
• Second settings enables you to select which data is overwritten when the memory is full.
The options are Oldest files and Only files transferred to the PC.
• When Oldest files is selected, memory cannot ever become full, but at the same
time, data may be lost if it is not transferred to the PC.
• When Only files transferred to the PC is selected, memory can become full,
but no data is lost because only transferred data is overwritten.
See also more information on Online and off-season modes.
To clear the transmitter memory, select a transmitter from the list and click the Clear button.
The software prompts for confirmation.
After you have introduced secondary base stations (one or two) to the system, you will have to
synchronize the transmitters with the new base station combination. See instructions in How to
synchronize transmitters with new base stations. There are yellow triangles in the Transmitters
tab if synchronization is required. To find out the reason for the yellow triangle, take the mouse
cursor on the symbol and a tooltip message is displayed.
Base Station / USB Dongle
44

Team2 SW help
Before base station or USB dongle settings can be changed, the device must be connected to the
computer. The base station is connected to the system when lights 1 and 2 are lit and Team2 PC
software is running. Only main base station settings can be changed and it must be done before
the secondary base stations are introduced to the system.
When the main base station is connected to the PC either with a Ethernet cable or wireless
connection, the wireless network key can be changed. Follow the instructions in the How to
setup wireless connection topic. Wired Ethernet connection is recommended when changing the
base station settings.
The base stations that are introduced to the Team2 system are listed in the Base Station / USB
Dongle tab. The type (main / secondary) is also displayed. If there are secondary base stations in
the system, the main base station settings (name and wireless network key) are disabled and
cannot be changed. The Remove button below the base station list clears the whole base station
list! The Add button below the base station list is used when secondary base stations are
introduced to the system.
USB dongle has to be introduced to the system during Wizard, or otherwise it will not work
properly. If you have not introduced the USB dongle during Wizard, see the instructions in the
hardware chapter. USB dongles that are in the system are listed in the USB Dongles list along
with status information. The status is either connected or disconnected.
• To change name of the USB dongle select the USB dongle from the list and type the new
name into the Name input field.
• To remove a USB dongle from the system select the USB dongle from the list and click
the Remove button.
Team Properties
To change Team Properties, a team must be selected. Team properties can be found from main
menu: Options > Team Properties. There are 5 tabs in Team Properties, Team, Sport Zones,
Training Activities, Tests and Players.
• Team
• Sport Zones
• Training Activities
• Tests
• Players
45
Team2 SW Help
Take the settings into use by clicking Save. Close the window by selecting Close. If the changes
are not saved when Close is selected, the software asks whether the changes are saved or not.
Team
The first tab is for Team details. The team's name, logo, detailed information and password can
be changed. Team's name and details are typed into the text fields.
• To add a logo, click the logo box (Click here to add a logo) and browse the team's logo
from computer directories. The logo must be in *.jpg format.
• To remove the logo, click the Remove button.
• To enable Password protection, check the Enabled box and type in the password. NOTE:
Password is not the same as the wireless network key.
Sport Zones
The second tab is for Sport Zones. Calculation method, which the sport zones are based on, can
be changed by clicking the selected radio button. The options are Player's maximum heart rate,
Player's heart rate reserve and Player's threshold values. Sport zone details (name, values) can
be also change after the selection of calculation method.
• To add sport zone click Add sport zone button and type in the name and select values.
NOTE that when player's threshold values is selected, you cannot add more sport zones.
Player's maximum heart rate (% of HRmax)
When the player's maximum heart rate is selected as the sport zone calculation method, sport
zones which the user can determine are specified as a percentage of a player's maximum heart
rate. As the zones are based on percentages of a player's own maximum heart rate, they are
individual for each player. The same percentages are, however, used for the whole team.
Player's heart rate reserve (% of HRR)
When a player's heart rate reserve is selected as the sport zone calculation method, the sport
zones, which can be determined by the user, are specified as a percentage of a player's heart
rate reserve. The heart rate reserve is the difference between a player's resting and maximum
heart rate. When the player's heart rate is his/her resting heart rate, the heart rate reserve is 0 %,
because the player is not "using" his/her heart rate reserve.
Player's threshold values
When the player's threshold values are selected as the sport zone calculation method, the sport
zones are based on the players' threshold values which are determined in the player settings.
Each player has an upper threshold (anaerobic) and a lower threshold (aerobic) value. The
46
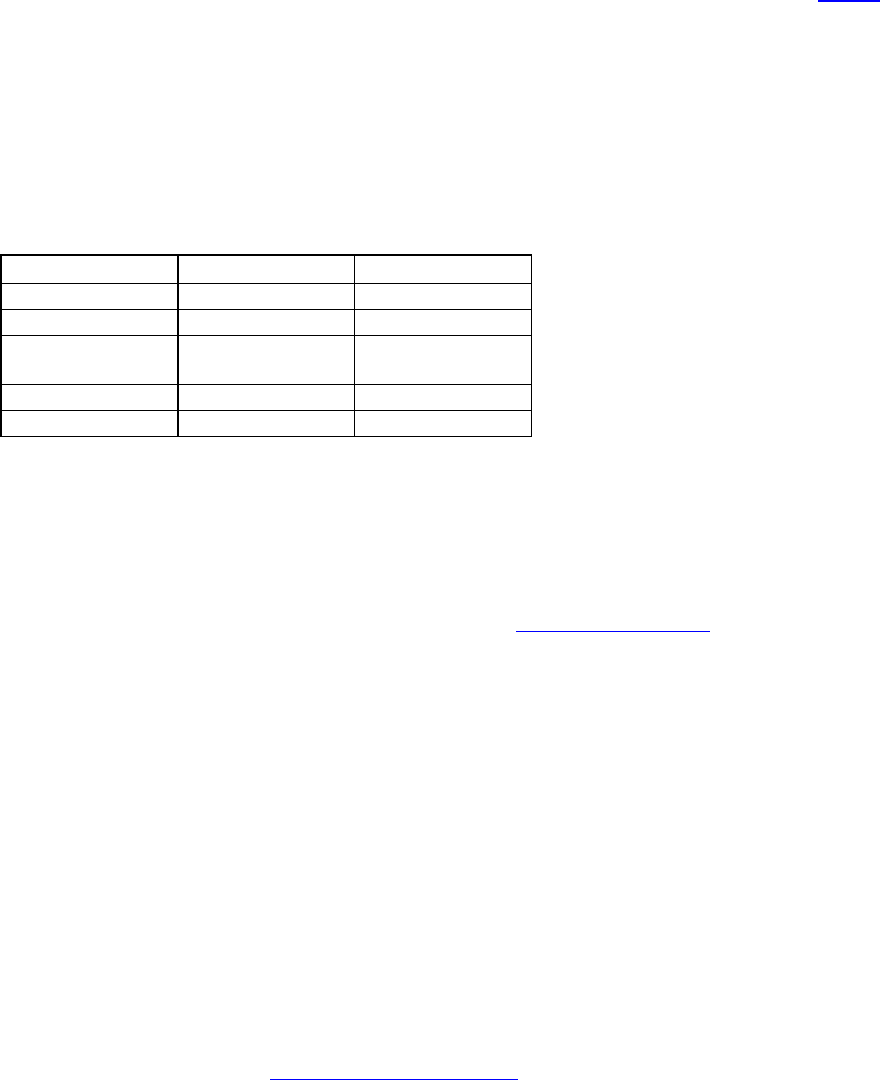
Team2 SW help
coach/trainer can determine how many heart beats the upper threshold zone and the lower
threshold zone differ from the players' upper and lower threshold values. The variances are the
same for the whole team. The threshold values enable the most individual training analysis.
Training Activities
The third tab is for Training Activities. Training activities are usually set beforehand during Wizard,
but more training activities can be added at any time. The number of training activities is not
limited per team. For example, training activities can be Running, Football and Gym.
Each training activity has a type (either continuous, intermittent or strength). The type indicates
how exhausting the training activity is. The type of training activity affects the training load and
recovery time calculations.
Training activity examples:
Continuous Intermittent Strength
Swimming Football Gym
Walking Ice hockey BodyPump
Skiing Up/Downhill
running
Roller-skating Rugby
Running Alpine skiing
Each training activity can have an individual color. If each training activity or test has its own
individual color, it is easier for you to visualize your team's training calendar. Activities are shown
in the calendar as color boxes.
Training activities have sub-activities, sessions. For example, a gym could have 60 min workout
and 45 min workout sessions. Sessions are managed in Session management.
Training activities and phases can be removed, added and modified.
• To modify training activity, select the activity from the list on the left and change its name,
color or type.
• To add new training activity, click Add button (below the list on left), type in the name for
the training activity, select the type from drop-down list and select a color by clicking the
color box next to name input field.
• To remove training activity, select the activity from the list on the left and click the Delete
button. Activity is removed without confirmation!
• To add a phase for a training activity, select the training activity from the list on the left
and click the Add button below the Training activity phases list. Type in the name for
the phase. See also more information on phases.
47
Team2 SW Help
• To change the name for a phase, select the phase from the phase list and change the
name in an input field on the right.
• To remove a phase, select the phase from the list on the right and click the Delete button.
Phase is removed without confirmation!
• To change the color for a training activity, select the activity from the list on the left. Click
on the color box on the right, next to training activity input field. Select a color. Colors
help the trainer to visualize a training calendar if each training activity or test has its own
individual color.
• To select a type for a training activity, select the activity from the list on the left. Select a
type from drop-down list on the right, below training activity input field.
Tests
The fourth tab is for Tests. Tests are like training activities. Tests are used the same way as
training activities. The difference is that if a test is selected as a training session subject, the Test
Results window can be opened from the main menu during online training. Tests can be added,
removed and modified.
• To add new test click Add button, type in name for the test and select a color.
• To remove test select the test from the list and click Delete button. Test is removed
without confirmation!
• To modify a test select the test from the list and change the name or the color.
Players
The fifth tab is for Players. All the team's players are listed in this tab. Player tab has 5 sub-tabs,
General, Values, Transmitter, Polar Training Computer and Notes. Use the horizontal arrows
to scroll the tabs. When information in any tab is to be changed, the player must be
selected from the list. NOTE: Changes affect only the selected player.
• General tab is for general player information, such as name, picture (in *.jpg format),
player number, date of birth and E-mail address.
• Values tab is for heart rate values.
• Transmitter tab is for changing the player's transmitter mode from Online to Off-season
and back. To change transmitter settings, the player has to have a transmitter assigned.
See more information here.
48

Team2 SW help
• Polar Training Computer tab is for transferring data from another Polar product, for
example, a training computer or cycling computer. You can also transfer information from
the PC to the Polar training computer. For example, the following Polar training
computers are compatible: CS400, RS400, AXN500, AXN700, S810i, S725X / S625X,
S725, S720i / S710i and S610i. See more information here.
• Note tab is for notes and comments. NOTE: Notes cannot be removed.
Players can be added and removed and player information can be modified.
• To add new player, click the Add button and fill in player information in the General and
Values tabs. Assign a free transmitter for the player in the General tab.
• To group players by player position, select a player, and select a player position for the
player from the drop-down list next to the Player Position symbol in the General tab.
For more information, see How to group players.
• To remove player, select the player from the list and click the Remove button. Removed
players can be retrieved by using the import player data function. For more information,
see How to import player data.
• To import player information, click the Import button. Import/Move players window
appears. For more information, see How to import player data.
• To change player information, select the player from the list and make the necessary
changes.
• To add player's picture, select the player from the list, open the General tab, click picture
box (Click here to add a picture) and browse a picture from the computer directories.
• To remove player's picture, select the player from the list, open the General tab and click
the Remove picture button. The picture is removed without confirmation!
• To add note, select the player from the list, open the Notes tab, type in the note and,
optionally, the author and then click the Add button. The note appears on the top of note
list. NOTE: Notes cannot be removed.
Transmitter
The Transmitter tab is for changing the transmitter mode from Online to Off-season and back.
Transmitter settings can also be modified in software preferences: Tools > Preferences >
Transmitters tab. Before modifying transmitter settings, transmitters must be inserted into the
charger and connected to the system.
49

Team2 SW Help
• To change transmitter's mode select the player from the list, open Transmitter tab, select
correct radio button (Online or Off-season) and click the Transfer button. Selected
transmitter settings can be transferred to all transmitters at once by clicking the Transfer
to all button.
• Off-season mode has two additional settings. These settings are enabled when Off-
season is selected.
• The Recording rate setting has two options, Every beat and Every 5 seconds.
This setting affects memory capacity.
• When Every beat is selected, the transmitter can record data up to 48
hours.
• When Every 5 seconds is selected, the transmitter can record data up
to 360 hours.
• Second setting enables you to select which data is overwritten when the memory
is full. The options are Oldest files and Only files transferred to the PC.
• When Oldest files is selected, the memory cannot ever become full, but
at the same time data may be lost if it's not transferred to PC.
• When Only files transferred to the PC is selected, the memory can
become full, but no data is lost because only transferred data is
overwritten.
• NOTE: In order to change transmitter settings, transmitters must be inserted into the
charger and connected to the system. When player is selected from the list, the software
indicates in the Transmitter tab whether or not the transmitter is connected to the system.
See also more information on Online and off-season modes.
NOTE: After you have introduced secondary base stations (one or two) to the system, you will
have to synchronize the transmitters with the new base station combination. See instructions in
How to synchronize transmitters with new base stations. There are yellow triangles in the
Transmitters tab if synchronization is required. To find out the reason for the yellow triangle, take
the mouse cursor on the symbol and a tooltip message is displayed.
Polar Training Computer
In the Polar Training Computer tab you can transfer data from the Polar training computer to the
PC and vice versa. The data transfer between the PC and the Polar training computer is done by
using infrared connection. You need either a built-in infrared port or Polar IrDA USB adapter on
your PC to transfer data. For example, the following Polar training computers are compatible with
50
Team2 SW help
infrared communication and Team2 transmitters: CS400, RS400, AXN500, AXN700, S810i,
S725X / S625X, S725, S720i / S710i and S610i.
When transferring data between the PC and the Polar training computer, set your Polar training
computer into connect mode, place it in front of the infrared port and select Transfer button from
the Team2 software. See the user manual of your Polar product to get support in setting the
training computer into transfer mode.
There are two sections in the tab: Transfer to the PC and Transfer to the Polar Training
Computer.
NOTE: Data cannot be transferred if there are unsaved changes in Team Properties. Click Save
before transferring data between the PC and the training computer.
When transferring data to the PC, set your Polar training computer into connect mode, place it in
front of the infrared port and select Transfer button from the Team2 software. If you were
transferring training files, the software displays a window where you can select which training
sessions you want to save to the system, to which player the training sessions are set and which
are the training activities after the transfer is done.
Transfer to the PC
Transfer to the PC has two settings that can be set on or off before transferring data.
• When Training sessions (Files) is checked, training files are transferred from the
training computer to the PC.
• When Person information (User settings) is checked, user information is transferred
from the training computer to the PC.
Transfer to the Polar Training Computer
Transfer to the training computer has five settings that can be set on or off before transferring
data.
• When Date and time is checked, the date and time is transferred to the training
computer.
• When Person information is checked, the selected player's information is transferred to
the training computer.
• When Personal values is checked, the selected player's heart rate (and other) values
are transferred to the training computer.
51
Team2 SW Help
• When Sport zones is checked, the sport zone settings are transferred to the training
computer.
• When Polar Team2 transmitter number (Time view) is checked, the selected player's
transmitter number is transferred to the training computer. The transmitter number can be
set to be displayed on the screen of the training computer in Time view by long-pressing
the upper right button.
Training calendar
Training Calendar
Training calendar is the first page that is displayed after opening Team2 software and completing
Wizard. Training calendar is a planning and follow-up tool for a trainer. Team's players, past and
future training sessions and training periods are shown on the same page. All these can also be
modified easily.
All the planning (seasons, training periods and training sessions) is done on the Training
Calendar page. Season consists of training periods, training periods consists of training sessions,
training sessions consists of phases.
Elements
The team's name and team's logo are displayed in the upper left corner of the page. Next to the
logo, there are buttons for season planning and training session planning.
The calendar in the upper part of the page is for planning seasons, training periods and training
sessions. The calendar has four sections:
• Date navigator enables you to browse the calendar back and forth. and shift the
calendar day by day. and shift the calendar by 4 weeks. The current date is
marked with black borders.
• Date row displays dates of minimum of 4 full weeks.
• Training period row displays periods that have been set. If no periods have been set,
there is a text Double-click to add training period.
• The training sessions area displays training sessions and tests that have been planned
and set. Training sessions and tests are marked with color boxes according to the
training activity colors. Colors help the trainer to visualize a training calendar if each
training activity or test has its own individual color.
52
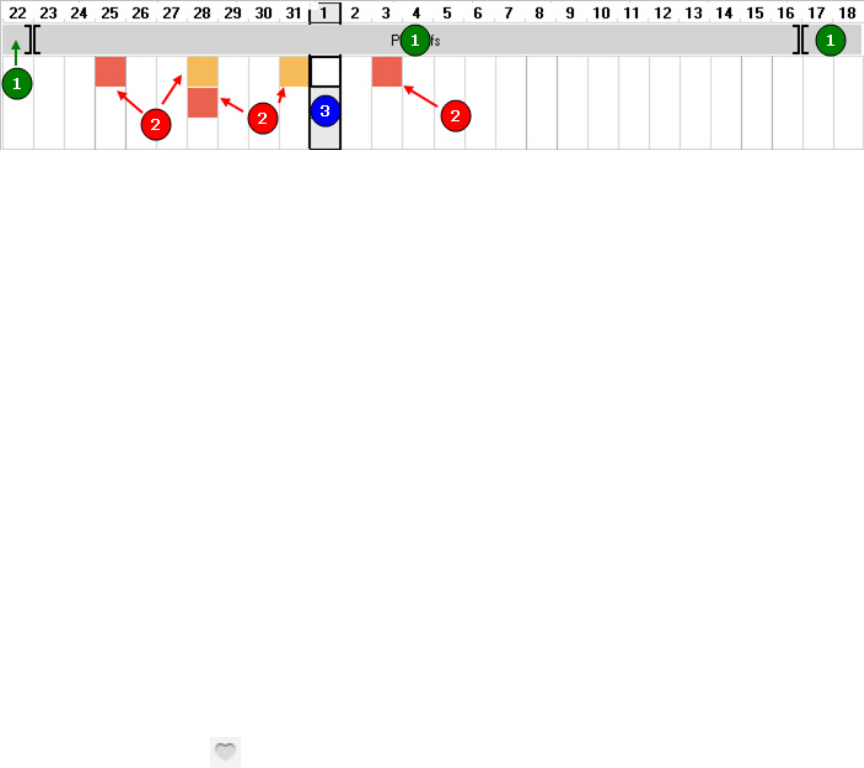
Team2 SW help
Image: (1) Training periods and (2) training sessions. The current date is marked with black
borders (3).
Player list and player training grid are in the lower part of the page. Player list displays all the
team's players that are in the system. The list has following features:
• Players are listed by player groups or, if there are no groups, by player number.
• In addition to players' names, player numbers and transmitter numbers are also
displayed.
• By double-clicking player's name, player information can be modified in the Team
Properties window.
Player training grid contains training information and it has following features:
• Each player has a row that displays player's training information.
• Columns of the grid are days as in the upper calendar.
• A heart symbol in the grid indicates that there is training data for the player on that
certain day.
• By moving the mouse cursor over the heart symbol, the training duration and training
session are shown.
• When a calendar item is selected by clicking from the player training grid, the selected
item is marked with thin black border to indicate the selection.
• Vertical lines between cells indicate a player's cumulative training load. The training load
is shown only until the current day. The options are green, yellow and red. A green line
indicates that player can train and is recovered from the previous training sessions. A red
line indicates that training is not recommended. A yellow line is in the between of the
green and the red; the player is not totally recovered from the previous training sessions
but the training is not forbidden either.
Settings
53

Team2 SW Help
Polar Team2 software's main settings can be found from the main menu. Most of the settings
should be adjusted into place before beginning to work with the software.
See also Team properties and Software preferences.
Right-Click Menus
Many features and functions can be accessed quickly by right-clicking an element or an item.
Below are the contents of right-click menus on the Training Calendar page.
Training Session Calendar
Right-clicking the upper calendar opens a menu. The menu, when right-clicked on an empty cell,
consists of the following:
• Add Training Session which opens Training Sessions window. This is the same function
as clicking the Training Sessions button, double-clicking a cell and Options > Training
Sessions.
When right-clicked a cell in the upper calendar and the cell has a training session, the menu
consists of the following enabled features:
• Add Training Session which opens the Training Sessions window. This is the same
function as clicking the Training Sessions button, double-clicking a cell and Options >
Training Sessions.
• Send Files by E-mail which opens your default E-mail software. The Polar Training File
(*.ptf) is an attachment.
• Delete Training Session, which removes the training session.
When right-clicking a cell in upper calendar and the cell has a training session which has training
data, the following features are also enabled:
• Copy Files to Clipboard, which copies selected training sessions training files to
clipboard.
• Delete Training Files, which deletes training files without confirmation.
Player List
Right-clicking the player list opens a menu. The menu consists of the following features:
• Add Player which opens Team Properties window. This is the same function as
Options > Team Properties > the Players tab.
54

Team2 SW help
• Copy Player List to Clipboard, which copies the player list, team's name, player
number, transmitter number and player groups to the clipboard. This is the same function
as Edit > Copy to Clipboard > Player list.
• Copy Player Details to Clipboard, which copies the selected player's details to the
clipboard.
• Team Properties, which opens Team Properties window. This is the same function as
Options > Team Properties.
Player Training Grid
Right-clicking the player training grid opens a menu. The menus has two possible contents. The
menu, when right-clicked on an empty cell, consists of the following:
• Add Training Session Manually, which opens the Add Training Session window where
it is possible to add manually a training session for selected player.
When right-clicking a cell in player training grid and the cell has heart symbol, the menu consists
of the following enabled features:
• Add Training Session Manually, which opens the Add Training Session window where
it is possible to add manually a training session for selected player.
• Copy to Clipboard, which copies the training file to the clipboard.
• Send Files by E-mail, which opens your default E-mail software. The Polar Training File
(*.ptf) is an attachment.
• Training Session Log, which opens the Training Session Log page and selected
training data is shown. This is the same function as double-clicking the heart symbol.
• Delete, which removes the training data.
Season Planning
Planning
Team2 offers you, as a trainer, the tools and possibility to plan your team's training. Although
Team2 can be used without using the planning tools, the planning enables you to follow-up and
report more efficiently training activity by training activity and even phase by phase!
All the planning (seasons, training periods and training sessions) is done on the Training
Calendar page. Below you can see a chart of how seasons are formed in Team2. Season consists
55
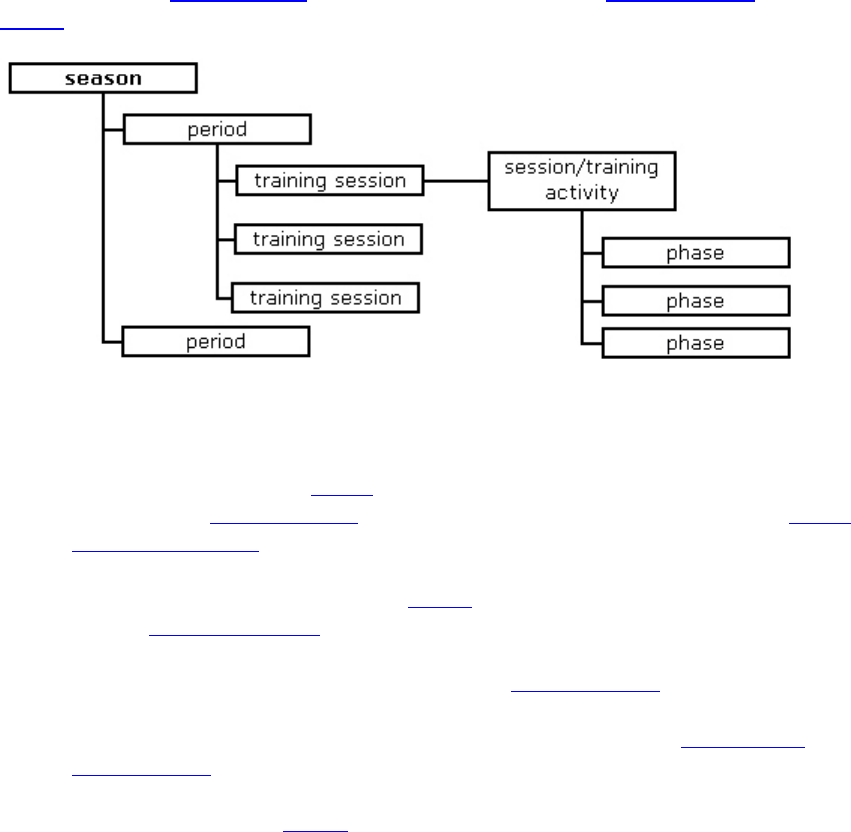
Team2 SW Help
of training periods, training periods consists of training sessions and training sessions consists of
phases.
First Steps
1. The first thing you have to do is to add all the team's training activities into the system.
Usually this is done during Wizard, but in case you have to add, modify or delete training
activities, open Team Properties from the main menu. More help can be found in How to
add training activities.
2. If you want to get most of Team2, add phases to the training activities. More help can be
found in How to add phases.
3. Open Session Management and create prepared training sessions so that the actual
planning process eases and speeds up. Prepared training sessions are "blocks", which
can be used to fill your training calendar. See detailed instructions in How to create
training session.
4. Start planning your first season.
Seasons
Characteristics of Season
• A season is a frame for training periods.
• The season itself does not have many settings, only the name can be changed.
• All the other changes (duration, starting and ending dates) are made by creating and
modifying training periods.
• The length of a season is not limited.
• Seasons are planned to a specific team.
56

Team2 SW help
• The number of seasons is not limited per team.
Planning
Seasons are planned with the Training seasons feature. To open Training seasons window, click
the Plan season button on the Training Calendar page or select Options > Plan season.
To start planning of new season, click the New button. The default name of the first season is
Season1. By clicking the name of the season, Season name text field below Seasons list is
enabled.
There are shown the following information in the Seasons list:
• Season (name)
• Start (start date)
• Duration (duration of season is calculated automatically and is determined by the
training periods)
• End (end date)
• Number of periods (number of planned training periods)
By default duration of a season is 1 day and the start date is the creation day (today). The end
date is set automatically according to the duration of the season. Start and end dates and the
duration of season are changed by planning and modifying training periods.
The second season is created again by clicking the New button. By default the next season
begins on the very next day the previous season has ended. This can be changed.
Season can be deleted by clicking the name of the season and clicking the Delete button. NOTE:
A season is deleted without confirmation!
Training seasons changes are taken into use by clicking OK and declined by clicking Cancel.
More information can be found on the Training periods page.
Training Periods
57

Team2 SW Help
Image: Season consists of training periods (1), training periods consists of training sessions (2),
training sessions consists of phases.
Characteristics of Training Period
• Before training periods can be added, a season must be created.
• The number of training periods is not limited per season.
• Periods determine the duration and schedule of the season. By changing the durations,
dates and number of training periods, season's details change.
• There cannot be empty slot between two training periods within one season. Therefore
the next training period begins automatically on the day after the previous one has ended.
• Training periods cannot overlap.
Planning
Training periods are added, deleted and modified in the Training seasons window, which opens
by clicking the Plan season button on the Training calendar page. By clicking name of a season,
the Training periods list is enabled. By default there is one training period that is named Period1.
Settings of training period can be changed by clicking the name of the period. The period name
text field, the Description text area and the Start date and End date menus are enabled.
If one training period is not enough, more can be added by clicking the Add button. Training
periods can be deleted by selecting the period from the list and clicking the Delete button. The
order of the training periods can be changed by selecting a training period from the list and
moving it up or down with arrow buttons .
By default the duration of training period is 1 day which is the minimum duration. The duration of
period is shown below the Start date and End date menus and in the Training periods list.
Training seasons changes are taken into use by clicking OK and declined by clicking Cancel.
Start and End Date Logic
Only the start date of the first period can be changed. Start dates of other training periods are
determined by the end date of previous period.
The end date of each training period can be changed. When end date of a period is changed, the
start and end dates of latter periods are changed automatically.
58
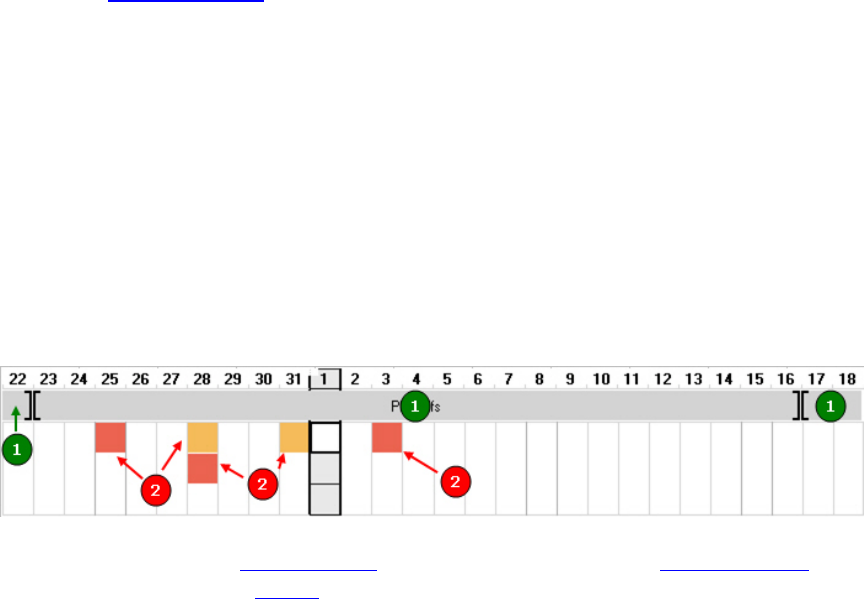
Team2 SW help
When the end date of period is changed, only the duration of that specific training period is
changed (made longer or shorter). Durations of other (latter) training periods are kept the same
as before, but only the start and end dates are changed.
When the order of training periods is changed, the durations of training periods are kept as
before, but the start and end dates are adjusted.
When a period is deleted, the start and end dates of other periods are changed but the durations
are kept as before. When the last training period is deleted, it has no effect on other periods.
Continue to Training sessions.
Training Sessions
Training session can be understood in two ways. A training session can be:
• the actual set training session that is planned and carried out and is shown in the training
calendar, or
• prepared exercise "block" that has a training activity and a name and can consist of
phases
In fact, the latter ones are set to be the contents of the former ones.
Image: Season consists of training periods (1), training periods consists of training sessions (3),
training sessions consists of phases.
Note: The season and training session tools that Team2 software offers are for easing the season
and training planning. It is up to you as a trainer whether or not you follow your plans.
Characteristics of Sessions
• Training sessions also can be added to a training calendar if there is no season or
training period(s).
• Training sessions can overlap.
• Sessions are fixed (specified by user) "blocks" that can be used unlimitedly.
59

Team2 SW Help
• Sessions are determined in Session Management window that can be accessed from
Training Sessions window.
• Session can consist of phases, which is an optional feature.
• Each team has its own sessions.
• Sessions are shown in the calendar as color boxes. Color of the box indicates the training
activity in question.
Planning
Training sessions can be added to a calendar by clicking the Training sessions button on the
Training Calendar page. By default, a training session is created for the creation day (current day).
The date can be changed but it has to be done before adding the training session. The date can
be selected from Training session for drop-down menu.
After the date is selected, training session can be added by clicking Add button. This is not
enough but you have to set Session properties below the Training session list.
A training session can be removed by selecting a session from the list and clicking the Remove
button. The training session is removed without confirmation!
There are shown the following information in the Training session list:
• Session (name of session)
• Activity (name of training activity)
• Start (starting time)
• End (ending time, which is calculated automatically according to the starting time and
duration)
• Duration (duration of training session)
NOTE: Training session is not saved to the system until the following properties are set!
Session Properties
By default the session name is New training session. To enable the Start time and Duration
settings, session has to be selected. If Start time and Duration are not set, the training session
is not complete and is not saved into the system.
60

Team2 SW help
All created training sessions are stored in the system and can be used again later. Created
training sessions are listed as a drop-down list in Session properties. More sessions can be
created at any time.
After you have created your main training sessions, the planning process eases and speeds up
because there are prepared "blocks" that can be used to fill the training calendar.
When you have created at least one training session, you can select it from the drop-down list
next to the new session icon .
After the session is selected the Start time and Duration settings are enabled. Set the starting
time and duration.
By default the Start time is the creation time. Start time can be changed.
By default the duration of the session is 30 minutes. Duration can be adjusted by clicking the up
and down arrows.
End time is calculated automatically according to the duration and start time of the training
session.
If the training session you are planning is atypical or new to the players, you can check the
Atypical/new training session. The checked box has an effect on the training load and recovery
calculations.
Training Sessions changes are taken into use by clicking OK and declined by clicking Cancel.
Created training sessions appear in the calendar. The color of the box indicates which training
activity is in question.
To create a session in Session Management:
1. Click on the new session icon or select New from the drop-down menu next to the
icon. Session Management window opens. Created sessions are sorted by the training
activity on the left. NOTE: Session can be modified by clicking the name and making the
changes. Session can be removed by clicking the name and clicking the Remove button.
2. Click the Add button below the session list.
3. Type a name for the session into the Name input field on the right.
4. Select a training activity for the session from the Training activity drop-down list below
the Name input field.
5. Repeat steps 2 to 4 if necessary.
61

Team2 SW Help
6. Close Session Management by clicking OK.
To make more specific plans, continue to the phases.
Phases
Season consists of training periods, training periods consists of training sessions, training
sessions consists of phases.
Characteristics of Phases
• Phases cannot be added if there is no training session.
• Phases is an optional feature but allows several extra features, for example:
• Allows you to create training reports based on phases.
• Allows you to search and compare phases in the training session log.
• Allows you to set the pace for training session.
• A phase is an individual section of training session, for example, certain exercise that
repeats in the team's training.
• Phases can be used only with the training activity for which they are specified. For
example, football can have 3 vs. 3 and warm up phases.
• The number of phases is not limited per training activity.
• Phases must be created beforehand in Team Properties (Options > Team Properties).
• Session and phases form a fixed "block" which has to be used as it is. When a session
that has phases is selected, phases must be used. In that case the duration of phases
determine the duration of that specific session. Although session with phases is fixed, the
duration of phases can be changed training session by training session.
• The same phase can be part of several sessions. For example, 3 vs. 3 can be a part of
60 min Football session and 45 min Football session.
• Sessions are fixed to specified sessions in Session Management.
Creating a Phase
1. Open Team Properties (Options > Team Properties).
2. Open the Training Activities tab.
62
Team2 SW help
3. Select a training activity from the list on the left.
4. Click the Add button below the Training activity phases list.
5. Type in name for the phase.
6. Repeat steps 3 to 5 if necessary.
7. Click Save to save the changes. Close the window by selecting Close.
Using of Phases
Before phases can be taken into use, training session must be created by clicking Add in the
Training Sessions window.
Phases are taken into use in Session Management, which can be accessed by clicking the
icon in the Training Sessions window. The training session from the Training sessions list must
be selected by clicking it before the icon is enabled.
After the session with phases is created (in the following two ways), the session is selected
normally from the drop-down list next to the new session icon in Training Sessions window.
Phases to previously created session:
1. Open Session Management.
2. Select the session from the list on the left by clicking on it.
3. Check the Training with phases box.
4. Click the Add button in the Phases section.
5. Select a phase from the drop-down list. NOTE: Phases are created beforehand in Team
Properties.
6. Repeat steps 4 and 5 to add more phases to the session.
7. Close the window by clicking OK. Cancel by clicking Cancel.
Phases to new session:
1. Open Session Management.
2. Click the Add button below the session list.
63
Team2 SW Help
3. Type in the session name and select a training activity from the Training activity drop-
down list.
4. Check the Training with phases box.
5. Click the Add button in the Phases section.
6. Select a phase from the drop-down list. NOTE: Phases are created beforehand in Team
Properties.
7. Repeat steps 5 and 6 to add more phases to the session.
8. Repeat steps 2 to 7 to add more session with phases.
9. Close the window by clicking OK. Cancel by clicking Cancel.
Session With Phases Compared to Session Without Phases:
• Start time is adjusted in the same way in both cases.
• In case of session with phases, the Duration setting is different from the case of a
session without phases.
• The duration of session with phases is set by changing the durations of the phases on
the right.
• Duration is calculated automatically according to the durations of the phases.
• End time is calculated automatically according to the duration and start time.
Online training
Online Training
Online Training opens by clicking the second page tab. Online training is tool for online
monitoring of players' heart rates. Heart rates can be viewed in a list, in a grid or as curves. Either
all or selected players' heart rates can be monitored at the same time. Heart rate, sport zone and
training load can be monitored simultaneously.
Elements
In the upper left corner it is shown if the base station is connected to the PC. Connection time is
also shown.
64
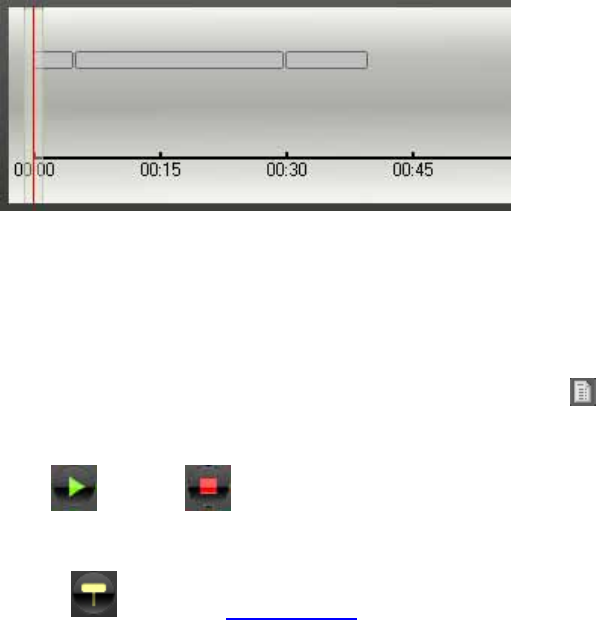
Team2 SW help
Connect/Disconnect button connects and disconnects the connection between the system and
base station during online training. After clicking Connect, the heart rates of players who wear a
transmitter begin to display on the screen. Clicking Disconnect ends online monitoring. During
online training, Disconnect is disabled if Start has been clicked but Stop hasn't. To enable the
Disconnect button, click Stop.
Online info (below) displays information on the current training session. In the online info box,
planned training phases, taken markers, time line, cursor and the name of current phase are
shown (Now: phase).
Above online info there is a session drop-down list where the current day's planned training
sessions, team's training activities to be used with unplanned training sessions, and the team's
tests are listed. If there are no planned training sessions for the current day, the alphabetically
first team's training activity is selected as a default.
Next to the session drop-down list, there is a test results symbol which opens the team's test
results sheet during online training if a test is selected as a training session.
Start and Stop buttons start and stop training. Cumulative Training Load is not shown
until the Start button is pushed.
Marker button is for taking markers during training. Marker can have notes that are typed in
after clicking the Marker button. Markers can be taken to one player, selected players or all
players. Into the marker files are saved the point of time when the marker was taken, the players,
the notes and the heart rate at the time the marker was taken.
Training duration shows the duration of current training since the moment Start was clicked.
Marker time shows the duration of training since the moment when the last marker was taken.
Training session progress is a list of events during current training. The first marking is Training
session started and the last marking is Training session stopped. All taken markers are logged
into the list with notes.
On the lower part of the screen on the left there is a player list which shows the team's players.
All the players that are, or have been, connected to the system during the current online training
65
Team2 SW Help
session are displayed in black. All the players that have not been connected to the system during
the current online training session are displayed in grey. The players whose heart rates you want
to be displayed on the screen can be selected by checking the box.
View content is the largest area on the screen. Heart rates, sport zones and training loads are
displayed in the area. Training data can be viewed in three different modes. Preferred mode can
be selected by clicking the tabs above the area. The options are List, Curve and Grid. Mode can
be changed during online training.
During the online training, Sport Zone Details window is opened by clicking a player's sport zone
column in List view. The durations of each sport zone are shown during the training session. The
duration of the training session, maximum heart rate and average heart rate are also shown.
The Settings button opens the Online Training Settings window. Online training settings can
be changed in this window. There are three tabs, one for each viewing mode (List, Curve and
Grid). The settings window is closed by clicking OK or Cancel. For more information on the
settings, see the Settings chapter.
Settings
Online training settings are accessed by clicking the Settings button on the Online Training
page. In Online Training Settings window are three tabs, one for each viewing mode (List, Curve
and Grid). Settings affect only the viewing mode in question.
Changed settings are taken into use by clicking OK.
List view settings
The values that are displayed in List view can be selected in settings. Each value is a column in
List view. By default Sport zone, Heart rate, Training load and Notes are selected. Other
options are Training load marker, Above threshold, Recovery HR and Average HR marker.
Columns are selected and deselected by checking the box.
The order of values can be changed by clicking the arrow buttons and . Selected value
can be moved up or down by clicking arrow buttons. Values are displayed on the Online Training
page in the same order as they are displayed in settings.
Curve view settings
HR curve
First set of settings is for HR curve. HR curve can be presented as traditional One second
intervals or as Beat-to-beat intervals.
66
Team2 SW help
Software can perform Automatic error correction during online training. The feature is turned
on and off by checking the box. This feature detects incorrect HR data and corrects it.
When Show team's average HR online is selected, the software displays the team's average
heart rate (grey graph) in the background of curve view. The average heart rate curve is
calculated online during training.
Time and HR axis
Second set of settings is for Time and HR axis. Time axis scale defines the time axis (horizontal)
scale of curve view. The shortest possible scale is 5 minutes, the longest 120 minutes. HR axis
maximum defines the HR axis (vertical) scale of curve view. The lowest possible HR maximum is
160 bpm, the highest 250 bpm.
There are three options how HR (axis) is presented. The options are bpm, % of HRmax and % of
HRR.
To show grid in the background of the curve view, Show grid must be checked. To show sport
zones in the background of the curve view, Show sport zones must be checked. Sport zones is
disabled if HR is presented as bpm.
Comparison curve
Third set of settings is for Comparison curve. A comparison curve is a curve that is drawn
according to the selected previous training session.
To enable the comparison curve Show comparison curve must be checked. The comparison
curve can be either Team's average curve or Player's curve.
After checking the box, the search selections below are enabled. To search for previous training
session data, which is used as comparison curve, select Training activity and date range
(Activities since) and click the Search button. Search results are listed in the Search results
box on the right. Select the training session that is used as a comparison.
Grid view settings
The order of three values (Sport zone, Heart rate or Training load) can be selected. Highlighted
information is the main information and is displayed in the center of the information box.
Information on left is displayed in the lower left corner of the box. Information on right is
displayed in the lower right corner of the box. When one is selected, the others change
automatically.
In grid view settings the Grid size can also be selected. The selected format defines how many
players' values are shown at once. When Fit to screen option is selected, software automatically
adjusts the grid to fit to screen. 4x4 is selected by default, which mean that up to 16 players'
values can be shown at the same time.
67

Team2 SW Help
Right-Click Menu
Many features and functions can be accessed quickly by right-clicking an element or an item.
Below are the contents of the right-click menu on the Online Training page.
Right-clicking the view content opens a menu that is enabled only when Connect is clicked. In
the Online Training page the menu consists of the following:
• Settings, which opens the Online Training settings window. This is the same function as
clicking the Settings button.
Start Online Training
See How to Start Online Training.
Stop Online Training
See How to Stop Online Training.
Training session log
Training Session Log
Training session log opens by clicking the third page tab. Training session log is a tool for
analyzing training data. Data can be searched by team, player, training activity, date or period.
In order to use Training session log, a team has to be selected.
Elements
Search Area
The upper part of the page is search area. Training sessions can be searched by team or by
player. When by player is selected, a drop-down list of players below is enabled.
Search results are limited by date range. Date range is selected by choosing either Search by
date, Search by period or Quick search. Each option enables an additional menu.
• Search by date enables the Start date and End Date menus which enable to select the
starting and ending dates. By default, the start date and end date are the current day's
date.
• Search by period enables a drop-down menu that lists all the team's training periods in
the system.
68
Team2 SW help
• Quick search enables a drop-down list that includes typical date ranges from Yesterday
to 12 months ago.
Listed in Training activity drop-down menu are team's training activities that are added in Team
Properties (Options > Team Properties > Training Activities tab).
Search is performed by clicking Search button.
Player and Training List
Search results are displayed in the player and training list on the left. The software indicates
whether the search results are for a team or for a player. The software also indicates how many
training sessions were found. The latest training session is displayed first. You can expand the
training session by clicking the expand button . An expanded training session lists all the
players that have training data for that training session. Players are sorted by player groups if
there are groups.
The title of the player list consists of training date and time and training activity. The delete button
removes the training session data from the system after confirmation.
Players can be selected and unselected by checking. Either one or several players can be
selected. Checking the All players box selects all the players from selected training session.
Players can also be selected by player groups. Checking a player group's box selects all the
players in that group. Each selected player has a color bar that indicates player's color in the
graphs.
Curve Area
Either individual or all players and training sessions are selected and unselected from the player
lists by checking.
The heart rate graphs are displayed in the curve area, which is the largest are of the Training
Session Log page. Each heart rate graph is displayed in a different color. Selections in the curve
area are made with a cursor. There are buttons for different action modes in the upper left corner
of curve area.
• Examine HR curve(s) mode is the default mode and enables you to view details of
heart rate curve(s). Either a point of time or area can be explored. Clicking the curve in
analysis mode opens the Details tab at the bottom of the screen. When one point of time
is selected, Heart rate and Cursor time are shown. When area is selected, also Sport
zones and Training load are shown. When area is selected, the heart rate is the average
heart rate of the selected area.
• Mark phases mode enables you to add phases to training sessions. Mark phases is
disabled if heart rate curves from several training sessions are displayed. The selected
69
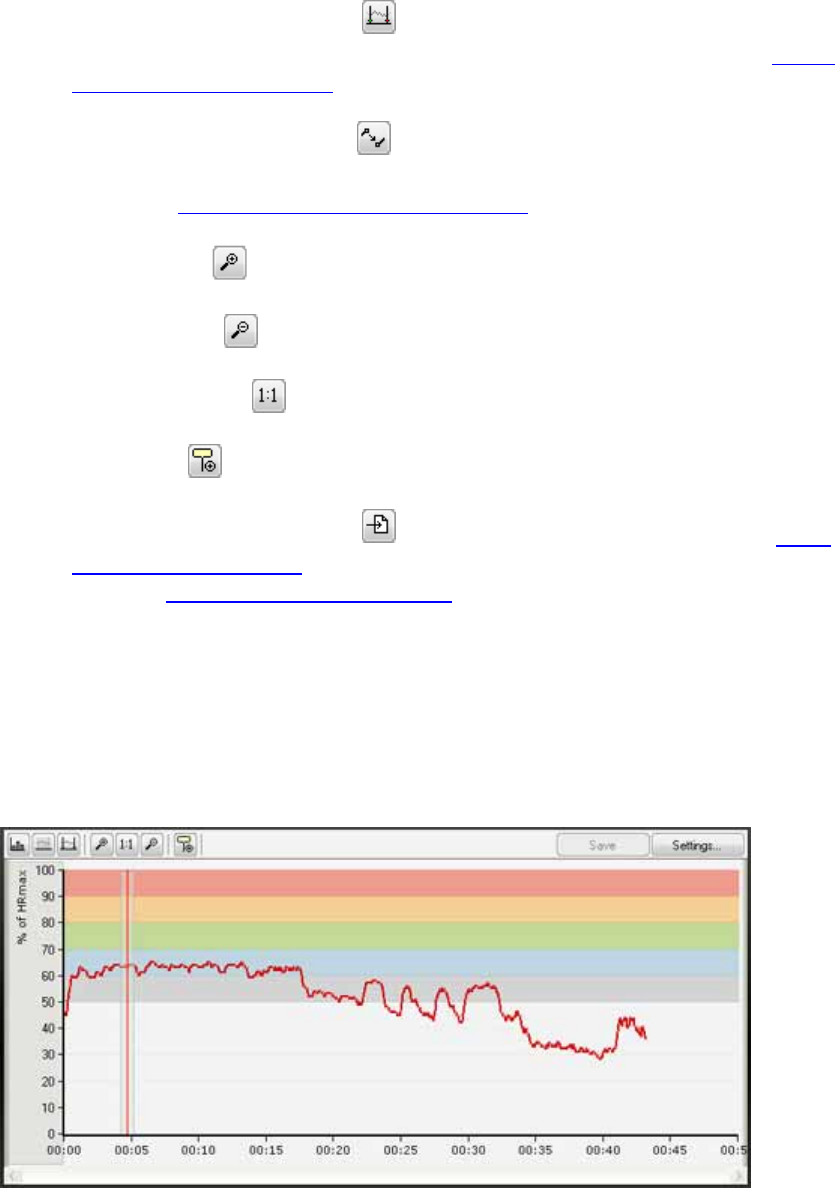
Team2 SW Help
area is marked as a phase. The phase's name is selected from drop-down list in the
summary tab. If overlapping phases are marked, the phases are merged automatically.
• Mark training time for session mode enables you to mark the effective training time
to the graph. The start and stop markers can be moved after setting them. See How to
mark training time for session for more information.
• Manual error correction mode enables you to manually remove errors from the
heart rate graph. Errors in the heart rate curve may appear for example as unrealistic
peaks. See How to correct heart rate data manually for more information.
• Zoom in mode enables you to zoom curves (in).
• Zoom out mode enables you to zoom curves (out).
• Zoom to 1:1 button restores the curve to the original size.
• Add marker button adds a marker to the selected training session (curves).
• Create training session report button opens a pop-up that enables you to create
either Excel of PDF report for the complete session or selected part of the training. You
can easily share the training session report. The button is disabled if curves from multiple
training sessions are selected.
In addition to the heart rate curve, taken or added markers are shown with timestamps at the
bottom of the curve area. When the timestamp is hovered with mouse cursor, marker details are
displayed.
When the training time is not marked for the session, the whole curve is thick.
70
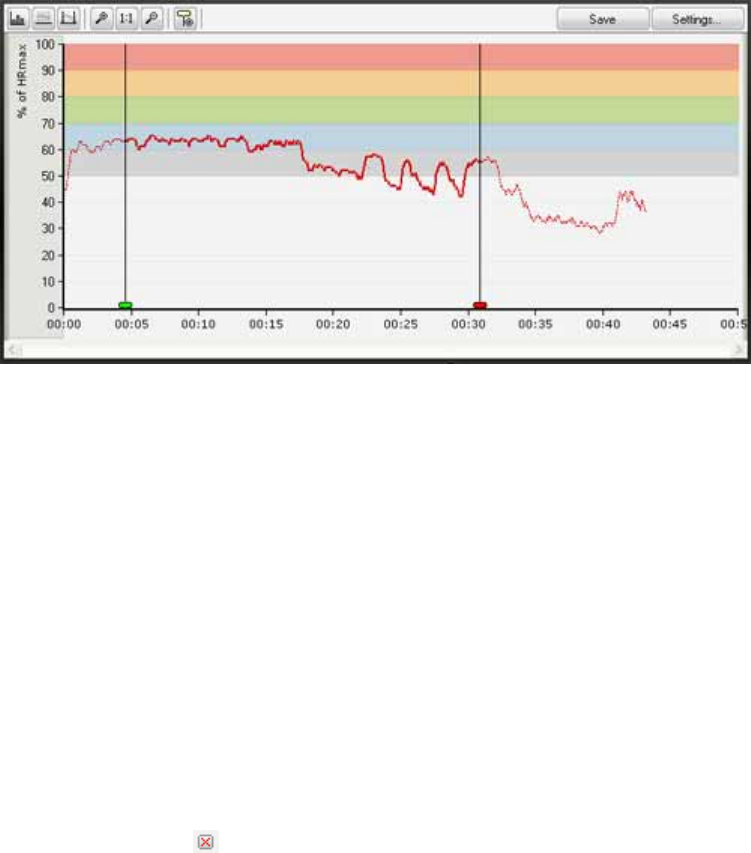
Team2 SW help
After the training time is marked for the session, the selected part of the curve is thick and the
rest is thinner.
To mark the training time for a session:Curve and Result details
Curve and result details are displayed below the curve area. There are three tabs which each
offer different features.
• Complete session is the first tab. It displays session information (heart rate, sport zones,
training load, Kcals and training time) individually for each player in table format. Each
training session is displayed separately.
• Details is the second tab. It displays each player's heart rate, sport zones, training load,
cursor time and notes in table format. Details are either for one point of time or a
selected time range (area).
• Summary is the third tab. It displays phases for the selected training session. Phases are
not shown if curves from several training sessions are selected. The phase's name can
be selected and details of the phase are shown. Phases can be removed by clicking the
delete button . NOTE: Team2 software does not ask for confirmation!
Settings window opens by clicking the Settings button. Changes can be saved by clicking the
Save button.
Settings
Training Session Log settings are accessed by clicking the Settings button. Changed settings
are taken into use by clicking OK and declined by clicking Cancel.
Time and HR axes
71

Team2 SW Help
The first set of settings is for Time and HR axis. Time axis scale defines the time axis (horizontal)
scale of the curve view. The shortest possible scale is 5 minutes, the longest 120 minutes. The
default value is Fit to screen which adjusts the time axis according to your screen size. HR axis
maximum defines the HR axis (vertical) scale of the curve view. HR axis minimum defines the
lowest value for the HR axis (vertical) scale. The default value for both axis maximum and axis
minimum is auto which sets the axis scale based on the heart rate data.
The way in which heart rate is presented can also be selected. Heart rate can be presented either
as bpm (beats per minute), % of HRmax (percentage of maximum heart rate) or % of HRR
(percentage of heart rate reserve) To show the sport zones in the background, Show sport
zones must be checked. Sport zones is disabled if heart rate is presented as bpm. Select the
Time format from the drop-down list. Options are Elapsed time (default) and Real time. Real time
cannot be selected if curves from multiple training sessions are selected.
Summary
The second set of settings is for the Summary tab. The way how heart rate is shown can be
selected from the drop-down menu. The options are Average/Maximum HR and Average HR.
HR curve
The third set of settings is for HR curve. HR curve can be presented either as One second
intervals or Beat-to-beat intervals.
Right-Click Menu
Many features and functions can be accessed quickly by right-clicking an element or an item.
Below are the contents of right-click menus on the Training Session Log page.
Right-clicking the curve area opens a menu. On the Training Session Log page the menu
consists of the following features:
• Create Training Session Report which opens a pop-up that enables you to create either
Excel of PDF report for the complete session.
• Copy HR values to clipboard which copies all the heart rate values to the clipboard.
The values can be pasted into any text document.
If a part of the curve is selected, the menu consists of the following feature:
• Selection Details which opens a window that contain physiological information on the
selected part of the curve.
• Create Training Session Report which opens a pop-up that enables you to create either
Excel of PDF report for the selected part of the training.
72

Team2 SW help
Search and View Training Data
See How to search training session.
Training reports
Training Reports
Training Reports opens by clicking the fourth page tab. Training reports is tool for analyzing,
printing and sharing. Report creation criteria can be saved as quick searches. Training reports'
content consists of graphs.
Elements
When the Training Reports page is opened, only the creation area is shown. Other elements are
displayed after a training report is created.
Creation Area
The upper part of the page is the creation area. On the left is the Training reports box that lists
all previously-saved training reports.
The first selection is for date range. Select date range by choosing either Search by date,
Search by period or Quick search. Each option enables an additional menu.
• Search by date enables the Start date and End Date menus, which enable you to select
the starting and ending dates. By default, the start date and end date are today's date.
• Search by period enables a drop-down menu that lists all the team's training periods in
the system.
• Quick search enables a drop-down list that includes typical date ranges from Yesterday
to 12 months ago.
The first two drop-down menus, Bar graph and Line graph, are for selecting what kind of
information is to be displayed as bar graphs and as line graphs. At least one of the two has to be
selected. The following types of training information can be displayed as bar and line graphs.
• Bar graph: Training session count, Energy expenditure, Training load, Training load in
sport zones, Training load and recovery, Training duration, Time in sport zones, Number
of heart beats.
• Line graph: Training session count, Energy expenditure, Training load, Average heart
rate, Maximum heart rate, Number of heart beats, Training duration.
73
Team2 SW Help
The third drop-down menu is for selecting Training activity. The options are the training activities
that are in the system for selected team. After training activity has been selected, it is possible to
select a certain phase. The listed phases are the phases of selected training activity.
Search is performed by clicking the Create button.
Player List Area
The player list area is on the left. The player list is created based on the created training report.
Players are sorted by player groups. The team's name is displayed above the player list.
Players can be selected and deselected by checking the box. Either one or several players can
be selected. Checking the All players box selects all the players from the selected training
session. Players can also be selected by player groups. Checking player group's box selects all
the players in that group. Each selected player has a color bar that indicates the player's color in
the graphs.
Graph Area
The graph area is the largest area of Training Reports. Created reports (graphs) are displayed in
the graph area. The graph area has two views. A view is selected by clicking the tab below the
graph area.
• By player shows player statistics individually.
• Summary shows compiled statistics either as total or average depending on the settings.
In the graph area header selected training information, training activity and phase, date range
and summary information are displayed. There are also Settings and Save as buttons. The
Settings button opens the Training Reports settings window and the Save as button enables you
to save the current training report as a quick search.
Graph's X-axis is always time. Graph's Y-axis measuring unit is determined based on the
selections for bar and line graphs. The bar graph measuring units are on the left side of the graph
and the line graph measuring units on the right side of the graph. If Graph for each player is
selected in the settings, a separate graph is shown for each player.
Settings
Training Reports settings are accessed by clicking the Settings button. The button is enabled
and visible after creating a report.
In the Training Report Settings window there are two tabs. The Organize tab is for organizing the
training reports quick search list and Graph is for training report graphs.
Changed settings are taken into use by clicking OK and declined by clicking Cancel.
74

Team2 SW help
Organize
Saved training reports are listed in the Training reports box in upper left corner of the training
reports page. Saved training reports can be organized by selecting one and clicking the up
and down arrows in Training reports settings.
Saved training reports can be deleted by selecting them one at a time and clicking the Delete
button.
Graph
There's one setting for both views. The By player view setting has two options, One player per
graph and Selected players in one graph.
• When One player per graph is selected, Team2 software shows individual graphs for the
selected players.
• When Selected players in one graph is selected, Team2 software shows the selected
players in one graph.
Summary view has also two options, Average and Total.
• When Average is selected, Team2 software shows the results as averages.
• When Total is selected, Team2 software shows the results as totals.
General settings allow you to choose how many days are included in summary view. NOTE: If
training report's date range is shorter than this setting, summary view uses the date range instead
of the setting.
When Show grid is checked, there's a grid displayed in the background of the graphs.
Right-Click Menu
Many features and functions can be accessed quickly by right-clicking an element or an item.
Below are the contents of the right-clik menu on the Training Reports page.
Right-clicking the graph area opens a menu. In Training Reports page the menu consists of the
following features:
• Send Graph by E-mail which opens your default E-mail software. The graph is an
attachment in picture format. This is not the same function as File > Send E-mail >
Current view as picture, which prints the whole window as a screen shot.
75

Team2 SW Help
• Copy to Clipboard, which has a submenu (it consists of Graph and Values). The
feature copies a selected item (graph or values) to the clipboard. This is the same
function as Edit > Copy to Clipboard.
• Print, which opens a preview window and enables you to print information on paper. This
is the same function as File > Print.
Create Training Report
See How to create training report and How to save training report.
How to...
How to...
The purpose of these articles is to give instructions to Team2 software users. Each article
instructs on one feature or function of the software.
How to Launch Wizard
Wizard launches when the Team2 software is run for the first time. Wizard guides you through the
introduction process step-by-step.
If you want to run Wizard again at some point, remove all the transmitters from the system
according to the instructions, close the software and re-run it. Wizard then launches automatically.
How to Copy Values to Clipboard
Several different values and information can be copied to the clipboard from Team2. The copied
data can be pasted to another software, for example a spreadsheet program.
To copy values, information or graphs to the clipboard, select Edit > Copy to Clipboard >
selection > Copy. If there are several values that can be copied, Team2 asks what you want to
copy. Another way to copy values, information or graphs is to right-click an item in the software
and select Copy to Clipboard.
What Can Be Copied
• On Training Calendar page, you can copy player lists, player values, training plans and
training files.
• Copy a player list and training plan (for selected data range) by selecting Edit >
Copy to Clipboard.
• By right-clicking the player's list, the selected player's details can also be copied
to the clipboard (Copy Player Details to Clipboard).
76
Team2 SW help
• Copy the selected training file by right-clicking an calendar item with heart
symbol in training calendar and selecting Copy to Clipboard . If there are more
than one training file in the same calendar item, first select the training session
and then Copy to Clipboard. The training file (*.ptf) can be pasted, for example,
to an e-mail message.
• On Training Session Log page, you can copy the graphs and the heart rate values.
• Copy the displayed graph or the heart rate values for the displayed graph by
selecting Edit > Copy to Clipboard.
• Copy the displayed graph or the heart rate values for the displayed graph by
right-clicking the graph area.
• NOTE: Before copying information to the clipboard, a training session must be
searched and displayed on the screen.
• On Training Reports page, you can copy the graphs and the values.
• Copy the displayed graph or the values for the displayed graph by selecting Edit
> Copy to Clipboard.
• Copy the displayed graph or the values for the displayed graph by right-clicking
the graph area.
• NOTE: Before copying information to the clipboard, a training report must be
created and displayed on the screen.
How Copied Information Is Displayed After Pasting
All the information that is copied from Team2, except for training files, can be pasted into any word
processing program or a spreadsheet program.
• Graphs are pasted as pictures.
• Player list, Player values, Training session values or Training report values are
pasted as tables or plain text.
• Player list is pasted as a table with four columns. The first column is empty. The
second column has the team's name on the first row and the player numbers
below it. The third column displays player names. The fourth column displays
player's transmitter numbers.
• Player details are pasted as plain text. When pasted to spreadsheet program,
each text row is in individual cell.
77

Team2 SW Help
• Training session values are pasted as a table. Each player and each training
session are displayed separately, organized horizontally. On the first row, there
are the dates and times and training sessions. On the second row, there are the
player names. On the third row, there are headings (Time and bpm). Below
headings, there are timestamps and heart rates listed, each on own row. The
sampling rate is determined by the recording rate (every beat or every 5
seconds). Example:
Date - Time -Training session Date - Time -Training session
Player name Player name
Time bpm Time bpm
00:00:02.905 89 00:00:01:517 87
00:00:03.623 90 00:00:02.604 87
00:00:05.619 92 00:00:03.579 90
• Training report values are pasted as a table. Each value is listed separately for
players, ordered vertically. The table has two columns. On the first row, the
player's first name is displayed. On the second row, there are headings (Period
and the measure). Below headings, there are time periods and measure values
listed, each on its own row. Example:
Player name
Time period Measure
First time period value
78

Team2 SW help
Second time period value
Third time period value
Player name
Time period Measure
First time period value
Second time period value
Third time period value
Database management
How to make backup file
A backup file is a copy of all the data that has been recorded into the system up until the moment
the backup was taken. You can restore the data if your PC crashes or loses the data at some
point, so all the data will not be lost.
If you have set automatic backups on, the Team2 software automatically takes backups when the
software is closed. Still, it is important to take backups every now and then, especially before
updating the software or installing a newer version. It is also recommended that you save the
backup file on an external storage device, for example, a USB flash drive or an external hard
drive, in addition to the PC's internal hard drive.
To make a backup file:
1. Open the Team2 software.
79

Team2 SW Help
2. Click File > Database Management. A popup window opens.
3. In the Backup tab, click Browse to select a directory for the backup file.
4. Click Backup to create the backup file. This takes approximately 10 minutes / 1 GB of
data.
5. Close the Database Management window by clicking Close.
By default the backup file is saved into the software's directory. If you were using the default
settings during the installation of the software, the default backup directory is:
• Windows XP: C:\Documents and Settings\All Users\Application
Data\Polar\Team2\data\Backup\
• Windows Vista and 7: C:\ProgramData\Polar\Team2\data\backup
The backup file can be copied to another location. The backup file is named with a timestamp.
How to restore from backup
You may need to restore data if, for example, you start using Team2 with a new PC or data has
been accidentally deleted. See also how to restore archived data below.
To restore data, you need a backup file, which is a file that includes all the data up until the
moment it was made. If the backup file is not up to date, some data may be lost.
To restore data:
1. Open the Team2 software.
2. Click File > Database Management. A popup window opens.
3. Go to the Restore tab.
4. Click Browse to select the directory where the backup file is located.
5. Select the correct file and click the Restore button.
6. Wait while the software restores the data. This may take several minutes depending on
the file size.
7. Close the Database Management window by clicking Close.
To restore archived data:
80

Team2 SW help
Note that when you restore from a backup archive file, you will lose all the data in the current
Team2 system. Therefore it is highly recommended that you make a backup file of the current
Team2 system before restoring archived data.
1. Open the Team2 software.
2. Click File > Database Management. A popup window opens.
3. Go to the Restore tab.
4. Click Browse to select the directory where the backup archive file is located. See How to
compact and archive database.
5. Select the correct file and click the Restore button.
6. Wait while the software restores the data. This may take several minutes depending on
the file size.
7. Close the Database Management window by clicking Close.
After restoring the archived data, the Team2 system will only contain the data that was in the
archive file.
How to set automatic backups on
A backup file is a copy of all the data that has been recorded into the system up until the moment
the backup was taken. You can restore the data if your PC crashes or loses the data at some
point, so all the data will not be lost.
By turning on the automatic backups, you do not have to backup the data manually. See How to
make backup.
To set automatic backups on:
1. Open the Team2 software.
2. Click File > Database Management. A popup window opens.
3. In the Backup tab, under Automatic backup, turn the automatic backups on by
selecting either:
• Always, when closing the software, or
• Always ask, when closing the software.
81

Team2 SW Help
4. Save the setting and close the Database Management window by clicking Close.
To turn the automatic backups off, select Never.
How to compact and archive the database
The bigger the Team2 database becomes, the slower the software opens and the longer the
searches take. The maximum size of the database is 4 GB. The size of the database is indicated
with a color bar in the Archive tab of Database management.
• When the bar is green, the size of the database is less than 2 GB.
• When the bar is yellow, the size of the database is 2-3 GB.
• When the bar is red, the size of the database is over 3 GB.
The size of the database can be reduced by compacting and archiving. Compacting is
recommended action if the bar is yellow or red. Archiving is the final measure if compacting does
not reduce the database size enough.
Compacting typically reduces the database size by 20-50%.
Please note that when the Team2 database is archived, the archived data can no longer be used
in the software for comparison or reports.
To compact the database:
1. Open the Team2 software.
2. Click File > Database Management. A popup window opens.
3. Open the Archive tab.
4. Click Compact to reduce the size of the database. This may take several minutes.
5. Close the Database Management window by clicking Close.
Archiving
The archiving is done by splitting the Team2 database from a selected date and by creating three
backup files into the backup file location. When the database is archived, the following backup
archive files are created:
• a file that contains the whole database before it is archived,
82
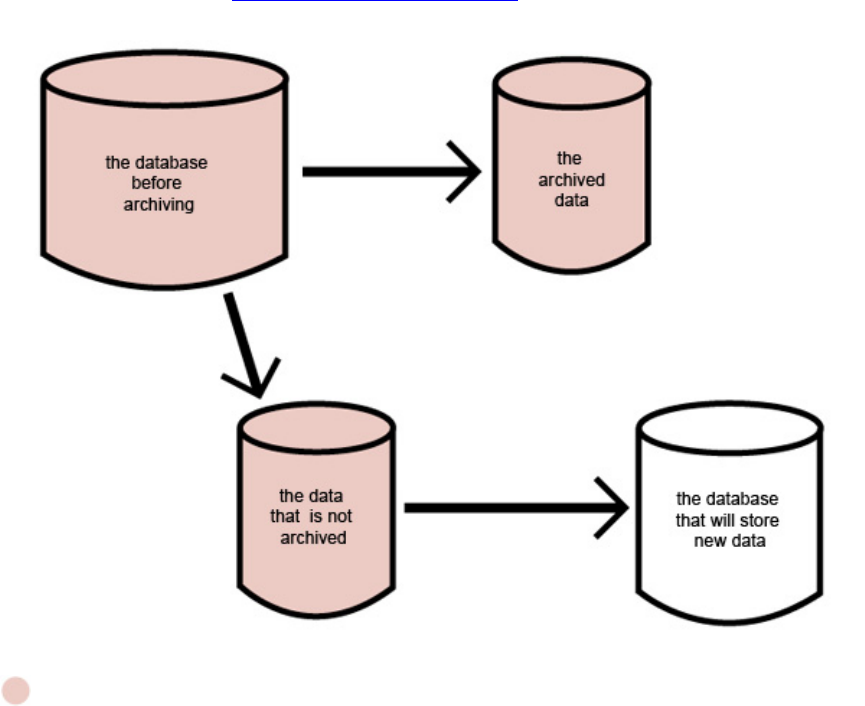
Team2 SW help
• a file that contains the archived data for the selected date range (from the beginning until
the selected date), and
• a file that contains the data from the selected date until the current date.
Note that the disk space required for archiving is three times the size of the database file.
After archiving, only the data from the selected date until the current date is available in the
Team2 software. See also how to restore the archived data.
These are the restore points that are saved into separate backup files when the database is
archived. You can restore any of these points.
To archive the database:
1. Open the Team2 software.
2. Click File > Database Management. A popup window opens.
3. Open the Archive tab.
83
Team2 SW Help
4. Select an end date for the data that is being archived. Please note that the archived data
(until the selected date) can no longer be used in the software.
5. Click Archive to archive the data between the selected date range. This takes
approximately 10 minutes / 1 GB of data.
6. Close the Database Management window by clicking Close.
Import data
How to Import Player Data
Player information can be imported to a team from another Polar software (compatible data can
be imported from the Polar Precision Performance and Polar ProTrainer softwares) or from
another team. Also, previously removed player can be retrieved to a team. NOTE: Players cannot
be imported during online training.
1. Open the Team2 software.
2. Select the team to which you want to import players.
3. Select Options > Team Properties.
4. Select the Players tab.
5. Click the Import button. Import/Move players window appears.
6. Select the player data you want to import. Options are Import players (import player
data from another Polar software) and Move player from another team (move players
from another team or retrieve previously removed players).
7. Import players:
• When you import players from another Polar software, select the Import button.
Importing window appears. Find the Polar Player Files (*.ppd) from the PC's
directories and select Open. Next you will have to synchronize the training
activities between the old system and Team2. The imported activities are listed in
the left column. Select a congruent training activity for each training activity from
the drop-down lists on the right. Select Add imported activity as new if you
want to create a new training activity to you Team2 system. Select Next to
continue. Select Close to finish.
Move players from another team:
84

Team2 SW help
• When you are moving players from another team, select from the Team drop-
down list the team you wish to import from. Player list appears on the left side of
the window. Click on the players you want to move (to the active team). The
selected players move onto the list on the right side of the window. Select the
Move button to move the selected players.
Retrieve previously removed players:
• When you are retrieving previously removed players, select Removed players
from the Team drop-down list. A list of removed players appears on the left side of
the window. Click on the players you want to retrieve (to the active team). The
selected players move onto the list on the right side of the window. Select the
Move button to retrieve the selected players.
See also How to remove players and How to select team.
How to Import Team Data
Team data can be imported from previous Polar team software. Compatible data can be imported
from the Polar Precision Performance and Polar ProTrainer software. When team data is
imported all the data (including player information) is imported at once.
To import team data:
1. Open the Team2 software.
2. Select Options > Teams.
3. Click the Import button.
4. Browse Polar Team Files from your computer directories.
5. If you are transferring team data from Polar ProTrainer software, you have to synchronize
the training activities between the old system and Team2. The imported activities are
listed in the left column. Select a congruent training activity for each training activity from
the drop-down lists on the right. Select Add imported activity as new if you want to
create a new training activity to you Team2 system. Select Next to continue. Select Close
to finish. Data is saved to your Team2 system.
How to Import Training Data
With Team2 it is possible to easily import training data to the system. Import Training Data can be
used, for example, when training session data is received by E-mail. Training data files must be in
85

Team2 SW Help
Polar training files format, which the Team2 produces. Training data can also be imported from
Polar ProTrainer software and it can be either in zip package or in *.hrm file format.
1. Open the Team2 software.
2. Select the team to which you want to import data.
3. Select File > Import Training Data.
4. Browse Polar training files or ProTrainer zip package from the computer directories and
click Open.
5. A list of found training files is shown. Select a player and a training activity for each
training session.
6. Select the training sessions you wish to save by checking the box.
7. Save the training session by selecting Save.
8. Close the window by selecting Close.
NOTE: When training data is imported from previous version of Team system (compatible data
can be imported from the Polar Precision Performance and Polar ProTrainer softwares), the
training type is automatically set as intermittent.
Online training
How to Start Online Training
In order to monitor training online, a team must be created and players must be added.
1. Give labelled transmitters to players who then attach them to Team2 transmitter straps.
Players moisten two electrode areas on the back of Team2 transmitter straps and secure
the straps around their chests just below the chest muscles. See How to use transmitter.
2. Place the base station (or the base stations) on the ground and switch it/them on.
3. Open the Team2 software and setup the connection between main base station and
PC/PDA.
4. Select a team that you want to use.
5. Open Online Training page.
86

Team2 SW help
6. Select a training session from the Training session drop-down list. The current day's
planned training sessions, team's training activities to be used with unplanned training
sessions and team's tests are listed.
7. Click Connect button to establish a connection between the PC and the main base
station. Players' heart rates start to display on the screen when they enter the base
station's range.
8. When all players' heart rates are displayed on the screen, click Start to begin the training
session.
9. Monitor the heart rates online.
See also How to stop online training.
How to Stop Online Training
To stop the online training:
1. Click Stop.
2. Click Disconnect to end the training session.
3. Collect the transmitters from the players.
4. Follow the care and maintenance instructions.
See also How to start online training.
How to Start Test
Tests are almost like normal online training sessions. The only difference is that you can type in
test results.
Before starting a test, a team must be created and players must be added.
1. Give labelled transmitters to players who then attach them to Team2 transmitter straps.
Players moisten two electrode areas on the back of Team2 transmitter straps and secure
the straps around their chests just below the chest muscles. See How to use transmitter.
2. Place the base station on the ground and switch it on.
3. Open the Team2 software and setup the connection between the base station and
PC/PDA.
87
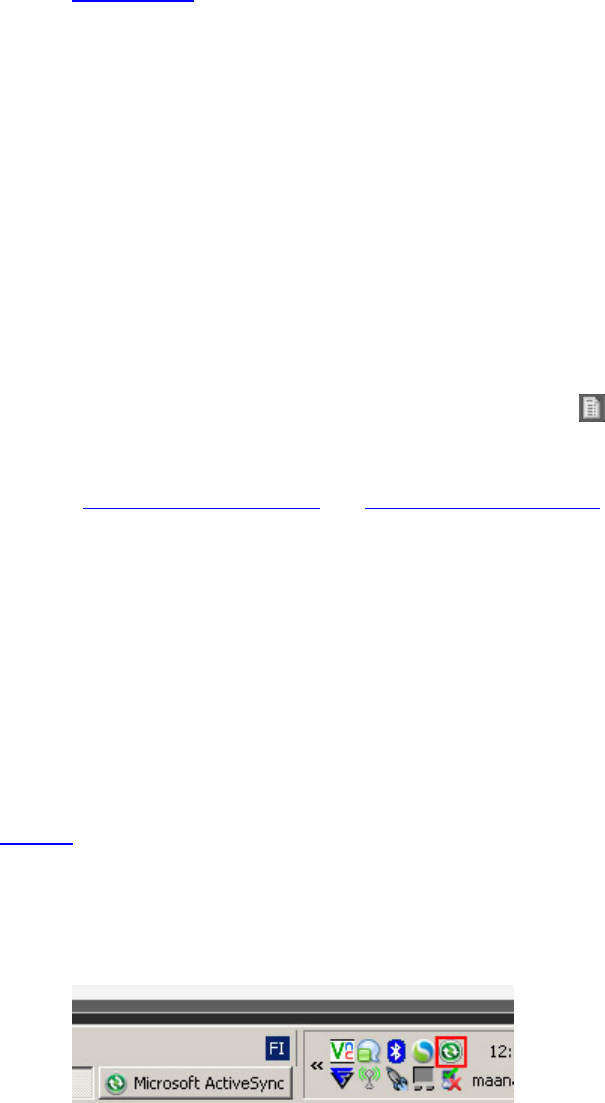
Team2 SW Help
4. Select a team that you want to use.
5. Open the Online Training page.
6. Select a test from the Training session drop-down list. The current day's planned
training sessions, team's training activities to be used with unplanned training sessions
and team's tests are listed.
7. Click Connect button to establish a connection between the PC and the base station.
Players' heart rates start to display on the screen when they enter the base station's
range.
8. When all the players' heart rates are displayed on the screen, click Start to begin the
training session.
9. To open the test results sheet, click a test results symbol or select Tools > Test
Results.
See also How to start online training and How to stop online training.
How to Synchronize PDA
In order to monitor players' heart rates during online training, player information has to be
transferred to the PDA. This feature is called Synchronize PDA and it can be found from the main
menu: Tools > Synchronize PDA.
Synchronization must be always performed after player information has been changed or new
players have been added.
Before you can synchronize player information to the PDA device, Team2 PDA software has to be
installed on your PDA. After installation of PDA software, the PDA can be synchronized.
1. Connect the PDA to the PC if it is not already connected. Your PC should inform you
when the connection is established between the PDA and the PC. If you are using
Microsoft ActiveSync to synchronize the information between your PC and PDA, there is
a green ActiveSync icon in the tray:
2. Open the Team2 PC software with your PC.
3. Select from the main menu Tools > Synchronize PDA.
88

Team2 SW help
NOTE: In addition to the currently active team, all the teams that are not protected with a
password are synchronized with the PDA.
After training
If you have taken and saved markers with PDA software, you can synchronize them to the PC
software. Connect the PDA to the PC, open the Team2 software and select Tools > Synchronize
PDA.
How to Take Markers
The marker information includes the following: time, notes, players and the heart rate at the
moment the marker was taken. Markers can be taken to one player, all players or selected
players.
To take markers during online training:
1. Start online training.
2. Select players from the player list. The marker is taken for the selected players.
3. Click the marker icon to take a marker. The note text box appears on the left side of
the marker icon.
4. Type in the note.
5. Note text box disappear after 5 seconds and the marker appears in the Training session
progress log.
To modify the markers during online training:
1. Select a marker from the Training session progress list. A pop-up window appears with
the existing note and marker information.
2. Modify the note if necessary and select Close to save and close the window. To delete
the selected marker, select Delete.
To modify the markers during the online training via Training Session Log
1. During an online training session, open the Training Session Log tab.
2. Make a search and limit the date range by selecting Quick search and Today from the
appearing drop-down list.
89
Team2 SW Help
3. The current training session is listed among the search results and the heading of the
training session is flashing green.
4. Double-click the training session heading. The Training Session Log popup window
appears.
5. Select a marker from the list on the left, and modify the notes on the right.
6. To delete a marker, select it from the list on the left and click the Delete button.
7. Close the window by clicking OK. Decline the changes by selecting Cancel.
8. Return to the Online Training page.
Players and teams
How to Add or Remove Sport Zones
The Sport Zones settings can be found from Team Properties. Team properties can be found
from the main menu: Options > Team Properties. There are 5 tabs in Team Properties and
Sport Zones is the second tab.
Take the settings into use by clicking Save. Close the window by selecting Close. If the changes
are not saved when Close is selected, the software asks whether the changes are saved or not.
To Add Sport Zones
1. Select a team.
2. Open Team Properties (Main menu > Options > Team Properties).
3. Open the Sport Zones tab.
4. Select a calculation method that needs changes.
5. Click the Add sport zone button.
6. Insert values for the new sport zone.
7. Repeat steps 5 and 6 if necessary.
NOTE: New sport zones can be added only if the Low value of lowest existing sport zone is larger
than 0.
To Remove Sport Zones
90

Team2 SW help
1. Select a team.
2. Open Team Properties (Main menu > Options > Team Properties).
3. Open the Sport Zones tab.
4. Select a calculation method that needs changes.
5. Click the Remove button in the rear of sport zone that you want to remove. Sport zone is
removed without confirmation! Repeat if necessary.
How to Add Players
Up to 80 players can be added per team.
To add new players:
1. Open the Team2 software.
2. Select the team to which you want to add players.
3. Select Options > Team Properties.
4. Select the Players tab.
5. Click the Add button and fill in the player's general information in the General tab. For
more information on the player positions, see How to group players.
6. Select also a transmitter number for the player from the General tab.
7. Select the Values tab and fill in the player's heart rate values and other values.
8. Select the Transmitter tab and modify transmitter information if necessary.
9. Return to the General tab and repeat steps 5 to 7 to add more players.
10. Click Save to save the changes. Close the window by selecting Close.
See also How to remove players and How to select team.
How to Create New Team
91

Team2 SW Help
It is possible to add all your teams to Team2. However, only one team can be used at a time.
The first team is usually created during Wizard. Next teams are created in Team2 settings. To
create a new team, follow the steps below.
1. Open the Team2 software.
2. Click Options > Edit Teams.
3. Click the New button.
4. Type the name of the new team into the Name input field.
5. Optionally, type in team details into the Team Details text area.
6. Optionally, add a team logo (in *.jpg format) by clicking the logo box and selecting logo
from the computer directories.
7. Optionally, select a password to protect the team data by checking the Enable check box
and then typing in the password.
8. Select the second tab, Sport Zones.
9. Select the calculation method you want to use. The options are HRmax, HRR and
threshold values.
10. Optionally, change the settings of the sport zones.
11. Select the third tab, Training Activities.
12. Click the Add button, and type the name of the activity into the Training Activity input
field. Select the activity's type from the Type drop-down menu.
13. If necessary, change the color of the activity by clicking the color box and selecting a new
color.
14. Repeat steps 12 and 13 until all necessary training activities are added.
15. Select the fourth tab, Tests.
16. Click the Add button, and type the name of the test into the Test input field.
17. If necessary, change the color of the test by clicking the color box and selecting a new
color.
92

Team2 SW help
18. Repeat steps 16 and 17 until all tests are added.
19. Select the fifth tab, Players.
20. Click the Add button to add the first player and fill the player's general information in the
General tab.
21. Select also a transmitter number for player in the General tab.
22. Select the Values tab on the player page and fill in the player's heart rate values and
other values.
23. Select the Transmitter tab on the player page and modify transmitter information if
necessary.
24. Return to the General tab on the player page and repeat steps 20 to 23 to add more
players.
NOTE:
• Team's password protection is not the same as the wireless network key.
• Teams can be deleted and modified afterwards.
• Logo can be removed by clicking the Remove logo button.
• Sport zones can be added by clicking the Add sport zone button.
• Default setting can be restored by clicking Restore default settings.
• Training activities and tests can be modified, removed and added afterwards.
• Training activities and tests can be removed by selecting the activity/test and clicking the
Delete button.
• Players can be removed by selecting the player and clicking Remove button.
• Players can be modified, removed and added afterwards.
• Player information can be imported from previous Polar Team software.
How to Delete Team
When you delete a team, all the team information and players are deleted.
93

Team2 SW Help
To delete a team:
1. Open the Team2 software.
2. Select Options > Edit Teams.
3. Select the team you want to remove by clicking the name.
4. Click the Delete button to delete the team.
5. Click Yes to approve the deletion. Click No to cancel the deletion.
How to Group Players
Each team has its own separate player groups. Before you can group a team's players, player
groups must be created. Player groups can be modified and the players' player positions can be
changed at any time. By default, the players are not grouped. If some of the players are grouped
by player position, the ungrouped players are shown in the player lists as "other".
If there are player groups, the players are always sorted by the player positions. Player groups
help you during online training and while analyzing the training data.
Create Player Groups
Before you can group team's players, player groups must be created. Player groups are called
Player positions.
1. Select a team.
2. Open Team Properties by selecting Options > Team Properties.
3. Select the Players tab.
4. Select a player from the list on the left and open the General tab.
5. Click the Player Position symbol to open the Player position window.
6. Add a player position by selecting Add.
7. Select the new player position from the list on the left and re-name the player position by
typing the name into the Title field on the right.
8. Click Enter on your keyboard.
9. Repeat steps 6 to 8 if necessary.
94

Team2 SW help
10. Close the window by selecting Close.
NOTE: You can modify the player position names at any time by accessing the Player position
window, selecting a player position and changing the name.
Group Players
When you have created player positions for the team, you can start grouping players.
Players' player positions can be changed at any time.
1. Select a team.
2. Open Team Properties by selecting Options > Team Properties.
3. Select the Players tab.
4. Select a player from the list on the left and open the General tab.
5. Select a player position for the player from the drop-down list next to the Player Position
symbol .
6. Repeat steps 4 and 5 if necessary.
7. Click Save to save the changes. Close the window by selecting Close.
How to Modify Player Information
Player information can be modified at any time.
To modify player information:
1. Open the Team2 software.
2. Select a team.
3. Select Options > Team Properties.
4. Select the Players tab.
5. Select a player from the list by clicking his/her name. The player's information fields are
enabled.
6. Modify player information as needed in the General, Values, Transmitter, Polar
Training Computer and Notes tabs. NOTE that the transmitters are assigned on the
General tab by selecting the transmitter number from the drop-down list.
95

Team2 SW Help
7. Repeat steps 5 and 6 when needed.
8. Click Save to save the changes. Close the window by selecting Close.
How to Modify Sport Zones
Sport Zones settings can be found from Team Properties. Team properties can be found from
main menu: Options > Team Properties. There are 5 tabs in Team Properties, and Sport Zones
is the second tab.
Settings are taken into use by clicking OK and declined by clicking Cancel.
Each calculation method (% of HRmax, % of HRR, threshold values) has its own sport zones.
See definitions for each sport zone in Team Properties chapter.
To Modify Sport Zones
1. Select a team.
2. Open Team Properties.
3. Open the Sport Zones tab.
4. Make necessary changes to selected calculation method.
5. Click Save to save the changes. Close the window by selecting Close.
See also How to add or remove sport zones.
How to Modify Team Properties
To change Team Properties, a team must be selected. Team properties can be found from the
main menu: Options > Team Properties. There are 5 tabs in Team Properties, Team, Sport
Zones, Training Activities, Tests and Players.
Settings are taken into use by clicking OK and declined by clicking Cancel.
To Modify Team Properties
1. Select a team.
2. Open Team Properties.
3. Make necessary changes. NOTE: There are 5 tabs in Team Properties.
4. Click Save to save the changes. Close the window by selecting Close.
96

Team2 SW help
How to Remove Players
Players can be removed at any time except during Online training. The player is removed from
the team and all the player information is removed.
To remove players:
1. Open the Team2 software.
2. Select the team to which you want to add players.
3. Select Options - Team Properties.
4. Select the Players tab.
5. Select the player you want to remove by clicking his/her name in the players list.
6. Click the Remove button.
7. Repeat steps 5 and 6 to remove more players.
8. Click Save to save the changes. Close the window by selecting Close.
NOTE:
• Software does not confirm the removal. The player is removed when the Remove button
is clicked.
• Removed players can be retrieved by using the import player data function. For more
information, see How to import player data.
See also How to add players and How to select team.
How to Select Team
In Team2 software one team can be used at a time although several teams can be in the system.
To choose a team to use:
1. Open the Team2 software.
2. Select Options > Edit Teams.
97

Team2 SW Help
3. Select a team by checking the box.
4. Click the Close button.
Optionally, if the team you want to select has been recently used, select File > Team's name from
the list below Backup and Restore.
Seasons and training sessions
How to Add Phases
Phases are created in Team Properties and are set specifically to a certain training activity.
To add phases in Team Properties:
1. Open the Team2 software.
2. Select a team.
3. Select Options > Team Properties.
4. Select the Training Activities tab.
5. Select a training activity from the list on the left.
6. Click the Add button below the Training activity phases list on the right side of the
window.
7. Type a name for the phase into the Name input field next to phase list on the right.
8. Click Enter on your keyboard.
9. Repeat steps 5 to 8 if necessary.
10. Click Save to save the changes. Close the window by selecting Close.
See also How to delete phases and How to modify phases.
How to Add Season
1. Open the Team2 software and select a team.
2. Click the Plan season button on the Training Calendar page.
3. Click the New button on the upper right corner of the window.
98

Team2 SW help
4. Select the new season from the list by clicking on it.
5. Type a name for the season into Season name input field in Season properties.
6. Close the window by clicking OK.
See also: How to delete season and How to add training periods.
How to Add Training Periods
1. Open the Team2 software and select a team.
2. Click the Plan season button on the Training Calendar page.
3. Select a season from the upper list by clicking on it.
4. Click the Add button below Training periods list.
5. Select the new training period from the list.
6. Type a name for the period into Period name field on the right.
7. Set the Start date and End date.
8. Repeat steps 4 to 7 if necessary.
9. Close the window by clicking OK.
See also: How to add season and How to delete training periods.
How to Add Training Activities
Training activities can be modified and added at any time.
To add training activities:
1. Open the Team2 software.
2. Select a team.
3. Select Options > Team Properties.
99

Team2 SW Help
4. Select the Training Activities tab.
5. Click the Add button below the Training activities list.
6. Type a name for the training activity into the Training activity input field on the right.
7. Select an individual color for the training activity by clicking the color box next to the input
field on the right.
8. Select a type for the training activity from the Type drop-down list.
9. Repeat steps 5 to 8 if necessary.
10. Click Save to save the changes. Close the window by selecting Close.
How to Add Training Session Manually
If a player has trained without using a transmitter, you can fill in the gaps by adding a training
session manually for the player.
1. In the training calendar, select a calendar item for a player by clicking it.
2. Select either Edit > Add Training Session Manually or right-click the item and select
Add Training Session Manually.
3. Select a training activity from the Activity drop-down list.
4. Enter the training load value in the Training load field.
5. Enter the times in sport zones into the fields on the right.
6. Save and close the window by clicking OK.
A heart symbol appears to the Training Calendar. The entered values have an effect on, for
example, training load calculations.
NOTE: When the heart symbol is double-clicked or when a manually added training session is
searched in Training Session Log tab, there is no heart rate curve available.
How to Create Training Session
Training sessions can be understood in two ways. A training session can be:
• the actual set training session that is planned and carried out and is shown in the training
calendar, or
100

Team2 SW help
• a prepared exercise "block" that has a training activity and a name and can consist of
phases
In fact, the latter ones are set to be the contents of the former ones.
To Set Training Session to the Training Calendar:
1. Open the Team2 software and select a team.
2. Click the Training sessions button on the Training Calendar page.
3. Select a date from the date menu at the top of the window.
4. Click the Add button in the upper right corner to add a training session.
5. Select the new training session from the list by clicking on it.
6. Select a training session from the Name drop-down list in Session properties. If the
training session you wish to select is not on the list, see the latter part of this article (To
Create Training Session in Session Management).
7. Set the start and end times for the training session. If the selected training session
consists of phases, select the start time and set the duration by setting the phases.
8. Check the Atypical/new training session if it is atypical or new. This option affects the
training load and recovery time calculations.
9. Repeat steps 3 to 8 if necessary.
10. Close the window by clicking OK.
To Create Training Session in Session Management
The Session Management is accessed via the Training Sessions feature (by clicking the New
button or selecting New from the drop-down menu)
To create training session in Session Management:
1. Open Session Management.
2. Click the Add button below the session list.
3. Type a name for the session into the Name input field on the right.
101

Team2 SW Help
4. Select a training activity for the session from the Training activity drop-down list below
the Name input field.
5. If you want the training session to consist of phases, check the Training with phases
box. Add as many phases as you wish by clicking the Add button below the phase list
and selecting a phase from the drop-down list.
6. Repeat steps 2 to 5 if necessary.
7. Close the window by clicking OK.
NOTE: To add phases to the sessions in Session Management, phases must be created for
training activities beforehand in Team Properties.
How to Delete Phases
1. Open the Team2 software.
2. Select a team.
3. Select Options > Team Properties.
4. Select the Training Activities tab.
5. Select the training activity from the list on the left.
6. Select the phase from the list on the right side of the window.
7. Click the Delete button below the phase list.
8. Click Save to save the changes. Close the window by selecting Close.
See also How to add phases and How to modify phases.
How to Delete Season
1. Open the Team2 software and select a team.
2. Click the Plan season button on the Training Calendar page.
3. Select the season from the list by clicking on it.
4. Click the Delete button in the right upper corner.
102

Team2 SW help
5. Close the window by clicking OK.
See also: How to delete season and How to add training periods.
How to Delete Training Period
1. Open the Team2 software and select a team.
2. Click the Training sessions button on the Training Calendar page.
3. Select a season from the upper list by clicking on it.
4. Select the training period from the lower list by clicking.
5. Click the Delete button to remove the training period.
How to Delete Training Session
Training sessions can be deleted from the system on the Training Calendar page and on the
Training Session Log page.
To delete a training session on the Training Calendar page:
1. Open the Team2 software and select a team.
2. On the Training Calendar page right-click the training session in the training session
calendar.
3. Select Delete Training Session from the menu. The training session is deleted.
To delete a training session on the Training Session Log page:
1. Open the Team2 software and select a team.
2. Search the training session.
3. In the training session list on the left, click the button next to the training session you
wish to delete.
4. Team2 software asks your confirmation before the session is deleted.
NOTE: When the training session is deleted, the training data files are also deleted.
103
Team2 SW Help
How to Modify Phases
1. Open the Team2 software.
2. Select a team.
3. Select Options > Team Properties.
4. Select the Training Activities tab.
5. Select the training activity from the list on the left.
6. Select the phase from the list on the right side of the window.
7. Change the name of the phase by typing the new name into the Name input field on the
right side of the phase list.
8. Click Enter on your keyboard.
9. Click Save to save the changes. Close the window by selecting Close.
NOTE: Only the name of the phase can be changed. If you want to move the phase under
another training activity, you have to remove the old phase and create a new phase under the
new training activity.
See also How to add phases and How to delete phases.
How to Order Training Periods
1. Open the Team2 software and select a team.
2. Click the Training sessions button on the Training Calendar page.
3. Select a season from the upper list by clicking on it.
4. Select a training period from the lower list by clicking on it.
5. Move it up or down by clicking the and arrow buttons.
6. Repeat steps 4 and 5 if necessary.
7. Close the window by clicking OK.
104
Team2 SW help
How to Remove Training Activities
1. Open the Team2 software.
2. Select a team.
3. Select Options > Team Properties.
4. Select the Training Activities tab.
5. Select the training activity from the list on the left.
6. Click the Delete button below the list on the left.
7. Repeat steps 5 and 6 if necessary.
8. Click Save to save the changes. Close the window by selecting Close.
Training session data
How to add or modify markers afterwards
Markers are typically taken during online training, but they can also be added and modified
afterwards in Training Session Log tab.
1. Make a training session search in the Training Session Log tab.
2. Select players' curves from the left. NOTE that to be able to modify markers, the curves
must be from the same training session.
3. Click the curve area to place the cursor (red line) by using Examine HR curve(s)
mode.
4. Click the add marker button . A yellow marker appears to the curve area.
5. Add notes to the marker by clicking it and typing into the appearing field. Save notes by
selecting Close.
• Markers cannot be moved but they can be deleted by clicking and selecting
Delete.
105
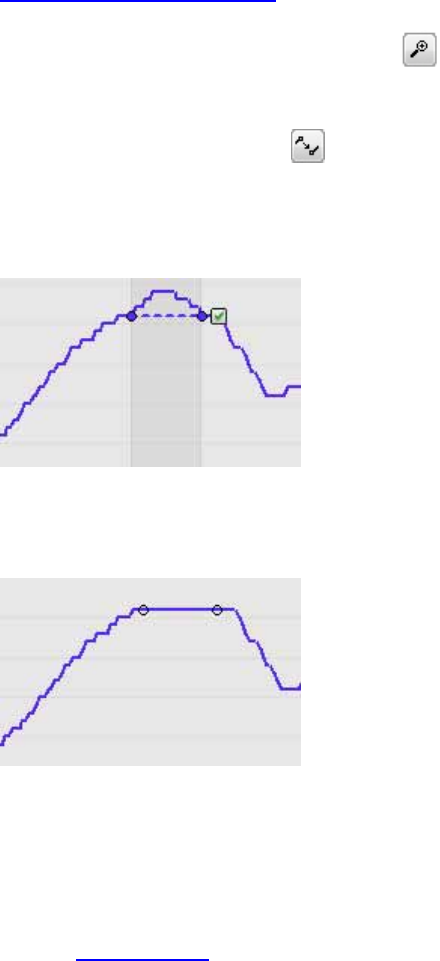
Team2 SW Help
• Marker information (date, time, training activity, notes) can be reviewed by
taking the mouse cursor on the marker.
How to correct heart rate data manually
Manual error correction tool enables you to manually remove errors from the heart rate graph.
Errors in the heart rate curve may appear for example as unrealistic peaks.
1. Make a training session search in the Training Session Log tab.
2. Select a player's curve from the left. Zoom in if necessary. NOTE that to manually
correct heart rate curve, only one curve can be selected.
3. Select Manual error correction mode from the toolbar.
4. Select the area you want to correct: click (and hold) the curve, drag to select the area,
release the mouse button. The selected area is marked and the new possible curve is
illustrated with dashed line. Adjust the selected if necessary by dragging the dots.
If needed, cancel the selection by clicking the curve outside the selected area.
5. Confirm the correction by clicking the green check box. The heart rate curve is corrected
according to the selection.
6. Save the changes by clicking Save button in the upper right corner of curve area.
How to Create Training Report
Training reports can be created from the scratch or by selecting a saved quick link. For more
information, see training reports.
106

Team2 SW help
To create a new training report:
1. Open the Team2 software and select the team.
2. Open Training Reports page.
3. Select new from the Training reports list on the left.
4. Select how you want to limit the date range for the report. The options are Search by
date, Search by period and Quick search.
5. Make the date range selections.
6. Select the information you want to be displayed as a bar graph from the Bar graph drop-
down list.
7. Select the information you want to be displayed as a line graph from the Line graph
drop-down list.
8. Select the training activity or test (or All) from the Training activity drop-down list.
9. If you have selected the training activity, select the training phase (or All) from the
Training phase drop-down list.
10. Click the Create button to create the training report based on the search criteria.
To create a training report based on saved search criteria:
1. Open the Team2 software and select the team.
2. Open the Training Reports page.
3. Select the saved training report from the Training reports list on the left.
4. Click the Create button.
See also: How to save training report.
How to Create Training Session Report
1. Make a training session search in the Training Session Log tab.
2. Select players' curves from the left. NOTE that the curves must be from the same training
session to create training session reports.
107

Team2 SW Help
3. You can create a training session report for the whole session or for a selected time
range:
• To create training session report for the complete training session, right-click
on the curve area and select Create Training Session Report or click on the
Create Training Session Report button.
• To create training session report for a selected time range, select the time
range by using the analysis tool and right-click on the curve area and select
Create Training Session Report. You can also click on the Create Training
Session Report button after selecting the time range.
4. Select which document format you want, the options are Excel are PDF.
5. Check that the information (training session, complete session/selected time, selected
players) is correct.
6. Click Create and wait until the report is opened. You can save the training session report
onto your computer.
NOTE: To open an Excel document, you need to have Microsoft Excel or similar software
installed onto your computer. To open a PDF document, you need to have Adobe Acrobat
Reader or similar software installed onto your computer.
See also How to share training session report.
How to export training data
It is possible to export training data from Team2 into ProTrainer (hrm/pdd) and text file.
1. Open the Team2 software.
2. Select the team you want to export data from.
3. Select File > Export.
4. Select the export format (ProTrainer (hrm/pdd) or text file, heart rate format (bpm or beat-
to-beat intervals), time format and date range. Optionally check the Error correction box.
5. Click Export to continue.
6. Browse the destination directory for the export file. The export files are named
automatically with team name and date. Team2 does not overwrite existing export files
with same file names. Number postfixes are used in file names if necessary.
108
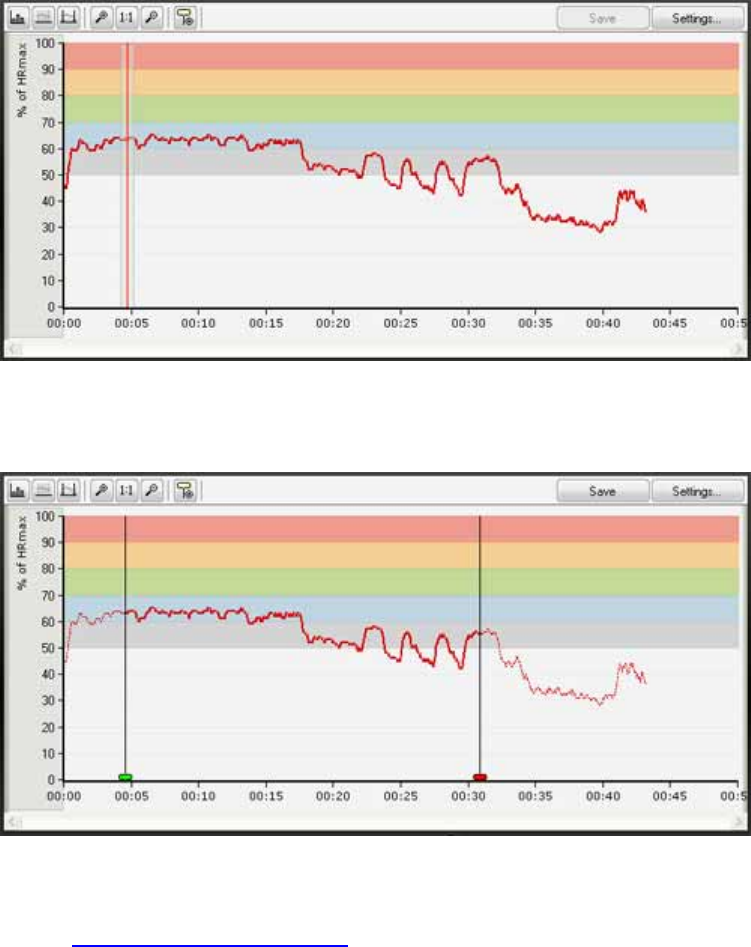
Team2 SW help
How to mark training time for session
The Team2 transmitter records heart rate data the whole time the player is wearing the transmitter.
By default the Team2 assumes that the training file includes only effective training time. In reality,
the file can include several minutes of heart rate data that is not actually effective training. For
example, the time the player spends in the locker room wearing the transmitter is not effective
training. You can mark the actual effective training time for a session by using the Mark training
time for session function in the Training Session Log tab.
When the training time is not marked for a session, the whole curve is thick.
After the training time is marked for a session, the selected part of the curve is thick and the rest
is thin.
To mark training time for a session:
1. Make a training session search in the Training Session Log tab.
109
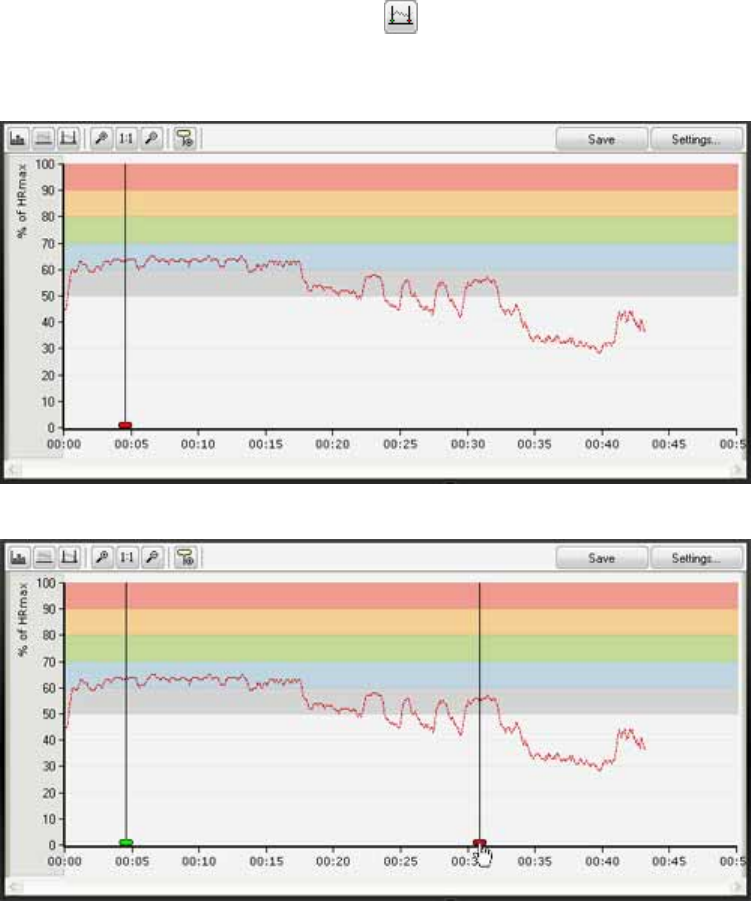
Team2 SW Help
2. Select players' curves from the left. NOTE that to be able to mark training time, the
curves must be from the same training session.
3. Select the Mark training time for session tool.
4. Click the curve area to add a Training session started marker. A red marker appears to
the curve area.
5. Click and hold the red marker and drag it to mark the training time.
110
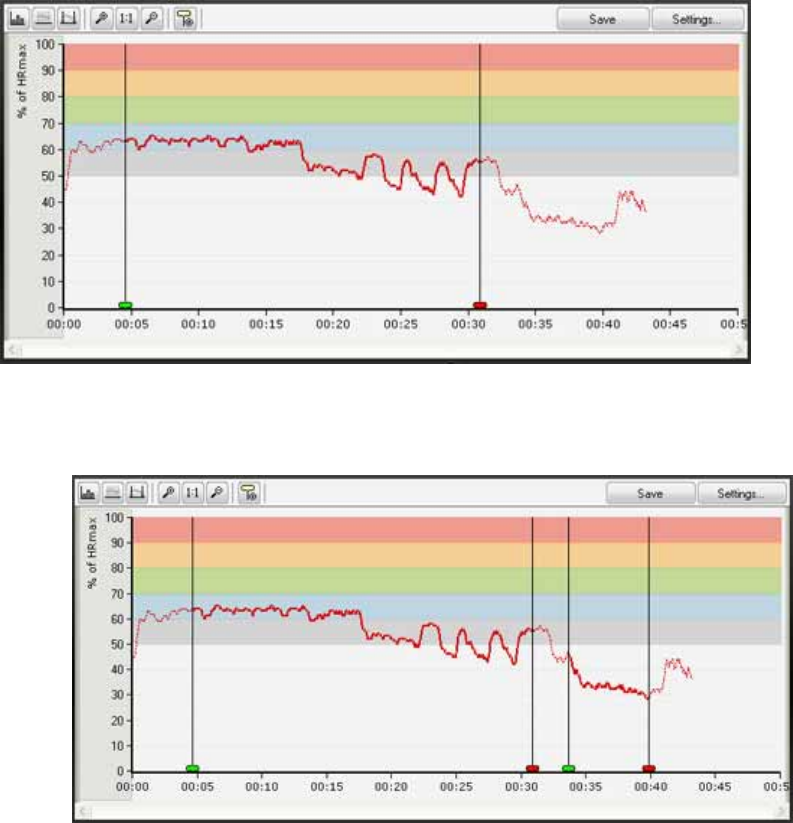
Team2 SW help
6. Release the mouse button to place a Training session stopped marker.
• You can adjust the selected area by moving the green and red markers.
• You can mark several training times (start and stop marker pairs) for a session.
• If you move the latter green marker to the left side of the first red marker (or the
earlier red marker to the right side of the latter green marker), the selected areas
are combined.
• You can delete a marker by clicking it and selecting Delete (or by right-clicking it
and selecting Delete Marker). When you delete either a start or stop marker, its
pair is also deleted.
7. After you have set the markers, click Save to save the changes.
How to Merge Training Sessions
Training sessions can be merged. The merging may be useful, for example, if data recording has
stopped and started again during online or off-season training.
111

Team2 SW Help
Take the following into consideration when merging training sessions:
• At least two training sessions must be selected for merging.
• The selected training sessions must be for the same player.
• The selected training sessions must be for the same day.
• It is possible to combine two training sessions that have different training activities. After
merging, the training activity for the merged training session is the first training session's
activity.
1. Make a training session search in the Training Session Log tab.
2. Select two or more training sessions for merging from the list on the left. Please, note that
the training sessions must be for the same player.
3. Select Edit > Merge Training Sessions. The software asks for you confirmation.
4. Check the summary in the confirmation pop-up and select Yes to confirm the merge.
NOTE that the merging cannot be reversed.
How to move training files
Training files can be moved into a new or an existing training session.
To move a training file into an existing training session:
1. Perform a training session search in the Training Session Log tab.
2. Select a player's training file(s) from list on the left.
3. Select Edit > Move players into an existing session. A pop-up appears.
4. Select a date by clicking on the date picker. The existing training sessions for that day
are displayed.
5. Select a training session from the list. The selected training files will be moved into the
selected session.
112

Team2 SW help
6. Review the list of selected players. The selection cannot be edited here. To change the
player selection, click Cancel, make the new selections.
7. Click OK to confirm the move.
To move training files into a new training session:
1. Perform a training session search in the Training Session Log tab.
2. Select a player's training file(s) from list on the left.
3. Select Edit > Move players into a new session. A pop-up appears.
4. Select a date by clicking on the date picker. Modify the time of day if necessary.
5. Select a training activity.
6. Check the Atypical/new training session check box if necessary.
7. Review the list of selected players. The selection cannot be edited here. To change the
player selection, click Cancel, and make the new selections.
8. Click OK to confirm the move.
How to Print Training Report
1. Create a training report.
2. Select Menu > Print from the main menu. A preview of the training report appears in a
new window.
3. Close the window by clicking the Close button. Your printer control panel appears.
4. Click OK to print the report on paper.
How to Save Training Report
To speed up the process of producing training reports, training reports can be saved as quick
links.
1. Create a training report.
113

Team2 SW Help
2. Click the Save as button in the graph area.
3. Type in the name for the report in the Save report window that appears in the upper left
corner.
4. To save the report click OK.
How to Search Training Session
For more information, see training session log.
1. Open the Team2 software and select the team.
2. Open the Training Session Log page.
3. Select either by team or by player depending on your wishes.
4. If you selected by player, select the player from the drop-down list below.
5. Select how you want to limit the date range for the report. The options are Search by
date, Search by period and Quick search.
6. Make the date range selections.
7. Select the training activity or test (or All) from the Training activity drop-down list.
8. Click the Search button to get the training sessions based on the search criteria.
9. Select the player or players by checking the box. The selected players' training data is
shown.
10. View the training data and make possible changes.
11. Save the changes by clicking the Save button.
When you leave the Training Session Log page and changes have not been saved, the software
asks if you want to save the changes. Select Yes or No. Select Cancel if you don't want to save
the changes or leave the page.
How to Send Training Session Files By E-mail
Training session files can be sent by e-mail. Files can be imported to Team2 software. This
feature can be useful if a player or another trainer has the software on his/her PC and wishes to
work with the data.
114

Team2 SW help
To send training session files:
1. Open the Team2 software and select the team.
2. Select File > Send E-mail.
3. Select the Training session files button.
4. Select the date range for the training sessions.
5. Select from the players list the players whose training data you want to send.
6. Click the Send button. Your default e-mail software opens. Training session files are an
attachment.
How to Share Training Session Report
1. Create a training session report in desired format.
2. Either save the file onto your PC or print it on paper.
3. Share the report by sending the file via e-mail.
How to Transfer Data Between PC and Training Computer
• Transfer to the PC
• Transfer to the Polar Training Computer
Data (training session data, person information, date information, personal values and sport zone
information) can be transferred between the Team2 PC software and your Polar training computer.
The data transfer between the PC and the Polar training computer is done by using infrared
connection. You need either a built-in infrared port or Polar IrDA USB adapter on your PC to
transfer data. For example, the following Polar training computers are compatible with infrared
communication and Team2 transmitters: CS400, RS400, AXN500, AXN700, S810i, S725X /
S625X, S725, S720i / S710i and S610i.
To transfer data, open the Polar Training Computer tab in Team properties (Options > Team
Properties > Players tab > Polar Training Computer tab). There are two sections in the tab,
Transfer to the PC and Transfer to the Polar Training Computer.
NOTE: Data cannot be transferred if there are unsaved changes in Team Properties. Click Save
before transferring data between the PC and the Training Computer.
Transfer to the PC
115
Team2 SW Help
Transfer to the PC has two settings that can be set on or off before transferring data.
• When Training sessions (Files) is checked, training files are transferred from the
training computer to PC.
• When Person information (User settings) is checked, user information is transferred
from the training computer to PC.
1. If you are using a separate infrared adapter, plug it into your PC.
2. Open Team2 software, select a team and open Team Properties.
3. Go to the Polar Training Computer tab (Players > Polar Training Computer), and
select the information you want to transfer (training sessions or person information).
4. Select a player from the player list on the left.
5. Set your Polar training computer into connect mode and place it in front of the infrared
port. See the user manual of your Polar product to get support in setting the training
computer into connect mode.
6. Click Transfer button from the Team2 software to begin the transfer.
7. If you are transferring training files, the software displays a list of training files found in the
training computer. Select which training sessions you want to save to the system, to
which player the training sessions are set and which are the training activities.
8. Select Transfer to save the training sessions to the system.
Transfer to the Polar Training Computer
Transfer to the training computer has five settings that can be set on or off before transferring
data.
• When Date and time is checked, the date and time is transferred to the training
computer.
• When Person information is checked, the selected player's information is transferred to
the training computer.
• When Personal values is checked, the selected player's heart rate (and other) values
are transferred to the training computer.
116
Team2 SW help
• When Sport zones is checked, the sport zone settings are transferred to the training
computer.
• When Polar Team2 transmitter number (Time view) is checked, the selected player's
transmitter number is transferred to the training computer. The transmitter number can be
set to be displayed on the screen of the training computer in Time view by long-pressing
the upper right button.
1. If you are using a separate infrared adapter, plug it into your PC.
2. Open Team2 software, select a team and open Team Properties.
3. Go to the Polar Training Computer tab (Players > Polar Training Computer), and
select the information you want to transfer (date and time, person information, personal
values, sport zones, or transmitter number).
4. Select a player from the player list on the left.
5. Set your Polar training computer into connect mode and place it in front of the infrared
port. See the user manual of your Polar product to get support in setting the training
computer into connect mode.
6. Click Transfer button from the Team2 software to begin the transfer.
7. Polar Training Computer settings updated successfully is displayed when the
transfer is successfully completed.
How to Transfer Data from Transmitters' Memory
After online training or off-season period (for example, independent training period), the training
data can be transferred from the transmitters' memory to the PC.
NOTE: Online training data can also be completed by using this feature. Completion can be
needed, for example, if there are gaps in the training data. Use cases:
• There were connection problems between the base station and the PC.
• There were connection problems between the transmitter(s) and the base station (the
transmitter was out of the base station's range).
117
Team2 SW Help
• There was only a PDA device used during online training and there was no data recorded
onto the PC.
To transfer data from the transmitters' memory:
1. Open the Team2 PC software.
2. Switch on the base station. Wait until the connection is ready between the base station
and the PC.
3. Insert the transmitters into the charger and plug in the power cable.
4. Select a team.
5. Select Tools > Transfer Training Sessions. The Select Transmitters to Transfer Files
window appears.
6. Select All files or New files at the bottom of the screen according to your wishes. When
New files is selected, the software shows transmitters in 3 groups: transmitters that have
new files (In charger: new files), transmitters that don't have new files (In charger: no
new files), and transmitters that are not in the charger (not in charger).
7. Check the transmitters you want to transfer data from. Check All transmitters if you
want to select all transmitters.
8. Select the Transfer to PC button to begin the transfer. Wait until the transfer is finished.
9. A list of found training files is shown. Select a player and a training activity for each
training session.
10. Select the training sessions you wish to save by checking the box.
11. Save the training session by selecting Save.
NOTE:
• The charger must be in close range (max. 2 meters (6.5 ft)) from the base station (or the
USB dongle) during the training session files are transferred from the transmitters'
memory.
• If New files is selected, you cannot select the transmitters that do not have new training
files. If you want to transfer data from all transmitters' memory, select All files.
• If you get Transferring Files Not Allowed: Transmitter X warning during file transfer,
the transmitter in question is in non-secured mode and the data transfer to the PC is not
118

Team2 SW help
allowed. Finish the transfer of other training files to your Team2 system normally. Switch
the failed transmitters to secured mode by removing the transmitters from charger and
inserting them back after a minimum of 3 seconds. Only one sound should be heard.
Repeat the file transfer with these transmitters.
Transmitters
How to Add Transmitters
When the original 10 transmitters are not enough, transmitters have not been added during
Wizard or some of the original transmitters have to be re-added, the Add new transmitter
function becomes handy. New transmitters can be added by using the base station or the USB
dongle. You can add up to 10 transmitters at a time. A maximum of 80 transmitters can be added
to the system.
Do not attach number labels to empty transmitters beforehand!
1. Open the Team2 software.
2. Connect the main base station to the PC.
3. Remove the old (previously added) transmitters from the charger.
4. Click Tools > Add New Transmitter. A popup window appears.
5. Make sure that you have either the base station connected to the PC (lights 1 and 2 are
on) or you have plugged in the USB dongle.
6. Insert the new transmitters into the charger and plug the power cable into the charger.
7. Wait until found transmitters start appearing under heading New on the left.
8. Select one of the new transmitters from the list by clicking. Wait until the transmitter is
moved under heading Added. At the same time, a green light is lit on one of the
transmitters in the charger. NOTE: It may take couple of second the green light to light up!
9. Remove the transmitter that has a green light on it from the charger.
10. Mark the transmitter with number label that is in accordance with transmitter's number
shown on the screen.
11. Repeat steps 8 to 10 until all the transmitters are added and labeled.
12. End by clicking the Finish button.
119

Team2 SW Help
NOTE:
• If you have more transmitters in the charger than were found, make sure the transmitters
are inserted correctly.
• During the transmitters are taught to the system, a yellow triangles are displayed in the
Transmitters tab (of Software Preferences) until the introduction is finalized. To find out
the reason for the yellow triangle, take the mouse cursor on the symbol and a tooltip
message is displayed.
How to Assign Transmitter to Player
Usually the transmitters are assigned to the players during Wizard. If the transmitters are not
assigned to the players, new transmitters have been added to the system or you want to change
the assigned player, you can assign the transmitters to the players in Team Properties:
1. Open the Team2 software.
2. Select a team.
3. Select Options > Team Properties.
4. Select the Players tab.
5. Select a player from the list by clicking his/her name. The player's information fields are
enabled.
6. Select the transmitter from the Transmitter drop-down list on the General tab.
7. Repeat steps 5 and 6 if needed.
8. Click Save to save the changes. Close the window by selecting Close.
How to Remove Transmitter
NOTE: Removing transmitter affects all the teams in the system.
1. Open the Team2 software.
2. Open Team2 Preferences by selecting Tools > Preferences.
3. Select the Transmitters tab.
4. Select a transmitter from the list by clicking it.
120

Team2 SW help
5. Click Remove button. The transmitter is removed without confirmation!
6. Repeat steps 4 and 5 if necessary.
See also How to add transmitters.
PDA software
Introduction to PDA Software
The PDA and Team2 PDA software liberates you as a trainer to monitor players' heart rates
effortlessly during training. Team2 PDA software offers few essential Online Training features.
Heart rates, sport zones and training loads can be monitored in a list or grid view. You can
monitor all the players or only a few players at a time. The PDA enables online monitoring with a
small-sized device without a PC!
It is easy to start up the Team2 PDA software and it is easy to use. Mobile online monitoring is
only a few steps away once the Team2 PC software has been taken into use:
1. Connect the PDA to PC according to the instructions provided with the PDA. To
synchronize information between your PC and the PDA, make sure you have all the
necessary software(*) installed on your computer.
2. Install the Team2 PDA software.
3. Sync your teams to the PDA via the Team2 PC software.
4. Connect the PDA to the Team2 base station with a wireless connection. See How to
establish wireless connection.
5. Monitor training online. See How to start online monitoring.
NOTE: PDA device is not provided in Team2 set. Contact your local IT dealer to purchase one.
Team2 PDA software is only available in English.
(*) If you are using Windows XP, you need to have Microsoft ActiveSync installed, and if you are
using Windows Vista, you need to have Windows Mobile Device Center installed.
If you need general instructions on how to use PDA device, see the PDA device's manual.
PDA Requirements
The Team2 PDA software requires that the PDA device fulfills the following minimum
requirements:
121

Team2 SW Help
• 10 MB of free disk space
• Wireless connection (IEEE802.11b/g)
• Operating system: Windows Mobile 5 (or newer)
The screen resolution of the PDA device must be 240x320 pixels.
Additionally, we recommend that the PDA device also has WPA encryption.
Installation of PDA Software
In order to monitor players' heart rates during online training, player information has to be
transferred to the PDA. Before you can synchronize player information to the PDA device, Team2
PDA software has to be installed onto your PDA.
To install the software, follow these steps:
1. Connect the PDA to the PC with USB cable according to the instructions provided with
the PDA. To synchronize information between your PC and the PDA, make sure you
have all the necessary software(*) installed on your computer.
2. Insert the Polar Team2 DVD into your optical drive. The DVD starts automatically.
3. Select language.
4. Select Install PDA Software.
5. Follow the instructions on both screens. All the necessary components are installed onto
your PC and the PDA.
(*) If you are using Windows XP, you need to have Microsoft ActiveSync installed, and if you are
using Windows Vista, you need to have Windows Mobile Device Center installed.
For more general information about the installation process see the PDA manual provided with
the device.
PDA Software
After installation, the Team2 PDA software can be found from the program folder of the PDA
device. The software opens by double-clicking the icon. The software should be closed by
selecting Menu > Quit.
122
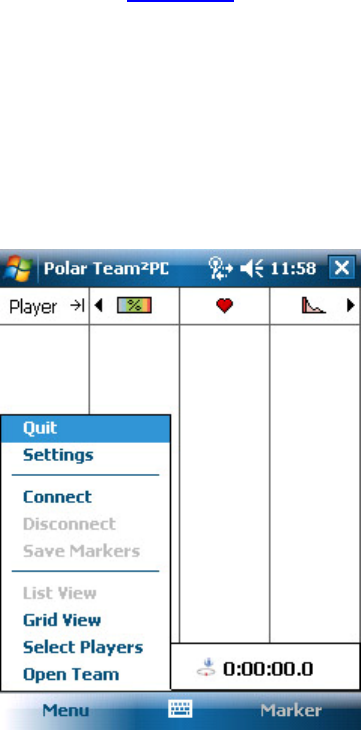
Team2 SW help
Remember to synchronize the team information onto the PDA before starting the online
monitoring.
Elements
The online monitoring view is the main view of the software. There are two options for the view,
List view and Grid view. The view type is selected from the main menu.
The main menu can be accessed by clicking Menu in the lower left corner.
The menu consists of the following:
• Quit, closes the software.
• Settings, opens Team2 PDA software settings.
• Connect, establishes a wireless connection to the base station if the wireless connection
settings are set correctly.
• Disconnect, disconnects the wireless connection to the base station.
• Save Markers, saves the taken markers to the PDA's memory.
• List View, selects the list view as the view type.
• Grid View, selects the grid view as the view type.
123
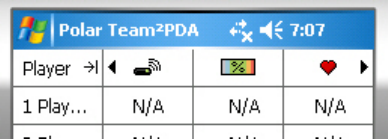
Team2 SW Help
• Select Players, opens a player selection window where you can select the players that
are shown in list and grid view.
• Open Team, opens a window where you can select the team you wish to use.
At the bottom of the page, next to Menu in the toolbar are Marker and PDA keyboard icons. The
marker is taken with the PDA software by clicking the Marker text during online training. When
the Marker text is clicked, timer on the screen is paused. Timer still runs in the background. By
clicking Continue the timer on the screen starts again.
Above the toolbar there are two timers. The timer on the left displays the whole duration of the
training session. The timer on the right displays the time since the moment the previous marker
was taken. The timers start at the moment the Connect is selected from the menu and the
connection between the PDA and the base station is established.
List View
The list view is selected from the main menu by selecting List View. The list view is also the
default view in the PDA software.
There are 5 possible columns in the list view.
• The first column is Player Name which is shown always. The column can be narrowed
and widened by clicking the small arrow icon next to the title. When the column is
widened, only 2 other columns are shown. When the column is narrowed 3 other columns
are shown.
• The other 4 columns are Sport zone, Heart rate, Transmitter number and Training load.
The columns that are shown are selected in the settings.
You can change the displayed columns by clicking the black arrow icons next to the column title
icons.
Grid View
The grid view is selected from the main menu by selecting Grid View.
124
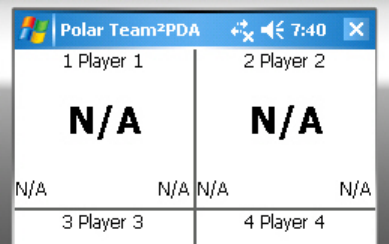
Team2 SW help
• If online training is not switched on, the grid view is only a grey screen.
• When the base station receives data from the transmitters, heart rates and other
information start to display in the grid view. The grid view provides players' names,
numbers, transmitter numbers, heart rates, sport zone information and training load
information.
Settings
The settings of Team2 PDA software can be accessed by selecting Settings from the main menu.
The settings are divided into three sections. There is one tab for each section which are General,
List View and Grid View.
The settings are saved by clicking OK in the upper right corner of the screen.
General
125
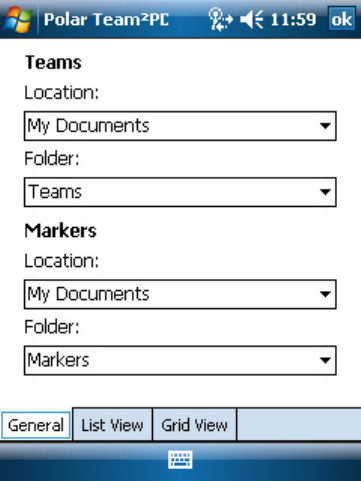
Team2 SW Help
There are four options in General tab. Each option is for selecting the location for team and
marker files.
Teams:
• Location - where the team files are stored. My Documents is selected by default.
• Folder - the folder in which the team files are stored. Teams is selected by default.
Markers:
• Location - where the marker files are stored. My Documents is selected by default.
• Folder - the folder in which the marker files are stored. Markers is selected by default.
List View
126
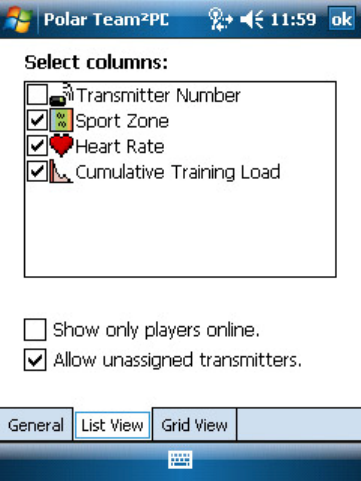
Team2 SW help
There are three options in List View tab.
• With the Select columns option you can select columns by checking which ones are
shown in the list view. The options are Transmitter Number, Sport Zone, Heart rate and
Cumulative Training Load. Each option is checked by default. The Player name column is
shown always, so it's not one of the options.
• By checking Show only players online, only players/transmitters that are online and
connected to the base station are displayed in the list view.
• By checking Allow unassigned transmitters, the transmitters that don't have a player
assigned are also displayed in the list view. If there is not a player assigned, only
transmitter's Bluetooth address is displayed in the Player name column.
Grid View
127
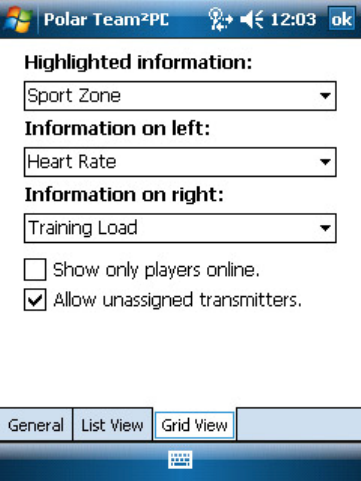
Team2 SW Help
There are five options in Grid View tab.
• The first three options are for selecting in which order the information is shown in the grid
view. Highlighted information is the information shown in the center of the grid cell.
Information on left is the information shown in the lower left corner of the cell.
Information on right is the information shown in the lower right corner of the cell. The
options for these selections are Sport Zone, Heart rate and Training Load. When one
option is changed, the others also change.
• By checking Show only players online, only players/transmitters that are online and
connected to the base station are displayed in the grid view.
• By checking Allow unassigned transmitters, the transmitters that don't have a player
assigner are also displayed in the grid view. If there is not a player assigned, only
transmitter's Bluetooth address is displayed as Player name.
How to...
How to Close PDA Software
Close the Team2 PDA software by selecting Menu > Quit. If you close the software by selecting
the cross in the upper right corner, the software is only minimized and it continues running in the
background.
After the software is minimized into the background, it can be stopped with the following the next
steps:
128
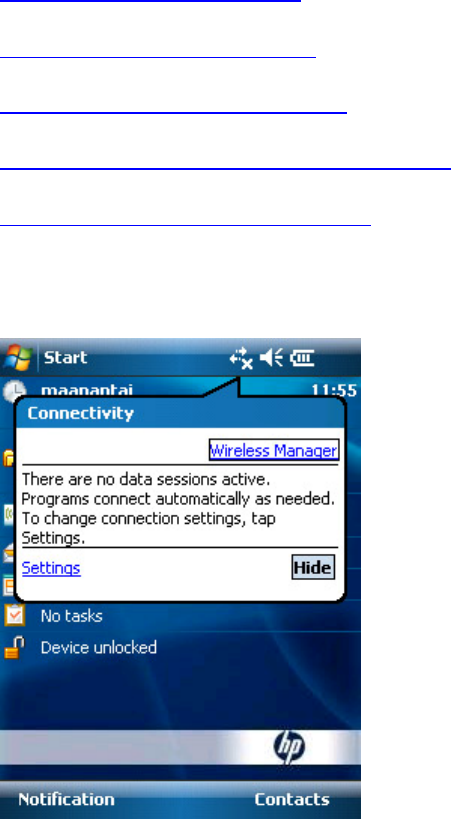
Team2 SW help
1. Select Start > Settings > System tab > Memory.
2. Select Running programs tab.
3. Select Polar Team2 PDA from the list.
4. Select Stop. The software disappears from the list.
How to Establish Wireless Connection
To monitor training online you have to establish a wireless connection between the PDA and the
main base station. All the wireless connection settings of your PDA must be checked when you
first start using the PDA software for the first time.
1. Make sure the wireless is enabled.
2. Check the wireless adapter settings.
3. Set the wireless network settings ready.
4. Finalize the wireless connection to the base station.
5. Disconnect the PDA from the base station.
Make Sure Wireless Is Enabled
1. Click the Connectivity icon at the top of the screen. A pop-up window appears.
129
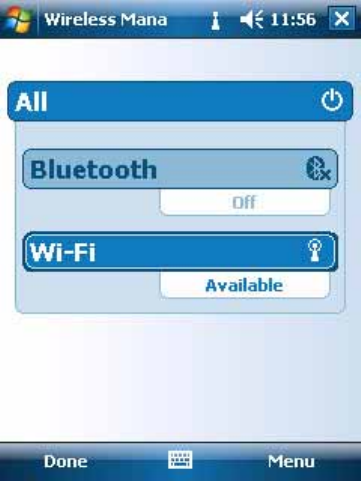
Team2 SW Help
2. Select Wireless Manager.
3. Make sure the wireless is enabled (not greyed out). You can enable the wireless by
clicking.
Check Wireless Adapter Settings
After you have checked that wireless is enabled, check the settings of your wireless adapter.
1. Open the wireless connection settings either by selecting Start > Settings >
Connections, or by clicking the Connectivity icon at the top of the screen and selecting
130
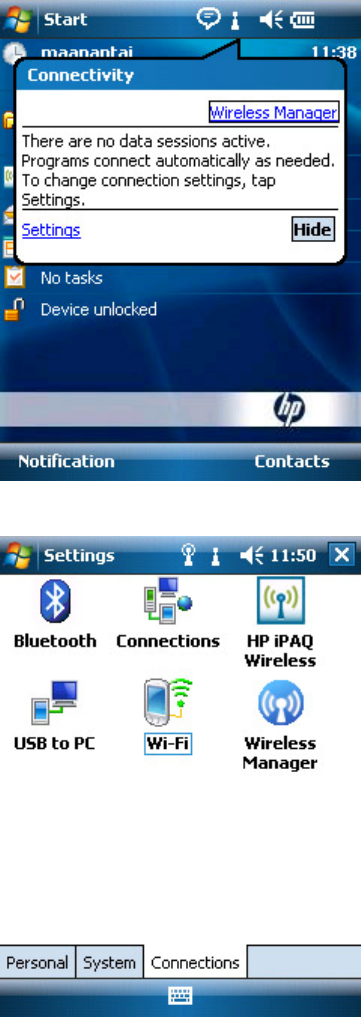
Team2 SW help
Settings.
2. Double-click Wi-Fi.
3. Select your wireless adapter from the list by clicking it once.
4. In the IP Address tab, make sure that Use server-assigned IP address is selected.
5. Select the Name Servers tab and make sure that the DNS, Alt DNS, WINS and Alt
WINS fields are empty.
131
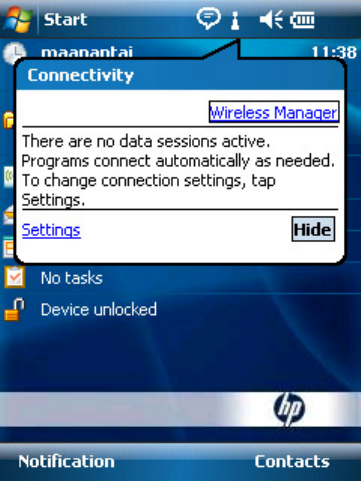
Team2 SW Help
6. Select OK from the upper right corner of the screen.
Set Wireless Network Settings Ready
1. Switch on the base station if it is not already switched on. Wait approximately for one
minute until the base station is ready (the blue light 1 is lit).
2. Open the wireless connection settings either by selecting Start > Settings >
Connections, or by clicking the Connectivity icon at the top of the screen and selecting
Settings.
132
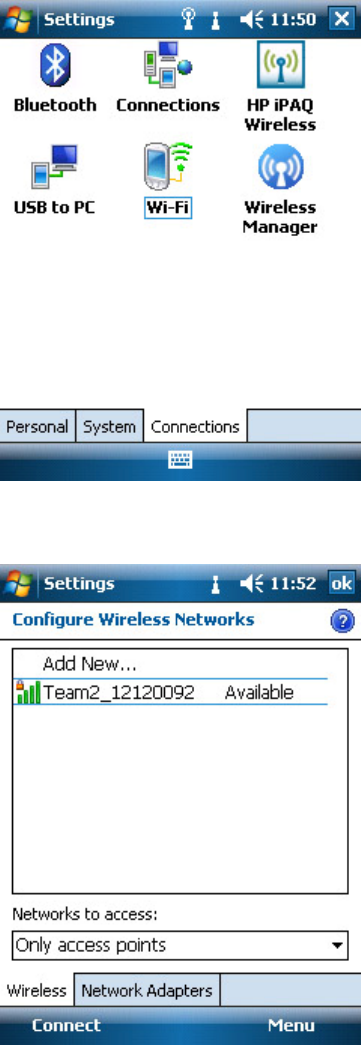
Team2 SW help
3. Double-click Wifi.
4. If the base station is ready, you should see the main base station's wireless network on
the Wireless Networks list.
5. Select your base station's network by clicking it once.
133
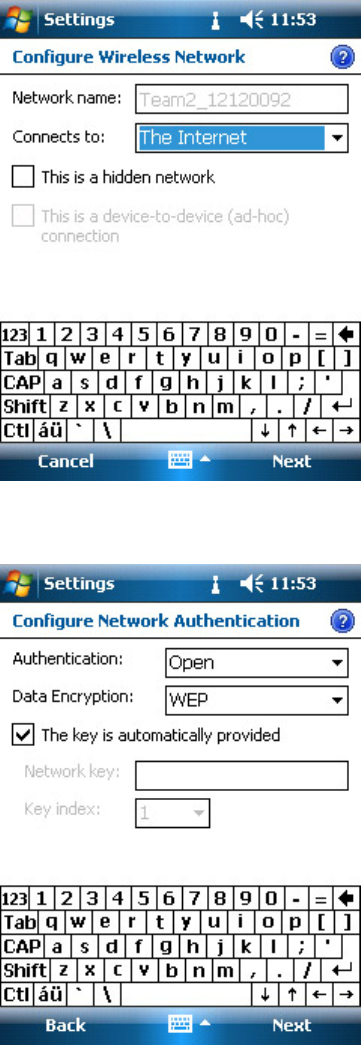
Team2 SW Help
6. Leave the first page of the configuration as it is. Do not check the This is a hidden
network box. Select Next to continue.
7. Select Open from the Authentication drop-down list, and WEP from the Data
Encryption drop-down list.
134
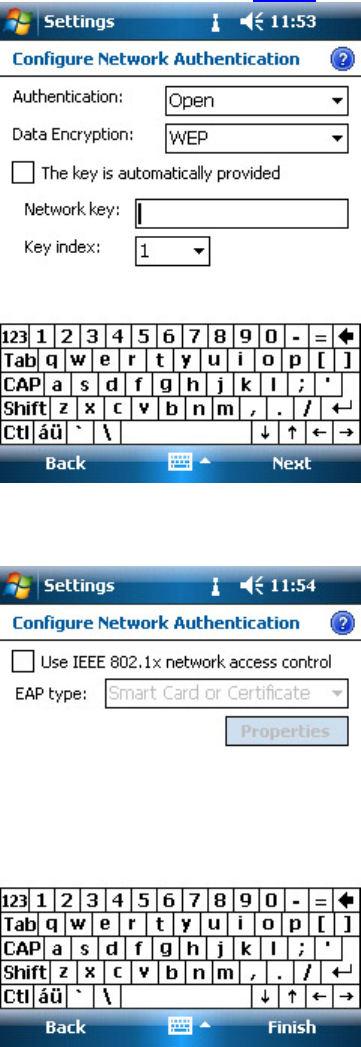
Team2 SW help
8. Uncheck The key is automatically provided box. Type in the base station's network key
you have determined during Wizard. Select Next to continue.
9. Leave the last page as it is. Do not check the Use IEEE 802.1x network access control
box.
10. Click Finish to complete the setting configuration.
11. The available wireless networks list is shown again. If your PDA does not automatically
start to connect to the main base station (it may take about 20-30 seconds), select the
base station's network from the list and select Connect.
135
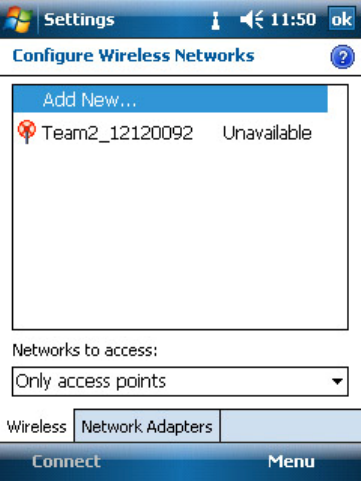
Team2 SW Help
After you have set the wireless network settings, your PDA automatically detects the main base
station's network when the base station is on, and the wireless connection is ready for use.
NOTE: If the main base station is not on, or the PDA is out of network range, the preset wireless
network is displayed as unavailable in the wireless network list.
Finalize the Wireless Connection to the Base Station
1. Switch on the main base station if it is not already switched on. Wait approximately for
one minute until the base station is ready (the blue light 1 is lit).
2. Open the Team2 PDA software (Start > Programs > Polar Team2PDA).
136
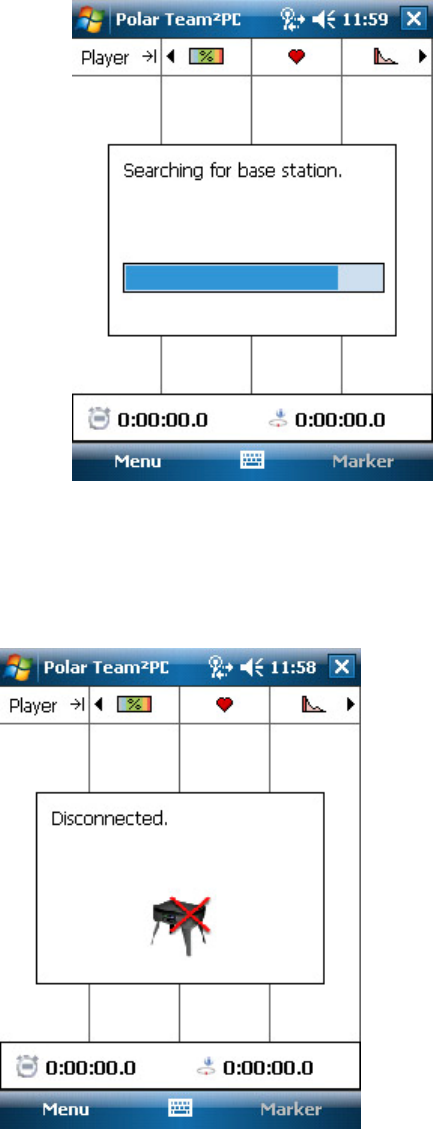
Team2 SW help
3. Select Menu > Connect. The PDA establishes a wireless connection to the main base
station if the wireless connection settings are correctly set.
Disconnect from Base Station
To disconnect the PDA from the main base station's wireless network, select Menu >
Disconnect. The connection is closed automatically. NOTE: The Wi-Fi adapter is still enabled.
How to Open Team
137
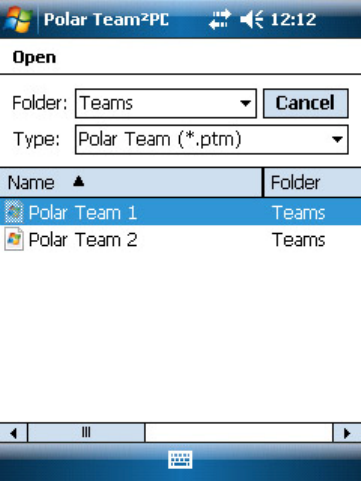
Team2 SW Help
Before you can monitor players' heart rates online, a team must be selected.
1. Open the Team2 PDA software.
2. Select Menu > Open Team.
3. If the folder in which the team files are stored is not displayed by default, select the folder
from the Folder drop-down list.
4. Tap on the team's name to select the team.
138
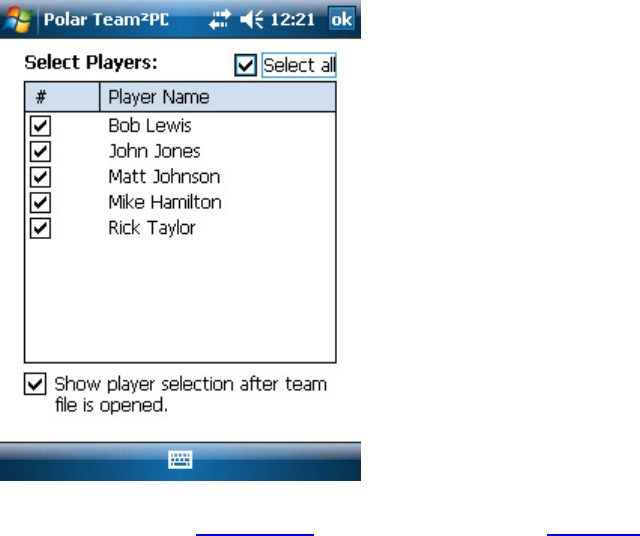
Team2 SW help
5. The player selection window is opened automatically if you have checked the Show
player selection after team file is opened option in player selection.
NOTE that the PDA has to be synchronized with the PC software and connected to the base
station before you can monitor players' heart rates online.
How to Select Players
The player selection window is opened automatically after you have selected a team, if you have
checked the Show player selection after team file is opened option at the bottom of the player
selection window.
The player selection is accessed by selecting Menu > Select Players. The list of currently-
selected team's players is displayed.
139
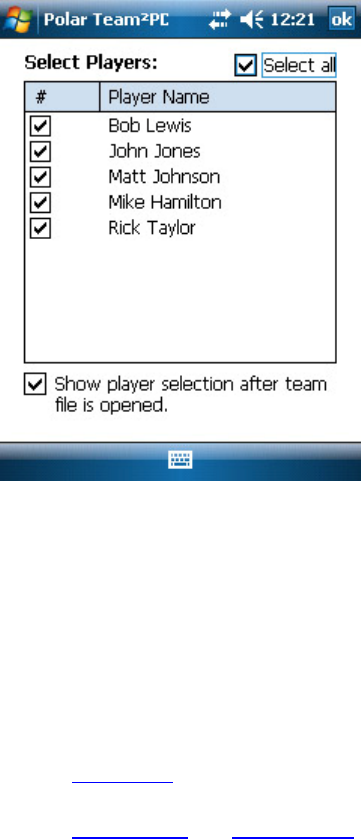
Team2 SW Help
Select the players you wish to be displayed in the list and grid views by checking the boxes.
Close the player selection by clicking OK in the upper right corner of the screen.
How to Start Online Monitoring
1. Switch on the base station and give the transmitters to the players.
2. Establish a wireless connection between the PDA and the base station according to the
instructions.
3. Open a team and select players.
140
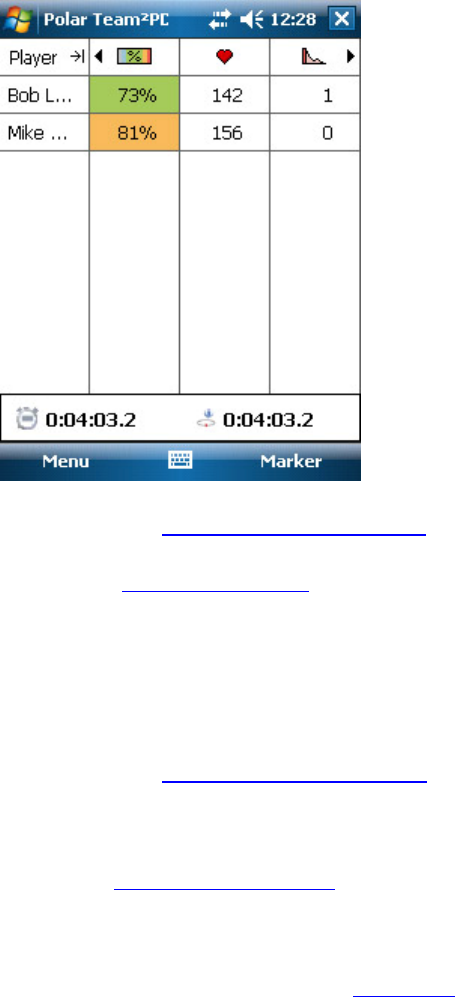
Team2 SW help
4. Monitor the players online. The players' heart rates start to display on the screen when
the base station detects their signal.
For more information, see How to stop online monitoring.
NOTE: Remember to synchronize the PDA with the Team2 PC software before online monitoring.
How to Stop Online Monitoring
Select Menu > Disconnect to end the online monitoring. Players' heart rates disappear from the
display.
For more information, see How to start online monitoring.
How to Synchronize PDA
For instructions, see How to synchronize PDA in the software How to section.
How to Take Markers
1. Start online monitoring according to the instructions.
2. To take a marker, select Marker from the tool bar at the bottom of the screen. The timer
on the screen is paused. Time still runs in the background. By clicking Continue the
141
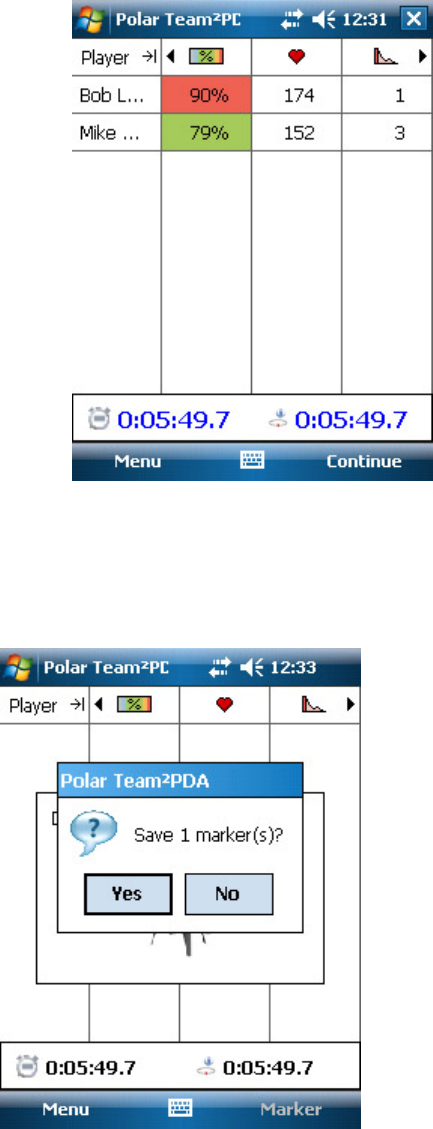
Team2 SW Help
timer on the screen starts again.
Saving the Markers
If you have taken markers and you close the connection to the base station (Menu >
Disconnect), the software asks whether you want to save the markers or not.
If you select no, the markers can also be saved later, before closing the software, by selecting
Menu > Save Markers.
142
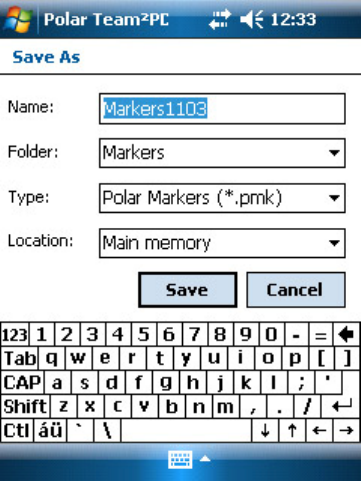
Team2 SW help
In both cases the marker files are saved by default to the folder set in the settings. Type in the file
name and select Save to save the markers.
If you select Cancel in the Save as window, you can save the markers again by selecting Menu
> Save Markers before closing the software.
After training
If you have taken and saved markers with the PDA software, you can synchronize them to the PC
software. Connect the PDA to the PC, open the Team2 software and select Tools > Synchronize
PDA.
Troubleshooting
Troubleshooting
Troubleshooting offers you firsthand help when you have a problem either with the hardware, PC
software or PDA software.
In many situations the best help can be found by using the search engine. The search engine can
be accessed by clicking the Search tab above the help menu.
Additionally, lots of information can be found in the How to articles which can be found in
separate folders under Hardware, Software and PDA software chapters.
Search Tips
143

Team2 SW Help
• Use simple search words or sentences. Two or three words are enough.
• Use basic forms of verbs.
• The search engine does not understand the meaning of interrogatives like "why", "what"
and "when". Instead use keywords, such as "transmitter", "green ligh"t and "planning", as
search words.
Glossary
There is also a glossary in the help. It can be accessed by clicking the Glossary tab above the
help menu.
Training Articles
For more information on the physiological aspects and other features of Polar products, visit the
Polar Collection of Training Articles.
Tutorial
For more visual guidance, see the Team2 tutorial which can be found from the PC software (Help
> Tutorial).
Connections
Below you can find help to some common problems with the connections between the base
station and PC/PDA.
• PC and Ethernet cable
• PC and wireless connection
• Wireless connection between PDA and base station
PC and Ethernet cable
The step-by-step instructions for wired connection can be found in the hardware section.
• Make sure that the Team2 software is running.
• Make sure that the main base station is switched on.
• Make sure that the network cable is plugged into the main base station and the PC.
144

Team2 SW help
• Check that the lights next to the Ethernet port on your PC are flashing. The flashing
means that the connection is working.
• Make sure that your Ethernet adapter is enabled:
1. Select Start > Control Panel > Network connections.
2. Right-click Local Area Connection.
3. If the right-click menu includes option Enable, the adapter is at the moment
Disabled. In this case, select Enable.
• Make sure the lights of the Ethernet port on your PC are flashing.
If you have checked all the issues mentioned above:
1. Close the software and switch off the main base station.
2. Open the software and switch on the main base station again.
If the connections still do not work, check that the status of your LAN connection is Connected
and the IP address of the base station is 192.168.42.x (x can be any number):
1. Select Start > Control Panel > Network connections.
2. Right-click Local Area Connection and select Status. The status is displayed on the
first page.
3. Select Support tab. The IP address is displayed.
If you have checked all the issues mentioned above:
• Try to reboot your PC.
• Update the drivers of the LAN adapter. Contact the adapter's manufacturer's web site.
PC and Wireless connection
The step-by-step instructions for wireless connection can be found in the hardware section.
• Make sure that the Team2 software is running.
• Make sure that the main base station is switched on.
145

Team2 SW Help
• Make sure you are using the correct wireless network key. The network key is set in the
Preferences of the software. If you have forgotten your wireless network key, change it
according to the instructions.
• If there are visible light indicators in your Wi-Fi adapter, check that they are flashing. The
flashing means that the connection is working.
• If you have a separate on/off switch for your Wi-Fi adapter (e.g. touch button on your
laptop's keyboard), make sure the adapter is switched on.
• Make sure that your wireless connection adapter is enabled:
1. Select Start > Control Panel > Network connections.
2. Right-click Wireless Network Connection.
3. If the right click menu includes option the Enable option, the adapter is currently
Disabled. In this case, select Enable.
• Some computers block the Wi-Fi connection automatically if the Ethernet cable is
plugged in. If this is the case, remove the Ethernet cable from the PC connector.
• Some computers block the Wi-Fi connection automatically if you are using a docking
station. If this is the case, remove the laptop from the docking station.
If you have checked all the issues mentioned above:
1. Close the software and switch off the main base station.
2. Open the software and switch on the main base station again.
If the connections still do not work, make sure that your PC is trying to connect to the main base
station:
1. Select Start > Control Panel > Network connections.
2. Right-click Wireless Network Connection and select View Available Wireless
Networks.
3. Select the Polar network from the list and click Connect.
4. Computer prompts you for the wireless network key.
If you have checked all the issues mentioned above:
146

Team2 SW help
• Try to reboot your PC.
• Update the drivers of the wireless connection adapter. Contact the adapter's
manufacturer's web site.
NOTE: If the wireless connection works between the PDA and the main base station but not
between the PC and the main base station, the problem is most likely in your PC settings.
Wireless connection between PDA and Base Station
• Make sure you have the main base station switched on.
• Make sure you have the correct wireless network key. If you have forgotten your wireless
network key, change it according to the instructions.
• Make sure you have enabled PDA's wireless adapter.
• Make sure you have the correct wireless adapter settings.
• Make sure you have the correct wireless network settings.
• If all the settings are set correctly, switch off the main base station and close the PDA
software (Menu > Quit). Then switch on the main base station and open the PDA
software again.
NOTE: If the wireless connection works between the PC and the main base station but not
between the PDA and the main base station, the problem is most likely in your PDA settings.
Online Training
Below you can find help to some common problems with online training.
Problem Cause Solution
Transmitter/Player's information
disappears from the list.
1) Transmitter's memory is full.
2) Transmitter's battery is empty.
3) Strap's electrode areas are dry or
strap is secured incorrectly.
4) Connection between the PC/PDA
and the base station is momentarily
1) Transfer training data from
transmitter to the PC.
2) Recharge transmitter's battery.
3) Wet the electrode areas of the
strap under running water. Make
sure that the strap is secured
correctly and the wet electrode
147

Team2 SW Help
disconnected.
5) Base station's battery is empty.
6) The transmitter is out of the base
station's range.
areas are firmly against player's
skin.
4) Wait for a moment. If connection
is not restored, switch the base
station off and on again. Also re-
open the software and establish
connection between PC and base
station normally.
5) Plug the power cable into the
base station.
6) Wait until the player is again in
the base station's range. The
transmitter has a buffer memory so
short gaps can be corrected during
the online training.
Cases 4 and 6: If there is a long gap
(several minutes) in data recording
during the online training, the data
can be completed by transferring
the data from the transmitter's
memory after the online training
according to the instructions.
Transmitter/Player is not shown
during online training.
1) Transmitter's battery is empty.
2) Strap's electrode areas are dry or
strap is secured incorrectly.
3) Connection between the PC/PDA
and the base station is momentarily
disconnected.
4) Base station's battery is empty.
5) There is not a player assigned to
the transmitter.
6) Transmitter is in off-season
mode.
1) Recharge transmitter's battery.
2) Wet the electrode areas of the
strap under running water. Make
sure that the strap is secured
correctly and the wet electrode
areas are firmly against player's
skin.
3) Wait for a moment. If connection
is not restored, switch the base
station off and on again. Also re-
open the software and establish
connection between PC and base
station normally.
4) Plug the power cable into the
148

Team2 SW help
7) Transmitter is in non-secured
mode.
base station.
5) Assign a player to the transmitter
in Team Properties (Options >
Team Properties > Players tab).
6) Change the transmitter's mode to
online in preferences according to
the instructions in software
preferences.
7) Change the transmitter's mode to
secured by inserting the transmitter
to the charger (power cable must be
plugged in), removing the
transmitter from charger and
inserting it back after a minimum of
3 seconds. Only one sound should
be heard.
When clicking the Connect button
in the Online Training tab, nothing
happens.
1) A team is not selected.
2) A training session is not selected.
1) Select a team (Options > Edit
Teams > Check a team > Close).
2) Select a training session or
training activity from the Training
session drop-down list at the top of
Online Training page.
If none of the above help, try to
close the Team2 software and open
it again.
Sport Zones
Below you can find help to some common problems with sport zones and sport zone settings.
Problem Cause Solution
New sport zone cannot be added. Low value of lowest existing sport Modify the Low value of the lowest
existing sport zone so that it's larger
149

Team2 SW Help
zone is 0. than 0.
There is not Remove button in the
rear of the sport zone.
Sport zone in question is the original
sport zone.
Original sport zones cannot be
removed.
Training computer
Below you can find help to some common problems with training computer usage with Team2
system.
Problem Cause Solution
The heart rate does not display on
the training computer screen.
1) Your Polar training computer is
not compatible with Team2
transmitters.
2) Your Polar training computer is
not in training mode.
1) For example, the following Polar
training computers can be used with
Team2 transmitter: RS400, RS300X,
AXN500 and AXN700. Full list of
compatible training computers can
be found at Polar website.
2) Set your training computer in
training mode. Usually, it is done by
pressing the RED button twice. For
more information, see the user
manual of your Polar product.
The transmitter number does not
display on the training computer
screen.
1) The transmitter number has not
been transferred to the training
computer.
2) The transmitter number has not
set to be displayed on the screen.
1) See the instructions in How to
transfer data between PC and
training computer.
2) In Time view, long-press the
upper right button.
Transfer
Below you can find help to some common problems with transfers.
150

Team2 SW help
Problem Cause Solution
In Options > Team Properties >
Players tab > Polar Training
Computer tab, the Transfer
buttons are disabled.
There are unsaved changes in
Team Properties. Click Save before
transferring data between the PC
and the training computer.
Click Save before transferring data
between the PC and the training
computer.
The transfer from the Polar training
computer to the PC or from the PC
to the Polar training computer fails.
1) Infrared adapter is not plugged in.
2) Infrared adapter drivers are not
installed.
3) Infrared adapter drivers are not
up-to-date.
4) Team2 software does not
recognize the infrared adapter.
5) Polar training computer is not in
transfer mode.
6) Your Polar training computer
does not support infrared
communication.
1) Plug in the infrared adapter.
2) Install the infrared adapter drivers
according to the instructions
provided with the adapter.
3) Update the infrared adapter
drivers. Usually, you can find the
newest driver's from the
manufacturer's web site.
4) Close the Team2 software, make
sure the infrared adapter is plugged
in properly and the drivers are
installed. Re-open the Team2
software.
5) See the user manual of your
Polar product to get support in
setting the training computer into
transfer mode.
6) For example, the following Polar
training computers are compatible
with infrared communication:
RS800CX, RS800, RS400, CS600
and CS400. Please note that not all
of the mentioned training computers
are compatible with Team2
transmitters.
151

Team2 SW Help
Transmitters
Below you can find help to some common problems with transmitters. Go through the list to get
firsthand help.
Problem Cause Solution
The transmitter cannot be taught to
the system.
The transmitter is in secured mode,
because it has already been paired
with another base station.
Change the transmitter's mode to
non-secured by removing the
transmitter from the charger and
inserting it back within 3 seconds.
When inserted into the charger,
three short sounds are heard
instead of one. Note that after you
have taught the transmitter to the
system, the connector's mode is
automatically changed to secured.
Training data cannot be transferred
from the transmitters to PC.
Transmitter is in non-secured mode,
because it is removed from and
inserted back into the charger within
3 seconds.
Change the transmitter's mode to
secured by removing the transmitter
from charger and inserting it back
after a minimum of 3 seconds. Only
one sound should be heard.
There's a yellow warning triangle in
the upper right corner of the
software and in the Transmitters
tab of software preferences.
The base station combination has
been changed (added or removed)
and base station information has not
yet synchronized to the transmitters.
See the instructions in How to
synchronize transmitters with new
base stations.
When inserted into charger, there is
no sound or light.
1) Power cable is not plugged into
the charger.
2) Transmitter is inserted into
charger incorrectly.
1) Plug the power cable into charger
and into the wall outlet.
2) Insert transmitter into the charger
so that the P of Polar logo is not
visible. The led is located next to
the R of Polar logo.
Transmitters are not shown as 1) Power cable is not plugged into 1) Plug the power cable into charger
152

Team2 SW help
connected even if they are inserted
into the charger correctly and there
is a connection between the base
station and the PC.
the charger.
2) The transmitters are in non-
secured mode.
and into wall outlet.
2) Change the transmitters' mode to
secured by removing the
transmitters from charger and
inserting them back after a minimum
of 3 seconds. Only one sound
should be heard.
A transmitter was not found during
Wizard or with Add New Transmitter
feature.
1) Transmitter is inserted into
charger incorrectly.
2) Contact problem between the
transmitter and the charger.
3) Problem with the wizard.
Click Search to start the search
again and wait until the system has
performed the search. Do this twice.
1) Insert transmitter into the charger
so that the P of Polar logo is not
visible. The led is located next to
the R of Polar logo.
2) Remove the transmitters that
were not found from the charger
and insert them back. You can also
try to insert the transmitters into
another slot of the charger.
3) Finish Wizard and add the rest of
the transmitters with Add New
Transmitters feature (Tools > Add
New Transmitter).
You have attached the numbered
sticker onto the new transmitters
(transmitter kit) and gone through
Add New Transmitter process. The
numbers that the system gave for
the transmitters don't match the
numbered stickers on the
transmitters.
Either...
1) Remove the numbered stickers
from the transmitters and attach
them onto the correct transmitters.
Or...
2) Cancel the Add New Transmitter
process, remove the transmitters
you added to the system (this time)
from the system (Tools >
Preferences > Transmitters tab),
and add the transmitters to the
153

Team2 SW Help
system one by one with the Add
New Transmitter feature.
Do this as follows:
• Insert only the first (e.g.
transmitter with a label
11) into the charger.
• Add the transmitter to the
system, it will
automatically be
numbered as 11.
• Insert only the second
(e.g. transmitter with a
label 12) into the charger.
• Add the transmitter to the
system, it will
automatically be
numbered as 12.
• Repeat until you have
added all the labelled
transmitters to the
system.
The number label has come off and
you don't know which transmitter it
is.
1) If only one transmitter doesn't
have a label, check the rest of the
transmitters' labels. The number
that is missing is the transmitter's
number.
2) If there are two or more
transmitters without a label, insert
them one by one into the charger
(one at a time). Open Tools >
Preferences > Transmitters tab.
Wait until the transmitter is
connected to the system. Find out
which transmitter is marked as
connected in the transmitter list.
Repeat this until you know the
154

Team2 SW help
numbers of each transmitter.
USB dongle
Below you can find help to some common problems with the USB dongle.
Problem Cause Solution
Team2 does not recognise the USB
dongle.
1) The USB dongle is not plugged
into the computer.
2) The USB dongle is not added to
the system.
3) You have installed the USB
dongle drivers from the included
CD. Drivers provided with Cubix
USB dongle are not compatible with
Team2 software. No driver
installation is needed. Just plug in
and start using with Team2.
1) Make sure you have properly
plugged in the USB dongle to the
USB port on your computer.
2) Make sure you have properly
plugged in the USB dongle to the
USB port on your computer.
1. Open Team2 software
2. Select Tools >
Preferences.
3. Select Base station /
USB dongle tab.
4. Click Add. A new dongle
appears to the USB
dongles list.
3) Uninstall the USB dongle drivers:
1. Select Start > (Settings)
> Control Panel.
2. Double-click Add or
Remove Program.
3. Select Bluetooth Stack
for Windows by Toshiba
from the list.
155

Team2 SW Help
4. Press Remove.
5. At some point Installation
remove ask for
confirmation "Are you
sure..." > Click Yes.
If Team2 software does not
recognise the USB dongle after the
you have uninstalled the drivers, try
to reboot your PC. You may also try
to plug the USb dongle into another
USB port on your PC.
You cannot transfer training session
files from the transmitters' memory
by using the USB dongle.
1) The USB dongle is not plugged
into the computer.
2) The Team2 software does not
recognise the USB dongle.
3) The USB dongle has not been
introduced to the Team2 software.
1) 1) Make sure you have properly
plugged in the USB dongle to the
USB port on your computer.
2) See the instructions above
(Uninstall the USB dongle drivers).
3) Introduce the USB dongle to the
Team2 software according to the
instructions.
Glossary
aerobic Uses oxygen
anaerobic Without oxygen
bpm Beats per minute, heart rate
continuous Training that is even and persistent. Has a low impact on
muscles and connective tissues.
hardware Equipment, devices. In this case all the equipment that
included in Polar Team2 set.
HR Heart rate, beats per minute
HRmax Maximum heart rate
HRR Heart rate reserve, the difference between resting and
maximum heart rate
intermittent Has a high impact on muscles and connective tissues
period Part of a season, for example, pre-season or post-season,
usually has a certain goal
phase Part of a training session, usually a certain exercise
156

Team2 SW help
recovery HR A measure that indicates how long it takes for a player's heart
to slow down after been exercised as hard as possible
recovery time An estimated time that it takes for a player to recover after
training, individual calculations
software PC or PDA program, in this case Team2 program
sport zone Training intensity zone set that allows easily to monitor the
intensity of training
threshold A heart rate level when the player reaches aerobic (lower
threshold) or anaerobic (upper threshold) state
training activity A type of team's training, for example, football or gym. The
type of training activity has an affect on training load and
recovery calculations.
training load A parameter that indicate how exhausting the training is. This
parameter makes different exercise sessions comparable in
terms of adaptive and exhausting characteristics.
training session Set of exercises that is performed at a time, can be planned
beforehand
VO2max The unit for oxygen uptake is millilitres per minute per weight
unit (ml/min/kg). The VO2max values vary between 35–85
ml/min/kg, depending on the individual’s performance and
sport.
Precautions
Minimizing Possible Risks
Training may include some risk. Before beginning a regular training program, answer the
following questions concerning your health status. If you answer yes to any of these questions,
consult a physician before starting any training program.
• Have you been physically inactive for the past 5 years?
• Do you have high blood pressure or high blood cholesterol?
• Do you have symptoms of any disease?
• Are you taking any blood pressure or heart medication?
• Do you have a history of breathing problems?
• Are you recovering from a serious illness or medical treatment?
• Do you use a pacemaker or other implanted electronic device?
• Do you smoke?
• Are you pregnant?
157

Team2 SW Help
Note that in addition to training intensity, medications for heart conditions, blood pressure,
psychological conditions, asthma, breathing, etc., as well as some energy drinks, alcohol, and
nicotine may also affect heart rate. It is important to be sensitive to your body’s responses during
training. If you feel unexpected pain or excessive fatigue when training, stop the exercise or
continue at a lighter intensity.
If you have a pacemaker, defibrillator or other implanted electronic device, you use the Polar
Team2 system at your own risk. Before starting use, take a maximal training stress test under the
supervision of a physician. The test is to ensure the safety and reliability of the simultaneous use
of the pacemaker and the Polar Team2 system. If you are allergic to any substance that comes
into contact with your skin or if you suspect an allergic reaction due to using the product, check
the listed materials in Technical Specifications. To avoid any skin reaction to the transmitter, wear
it over a shirt. Moisten the shirt well under the electrodes to ensure flawless operation. If you use
insect repellent on your skin, make sure that it does not come into contact with the transmitter.
Exercise equipment with electronic components may cause interfering stray signals. To
tackle these problems, try the following:
1. Remove the transmitter from your chest and use the exercise equipment as you would
normally.
2. Move the wrist unit around until you find an area in which it displays no stray reading or
does not flash the heart symbol. Interference is often worst right in front of the display
panel of the equipment, while the left or right side of the display is relatively free of
disturbance.
3. Put the transmitter back on your chest and keep the wrist unit in this interference-free
area as much as possible.
If the Polar Team2 system still does not work, the piece of equipment may be electrically too noisy
for wireless heart rate measurement.
Polar Team2 transmitter may not be worn when swimming. For more information, visit
http://support.polar.fi. Water resistance of Polar products is tested according to International
Standard ISO 2281. Products are divided into three categories according to their water resistance.
Check the back of your Polar product for the water resistance category, and compare it to the
chart below. Please note that these definitions do not necessarily apply to products of other
manufacturers.
Marking on case back Water resistant characteristics
Water resistant Protected against wash splashes, sweat,
158

Team2 SW help
raindrops etc. Not suitable for swimming.
Water resistant 30 m/50 m Suitable for bathing and swimming
Water resistant 100 m Suitable for swimming and snorkeling
(without air tanks)
Important Safety Information
Base Station
• The stand must be used when base station is placed on moist ground, e.g., on a wet
lawn.
• During charging the legs of the base station must be used because the bottom heats up.
The bottom of the base station heats up to 60°C (140°F).
• During charging, the maximum operating temperature is 45°C (113°F).
AC-Powered Devices
These precautions apply to all products that plug into a standard wall power outlet.
Failure to take the following precautions can result in serious injury or death from electronic shock
or fire or in damage to the device.
To Select an Appropriate Power Source For Your Device:
• Use only the power supply unit and AC power cord that came with your device or that
your received from an authorized repair center.
• AC adapters are only for indoor use.
• Confirm that your electrical outlet provides the type of power indicated on the power
supply unit (in terms of voltage [V] and frequency [Hz]). If you are not sure of the type of
power supplied to your home, consult a qualified electrician.
• Do not use non-standard power sources, such as generators or inverters,even if the
voltage and frequency appear acceptable. Use only AC power provided by a standard
wall outlet.
159
Team2 SW Help
• Do not overload your wall outlet, extension cord, power strip, or other electrical
receptacle. Confirm that they are rated to handle the total current (in amps [A]) drawn by
the device (indicated on the power supply unit) and any other devices that are on the
same circuit.
To Avoid Damaging the Power Cords and Power Supply:
• Protect the power cords from being walked on.
• Protect cords from being pinched or sharply bent, particularly where they connect to the
power outlet, the power supply unit, and the device.
• Do not jerk, knot, sharply bend, or otherwise abuse the power cords.
• Do not expose the power cords to sources of heat.
• Keep children and pets away from the power cords. Do not allow them to bite or chew on
them.
• When disconnecting the power cords, pull on the plug - do not pull on the cord.
If a power cord or power supply becomes damaged in any way, stop using it immediately. Unplug
your device during lightning stroms or when unused for long periods of time.
For devices with an AC power cord that connects to the power supply, always connect the power
cord according to the following instructions:
1. Plug the AC power cord into the power supply unit until it stops.
2. Plug the other end of the AC power cord into the wall outlet.
Battery-Powered Devices
These precautions apply to all products that use rechargeable or disposable batteries.
Improper use of batteries may result in battery fluid leakage, overheating, or explosion. Released
battery fluid is corrosive and may be toxic. It can cause skin and eye burns, and is harmful if
swallowed.
Rechargeable Batteries Only:
• Charge only with the recharger provided with the product.
Wireless Devices
160

Team2 SW help
Such us Base station and transmitter.
Before boarding any aircraft or packing a wireless device in luggage that will be checked, remove
the batteries from the wireless device or turn the wireless device off (if it has an on/off switch).
Wireless devices can transmit radio frequency (RF) energy, much like a cellular telephone,
whenever batteries are installed and the wireless device is turned on (if it has an on/off switch).
All Devices
Do Not Attempt Repairs
Do not attempt to take apart, open, service, or modify the hardware device or power supply.
Doing so could present the risk of electrical shock or another hazard. Any evidence of any
attempt to open and/or modify the device, including any peeling, puncturing, or removal of any of
the labels, will void the Limited Warranty.
Choking Hazard
This device may contain small parts that which may be a choking hazard to children under 3.
Keep small parts away from children.
Regulatory Information
• Base Station
• Transmitter
• Charger
Base Station
FCC regulatory information
This device complies with part 15 & 18 of the FCC rules. Operation is subject to the following two
conditions: (1) This device may not cause harmful interference, and (2) This device must accept
any interference received, including interference that may cause undesired operation.
Note: This equipment has been tested and found to comply with the limits for a Class B digital
device, pursuant to part 15 of the FCC Rules and for a miscellaneous type ISM device, pursuant
to part 18 of the FCC Rules. These limits are designed to provide reasonable protection against
harmful interference in a residential installation. This equipment generates, uses, and can radiate
radio frequency energy and, if not installed and used in accordance with the instructions, may
cause harmful interference to radio communications. However, there is no guarantee that
161
Team2 SW Help
interference will not occur in a particular installation. If this equipment does cause harmful
interference to radio or television reception, which can be determined by turning the equipment
off and on, the user is encouraged to try to correct the interference by one or more of the
following measures:
1) Reorient or relocate the receiving antenna.
2) Increase the separation between the equipment and receiver.
3) Connect the equipment into an outlet on a circuit different from that to which the receiver is
connected.
4) Consult the dealer or an experienced radio/TV technician for help.
Caution! Changes or modifications not expressly approved by the party responsible for
compliance could void the user's authority to operate the equipment.
FCC Radiation Exposure Statement
The radiated output power of the Base Station is far below the FCC radio frequency exposure
limits. Nevertheless, the Base Station should be used in such a manner that the potential for
human contact during normal operation is minimized. To avoid the possibility of exceeding the
FCC radio frequency exposure limits, you should keep a distance of at least 20 cm between you
and the Base Station.
Industry Canada (IC) regulatory information
This device complies with RSS-210 and ICES-001of Industry Canada rules. Operation is subject
to the following two conditions: (1) This device may not cause harmful interference, and (2) This
device must accept any interference received, including interference that may cause undesired
operation.
Avis de conformité à la réglementation d’Industrie Canada
Cet appareil est conform à la norme CNR-210 et NMB-001 du Industrie Canada. L'utilisation de
ce dispositif est autorisée seulement aux deux conditions suivantes : (1) il ne doit pas produire de
brouillage, et (2) l'utilisateur du dispositif doit être prêt à accepter tout brouillage radioélectrique
reçu, même si ce brouillage est susceptible de compromettre le fonctionnement du dispositif.
Industry Canada (IC) Radiation Exposure Statement
The radiated output power of the Base Station is far below the Industry Canada radio frequency
exposure limits. Nevertheless, the Base Station should be used in such a manner that the
potential for human contact during normal operation is minimized. To avoid the possibility of
exceeding the Industry Canada radio frequency exposure limits, you should keep a distance of at
least 20 cm between you and the Base Station.
162

Team2 SW help
Déclaration d'Industrie Canada (IC) sur l'exposition aux radiations
Le taux de radiation de la station de base est nettement en dessous des limites en matière
d'exposition aux fréquences radio imposées par Industrie Canada. Néanmoins, la station de base
doit être utilisée de manière à limiter autant que possible les contacts avec une personne
pendant son fonctionnement normal. Pour éviter tout risque de dépassement des limites en
matière d'exposition aux fréquences radio imposées par la Industrie Canada, vous devez
conserver une distance minimale de 20 cm entre vous et la station de base.
Europe
This product is compliant with Directives 93/42/EEC and 1999/5/EC. The relevant Declaration of
Conformity is available at www.polar.fi/support.
Polar products are electronic devices and are within the scope of Directive 2002/96/EC of the
European Parliament and of the Council on waste electrical and electronic equipment (WEEE).
These products should thus be disposed of separately in EU countries. Polar encourages you to
minimize possible effects of waste on the environment and human health also outside the
European Union by following local waste disposal regulations and, where possible, utilize
separate collection of electronic devices.
South Africa
Singapore
163
Team2 SW Help
Transmitter
FCC regulatory information
This device complies with part 15 of the FCC rules. Operation is subject to the following two
conditions: (1) This device may not cause harmful interference, and (2) This device must accept
any interference received, including interference that may cause undesired operation.
Note: This equipment has been tested and found to comply with the limits for a Class B digital
device, pursuant to part 15 of the FCC Rules. These limits are designed to provide reasonable
protection against harmful interference in a residential installation. This equipment generates,
uses and can radiate radio frequency energy and, if not installed and used in accordance with the
instructions, may cause harmful interference to radio communications. However, there is no
guarantee that interference will not occur in a particular installation. If this equipment does cause
harmful interference to radio or television reception, which can be determined by turning the
equipment off and on, the user is encouraged to try to correct the interference by one or more of
the following measures:
1) Reorient or relocate the receiving antenna.
2) Increase the separation between the equipment and receiver.
3) Connect the equipment into an outlet on a circuit different from that to which the receiver is
connected.
4) Consult the dealer or an experienced radio/TV technician for help.
Caution! Changes or modifications not expressly approved by the party responsible for
compliance could void the user's authority to operate the equipment.
Industry Canada (IC) regulatory information
This device complies with RSS-210 of Industry Canada rules. Operation is subject to the following
two conditions: (1) This device may not cause harmful interference, and (2) This device must
accept any interference received, including interference that may cause undesired operation.
Avis de conformité à la réglementation d’Industrie Canada
164
Team2 SW help
Cet appareil est conform à la norme CNR-210 du Industrie Canada. L'utilisation de ce dispositif
est autorisée seulement aux deux conditions suivantes : (1) il ne doit pas produire de brouillage,
et (2) l'utilisateur du dispositif doit être prêt à accepter tout brouillage radioélectrique reçu, même
si ce brouillage est susceptible de compromettre le fonctionnement du dispositif.
Europe
This product is compliant with Directives 93/42/EEC and 1999/5/EC. The relevant Declaration of
Conformity is available at www.polar.fi/support.
This marking shows that the product is protected against electric shocks.
Polar products are electronic devices and are within the scope of Directive 2002/96/EC of the
European Parliament and of the Council on waste electrical and electronic equipment (WEEE).
These products should thus be disposed of separately in EU countries. Polar encourages you to
minimize possible effects of waste on the environment and human health also outside the
European Union by following local waste disposal regulations and, where possible, utilize
separate collection of electronic devices.
South Africa
165
Team2 SW Help
Singapore
Charger
FCC regulatory information
This device complies with part 18 of the FCC rules. Operation is subject to the following two
conditions: (1) This device may not cause harmful interference, and (2) This device must accept
any interference received, including interference that may cause undesired operation.
Note: This equipment has been tested and found to comply with the limits for a miscellaneous
type ISM device, pursuant to part 18 of the FCC Rules. These limits are designed to provide
reasonable protection against harmful interference in a residential installation. This equipment
generates, uses and can radiate radio frequency energy and, if not installed and used in
accordance with the instructions, may cause harmful interference to radio communications.
However, there is no guarantee that interference will not occur in a particular installation. If this
equipment does cause harmful interference to radio or television reception, which can be
determined by turning the equipment off and on, the user is encouraged to try to correct the
interference by one or more of the following measures:
1) Reorient or relocate the receiving antenna.
2) Increase the separation between the equipment and receiver.
3) Connect the equipment into an outlet on a circuit different from that
to which the receiver is connected.
4) Consult the dealer or an experienced radio/TV technician for help.
Caution! Changes or modifications not expressly approved by the party responsible for
compliance could void the user's authority to operate the equipment.
Industry Canada (IC) regulatory information
This ISM device complies with ICES-001of Industry Canada rules. Operation is subject to the
following two conditions: (1) This device may not cause harmful interference, and (2) This device
must accept any interference received, including interference that may cause undesired operation.
166

Team2 SW help
Avis de conformité à la réglementation d’Industrie Canada
Cet appareil est conform à la norme NMB-001 du Industrie Canada. L'utilisation de ce dispositif
est autorisée seulement aux deux conditions suivantes : (1) il ne doit pas produire de brouillage,
et (2) l'utilisateur du dispositif doit être prêt à accepter tout brouillage radioélectrique reçu, même
si ce brouillage est susceptible de compromettre le fonctionnement du dispositif.
Europe
This product is compliant with Directives 93/42/EEC and 1999/5/EC. The relevant Declaration of
Conformity is available at www.polar.fi/support.
Polar products are electronic devices and are within the scope of Directive 2002/96/EC of the
European Parliament and of the Council on waste electrical and electronic equipment (WEEE).
These products should thus be disposed of separately in EU countries. Polar encourages you to
minimize possible effects of waste on the environment and human health also outside the
European Union by following local waste disposal regulations and, where possible, utilize
separate collection of electronic devices.
South Africa
Singapore
167
Team2 SW Help
Technical Specifications
Transmitter
Transmitter strap material:
• 35 % Polyester, 35 % Polyamide, 30 % Polyurethane.
Connector material:
• Back cover: PA+GF,
• Press-buttons: stainless steel AISI316,
• Front cover: ABS + GF,
• Lense on the front cover: PMMA
Radio Frequency Technical Specifications
Charger Unit
Frequency: 13.56 MHz, Industrial-Scientific-Medical (ISM) band used.
Bluetooth Devices
Base station
RF output power: meets Bluetooth® requirements.
Frequency: 2400 MHz to 2483.5 MHz, max. 100 mW.
Bluetooth QD ID B011340.
Transmitter
RF output power: meets Bluetooth® requirements.
Frequency: 2400 MHz to 2483.5 MHz, max. 20 mW.
Bluetooth QD ID B011340.
168
Team2 SW help
2.4 GHz Devices (Such as Base Station and Transmitter)
Non-specific short range device.
RF output power: meets all SRD requirements.
Frequency: within the range of 2400 MHz to 2483.5 MHz.
For Bluetooth and 2.4 GHz devices only: to comply with FCC RF exposure requirements, the
following operating configurations must be satisfied: the antenna has been installed by the
manufacturer and no changes can be made.
Guarantee and Disclaimer
Polar Team2 Pro International Warranty
• Polar Electro Oy guarantees to the original purchaser of Polar Team2 Pro that the product
will be free from defects in material or workmanship for ONE year from the date of
purchase.
• The original receipt is your proof of purchase!
• Warranty does not cover damage due to misuse, abuse, accidents or negligence of the
precautions; improper maintenance, cracked or broken cases or the elastic strap. During
the guarantee period the product will be either repaired or replaced free of charge at an
authorized Polar Service Center.
• Polar Electro Oy’s warranty is limited to defects in material and workmanship. Polar
Electro Oy’s liability is limited to repair or replacement of defective products. Polar Electro
Oy shall not be liable for any damages, losses, costs, or expenses, whether direct,
indirect, incidental, consequential, or special, arising out of, or related to the use of Polar
products.
© 2008 Polar Electro Oy, FIN-90440 KEMPELE, Finland.
Polar Electro Oy, FIN-90440 KEMPELE, Finland. Polar Electro Oy is a ISO 9001:2000 certified
company. All rights reserved. No part of this manual may be used or reproduced in any form or by
any means without prior written permission of Polar Electro Oy. The names and logos marked
with a ™ symbol in this user manual or in the package of this product are trademarks of Polar
Electro Oy. The names and logos marked with a ® symbol in this user manual or in the package
of this product are registered trademarks of Polar Electro Oy, except that Windows is a trademark
of Microsoft Corporation.
Disclaimer
169
Team2 SW Help
170
• The material in this manual is for informational purposes only. The products it describes
are subject to change without prior notice, due to the manufacturer’s continuous
development program.
• Polar Electro Inc. / Polar Electro Oy makes no representations or warranties with respect
to this manual or with respect to the products described herein.
• Polar Electro Inc. / Polar Electro Oy shall not be liable for any damages, losses, costs or
expenses, direct, indirect or incidental, consequential or special, arising out of, or related
to the use of this material or the products described herein. This product is protected by
the incorporeal rights of Polar Electro Oy as defined by the following documents: FI
20075426, US 21/133888, EP 08157710.8, FI115084, US7418237, EP1543769,
FI110915, US7324841, US7018339, FI114202, US6537227, EP1147790, HK1040065,
FI96380, JP3568954, US5611346, EP665947, FI23471, EU00046107-0001,
USD492783S, USD492784S, USD492999S. Other patents pending.
Manufactured by Polar Electro Oy, Professorintie 5, FIN-90440 KEMPELE, Tel +358 8 5202 100,
Fax +358 8 5202 300, www.polar.fi