Philips Consumer Lifestyle WAC700 Home Audio System with WLAN audio streaming User Manual 1
Philips Consumer Lifestyle Home Audio System with WLAN audio streaming 1
UserManual.wiki
>
Philips Consumer Lifestyle
>
WAC700 User Manual
>
User manual
Contents
1.
FCC Notes
2.
User manual
User manual
Navigation menu
Upload a User Manual
Namespaces
Wiki Guide
HTML
PDF
Info
Views
User Manual
Discussion / Help
Navigation

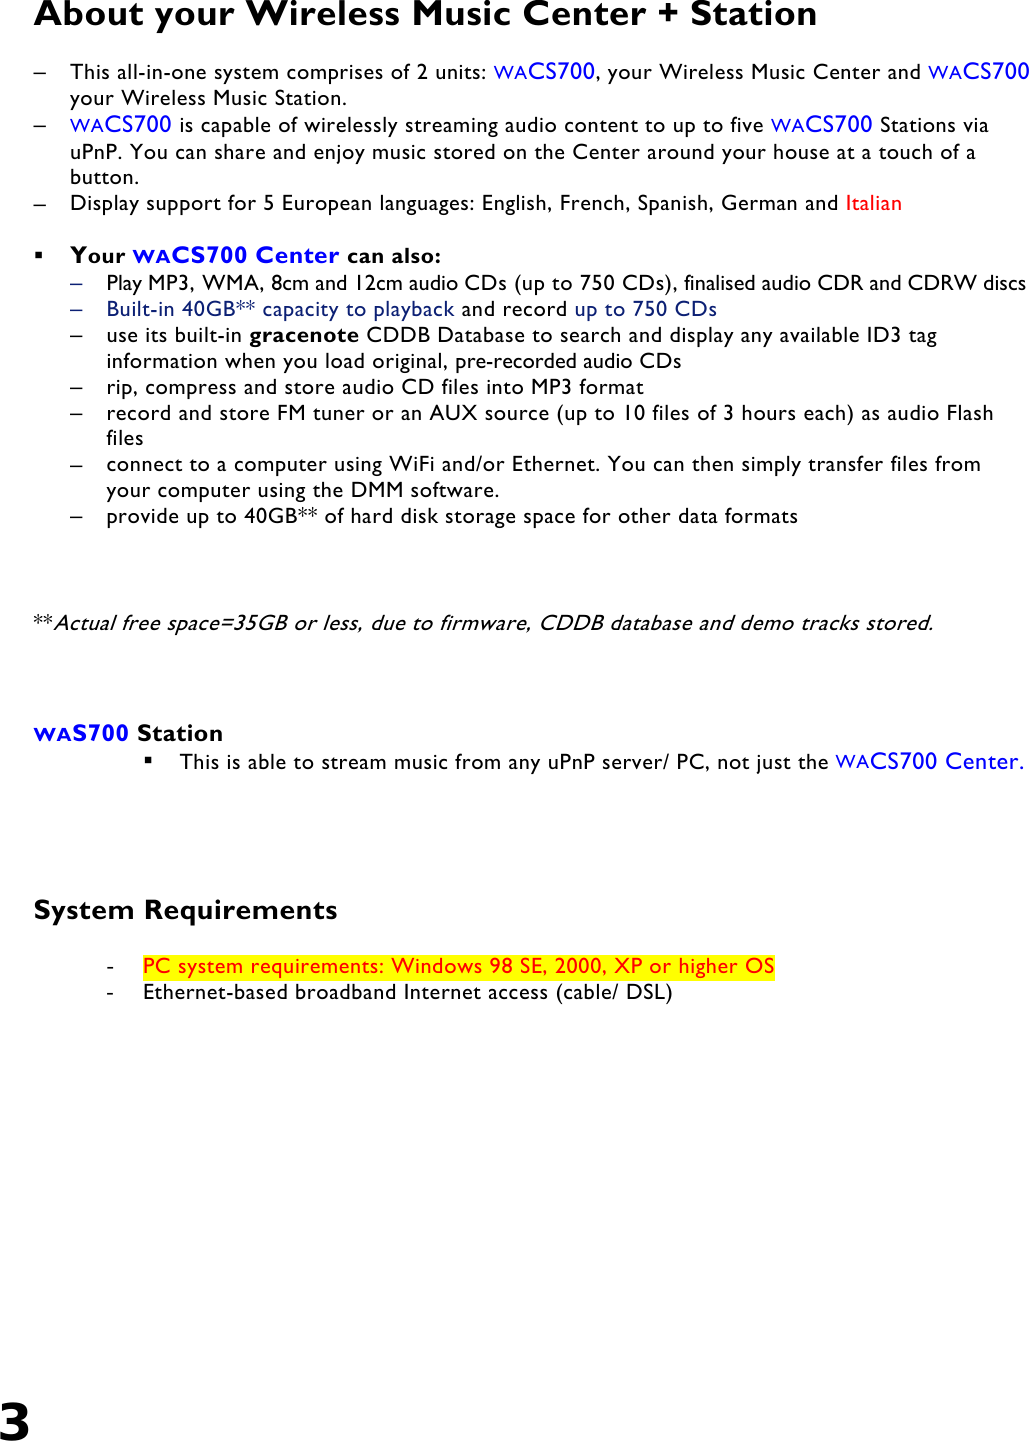
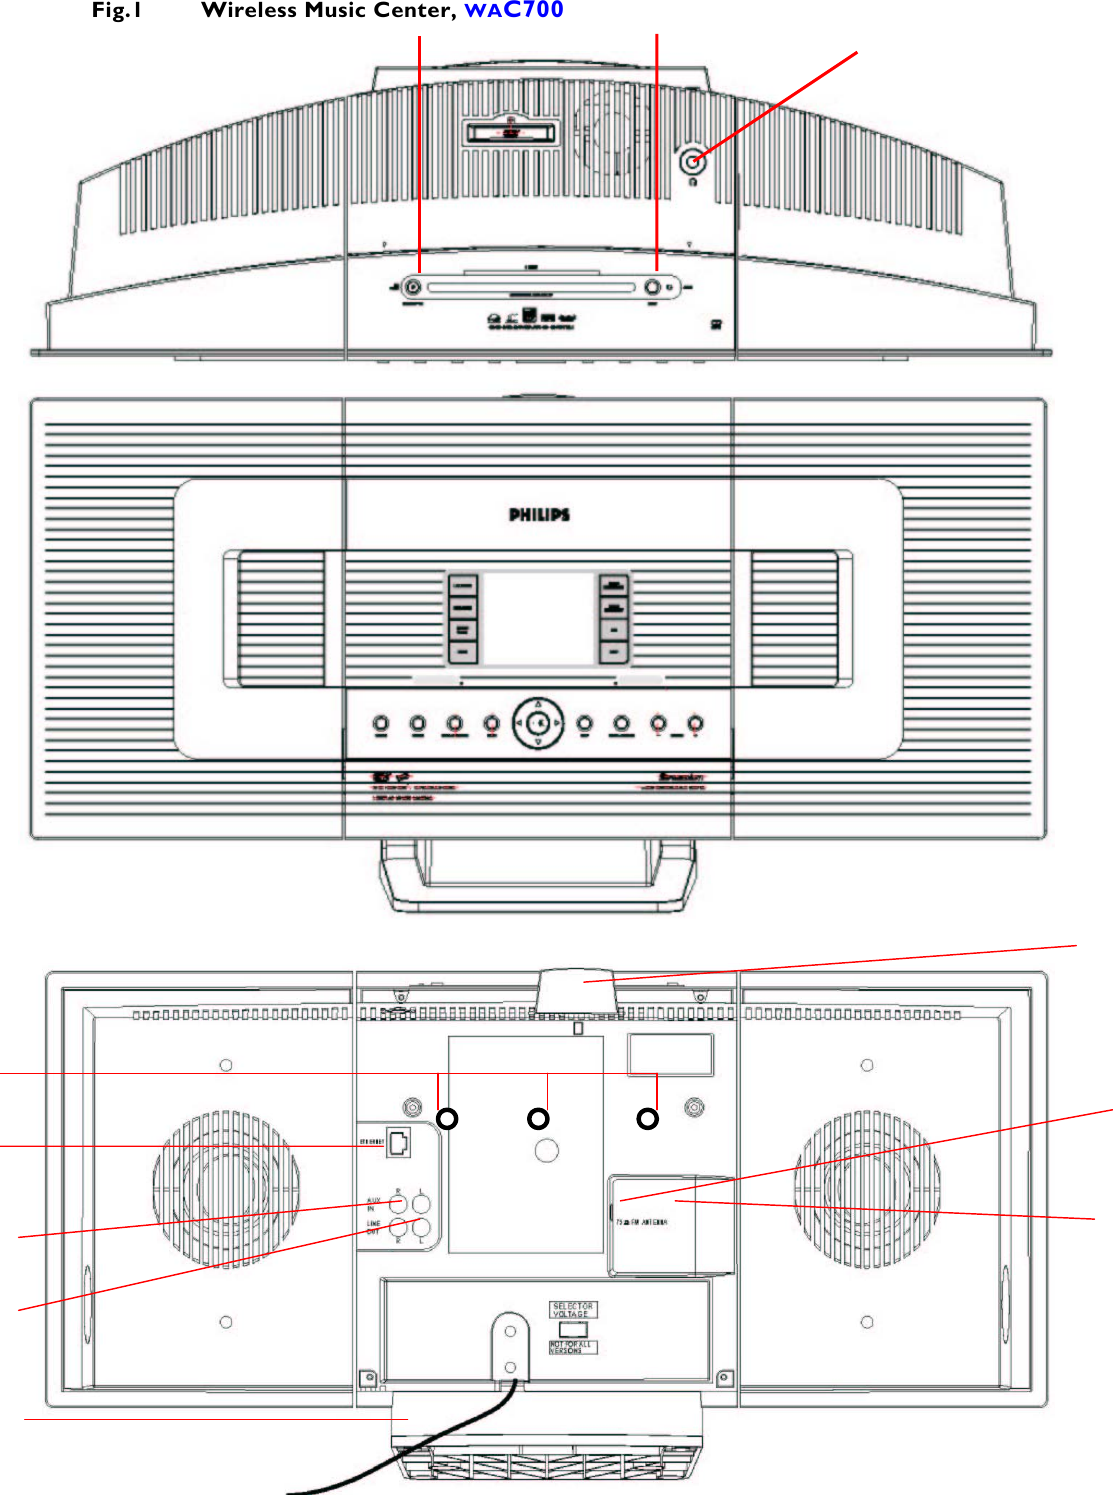
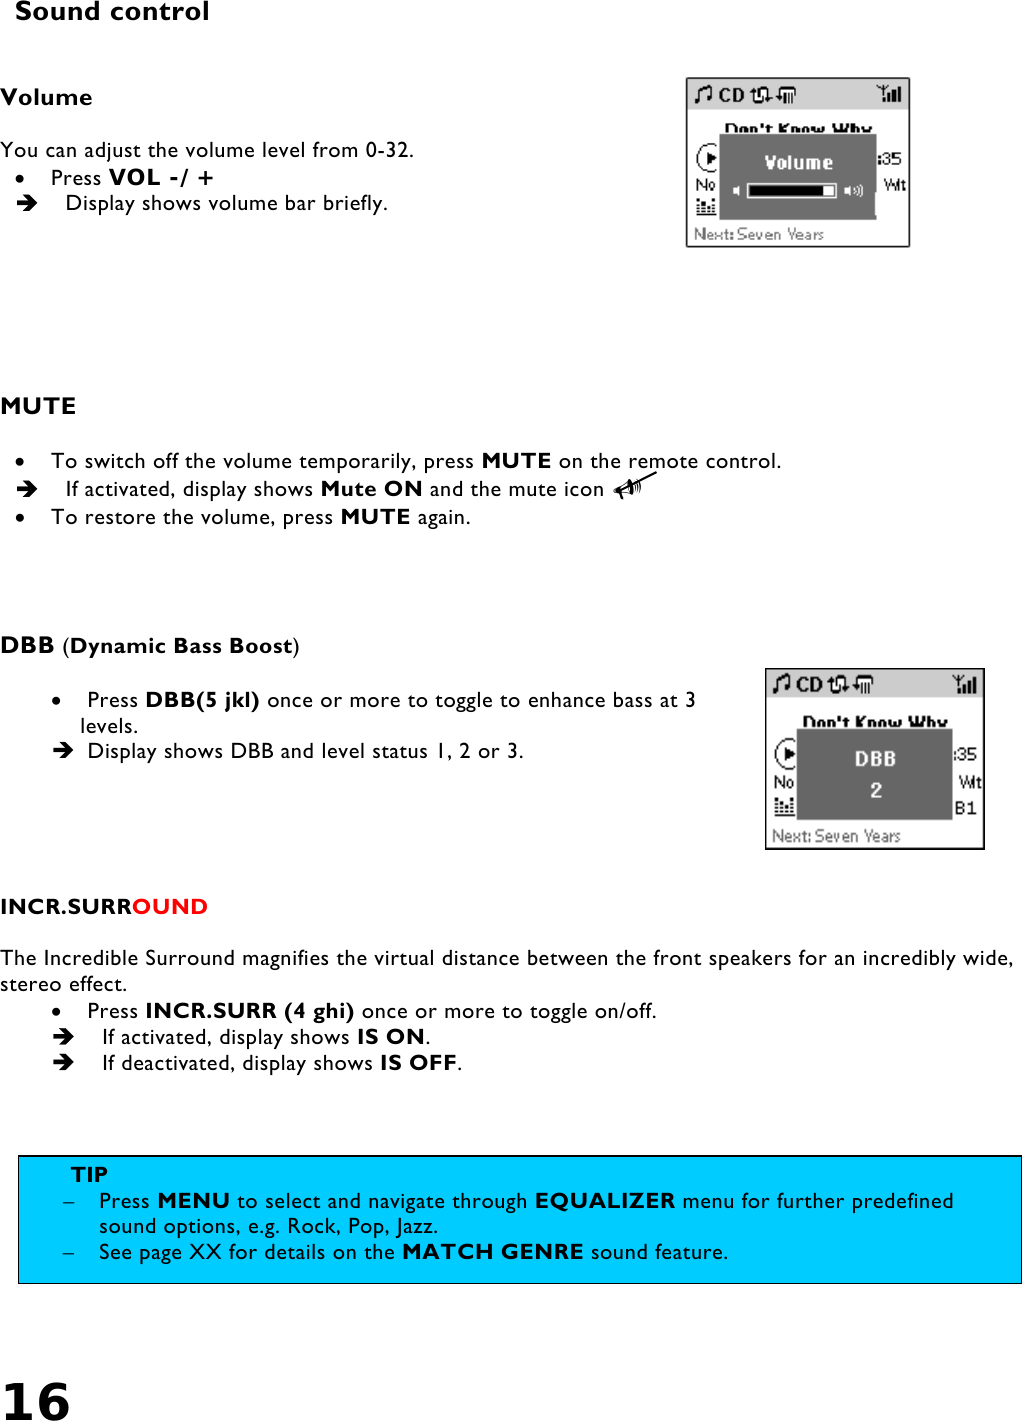
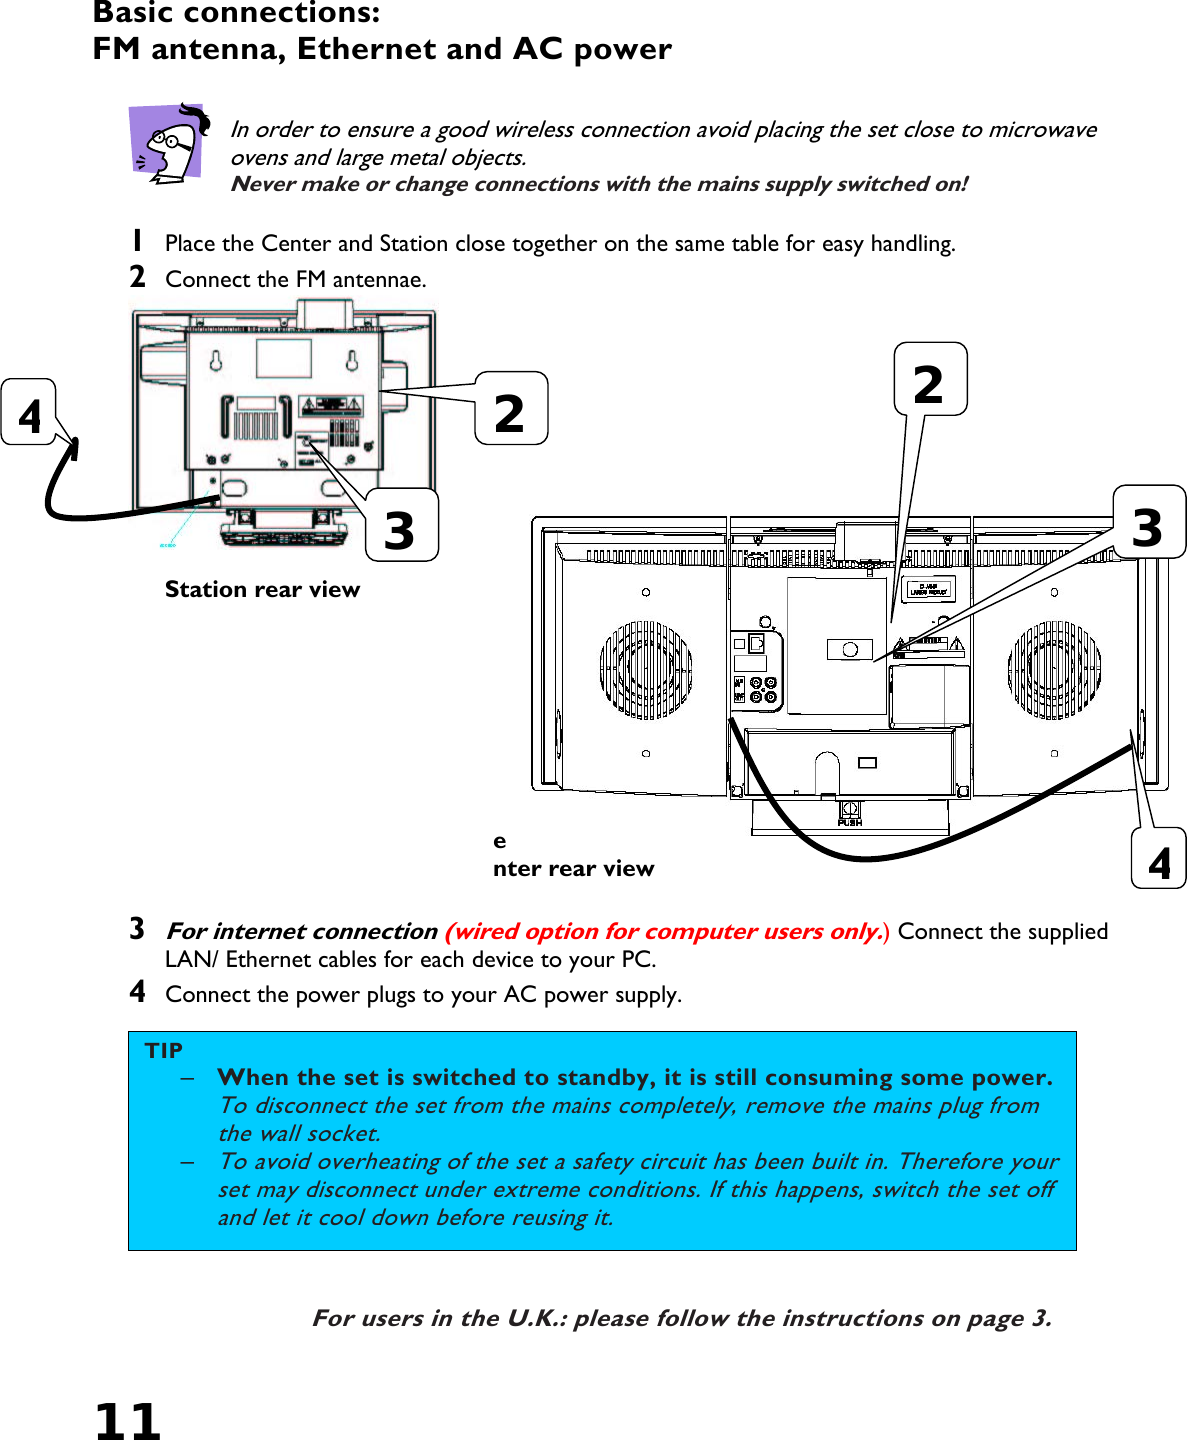
![6 Controls (See fig. 1 & 2. Features are same on both Center & Station unless stated) Top & Front STANDBY ON - press briefly for standby on/ off (green light indicator when streaming) -press and hold to activate ECO POWER standby (red light) EJECT –eject disc (on Center only) ACTIVE – indicator lights up during wi-fi streaming (broadcast from Station) LIKE ARTIST - selects all tracks of a specified artist LIKE GENRE - selects all tracks of a specified genre MATCH GENRE – activates preset sound setting to match a genre MENU - menu view on/ off MUSIC FOLLOWS ME - stream music from Center to (other) Station(s) MUSIC BROADCAST – activates music broadcast at a chosen Station (on Center only) DBB – toggles Dynamic Bass Boost options to enhance bass VIEW – display view options Flat Plexi-Piston™ speakers IR –infrared sensor for remote controls Always point the remote control towards these sensors SOURCE – toggles 4 sound sources REC – to record from a selected source. Lights up red when recording (on Center only) INCR.SURROUND – Incredible Surround sound option on/off MUTE – mute sound on/off Navigation control: OK start /pause playback; confirm a setting; / previous/ next level screen; Up / previous / scroll upwards/ fast search play backwards Down / next / scroll downwards/ fast search play forwards STOP – stops CD/ HD playback; - stops music broadcast; - stops recording; (on Center only) MARK/ UNMARK - mark or unmark tracks for ripping (on Center only) VOL -/+ - adjusts volume Left/ Right/ Rear… X – socket for 3.5mm headphones (not included) WI-FI - antenna screw holes – for wall mounting FM tuner coaxial cable connection (cable not included) LAN/ Ethernet connection AUX IN Left, Right – connect to the analogue audio output of external devices LINE OUT Left, Right – connect to the analogue audio inputs of an external recording device/ amplifier (on Center only) FM ANTENNA - connect the supplied FM cable here Voltage selector – some versions only. [Korea/ 01 version]](https://usermanual.wiki/Philips-Consumer-Lifestyle/WAC700.User-manual/User-Guide-543898-Page-12.png)
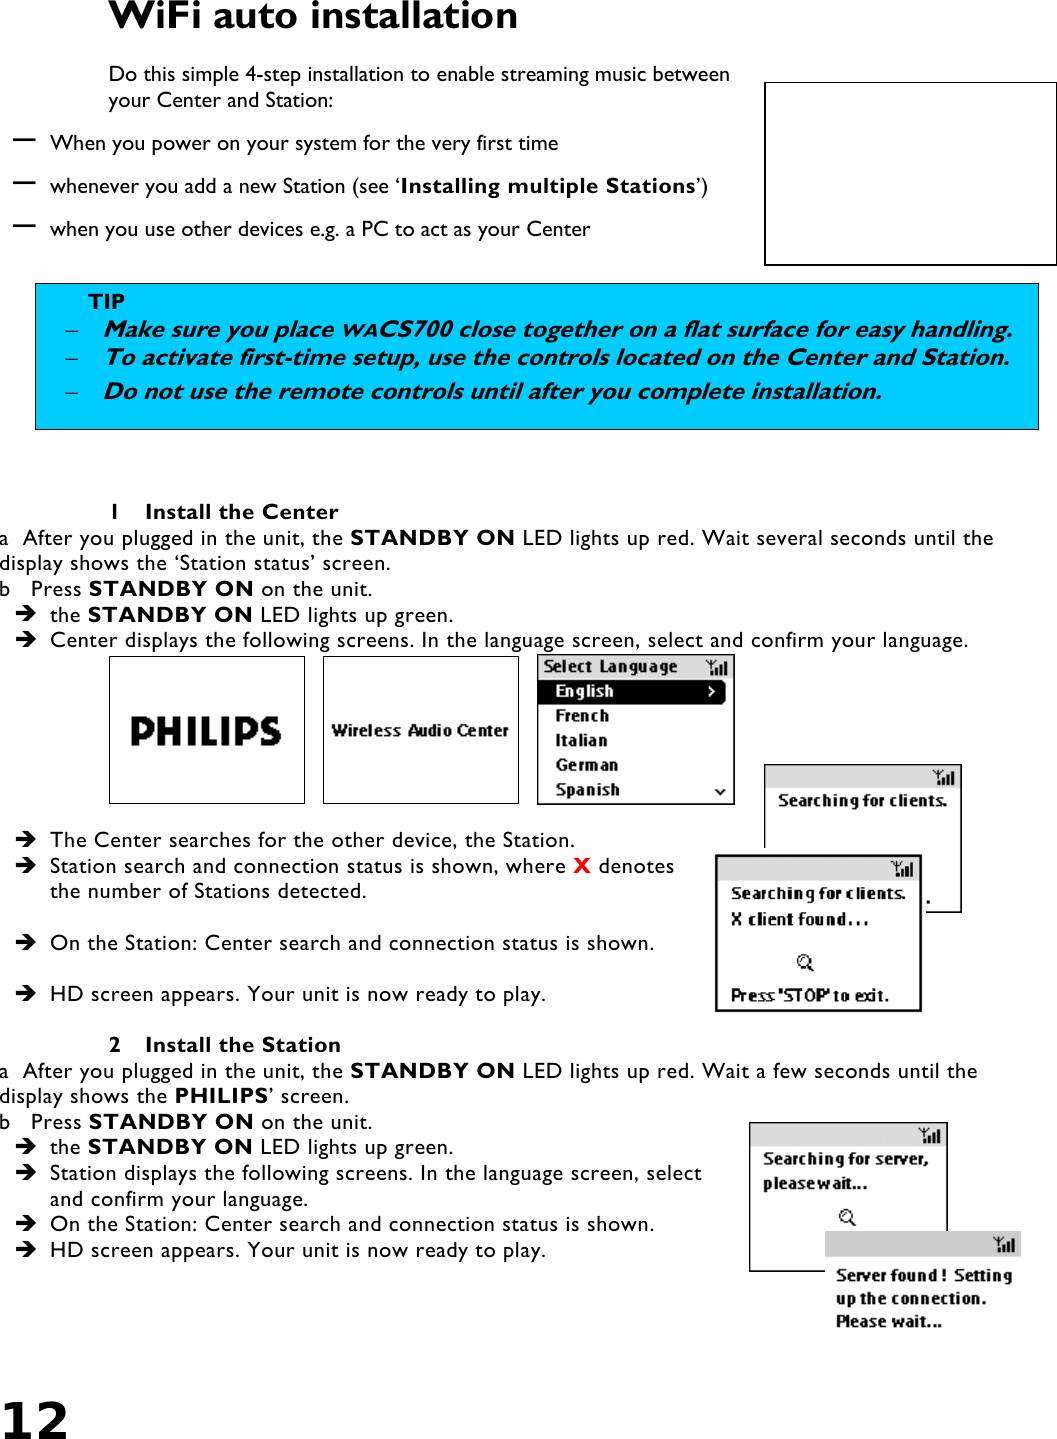
![13 Installing multiple Stations Install up to 5 Stations to your Center. 1 Check your Center is in the HD source mode. 2 On the Center, press MENU. 3 Connect your new Station to the power supply. a After you plugged in the unit, the STANDBY ON LED lights up red. Wait a few seconds until the display shows the PHILIPS’ screen. b Press STANDBY ON on the unit. the STANDBY ON LED lights up green. 4 On the Center, use the navigation control to select Station Management Add new Station 5 Press OK to confirm. Your Center and Station enters the Installation mode. Any streaming, if active, will stop. Display shows messages: Server adding new stations to network, shall loose connection to Center soon, followed by No connection to Center and then Display shows Station number when found. Display shows Station connection status. is displayed for connected Stations. If disconnected: Other Connection status messages – DMM found! Is displayed if you are using WACS700 with a computer installed with Philips Digital Media Manager (DMM). – [Please ensure that the Center is in Station installation mode. Switch source to abort the install process]: This error message appears if the Station is unable to detect the Center in 10 seconds or more. To quit auto installation mode/ installation error mode • Press the STOP button to exit. Delete Station Select this menu option if you need to remove a Station e.g. if Station is taken away for repair. • press MENU and select the following submenus to confirm: Station Management Delete Station Station X (number and room location) Yes/ No? Delete Station](https://usermanual.wiki/Philips-Consumer-Lifestyle/WAC700.User-manual/User-Guide-543898-Page-19.png)