Paxton Access 162739 OEM Plastic Reader Keypad / Mace Security Standalone Plastic Reader & Keypad User Manual INSTRUCTION OEM plastic reader keypad
Paxton Access Ltd OEM Plastic Reader Keypad / Mace Security Standalone Plastic Reader & Keypad INSTRUCTION OEM plastic reader keypad
Contents
- 1. Paxton User Manual
- 2. Mace Security User Manual
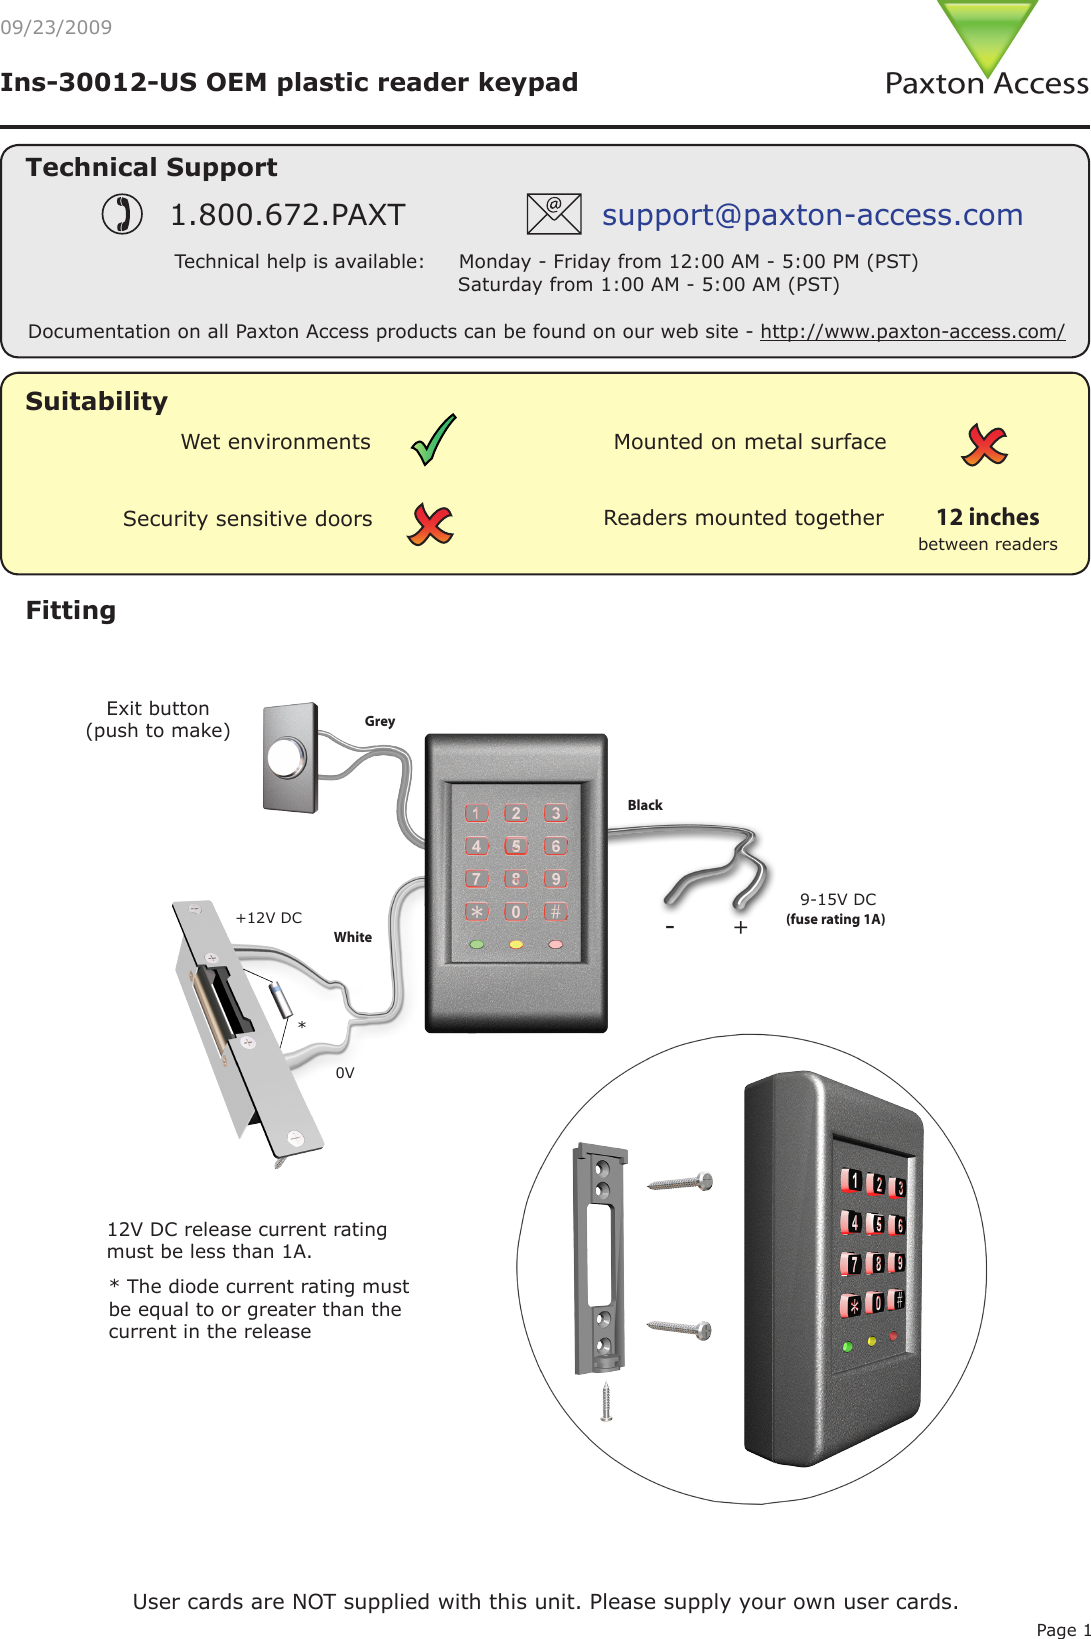
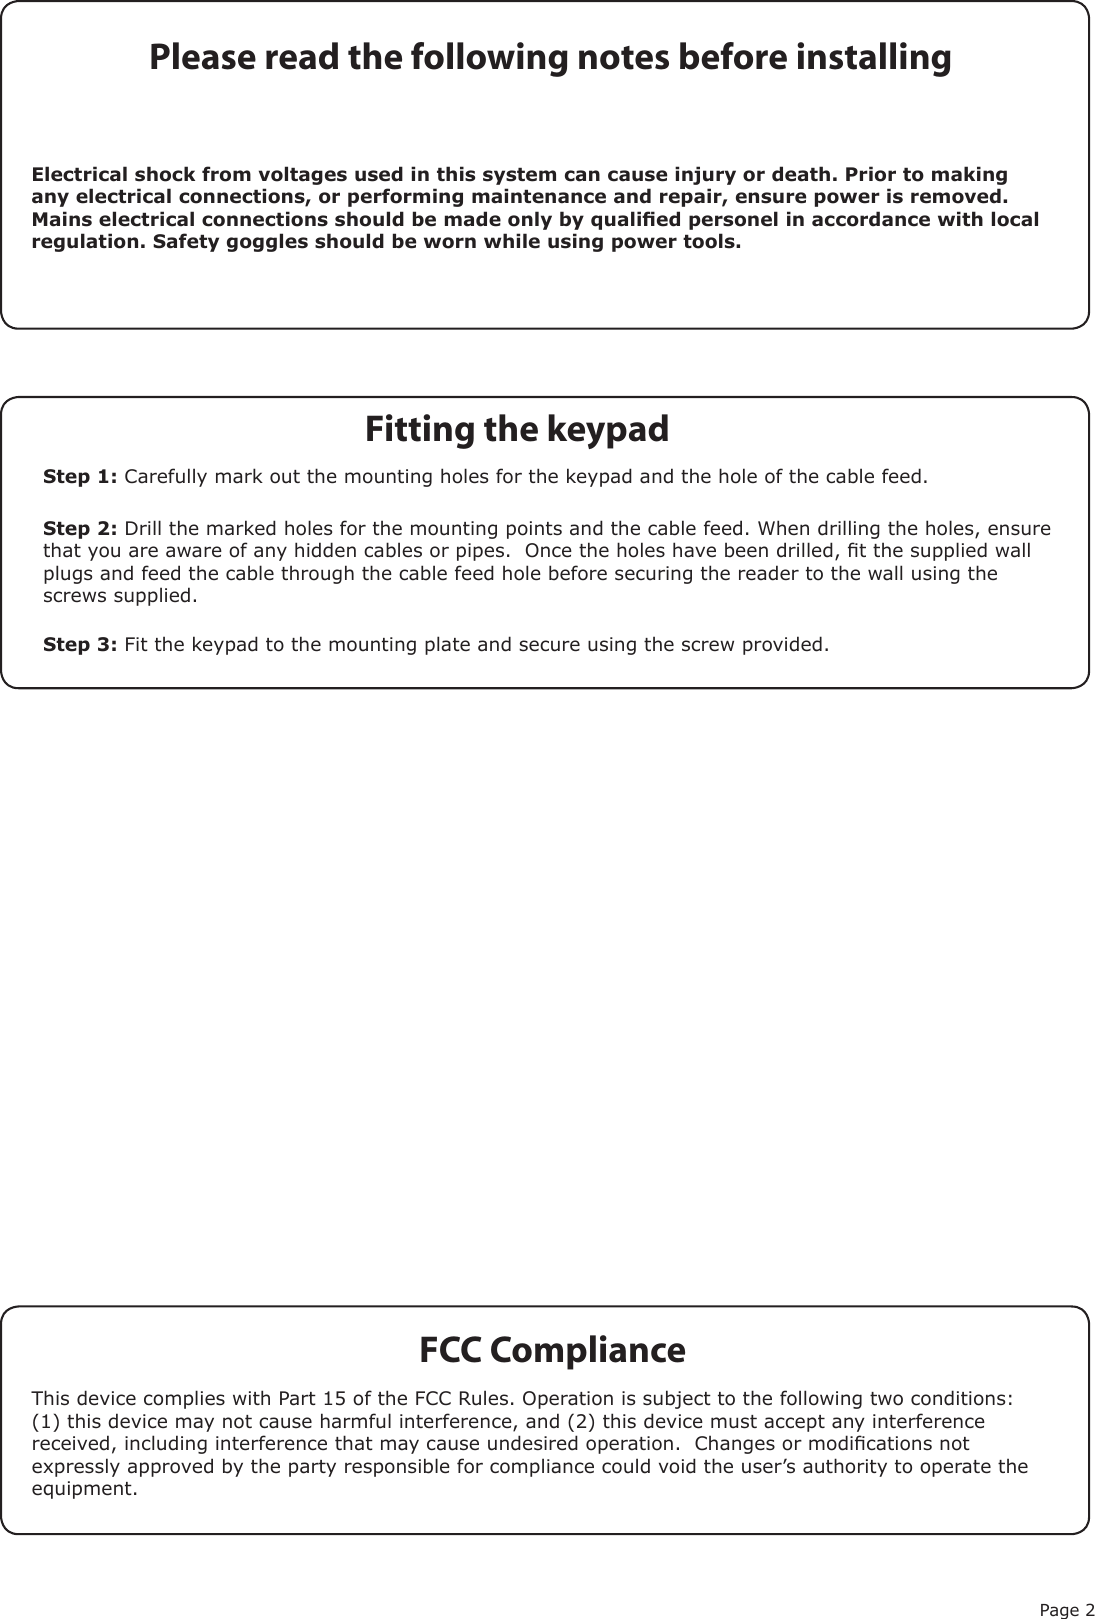
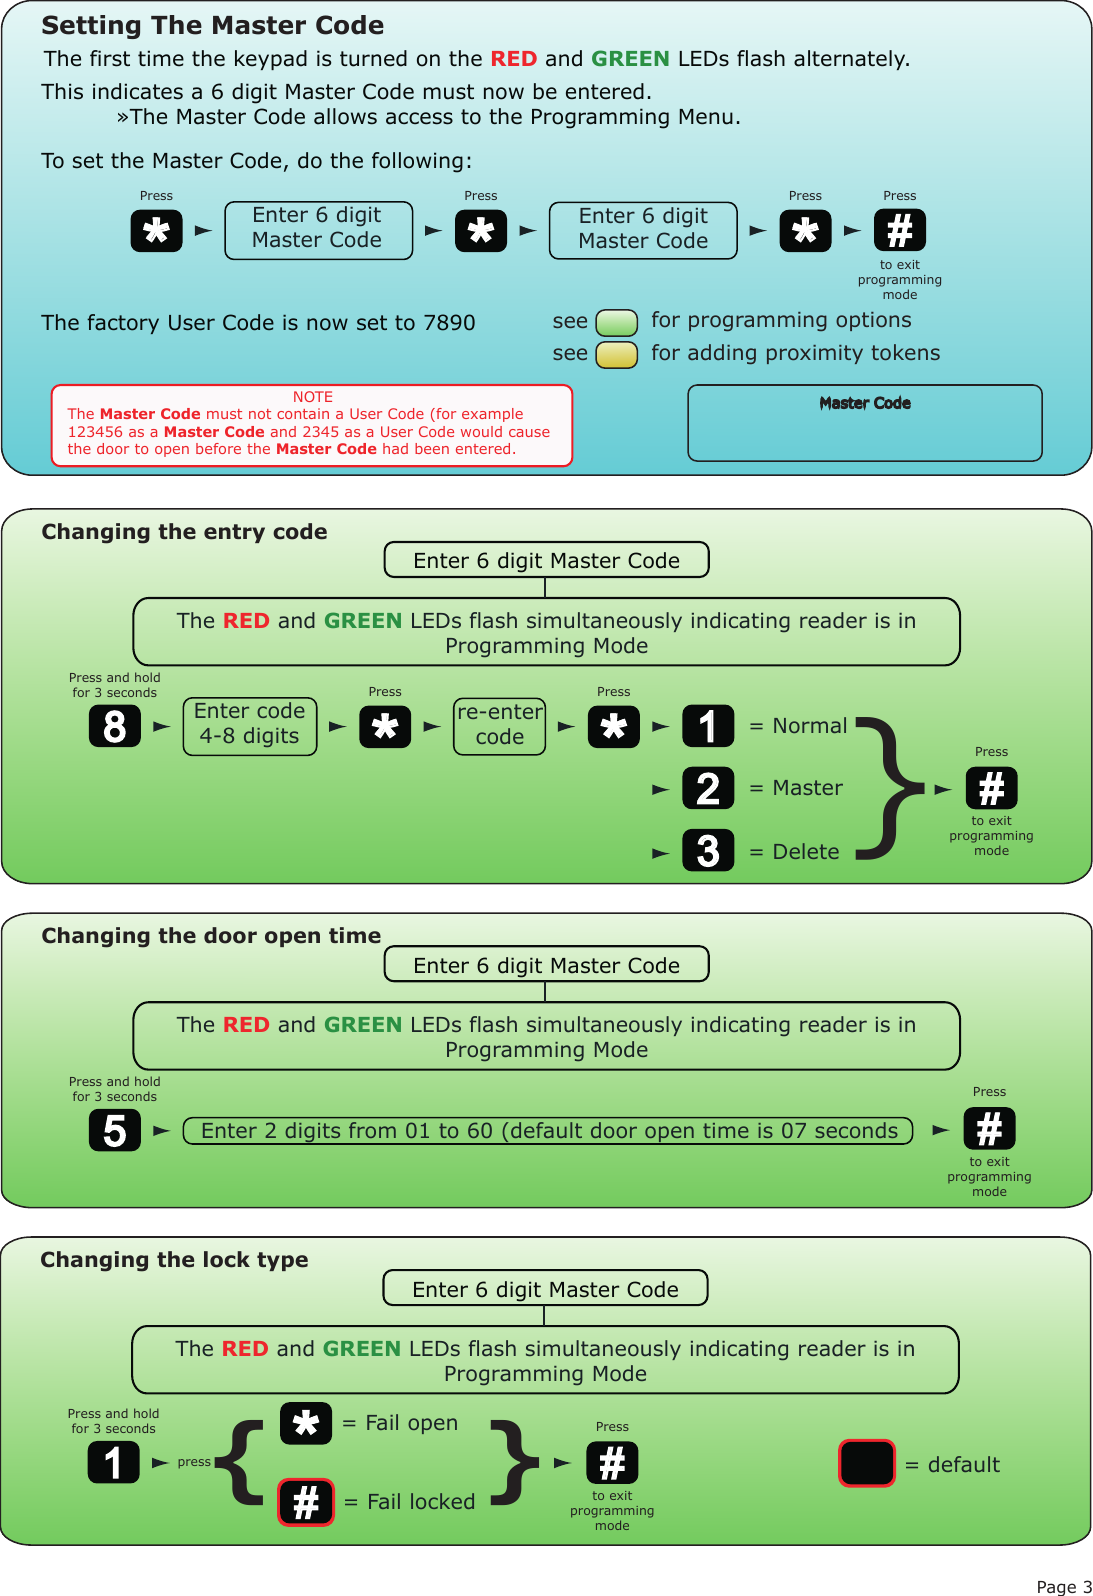
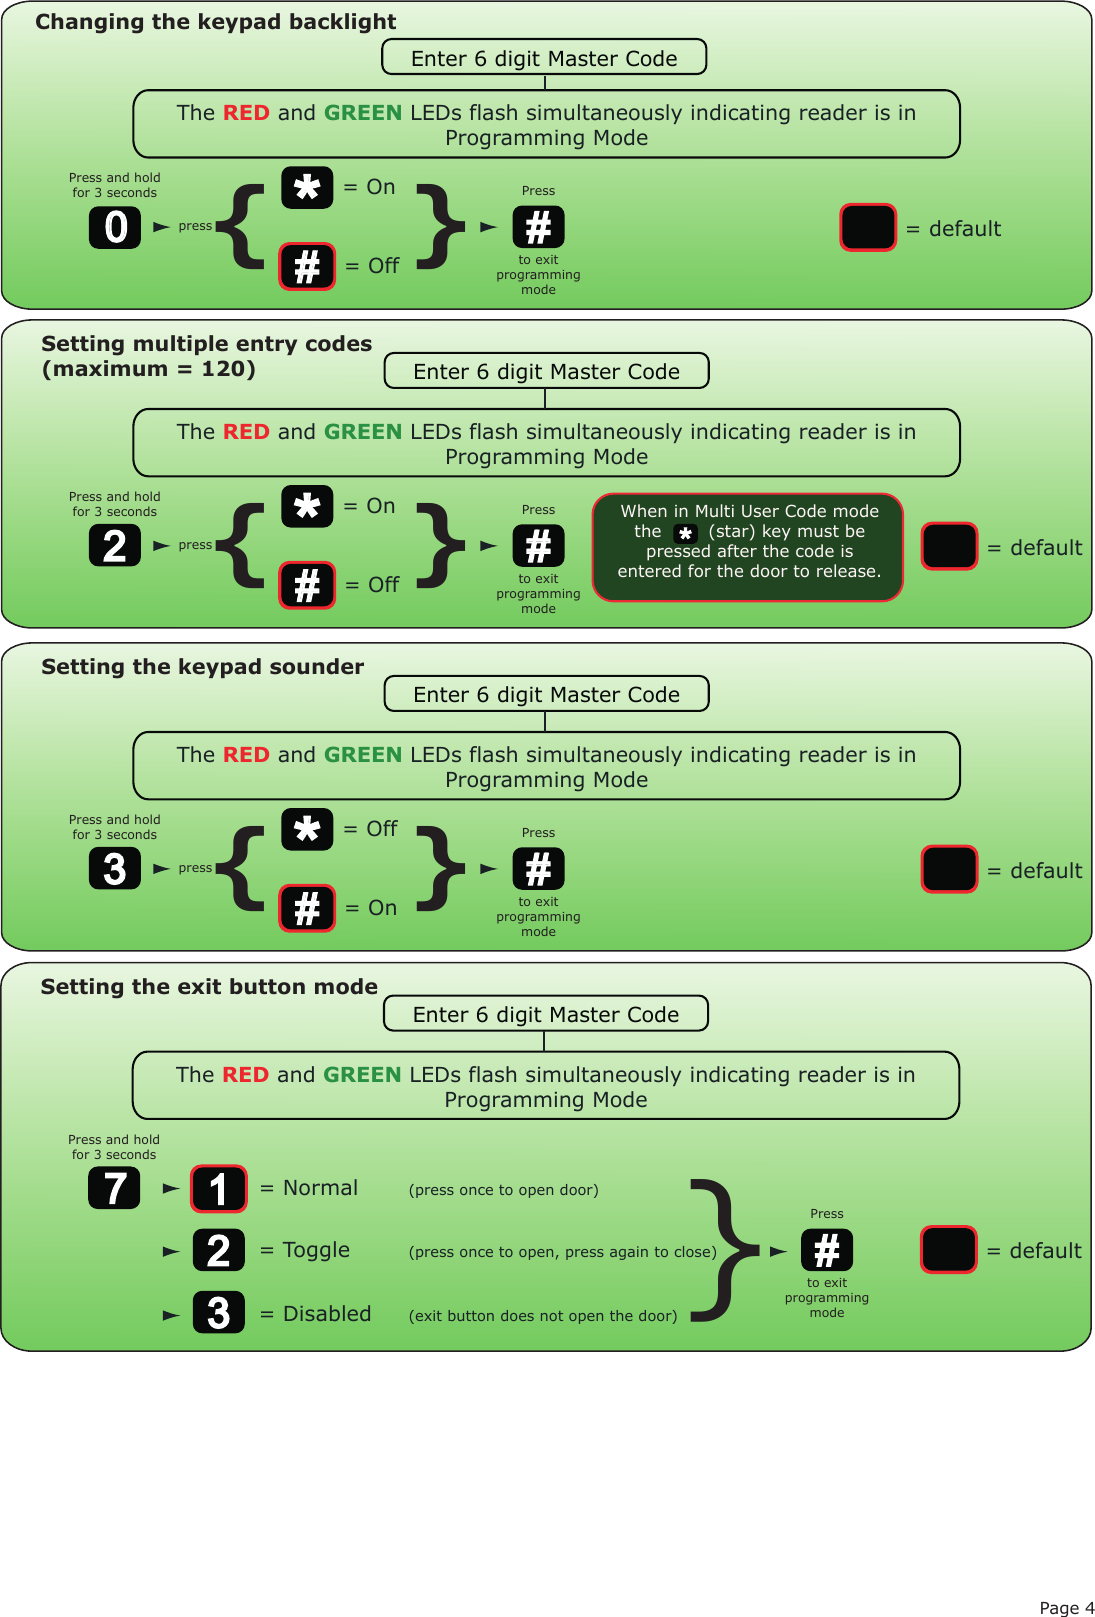
Paxton User Manual