Pantech PX-600 Dual-Band CDMA/ EVDO USB Modem User Manual UM150AL PX 600 1015 indd
Pantech Co., Ltd. Dual-Band CDMA/ EVDO USB Modem UM150AL PX 600 1015 indd
UserManual.wiki
>
Pantech
>
PX-600 User Manual
>
Manual
Contents
1.
Users Manual
2.
Manual
3.
User Manual
Manual
Navigation menu
Upload a User Manual
Namespaces
Wiki Guide
HTML
PDF
Info
Views
User Manual
Discussion / Help
Navigation
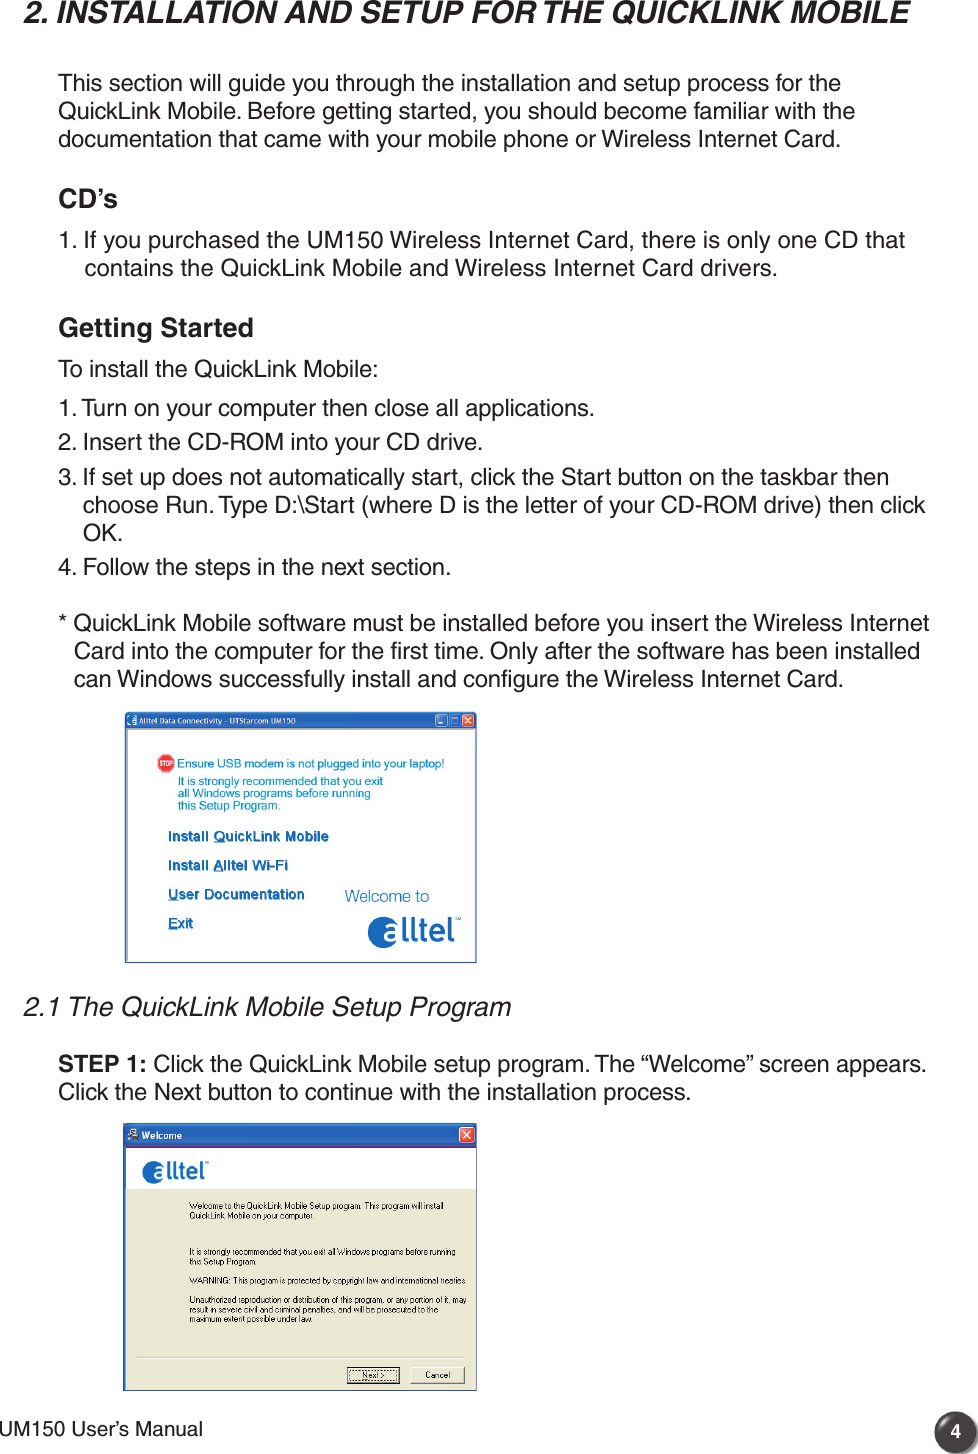
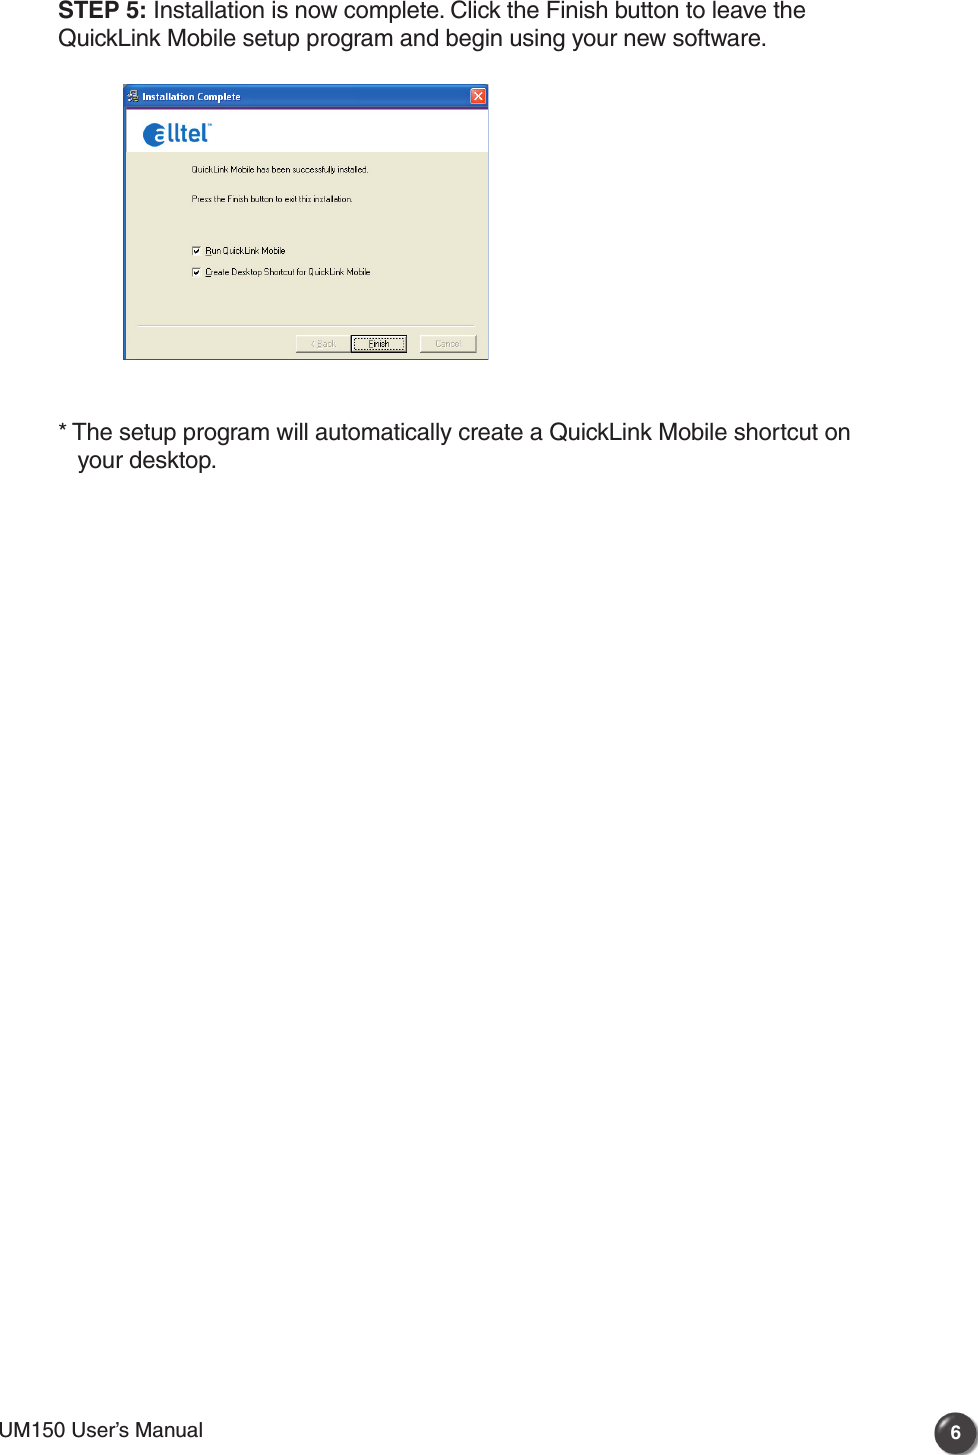
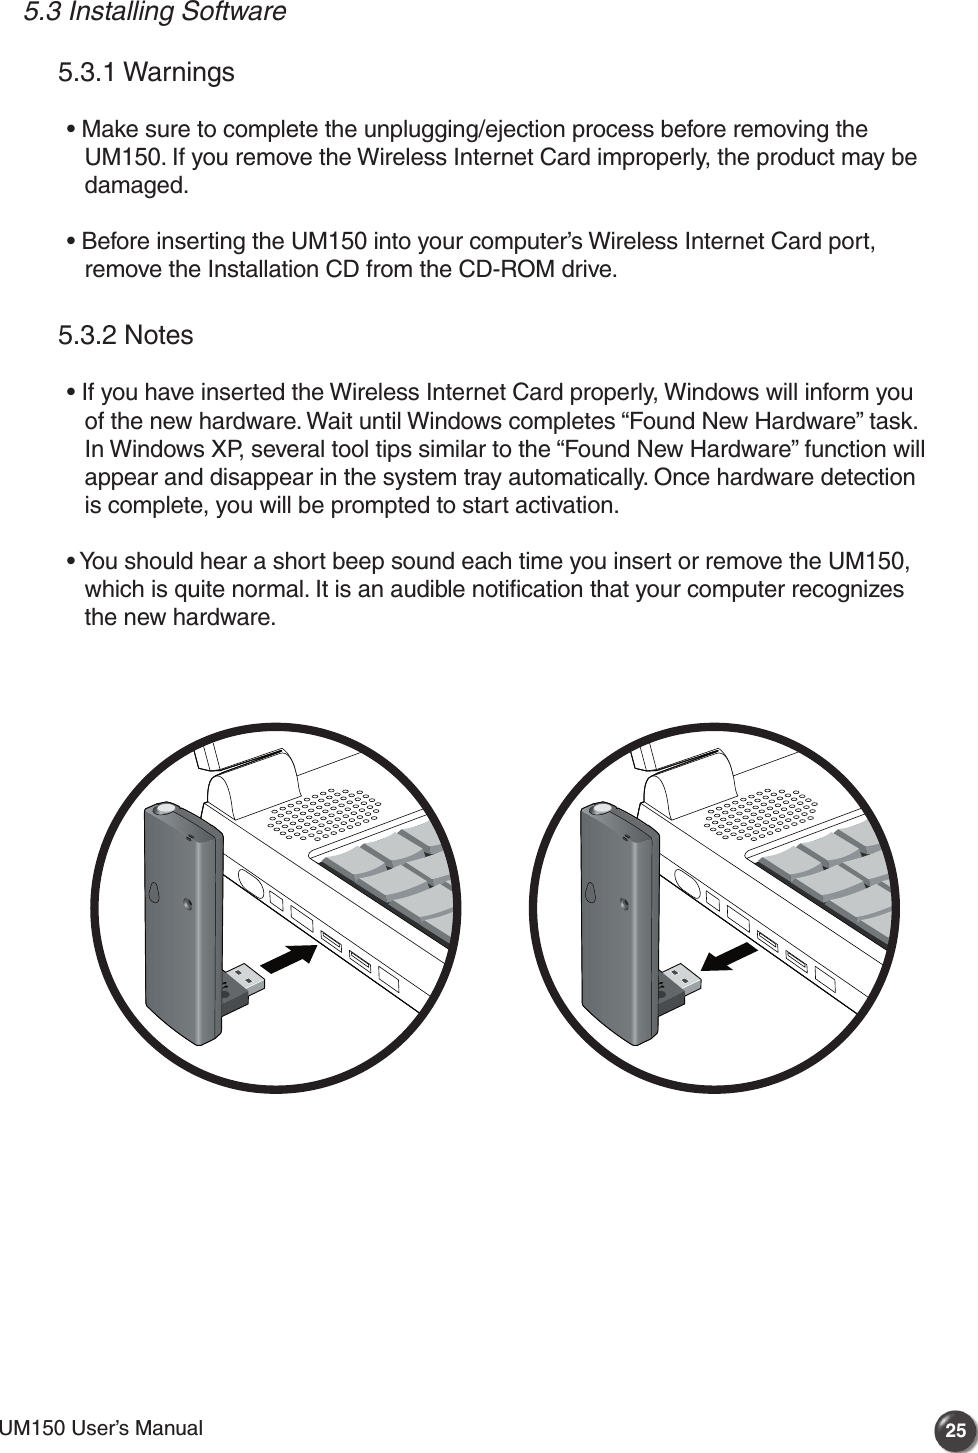
![UM150 User’s Manual 3UM150 User’s Manual1.6 Product Handling1) Do not put any adhesive label on the USB connector. It may leave a sticky residue that can cause problems inside the PC USB port.2) The UM150 USB device should easily slide into the USB port. Do not force the UM150 into the USB port as it may cause damage to the modem and/or the port.3) Keep the UM150 in a dry and clean place. (Storage temperature: -22°F to 149°F [- 30°C to 65°C]). Keep your device away from liquids, dust and excessive heat. 1.7 ConfigurationTo use the UM150, you should install the software included in the installation CD and configure the UM150 USB device. See the next section for more infomration on software installation and USB device configuration.](https://usermanual.wiki/Pantech/PX-600.Manual/User-Guide-889423-Page-5.png)
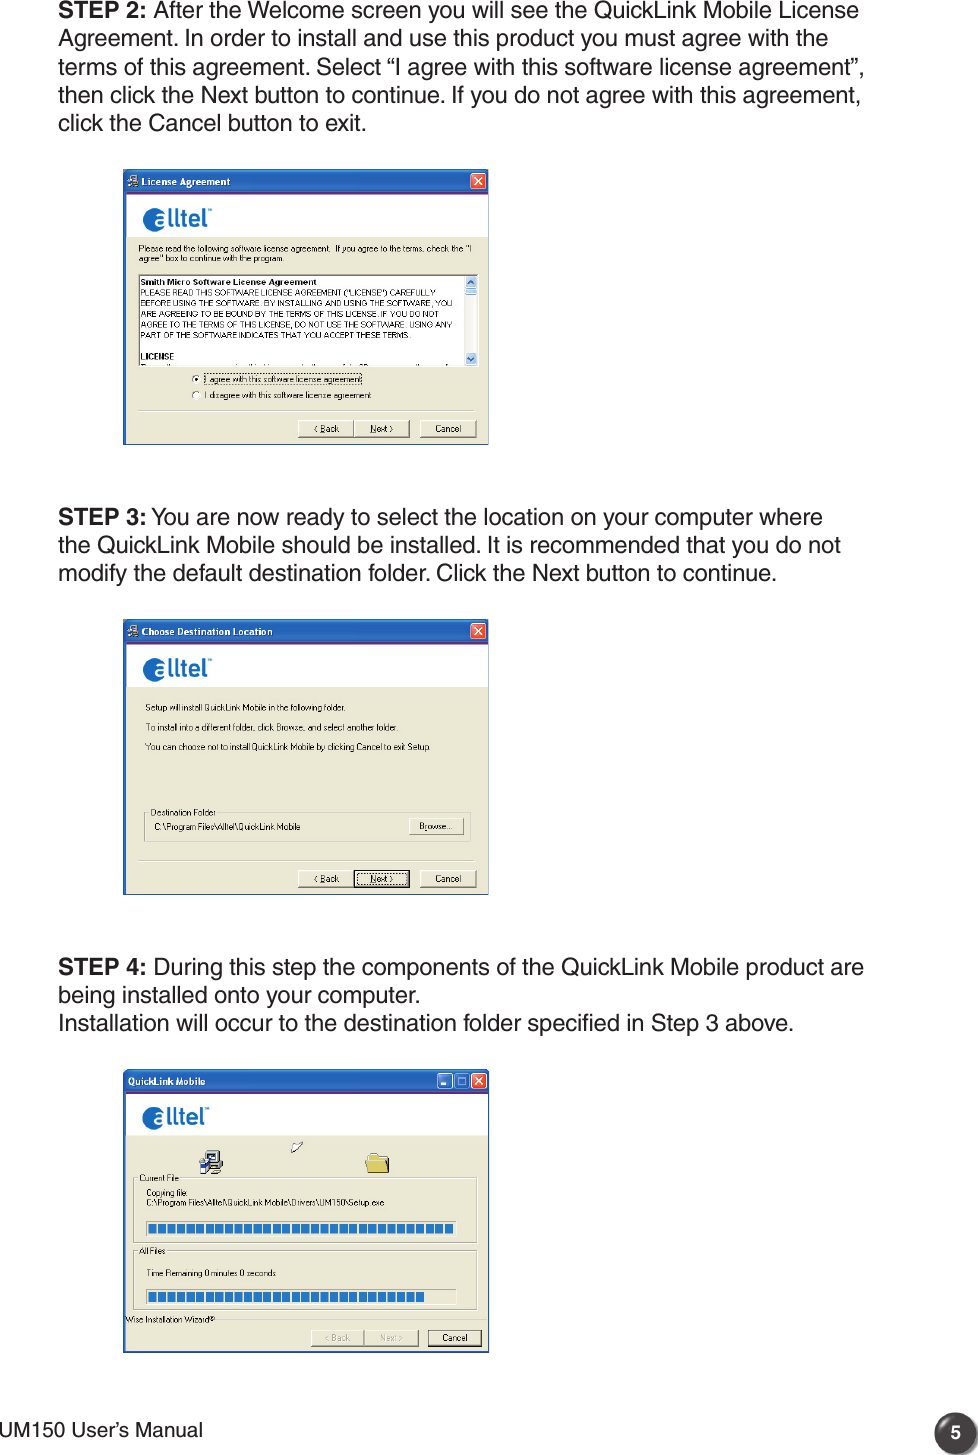
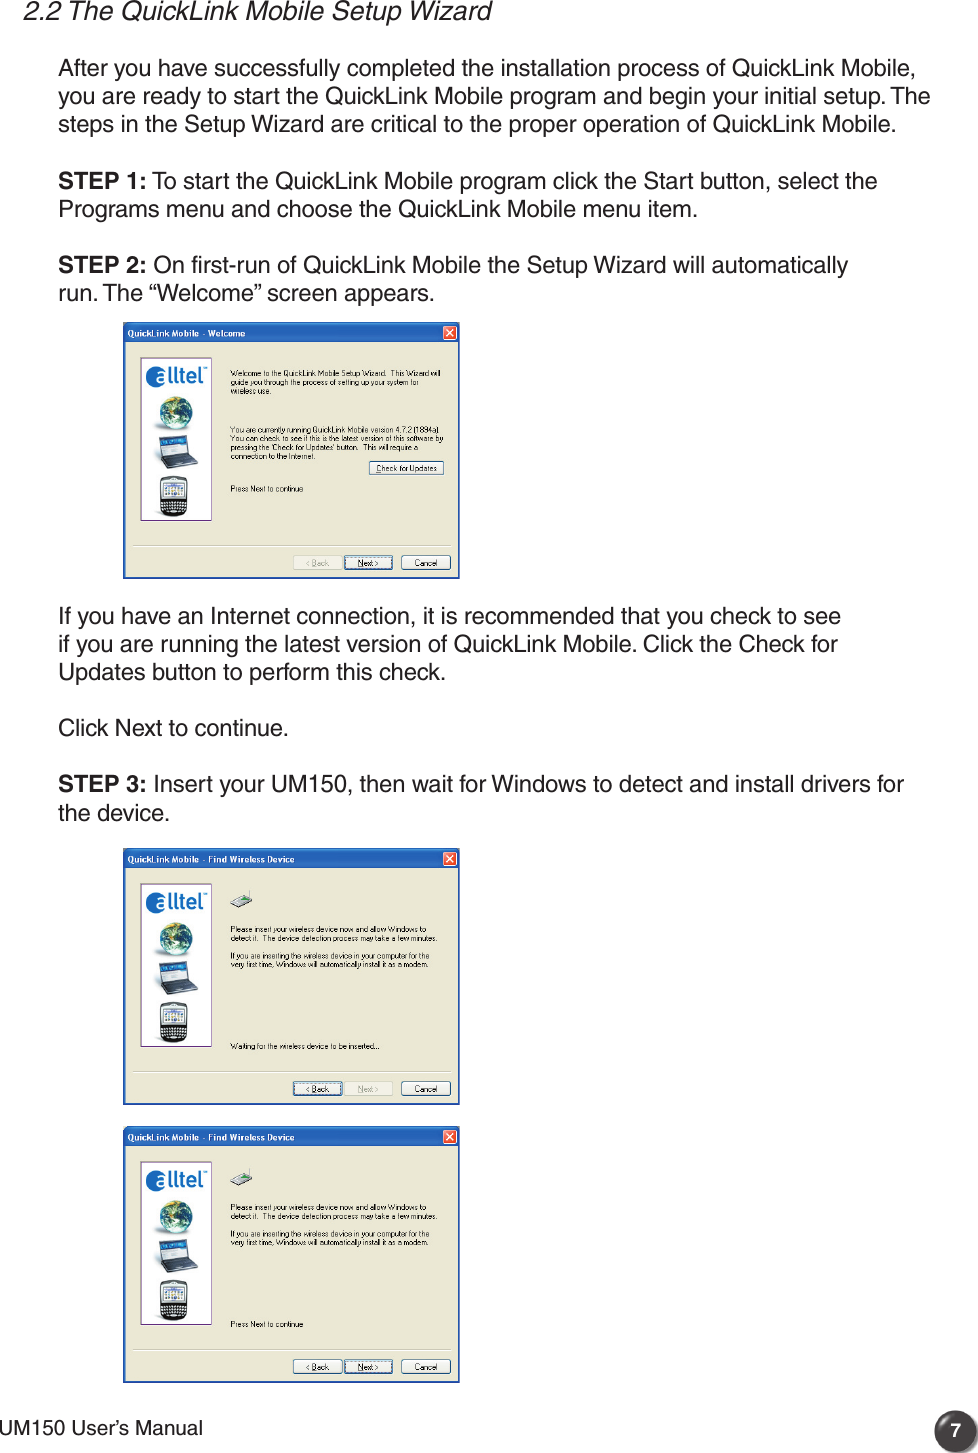


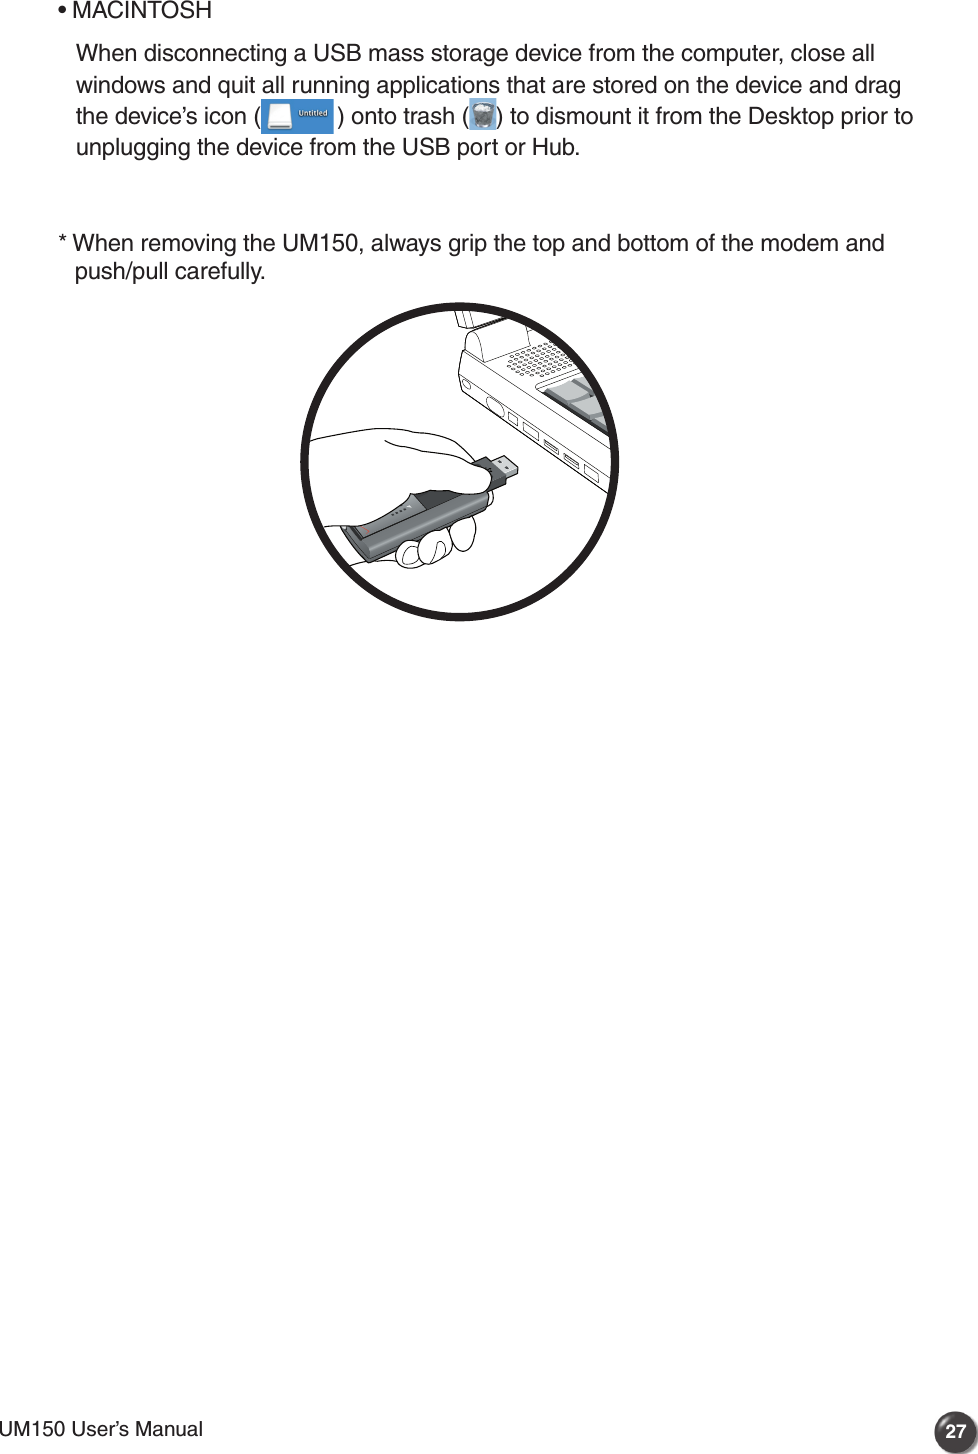
![UM150 User’s Manual 26UM150 User’s Manual5.3.3 Unplugging or Ejecting the Device Make sure to complete the unplug/eject process on your computer before removing the UM150 from your PC. If you remove the USB device improperly, the product may be damaged.• WINDOWSWhen disconnecting a USB mass storage device from the computer, close all windows and quit all running applications that are stored on the device and double click the Unplug/Eject Hardware icon in the System tray.When you press the Unplug/Eject icon in the system tray, the pop-up window will appear. Click the [Stop] button. Now, you can remove the UM150 from your computer.Windows XP VistaUnplug / Eject Hardware iconSystem Tray](https://usermanual.wiki/Pantech/PX-600.Manual/User-Guide-889423-Page-28.png)
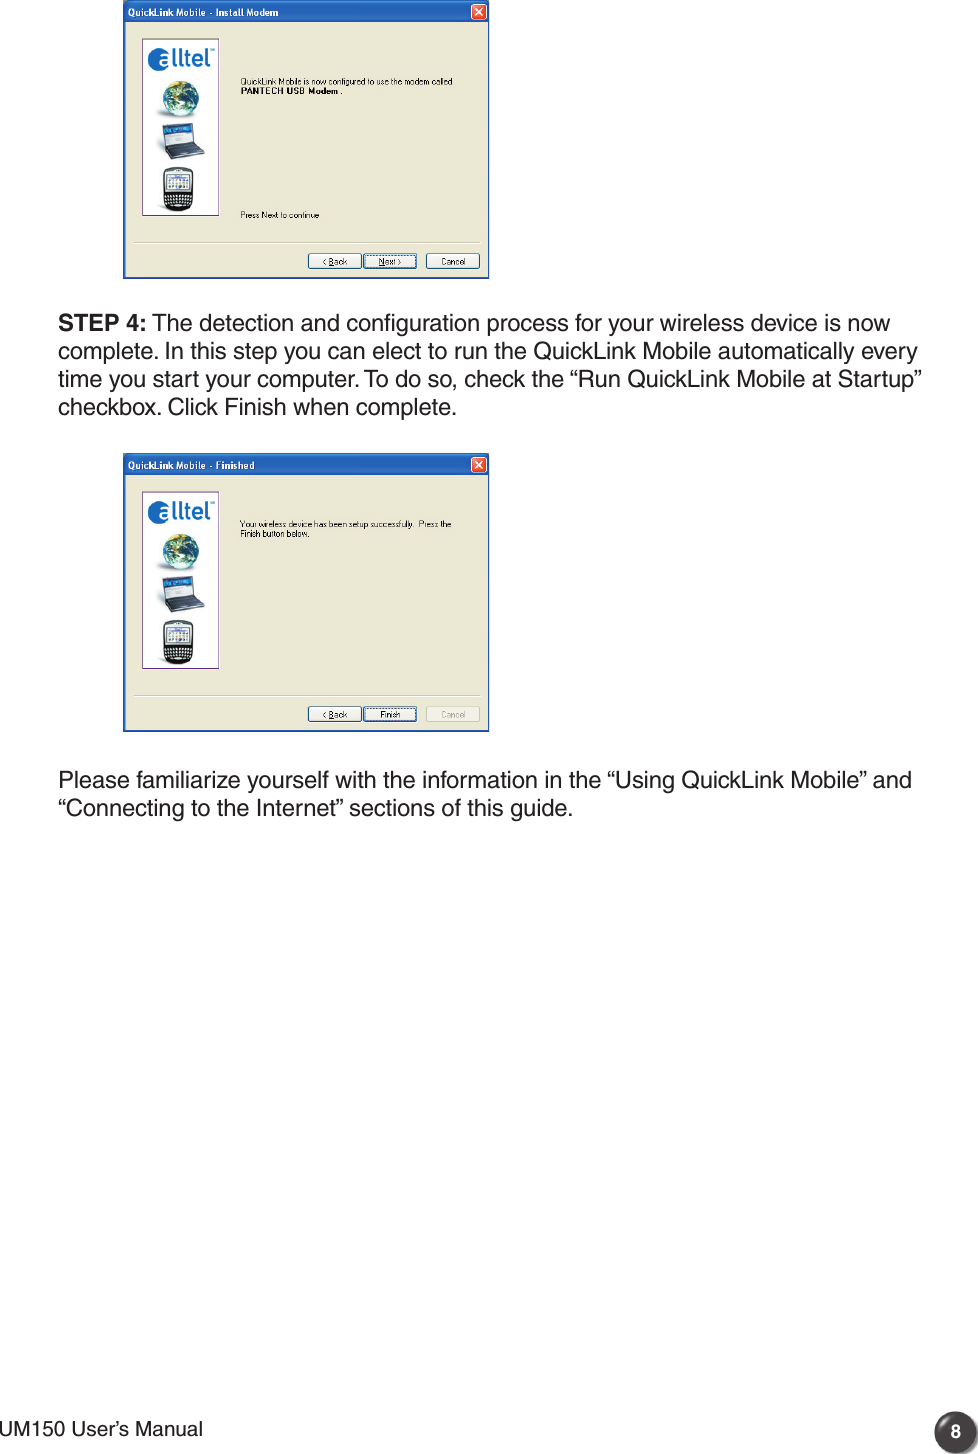
![UM150 User’s Manual 29UM150 User’s Manual5.3.5 Using the Wireless Internet Card Extension Cable • The UM150 Modem package includes an extension USB Y-shaped cable. Although the cable is not required for use with your UM150 Modem, it offers increased performance for your UM150 Modem under certain operating conditions. Simply insert the USB connector into the USB port of your computing device to deliver a DC power supply, increased RF performance, and to solve clearance issues. Using the Wireless Internet Card Extension Cable: 1) Plug the single end of the Y-shaped cable into the UM150 Modem. [A] 2) Depending on the condition you are trying to solve (DC power supply, increased RF performance, or clearance issues), plug either one of the two connected ends of the Wireless Internet Card extension cable into the Type A USB port(s) on your computer. [B] * The Wireless Internet Card extension cable connector labeled #1, is the primary data power cable used to either extend the UM150 modem away from your computer allowing you to locate the modem in a more optimum signal location or solve any computer USB port clearance issues. The Wireless Internet Card extension cable connector labeled #2, is a DC power supply cable and must be used with connector #1 to provide the modem up to 1Amp of current for use in weaker signal areas. 3) The device is connected to and powered by the computer as soon as the USB cable is plugged properly into the appropriate Type A USB port(s). 4) Launch Quick Link Mobile and click Connect.AB#1#2](https://usermanual.wiki/Pantech/PX-600.Manual/User-Guide-889423-Page-31.png)