Pantech OVAL Dual-Band CDMA phone With Bluetooth User Manual 070312 CDM 8960 OVAL M indd
Pantech Co., Ltd. Dual-Band CDMA phone With Bluetooth 070312 CDM 8960 OVAL M indd
UserManual.wiki
>
Pantech
>
OVAL User Manual
>
Manual
Contents
1.
User Manual
2.
Manual
Manual
Navigation menu
Upload a User Manual
Namespaces
Wiki Guide
HTML
PDF
Info
Views
User Manual
Discussion / Help
Navigation
![ACCESSING THE MENU BASIC OPERATION To access the menu in the idle mode, press[MENU]. To scroll through the menu use the Navigation Key. To return to the previous page, press. To exit the current menu and return to the idle mode, press. Press the Navigation Keyto enter a function when its main page is displayed or press its assigned number to have direct access to the function.Hotkey In idle mode, move the Navigation Key as follows to access these functions:• Leftward movement : Shortcut key 1• Upward movement : Shortcut key 2• Rightward movement : Shortcut key 3• Downward movement : Shortcut key 421BASIC OPERATION TURNING THE PHONE ON / OFFHTURNING THE PHONE ON Press and holduntil your “Power On” logo appears and the tone sounds. If “Enter Lock Code” appears on the display enter your 4-digit password to unlock your phone.HTURNING THE PHONE OFF Press and holduntil your “Power Off” logo appears.• Immediately change or recharge the battery when “BATTERY LOW” appears on the display. Memory may possibly be damaged if the phone turns off due to the battery completely draining.• Turn the phone off before removing or replacing the battery. If the phone is on, unsaved data may be lost.20Your phone can be customized via the menu. Each function can be accessed by scrolling with the Navigation Key or by pressing the number that corresponds with the menu item.](https://usermanual.wiki/Pantech/OVAL.Manual/User-Guide-773799-Page-10.png)
![2524BASIC FUNCTIONS BASIC OPERATIONBASIC OPERATION MENU SUMMARYMAIN MENU 2ND DEPTH 3RD DEPTH 4TH DEPTH6. Phone Settings7. Call Settings8. Memory9. Phone Info1. Standalone Mode2. Set Shortcut keys3. Voice Commands4. Language5. Location6. Security7. System Select8 . NAM Select1. Answer Options2. Auto Retry3. TTY Mode4. One Touch Dial5. Voice Privacy6. DTMF Tones1. Save Options2. Phone Memory3. Card Memory1. My Number2. SW Version3. Icon Glossary1. Left Key2. Up Key3. Right Key4. Down Key5. Reset All1. Mode2. Call Alert1. Edit Codes2. Restrictions3. Phone Lock Setting4. Lock Phone Now1. Auto NAM2. Change NAMHMAKING A CALL Enter a phone number.To modify the phone number you have entered:• To erase one digit at a time press .• To erase the entire number, press and hold .Phone number display in contact list If there is no name in the Contact’s name field, the highest priority phone number is displayed. If no phone numbers are stored, the email address appears.All matching entries will be displayed. To call the selected number, press .To send the TXT, Picture or Video message with phone number:• Enter a part of the phone number and then press Right Soft Key [OPTIONS], select “New TXT Message, New Picture Message or New Video Message”. Please refer to page 130, page 132 or page 134 for more details on “Send New TXT Message, Send New Picture Message or Send New Video Message”. Press. The indicator,, appears on the display.• If “CALL FAILED” appears on the display or the line is busy, press or .• If you activate the “AUTO RETRY” function, the phone will automatically retry. (Refer to page 84).• When you place or receive a call from stored phone numbers, the name will be displayed.• There is another way to make a call through the VR mode, which is called “Call <Name><Loc>”. Please refer to page 92 for more details.• If “Enter Lock Code” appears on the display enter your 4-digit password to unlock your phone. To end a call, press.](https://usermanual.wiki/Pantech/OVAL.Manual/User-Guide-773799-Page-12.png)
![BASIC FUNCTIONS BASIC OPERATIONBASIC OPERATION BASIC FUNCTIONS2726HANSWERING CALLS When your phone rings or vibrates, pressto answer the incoming call. (Depending on your phone’s settings, you may also answer incoming calls by opening the phone or by pressing any key.)To ignore incoming calls, press Right Soft Key[IGNORE]. To end a call, press.HSPEAKER PHONEThe Speaker Phone feature lets you hear audio through the speaker and talk without holding the phone. To activate the Speaker Phone in idle, answering or calling modes, press Speaker Key. When the Speakerphone mode is on in the idle mode, the Speakerphone mode will be off one minute later. When Speakerphone mode is on in the idle mode, you make a call within one minute, the Speakerphone mode will be off upon ending the call.HCALLER ID FUNCTIONIdentifies caller by displaying their phone number. If the caller’s name and number are already stored in your contact list, name will appear. The caller ID is stored in the recent calls list.HWAIT/PAUSE FEATUREPauses are used for automated systems (i.e., voice mail, calling cards). Insert a pause after a phone number and then enter another group of numbers. The second set of numbers is dialed automatically after the pause. This feature is useful for dialing into systems that require a code. To insert a wait/pause, enter a phone number and then press Right Soft Key[OPTIONS]. Select either 2-Sec Pause (“P”) or a Wait (“W”). Press to dialor Left Soft Keyto save. Please refer to page 36 for more details about storing a phone number.HANSWERING A CALL To answer a call, press any key except, Right Soft Key,, Side Camera Key, Side AVR Key, Speaker Key, Side Volume Key /or Left Soft Key. To end the call, press.In Auto Answer Mode a call is automatically answered after a preset number of ring tones. See page 84 for more details. To select an answering option, press [MENU], then press the Navigation Key right 2 times forthe ”Settings & Tools”menu. Pressing for Call Settings, then for Answer Options, select either “Flip Open”, “Any Key”, ”Send Only” or “Auto w/ Hands-free”.](https://usermanual.wiki/Pantech/OVAL.Manual/User-Guide-773799-Page-13.png)
![BASIC FUNCTIONS BASIC OPERATION29BASIC OPERATION BASIC FUNCTIONS28HCALLING A NUMBER FROM CONTACTSPress Right Soft Key[CONTACTS] to access the directory.Select the desired phone number and press.HADJUSTING MASTER VOLUMETo adjust the master volume: In idle mode, press the up or down side volume key. Select one of the following options and press[SET] to save it.• Move the Navigation Key up/down to adjust Earpiece volume during a call.• Move the Side Volume Key up or down to adjust Earpiece volume during a call.HMUSIC PLAYERMusic Player is for playing WMA/MP3 files saved on a micro SD Card or internal memory. To display the play/list or play/all tracks when the phone is closed, press and hold. Press[PLAY/PAUSE], press[FFW] or press[FRW] to select another WMA/MP3 file. To stop the music player, open the shell and press.HVIBRATE ON/OFF MODE To activate vibrate on/off mode, press and hold.HMAKING AN INTERNATIONAL CALLPress and hold. When “+” is displayed, enter the country and area codes, then complete the number and send the call.H3-WAY CALLINGWith 3-Way Calling, you can talk to two people at the same time. When using this feature, the normal airtime rates will be applied for each of the two calls. Enter the number you wish to call and then press. Once you have established the connection, enter the second number you wish to call and then press. When you’re connected to the second party, pressagain to begin your 3-Way call.If one of the people you called hangs up during your call, you and the remaining caller stay connected. If you initiated the call and are the first to hang up, all three callers are disconnected.HCALL WAITING FUNCTIONNotifies you of an incoming call when you are already on a call by sounding a beep tone and displaying the caller’s phone number. To answer another call while on the phone, press. This places the first call on hold. To switch back to the first caller, pressagain.Call Waiting is a system dependent feature. Please contact your service provider for details.• All Sounds Off• Alarms Only• Vibrate Only• Low / Medium Low / Medium / Medium High / High](https://usermanual.wiki/Pantech/OVAL.Manual/User-Guide-773799-Page-14.png)
![HAVAILABLE OPTIONS DURING A CALLTo display menu options during a call, press Right Soft Key[OPTIONS].MESSAGINGEnables you to send a message in the during a call. Press Right Soft Key[OPTIONS], thenfor Messaging.CONTACT LISTTo select the phone number in your Contact List. Press Right Soft Key[OPTIONS], thenfor Contact List.RECENT CALLSTo select the phone number in Recent Calls. Press Right Soft Key[OPTIONS], thenfor Recent Calls.AUDIO TO DEVICE / AUDIO TO PHONEDisplay only if device supports Bluetooth connections. If device supports Bluetooth disconnected, appears Bluetooth Menu instead of Audio to device / Audio to phone. Press Right Soft Key[OPTIONS], thenfor Audio to Device / Audio to Phone.DURING A CALL BASIC OPERATION3130BASIC OPERATION DURING A CALLMAIN MENUTo access the phone's main menu in the during a call. Press Right Soft Key[OPTIONS], thenfor Main Menu.NOTEPADEnables you to compose and store reminders and notes in the during a call. Press Right Soft Key[OPTIONS], thenfor Notepad.](https://usermanual.wiki/Pantech/OVAL.Manual/User-Guide-773799-Page-15.png)


![ENTERING LETTERS, NUMBERS & SYMBOLS MEMORY FUNCTIONThe input mode (Alpha editor) will automatically be activated when necessary to enter letters and numbers. As shown below, there are 6 available modes ; Standard input mode (Abc)/(ABC), Input mode (Word), Numeric mode (123), Symbol mode (Symbols) and Quick Text mode (Quick Text). The input mode indicator appears on the upper right of the display when letters and numbers are entered. To select the desired input mode among the 6 modes below, press Left Soft Key[Abc], and then enter letters and numbers.37MEMORY FUNCTION STORING A PHONE NUMBERThe phone book stores up to 500 entries. Enter phone # and press Left Soft Key[SAVE]. Choose “Add New Contact” or “Update Existing” and pressto Select. If “Add New Contact” is selected, the phone number will appear above a list. Press the Navigation Keyup/down to choose the type of number you’re adding, as indicated by the icon. Pressto select. If “Update Existing” is selected, your contact list is displayed. Choose the entry to add the phone number to, and then press. You will see the phone number updated in the existing list. Pressto select. Enter a name. Please refer to page 37 for more details on entering letters, numbers & symbols. To change the input mode, press Left Soft Key[Abc]. Press the Navigation Keydown to select other options (Mobile1.2, E-mail1.2, etc...). If entering a phone number, press Right Soft Key[OPTIONS] to select one of the following options: To store the entry, press[SAVE]. “CONTACT SAVED” or “CONTACT UPDATED” will be displayed.36• Set Speed Dial• Set As Default• Add PauseThe following illustrates the function assigned to each key in the Alpha Editor.FUNCTIONKEYAbc - Press to change mode. [Word][Abc][ABC][123][Symbols][Quick Text]Next - Press to view the next matching word if the highlighted word is not the word you intended.Space - Press to accept a word and add a space.Clear - Press to delete a character to the left of the cursor.Send - Send the letters and numbers you enter.Caps Lock - Press to select a letter case of the standard text input or text input mode. [Abc], [ABC] and [abc] indicate the standard text input. [Word], [WORD] and [word] indicate the predictive text input.Input mode indicator•Word : Input mode•Abc : Abc mode•ABC : ABC mode•123 : Numeric mode•Symbols : Symbol mode•Quick Text : Quick Text mode](https://usermanual.wiki/Pantech/OVAL.Manual/User-Guide-773799-Page-18.png)
![ENTERING LETTERS, NUMBERS & SYMBOLS MEMORY FUNCTION39MEMORY FUNCTION ENTERING LETTERS, NUMBERS & SYMBOLSHSTANDARD INPUT MODEUse the digit keys to enter letters, numbers and characters. Enter letters using the key pad as follows: To change the input mode, press Left Soft Key[Abc]. When entering special character such as . @ ? ! - , & : ’ / 1, pressrepeatedly. To enter a space, press. The cursor will automatically move to the next column. Repeat until letters are entered. There is a 160-letter limit. To delete one digit, press. To delete the entire entry, press and hold. To change from lowercase to uppercase, press.38Key Pad1TimeRepetitions2 timesRepetitions3 timesRepetitions4 timesRepetitions5 times2ABC3DEF4GHI:9WXYZADG:WBEH:XCFI:Y234:ZADG:9Select Abc mode by pressing Left Soft Key [Abc].When you select this mode, the Abc icon appears as a visualconfirmation.• Find the key that corresponds to the letter you want to enter. • Press it as many times as needed for the letter to appear on the screen.• To enter the name “John”:Press [ ] JPress [ , , ] oPress [ , ] hPress [ , ] nHWORD INPUT MODEThe input mode incorporates a built-in-dictionary to determine a word based on the entered characters. A word can be entered morequickly by pressing a key once per character. Select the Word mode by pressing Left Soft Key[Abc]. Press a digit key once to enter the character you want and then enter all the characters to input the word you want. To view the next matching word, press. To accept the matching word, enter a space and then press.](https://usermanual.wiki/Pantech/OVAL.Manual/User-Guide-773799-Page-19.png)
![ENTERING LETTERS, NUMBERS & SYMBOLS MEMORY FUNCTION41MEMORY FUNCTION ENTERING LETTERS, NUMBERS & SYMBOLSTo enter a compound word:• Enter the first part of the word and then press the Navigation Key right to accept it.• Enter the last part of the word and then press to enter the word.To enter “Fun fare” in the input mode.• After you enter the 1st letter, press Left Soft Key [Abc] to select input mode and to choose the lower case (Word).• Press , and you will see “Fun” highlighted. Press to select it.• Press , , and until you see “ease” highlighted. Press to select the next matching word, you will see “fare” and then enter a space.HNUMERIC MODEAllows you to enter numbers. Press Left Soft Key[Abc] and scroll down to “123” and pressto change to Numeric Mode. To enter a number, press a digit key.40HSYMBOL MODEAllows you to enter symbols. Press Left Soft Key[Abc] and scroll down to “Symbols” and pressto change to Symbol Mode. Select symbol you want to enter with the Navigation Key.Press the Navigation Keyup/down/left/right.HQUICK TEXTAllows you to enter written sentences. Press Left Soft Key[Abc] and scroll down to “Quick Text” and pressto change to Quick Text Mode. Select Quick Text you want to enter with the Navigation Key, press[OK].Use the Navigation Key to view a different line of symbols.](https://usermanual.wiki/Pantech/OVAL.Manual/User-Guide-773799-Page-20.png)
![CONTACTS MENU FUNCTION4544MENU FUNCTION CONTACTSStores up to 500 entries, each of which can be assigned to a group.Entries can be retrieved by name or group.HNEW CONTACTAdds a new entry. Press[MENU], thenfor New Contact. To enter a name or number, use the Navigation Keyto select the contact field.Please refer to page 37 for more details on entering letters, numbers & symbols. To save the entry, press[SAVE].To return to the previous page, press.• For each new contact, at least 1 phone number or email address needs to be saved with the contact. “ADD AT LEAST ONE NUMBER OR E-MAIL ADDRESS” will be displayed if neither have been added.• If the entry name is left empty and a phone number is provided, the entry will be saved and only the phone number will be displayed.HCONTACT LISTRetrieves an entry by name and calls by simply pressing Right Soft Key . You can review all the entries stored in your contact list or quickly find an entry by entering a name or its character string. Press[MENU], thenfor Contact List press Right Soft Key[CONTACTS]. The list of names in your contacts is displayed alphabetically. Enter a name or its character string or scroll through the list with the Navigation Key. Please refer to page 37 for more details on entering letters, numbers & symbols. To edit the entry, press Left Soft Key[EDIT]. To show detail of the entry, press[VIEW]. To call the selected number, press Right Soft Key[OPTIONS] and then select “Call” or press.• PHONE BOOK FIELDS : Name/Mobile 1/Home/Work/ E-mail 1/Group/Picture/Ringtone/Mobile 2/Fax/E-mail 2.• Under “Mobile 1”, “Mobile 2”, “Home”, “Work” or “Fax” input the phone number and then by pressing Right Soft Key [OPTIONS], you can choose from the following:1. Set Speed Dial2. Set As Default3. Add Pause• To use and manage contacts, press Right Soft Key[OPTIONS] then select:1. New Contact: To add a New Contact.2. Erase: To delete a contact.3. New TXT Message: To create a TXT message.4. New Picture Message: To create a Picture message.5. New Video Message: To create a Video message.6. Call: To call the contact.7. Erase All: To delete all contact list.• To set as emergency number, select “In Case of Emergency“. Please refer to page 50 for more details on “In Case of Emergency“.](https://usermanual.wiki/Pantech/OVAL.Manual/User-Guide-773799-Page-22.png)
![CONTACTS MENU FUNCTION47MENU FUNCTION CONTACTS46HGROUPSGroups allows you to classify phone entries into groups with up to 10 numbers in each group. The existing groups include Family and Work and they cannot be erased or renamed. You can add up to 28 more groups which can be changed or erased.ADD NEW GROUP Press[MENU], thenfor Groups. To select “New”, press Left Soft Key[NEW]. Input a new group name. To save it, press[SAVE].ASSIGN PHONE NUMBER TO GROUP Press[MENU], thenfor Groups. To assign phone numbers to a Group, select “Add”, press Right Soft Key[OPTIONS]. Select a location and then press[MARK]. Your contact entries will be displayed in alphabetical order. Select the contact for the group and then press Left Soft Key[DONE]. “CONTACT ADDED TO [GROUP NAME]” will be displayed. Repeat for each location for the Group.CHANGE GROUP NAME Press[MENU], thenfor Groups. Use the Navigation Keyto select the existing group name that you want to change. To select “Rename”, press Right Soft Key[OPTIONS]. Input a new group name. To save it, press[SAVE].SEND TXT MESSAGE TO A GROUP Press[MENU], thenfor Groups. Select an existing group name with the Navigation Key. To select “New TXT Message”, pressRight Soft Key[OPTIONS]. Input a “Text”, press Right Soft Key[OPTIONS] to select “Save As Draft”, “Add Graphic”, “Add Sound”, “Font Size”, “Add Name Card”, “Add Quick Text”, “Priority Level” and “Cancel Message”. To send the TXT message, press[SEND].To save the TXT message, press Right Soft Key[OPTIONS] and then select “Save As Draft” and then press.](https://usermanual.wiki/Pantech/OVAL.Manual/User-Guide-773799-Page-23.png)
![CONTACTS MENU FUNCTION49MENU FUNCTION CONTACTS48SEND PICTURE MESSAGE TO A GROUP Press[MENU], thenfor Groups. Select an existing group name with the Navigation Key. To select “New Picture Message”, press Right Soft Key[OPTIONS]. Input a “Text”, “Picture”, “Sound”, “Subject”, “Name Card”, and then press Right Soft Key[OPTIONS] to select “Preview”,“Save As Draft”, “Add Quick Text”, “Add Slide”, “Priority Level”, “Remove Picture”, “Remove Sound” or “Cancel Message”. To send the picture message, press[SEND].To save the picture message, press Right Soft Key[OPTIONS] and then select “Save As Draft” and then press.SEND VIDEO MESSAGE TO A GROUP Press[MENU], thenfor Groups. Select an existing group name with the Navigation Key. To select “New Video Message”, press Right Soft Key[OPTIONS]. Input a “Text”, “Video”, “Subject”, “Name Card”, and then press Right Soft Key[OPTIONS] to select “Preview”, “Save As Draft”, “Add Quick Text”, “Priority Level”, “Remove Video” or “Cancel Message”. To send the video message, press[SEND].To save the video message, press Right Soft Key[OPTIONS] and then select “Save As Draft” and then press.ERASE GROUP Press[MENU], thenfor Groups. Select an existing group name with the Navigation Key. To select “Erase”, press Right Soft Key[OPTIONS]. Select “Yes” to erase it, press.When using Erase Group, the saved entries are moved to the “No Group”.](https://usermanual.wiki/Pantech/OVAL.Manual/User-Guide-773799-Page-24.png)
![5150CONTACTS MENU FUNCTIONMENU FUNCTION CONTACTSHSPEED DIALSIn idle mode, calls can be placed to numbers stored in speed dial by pressing & holding the location number on the key pad. For a 2-digit location number, press the first number and then press and hold the second number. Press[MENU], thenfor Speed Dials. To assign a phone number to a location, select the loca-tion and then press[SET]. Select the contact with the Navigation Keythen press. Select the phone number with the Navigation Keythen press.• “Unassigned” appears if the location is available.• To call an assigned number, press & hold the last digit of the speed dial #. Select “Yes”, then press. “SPEED DIAL SET” will be displayed.HIN CASE OF EMERGENCYYour phone has a special menu to organize your emergency contacts and information. Press[MENU], thenfor In Case of Emergency. Select one of the entries using the Navigation Key. To set a new emergency number, choose Contact 1, 2 or 3. Press[ADD]. Select “From Contacts” or “Enter Number” with the Navigation Key. Press. Pressto save it. You can use this area to add personal note, including allergies, medications, and other health information’s. If you want to add emergency personal info, select “Personal Info“. Press[VIEW]. Choose Note 1, 2 or 3, press[ADD]. Enter a special note that would prove useful in case of emergency, pressprove useful in case of emergency, pressprove useful in case of emergency[SAVE] to save it. HMY NAME CARDCreate your own business card, so that you can send all your details upon request by TXT message, picture&video message, by E-mail, by Bluetooth or etc... Press[MENU], thenfor My Name Card. The list of my name card in your phone book is displayed. To edit it, press Left Soft Key[EDIT], edit a my name card, then press[SAVE] to save it. Select my name card with the Navigation Key, press[SEND] to send a my name card. To move a New Message menu.Please refer to page 130, for more details on “New Message”.1. From Contacts: Search for a phone number which is stored in the contacts list.2. Enter Number: To store the new emergency phone number in contacts.](https://usermanual.wiki/Pantech/OVAL.Manual/User-Guide-773799-Page-25.png)
![5352MENU FUNCTION RECENT CALLS RECENT CALLS MENU FUNCTIONHMISSEDDisplays information about the 90 most recently missed calls.Place a call to a missed call number by simply pressing . To see a list of the 90 most recently missed calls, press[MENU], then press the Navigation Keyright once for the“Recent Calls” menu. Pressfor Missed. If the number is already stored in your contacts, only the name appears. If the number is not stored, only the phone number appears. To view missed call details, press[OPEN].Call details include date, time and phone number. Press Right Soft Key[OPTIONS] and then select “Save” to save it or select “Erase” to delete it.• After 90 missed calls, the oldest call will automatically be erased from the history.• Press Left Soft Key [MESSAGE], to send a TXT, Picture or Video Message.HRECEIVEDDisplays information about the 90 most recently received calls.Place a call to a received call by simply pressing . To see a list of the 90 most recently received calls, press[MENU], then press the Navigation Keyright once for the“Recent Calls” menu. Pressfor Received. If the number is already stored in your contacts, only the name appears. If the number is not stored, only the phone number appears. To view received call details, press[OPEN].Call details include date, time and phone number. Press Right Soft Key[OPTIONS] and then select “Save” to save it or select “Erase” to delete it.• After 90 received calls, the oldest call will automatically be erased from the history.• Press Left Soft Key [MESSAGE], to send a TXT, Picture or Video Message.• Save: To store the phone number in your phone book.• Details: If the selected entry is already stored in the contacts list, view the caller’s information.• Erase: To erase a missed calls listing.• Lock/Unlock: To lock or unlock a missed calls listing.• Erase All: To erase all missed calls listings.• View Timers: To display usage time.• Save: To store the phone number in your phone book.• Details: If the selected entry is already stored in the contacts list, view the caller’s information.• Erase: To erase a received calls listing.• Lock/Unlock: To lock or unlock received calls listing.• Erase All: To erase all received calls listings.• View Timers: To display usage time.](https://usermanual.wiki/Pantech/OVAL.Manual/User-Guide-773799-Page-26.png)
![5554RECENT CALLS MENU FUNCTIONMENU FUNCTION RECENT CALLSHDIALEDDisplays information about the 90 most recently dialed numbers.Place a call to a dialed call by simply pressing . To see a list of the 90 most recently dialed numbers, press[MENU], then press the Navigation Keyright once for the“Recent Calls” menu. Pressfor Dialed. If the number is already stored in your contacts, only the name appears. If the number is not stored, only the phone number appears. To view dialed call details, press[OPEN].Call details include type of call, date, time and phone number. Press Right Soft Key[OPTIONS] and then select “Save” to save it or select “Erase” to delete it.• After 90 dialed calls, the oldest call will automatically be erased from the history.• Press Left Soft Key [MESSAGE], to send a TXT, Picture or Video Message.• Save: To store the phone number in your phone book.• Details: If the selected entry is already stored in the contacts list, view the caller’s information.• Erase: To erase a dialed calls listing.• Lock/Unlock: To lock or unlock dialed calls listing.• Erase All: To erase all dialed calls listings.• View Timers: To display usage time.HBLOCKEDThis menu appears only when “Incoming Call Restriction“ is set. Displays information about the 90 most Incoming Call numbers.Place a call to a blocked call. To see a list of the 90 most recently blocked numbers, press[MENU], then press the Navigation Keyright once for the“Recent Calls” menu. Pressfor Blocked and then enter your restriction code, press.If the number is already stored in your contacts, only the name appears. If the number is not stored, only the phone number appears. To view dialed call details, press[OPEN].Call details include type of call, date, time and phone number. Press Right Soft Key[OPTIONS] and then select “Save” to save it or select “Erase” to delete it.• After 90 blocked calls, the oldest call will automatically be erased from the history.• Press Left Soft Key [MESSAGE], to send a TXT, Picture or Video Message.• Please refer to page 80 for more details on “Restrictions“.• Save: To store the phone number in your phone book.• Details: If the selected entry is already stored in the contacts list, view the caller’s information.• Erase: To erase a blocked calls listing.• Lock/Unlock: To lock or unlock blocked calls listing.• Erase All: To erase all blocked calls listings.• View Timers: To display usage time.](https://usermanual.wiki/Pantech/OVAL.Manual/User-Guide-773799-Page-27.png)
![HVIEW TIMERSChecks the usage time and manages your calls within the limit you set. The 11 timers include (Last Call, All Calls, Received Calls, Dialed Calls, Roaming Calls, Transmit KB, Received KB, Total KB, Last Reset, Lifetime Calls, Lifetime Data Counter): Press[MENU], then press the Navigation Keyright once for the“Recent Calls” menu. Pressfor View Timers.• If Incoming Call Restriction has not been set, pressinstead of .• Please refer to page 80 for more details on “Restrictions“. Select “Last Call”, “All Calls”, “Received Calls”, “Dialed Calls”, “Roaming Calls”, “Transmit KB”, “Received KB”, “Total KB” with the Navigation Key.To reset an individual, press Left Soft Key[RESET], select “Yes,” then press.To reset all timer, press Right Soft Key[RESET ALL], then select “Yes”, press. To return to the previous page, press.HALLDisplays information about the most recent received, dialed and missed calls. To see a list of the 270 most recent received, dialed and missed calls, press[MENU], then press the Navigation Keyright once for the“Recent Calls” menu. Pressfor All.If the number is already stored in your contacts, only the name appears. If the number is not stored, only the phone number appears.• If Incoming Call Restriction has not been set, pressinstead of .• Please refer to page 80 for more details on “Restrictions“. To view details, press[OPEN].Call details include type of call, date, time and phone number. Press Right Soft Key[OPTIONS] and then select “Save” to save it or select “Erase” to delete it.• After the 270 received, dialed or missed calls, the oldest call will automatically be erased from the history.• Press Left Soft Key [MESSAGE], to send a TXT, Picture or Video Message.• Save: To store the phone number in your phone book.• Details: If the selected entry is already stored in the contacts list, view the caller’s information.• Erase: To erase a recent calls listing.• Lock/Unlock: To lock or unlock recent calls listing.• Erase All: To erase all recent calls listings.• View Timers: To display usage time.MENU FUNCTION RECENT CALLS56RECENT CALLS MENU FUNCTION57](https://usermanual.wiki/Pantech/OVAL.Manual/User-Guide-773799-Page-28.png)
![MENU FUNCTION SETTINGS58SETTINGS MENU FUNCTION59Set Off or Set On—To activate or deactivate Bluetooth connectiv-ity. An active Bluetooth connection is indicated byat the top of the display.Options—To define how your phone is shown to other devices with Bluetooth connectivity. To change the name of your phone that is seen by other users, select My Phone Name, enter the new name, and select OK. To display your phone to other devices for one minute or to hide your phone from other users, select Discovery Mode > On or Off.Important: Features using Bluetooth technology, or allowing such features to run in the background while using other features, increase the demand on battery power and reduce the battery life.Bluetooth pairing from phone to PCBluetooth pairing between your phone and PC or laptop is initialized from your phone or from your PC or laptop. To connect from your phone, do the following: To enable Bluetooth on your phone, press[MENU], then press the Navigation Keyright 2 times for the“Settings & Tools” menu. Pressfor Bluetooth Menu. To select On, press the left soft key. The Bluetooth iconis displayed in the upper right corner of the main display left the battery icon when Bluetooth is enabled. To pair your phone to your PC or laptop, select Add New Device. Place the PC you are connecting to in discoverable mode and select OK. The phone searches for Bluetooth devices in range and lists all devices found. Scroll to your PC or laptop name in the list and select OK. Enter your password on your phone, then enter the same password on your PC or laptop.Customizes your phone and optimizes performance through a variety of settings.HBLUETOOTHBluetooth technology connectivity enables wireless connections between electronic devices. If connected with a Bluetooth Handsfree device, you can use your phone more freely. With DUN, you can also use the phone as a wireless modem. It can also be used to connect wirelessly to products that use Bluetooth wireless technology, such as computers. You can synchronize your phone and your PC using Bluetooth connectivity. Since devices with Bluetooth connectivity communicate using radio waves, your phone and the other device do not need to be in direct line-of-sight. The two devices only need to be within 10 meters (30 feet) of each other. The connection can be subject to interference from obstructions such as walls or other electronic devices. This device is compliant with Bluetooth specification 1.1, supporting the following profiles: HSP V1.1 (headset profile), HFP V1.0 (handsfree car kit profile), DUN V1.1 (dial-upnetworking), GAP (general access profile) and SPP V1.1 (serial port profile). To ensure interoper-ability between other devices supporting Bluetooth technology, use UTStarcom approved enhancements for this model. Check with the manufacturers of other devices to determine their compatibility with this phone. There may be restrictions on using Bluetooth technology in some locations. Check with your local authorities or Verizon. If you want more information on this function, visit the Bluetooth Technology organization Web site: https://www.bluetooth.org/.To access the Bluetooth menu, press[MENU], then press the Navigation Keyright 2 times for the“Settings & Tools” menu. Pressfor Bluetooth Menu. And from the follow-ing options:Add New Device—To set up a pairing between your phone and another device with Bluetooth technology. With Bluetooth activated, place the device you are connecting to in discoverable mode and select OK.](https://usermanual.wiki/Pantech/OVAL.Manual/User-Guide-773799-Page-29.png)
![MENU FUNCTION SETTINGS60SETTINGS MENU FUNCTION61 Your phone displays a message asking to pair with your PC or laptop. Select OK and enter the same password entered on your PC. Select Ask always or Always connect on your phone, and select OK. The message Port enabled is displayed on the phone confirming the pairing. All services such as Dial up Networking (DUN) are available on the phone. Available services are also listed on your PC or laptop. Select services you want to use with your phone.If your phone is connected to a laptop or PC using Bluetooth, you cannot use the USB cable. To use the USB cable, go to the Bluetooth menu, select the laptop or PC connected to your phone and then disable the port using the applicable softkey. Unpairing a Bluetooth connectionTo successfully unpair a Bluetooth connection, you must unpair both the phone and the PC or laptop. To unpair the connection, do the following: To unpair the connection from the phone, scroll to the name of the PC and select OK. The message Port disabled is displayed on the phone confirming the unpairing. Follow the Bluetooth instructions on you PC or laptop, or the Bluetooth dongle instructions for unpairing the PC or laptop from the phone. A dongle is a small USB device added to a PC or laptop that does not have a built-in Bluetooth connection. PC, laptop, and dongle products have website support for Bluetooth connectivity. Select Ask always or Always connect on your phone, and select OK. The message Port enabled is displayed on the phone confirming the pairing.Bluetooth pairing from PC to phoneTo initialize a Bluetooth connection from your PC or laptop to your phone, do the following: To enable Bluetooth on your phone, press[MENU], then press the Navigation Keyright 2 times for the“Settings & Tools” menu. Pressfor Bluetooth Menu. To select On, press the left soft key. The Bluetooth iconis displayed in the upper right corner of the main display left the battery icon when Bluetooth is enabled. In the Bluetooth menu, select Options with the right softkey. Scroll to Discovery Mode and select OK. Scroll to On and select OK. Your phone is in discoverable mode by other Bluetooth devices for one minute. Press the End key once, or the Clear key twice to return to the standby mode.The phone must be in the standby mode to pair with another device. From your PC, search for Bluetooth devices. A list of devices shows the CDM-8960 or the name you selected for your phone. Select your phone from the list of found devices and enter the password.](https://usermanual.wiki/Pantech/OVAL.Manual/User-Guide-773799-Page-30.png)
![MENU FUNCTION SETTINGS62SETTINGS MENU FUNCTION63 Instructions (Place device you are connecting to in discoverable mode) will be displayed. Highlight the device and press.HBLUETOOTH MENUThe CDM-8960 is compatible with devices that support the Bluetooth headset and hands-free profile(s)*. You may create and store 30 pairings within the CDM-8960 and connect to one device at a time. The approximate communication range for Bluetooth wireless technology is up to 30 feet (10 meters).Read user guide of each Bluetooth accessory that you are trying to pair with your phone because the instructions may different.BLUETOOTH ON/OFFThe Power feature allows you to turn the Bluetooth function on and off. Press[MENU], then press the Navigation Keyright 2 times for the“Settings & Tools” menu. Pressfor Bluetooth Menu. Press Left Soft Key[SET ON/SET OFF] to activate/deactivate Bluetooth mode.ADD NEW DEVICEPairing is the process that allows the handset to locate establish and register 1-to-1 connection with the target device. Press[MENU], then press the Navigation Keyright 2 times for the“Settings & Tools” menu. Pressfor Bluetooth Menu. Select “1. Add New Device”, then press. If Bluetooth is set to off, “Turn Bluetooth power on?” will appear. Select “Yes” and press.By pressing Right Soft Key [OPTIONS], you can choose from the following:My Phone Name: Your phone’s Bluetooth name will appear to other in-range Bluetooth devices, depending on your discovery mode. Enter a new name and pressto save and exit.Discovery Mode: Turns Discovery Mode “on” or “off.” If Discovery Mode is turned on, other devices will be able to find your device for one minute.Supported Profiles: Displays the following list of options. 1. Headset: Supports use of a compatible Bluetooth headset for mono voice.2. Handsfree: Supports Bluetooth headsets, and may also support other installed compatible Bluetooth devices with speakerphone capabilities, such as car kits or a conference room device. For Handsfree Car Kit Compatibility, refer to www.verizonwireless.com/bluetoothchart on the Verizon Wireless Website.3. Dial Up Networking: Allows the phone to be used as a data modem with a compatible Bluetooth device, such as a laptop or PDA, over the VZW NationalAccess and/or VZW BroadbandAccess systems.”](https://usermanual.wiki/Pantech/OVAL.Manual/User-Guide-773799-Page-31.png)
![MENU FUNCTION SETTINGS64SETTINGS MENU FUNCTION65 The handset will prompt you for the passkey. Consult the Bluetooth accessory instructions for the appropriate passkey (typically “0000” - 4 zeroes). Enter the passkey and press.The default PIN code may differ depending on Bluetooth devices. Please refer to the user guide of the Bluetooth device that you wish to use. Once pairing is successful, select “Yes” and pressto connect with the device. Once paired, you will see the device listed in the “1. Add New Device” menu.By pressing Right Soft Key [OPTIONS], you can choose from the following:Remove Device: Removing a device from the paired list.Rename Device: Renaming the paired device.Incoming Security: To Select “Always Ask” or “Always Connect”.Device Info: Reviewing information about the paired device.HSOUNDS SETTINGSCALL SOUNDSTo select a ringer type for incoming calls:CALL RINGTONE Press[MENU], then press the Navigation Keyright 2 times for the“Settings & Tools” menu. Pressfor Sound Settings, thenfor Call Sounds, and thenfor Call Ringtone. Select your desired ringer type. Select one of the available ring types. To confirm, press.CALL VIBRATE Press[MENU], then press the Navigation Keyright 2 times for the“Settings & Tools” menu. Pressfor Sound Settings, thenfor Call Sounds, and thenfor Call Vibrate. Select “On” or “Off” with the Navigation Keyand then pressto save it.• Up or Down key: 1. Get New Ringtones or select your desired ringer type.• Press Left Soft Key [PLAY/STOP] to play/stop sound.](https://usermanual.wiki/Pantech/OVAL.Manual/User-Guide-773799-Page-32.png)
![SETTINGS MENU FUNCTION67 To save, press.VOICEMAIL Press[MENU], then press the Navigation Keyright 2 times for the“Settings & Tools” menu. Pressfor Sound Settings, thenfor AlertSounds, and thenfor Voicemail. Select “Tone”, “Vibrate” or “Reminder” with theand then select one of the following options by pressing the. To save, press.KEYPAD VOLUMETo adjust key pad tone: Press[MENU], then press the Navigation Keyright 2 times for the“Settings & Tools” menu. Pressfor Sound Settings, thenfor Keypad Volume. Select one of the following options by pressing the Navigation Keyup/down. To save, press.• Tone: 1. Get New Ringtones or select your desired ringer type.• Vibrate: Select “On” or “Off”.• Reminder: Select “Once”, “Every 2 Minutes”, “Every 15 Minutes” or “Off”.• Low ~ High• OffMENU FUNCTION SETTINGS66ALERT SOUNDSWhen selected, this setting alerts you to the following handset changes:TXT MESSAGE Press[MENU], then press the Navigation Keyright 2 times for the“Settings & Tools” menu. Pressfor Sound Settings, thenfor Alert Sounds, and thenfor TXT Message. Select “Tone”, “Vibrate” or “Reminder” with the Navigation Keyand then select one of the following options by pressing the Navigation Key. To save, press.PIC-VIDEO MESSAGE Press[MENU], then press the Navigation Keyright 2 times for the“Settings & Tools” menu. Pressfor Sound Settings, thenfor Alert Sounds, and thenfor Pic-Video Message. Select “Tone”, “Vibrate” or “Reminder” with theNavigation Keyand then select one of the following options by pressing the Navigation Key.• Tone: 1. Get New Ringtones or select your desired ringer type.• Vibrate: Select “On” or “Off”.• Reminder: Select “Once”, “Every 2 Minutes”, “Every 15 Minutes” or “Off”.• Tone: 1. Get New Ringtones or select your desired ringer type.• Vibrate: Select “On” or “Off”.• Reminder: Select “Once”, “Every 2 Minutes”, “Every 15 Minutes” or “Off”.](https://usermanual.wiki/Pantech/OVAL.Manual/User-Guide-773799-Page-33.png)
![69SETTINGS MENU FUNCTIONCALL CONNECTNotifies you that a call has been successfully placed. Press[MENU], then press the Navigation Keyright 2 times for the“Settings & Tools” menu. Pressfor Sound Settings, thenfor Service Alerts, and thenfor Call Connect. Select “On” or “Off” with the Navigation Keyand then pressto save it.POWER ON/OFFPOWER ONAllows you to activate/deactivate the power on tones. Press[MENU], then press the Navigation Keyright 2 times for the“Settings & Tools” menu. Pressfor Sound Settings, thenfor Power On/Off, and thenfor Power On. Select “On” or “Off” with the Navigation Keyand then pressto save it.POWER OFFAllows you to activate/deactivate the power off tones. Press[MENU], then press the Navigation Key right 2 times for the“Settings & Tools” menu. Pressfor Sound Settings, thenfor Power On/Off, and thenfor Power Off. Select “On” or “Off” with the Navigation Keyand then pressto save it.68MENU FUNCTION SETTINGSSERVICE ALERTSERI (Enhanced Roaming Indicator)ERI (Enhanced Roaming Indicator)The Enhanced Roaming Indicator (ERI) feature displays a text banner on the display screen informing the handset user of which systems the wireless device is using as compared to the service plan they purchased. The ERI Banner text changes to tell a customer if they are using the: “Verizon Network”, “Extended Network” or “Roaming”. Press[MENU], then press the Navigation Keyright 2 times for the“Settings & Tools” menu. Pressfor Sound Settings, thenfor Service Alerts, and thenfor ERI. Select “On” or “Off” with the Navigation Keyand then pressto save it.MINUTE BEEPSounds an alert every minute during a call. Press[MENU], then press the Navigation Keyright 2 times for the“Settings & Tools” menu. Pressfor Sound Settings, thenfor Service Alerts, and thenfor Minute Beep. Select “On” or “Off” with the Navigation Keyand then pressto save it.](https://usermanual.wiki/Pantech/OVAL.Manual/User-Guide-773799-Page-34.png)
![SETTINGS MENU FUNCTION71BACKLIGHTBacklights the display and key pad and activates dimming for easy viewing in dark places.DISPLAY Press[MENU], then press the Navigation Keyright 2 times for the“Settings & Tools” menu. Pressfor Display Settings, thenfor Backlight, and thenfor Display. Select one of the following options with the Navigation Key. Pressto save it.KEYPAD Press[MENU], then press the Navigation Keyright 2 times for the“Settings & Tools” menu. Pressfor Display Settings, thenfor Backlight, and thenfor Keypad. Select one of the following options with the Navigation Key. Pressto save it. 7 Seconds, 15 Seconds, 30 Seconds, Always On, Always Off.MENU FUNCTION SETTINGS70HDISPLAY SETTINGSAllows you to customize the display.BANNERYou can choose to display a personal Banner greeting or the Enhanced Roaming Indicator (ERI) banner on the phone’s screens:PERSONAL BANNERThe text greeting can be up to 16 characters and is displayed on your phone’s screen in standby mode. Press[MENU], then press the Navigation Keyright 2 times for the“Settings & Tools” menu. Pressfor Display Settings, thenfor Banner, and thenBanner, and thenBannerfor Personal Banner. Enter a new personal greeting. To change the input mode, press Left Soft Key[Abc]. Pressto save it.ERI BANNER Press[MENU], then press the Navigation Keyright 2 times for the“Settings & Tools” menu. Pressfor Display Settings, thenfor Banner, and thenBanner, and thenBannerfor ERI Banner. Select “On” or “Off” with the Navigation Keyand then pressto save it. 7 Seconds, 15 Seconds, 30 Seconds, Always On, Always Off.](https://usermanual.wiki/Pantech/OVAL.Manual/User-Guide-773799-Page-35.png)
![SETTINGS MENU FUNCTION73 Select a display from the Graphic list using the Navigation Keyand then pressto save it.DISPLAY THEMES Press[MENU], then press the Navigation Keyright 2 times for the“Settings & Tools” menu. Pressfor Display Settings, thenfor Display Themes. Select one of the following options with the Navigation Key. Pressto save it.DIAL FONTS Press[MENU], then press the Navigation Keyright 2 times for the“Settings & Tools” menu. Pressfor Display Settings, thenfor Dial Fonts. Select “Normal” or “Large” with the Navigation Key. Pressto save it.MENU FUNCTION SETTINGS72WALLPAPERMAIN SCREEN Press[MENU], then press the Navigation Keyright 2 times for the“Settings & Tools” menu. Pressfor Display Settings, thenfor Wallpaper, Wallpaper, Wallpaperand thenfor Main Screen. Select “My Pictures” or “My Videos” with the Navigation Key. Select Default to choose a pre-installed display, Downloads, Pic # or Video # to choose a display you have downloaded to your phone. To launch “Get It Now”, press Right Soft Key[GET NEW]. To expand selected image or play video, press Left Soft Key[VIEW/PLAY]. Select a display from the Animation and the Graphic list using the Navigation Keyand then pressto save it.FRONT SCREEN Press[MENU], then press the Navigation Keyright 2 times for the“Settings & Tools” menu. Pressfor Display Settings, thenfor Wallpaper, Wallpaper, Wallpaperand thenfor Front Screen. Select Default to choose a pre-installed display, Downloads, Pic # to choose a display you have downloaded to your phone. To launch “Get It Now”, press Right Soft Key[GET NEW]. To expand selected image, press Left Soft Key[VIEW].• Default• Youth](https://usermanual.wiki/Pantech/OVAL.Manual/User-Guide-773799-Page-36.png)
![75SETTINGS MENU FUNCTIONHPHONE SETTINGSSTANDALONE MODEStandalone Mode allows you to turn off the phone’s radio functions where they are restricted. Press[MENU], then press the Navigation Keyright 2 times for the“Settings & Tools” menu. Pressfor Phone Settings, thenfor Stanalone mode. Select “On” or “Off” with the Navigation Keyand then pressto save it.In Standalone Mode, all menu functions can be accessed except making calls, receiving calls, data connection (Wap, Brew) and Bluetooth.SET SHORTCUT KEYSYour phone offers you the option of assigning a shortcut key () to a favorite or often-used function. To assign a shortcut to the key: Press[MENU], then press the Navigation Keyright 2 times for the“Settings & Tools” menu. Pressfor Phone Settings, thenfor Set Shortcut Keys. Selectfor Left Key,for Up Key,for Right Key orfor Down Key. Select one of the following options with theNavigation Key, pressto save it.• Digital• Analog• Off74MENU FUNCTION SETTINGSCLOCK FORMATMAIN CLOCKTo change the main clock’s appearance on the standby screen: Press[MENU], then press the Navigation Keyright 2 times for the“Settings & Tools” menu. Pressfor Display Settings, thenfor Clock Format, and thenfor Main Clock. Select one of the following with the Navigation key. To save, press.FRONT CLOCKTo change the main clock’s appearance on the standby screen: Press[MENU], then press the Navigation Keyright 2 times for the“Settings & Tools” menu. Pressfor Display Settings, thenfor Clock Format, and thenfor Front Clock. Select one of the following with the Navigation Key. To save, press.• Digital• Analog• Minimize• Off](https://usermanual.wiki/Pantech/OVAL.Manual/User-Guide-773799-Page-37.png)
![SETTINGS MENU FUNCTION77If you change the setting details in the phone’s mode in Voice Commands, this will affect the mode in Sound (refer to page 98) or vice versa.CALL ALERT Press[MENU], then press the Navigation Keyright 2 times for the“Settings & Tools” menu. Pressfor Phone Settings, thenfor Voice Commands, and thenfor Call Alert. Select one of the following with the Navigation Key. To save, press.For more information about the enhanced voice commandssupported by your device, see “Voice Tools“. Please refer to page 90 for more details.• Prompt Mode: If AVR key is pressed on the idle screen or in the Contact menu, voice call alert will be announced. • Readout Mode: If AVR key is pressed on the idle screen or in the Contact menu, voice call alert will be announced, or in the Menu, Notice and Confirm window, the phone will readout main menu and information.• Tones Only Mode: You can hear ringtone instead of voice call alert if AVR key is pressed on the idle screen or in the Contact menu. MENU FUNCTION SETTINGS76 To reset the shortcut keys, pressfor Reset All,select “Yes”, then press.VOICE COMMANDSYou can use voice commands to control your device. MODE Press[MENU], then press the Navigation Keyright 2 times for the“Settings & Tools” menu. Pressfor Phone Settings, thenfor Voice Commands, and thenfor Mode. Select one of the following with the Navigation Key. To save, press.Get It Now/Bluetooth Menu/Calendar/Inbox/Settings & Tools/My Pictures/My Videos/My Music/Picture & Video/News & Info/My Ringtones/My Sounds/Games/Music & Tones/E-mail/Chat/Mobile IM/Alarm Clock/Calculator.• Ring Only : Deactivate Voice Call Alert. You can hear ringtone only. • Caller ID + Ring: Playback the Voice Call Alert only once and then you will hear ringtone. • Name Repeat: Activate Voice Call Alert. You will hear the caller’s details repeatedly.](https://usermanual.wiki/Pantech/OVAL.Manual/User-Guide-773799-Page-38.png)
![SETTINGS MENU FUNCTION79• Location On: Your location is now available to the network.• E911 Only: Your location will be hidden from network & application except 911.MENU FUNCTION SETTINGS78LANGUAGESelects the language in which letters are displayed on the screen. Press[MENU], then press the Navigation Keyright 2 times for the“Settings & Tools” menu. Pressfor Phone Settings, thenfor Language. Select “English” or “Español” with the Navigation Key. Pressto save it.LOCATIONTo determine whether or not the network system can detect your position: Press[MENU], then press the Navigation Keyright 2 times for the“Settings & Tools” menu. Pressfor Phone Settings, thenfor Location. Select “Location On” or “E911 Only” with the Navigation Key. Pressto save it.SECURITYPrevents unauthorized use of your phone. The following settings can be restricted: After three consecutive incorrect Lock Code entries, “INCORRECT LOCK CODE. PLEASE REFER TO THE USER GUIDE”, and the Lock Code is blocked. If you forget any of these codes, contact your service provider.EDIT CODESChanges your Device/Location 4-digit password.PHONE ONLYChanges your Phone's 4-digit password. Press[MENU], then press the Navigation Keyright 2 times for the“Settings & Tools” menu. Pressfor Phone Settings, thenfor Security,Security,Securityand then enter your password, press. Selectfor Edit Codes, thenfor Phone Only. Enter a “New Code” then press.](https://usermanual.wiki/Pantech/OVAL.Manual/User-Guide-773799-Page-39.png)
![SETTINGS MENU FUNCTION81CALLS & SERVICESChanges your Calls & Service's 4-digit password. Press[MENU], then press the Navigation Keyright 2 times for the“Settings & Tools” menu. Pressfor Phone Settings, thenfor Security,Security,Securityand then enter your password, press. Selectfor Edit Codes, thenfor Calls & Services. Enter a “Current Code” then press. Enter a “New Code” then pressto save it.RESTRICTIONSYou can restrict the use of your phone for outgoing calls, incoming calls, outgoing message, incoming messageand dial-up modem. Press[MENU], then press the Navigation Keyright 2 times for the“Settings & Tools” menu. Pressfor Phone Settings, thenfor Security,Security,Securityand then enter your password, press. Selectfor Restrictions, enter your password, then press. Selectfor Location Setting,for Calls,for Messages orfor Dial-Up Modem.MENU FUNCTION SETTINGS80 Pressto save it.PHONE LPHONE LPOCK SETTINGPrevents the phone from being used without entering the password first. Press[MENU], then press the Navigation Keyright 2 times for the“Settings & Tools” menu. Pressfor Phone Settings, thenfor Security,Security,Securityand then enter your password, press. Selectfor Phone Lock Setting. Select “Unlocked” or “On Power Up” with the Navigation Key. Pressto save it.1. Location Setting: To select “Unlock Setting” or “Lock Setting” with the Navigation KeySetting” with.2. Calls: To select “Incoming Calls” or “Outgoing Calls” and then select “Allow All”, “Contact Only” or “Block All” with the Navigation Keythen select “Allow All”, “Contact Only” or “Block .3. Messages: To select “Incoming Messages” or “Outgoing Messages” and then select “Allow All” or “Block All” with the Navigation KeyMessages” and then select “Allow All” or .4. Dial-Up Modem: To select “Allow” or “Block” with the Navigation Key .• Unlocked: Do not lock the phone. • On Power Up: Not locked, but it is automatically locked when power is recycled.](https://usermanual.wiki/Pantech/OVAL.Manual/User-Guide-773799-Page-40.png)
![SETTINGS MENU FUNCTION83NAM SELECTEnables Auto NAM (Number Assignment Modules) or manually selects a NAM.AUTO NAMAutomatically switches phone to proper NAM when you have multiple NAM registrations. Press[MENU], then press the Navigation Keyright 2 times for the“Settings & Tools” menu. Pressfor Phone Settings, thenfor NAM Select, and thenfor Auto NAM. Select “On” or “Off” with the Navigation Keyand then pressto save it.CHANGE NAMChanges the NAM used by the phone when you have multiple registrations. Press[MENU], then press the Navigation Keyright 2 times for the“Settings & Tools” menu. Pressfor Phone Settings, thenfor NAM Select, and thenfor Change NAM. Select one of the following options with the Navigation Key. Pressto save it.MENU FUNCTION SETTINGS82LOCK PHONE NOWLock the phone now. Press[MENU], then press the Navigation Keyright 2 times for the“Settings & Tools” menu. Pressfor Phone Settings, thenfor Security,Security,Securityand then enter your password, press. Selectfor Lock Phone Now. Lock the phone now.SYSTEM SELECTSelects the Preferred System. Press[MENU], then press the Navigation Keyright 2 times for the“Settings & Tools” menu. Pressfor Phone Settings, thenfor System Select. Select one of the following options with the Navigation Key. Pressto save it.• Automatic B• Automatic A• Home Only• NAM 1 - VERIZON• NAM 2 - VERIZON](https://usermanual.wiki/Pantech/OVAL.Manual/User-Guide-773799-Page-41.png)
![85SETTINGS MENU FUNCTION To save, press.TTY MODEYour phone is able to operate with a TTY (Teletypewriter) device in both analog and digital modes. This feature is system dependent and may not be available in all areas. Press[MENU], then press the Navigation Keyright 2 times for the“Settings & Tools” menu. Pressfor Call Settings, thenfor TTY Mode. Select one of the following with the Navigation key. To save, press.• Flip Open• Any Key• Send Only• Auto w/ Hands-free84MENU FUNCTION SETTINGSHCALL SETTINGSANSWER OPTIONSTo select an answer mode: Press[MENU], then press the Navigation Keyright 2 times for the“Settings & Tools” menu. Pressfor Call Settings, thenfor Answer options. Select with the Navigation Keyand then press[MARK/UNMARK]. To save, press Left Soft KeyTo save, press Left Soft KeyT[DONE].• If “Auto w/ Hands-free“ selected, when you closed the flip, automatic answer is disabled.• The four functions can be used at the same time.AUTO RETRYAutomatically redials after a set time interval. Press[MENU], then press the Navigation Keyright 2 times for the“Settings & Tools” menu. Pressfor Call Settings, thenfor Auto Retry. Select one of the following with the Navigation Key.• TTY Full• TTY + Talk• TTY + Hear• TTY Off• Off• Every 3 Seconds• Every 5 Seconds• Every 7 Seconds• Every 10 Seconds](https://usermanual.wiki/Pantech/OVAL.Manual/User-Guide-773799-Page-42.png)
![87SETTINGS MENU FUNCTIONONE TOUCH DIAL Press[MENU], then press the Navigation Keyright 2 times for the“Settings & Tools” menu. Pressfor Call Settings, thenfor One Touch Dial. Select “On” or “Off” with the Navigation keyand then pressto save it.VOICE PRIVACYEnhances voice privacy and avoids tapping during a call. Press[MENU], then press the Navigation Keyright 2 times for the“Settings & Tools” menu. Pressfor Call Settings, thenfor Voice Privacy. Select “On” or “Off” with the Navigation keyand then pressto save it.DTMF TONESTo adjust tone length: Press[MENU], then press the Navigation Keyright 2 times for the“Settings & Tools” menu. Pressfor Call Settings, thenfor DTMF Tones. Select “Normal” or “Long” with the Navigation keyand then pressto save it.86MENU FUNCTION SETTINGSOn: Makes it more difficult to wire tap.HMEMORYSAVE OPTIONSYou can save various data including Picture, Video and Sound files on either the phone’s memory or memory card. Press[MENU], then press the Navigation Keyright 2 times for the“Settings & Tools” menu. Pressfor Memory, thenMemory, thenMemoryfor Save Options. Selectfor Pictures,for Videos orfor Sounds with the Navigation Keyand then select one of the following options by pressing the Navigation Key. To save, press.PHONE MEMORY Press[MENU], then press the Navigation Keyright 2 times for the“Settings & Tools” menu. Pressfor Memory, thenMemory, thenMemoryfor Phone Memory. Select one of the following options by pressing theNavigation Keyand then press.• Phone Memory• Card Memory• Phone Memory Usage• My Pictures• My Videos• My Music• My Sounds](https://usermanual.wiki/Pantech/OVAL.Manual/User-Guide-773799-Page-43.png)
![SW VERSIONDisplays the (Software/Hardware/PRL/ERI/Browser/Get It Now) version. Press[MENU], then press the Navigation Keyright 2 times for the“Settings & Tools” menu. Pressfor Phone Info, thenfor SW Version. The software, hardware and browser version appears. To return to the previous page, press.ICON GLOSSARYDisplays the Indicator Icons of your cellular telephone. Press[MENU], then press the Navigation Keyright 2 times for the“Settings & Tools” menu. Pressfor Phone Info, thenfor Icon Glossary. A list of your phone indicator icons appear. To return to the previous page, press.89SETTINGS MENU FUNCTION• Card Memory Usage• My Pictures• My Videos• My Music• My Sounds88MENU FUNCTION SETTINGS The current options memory information appears at the display screen. To return to the previous page, press.CARD MEMORY Press[MENU], then press the Navigation Keyright 2 times for the“Settings & Tools” menu. Pressfor Memory, thenMemory, thenMemoryfor Card Memory. Select one of the following options by pressing the Navigation Key. The current options memory information appears at the display screen. To return to the previous page, press.HPHONE INFOMY NUMBERDisplays your phone number. Press[MENU], then press the Navigation Keyright 2 times for the“Settings & Tools” menu. Pressfor Phone Info, thenfor My Number. You will see the MDN/MIN and provider name. To return to the previous page, press.](https://usermanual.wiki/Pantech/OVAL.Manual/User-Guide-773799-Page-44.png)
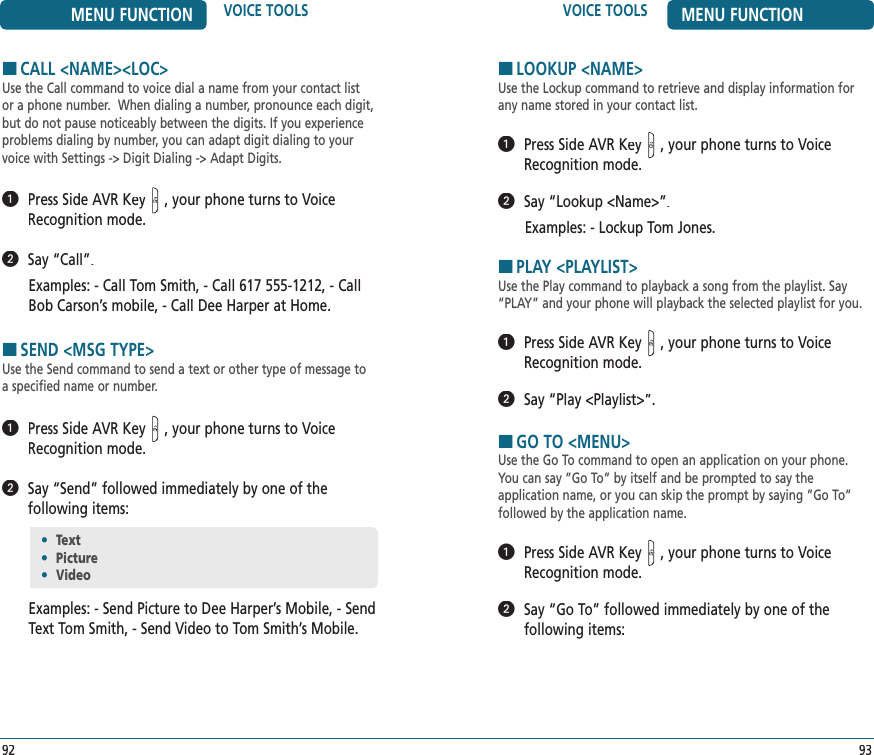
![Your phone is equipped with an AVR (Advanced Voice Recognition) feature. This feature allows you to make calls or use the phone’s functions by simply using your voice. All you have to do is talk into the phone, and the phone will recognize your voice and complete tasks by itself. HAVR (ADVANCED VOICE RECOGNITION) Press Side AVR Key, your phone turns to Voice Recognition mode. The phone displays the Command menu and prompts you to say the name of the command you want to use. To complete your task, simply follow the voice prompts. You can speak the name of the command after you hear a beep.You can hear a beep in the Tone Only Mode (Settings -> Sound -> Mode -> Tones Only Mode) while you can see a prompt without a beep sound in the Prompt Mode or Readout Mode.When it recognizes one of these commands, the phone launches the associated application. If the phone does not hear a command within approximately eight seconds, it de-activates voice recognition without taking any action.VOICE TOOLS MENU FUNCTION919191• Call <Name><Loc>• Send <Msg Type>• Lookup <Name>• Play <Playlist>• Go To <Menu>• Check <Item>• My Account• Help Guide90MENU FUNCTION VOICE TOOLSHVOICE COMMAND WITHIN CONTACTThe Voice Command function is available when pressing Side AVR Key in the Contact List and View Contact window. Press[MENU], thenfor Contact List or press Right Soft Key[CONTACTS]. The list of names in your contacts is displayed alphabetically. Scroll through the list with the Navigation Key. Press Side AVR Key, your phone turns to Voice Recognition mode. The phone displays the Command menu and prompts you to say the name of the command you want to use.• Voice Recognition for Call, Play, and Check commands can activate by AVR Side Long Press even without connection of Earjack and Bluetooth at Flip Close. For the menu which can not continue the action at Flip Close state such as Send MSG, Lookup etc, the pop-up screen will be displayed with “Flip Open to continue..“. Spending several seconds after displaying the phrase, the device should return to the Idle state.• Press Side AVR Key when hearing the voice guide and you can use voice commands immediately without wait-ing for the voice guide to end.• Call• Read Out• New Contact• Modify• Erase](https://usermanual.wiki/Pantech/OVAL.Manual/User-Guide-773799-Page-45.png)
![HMY ACCOUNT Press Side AVR Key, your phone turns to Voice Recognition mode. Say “My Account”. Connect “WAP Browser”.HHELP GUIDE Press Side AVR Key, your phone turns to Voice Recognition mode. Say “Help Guide“.HSETTINGSCHOICE LISTSWhen voice recognition is not confident it has recognized a name or number correctly, it will show you a list of up to three choices. You can control when choice lists appear. Press Side AVR Key, your phone turns to Voice Recognition mode. Press Right Soft Key[SETTINGS], thenfor Choice Lists. Select “Automatic”, “Always On” or “Always Off”. To save, press[OK].• Status• Voicemail• Messages• Missed Calls• Time• Battery• Signal Strength• VolumeVOICE TOOLS MENU FUNCTION95MENU FUNCTION VOICE TOOLS94HCHECK <ITEM>The Check command lets you check status information for your phone. You can say “Check“ or “Check Status“ to see and hear all status information. Press Side AVR Key, your phone turns to Voice Recognition mode. Say “Check” followed immediately by one of the following items:• Contacts• Recent Calls• Messaging• Get It Now• Setting & Tools• News & Info• V CAST Videos• My Music](https://usermanual.wiki/Pantech/OVAL.Manual/User-Guide-773799-Page-47.png)
![ Press Right Soft Key[SETTINGS], thenfor Digit Dialing. Selectfor Adapt Digits, press[OK]. Wait for the beep, and then repeat the digits using a normal tone of voice. (The phone plays back your recording and asks you if the recording sounds “OK.”) If the recording sounds OK (no mistakes and no background noises), say Yes. If you need to re-record the digits to fix any problems, say No. (The phone then prompts you to say the digits again.) Wait for the beep, and then record the digits again. (Repeat this step until you are satisfied with the recording.) After confirming that the recording sounds OK, repeat the recording process with the next set of digits. (After six sets of digits, the phone will ask you wheth-er you want to do more adaptation. Answer Yes.) Repeat steps 4-7 for another nine sets of digits. (After the nine set of digits, you will be half-way through the session and the phone will ask “More Adaptation?”) Select OK to continue for six more sets of digits, or pressfor partial adaptation. When you are finished with a full session, you will reach a screen that reads, “Adaptation Complete.”VOICE TOOLS MENU FUNCTION97MENU FUNCTION VOICE TOOLS96SENSITIVITYThe Sensitivity setting controls how the voice recognition software determines when a spoken word is a match. If you frequently experience the messages “Please Repeat...“ or “No Match Found,“adjust the sensitivity toward Reject Less. If you frequently experience false activations (when the phone recognizes a name you didn't say), adjust the sensitivity toward Reject More. Press Side AVR Key, your phone turns to Voice Recognition mode. Press Right Soft Key[SETTINGS], thenfor Sensitivity. Scroll “Reject More”, “Recommended” or “Reject Less”. To save, press[OK].DIGIT DIALINGADAPT DIGITSDigit Dialing is speaker independent, which means that no training or adaptation is required. Some users with heavy accents or unusual voice characteristics may find difficulty in achieving high accuracy with speaker independent Digit Dialing, so the Adapt Digits feature allows users to dramatically improve the digit accuracy through adaptation. Users who get acceptable digit recognition accuracy will find no additional benefit to performing the Adapt Digit adaptation. Press Side AVR Key, your phone turns to Voice Recognition mode.](https://usermanual.wiki/Pantech/OVAL.Manual/User-Guide-773799-Page-48.png)
![ To save, press[OK].If you change the setting details in the phone’s mode in Sound, this will affect the mode in Voice Commands (refer to page 76) or vice versa.NAME SETTINGSSPEEDYou can change the speed of name playback. Press Side AVR Key, your phone turns to Voice Recognition mode. Press Right Soft Key[SETTINGS], thenfor Sound. Selectfor Name Settings, thenfor Speed, press[OK]. Scroll “Faster”, “Recommended” or “Slower”. To save, press[OK].VOLUMEYou can change the volume of name playback. Press Side AVR Key, your phone turns to Voice Recognition mode. Press Right Soft Key[SETTINGS], thenfor Sound. Selectfor Name Settings, thenfor Volume, press[OK].VOICE TOOLS MENU FUNCTION99MENU FUNCTION VOICE TOOLS98RESET DIGITSRESET DIGITSRESETReset digit adaptation to factory default settings. Press Side AVR Key, your phone turns to Voice Recognition mode. Press Right Soft Key[SETTINGS], thenfor Digit Dialing. Selectfor Reset Digits, press[OK]. Read “Reset digit adaptation to factory default settings?“ and press[OK].SOUNDMODEThe modes setting lets you control how you are notified by the system. In prompt mode, the system will prompt you for information. In readout mode, the system will prompt you for information and playback the menu items as you navigate. In tones only mode, the system will only prompt you with beeps. Press Side AVR Key, your phone turns to Voice Recognition mode. Press Right Soft Key[SETTINGS], thenfor Sound. Selectfor Mode, press[OK]. Select “Prompt Mode”, “Readout Mode” or “Tones Only Mode”.](https://usermanual.wiki/Pantech/OVAL.Manual/User-Guide-773799-Page-49.png)
![TOOLS MENU FUNCTION101MENU FUNCTION VOICE TOOLS100 Scroll “Louder”, “Recommended” or “Softer”. To save, press[OK].ABOUT Press Side AVR Key, your phone turns to Voice Recognition mode. Press Right Soft Key[SETTINGS], thenfor About. The VoiceSignal version appears. To return to the previous page, press[OK].HINFO Press Side AVR Key, your phone turns to Voice Recognition mode. Select the command menu with the Navigation Keyup/down, press Left Soft Key[INFO]. Command menu information's appears. To return to the previous page, press[OK].HCALCULATORTo access the calculator: Press[MENU], then press the Navigation Keyright 2 times for the“Settings & Tools” menu. Pressfor Tools, thenfor Calculator. Follow the instructions below to calculate 8×6÷4-2.5=9.50Navigation Key right : X, Navigation Key down : -,Navigation Key left : ÷, Navigation Key up : +, : ., Left Soft Key : Clear, : =. To reset, press Left Soft Key[CLEAR].• To change the displayed number from positive (+) to negative (-) and vice versa, press [ ].• Press Right Soft Key [OPERATOR] to use parenthesis and “Exponent”.Input 8 and then press the Navigation Key right.Input 6 and then press the Navigation Key Left.Input 4 and then press the Navigation Key down.Input 2 and then press the to input (.).Press 5.Then press and you will see the answer.](https://usermanual.wiki/Pantech/OVAL.Manual/User-Guide-773799-Page-50.png)
![TOOLS MENU FUNCTION103MENU FUNCTION TOOLS102START DATEUse the keypad to change or enter the start date.RECURRENCEUse the Navigation keyto select a repeat setting for the calendar. (Daily, Weekly, Monthly or Yearly).BY COUNTUse the keypad to enter a count.END DATEUse the keypad to change or enter the end date.TIME ZONESTIME ZONESTIME ZONEUse the Navigation Keyto select a time zones, press Left Soft Key[SET]. (OFF, EST, EDT, CST, CDT, MST, MDT, PST, PDT, AKST, AKDT, HAST, HADT or GMT/UTC).ALERTUse the keypad to 1. Get New Ringtones or select the alert tone you wish to set.VIBRATEUse the Navigation Keyto select vibrate On/Off.REMINDERUse the Navigation Keyto select an alert time interval option (0 Minute, 5 Minutes, 10 Minutes, 15 Minutes).HCALENDARSets an event and reminds you of that event.ADD NEW Press[MENU], then press the Navigation Keyright 2 times for the“Settings & Tools” menu. Pressfor Tools, thenfor Calendar. Move the Navigation Keyto choose a date in the calendar and then press. Press Right Soft Key[OPTIONS] to 1. Weekly View, 2. Go To Date, 3. Erase, 4. Erase Passed or 5. Erase All. PressLeft Soft Key[ADD] to set a new event. To set a new event, pressRight Soft Key[OPTIONS] then select “Add”. The appointment field is highlighted. Press the Navigation Keydown to set the alarm options.APPOINTMENTUse the keypad to enter an appointment in your schedule.START TIMEUse the keypad to set a start time and press Left Soft Keyto select “am” or “pm”.END TIMEUse the keypad to set an end time and press Left Soft Keyto select “am” or “pm”.](https://usermanual.wiki/Pantech/OVAL.Manual/User-Guide-773799-Page-51.png)
![105TOOLS MENU FUNCTIONTIMEUse the keypad to set a time for the alarm and press Left Soft Keyto select “am” or “pm”.FREQUENCYFREQUENCYUse the Navigation Keyto select a setting for the alarm (Once, Daily, Mon - Fri, Weekends).RINGERPress Left Soft Key[SET], to use the keypad to 1. Get New Ringtones or select the alert tone you wish to set. To save an alarm setting, press[SAVE].HWORLD CLOCKTo display the time and date in pre-programmed cities: Press[MENU], then press the Navigation Keyright 2 times for the“Settings & Tools” menu. Pressfor Tools, thenfor World Clock. Select a city by pressing Left Soft Key[CITIES]. Or use the Navigation Keyto select another city. The world map appears with the city, its date and time. Use the Navigation Keyto select another city. DST (Daylight Saving Time) information should be applied for each city and persistent throughout the power cycle as well as application’s life cycle, press Right Soft Key[DST]to set the DST options.104MENU FUNCTION TOOLS Press[SAVE] to save it or[CLR] to return to the calendar. The date of the event will be marked on your calendar.VIEW PLAN LIST Press[MENU], then press the Navigation Keyright 2 times for the“Settings & Tools” menu. Pressfor Tools, thenfor Calendar. To view the Calendar List: Move the Navigation Keyto choose an event and then press[VIEW], press[VIEW]. Press Left Soft Key[ERASE] and then select “Yes”, press.HALARM CLOCK Press[MENU], then press the Navigation Keyright 2 times for the“Settings & Tools” menu. Pressfor Tools, thenfor Alarm Clock. Select one of the entries using the Navigation Key. To set a new alarm, choose alarm 1, 2 or 3. To edit an existing alarm, select that alarm. Press. The setting field will be highlighted. Press the Navigation Keydownto select alarm options.ALARMUse the Navigation Keyto select alarm On/Off.](https://usermanual.wiki/Pantech/OVAL.Manual/User-Guide-773799-Page-52.png)
![TOOLS MENU FUNCTION107HNOTEPADYour phone includes an internal notepad that can be used to compose and store reminders and notes.ADD MEMOTo compose a memo (there is an 80-letter limit): Press[MENU], then press the Navigation Keyright 2 times for the“Settings & Tools” menu. Pressfor Tools, thenfor Notepad. To add a new memo, press Left Soft Key[NEW]. Input a new text memo. (Please refer to page 37 for more details on entering letters, numbers & symbols.) To save memo, press[SAVE].VIEW MEMOTo view a saved memo: Press[MENU], then press the Navigation Keyright 2 times for the“Settings & Tools” menu. Pressfor Tools, thenfor Notepad. The list of all memos, in saved order, is displayed. Select a memo and then press[VIEW]. To add a new memo, press Left Soft Key[NEW]. To erase a memo, press Right Soft Key[OPTIONS] “Erase”.To erase all memos, press Right Soft Key[OPTIONS] “Erase All”.MENU FUNCTION TOOLS106CITYUse the Navigation Keyto select another city.DST (Daylight Saving Time)DST (Daylight Saving Time)Use the Navigation Keyto select DST On/Off.START DATEUse the keypad to change or enter the start date.START TIMEUse the keypad to set a start time and press Left Soft Keyto select “am” or “pm”.END DATEUse the keypad to change or enter the end date.END TIMEUse the keypad to set an end time and press Left Soft Keyto select “am” or “pm”. To save an DST setting, press[SAVE]. To return to the previous page, press.](https://usermanual.wiki/Pantech/OVAL.Manual/User-Guide-773799-Page-53.png)
![MY ACCOUNT MENU FUNCTION109 Press[MENU], then press the Navigation Keyright 2 times for the“Settings & Tools” menu. Pressfor My Account. Connect “WAP Browser”.MENU FUNCTION TOOLS108 The selected memo will appear.To edit it, press[EDIT] and input a new textmemo and then press[SAVE] to save it.HSTOP WATCHSimultaneously times up to eight different events. To operate the stop watch: Press[MENU], then press the Navigation Keyright 2 times for the“Settings & Tools” menu. Pressfor Tools, thenfor Stop Watch. To measure a time period:1. To start the stop watch, press[START].2. To pause it, press[STOP].3. To resume it, press[START]. To reset it, press Right Soft Key[RESET]. To time up to eight events at once:1. To start, press[START].2. To stop a time period and continue measuring another one, press Left Soft Key[CONT].3. To stop the second and continue measuring a third one, press Left Soft Key[CONT].4. To measure up to eight time periods, repeat the above steps.5. To stop the stop watch, press[STOP].6. To review the results, press Left Soft Key[VIEW].7. To return to the stop watch, press.8. To reset it, press Right Soft Key[RESET].](https://usermanual.wiki/Pantech/OVAL.Manual/User-Guide-773799-Page-54.png)

![GET NEW RINGTONES Press[MENU], then press the Navigation Keyleft 2 times for the“Get it Now” menu. Pressfor Music & Tones, thenfor Get New Ringtones. If you have not downloaded any ringtones or ring-tone applications previously, pressfor Get New Applications. The Get It Now browser will launch. From the Download menu, select a service provider and press. Then select the application and pressto download it. To download a ringtone, select the application from the Get New Ringtones menu. Once the application has launched, follow the directions to download your ringtones. Downloaded ringtones are saved to the My Ringtones menu.MY RINGTONES Press[MENU], then press the Navigation Keyleft 2 times for the“Get it Now” menu. Pressfor Music & Tones, thenfor My Ringtones. To play downloaded tunes or tones: Select the tunes or tones you want to play and then press[PLAY]. To erase downloaded tunes or tones: Select the tunes or tones you want to erase and then press Right Soft Key[OPTIONS] and select “Erase” and then select “Yes”, press.GET IT NOW113GET IT NOW112HMUSIC & TONESTo access the Music & Tones menu.V CAST MUSICYou can use the V Cast Music option to download music from the V Cast music catalog. Press[MENU], then press the Navigation Keyleft 2 times for the“Get it Now” menu. Pressfor Music & Tones, thenfor V Cast Music. Browse of Search the catalog to preview the songs you want. Highlight the music that you want to purchase. Press[BUY] to purchase. The Confirm Purchase screen will display the price and items you selected to purchase. Press[BUY] to accept the terms. You’lll receive a confirmation that your purchase was successful and your music is available for download. Pressto continue. Highlight Phone Memory or Memory Card for Storage location (Memory Card is recommended, and is only an option if a memory card is in your phone). Pressto begin downloading. Wait for the phone to acquire the content license. Presswhen download is complete. Press Right Sofy Key[PLAY] to play the downloaded song immediately.](https://usermanual.wiki/Pantech/OVAL.Manual/User-Guide-773799-Page-56.png)
![GET IT NOW115MY MUSIC Press[MENU], then press the Navigation Keyleft 2 times for the“Get it Now” menu. Pressfor Music & Tones, thenfor My Music. The My Music Menu consists of V Cast Music and all your saved songs - saved to your phone or your Micro SD card. To download more music, highlight V Cast Music and press. You will connect to the V Cast service. To play a saved song, scroll through the list of tracks and press[PLAY]. Press Left Soft Key[MUTE] to mute the song. Press Right Soft Key[OPTIONS] to 1. Play All, 2. Shuffle, 3. Get V Cast Music or 4. Play Music by Artist.• Press Left Soft Key [MY MUSIC/PLAYLIST].• In My Music mode, pressing Right Soft Key[OPTIONS], you can choose from the following:1. Erase: Erase the current music from your phone.2. Rename: To edit the music’s title.3. Lock: Lock/Unlock the current music from your phone.4. Move: To move the selected music to the other save location.5. Erase All: To erase all the musics in your phone. 6. File Info: Displays information on the selected music.• In Playlist mode, pressing Right Soft Key[OPTIONS], you can choose from the following:1. View: To edit a playlist.2. Erase: Erase the current playlist from your phone.3. Erase All: To erase all the playlist in your phone. 4. New Playlist: To add a new playlist. To assign downloaded tunes or tones: Select the tunes or tones you want to assign and then press Left Soft Key[SET AS]. Select “Ringtone”, “Contact ID” or “Alert Sounds” and then press.• By pressing Right Soft Key [OPTIONS], you can choose from the following:DOWNLOADED RINGTONE:1. Erase: Erase the current ringtone from your phone.2. Rename: To edit the ringtone’s title.3. Lock: Lock/Unlock the current ringtone from your phone.4. Erase All: To erase all the ringtones in your phone. 5. File Info: Displays information on the selected ringtone.PRELOADED SOUND:1. Erase: Erase the current ringtone from your phone.2. Erase All: To erase all the ringtones in your phone. 3. File Info: Displays information on the selected ringtone.• Press [PLAY/STOP] to play/stop ringtone.GET IT NOW114• By pressing Right Soft Key [SET AS], you can choose from the following:1. Ringtone2. Contact ID3. Alert Sounds - 1. All Messages2. TXT Message3. Pic-Video Message4. Voicemail](https://usermanual.wiki/Pantech/OVAL.Manual/User-Guide-773799-Page-57.png)
![GET IT NOW117 To send the Picture message, press Right Soft Key[OPTIONS]. Then pressfor Send. Please refer to page 132 for more details on “Send New Picture Message”.RECORDING NEW TONES Press[MENU], then press the Navigation Keyleft 2 times for the“Get it Now” menu. Pressfor Music & Tones, thenfor My Sounds. Pressfor Record New. “Press OK to start recording” will be displayed. Pressto begin recording. When done, press[STOP] to finish recording. The recording is automatically saved to your My Sounds list. Your recording is saved with a number. To rename your recording, scroll to it in the My Sounds menu, them press Right Soft Key[OPTIONS]. Then pressfor Rename. Press the Navigation Keyleft to start the song over again.Press the Navigation Keyrightto skip to the next song if there are other songs to be played. Pressto pause or play the song.MY SOUNDS Press[MENU], then press the Navigation Keyleft 2 times for the“Get it Now” menu. Pressfor Music & Tones, thenfor My Sounds. To play downloaded sounds, select the sound you want to play, then press[PLAY]. To erase downloaded sounds, select the sound you want to erase, then press Left Soft Key[ERASE], then select “Yes“, press[OK].GET IT NOW116• By pressing Right Soft Key [OPTIONS], you can choose from the following:DOWNLOADED or RECORD SOUND:1. Send: To send a sound.2. To PIX Place: To upload selected sound to picture server.3. Rename: To edit the sound’s title.4. Move: To move the selected sound to the other save location.5. Lock/Unlock: To select “Lock” or “Unlock”.6. Erase All: To erase all the sounds in your phone. 7. File Info: Displays information on the selected sound.PRELOADED SOUND:1. Send: To send a sound.2. To PIX Place: To upload selected sound to picture server.3. File Info: Displays information on the selected sound.• Press [PLAY/STOP] to play/stop sound.](https://usermanual.wiki/Pantech/OVAL.Manual/User-Guide-773799-Page-58.png)
![GET IT NOW119HPICTURE & VIDEOV CAST VIDEOS Press[MENU], then press the Navigation Keyleft 2 times for the“Get it Now” menu. Pressfor Picture & Video, thenfor V Cast Videos. Connection to the V CAST Video Service.GET NEW PICTURES Press[MENU], then press the Navigation Keyleft 2 times for the“Get it Now” menu. Pressfor Picture & Video, thenfor Get New Pictures,then select “Get New Applications”. (Get It Now will launch and take you to the download menu.) Use the Navigation Keyto select a provider’s browser, press. Select the desired application from the application list and then pressto download it.The downloaded application will be included in the list displayed when you access: Get New Pictures > 1. Get New Applications. After executing the downloaded application, download the desired Picture. (The downloaded contents are saved in My Pictures.) SYNC MUSIC Press[MENU], then press the Navigation Keyleft 2 times for the“Get it Now” menu. Pressfor Music & Tones, thenfor Sync Music. Open Windows Media™ Player 10 on your PC and select the “Sync” tab. Select “Edit Playlist” and select the songs from your library that you want to sync. In Windows Media Player 10, select “V CAST Mobile Phone - Removable Storage Card” unless no memory card is available. Start the sync process in Windows Media Player 10 by pressing “Start Sync”. Remember, your phone must be in “Sync Music” mode. When synching completes, disconnect the cable from your phone and exit “Sync Music”. Under the “Music & Tones” menu, open “My Music” to view and play your music.V CAST Music phones only support music imported from a CD via Windows Media™ Player 10, purchased from the V CAST Music Service, or other purchased Windows Media™ formatted music. iPod® and iTunes® compatible music files are not compatible with V CAST Music.GET IT NOW118](https://usermanual.wiki/Pantech/OVAL.Manual/User-Guide-773799-Page-59.png)
![GET IT NOW121MY VIDEOSIn Review Mode, you can view all the videos you have taken, store selected video in your phone, send video to the Online Album, delete video and access additional video options. Press[MENU], then press the Navigation Keyleft 2 times for the“Get it Now” menu. Pressfor Picture & Video, thenfor My Videos. In Review Mode, you can view all the videos you have stored in your phone. Select the video with the Navigation Keyand then press[PLAY].PRELOADED PIX:• Set As: Assigns the selected picture to display for specific tasks. (Wallpaper)• Take Picture: To take new picture.• Rotate: To rotate the selected picture.• Get New Pictures: To download picture.• Erase All: To erase all the pictures in your phone.• File Info: Displays information on the selected picture, such as “File Name”, “Date”, “Time”, “Resolution”, “Size”.• Press Left Soft Key [ERASE] to erase the current picture from your phone.MY PICTURESIn Review Mode you can view all the pictures you have taken, store selected images in your phone, send pictures to the Online Album, delete images and access additional picture options. Press[MENU], then press the Navigation Keyleft 2 times for the“Get it Now” menu. Pressfor Picture & Video, thenfor My Pictures. In Review Mode, you can view all the pictures you have stored in your phone. Select the picture with the Navigation Keyand then press[VIEW].GET IT NOW120• To view the previous or next picture in detail view, press the Navigation Key up/down.• By pressing Right Soft Key [OPTIONS], you can choose from the following:DOWNLOADED or TAKEN PICTURE:• Send: To send a picture message.• Set As: Assigns the selected picture to display for specific tasks. (Wallpaper/Picture ID)• To PIX Place: To upload selected picture to picture server.• Take Picture: To take new picture.• Rotate: To rotate the selected picture.• Get New Pictures: To download new picture.• Rename: To edit the picture’s title.• Move: To move the selected picture to the other save location.• Lock/Unlock: To set “Lock” or “Unlock”.• Erase All: To erase all the pictures in your phone.• File Info: Displays information on the selected picture, such as “File Name”, “Date”, “Time”, “Resolution”, “Size”.• To view the previous or next video in detail view, press the Navigation Key up/down.](https://usermanual.wiki/Pantech/OVAL.Manual/User-Guide-773799-Page-60.png)
![GET IT NOW123 After taking the picture it will be displayed. To save the picture, press Left Soft Key[SAVE].To go back to idle mode without saving thepicture, press.To take another picture without saving the pictureyou just took, press Right Soft Key[ERASE].To send the picture to someone, press[SEND].Please refer to page 132 for more details on“Send New Picture Message”.• By pressing Right Soft Key [OPTIONS], you can choose from the following:1. Resolution: To select a resolution for a picture. (Landscape: 1280x960/640x480/320x240/160x120, Portrait: 960x1280/480x640/240x320/120x160)2. Self Timer: To activate the camera’s timer function. (Off/3 Seconds/5 Seconds/10 Seconds)3. Brightness: To brightness up/down( -2, -1, 0, +1, +2).4. White Balance: To select white balance. (Auto/Sunny/Cloudy/Tungsten/Fluorescent/Darkness)5. Shutter Sound: To select a shutter sound. (Shutter/Silent/Say “Cheez”/Ready! 123)6. Color Effects: To select color effect among the following: (Normal/Antique/Black and White/Negative)7. Capture Mode: To select Capture mode “Landscape” or “Portrait”.8. Sub Display: To take a picture using the Sub LCD. By pressing Right Soft Key [OPTIONS], you can choose Sub LCD options: 1. Resolution/2. Self Timer/3. Brightness/4. White Balance/5. Shutter Sound/ 6. Color Effects/7. Capture Mode/8. Main Display• User can control zoom directly by pressing the Navigation Key . Press the Navigation Key up/down: Zoom Up/Down. (Except 1280X960, 960X1280 mode).GET IT NOW122TAKE PICTURE Press camera key or press and hold side camera key when flip is closed. Point the camera lens at your subject. You can check the picture framing through the main display screen. Press side camera key or press[TAKE] to take the picture.• By pressing Right Soft Key [OPTIONS], you can choose from the following:DOWNLOADED or TAKEN VIDEO:1. Send: To send a video message.2. Record New: To record new video.3. To PIX Place: To upload selected video to video server.4. V CAST Videos: To download V CAST video.5. Set As: Assigns the selected video to display for specific tasks. (Wallpaper/Ringer ID)6. Rename: To edit the video’s title.7. Move: To move the selected video to the other save location.8. Lock/Unlock: To set “Lock” or “Unlock”.9. Erase All: To erase all the videos in your phone.10. File Info: Displays information on the selected video, such as “File Name”, “Date”, “Time”, “Resolution”, “Size”.• Press Left Soft Key [ERASE] to erase current video from your phone.• To view captured images, press Left Soft Key [MY PICS].](https://usermanual.wiki/Pantech/OVAL.Manual/User-Guide-773799-Page-61.png)
![GET IT NOW After taking the video it will be displayed.To save the video, press Left Soft Key[SAVE].To go back to idle mode without saving the video, press.To erase video, press Right Soft Key[ERASE].To send the video to someone, press[SEND]. Please refer to page 134 for more details on “Send New Video Message”.PIX PLACE Press[MENU], then press the Navigation Keyleft 2 times for the“Get it Now” menu. Pressfor Picture & Video, thenfor PIX Place. Connect “WAP Browser”.HGAMESDOWNLOADING NEW GAMES Press[MENU], then press the Navigation Keyleft 2 times for the“Get it Now” menu. Pressfor Games, then select “Get New Applications”, press. (Get It Now will launch and take you to the download menu.) Use the Navigation Keyto select a provider’s browser, press. Use the Navigation Keyto select a game you wish to download, and press.125GET IT NOW124RECORD VIDEO Press[MENU], then press the Navigation Keyleft 2 times for the“Get it Now” menu. Pressfor Picture & Video, thenfor Record Video. OR, in idle mode, press and hold. OR, in camera preview mode, press. Point the camera lens at your subject. You can check the video framing through the main display screen. Press camera key or press[REC] to take the video. To pause/resume recording, press Left Soft Key[PAUSE/RESUME]. To stop recording, press[STOP].• To view captured videos, press Left Soft Key[VIDEOS].• By pressing Right Soft Key [OPTIONS], you can choose from the following:1. Brightness: To brightness up/down( -2, -1, 0, +1, +2).2. White Balance: To select white balance. (Auto/Sunny/Cloudy/Tungsten/Fluorescent/Darkness)3. Mute/Unmute: To select Mute to Turn On/Off sound recording.4. Sub Display: To take a video using the Sub LCD.By pressing Right Soft Key [OPTIONS], you can choose Sub LCD options:1. Brightness/2. White Balance/3. Mute/4. Main Display• User can control zoom directly by pressing the Navigation Key up/down: Zoom Up/Down.](https://usermanual.wiki/Pantech/OVAL.Manual/User-Guide-773799-Page-62.png)
![GET IT NOW127HEXTRASCONNECTING EXTRAS Press[MENU], then press the Navigation Keyleft 2 times for the“Get it Now” menu. Pressfor ConnectingExtras, then select “Get New Applications”.HGET IT NOW INFODisplays information about “App. Memory”, “Phone Memory”, “View Log” and “Help”: Press[MENU], then press the Navigation Keyleft 2 times for the“Get it Now” menu, press Right Soft Key[INFO]. Select one of the following options with the Navigation Key. To return to the previous page, press.• App. Memory• Phone Memory• View Log• HelpGET IT NOWPLAYING DOWNLOADED GAMES Press[MENU], then press the Navigation Keyleft 2 times for the“Get it Now” menu. Pressfor Games. To play the game you downloaded, select the game and press[PLAY].HNEWS & INFOCONNECTING NEWS & INFO Press[MENU], then press the Navigation Keyleft 2 times for the“Get it Now” menu. Pressfor Connecting News & Info. Connect “WAP Browser”.HTOOLS ON THE GOCONNECTING TOOLS ON THE GO Press[MENU], then press the Navigation Keyleft 2 times for the“Get it Now” menu. Pressfor Connecting Tools On the Go, then select “Get New Applications”.126](https://usermanual.wiki/Pantech/OVAL.Manual/User-Guide-773799-Page-63.png)
![NEW MESSAGE VOICE MAIL, TXT, PICTURE, VIDEO MESSAGING131 Under “Message”, input a new TXT message and then press[SEND].(Please refer to page 37 for more details on entering letters, numbers and symbols.) To send the TXT message, press[SEND].• If one of the fields is inserted in TXT message field, the message is saved in the draft box.• Input at least one TXT message field to save in the draft box.Press Right Soft Key [OPTIONS], you can choose from the following:1. Save As Draft: To save the TXT message.2. Add Graphic: Inserts simple graphic image in TXT message.3. Add Sound: Inserts EMS sound in TXT message.4. Font Size: Select “Small“, “Normal“ or “Large“.5. Add Name Card: Inserts name card in TXT message.6. Add Quick Text: Inserts already written sentences in TXT message.7. Priority Level: Select “High“ or “Normal“.8. Cancel Message: To cancel message.VOICE MAIL, TXT, PICTURE, VIDEO MESSAGINGWHEN A NEW MESSAGE ARRIVES130 The following display appears when a new message arrives. To display the message, select “View Now” and then press.By pressing Right Soft Key [ADD], you can choose from the following:1. From Contacts: Search for a phone number which is stored in the contacts list.2. Recent Calls: Search the phone number which is stored in the recent calls list.3. Groups: Search the groups stored in the contacts list.4. To Contacts: To store the phone number in contacts.VOICE MAIL, TXT, PICTURE, VIDEO MESSAGINGNEW MESSAGEHSEND NEW TXT MESSAGE Press Left Soft Key[MESSAGE], thenfor New Message, and thenfor TXT Message. Under “To”, input the phone number and then press.Press[MENU], then press the Navigation Keyleft 2 times for the“Get it Now” menu. Pressfor Picture & Video, thenfor Record Video.](https://usermanual.wiki/Pantech/OVAL.Manual/User-Guide-773799-Page-65.png)
![NEW MESSAGE133 Under “Subject”, input a subject. (Please refer to page 37 for more details on entering letters, numbers and symbols. Max 100 characters support.) Under “Name Card”, enable to insert name card. Press Left Soft Key[ADD], select “My Name Card“or “Contacts“, press,select my card you’d like to send and then press. To send the Picture message, press[SEND].By pressing Right Soft Key [OPTIONS], you can choose from the following:1. Preview: To preview a written picture message.2. Save As Draft: To save the picture message.3. Add Quick Text: Inserts already written sentences in TXT message.4. Add Slide: To add a another message.5. Priority Level: Select “High“ or “Normal“.6. Remove Picture: To remove inserted picture.7. Remove Sound: To remove inserted sound.8. Remove Name Card: To remove inserted name card.9. Cancel Message: To cancel message.VOICE MAIL, TXT, PICTURE, VIDEO MESSAGINGNEW MESSAGE132HSEND NEW PICTURE MESSAGE Press Left Soft Key[MESSAGE], thenfor New Message, and thenfor Picture Message. Under “To”, input the phone number and then press. Under “Text”, input a new TXT message and then press the Navigation Keydown.(Please refer to page 37 for more details on entering letters, numbers and symbols. A maximum of 1,000 characters is allowed.) Under “Picture”, user can insert/remove only one picture.Press Left Soft Key[MY PICS], select picture you’d like to send and then press. Under “Sound”, user can insert/remove only one sound.Press Left Soft Key[SOUNDS], select the sound you’d like to send and then press.By pressing Right Soft Key [ADD], you can choose from the following:1. From Contacts: Search for a phone number which is stored in the contacts list.2. Recent Calls: Search the phone number which is stored in the recent calls list.3. Groups: Search the groups stored in the contacts list.4. To PIX Place: To send pictures by using online Address.5. To Contacts: To store the phone number in contacts.VOICE MAIL, TXT, PICTURE, VIDEO MESSAGING](https://usermanual.wiki/Pantech/OVAL.Manual/User-Guide-773799-Page-66.png)
![NEW MESSAGE Under “Name Card”,enable to insert name card. Press Left Soft Key[ADD], select “My Name Card“or “Contacts“, press,select my card you’d like to send and then press. To send the video message, press[SEND].135VOICE MAIL, TXT, PICTURE, VIDEO MESSAGINGBy pressing Right Soft Key [OPTIONS], you can choose from the following:1. Preview: To preview a written video message.2. Save As Draft: To save the video message.3. Add Quick Text: Inserts already written sentences in TXT message.4. Priority Level: Select “High“ or “Normal“.5. Remove Video: To remove inserted video.6. Remove Name Card: To remove inserted name card.7. Cancel Message: To cancel message.NEW MESSAGEHSEND NEW VIDEO MESSAGE Press Left Soft Key[MESSAGE], thenfor New Message, and thenfor Video Message. Under “To”, input the phone number and then press. Under “Text”, input a new TXT message and then press the Navigation Keydown. (Please refer to page 37 for more details on entering letters, numbers and symbols. A maximum of 1,000 characters is allowed.) Under “Video”, user can insert/remove only one video.Press Left Soft Key[VIDEOS], select video you’d like to send and then press. Under “Subject”, input a subject.(Please refer to page 37 for more details on entering letters, numbers and symbols. Max 100 characters support.)By pressing Right Soft Key [ADD], you can choose from the following:1. From Contacts: Search for a phone number which is stored in the contacts list.2. Recent Calls: Search the phone number which is stored in the recent calls list.3. Groups: Search the groups stored in the contacts list.4. To PIX Place: To send video by using online Address.5. To Contacts: To store the phone number in contacts.134VOICE MAIL, TXT, PICTURE, VIDEO MESSAGING](https://usermanual.wiki/Pantech/OVAL.Manual/User-Guide-773799-Page-67.png)
![INBOX137VOICE MAIL, TXT, PICTURE, VIDEO MESSAGINGREPLY W. COPY Select to reply with the original message included. To send the TXT, press[SEND].FORWARD Select to forward the TXT or Picture/Video message. Input the phone number of the person you are sending the message and then press. Input any TXT message to go along with the forwarded message and then press[SEND].SAVE PICTURE (MMS PICTURE)SAVE PICTURE (MMS PICTURE) Select to save a picture to the “My Pictures” folder.SAVE VIDEO (MMS VIDEO)SAVE VIDEO (MMS VIDEO) Select to save a video to the “My Videos” folder.SAVE AS RINGTONE If you receive a MMS message, select to save a sound to the “My Ringtones” folder.• “Reply with Copy” menu appears only when you receive a TXT message.• “Save Picture” menu appears only when you receive a Picture message.• “Save Video” menu appears only when you receive a Video message.INBOXThe Inbox manages received TXT, Picture/Video, Web Alert messages. To access: Press Left Soft Key[MESSAGE], thenfor Inbox. Select a message and then press[OPEN]. The message is displayed. To delete a message, press Left Soft Key[ERASE], press.When you select WAP PUSH message, press, to launch the browser. Press Right Soft Key[OPTIONS].PLAY AGAIN To play a received Picture/Video message.REPLY Type your reply and then press.ERASE INBOX To erase all inbox message, select “Erase Inbox” and then select “Yes”, press. “Play Again” menu appears only when you receive a Picture/Video message.•: Lock •: MMS Unread•: Priority •: MMS Read•: Read •: Unread•: EMS Unread •: EMS Read•: WAP Unread •: WAP Read136VOICE MAIL, TXT, PICTURE, VIDEO MESSAGING](https://usermanual.wiki/Pantech/OVAL.Manual/User-Guide-773799-Page-68.png)
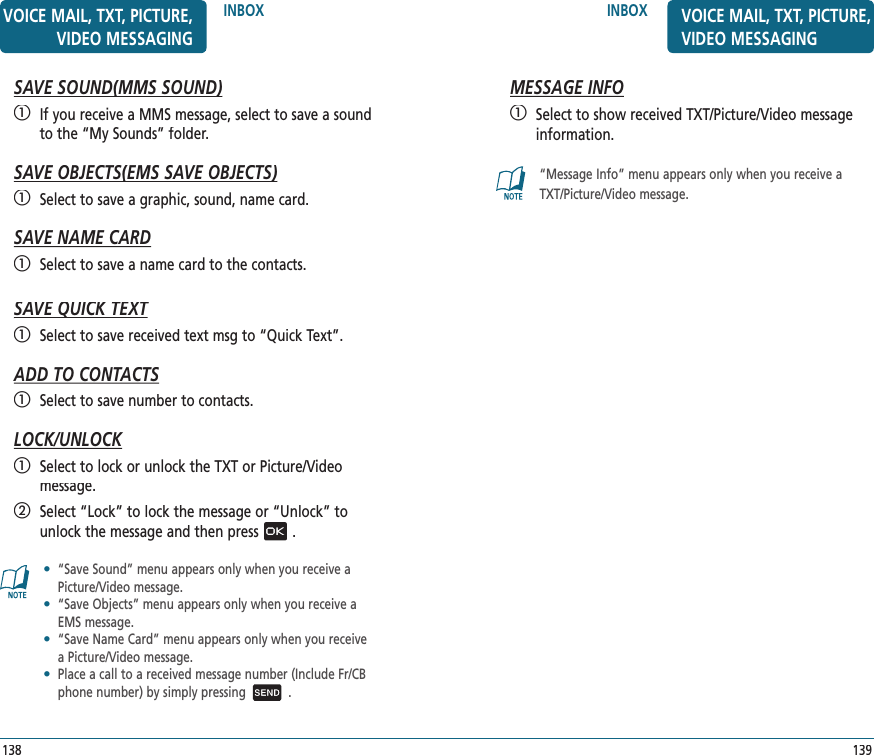
![141SENT VOICE MAIL, TXT, PICTURE, VIDEO MESSAGINGERASE To erase this message, select “Erase” and then select “Yes”, press.ERASE SENT To erase all sent message, select “Erase Sent” and then select “Yes”, press.ADD TO CONTACTS Select to save number to contacts.LOCK/UNLOCK Select to lock or unlock the TXT or Picture/Video message. Select “Lock” to lock the message or “Unlock” to unlock the message and then press.SAVE QUICK TEXTSAVE QUICK TEXT Select to save sent msg to “Quick Text”.VIEW NAME CARD To view include name card with in message.MESSAGE INFO Select to show send TXT/Picture/Video message information.Place a call to a send message number by simply pressing.Manages sent TXT, Picture/Video messages or messages waiting to be sent.Press Left Soft Key [MESSAGE], thenfor Sent. Select a message and then press[OPEN]. The message is displayed. To delete a message, press Left Soft Key[ERASE], press. Press Right Soft Key[OPTIONS].FORWARD Select to forward the TXT or Picture/Video message. Input the phone number of the person you are sending the message and then press. Input any TXT message to go along with the forwarded message and then press[SEND].PLAY AGAIN Select to play sent MMS message.“Play Again” menu appears only when you send a MMS message.RESEND Select to resend a TXT or Picture/Video message.•: Lock •: Incomplete Delivery•: Priority •: Delivered•: Sent •: Sent Failed140SENTVOICE MAIL, TXT, PICTURE, VIDEO MESSAGING](https://usermanual.wiki/Pantech/OVAL.Manual/User-Guide-773799-Page-70.png)
![VOICEMAIL143VOICE MAIL, TXT, PICTURE, VIDEO MESSAGINGDisplays the number of voice mails and accesses them by pressing. Press Left Soft Key [MESSAGE], thenfor Voicemail.FIRST TIME USER Dial *86 and then press[SEND]. At the recording, press. To set up your account follow the voice tutorial.EXISTING USER Dial *86 and then press[SEND]. At the recording, enter your 4 digits password, and then press. To listen to new messages, press.Draft Folder contains any draft messages or saved messages. If mes-sage composition is interrupted by a voice call or other interrupting event, the text of the current composition is automatically saved in the drafts folder. Press Left Soft Key [MESSAGE], thenfor Drafts. Select a message and then press[EDIT]. The message is displayed. To delete a message,press Left Soft Key [ERASE], press. Press Right Soft Key[OPTIONS].SEND Select to send a selected message.LOCK/UNLOCK Select to lock or unlock the TXT or Picture/Video message. Select “Lock” to lock the message or “Unlock” to unlock the message and then press.ADD TO CONTACTS Select to save number to contacts.ERASE DRAFTS To erase all drafts messages, select “Erase Drafts” and then select “Yes”, press.•: Lock•: MMS Drafts•: SMS/EMS DraftsDRAFTS142VOICE MAIL, TXT, PICTURE, VIDEO MESSAGING](https://usermanual.wiki/Pantech/OVAL.Manual/User-Guide-773799-Page-71.png)
![ERASE ALL145VOICE MAIL, TXT, PICTURE, VIDEO MESSAGING Press Left Soft Key [MESSAGE], thenRight Soft Key[OPTIONS]. 2.1. To erase all the inbox messages, press[ERASE INBOX].2.2. To erase all the drafts messages, press[ERASE DRAFTS].2.3. To erase the sent messages, press[ERASE SENT].2.4. To erase the all message, press[ERASE ALL]. Select “Yes” and then press. Press Left Soft Key [MESSAGE], thenfor E-Mail. Browser launches. Press Left Soft Key [MESSAGE], thenfor Chat. Browser launches.E- MAIL144VOICE MAIL, TXT, PICTURE, VIDEO MESSAGINGCHATVOICE MAIL, TXT, PICTURE, VIDEO MESSAGINGHGET NEW Press Left Soft Key [MESSAGE], thenfor Mobile IM, and thenfor Get New Applications. Launch “Get It Now”.MOBILE IMVOICE MAIL, TXT, PICTURE, VIDEO MESSAGING](https://usermanual.wiki/Pantech/OVAL.Manual/User-Guide-773799-Page-72.png)
![SETTINGS147VOICE MAIL, TXT, PICTURE, VIDEO MESSAGINGQUICK TEXTTo edit the Quick TXT message you have saved: Press Left Soft Key[MESSAGE], thenLeft Soft Key[SETTINGS], and thenfor All Messages. Press[QUICK TEXT].2.1. Select a message from the list. Press.2.2. To add a new Quick TXT message, press Right Soft key[NEW], then enter text, press. To erase the saved Quick TXT message, press Left Soft Key[ERASE].VOICEMAIL# Press Left Soft Key[MESSAGE], thenLeft Soft Key[SETTINGS], and thenfor All Messages. Press[VOICEMAIL#].Input a new voice call back number or edit voice call back number. Pressto save it.Pre-defined quick text as below.What’s up?/Let’s meet./Check this out!/Whacha doing?/ Thanks/What do you think?/You’ve gotta be here to enjoy this./Would you like to join me for a date tonight?/ On my way./Yes/You’re the best!/Call me.Set messaging preferences and default settings.HALL MESSAGE SETTINGSAUTO SAVE Press Left Soft Key[MESSAGE], thenLeft Soft Key[SETTINGS], and thenfor All Messages. Press[AUTO SAVE]. Select “On”, “Off” or “Prompt” with the Navigation Key. Pressto save it.AUTO ERASEAutomatically erases inbox messages when new messages arrive. Press Left Soft Key[MESSAGE], thenLeft Soft Key[SETTINGS], and thenfor All Messages. Press[AUTO ERASE]. Select “On” or “Off” with the Navigation Key. Pressto save it.• On: All sent messages saved in the Sent box.• Off: All sent messages not saved in the Sent box.• Prompt: “Yes”, “No” dialogue box displayed after sent message.• On: Oldest message erased from inbox automatically when Inbox is full.• Off: Oldest message not erased from inbox automatically when Inbox is full.SETTINGS146VOICE MAIL, TXT, PICTURE, VIDEO MESSAGING](https://usermanual.wiki/Pantech/OVAL.Manual/User-Guide-773799-Page-73.png)
![SETTINGS149VOICE MAIL, TXT, PICTURE, VIDEO MESSAGINGALL MESSAGE SIGNATURECreate a signature that can be automatically inserted at the end of all TXT and Picture messages. Press Left Soft Key[MESSAGE], thenLeft Soft Key[SETTINGS], and thenfor All Messages. Press[SIGNATURE]. To activate Signature function, put the cursor on Insert Signature then select “Custom” by using up or down direction keys. To deactivate Signature function, select “None”. To input “Signature”, put the cursor on Edit Signature and then enter Signature Edit window by using right or left direction keys. Pressto save it.ENTRY MODESets an Entry Mode as a default. For example, if Word Mode is the default, its icon will appear. Press Left Soft Key[MESSAGE], thenLeft Soft Key[SETTINGS], and thenfor All Messages. Press[ENTRY MODE]. Select “Word”, “Abc”, “ABC” or “123” with the Navigation Key. Pressto save it.CALLBACK #Edits a default callback number so that the recipient can callback or reply. Press Left Soft Key[MESSAGE], thenLeft Soft Key[SETTINGS], and thenfor All Messages. Press[CALLBACK#]. Select “Off” or “On” with the Navigation Key. If “On” selected, input a new callback number, pressto save it.SETTINGS148VOICE MAIL, TXT, PICTURE, VIDEO MESSAGING](https://usermanual.wiki/Pantech/OVAL.Manual/User-Guide-773799-Page-74.png)
![SETTINGS151VOICE MAIL, TXT, PICTURE, VIDEO MESSAGING To input “Signature”, put the cursor on Edit Signature and then enter Signature Edit window by using right or left direction keys. Pressto save it.HPIC-VIDEO MESSAGE SETTINGSAUTO RECEIVE Press Left Soft Key[MESSAGE], thenLeft Soft Key[SETTINGS], and thenfor Pic-Video Messages. Press[AUTO RECEIVE]. Select “On” or “Off” with the Navigation Key. Pressto save it.HTXT MESSAGE SETTINGSAUTO VIEWIf the “Auto View” is set to on, the user will be able to view the message. If the “Auto View” is set to off, the user can view the message by entering SMS Menu-> Inbox. Press Left Soft Key[MESSAGE], thenLeft Soft Key[SETTINGS], and thenfor TXT Messages. Press[AUTO VIEW]. Select “On” or “Off” with the Navigation Key. Pressto save it.TXT MESSAGE SIGNATURECreate a signature that can be automatically inserted at the end of a message. Press Left Soft Key[MESSAGE], thenLeft Soft Key[SETTINGS], and thenfor TXT Messages. Press[SIGNATURE]. To activate Signature function, put the cursor on Insert Signature then select “Custom” by using up or down direction keys. To deactivate Signature function, select “None”.• On: Picture message downloaded automatically.• Off: Picture message must be retrieved from the inbox or at new TXT message prompt.SETTINGS150VOICE MAIL, TXT, PICTURE, VIDEO MESSAGING• On: TXT message displayed automatically.• Off: TXT message displayed by going to the inbox or responding to interactive notification.](https://usermanual.wiki/Pantech/OVAL.Manual/User-Guide-773799-Page-75.png)
![CHAPTER 7 MOBILE WEB 2.0This chapter addresses Internet services and web browsing. For more detailed information contact your service provider.STARTING INTERNET BROWSERBROWSER MENU CHAPTER 7 MOBILE WEB 2.0152SETTINGSVOICE MAIL, TXT, PICTURE, VIDEO MESSAGINGPIC-VIDEO MESSAGE SIGNATURECreate a signature that can be automatically inserted at the end of a message. Press Left Soft Key[MESSAGE], thenLeft Soft Key[SETTINGS], and thenfor Pic-Video Messages. Press[SIGNATURE]. To activate Signature function, put the cursor on Insert Signature then select “Custom” by using up or down direction keys. To deactivate Signature function, select “None”. To input “Signature”, put the cursor on Edit Signature and then enter Signature Edit window by using right or left direction keys. Pressto save it.](https://usermanual.wiki/Pantech/OVAL.Manual/User-Guide-773799-Page-76.png)
![155BROWSER MENU MOBILE WEB 2.0SEARCHTakes user to the VZW Search page. To select “Search”. Pressthe Navigation Keyup, then press Right Soft Key[MENU]for Search.GO TO URLTakes user to the VZW Search>Go to Site page. To select “Go to URL”. Pressthe Navigation Keyup, then press Right Soft Key[MENU]for Go to URL.SHOW URLDisplays the current URL. To select “Show URL”. Pressthe Navigation Keyup, then press Right Soft Key[MENU]for Show URL.BACKProvides the ability to redisplay the page previously displayed. To select “Back”. Pressthe Navigation Keyup, then press Right Soft Key[MENU]for Back.154MOBILE WEB 2.0 STARTING INTERNET BROWSERHLAUNCHING MOBILE WEB 2.0Now you can access news, sports, weather, and e-mail from your phone. Mobile Web 2.0 keeps you updated by providing access to up-to-date information such as news, sports, weather and stock quotes when you subscribe to Internet service with your service provider. Please contact your service provider for a list of available websites and service details. To start your Internet browser and access websites through your wireless handset press the Navigation Keyup.MOBILE WEB 2.0 BROWSER MENUThe browser menu lists the actions necessary to operate the browser. To access, press the Navigation Keyup and then press Right Soft Key[MENU].VZW HOMEReturns the user to the home page. To select “VZW Home”. Pressthe Navigation Keyup, then press Right Soft Key[MENU]for VZW Home.ADD FAVORITETakes user to the VZW Add Favorite page. To select “Add Favorite”. Pressthe Navigation Keyup, then press Right Soft Key[MENU]for Add Favorite.For favorites, page name and URL need to auto-populate.](https://usermanual.wiki/Pantech/OVAL.Manual/User-Guide-773799-Page-77.png)
![157BROWSER MENU MOBILE WEB 2.0MANAGE MEMORYWill display following list of options. To select “Manage Memory”. Pressthe Navigation Keyup, then press Right Soft Key[MENU]for Manage Memory.SETTINGS Selecting “Settings” will display following list of options. Pressthe Navigation Keyup, then press Right Soft Key[MENU]for Settings.156MOBILE WEB 2.0 BROWSER MENU• Downloads: Selecting the “Downloads” item allows the user to enable/disable downloading images, background sounds, and object downloads when a URL is accessed.• Restart Browser: Selecting “Restart Browser” causes the history and cache to be cleared and returns the user to the homepage.• Scroll Mode: Selecting “Scroll Mode” from the Settings menu allows the user to select the way text scrolls and the scroll speed.• Send Referrer: When the “Send Referrer” item is selected from the Settings menu, the browser allows the user to turn on or off sending the referrer URL.• Key Press Time Out: When the “Key Press Timeout” item is selected from the Settings menu, the browser allows the user to set the key press timeout as fast, medium or slow. Medium is 1.5 seconds, slow 2 seconds and fast is 1 second. The key press timeout is the period of time after which the cursor auto-advances to the next entry position. In most cases, a single key can be used to enter more than one character. Each time the key is pressed the last character of the line is replaced by the next choice for that key. As long as the same key is re-pressed within key press timeout, the last character cycles between all the choices for the key.• Connection Time Out: When the Connection Timeout item is selected from the Settings menu, the browser allows the user to set the connection timeout. The connection timeout determines how long the browser will wait for a response from the network for a network request.• Clear Cache: Clears the cache.• Clear History: Clears the list of recently visited URLs.• Clear Cookies: Clears saved cookies.• Autofill: Automatically fills in character for browser recognized words.](https://usermanual.wiki/Pantech/OVAL.Manual/User-Guide-773799-Page-78.png)
![CHAPTER 8 SAFETY ANDWARRANTYThis chapter addresses the safety guidelines and precautions to follow when operating your phone. Before operating your phone, please be aware of all the safety details.This chapter contains the terms and conditions of services and the warranty for your phone. Please review them thoroughly.SAFETY INFORMATION FOR WIRELESS HANDHELD PHONESSAFETY INFORMATION FOR FCC RF EXPOSURESAR INFORMATIONFCC HEARING-AID COMPATIBILITY (HAC) REGULATIONS FOR WIRELESS DEVICESFDA CONSUMER UPDATE12 MONTH LIMITED WARRANTY CHAPTER 8 SAFETY AND WARRANTY158MOBILE WEB 2.0 BROWSER MENUADVANCED Selecting “Advanced”, will display following list of options. Pressthe Navigation Keyup, then press Right Soft Key[MENU]for Advanced.EXITPressto exit out of the browser and return to idle mode.• About: Displays the name of the supplier of the Browser and the Browser SW version.• Refresh: Allows the user to reload the current URL.• History: Displays the previous 20 number of visited URLs, where X=20.• Encryption: Displays the following list of options.1. Authentication: Gives the option to turn Authentication Caching ON or OFF.2. Root Certificate: Shows the root security keys for TLS.3. Current Certificate: Shows the current site security key for TLS (if applicable).](https://usermanual.wiki/Pantech/OVAL.Manual/User-Guide-773799-Page-79.png)
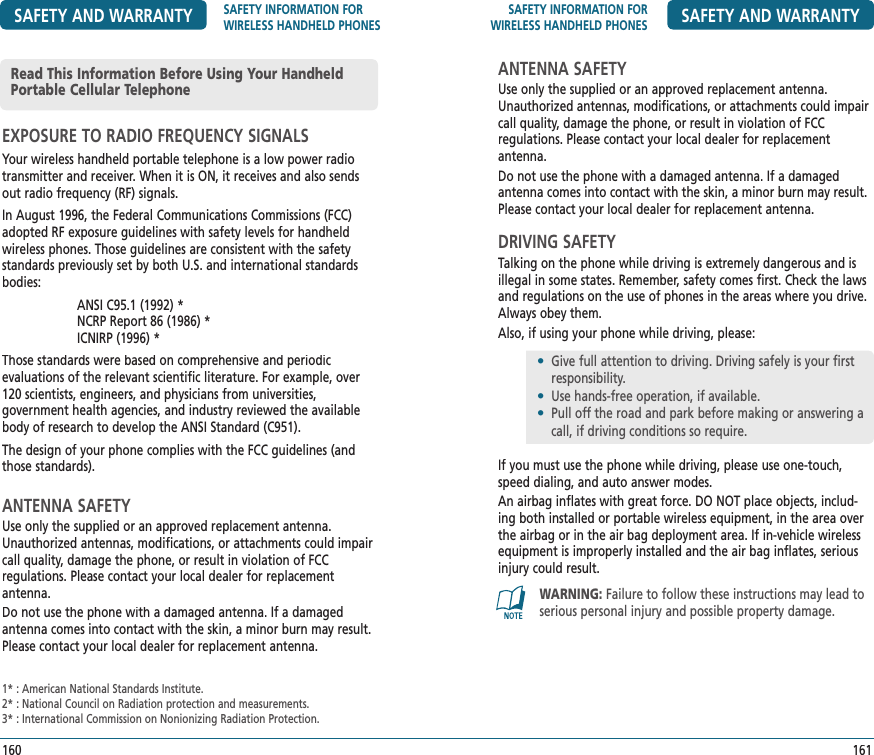

![FCC HEARING-AID COMPATIBILITY (HAC) REGULATIONS FOR WIRELESS DEVICESSAFETY AND WARRANTY169The hearing aid and wireless phone rating values are then added together. A sum of 5 is considered acceptable for normal use. A sum of 6 is considered for best use.In the above example, if a hearing aid meets the M2 level rating and the wireless phone meets the M3 level rating, the sum of the two values equal M5. This should provide the hearing aid user with “normal usage” while using their hearing aid with the particular wireless phone. “Normal usage” in this context is defined as a signal quality that is acceptable for normal operation.The M mark is intended to be synonymous with the U mark. The T mark is intended to be synonymous with the UT mark. The M and T marks are recommended by the Alliance for Telecommunications Industries Solutions (ATIS). The U and UT marks are referenced in Section 20.19 of the FCC Rules. The HAC rating and measure-ment procedure are described in the American National Standards Institute (ANSI) C63.19 standard.For information about hearing aids and digital wire-less phone• Fcc Hearing Aid Compatibility and Volume Control http://www.fcc.gov/cgb/dro/hearing.html• Gallaudet University, RERC http://tap.gallaudet.edu/DigWireless.KS/DigWireless.htm• Self Help for Hard of Hearing People Inc. [SHHH] www.hearingloss.org/hat/TipsWirelessPhones.htm• The Hearing Aid Compatibility FCC Order http://hraunfoss.fcc.gov/edocs_public/attachmatch/ FCC-03-168A1.pdfSAFETY AND WARRANTY FCC HEARING-AID COMPATIBILITY (HAC) REGULATIONS FOR WIRELESS DEVICES168On July 10, 2003, the U.S. Federal Communications Commission (FCC) Report and Order in WT Docket 01-309 modified the exception of wireless phones under the Hearing Aid Compatibility Act of 1988 (HAC Act) to require digital wireless phones be com-patible with hearing-aids. The intent of the HAC Act is to ensure reasonable access to telecommunications services for persons with hearing disabilities.While some wireless phones are used near some hearing devices (hearing aids and cochlear implants), users may detect a buzz-ing, humming, or whining noise. Some hearing devices are more immune than others to this interference noise, and phones also vary in the amount of interference they generate.The wireless telephone industry has developed a rating system for wireless phones, to assist hearing device users find phones that may be compatible with their hearing devices. Not all phones have been rated. Phones that are rated have the rating on their box or a label located on the box.The ratings are not guarantees. Results will vary depending on the user’s hearing device and hearing loss. If your hearing device hap-pens to be vulnerable to interference, you may not be able to use a rated phone successfully. Trying out the phone with your hearing device is the best way to evaluate it for your personal needs.M-Ratings: Phones rated M3 or M4 meet FCC requirements and are likely to generate less interference to hearing devices than phones that are not labeled. M4 is the better/higher of the two ratings.Hearing devices may also be rated. Your hearing device manufac-turer or hearing health professional may help you find this rating.Higher ratings mean that the hearing device is relatively immune to interference noise.](https://usermanual.wiki/Pantech/OVAL.Manual/User-Guide-773799-Page-84.png)