ORION ELECTRIC M2D3B TV Interface Device User Manual VRB1351A EN 01 05
ORION ELECTRIC CO., LTD. TV Interface Device VRB1351A EN 01 05
UserManual.wiki
>
ORION ELECTRIC
>
M2D3B User Manual
>
Manual 3
Contents
1.
Manual 1
2.
Manual 2
3.
Manual 3
Manual 3
Navigation menu
Upload a User Manual
Namespaces
Wiki Guide
HTML
PDF
Info
Views
User Manual
Discussion / Help
Navigation
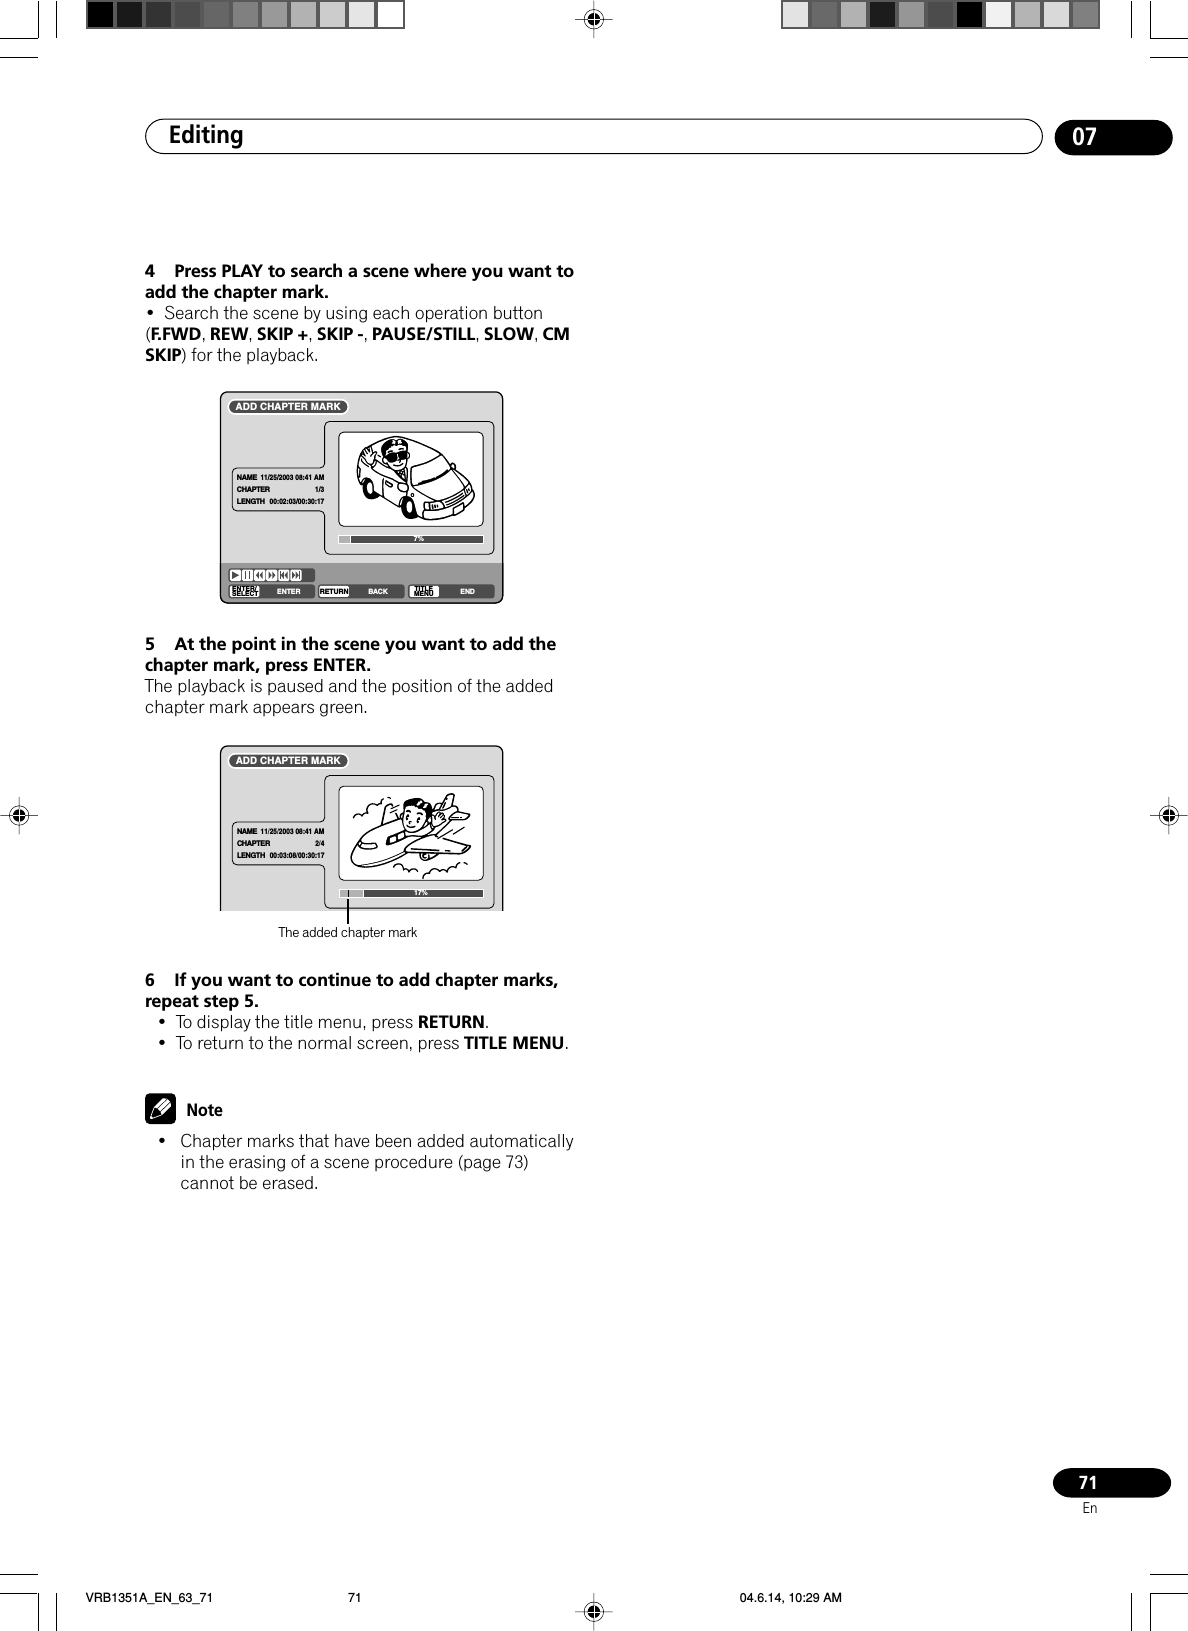
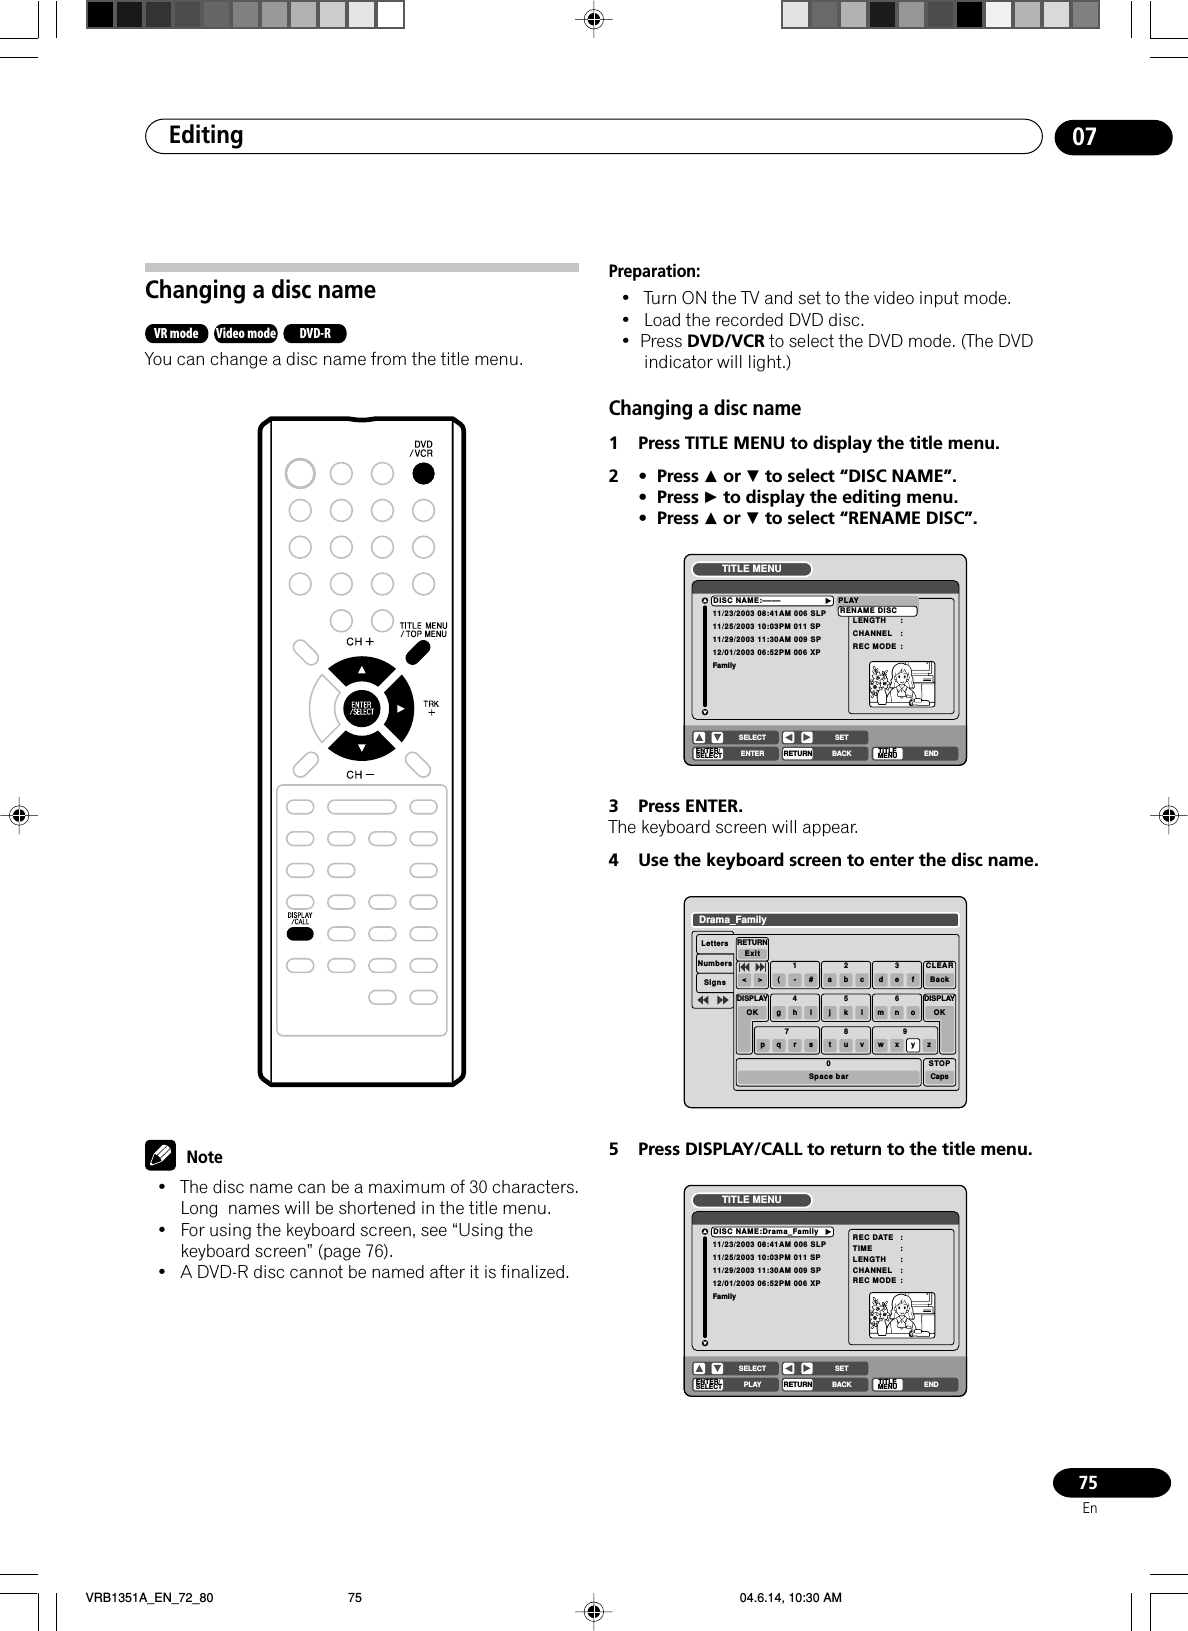
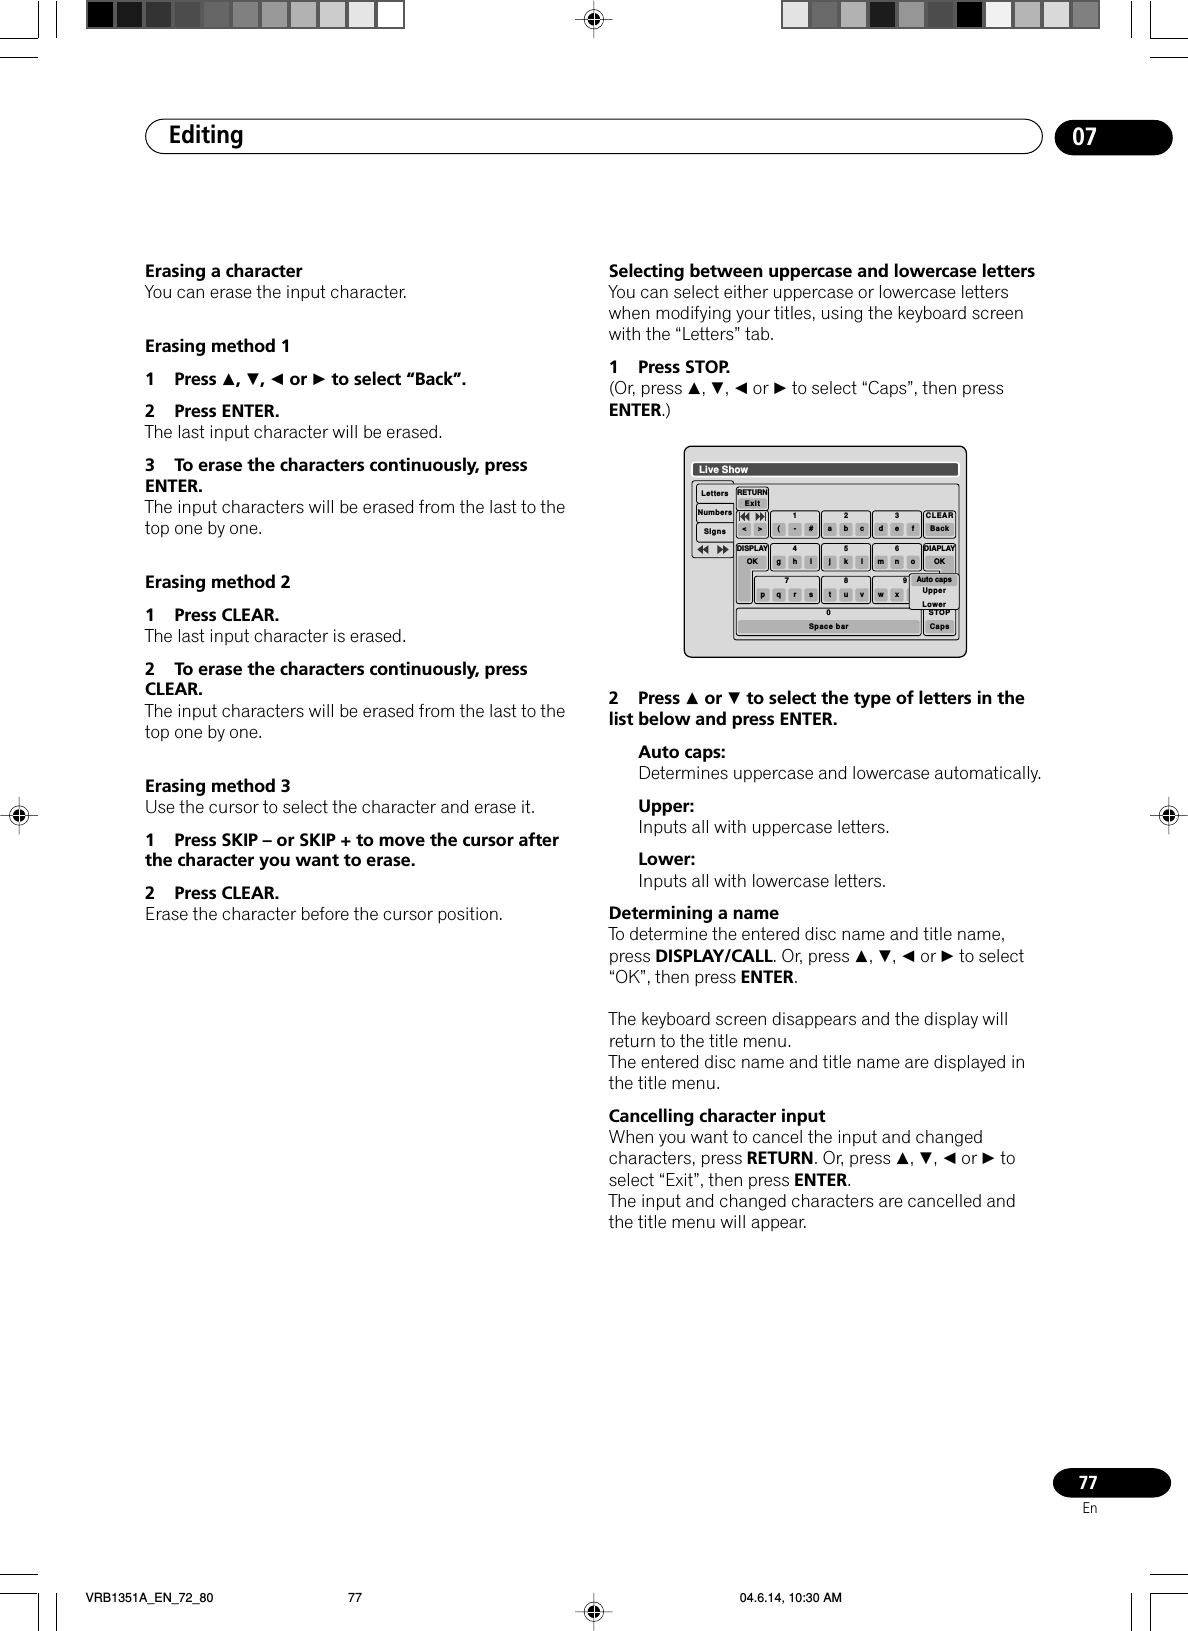
![Editing0776EnUsing the keyboard screenVR mode Video mode DVD-RThis section explains the function of the keyboardscreen and how to input characters. The disc name andthe title name can be changed using the keyboardscreen.Keyboard screen typesThe keyboard screen has three types of “Letters”,“Numbers” and “Signs”. The type can be switched overby pressing REW or F.FWD.Letters:This is mainly used for inputting alphabetical letters.For the keyboard screen of Letters, see the previouspage.Numbers:This is used for inputting numbers.Live ShowNumbersSignsLetters1< > 2 3CLEARBackRETURNExit4567 809DISPLAYOKDISPLAYOKSigns:This is used for inputting symbols.Live ShowNumbersSignsLetters1) !< > ,2? @ #3& % /CLEARBackRETURNExit0Space bar4. * _5- + =6[ ] :7¨; \ ‘8< > $9:·) :·(;-/ :·}DISPLAYOKDISPLAYOKInputting charactersThere are two methods for inputting characters.Character input 11 Press , , or to select the character to beinput.2 Press ENTER.The selected character will be input.Character input 2Example: Explained here is the procedure when youinput “F” and “J”.1 Press the numeric keys where a character youwant to input is assigned.3de f2 Press the numeric keys continuously and selectthe character to be input.To input F, press 3 three times.3de fNote•When the interval between the pressing numerickeys is 2 seconds or more in selecting the inputcharacter, the selected character will automaticallybe input.3 Stop the key operation when you select thecharacter to be input.The selected character will automatically be input.F4 Press the numeric keys where the followingcharacter is assigned.5jk l5 When the character to be input is selected, stopthe key operation.The selected character is automatically input.FjVRB1351A_EN_72_80 04.6.14, 10:30 AM76](https://usermanual.wiki/ORION-ELECTRIC/M2D3B.Manual-3/User-Guide-447672-Page-6.png)