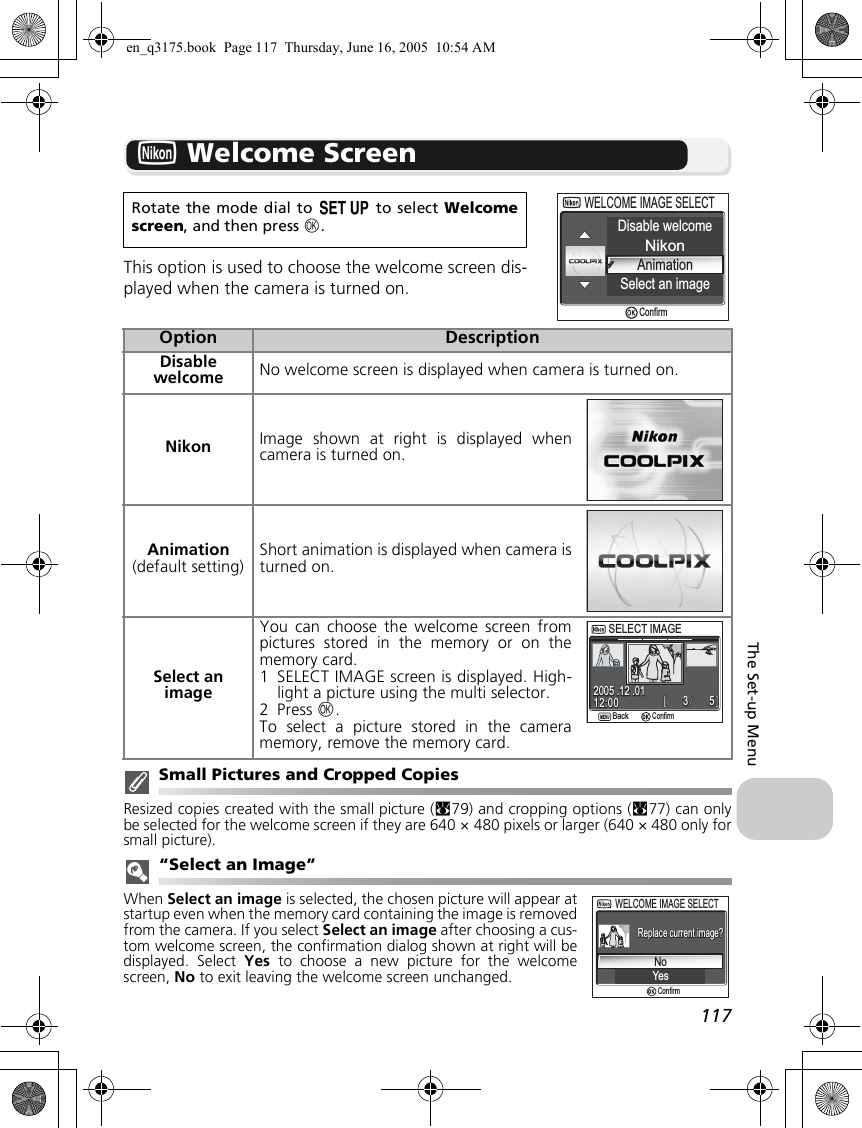
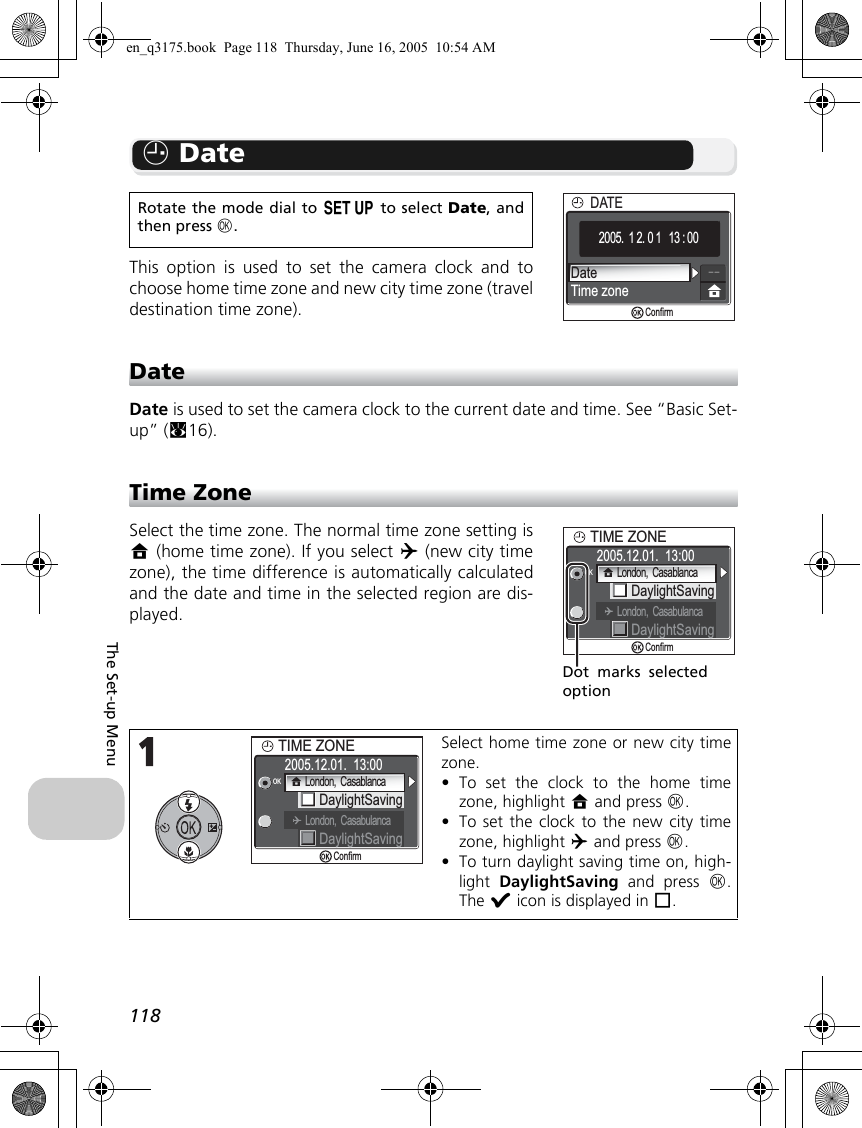
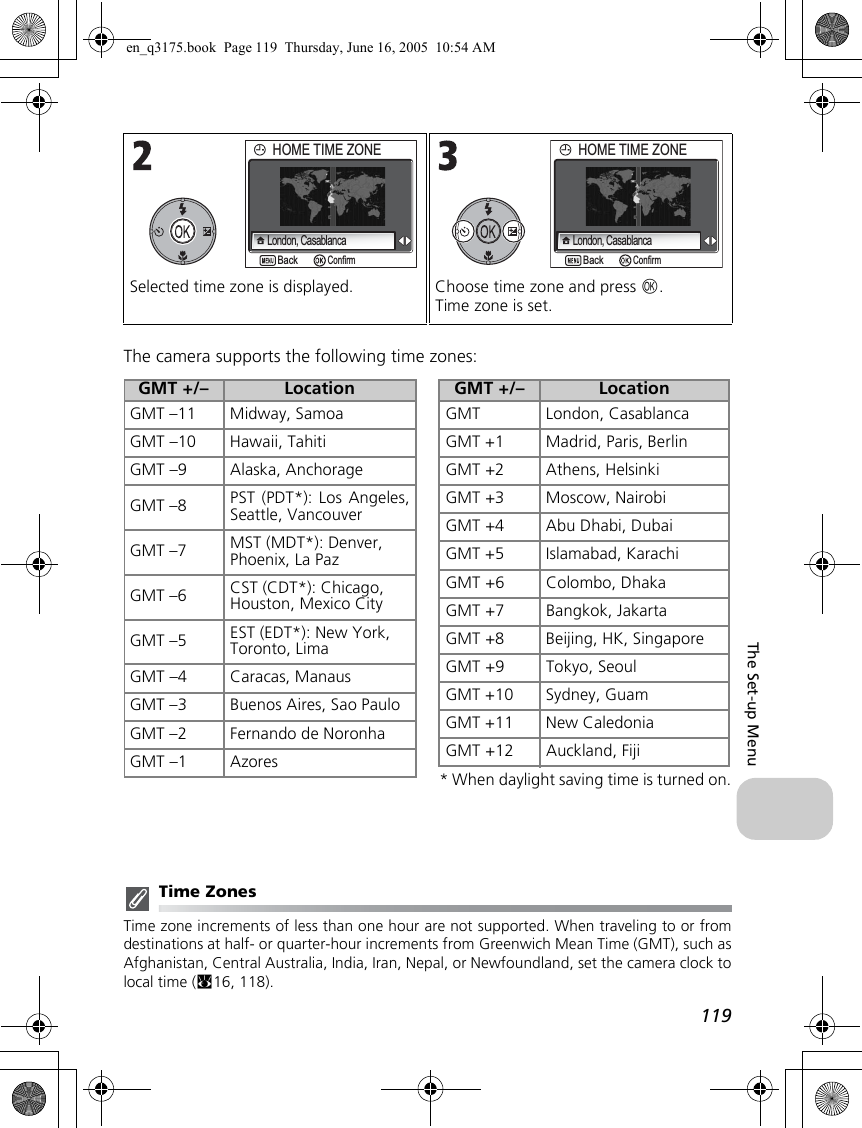
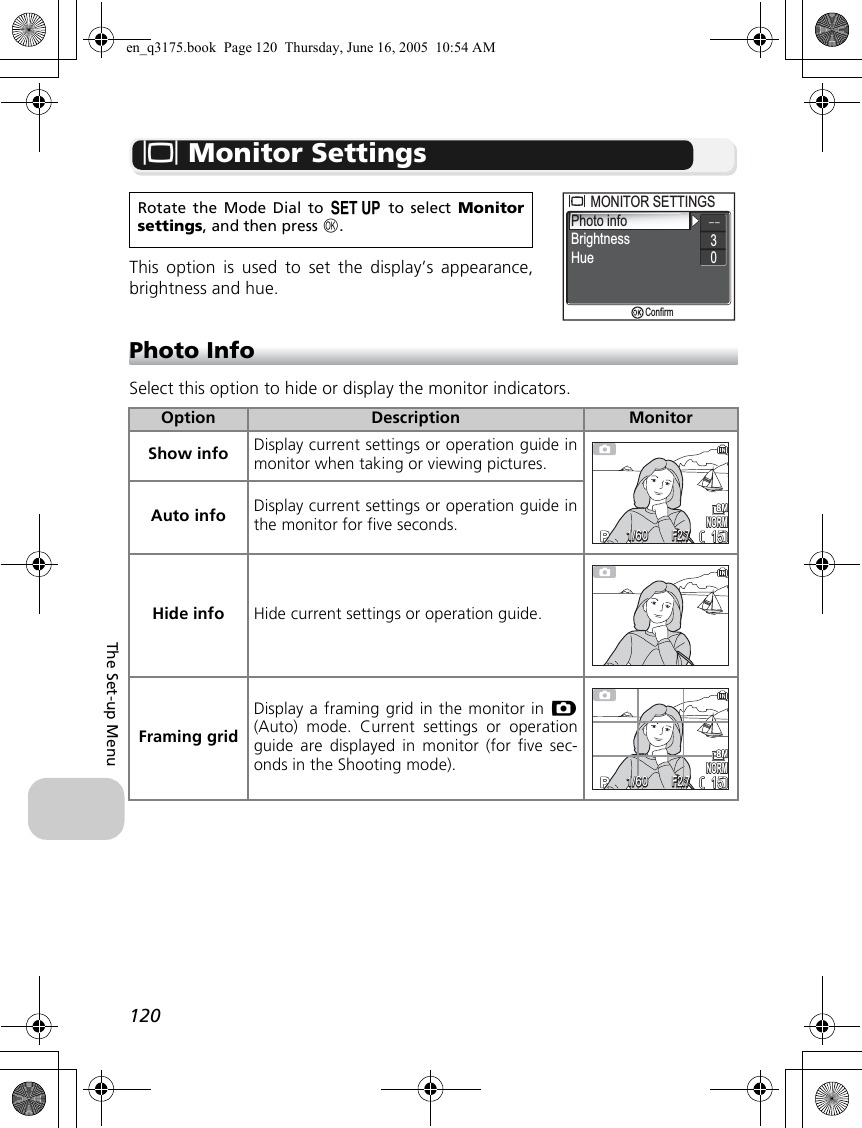
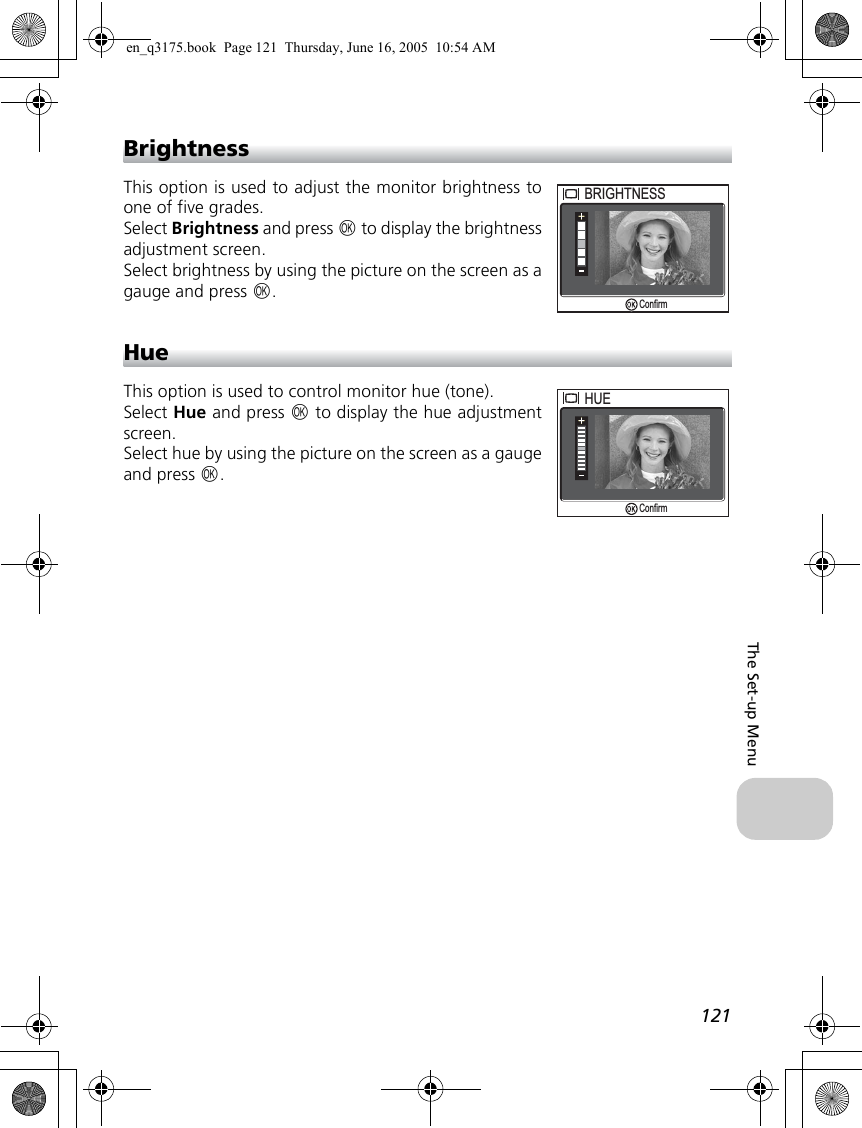
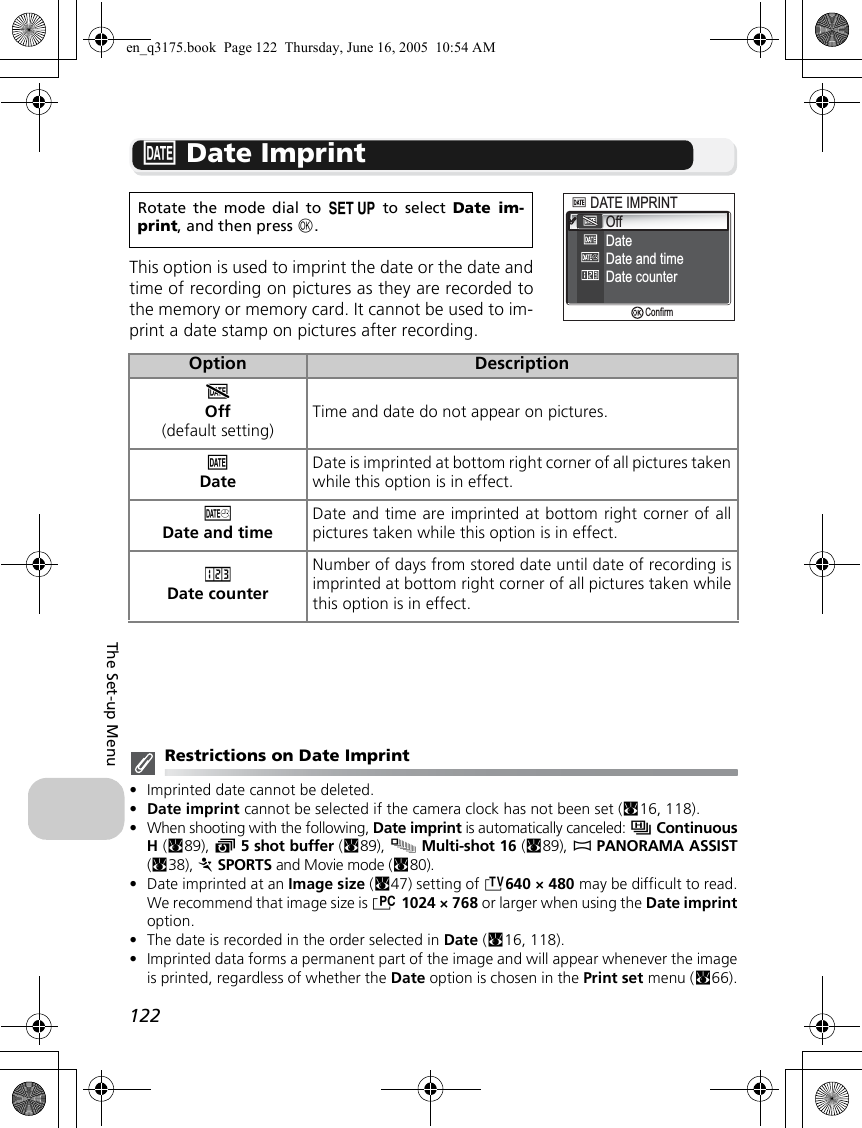
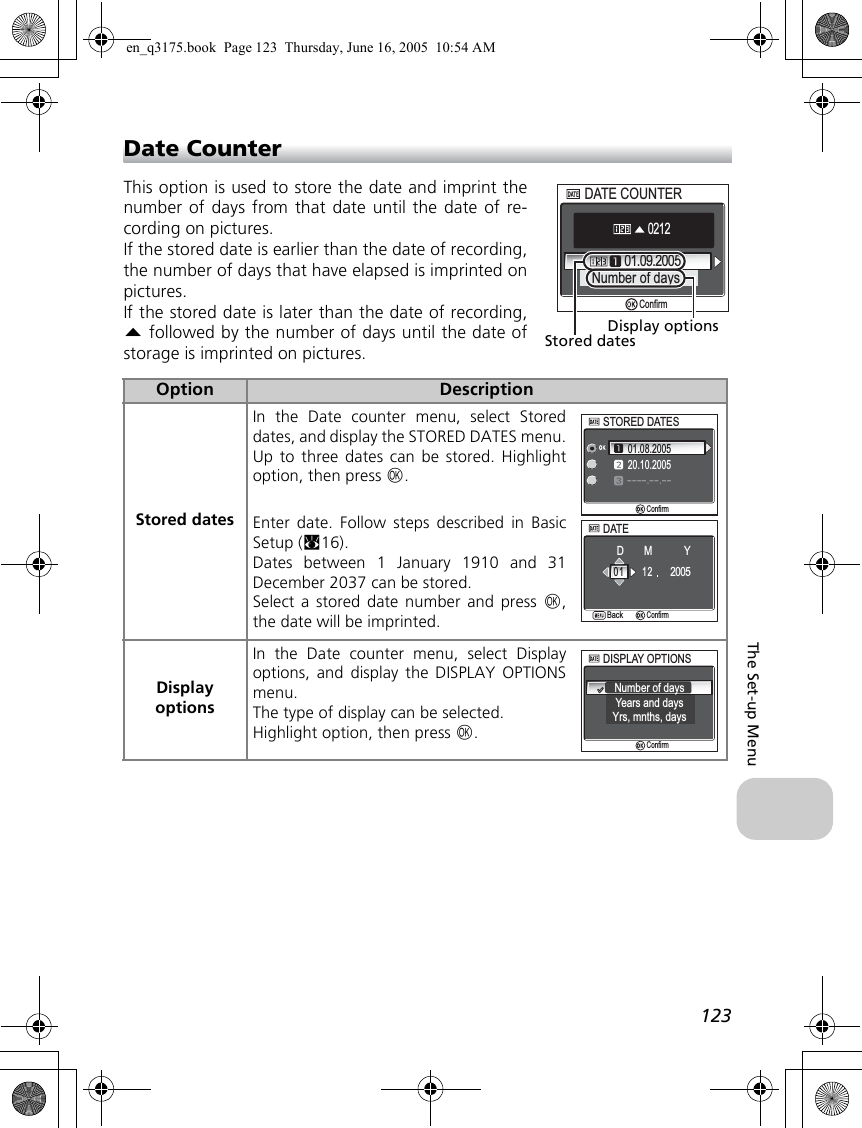
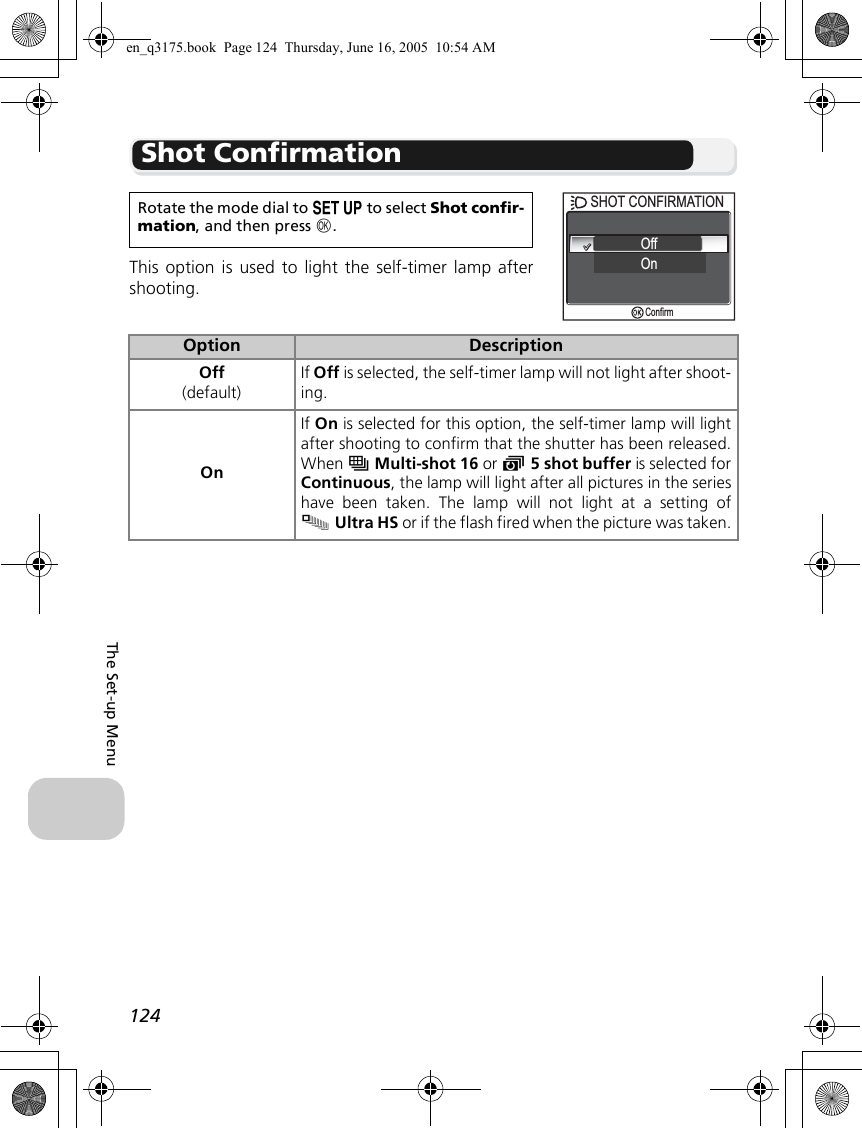
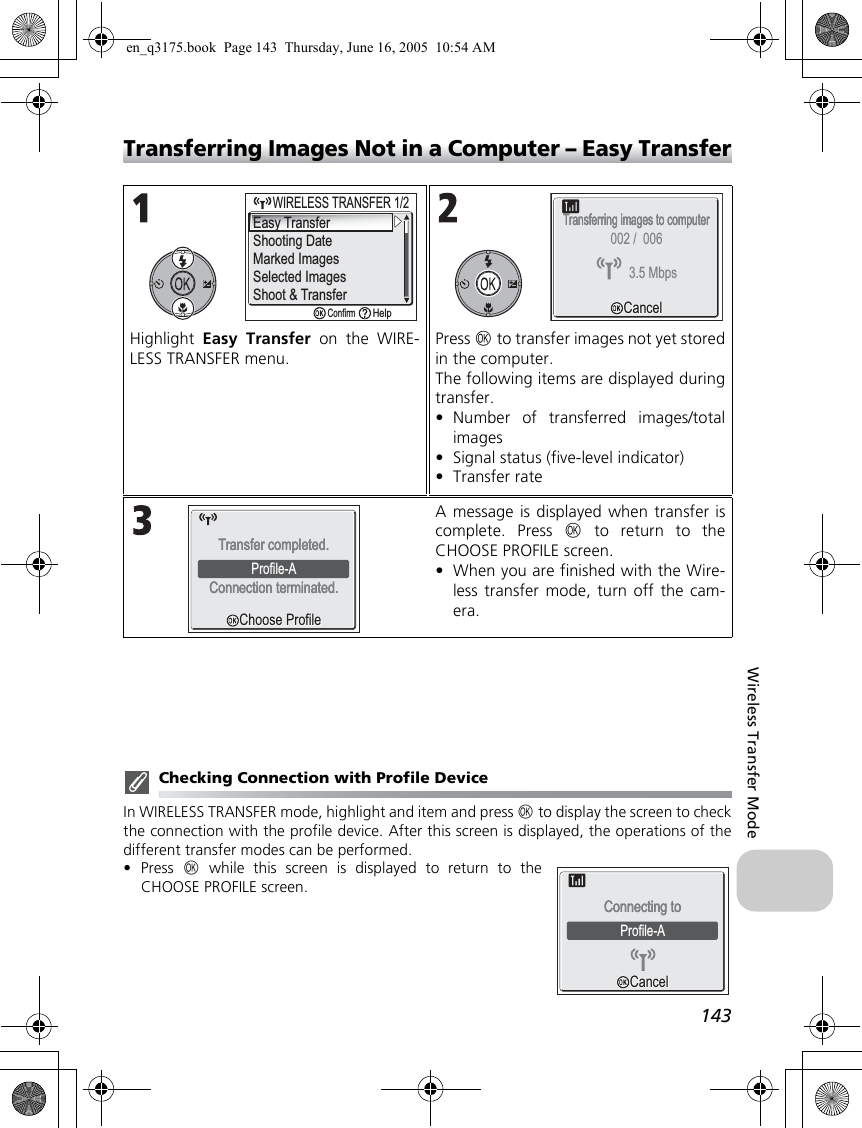
Nikon CXP1 Digital camera with 802.11b/g transmitter User Manual 3 of 3
Nikon Corporation Digital camera with 802.11b/g transmitter 3 of 3
Nikon >
Contents
- 1. User Manual 1 of 3
- 2. User Manual 2 of 3
- 3. User Manual 3 of 3
User Manual 3 of 3

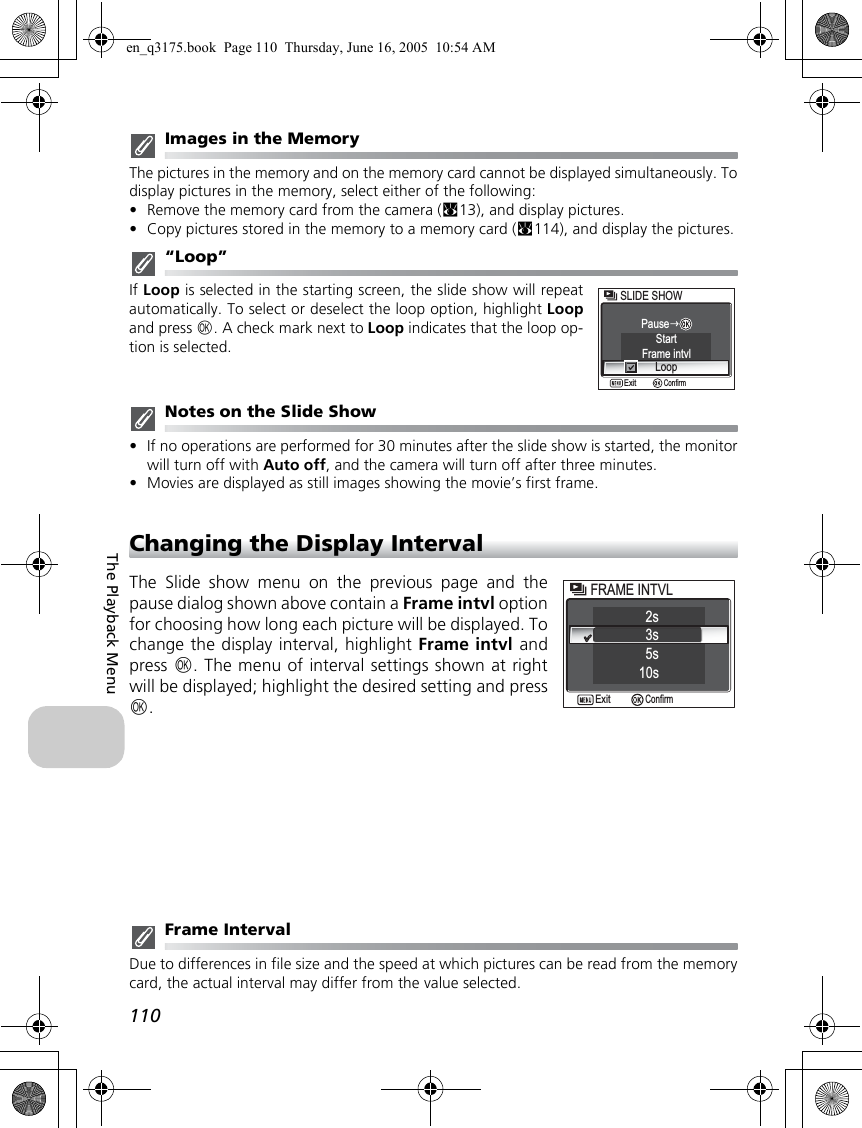


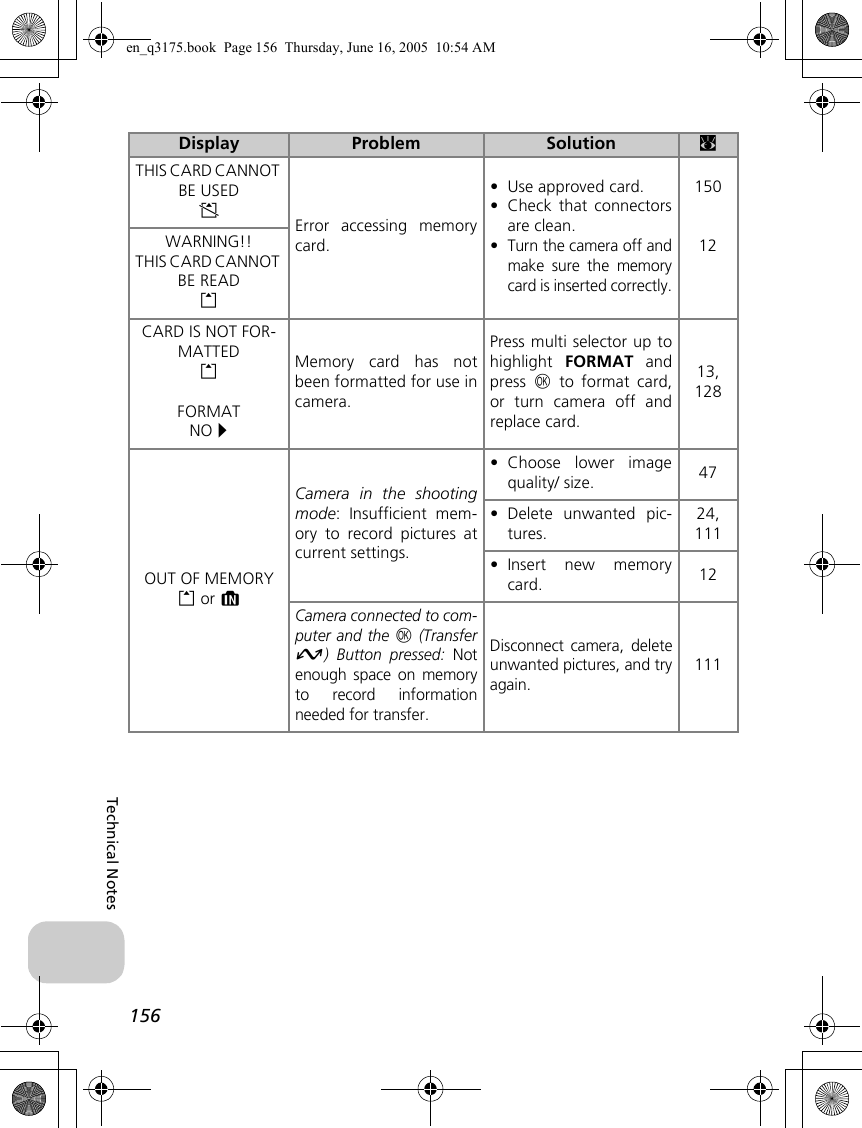
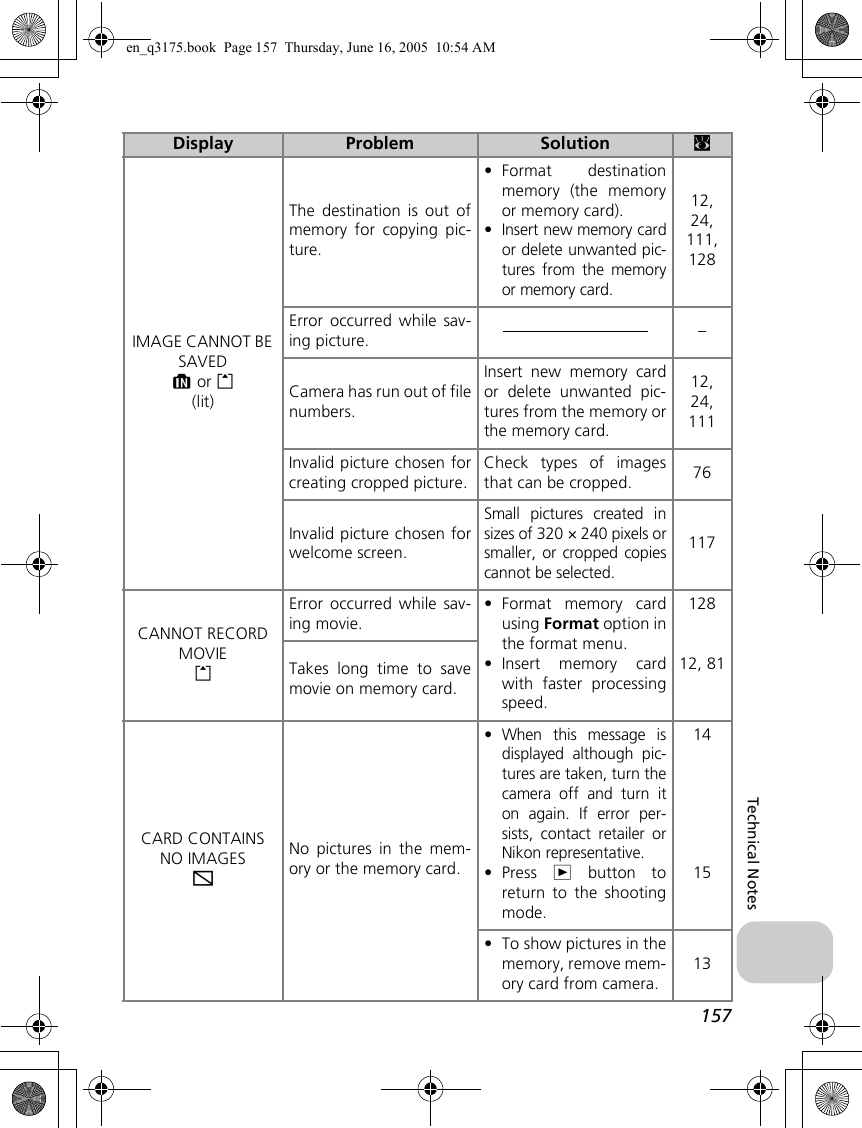
![155Technical NotesError MessagesThe following table lists the error messages and other warnings that appear in themonitor and how to deal with them.Display Problem Solution cs(blinks) Clock not set. Set clock to current dateand time. 16WARNING!! BATTERY EXHAUSTEDwBattery exhausted. Turn camera off andreplace battery. 10[ ]p(flashes red)Camera cannot focus.Use AF lock to focus onanother subject at samedistance, then recomposepicture.98JSlow shutter speed. Pic-tures may be blurred.Use flash, or steady cam-era using tripod, by plac-ing camera on levelsurface, or by holdingcamera in both handswith elbows againsttorso.20, 27, 44Please waity•Camera turned off.•The i button pressedduring recording pic-tures.•The mode dial rotatedto another mode dur-ing recording.Message clears from dis-play automatically whenrecording is complete.23WARNING!!PLEASE WAIT FOR THE CAMERA TO FINISH RECORDINGyMEMORY CARD IS WRITE PROTECTEDOWrite-protect switch ofthe memory card is in“lock” position.Slide write-protect switchto “write” position. 13en_q3175.book Page 155 Thursday, June 16, 2005 10:54 AM](https://usermanual.wiki/Nikon/CXP1.User-Manual-3-of-3/User-Guide-558203-Page-57.png)
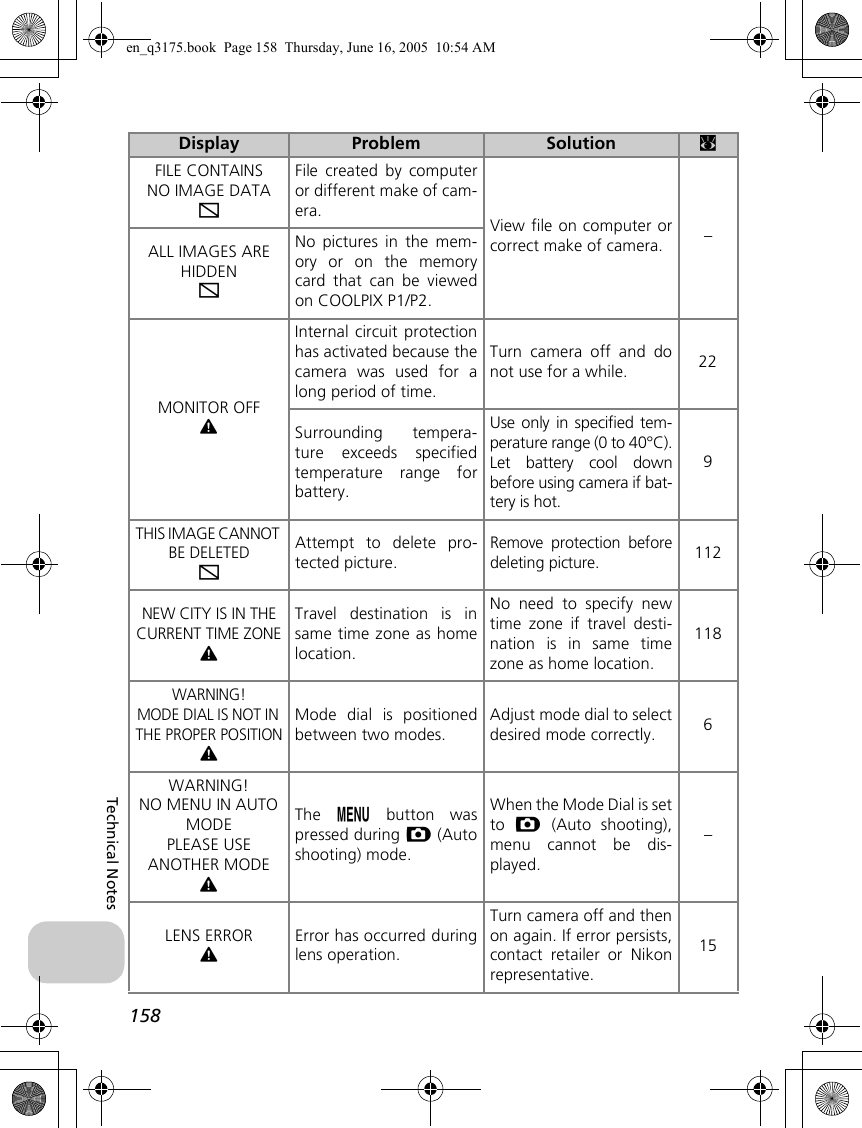
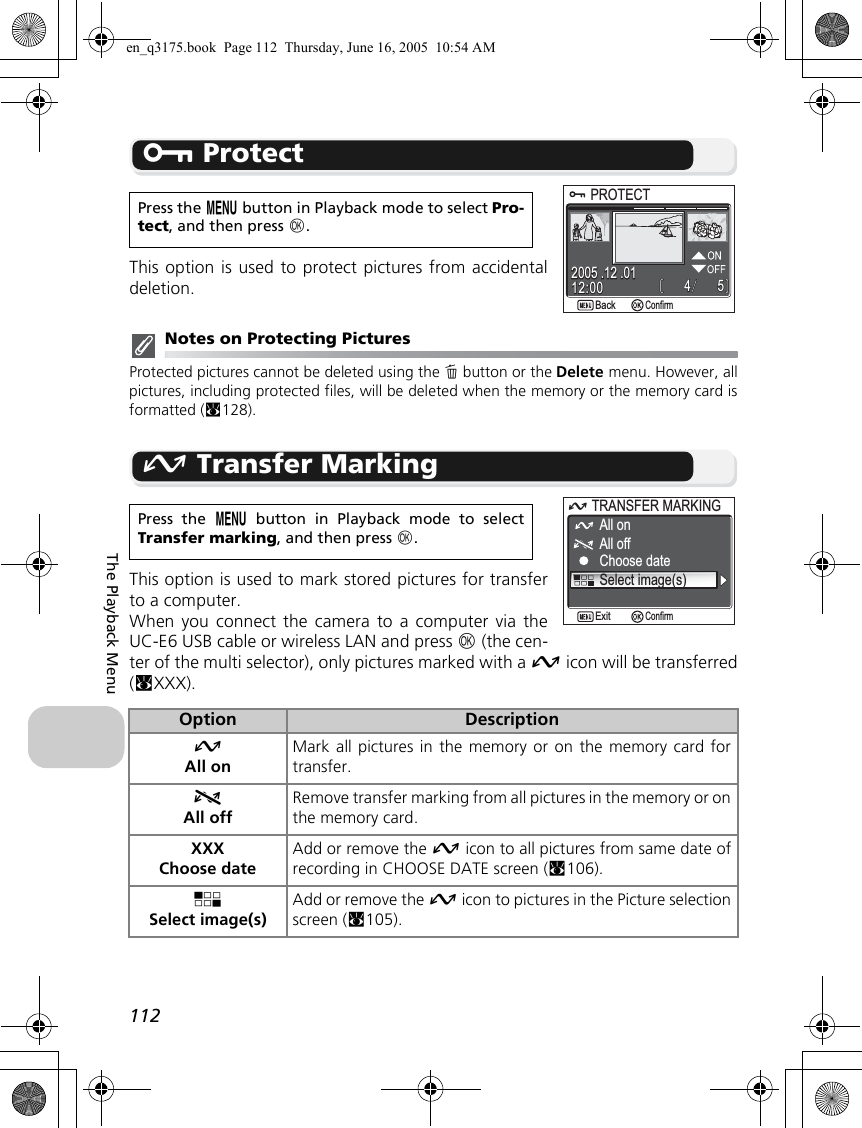
![165Technical NotesSpecificationsType COOLPIX P1/P2 digital cameraEffective pixels 8.0 million (for COOLPIX P1)/5.1 million (for COOLPIX P2)CCD 1/1.8" high-density CCD; total pixels: 8.31 million (for COOLPIX P1)/5.26 million (for COOLPIX P2)Image size (pixels)•3,264×2,448 [8M] (for only COOLPIX P1)•2,592×1,944 [5M] • 2,048×1,536 [3M]•1,600×1,200 [2M] • 1,280×960 [1M]•1,024×768 [PC] • 640×480 [TV]•3,264×2,176 [3:2] (for COOLPIX P1)•2,592×1,728 [3:2] (for COOLPIX P2)Lens 3.5 × Zoom-Nikkor ED lensFocal length F=7.5 - 26.3 mm (35-mm [135] camera-format equivalent: 36 - 126mm)f/-number f/2.7 - f/5.2Construction Seven elements in six groupsDigital zoom Up to 4× (35-mm [135] camera-format equivalent: 504 mm)Autofocus (AF) Contrast-detect through-the-lens (TTL) AF, AF-assist illuminatorFocus range 50 cm (1') - ∞; macro mode 4 cm/1.6" (W) - ∞Focus area selection Auto (nine-area automatic selection), Manual (99-area manual selec-tion), Off (center focus area selection)AF-assist illuminatorCLASS 1 LED PRODUCT (IEC60825-1 Edition 1.2-2001)Maximum output: 1900µWMonitor 2.5", 110,000-dot, amorphous silicon TFT transflective LCD withbrightness adjustmentFrame coverage (shooting mode) Approximately 100% horizontal and 97% verticalStorageMedia Internal memory (approximately 32 MB for COOLPIX P1/16 MB forCOOLPIX P2)/SD (Secure Digital) Memory cardsFile system Compliant with Design Rule for Camera File System (DCF), Exif 2.2,and Digital Print Order Format (DPOF)File formats Compressed: JPEG-baseline-compliant (1:4, 1:8, 1:16)Movies: QuickTime Sound files: WAVen_q3175.book Page 165 Thursday, June 16, 2005 10:54 AM](https://usermanual.wiki/Nikon/CXP1.User-Manual-3-of-3/User-Guide-558203-Page-67.png)