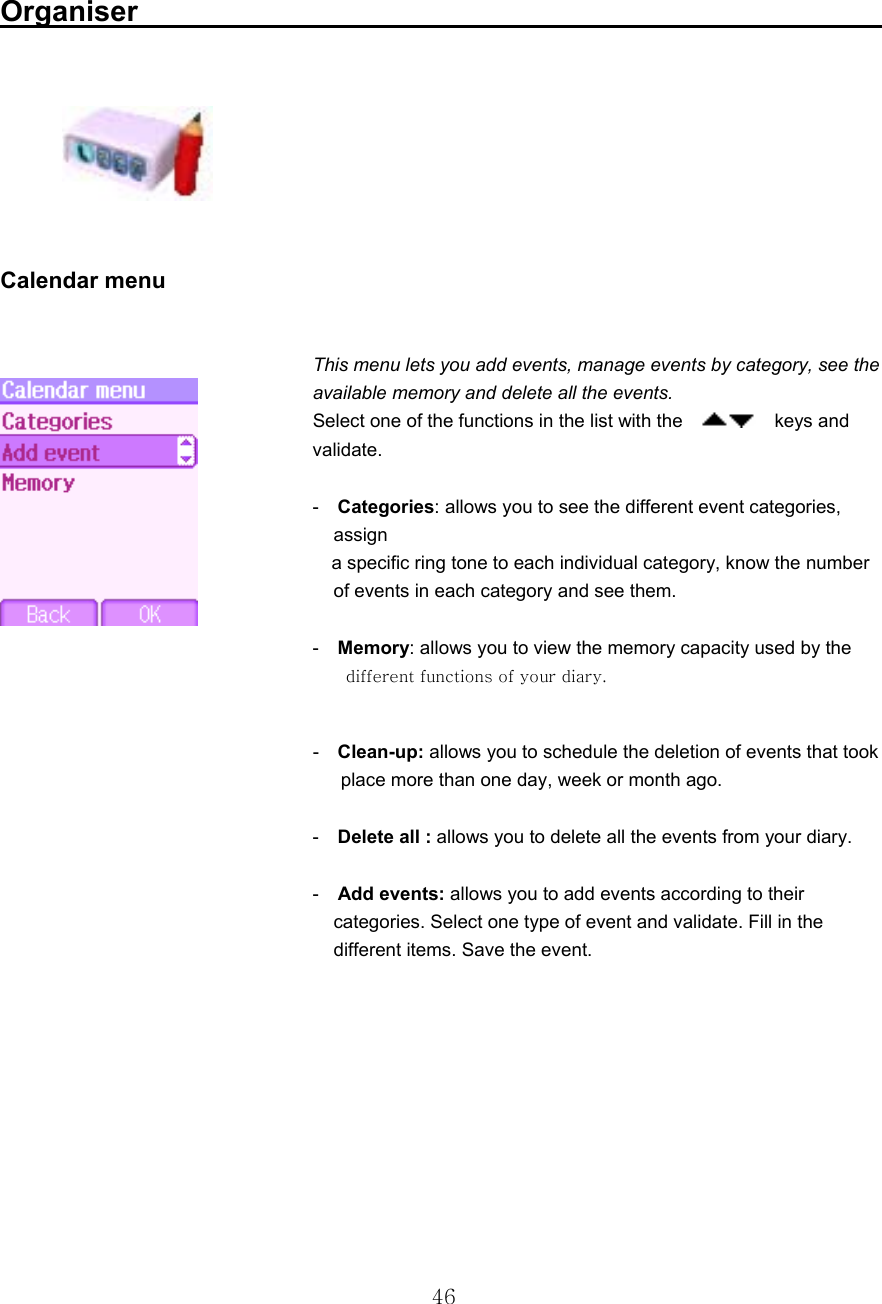
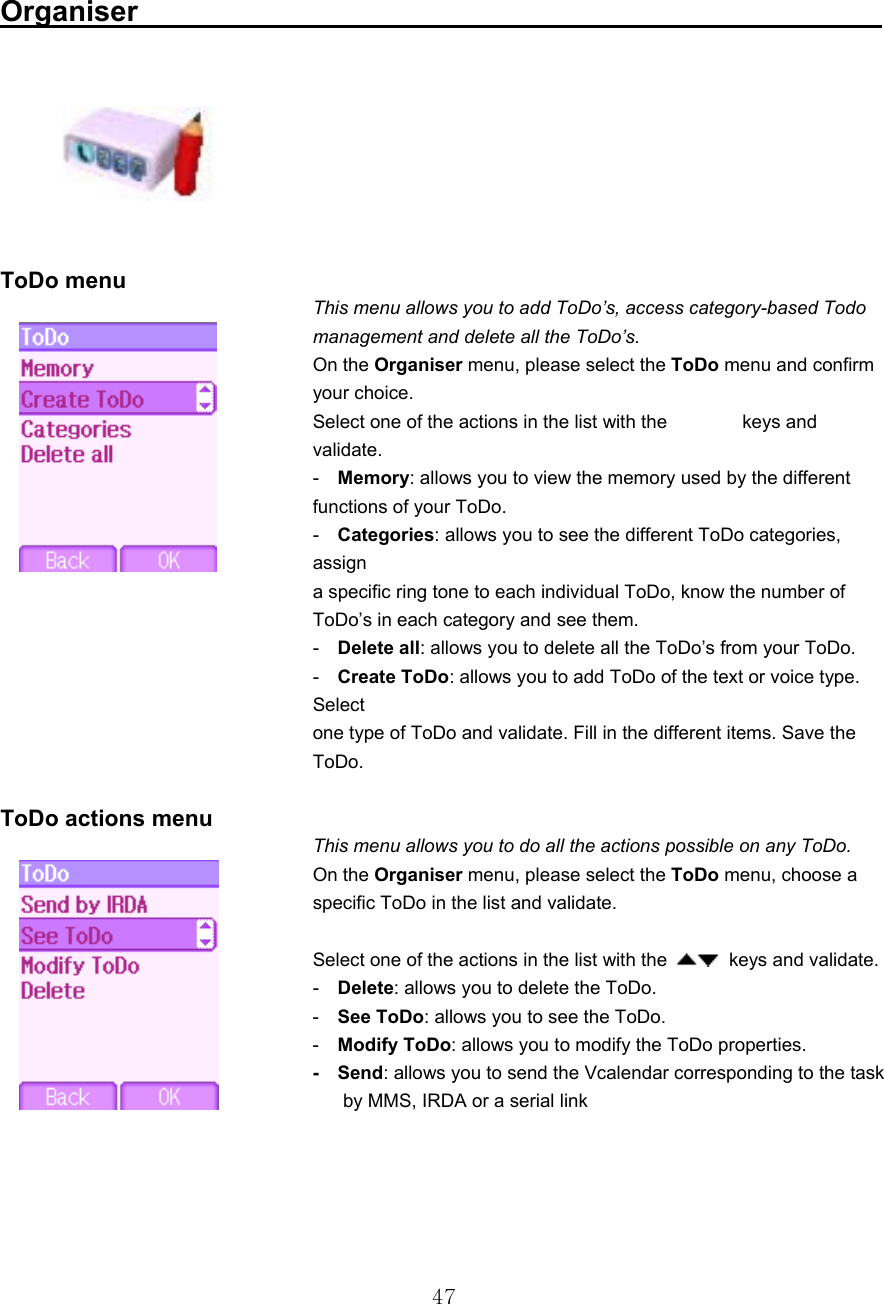
Netron Tech NHC-8000 Single-Band PCS GSM Phone User Manual NHC 8000 user manual draft 02

Netron Tech. CO., LTD. Single-Band PCS GSM Phone NHC 8000 user manual draft 02

Users Manual

 1
 2 Menus
 3 Contents                                                      Page 2   Page 8   Page 9     Page 10   Page 11   Page 12       Page 14         Page15           MENUS   YOUR PHONE PACKAGE - ACCESSORIES   DESCRIPTION Programmable keys and Shortcut keys Strap attachment   NAVIGATION PRINCIPLES   INITIAL SCREEN   ACTIVATING YOUR PHONE Information on the SIM card Installing the SIM card and the battery   USING YOUR PHONE Don't obstruct the antenna with your fingers Increase the efficiency of your phone Charging the battery   PHONEBOOK Using the phonebook Contacts menu Options from a contact saved Sending a vCard Receiving a vCard
 4 Contents                                                      Page 22                     Page 33       Page 35                 Page 39         MESSAGES Compose SMS Compose MMS Receiving messages Inbox Drafts Sending options Outbox Memory Local information   CAMERA   Take and send a photo   MULTIMEDIA   My Photos Display a photo Edit a photo My Pictures My Sounds Memory   WAP   The WAP Menu Configuring WAP parameters WAP Logging on Downloading sounds and images WAP Logging off GPRS
 5 Contents                                                       Page 44       Page 45                         Page 53             GAMES Built-in games Downloaded games   ORGANISER Diary Calendar menu ToDo menu ToDo actions menu Sending a vCal Receiving a vCal Synchronization with a phone or a PC Calculator Converter Alarm Timer   SETTINGS Sounds Volume and ring tone Vibrate Silent mode Beeps Recorder Look’n feel Wallpapers Screensaver
 6 Contents                                                                          Camera Timer Click sound Format    Languages   Calls Calls forwarded View last calls Counters Display number Call waiting Automatic redial Answer phone ALS   Security Keypad locking PIN number PIN number 2 Phone code Confidentiality Operator Call barring Fixed dialling Cost   Networks   Others Car kit Data
 7 Contents                                                                      Page 71   Page 72   Page 76   Page 79   Page 84             Energy saving Shortcuts Date / Time Control Display Time zone Summer time     SERVICES   TECHNICAL FEATURES   WARRANTY   TROUBLESHOOTING   INDEX
 8 When you open the box, check that all items are present:  1 – Phone 2 – Charger 3 – Battery 4 – User guide        Accessories You can also find (as an option) or order the following accessories: Hands-free kit (*) Additional battery Additional charger (*) Cable to connect your phone to a PC USB or serial port (*) CD driver (PC or Mac) to synchronise your phone with your PC Cigar lighter charger (*) Colored covers   (*) These accessories are identical to the ones provided for the earlier 8000 series.
 9 Description                                                   Programmable keys And Shortcut keys      Hold down: Stop Press briefly: In a call context: Reject a call - hang up In menus: Return to initial screen.   Press briefly: Start phone In call context: Call - receiving a call - hands-free mode   Left programmable key: In initial screen: Access to certain functions (shortcuts) In menus: Cancel (or return) as indicated on the screen During call: Reduce volume   Right programmable key: In initial screen: Access to certain functions (shortcuts) In menus: Validate, choose as shown on the screen During call: Increase volume Camera key (side key) Previous choice / increase value / up   Next choice / reduce value / down   Up input field / move left   Down input field / move right   Hold down: In initial screen: Silent mode  In call reception mode: Short press stops ring tone In ring tone setting mode: Activate / deactivate ring tone Upper case/Lower case Wap key (Login on the network) Zoom mode (see Messages and WAP menus)
 10 Navigation principles                                                          These basic principles bring a great intuitiveness to your phone. Validate by pressing the     key. Cancel by pressing the     key. The thumbnails at the bottom of the screen refer to the        keys. In the menus, a title bar reminds you of the previous level. The    navigation keys are used to navigate from one menu to another within the same menu structure. The        key is used to go from a menu to a sub-menu. The        key is used to go from a sub-menu to a menu. The first menu level can be identified by a large animated icon in the centre of the screen. The second menu level can be identified by a large static icon in the centre of the screen. The    key (press briefly) is used to go back to the initial screen (current function is abandoned)
 11 Initial screen                                                                   The initial screen contains the following information: 1 - The title bar icons: Battery Calls forwarded Call (establishing the call) Call (hands free) Message (reception of a message, message memory full) FAX DATA Silent mode WAP (@) GPRS         Home zone Signal strength level (5 bars).   2 - Date and time, in digital or analog mode   3 - Network provider   4 - Thumbnail centred on bottom line: the main « Menu » thumbnail shows that the menu can be accessed via the      keys. The following information may also be displayed: « 1 message received »; or « 1 call ». They can be deleted by pressing    key briefly.
 12 Activating your phone                                                                             To use your phone, you need a card called SIM card. It contains personal information that you cannot modify: Secret codes (PIN(s): Personal Identification Numbers), these codes Allow you to protect access to your   SIM card and phone. Phonebook, Messages, How special services work. Your phone is compatible with the SIM 3V cards    Information on the SIM card WARNING   This card must be handled and stored with care in order not to be damaged. If you should lose your SIM card, contact your network provider or your SMC (Services Marketing Company) immediately. Please keep your SIM card out of reach of young children.
 13 Activating your phone                                          The SIM card is inserted under the phone's battery.   Ensure that the phone is switched off and the charger disconnected. Turn the phone back and push lock button upwards. Take out battery if already installed. Slide the SIM card, with cut corner as shown on the phone,   into the card holder with fold face down. Place the battery by positioning first the top of it, as shown   on the battery. Replace the battery .                                                Installing the SIM card and the battery
 14 Using your phone                                               Your phone is powered by a rechargeable battery. A new battery must be charged for 2 hours at least before being used for the first time. It reaches its optimum capacity after a few cycles of use. When your battery has been discharged, the phone displays the state (empty battery icon flashes). In this case recharge your battery for at least 15 minutes before making any calls in order not to be cut off in the middle of a call.     To recharge the battery: Connect the charger to a socket. Plug the end of the cable into the bottom connector of the phone.   The phone is then charging up. The battery icon is scrolling up and down to indicate that it is charging. When the battery is fully charged, the charging stops on its own. Disconnect the cable. When charging, the battery may warm up, this phenomenon is normal            Charging the battery WARNING   There is danger of explosion if the battery is placed in an incorrectly way or if it is exposed to fire. Do not short circuit it. The battery does not have any part that you can change. Do not try to open the battery casing. Use only the appropriate chargers and batteries as shown in the manufacturer's catalogue. Used batteries must be disposed of in the appropriate places. We advise you to take the battery out if you plan not to use the phone for extended periods.
 15 Phonebook                                                    The phonebook allows you to store numbers that you call regularly. These numbers can be stored in the SIM card or in the phone. Your phone has a vCard phonebook, the following fields can be filled in the phone for each contact: last name, first name, number 1, email, number 2, number 3, call group, company, comment, photo. The fields preceded with a star are mandatory. The storage capacity will depend on the SIM card. Please contact your network provider to get that information.      In the initial screen, press the    key to access the main menus. The first menu proposed is Phonebook. Press the    key corresponding to the validation key to enter the menu. The list of your correspondents appears. By default, the cursor is positioned on the first name in alphabetical order. If you are using your phone and SIM card for the first time, the phonebook list will be empty, only the Contacts menu function will be available.         Using the phonebook
 16 Phonebook                                                                Add contact Select Add contact and press the    key to enter the menu. Choose the location where you wish to enter the contact (SIM card, phone or fixed dialling memory – Fixed dialling is available depending on PIN number 2 options of your SIM card) and enter the contact information and validate after each entry. The information needed to store a contact in the phone is first name, last name, one phone number or an email address.   All other fields are not mandatory. If you do not want to fill them, select Save to save the contact created.   Note: If you want to store a contact in a call group, the ring tone, when the contact is calling, is the one defined by default in the call group. To modify the ring tone, select Phonebook, Contacts menu, Call Groups, select the call group, Options then Modify. Modify the ring tone and validate.  Contacts menu
 17 Phonebook                                                        Call groups 6 default call groups have already been created. You can create others. You have the facility to group your contacts into call groups.   It is possible to allocate characteristics to each group (icon, ring tone, vibrate mode).   Creating new groups: Do same as above to get the Contacts menu and validate. Press    key to position the cursor on Call groups and validate. By default, the cursor is automatically placed on Call groups menu, validate.  Choose one of the options given: Create group or Memory available.  Creating a group By default, the cursor is placed on Create group, validate. Enter the name and validate.   Choose the icon, the ring tone and vibrate mode that you want to allocate to this group (validate after each step).  Memory Select Memory and validate. The screen displays the number of locations available for new groups.
 18 Phonebook                                                           Memory Select Memory and validate. SIM or Telephone and validate.  The screen displays the locations used on the SIM Card and in the phone itself. The screen displays the amount of memory used. The memory capacity is shared between the phonebook and the photo, pictures, organiser, etc. features. If you lack memory, check if you can free some space from another function.  My numbers  You can create the entries corresponding to your own numbers in order to consult them when necessary. Select My numbers and validate. Enter the different details and validate.
 19 Phonebook                                                              See contact Select a contact from the list using the    keys. Then press the   key. By directly pressing one character, the phone will display the first contact saved in the phonebook, starting with it. The first menu proposed is See contact. Validate. Details of the contact appears (name, phone number, call group, and some other details). Further screens display the other details of the contact: Press the      key to view the 3 phone numbers the email address, company and comment for this contact. Press the    key from any of these screens to call this contact. Press The    key to go back to the phonebook. The memory number of the contact (for example 21) allows you to call him directly typing from the initial screen this number followed by * (example : 21*). Different icons inform you of the position in the phonebook where the contact is stored:   contact stored in the SIM card   contact stored in the phone   if the Fixed dialling option is activated, only those contacts may be called. See PIN number 2 and Fixed Dialling in Security         Menu for more details about this activation.                Options from a contact saved
 20 Phonebook                                                             Modify contact Select the contact desired and validate. Select Modify contact and validate. Modify what you want and validate then select Save once the modifications completed.   Copy to SIM / Copy to mobile This allows you to copy your phonebook entries from one memory to the other. Only the name, first phone number and the call group will be copied. Select Copy to SIM or Copy to mobile and validate.   Delete Select Delete and validate. Validate deletion of entry.   Call Select Call. Press the    key to start the call. You can also select the party to be called from the phonebook, and press the    key to make the call.
 21 Phonebook                                                            Cards can be sent to another phone supporting vCard. On a contact in the phonebook, please select the Send by option menu item (EMS, MMS or IRDA).   If the vCard is sent successfully, an information message is displayed.  vCards can be sent as an attachment to an EMS or MMS message. See Compose MMS on page 25.     When a vCard is received enclosed to an EMS or MMS message, the message « You have received 1 message » is displayed.   Open the MMS from the inbox. Go to Options by pressing the      key,and select Extract; select the vCard among the list of objects attached to this MMS, and add this contact to the phonebook by pressing the    key. A message is displayed to confirm the action.           Sending a vCard               It is possible to send a vCard from each contact stored in the phonebook. Receiving a vCard
 22 Message                                                              On the Messages menu, please select the Compose menu and validate. Choose the SMS option. The language used is the one selected on the display of the phone (if the language selected is not compatible with the Easy Message T9™, the English language will be automatically selected). When the text has been entered, the   key (options) can also be used to access the functions offered: Save is used to save a draft in memory Send is used to send the message by entering the correspondent's number T9 options (see page 25) Editor mode (see page 24) Send options is used to indicate the message format, the period of validity, or to activate/deactivate a reply Cancel is used to delete all text entered Activate/deactivate zoom is used to modify size of characters Formatting is used to enrich a text              Insert to insert an image or sound into your message (see page 24).      Compose SMS
 23 Message                                                      The Easy Message T9™ mode helps you to easily write your short Messages.      Using T9 Mode                                      Press once the key corresponding to the letter chosen and make the word by continuing to press the keys corresponding to the various letters without paying attention to the display: the word is highlighted.   If you agree on the word proposed on the screen, press the     key to validate it, and go on writing the next word.   However, the same sequence of keys pressed can correspond to several words, existing on the dictionary. If the word that appears is not the word you expected, press the    key indicating    to scroll through the words corresponding to this key sequence.   Once you agree on the word proposed on the screen, press the 0 key to validate it, add a space and go on writing the next word.   If the word you are expected is not proposed, please add characters until you get the message Add the word? Press Yes and validate if the word displayed suits you.
 24 When composing amessage: The navigation kdys assumethe following functions:  -  key: Last word -  key: Next word -  key:    Previous line -  key:    Next line -  key:    Deletes last letter -  key:    Message options -  key(long press): Zoom mode (changes sizeof Characters) -  key(short press):     Access to symbol table Message                                                            In the input screen, the     key is used to access other input options.     Input modes                                               Editor mode: The ABC mode is used to write words that do not exist in the dictionary. To get a particular character, please press the corresponding key several times: the characters will scroll down on your screen. Mode 123 is used to add numbers. Insert mode is used to add symbols, animations, call group icons and tunes: the SMS then becomes an EMS. Images and sounds can be of two types: pre-defined or customized. Pre-defined images and sounds are smaller, especially suited to exchanging messages.   Upper case A short press of    the   key will display the next letter in upper case. Two short presses on the key allow you to switch to upper case editing mode for the whole message.   Punctuation characters Punctuation characters are obtained thanks to key 1 (except in 123 mode), or with the help of Insert mode (fast access via the key).   Accented characters Accented characters are generated automatically in T9 mode. In ABC mode accented characters are available by pressing the key supporting the non-accented character in succession.
 25 Message                                                          On the Messages menu, please choose the Compose menu and validate. Select the MMS option.    The functions offered are: The functions offered are: Subject: please write the subject of your MMS. To: this option allows you to select the receiver. Cc: this option allows you to select the receiver in copy. Priority: to give a priority level to the message. Delivery report: to choose to receive a delivery report. Body: to enter text and multimedia objects to the message. When the text has been entered in the body screen, the   key  (options) can also be used to access the functions offered: Slide to compose a slideshow of the multimedia objects. Send Send, Send and receive all, send later. Insert to insert multimedia objects such as images, animations and sounds into your message. Editor Mode to edit and format the text. T9 options (see page 23). Preview to see a presentation of the multimedia objects.   Warning: some message sendings may fail if the message contents is too big.     Compose MMS
 26 Message                                                           Saving your message You can save your message as a draft by selecting « Save » from the options, when editing the Subject or the Body. You will be able to edit it later from the Draft menu.   Sending MMS messages   Once the MMS are sent, you have the option to save them in your Outbox. It is recommended not saving them automatically: too many messages saved will quickly fill up the available memory and no further messages will be received. Note: It is possible that the voice message format (.amr) is not supported by some PC. See your PC provider. Receiving MMS messages Three options are offered to retrieve your MMS: automatic, semiautomatic and manual options. The « automatic retrieval » is automatically programmed in the phone. If you are using the network of another network provider, you will get a message informing you that an MMS has been received. The « semi-automatic retrieval » gives you different options to retrieve the message. If you only want to read it once using your own network, please select  « Manual Retrieval ».     Compose MMS
 27 Message                                                           When you receive a message, the phone will play the ring tone that you have selected, and the message icon        will come on the screen of your phone.   If you do not read the messages, this icon remains displayed on the screen. When it flashes, the memory is full.   Receiving icons, backgrounds or tunes can take several seconds. An icon is blinking when the download of your message is in progress.   Note that you have three different possibilities for receiving MMS: automatically, semi-automatically or manually; if « manual mode » is activated, then you will receive only a notification in your Inbox, meaning that a MMS is available on the MMS Server; select this notification, and read it when you want to retrieve the MMS from the server. For more details about automatic and retrieval modes, see « Sending Options » on page 29.   Please contact your network provider to get more information on icons, backgrounds or tunes downloading.         Receiving MMS
 28 Message                                                      Received messages are stored in the SIM card or in the phone until you choose to delete them.      On the Messages menu, please choose the Inbox menu and Select.   Each message shows the presence of any attachments, the time and date the message was received and its size. Icons are used to describe the type of message     Messages are listed in chronological order, the latest one being displayed first.   The quantity of Not Read and Not Retrieved messages is shown. Not Retrieved and Not Read messages are shown in bold.   Select a message and press the    key. Choose one of the options given.   Enclosures (pictures or sounds), which you receive, can be saved in order to be used later on (stored…).   You can consult them in the corresponding menus (WAP bookmarks in WAP, tune in Sounds, backgrounds in Look’n Feel, and icons in Call groups).     Inbox
 29 Message                                                          On the Messages menu, please choose the Drafts menu and Select.   Select a message and press the    key. If you do not delete this message, it will remain as a draft and can be re-used even if you have already sent it.   Choose one of the options given: Delete all, Visualise, Modify, Details, Delete.    On the Messages menu, please choose Options and Select. Choose one of the options given: SMS or MMS.   The sending options which are proposed are: message centre number, store sent message, reply given, period of validity (during that period, the network provider will try to send the message), message format.        Drafts                       When you store a composed message, it is stored among the drafts. Sending options               Several sending options are offered
 30 Message                                                          The proposed options are: - MMS server: to select another MMS provider, or set the         parameters of a new MMS provider. - Store message sent: (it is highly recommended that you keep this       function deactivated, in order to avoid a full memory), - Retrieval mode: if you are in a poor coverage area, it may be more   convenient to choose the manual retrieval mode which gives you                       the retrieve later option. - Priority: selection of a priority to send a message. - Delivery report: request of a delivery report when sending a   message. - Send delivery report: sending a delivery report when receiving a    message. - MMS reject: if you want to deactivate the reception of any MMS in    your phone.
 31 Message                                                           Too many messages saved will quickly fill up the available memory and no further messages will be received.   On the Messages menu, please choose the Outbox menu and Select.  For each message, its characteristics (shown with an icon) and the time (or date) of sending are displayed on the screen. Select a message and press the   key. Choose one of the options given: Delete sent, Read, Modify, Forward, Delete, Delete all.   On the Messages menu, please select the Memory option and Select. Choose one of the options given: SMS or MMS. The SMS screen displays the memory available either on the SIM card or on the phone. The MMS screen displays how much memory is used in Kbytes          Outbox                        The Outbox is used to store all your sent and waiting messages. Memory                         You may know the memory available for saving messages..
 32 Message                                                           You can choose whether you want to receive this information or not (please contact your network provider). On the Messages menu, please select the Local info. menu and Select.              Local information
 33 Camera                                                       This menu allows you to take photos and use them for different purposes. For instance, you can send them to another phone or an Internet address, store them, use them as wallpapers or screen savers.     Before taking a picture, some features need to be set. See the Settings menu.   Select the Camera menu. The camera is now on. Open the shutter at the back of your phone. Look into your phone display and position your subject. Move your phone to position your photo.   To activate one of the four available zoom levels, use the         keys    You can set the luminosity using the   keys:  : to avoid backlighting,    : outdoor,     : low luminosity.   Press Take, the photo is taken and stays on the phone display.   Warning: if you press the  key, you will go back to the previous screen and lose the photo you have just taken.   Briefly press the    key to save your photo. You may have to choose the photo format, depending on your settings.   If there is not enough memory to save the photo, a warning message appears, prompting you to confirm whether you want to go on. Once taken, the photo appears on the phone display. The name is made up with a number. Note: using the camera during a call may disturb the call quality.   Take and send a photo
 34 Camera                                                            The Options menu appears, giving you the option to choose between:   - New photo: allows you to take a new photo, - Modify the name: allows you to modify the name of a photo, - Send: allows you to send the photo by MMS (see the Message    menu).   Select one of the options with the    keys and validate.
 35 Multimedia                                                        This menu gives you easy access to your favourite photos, pictures and sounds      Display a photo On the Multimedia menu, please select the My Photos menu and Select.   The pictures stored are displayed on the screen. Please use the   keys to select one of them. Once you have selected a photo, press the      key to validate the Options menu.   Select one of the options in the list with the   keys and validate. -  Use as: allows you to use the photo as a wallpaper or screen           saver, -  Delete: allows you to delete a photo, -  Delete all: allows you to delete all photos, -  Modify the name: allows you to modify the name of a photo, -  Send by: allows you to send the photo by MMS or IRDA (see the  Messages menu), -  Editor: allows you to retouch the photo.              My Photos                  This menu gives you access to your photos.
 36 Multimedia                                                              Edit a photo On the Multimedia menu, please select the My Photos menu and Select. Select a photo and the Edit option, the Photo editor menu appears. Select one of the edit functions with the    keys and validate: -  Sepia: allows you to change colors into sepia, -  Zoom: allows you to magnify certain parts of your photo, -  Adjustment: allows you to improve contrast, -  Emboss: allows you to modify a photo with an embossed grey tint, -  Negative: allows you to change a photo into negative, -  Grey Scale: allows you to change color into black and white, -  Add mark: allows you to add special characters or drawings to   your photo, -  Add frame: allows you to surround your photo with a frame, -  Contrast: allows you to increase or decrease the contrast of your    photo, -  Sharpen: allows you to sharpen a photo, -  Blur: allows you to add blur to a photo.
 37 Multimedia                                                               On the Multimedia menu, please select the My Pictures menu and Select.  The pictures stored are displayed on the screen. Please, use the   keys to select one of them. Once you have selected a picture, press the    key to validate the Options menu .  Select one of the options in the list with the     keys and validate. -  Use as: allows you to use the picture as a wallpaper or           screensaver,. -  Delete: allows you to delete a picture, -  Delete all: allows you to delete all pictures, -  Modify the name: allows you to rename a picture,                 My Pictures               This menu gives you access to your pictures.
 38 Multimedia                                                               To access your sounds, use the same procedure as for your pictures (see the My Pictures menu).             On the Multimedia menu, please select the Memory menu and Select.  Use the    keys to select the different features using memory. You can see the memory capacity used by each individual feature.           My Sounds                This menu gives you access to your sounds. Memory             This menu indicates the memory size used by the different features of your phone.
 39 WAP                                                      WAP (Wireless Application Protocol): a protocol that translates the Internet language into WML language that can be read by a phone. The WAP function allows you to log onto certain Internet sites. You can log onto sites that allow you to download tunes, icons or animated screensavers to your phone.      The WAP navigator is under   Licence:  The WAP navigator is the exclusive   Property of Openwave. For this reason, it is forbidden to Modify, translate, disassemble or Even decompile all or part of the Software that makes up the navigator.               The Services menu, a dropdown menu, can be accessed at all times when navigating through WAP pages.           Select the top left icon using the  key. Consult the Services Menu using the   key; these Services Menus can also be consulted from any WAP page, using the green key; these Services menus contain all the following sub menus;  Welcome: logs onto the home page. (carries the name of your access provider) Bookmarks: is used to save in a phonebook the names and addresses of Internet sites in order to make the access easy. You can receive bookmarks from messages and add them to this list (see chapter on SMS). You can also send messages by SMS: select a bookmark, press the   key (Options), then select Send by message. Go to URL: this menu allows you to input an Internet address directly. Inbox: this menu allows you to check the messages sent by the Internet site. Save items: is used to save a WAP site items. Reload: refreshes the current page. Reset cache: clears the stored information on previous connections.The WAP Menu You can activate themagnifying glass to increasethe size of the characters byholding down the   key.
 40 WAP                                                      Advanced…: choose one of the following advanced settings - Settings - Show URL - Disconnect - Circuit prompt (if user wants to confirm each logon) - Security (is used to access information on making WAP      connections secure). About…: information on the browser. Exit: returns to the phone's home page  Select the Advanced… menu, then the Settings menu. Choose from the proposed sub-menus: Connection settings is used to select or modify your access provider's logon parameters or configure the parameters of other access providers. The active access service is preceded with a star.   Configuration of WAP and GPRS parameters:   All information to be entered in the parameters are provided by your operator or access provider.   - Choose the access service, then press Options. - Enter the title and validate. - Enter Internet address of home page and validate. - Enter parameters of preferred connections: GSM if not GPRS (by default): the logon to WAP services uses the GPRS as a priority. However, in the event of unavailability of the GPRS network, the GSM network is used to establish the link. GPRS: the logon to WAP services uses the GPRS network exclusively. GSM: the logon to WAP services uses the GSM network exclusively.       Configuring WAP parameters
 41 WAP                                                      The GSM parameters to be entered are: - Login - Password - IP address of WAP gateway - Port type (secure or insecure) - Dial-up number - Mode (digital, analog or automatic)   In automatic mode access can be gained to the operator's network by a digital link and an analog link to a different network (in roaming). The GPRS parameters to be entered are:   - Login - Password - IP address of WAP gateway - Port type (secure or insecure) - APN: if no APN has been defined, press the   key (Options) then the APN menu. Select or add an APN.   Once all the settings have been entered, you can activate the chosen access provider. Select him from the list. Validate your choice.   Linger timer is used to choose the time after which the call is automatically disconnected if you have forgotten to log off from a service.
 42 WAP                                                             The connection to a WAP service on the GPRS network is not cut if an incoming call is received. You can answer the call.      Using the Welcome menu, you can log onto your access provider's WAP site by pressing the  key. If you are logging onto the GSM network, the    @ symbol flashes, the metering of the cost of the call starts as soon as it stops flashing.  Some WAP sites allow you to download tunes, icons or animated screensavers. Once downloaded, they are stored in your phone's memory. You can then save them in your phone (same operation as used for downloading using messages).     To log off, press the    key. The logoff happens automatically after a few seconds of inactivity if you forget to log off. This period is defined by the linger time setting.         WAP Logging on Downloading sounds and images WAP Logging off
 43 WAP                                                                A flashing icon indicates that the phone is logging onto a GPRS network. A non-flashing icon indicates that the GPRS network is available; if the icon is dark, it indicates that the phone is logged onto the GPRS network: see page 43 for the attachment options. This icon is not displayed if the GPRS network is not available or if the SIM card inserted in your phone does not include the GPRS service. It may also disappear when accessing WAP services if the connection uses the GSM network instead of the GPRS network.                        GPRS
 44 Games                                                         Your phone is supplied with at least two games: MegaBox Conquest and Taquin. You can also download new games depending on your phone and your subscription.   On the Games menu, please select the Downloaded games menu and validate; this menu can also be accessed from the initial screen by a long press on the 9 key. You can:   - Play the downloaded game already present (Wallbreaker). Use    keys     2, 4, 6, 8 or navigation key to move and 5 to accept or . - Download new games (available from the catalog) - Consult the loyalty points acquired during downloads, news,   instructions,  - Make settings.    On the Games menu, please select the Downloaded games menu and validate; this menu can also be accessed from the initial screen by a long press on the 9 key. You can: - Download new games (available from the catalog) - Consult the loyalty points acquired during downloads, news,   instructions,  - Make settings.    Built-in games                   Wallbreaker Downlaod games              This optional menu has been developed by the company In-Fusio .
 45 Organiser                                                      This menu gives you access to the different possible functions and actions provided by your diary and your Todo, on optio                  On the Organiser menu, please select the Diary menu and validate. Select one of the functions in the list with the      keys and validate.   - See date: allows you to access events at a specific date.   - See today: allows you to access the events for the current day and     the actions possible on any event (see, modify, delete and send).    - See week: allows you to access events on a week-by-week basis.   - See month: allows you to access events on a month-by-month      basis.   - Calendar menu: see below       Diary                    This menu gives you access to your diary and get to a day, week, month or                            specific date. It lets you add events, access the global actions for all the                            events and manage them by event category.
 46 Organiser                                                         Calendar menu  This menu lets you add events, manage events by category, see the available memory and delete all the events. Select one of the functions in the list with the      keys and validate.   -  Categories: allows you to see the different event categories,      assign     a specific ring tone to each individual category, know the number       of events in each category and see them.   -  Memory: allows you to view the memory capacity used by the         different functions of your diary.   -  Clean-up: allows you to schedule the deletion of events that took       place more than one day, week or month ago.   -  Delete all : allows you to delete all the events from your diary.   -  Add events: allows you to add events according to their           categories. Select one type of event and validate. Fill in the   different items. Save the event.
 47 Organiser                                                         ToDo menu This menu allows you to add ToDo’s, access category-based Todo management and delete all the ToDo’s. On the Organiser menu, please select the ToDo menu and confirm your choice. Select one of the actions in the list with the                keys and validate. -  Memory: allows you to view the memory used by the different functions of your ToDo. -  Categories: allows you to see the different ToDo categories, assign a specific ring tone to each individual ToDo, know the number of ToDo’s in each category and see them. -  Delete all: allows you to delete all the ToDo’s from your ToDo. -  Create ToDo: allows you to add ToDo of the text or voice type. Select one type of ToDo and validate. Fill in the different items. Save the ToDo.  ToDo actions menu    This menu allows you to do all the actions possible on any ToDo. On the Organiser menu, please select the ToDo menu, choose a specific ToDo in the list and validate.   Select one of the actions in the list with the   keys and validate. -  Delete: allows you to delete the ToDo. -  See ToDo: allows you to see the ToDo. -  Modify ToDo: allows you to modify the ToDo properties. -  Send: allows you to send the Vcalendar corresponding to the task           by MMS, IRDA or a serial link
 48 Organiser                                                           You can send vCals to another phone using MMS or IRDA depending on your phone and the recipient’s phone. On the See today list, please select an event and in the Todo event actions menu list, select Send. Then choose between EMS, MMS, IRDA or serial link for the type of sending and confirm. For EMS and MMS deliveries, you should in addition select your contact information (phone number or Email address) before confirming. On the task list (Todo main menu), please select a task and in the Todo task actions menu list select Send. Then choose between MMS or IRDA for the type of sending and confirm. When sending MMS, please select your contact information (phone number or Email address) before confirming. If you receive a call while you are sending a vCal, the call will have precedence.           Sending a vCal                                    You can send a vCal from each diary event and each Todo task. Yet, this                                         function is available only on certain models of phone.
 49 Organiser                                                          The vCal receipt mode differs with the type of delivery: - By EMS or MMS, you receive a message you have to open to   extract the vCal. You cannot add the event to your diary until you       have saved it. - By IRDA or serial link, you receive a message and when the     download is completed, a message appears on your phone   display, asking you what you want to do with the vCal (save it,   delete it…). You can assign a different beep to each diary event or   Todo task. You can also assign a different ring tone to each diary   event category or Todo task category.   If you receive a call during a synchronization the call has precedence. Synchronization will stop and you will have to start it all over again          Receiving a vCal Synchronizaton with   A phone or a PC     You can synchronize your diary with that of another phone or PC, but the two devices must be connected through a serial link or IRDA and equipped with the appropriate software.Two sync types are possible, standard sync and fullsync. Full sync is required for the first synchronization whereas standard sync must be done regularly between the two devices.
 50 Organiser                                                              On the Organiser menu, please select the Calculator menu and Select. You can use the calculator thanks to the following keys:   Up key: Add  Down key: Subtract   Right key: Multiply   Left key: Divide   Right programmable key: Equals    Left programmable key: Delete    key or #: Decimal point.     If no calculations are being run, the   key allows you to use the value in the converter directly.             Calculator                          This menu allows you to use your phone as a calculator
 51 Organiser                                                              On the Organiser menu, please select the Converter menu and Select. Enter a value and press the   key to convert from one currency to another, or the    key to convert back. The   key allows you to use the following options:  Rapid exchange If the Rapid exchange is activated, the converter will work in the initial screen by entering the desired numbers and pressing the         keys to convert.  Exchange rate Enter the exchange rate corresponding to the chosen currency.  Currency Enter the two types of currency to be converted.  Go to calculator This option allows you to use immediately the value converted in the calculator.         Converter                       This menu allows you to convert one currency to another
 52 Organiser                                                     The alarm works even when the phone is switched off    On the Organiser menu, please select the Alarm menu and Select. Activate or Deactivate the alarm and validate. Set the wake-up time by entering the numbers directly or using the  keys and validate. The alarm icon appears on the initial screen            On the Organiser menu, please select the Timer menu and Select. Activate or Deactivate the alarm and validate. Set the duration by entering the numbers directly or using   the keys and validate.           The alarm icon appears on the initial screen         Alarm                                This menu allows you to set and activate the alarm. Timer                                This menu is used to set and activate the timer.
 53 Settings                                                               This menu allows you to set your phone.       Volume and ring tone This menu allows you to allocate a ring tone to each type of event. On the Sounds menu, please select the Ring tones menu and Select.  Select one of the events given: Alarm, Calls, Messages, Local Infos   and Fax and validate. Select the ring tone from the proposed list and validate. Adjust the volume using the   keys and validate. You can deactivate the sound by pressing the   key. Voice Calls: the ring tone selected here will be played only when receiving a call from a contact stored without any call group. Otherwise, the ring tone selected for this call group will be played. This menu allows you to activate the vibrate mode for calls. Vibrate On the Sounds menu, please select the Vibrate menu and Select. Select the vibrate mode from the proposed choices (ring tone and vibrate, vibrate only, vibrate inactive or vibrate plus ring tone) and validate.          Sounds                             This menu allows you to customize the ring tones on your phone and to                                          activate beep and vibrate modes.
 54 Settings                                                     Warning: vibrate mode is not a priority regarding the ring tone selected on the call group. To make vibrate mode apply in general, switch to Silent mode.         Silent mode This menu allows you to switch to Silent mode. On the Sounds menu, please select Silent mode and Select. Activate or deactivate Silent mode and validate. Silent mode can also be accessed via the initial screen by holding down the   key. When the phone is in silent mode, the relevant icon appears on the initial screen. In this mode, the ring tone will not function, except for the alarm clock.   Beeps This menu allows you to activate a beep for each type of event.   On the Sounds menu, please select the Beeps menu and Select.   Select the type of beep you want to allocate from the proposed choices (Key beep, Network beep or Battery beep) and validate. Activate or deactivate the beep and validate.   If you select key beeps, different options are given.
 55 Settings                                                     .             Recorder These menu allows you to record you own melody.   On the Sounds menu, please select the Recorder menu and Record. Record your melody or your voice by means of the microphone then save it. Give it a name and validate. The new melody is saved in the ring tone list.      This menu allows you to choose the skin of your phone, i.e. define its look (text font, colors, default animation, background image…). On the Look’n feel menu, please select Skins. Select the desired skin and validate. Skins are not downloadable but you can download screensavers and boot mode animations without changing those included by default with the skin. This menu allows you to customize your screen by choosing a different Presentation.     Display                           This menu allows you to customize your screen by choosing a different                                         presentation.
 56 Settings                                                     .             Wallpapers This menu allows you to display the background picture you want on your phone. On the Look’n feel menu, please select the Wallpapers menu and Select.   Select the Wallpaper and Visualise. The picture appears in the background of the screen.   Press the    key to validate this choice, or the    key to go back to choice.     Screensaver This menu allows you to display an animation when the phone is in standby mode.  On the Look’n feel menu, please select the Screensavers menu and Select. Select one of the screensavers given and Visualise. The chosen screensaver appears on the screen, validate it. Adjust the screensaver display time (more than 60 seconds) and validate. The screensaver comes on the screen each time the display time that has been selected runs off.
 57 Settings                                                     .              On the Settings menu, please select the Camera menu and Select. Do the settings with the three menus below.           Timer       This menu allows you to set the delay of the timer used when     taking a photo.   Click sound      This menu allows you to select the sound you will hear when     taking a photo Format       This menu allows you to choose the format in which your photo         will be saved. There are several options:     -   either you ystematically set the photo format to one of the        following: High resolution or Mobile format,         -    or you can choose the photo format on a case-by-case basis.      Camera                            This menu allows you to set the camera feature of your phone.
 58 Settings                                                     .              On the Settings menu, please select the Languages menu and Select.  Select your language and validate. If you select Automatic, the language used will be the one relative to your SIM card.       The Calls menu allows you to manage and check all the calls made or received (     outgoing and      incoming).               Languages                 This menu allows you to choose your phone's display language. Calls
 59 Settings                                                     .             Calls forwarded Depending on your subscription, this service allows you to forward incoming calls to a different number or to the voice mailbox.   On the Calls menu, please select the Calls forwarded menu and Select.   Choose the type of forwarding you want from the options available        View last calls  This menu allows you to access the list of last numbers used. On the Calls menu, please select the View last calls menu and Select. For every phone call are displayed on the screen: - its characteristics (shown with an icon), - the time (or date), - its duration. Select a call from the list and validate. Select one of the options given: Call, Store in your phonebook, Send       a message, Delete, Delete all. You can also make the call by pressing the  key
 60 Settings                                                     .      Fast access to the list of calls from the initial screen: press the key.       Counters This menu allows you to consult the duration of the up calls.   It can also be used to check the volume of data exchanged in GPRS.   On the Calls menu, please select the Counters menu and Select.   Select one of the options given       Display number  This menu allows you to modify the status of the display number function.  On the Calls menu, please select the Display number menu and Select.  Select one of the options given: Anonymous mode, My number, Callers number.  Anonymous mode You have the facility to mask your number on the phone of the person you are calling. Preset: network default mode. No: you choose not to activate anonymous mode and then to display your number. Yes: you choose to active anonymous mode and then not to display your number.    access to the list of calls from the initial screen: press the key.
 61 Settings                                                     .      During a call, you may be informed that a caller is trying to reach you : you hear a special tone. The caller's identity is displayed on the screen(name or number).       Call waiting  (Operator-dependent service)   On the Calls menu, please select the Call waiting menu and Select.   You can activate, deactivate, or consult the status of the call waiting service in order to check if it is active or not.   During a call, if a second caller tries to contact you, the screen displays the call warning.    Automatic redial  This menu allows you to call back a caller you have not managed to reach.    On the Calls menu, please select the Automatic redial menu and Select.    You can set the redial function to inactive, on request or systematic.    If you choose On demand, your phone will offer to redial your caller automatically if his number is busy.
 62 Settings                                                     .             PIN number  This menu allows you to activate and modify your phone's PIN.   On the Security menu, please select the PIN number menu and Select.   To modify the PIN, select Modify and Select. Enter old PIN and validate. E0nter new PIN twice and validate.        PIN number 2  You have a second PIN number to allow you to access certain functions*.   * These functions may or may not be available depending on your SIM card.   Proceed as above in order to activate, deactivate or modify PIN number 2 of your phone.     Security                        This menu allows you to configure your phone's security settings.
 63 Settings                                                                    Phone code  The Phone code menu allows you to activate the phone code so that it is requested and checked whenever the phone is switched on if a different SIM card is used. This code is automatically linked to the SIM card installed when the phone is activated, for example to protect the phone if stolen.    To activate or deactivate the phone code, select the Phone code menu and validate. Enter 0000 (the factory code, by default) and validate. Select Activate or Deactivate and validate.   To modify the phone code, select Modify and validate. Enter old phone code and validate. Enter new phone code and validate. Enter phone code again to confirm it and validate.
 64 Settings                                                     The Confidentiality function is used to delete numbers stored in View last calls and the SMS stored in the memory when a new SIM card is inserted into the phone..               Confidentiality This menu allows the activation of automatic deletion, after power off/on, for messages and/or calls stored in the phone.   On the Security menu, please select the Confidentiality menu and Select. Select Activate or Deactivate and validate.        Operator  This menu allows you to modify the call barring.   On the Security menu, please select the Operator menu and Select.   Access to this service depends on your type of subscription.        Security                        This menu allows you to configure your phone's security settings.
 65 Settings                                                     Call barring can be applied to ALL calls (incoming and outgoing), to all incoming calls when you are away from your home country (if roaming available).         Call barring This menu allows you to block the sending or reception of certain calls.Before you can use this service, a password will be provided by your operator when you take out your subscription. On the Security menu, please select the Call barring menu and Select. Select Activate or Deactivate and validate. Access to this service depends on your subscription type.          Fixed dialling  This menu allows you to restrict the outgoing calls. The availability of this menu depends on your SIM. On the Security menu, please select the Fixed dialling menu and Select. Enter PIN number 2 and validate. Select Activate or Deactivate and validate. Proceed as for any other phonebook. When activating this function, only the numbers stored in the phonebook can be called. This phonebook is linked to the SIM card, and its size depends on the card's capacity.
 66 Settings                                                                 Cost  This menu allows you to control the cost of your calls (*). On the Security menu, please select the Cost menu and validate. The Cost menu (*) lets you check the cost of the last call you made and of all the calls you made since you last deleted them. The Delete costs menu (*) lets you delete the cost of your last call and reset the cost counter after entering your PIN 2 code. (*) WARNING Depending on how the networks and associated subscription cards are configured, some functions    On the Settings menu, please select the Networks menu and Select. Choose Preferred to view all the pre-registered networks. Choose Selection to activate (automatically or manually) one of the networks accessible in the area in which your are located. Choose Network type to select your network: GSM-DCS or PCS (depending on model). Choose GPRS to select the way you want to be attached on the GPRS network: always, or only when needed (when launching a data connection).       Networks                         This menu allows you to configure network preferences.
 67 Settings                                                                 Car kit This menu allows you to access the various accessories offered by your phone: car kit and data parameters. This menu allows you to configure your phone with a car kit. On the Others menu, please select the Car kit menu and Select. Choose one of the options given: Automatic response, Switch off, Kit volume.        Data  This menu is used to configure the data exchange with another device (Personal Digital Assistant, PC, etc.). On the Others menu, please select the Data parameters menu and validate. With the IRDA menu, you can activate the infrared connection from your phone; this allows you, for example, to connect your handset to your computer, in order to download newpictures or ring-tones, using the « my Picture and sound » software (available on http://www.sagem.com). Use the Speed menu to configure the data transfer speed if you are using AT commands. You can also connect it to your computer in order to receive data or fax through GSM or GPRS network: configure the connection parameters of your computer using the Wellphone CD supplied as an accessory.   Others
 68 Settings                                                                 Energy saving This function is used to deactivate the screen backlight and to select th economic mode. On the Others menu, please select the Energy saving menu and Select.  Backlight: choose one of the options given: Deactivate, Full backlight, Screen only, and validate. By deactivating the screen backlight, you increase the battery life of your phone. Warning: display legibility is reduced. Economic mode: choose one of the options given: Partial, Deactivate, Complete, and validate. When choosing the economic mode, the screen goes out(standby mode) To quit economic mode, press the   key.    This menu allows you to customize the settings of your phone to make it as convenient as possible for you to use. On the Settings menu, please select the Shortcuts menu and Select. Select the key that you wish to modify and validate. Choose the function that you want to allocate to this key and validate         Shortcuts                   This menu allows you to allocate functions to the programmable keys.
 69 Settings                                                                 Set Data/Time This menu allows you to set the date and time of your phone. On the Date / time menu, please select Set Data/Time and validate. Date: set the date by entering it directly in digital form or by using the keys. Use the   (or    ) key to access the next (or previous) entry field.   Once the date is correct, validate it.   Time: same procedure as for setting the date.   Display   This menu allows you to select the date and time display type.   On the Date / time menu, please select Display and validate.   In the list that appears, select the desired display type between:   - Analog, - Digital, - None,   by using the     keys and validate.     Data / Time
 70 Settings                                                                 Time Zone  This menu allows you to change time in relation to the GMT time. On the Date / time menu, please select Time zone and validate. Choose the time of the country desired by calculating the time from the GMT time.             Daylight savings  This menu allows you to set your phone to the summer/winter time.   On the Date / time menu, please select 1 h, 2 h Summer time or Winter time depending on the season, and validate.
 71 Service                                                      This menu allows you to access numerous services offered by your operator. The list of these services will appear in the menu depending on your subscription      On the Services menu, please choose from the list offered. This list depends on your SIM.                            Services                          This menu allows you to access your operator's basic services.
 72 Technical features                                              Use of your phone is subject to safety measures designed to protect users and their environment.   Electrical safety: Only use the chargers listed in the manufacturer’s catalogue. Using any other charger  may be dangerous; it would also invalidate your warranty. Line voltage must be exactly the one indicated on the charger’s serial plate.   Aircraft safety: When travelling by plane, you will need to switch your phone off when so instructed by the cabin crew or the warning signs. Using a mobile phone may be dangerous to the operation of the aircraft and may disrupt the phone network.   Explosive materials: Please comply with warning signs at petrol station asking you to switch your phone off. You will need to comply with radio equipment usage restrictions in places such as chemical plants, fuel depots and at any location where blasting operations are under way.   Electronic medical equipment: Your phone is a radio transmitter which may interfere with electronic medical equipment such as hearing aids, pacemakers, etc. Your doctor or the manufacturers of such equipment will be able to give you any advice you may need in this area. Always make sure that your phone is switched off in hospitals when so instructed by warning signs or by medical staff.   Road safety: Except in emergencies, do not use your phone when driving unless you have a hands-free kit enabling you to manoeuvre freely. In order to give your full attention to driving, stop and park safely before making a call. You must comply with any current legislation.   This phone complies with European requirements governing exposure to radio waves. Your phone is a transmitter/receiver. It has been designed and manufactured to comply with radiofrequency energy exposure limits recommended by the Council of the European Union and the ICNIRP for the entire population. These limits were established by independent scientific agencies on the basis of in-depth and regular evaluations of scientific studies. The limits include a large safety margin that is intended to guarantee the safety of all, irrespective of age or state of health.   The exposure standard for phones uses a unit of measure called the SAR, or Specific Absorption Ratio. The SAR limit
 73 recommended by the Council of the European Union and the ICNIRP is 2 W/kg (*). Tests were conducted on a standardised usage position basis, with the phone transmitting at its maximum level certified in all its frequency bands. Although the standardised measurement is done at maximum power, the real SAR of the phone in use is generally very far below the maximum value. The phone was designed to operate at the power level strictly neces-sary to ensure communication with the network. In general, the closer you are to a base station, the lower the power at which the phone will transmit.   Validation of conformity with European directive 1999/5 (directive R&TTE) is a pre-requisite for introducing any model of phone onto the market. Protection of health and the safety of the public and the user are a vital requirement of this directive. This model's maximum SAR value measured in the conformity test is 0.65 W/kg. Although differences may exist from one phone tothe other and depending on position, all comply with European regulations.   (*) The SAR limit for phones used by the general public is 2 watts/kilogram (2 W/kg) on average for 10 g of tissue. This value includes a large safety margin to increase protection and to take account of the variations in measurements. The SAR information may vary in different parts of the world, depending on declared national requirements and the frequency bands used by the network.
   Safety Information  1 . SAFETY INFORMATION FOR FIXED WIRELESS TERMINALS  .POTE NTIALLY EXPLOSIVE ATMOSPHERES Turn your phone OFF when in any area with a potentially explosive atmosphere and obey all signs and instructions. Sparks in such areas could cauls e an explosion or fire resulting in bodily injury or even death. . INTERFERENCE TO MEDICAL DIVICES Certain electronic equipment may be shielded against RF signal from you wireless phone. (pacemakers, Hearing Aids, and so on) Turn your phone OFF in health care facilities when any regulations posted in these areas instruct you to do so. RF signals may affect improperly installed or inadequately shielded electronic system in motor vehicles.  .EXPOSURE TO RF ENERGY Use only the supplied or an approved replacement antenna. Do not touch the antenna unnecessarily when the phone is in use. Do not move the antenna close to, or touching any exposed part of the body when making a call.
    FCC Compliance Information  This device complies with Part 15 of FCC Rules. Operation is subject to the following two conditions:  (1) This device may not cause harmful interference, and (2) This device must accept any interference received.        Including interference that may cause undesired operation.     Information to User  This equipment has been tested and found to comply with the limits for a Class B digital device, pursuant to part 15 of the FCC Rules. These limits are designed to provide reasonable protection against harmful interference in a residential installation. This equipment generates, uses and can radiate radio frequency energy and, if not installed and used in accordance with the instructions, may cause harmful interference to radio communications. However, there is no guarantee that interference will not occur in a particular installation. If this equipment does cause harmful interference to radio or television reception, which can be determined by turning the equipment off and on, the user is encouraged to try to correct the interference by one or more of the following measures:  - Reorient or relocate the receiving antenna. - Increase the separation between the equipment and receiver. - Connect the equipment into an outlet on a circuit different from that to which the receiver is connected. - Consult the dealer or an experienced radio/ tv technician for help.
   SAFETY INFORMATION FOR RF EXPOSURE  Body worm operation This device was tested for typical body-worn operations with the back of the phone kept  25 mm. from the body. To maintain compliance with FCC RF exposure requirements, use only belt-clips, holsters or similar accessories that maintain a 25 mm. separation distance between the user’s body and the back of the phone, including the antenna. The use of belt-clips, holsters and similar accessories should not contain metallic components in its assembly. The use of accessories that do not satisfy these requirements may not comply with FCC RF exposure requirements, and should be avoided.
   SAR INFORMATION  THIS MODEL PHONE MEETS THE GOVERNMENT’S  REQUIREMENTS FOR EXPOSURE TO RADIO WAVES.  Your wireless phone is a radio transmitter and receiver. It is designed and manufactured not to exceed the emission limits for exposure to radiofrequency (RF) energy set by the Federal Communications Commission of the U.S. Government. These limits are part of comprehensive guidelines and establish permitted levels of RF energy for the general population. The guidelines are based on standards that were developed by independent scientific organizations through periodic and thorough evaluation of scientific studies. The standards include a substantial safety margin designed to assure the safety of all persons, regardless of age and health. The exposure standard for wireless mobile phones employs a unit of measurement known as the Specific Absorption Rate, or SAR. The SAR limit set by the FCC is 1.6 W/kg. * Tests for SAR are conducted with the phone transmitting at its highest certified power level in all tested frequency bands. Although the SAR is determined at the highest certified power  level, the actual SAR level of the phone while operating can be well below the maximum value. This is because the phone is designed to operate at multiple power levels so as to use only the power required to reach the network. In general, the closer you are to a wireless base station antenna, the lower the power output. Before a phone model is available for sale to the public, it must be tested and certified to the FCC that it does not exceed the limit established by the government adopted requirement for safe exposure. The tests are performed in positions and locations (e.g., at the ear and worn on the body) as required by the FCC for each model. The highest SAR value for this model phone when tested for use at the ear is 0.9 W/Kg  and when worn on the body , as described in this user guide, is 0. 235 W/Kg. (Body-worn measurements differ among phone models, depending upon available accessories and FCC requirements). While there may be differences between the SAR levels of various phones and at various positions, they all meet the government requirement for safe exposure. The FCC has granted an Equipment Authorization for this model phone with all reported SAR levels evaluated as in compliance with the FCC RF exposure guidelines. SAR information on this model phone is on file with the FCC and can be found under the Display Grant section of http://www.fcc.gov/ oet/fccid after searching on FCC ID : RY3NHC-1000 .   Additional information on Specific Absorption Rates (SAR) can be found on the Cellular Telecommunications Industry Asso-ciation (CTIA) web-site at http://www.wow-com.com. * In the United States and Canada, the SAR limit for mobile phones used by the public is 1.6 watts/kg (W/kg) averaged over one gram of tissue. The standard incorporates a sub-stantial margin of safety to give additional protection for the public and to account for any variations in measurements.
   U.S.A.  U.S.FEDERAL COMMUNICATIONS COMMISSION RADIO FREQUENCY INTERFERENCE STATEMENT  INFORMATION TO THE USER  NOTE : This equipment has been tested and found to comply with the limits for a  Class B                   digital device pursuant to Part 15 of the FCC Rules.  These limits are designed to provide reasonable protection against harmful Interference in a residential installation This equipment generates, uses, and can radiate radio frequency energy and, if Not installed and used in accordance with the instructions, may cause harmful Interference to radio communications. However, there is no guarantee that interference will not occur in a particular Installation. If this equipment does cause harmful interference to radio or television reception, which can be determined by turning the equipment off and on, the user is encouraged to try to correct the interference by one or more of the following measures:  l Reorient or relocate the receiving antenna. l Increase the separation between the equipment and receiver. l Connect the equipment into an outlet of a circuit different from that to which the receiver is connected. l Consult the dealer or an experienced radio/TV technician for assistance.  Changes or modification not expressly approved by the party responsible for Compliance could void the user’s authority to operate the equipment. Connecting of peripherals requires the use of grounded shielded signal cables.

Navigation menu