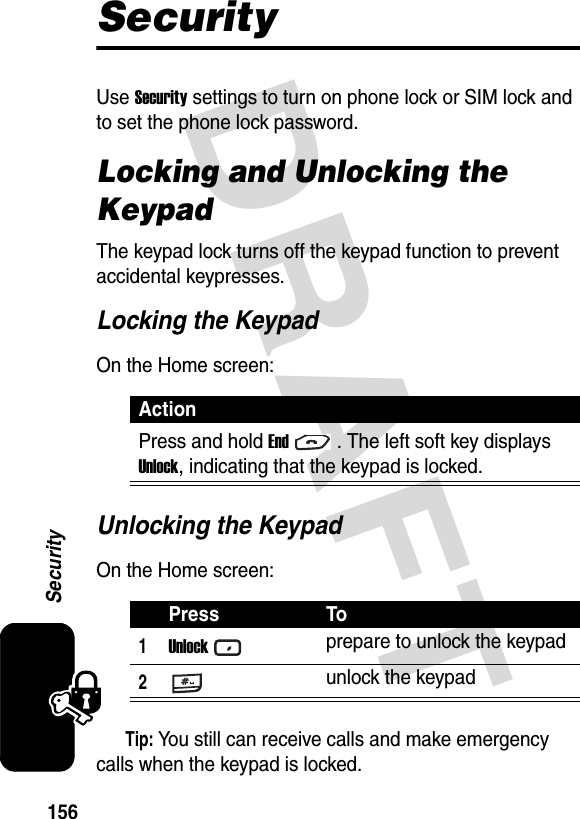
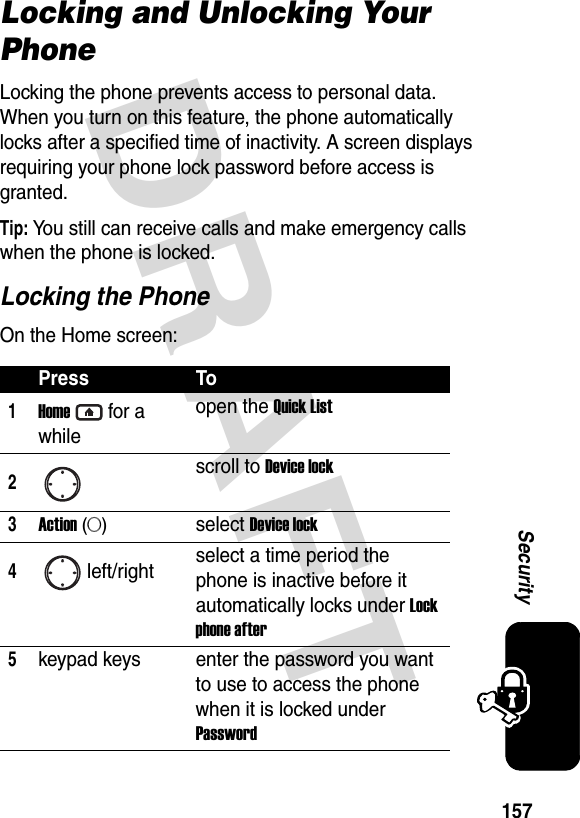
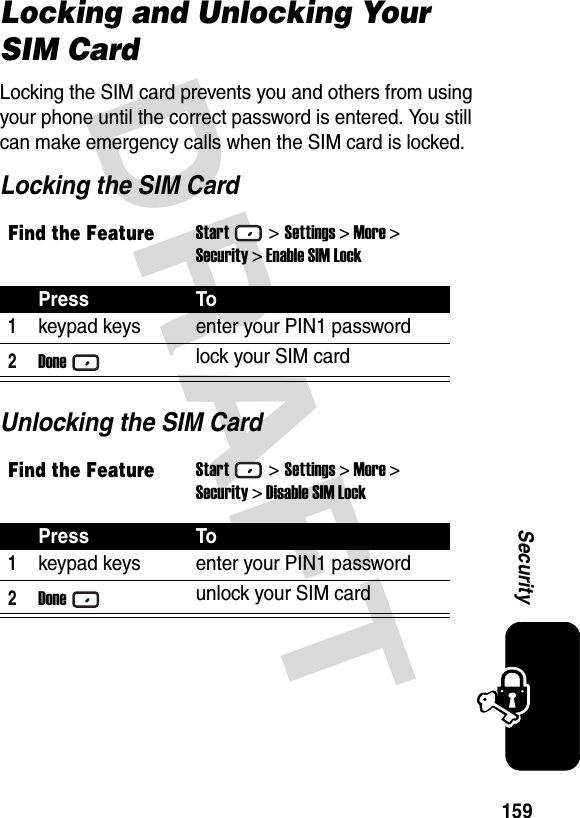
Motorola Mobility T56EV1 Portable Cellular / PCS GSM Transceiver User Manual UG C330 GSM
Motorola Mobility LLC Portable Cellular / PCS GSM Transceiver UG C330 GSM
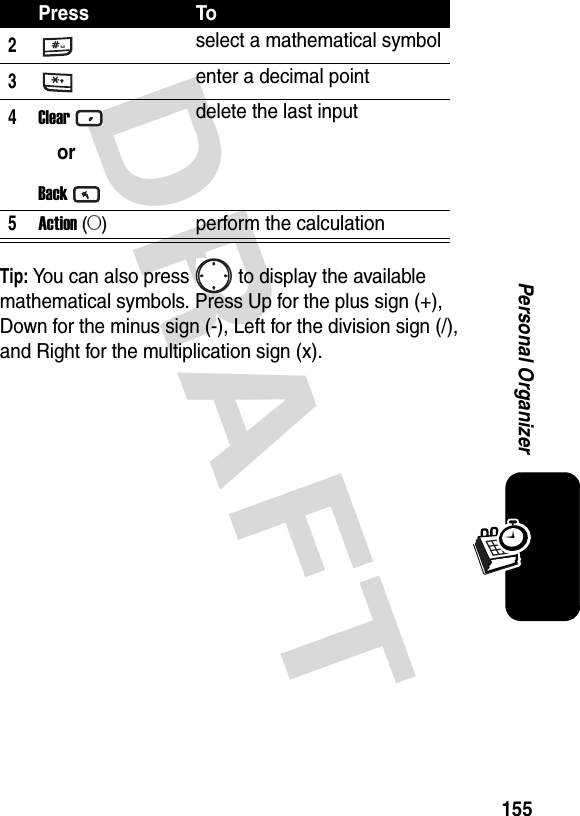
UserManual.wiki
>
Motorola Mobility
>
T56EV1 User Manual
Exhibit 8 Users Manual
Navigation menu
Upload a User Manual
Namespaces
Wiki Guide
HTML
PDF
Info
Views
User Manual
Discussion / Help
Navigation


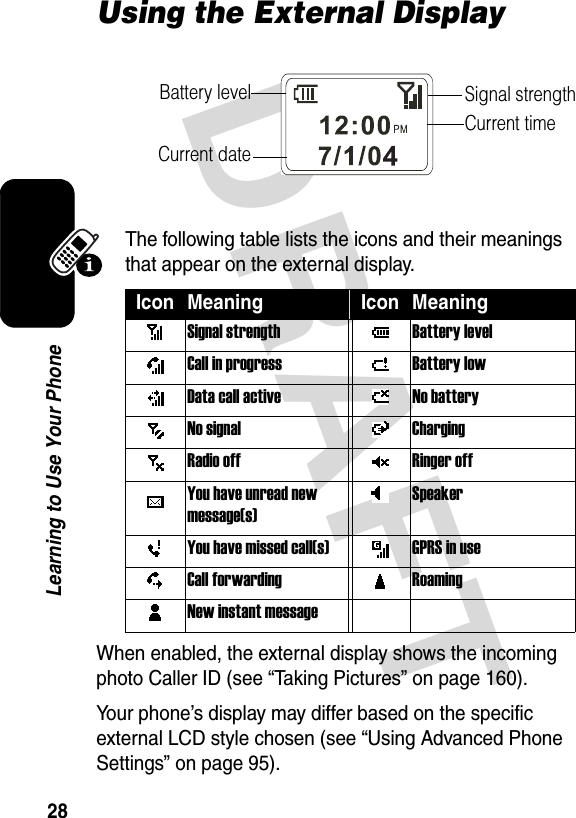


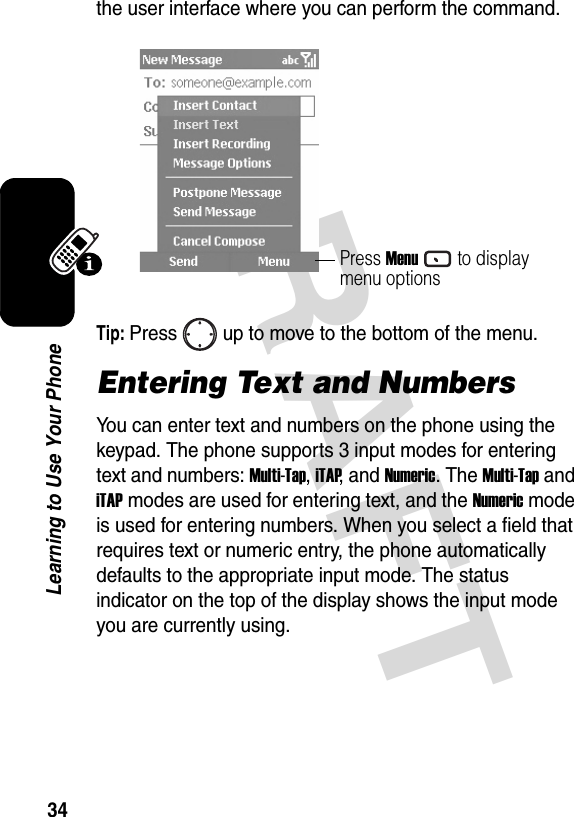


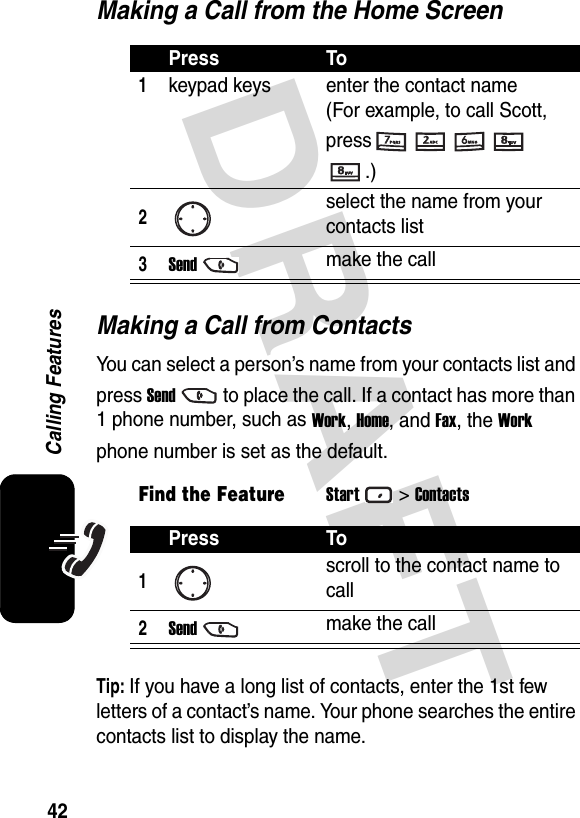
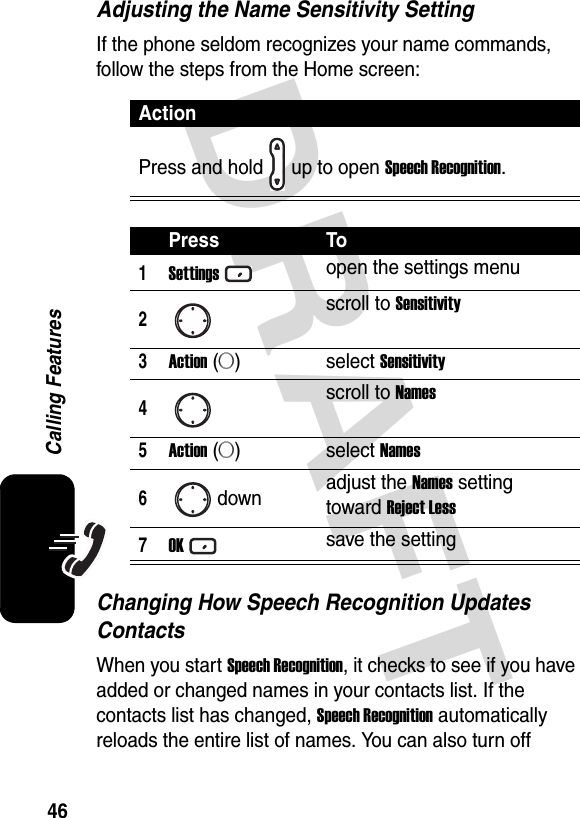
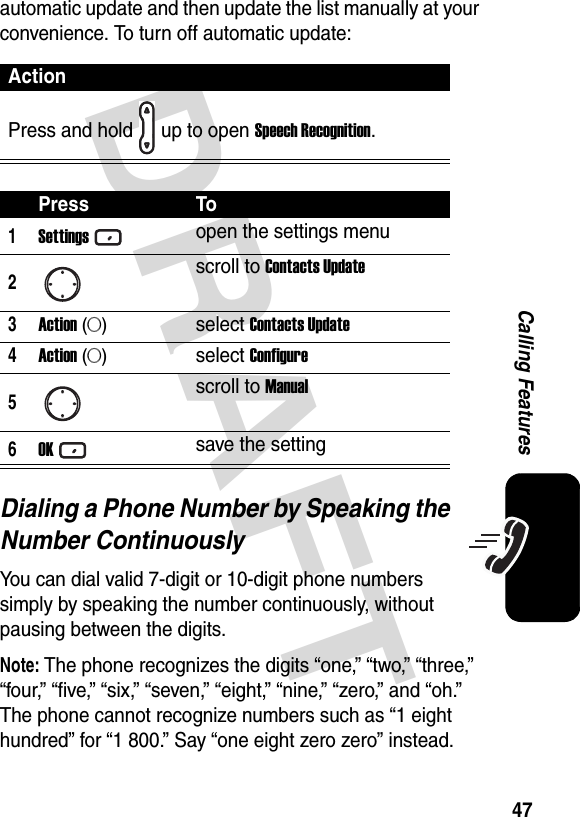

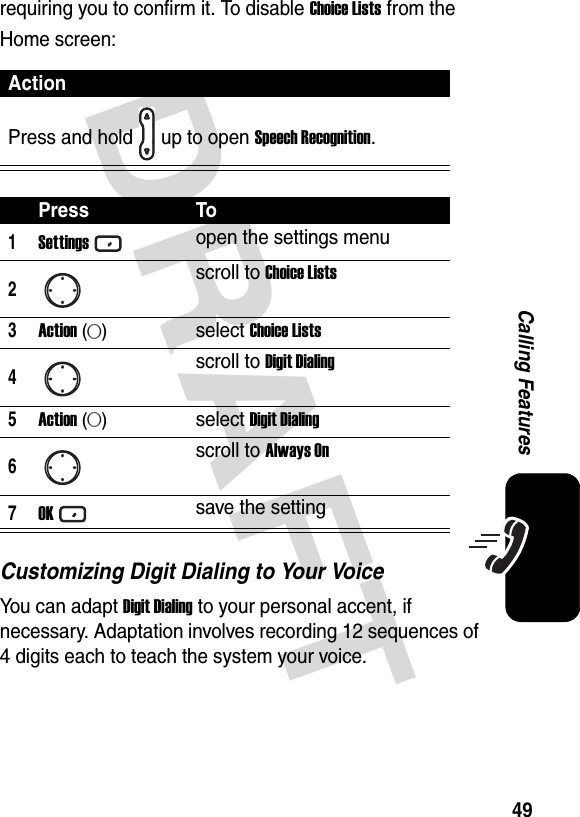
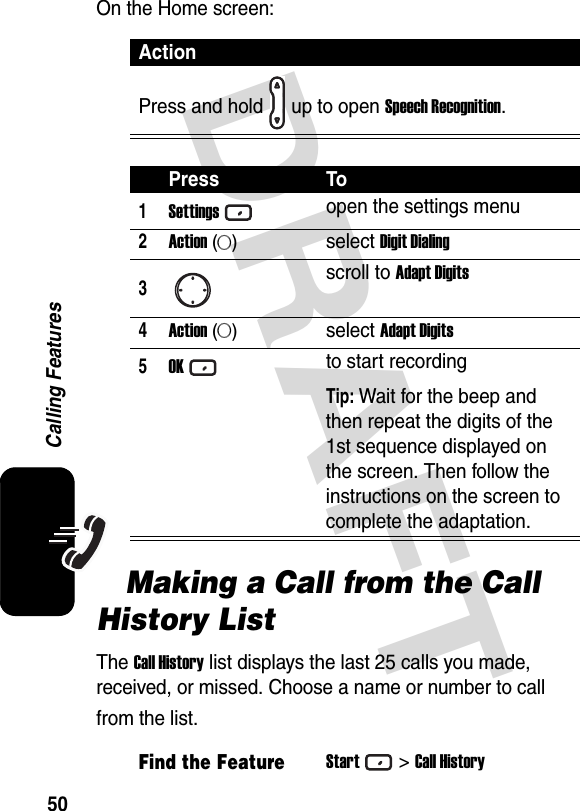


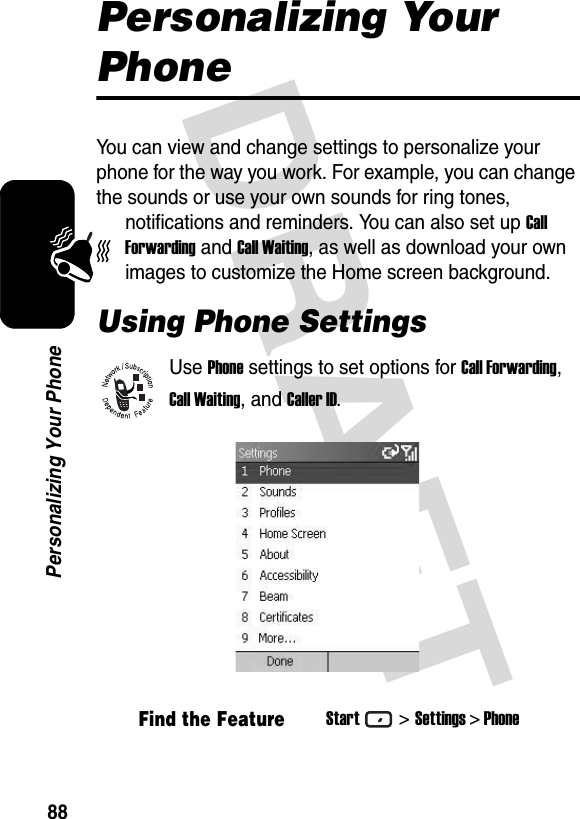
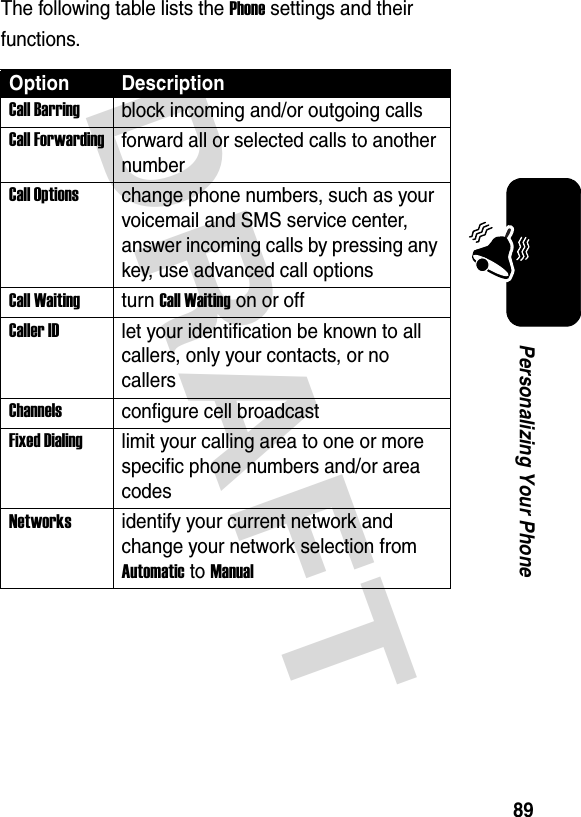

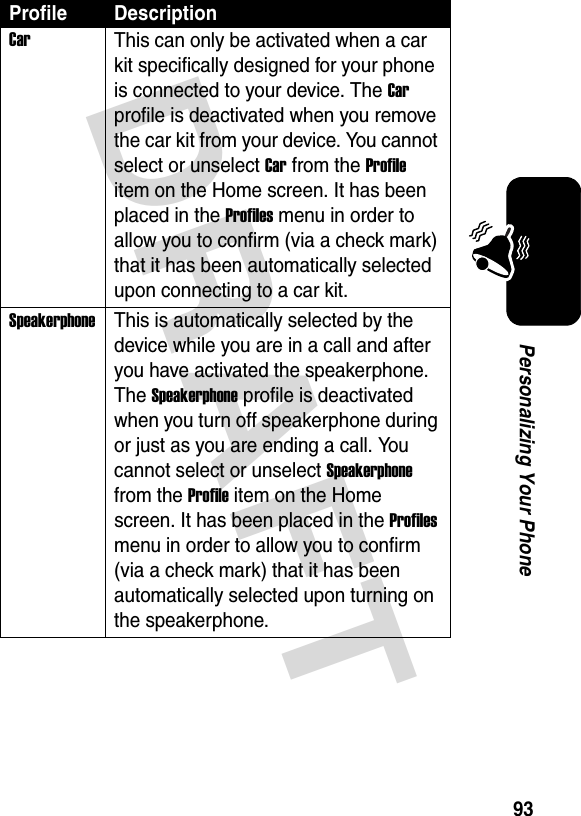
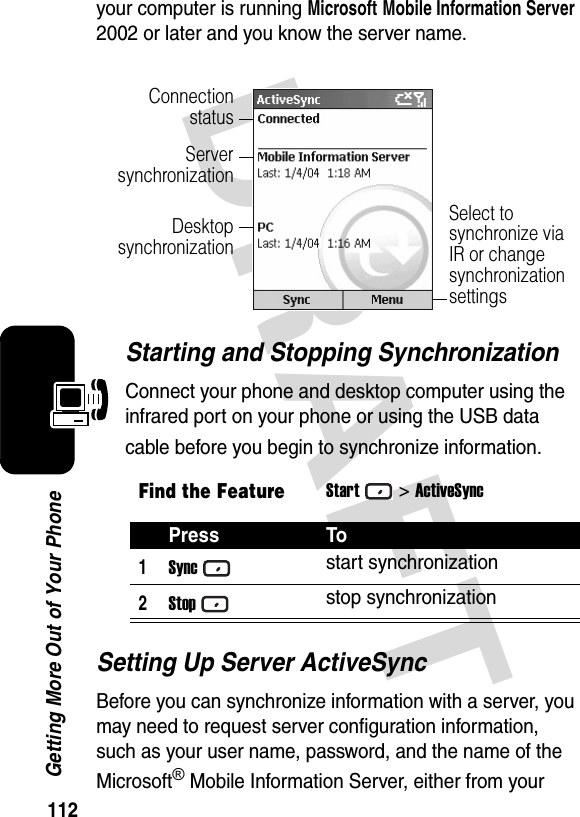
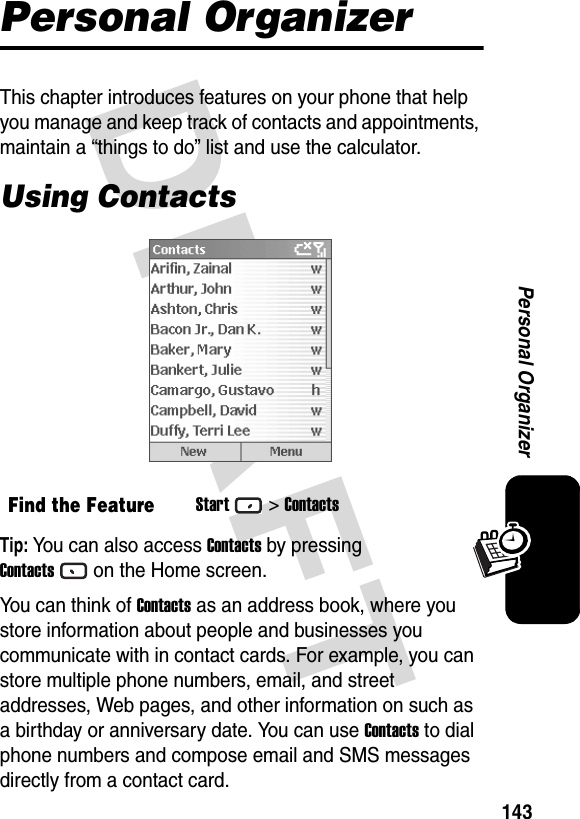
![DRAFT 91Personalizing Your PhoneUsing ProfilesUse Profiles settings to configure how your phone notifies you about an incoming call, an approaching appointment, or an arriving message. You can use Profiles to change notifications quickly based on your situation. For example, you may want the phone to ring louder if a client is calling, or you may not want the phone to ring at all, but want to hear calendar reminders. The default profile used with your phone is the Normal profile. The name of the current profile displays on the Home screen.Tip: You also can either assign Profiles settings by selecting Profile: [Type] from the Home screen, or select a different profile using the Quick List by pressing Power (p) or holding down Homefrom the Home screen.Note: When a headset is plugged into the phone, the Headset profile is used automatically.Find the FeatureStart>Settings > ProfilesIndicates your current profile](https://usermanual.wiki/Motorola-Mobility/T56EV1/User-Guide-450458-Page-94.png)