Motorola Mobility T56ET1 Portable Cellular/PCS Transceiver (AMPS/CDMA) User Manual UG C330 GSM
Motorola Mobility LLC Portable Cellular/PCS Transceiver (AMPS/CDMA) UG C330 GSM
Contents
- 1. Exhibit 8a Users Manual
- 2. Exhibit 8b Users Manual
- 3. Exhibit 8a Users Manual Addendum
Exhibit 8a Users Manual

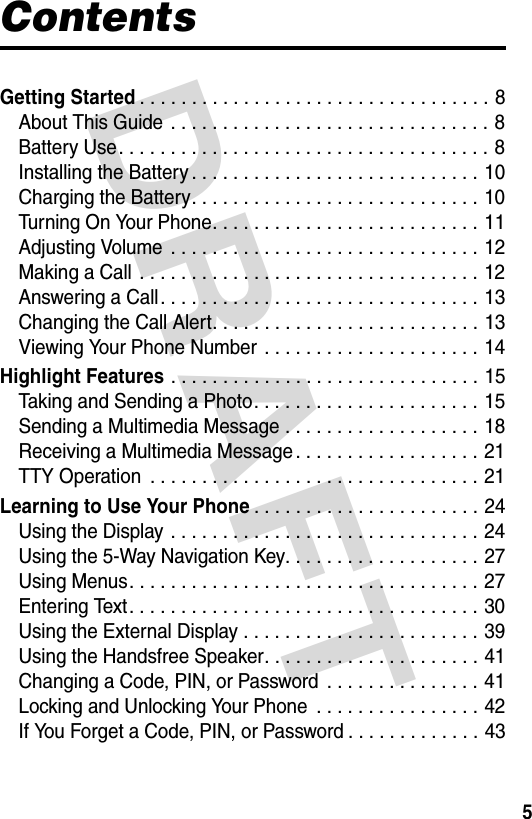

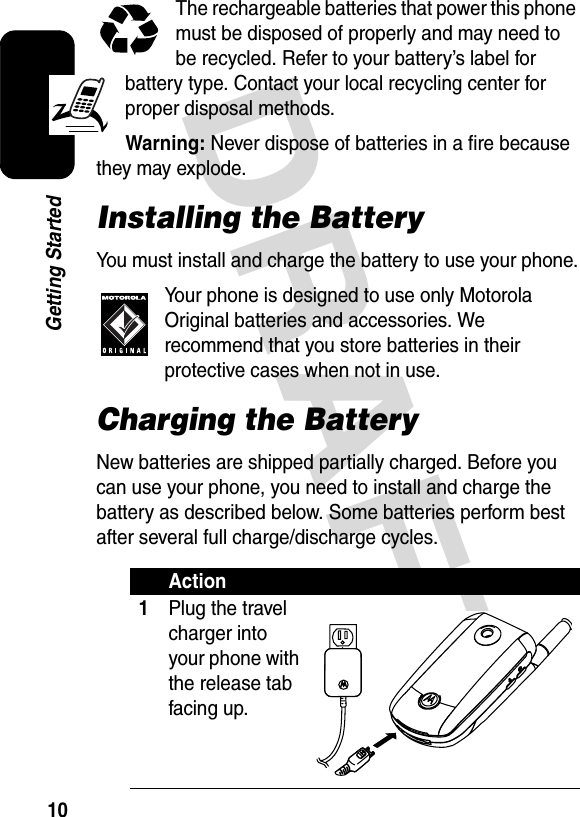
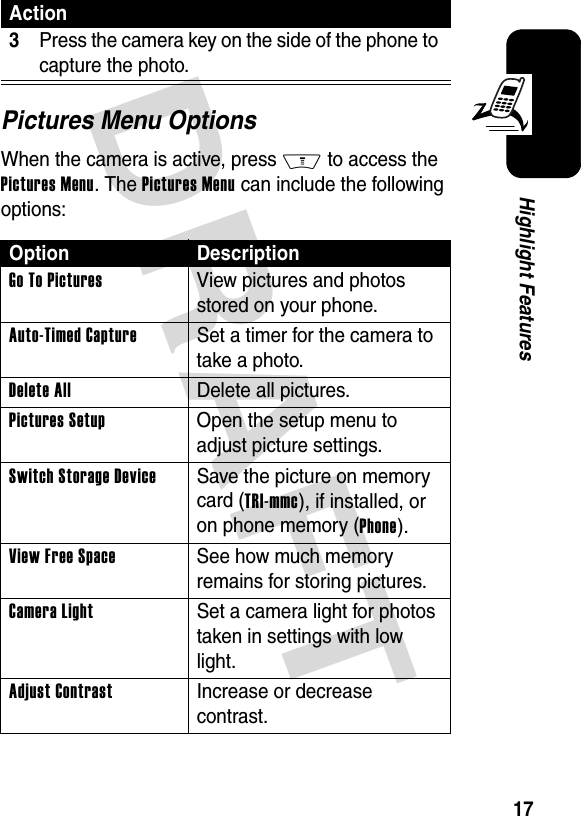

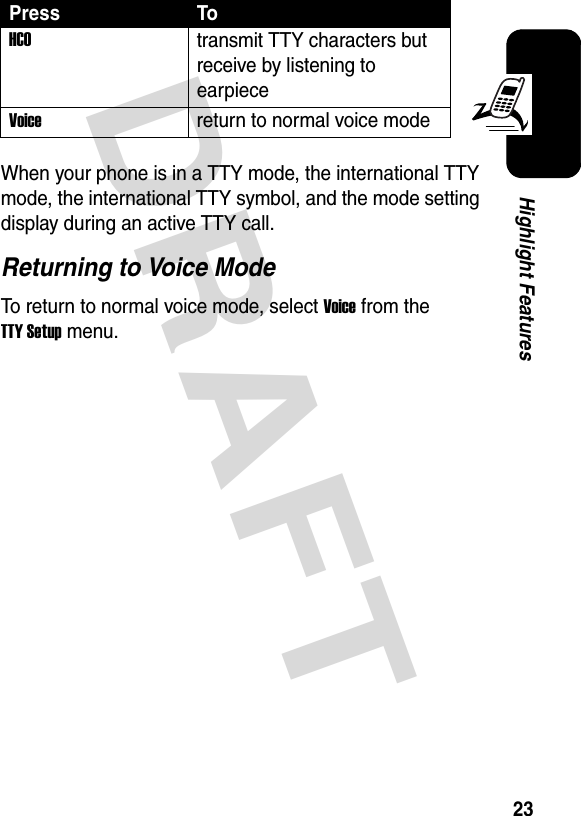
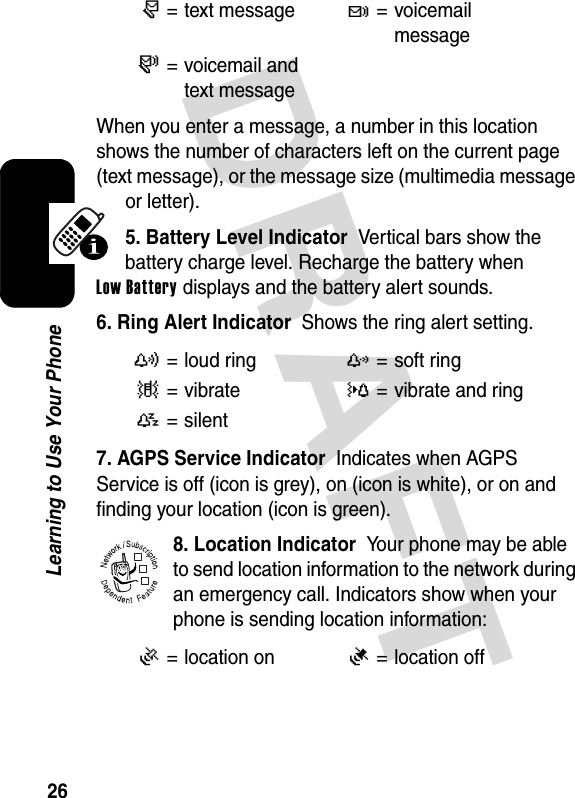

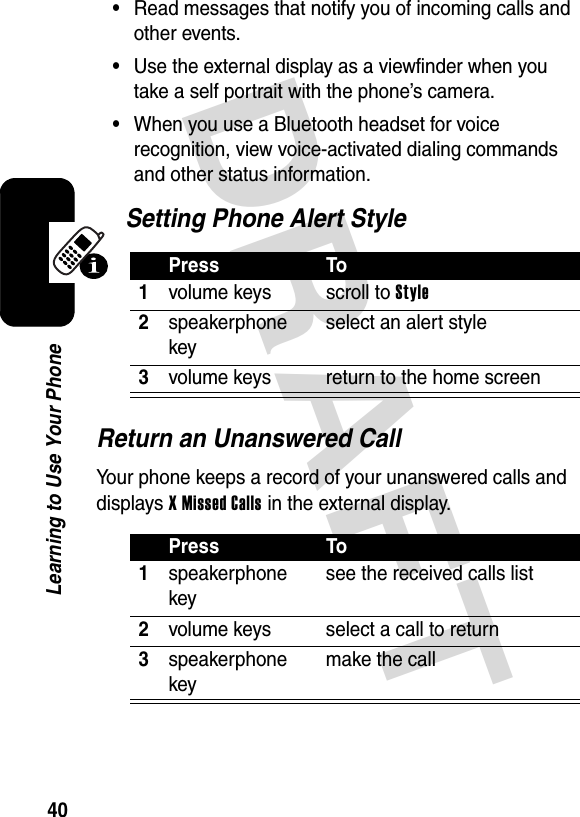
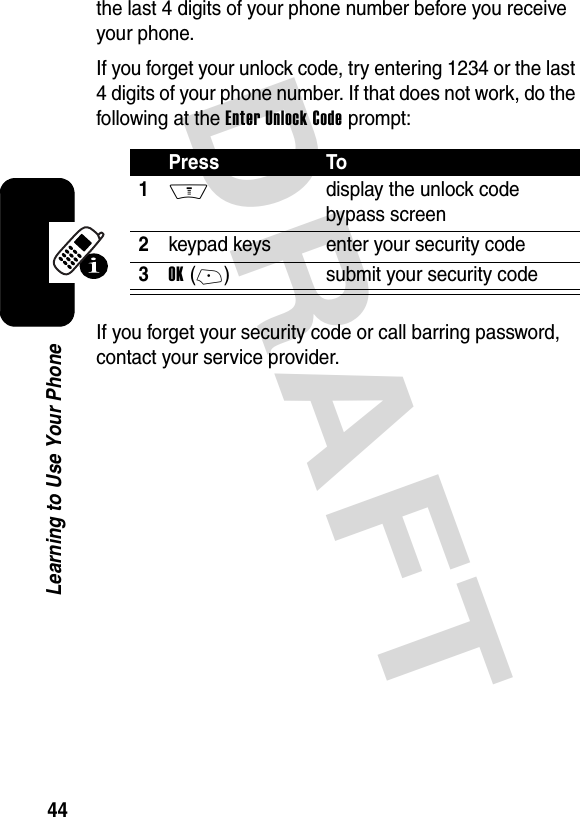
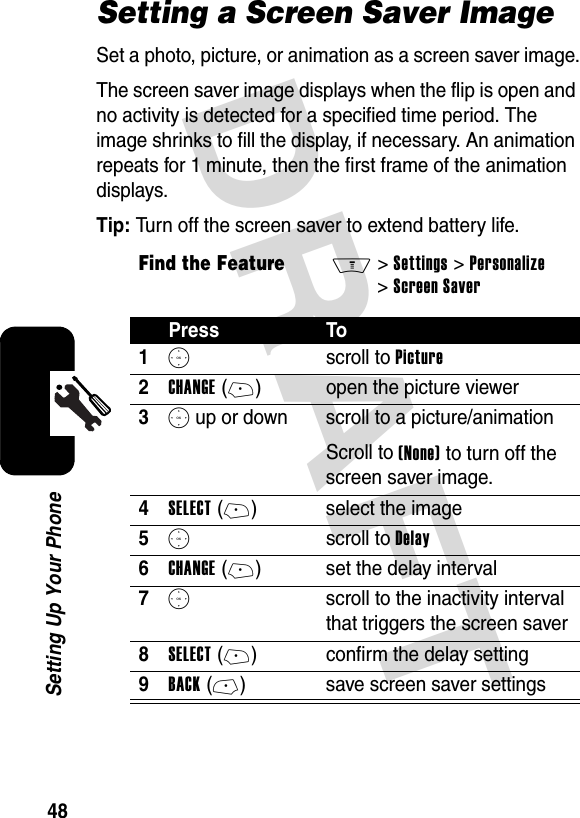
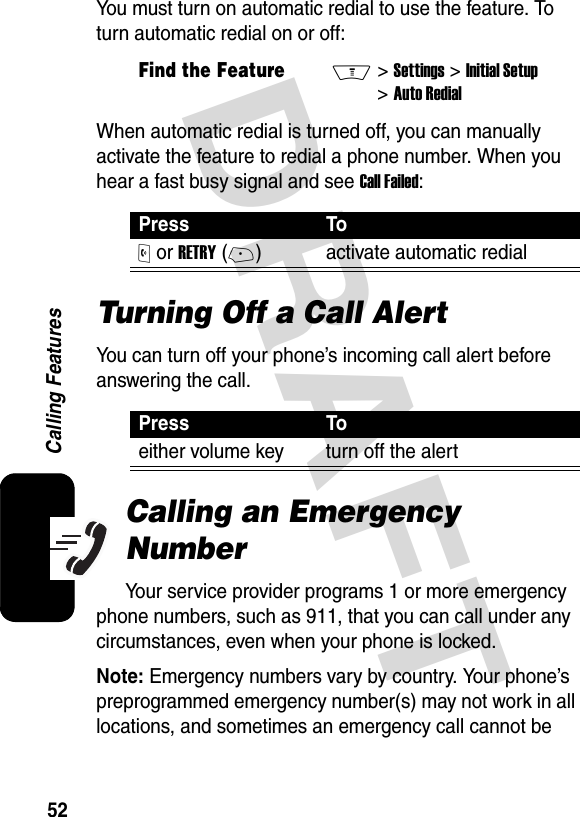
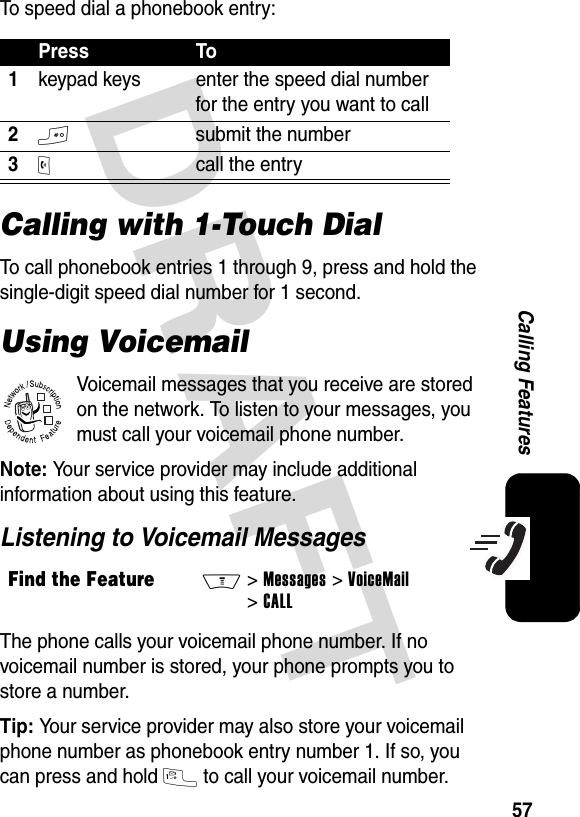
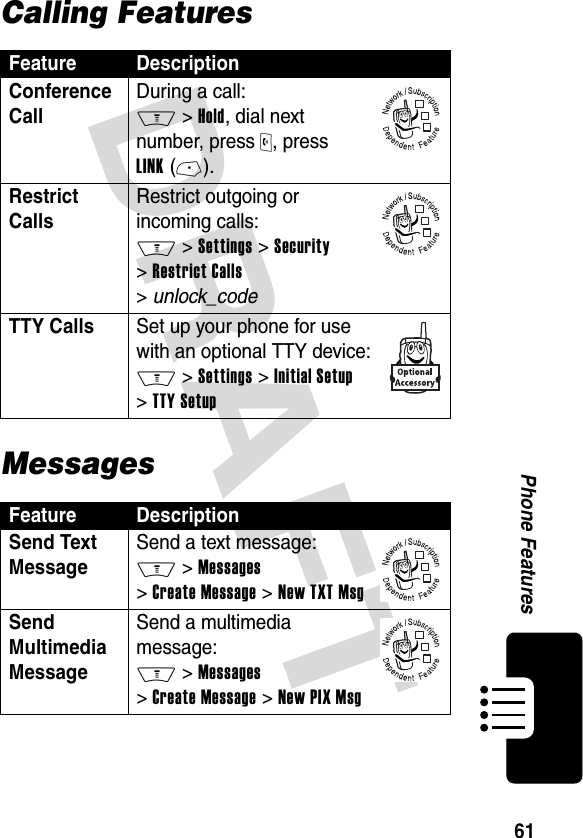
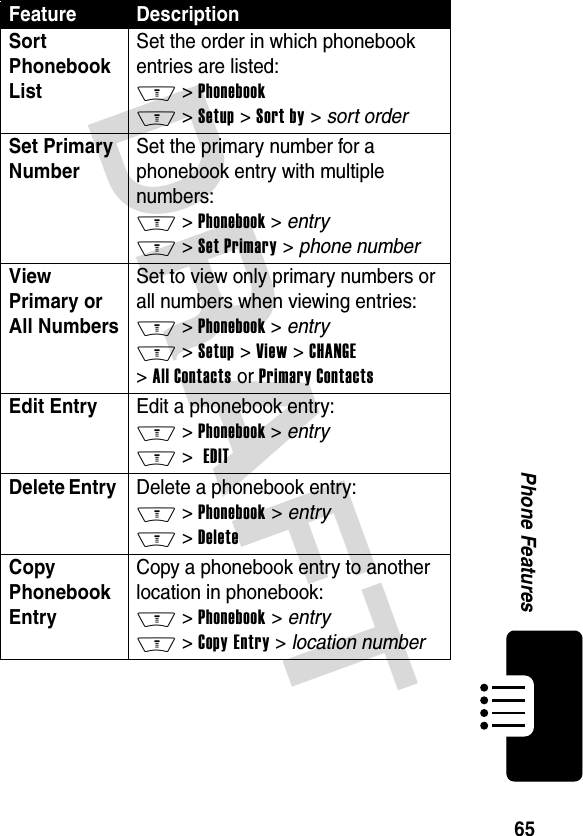
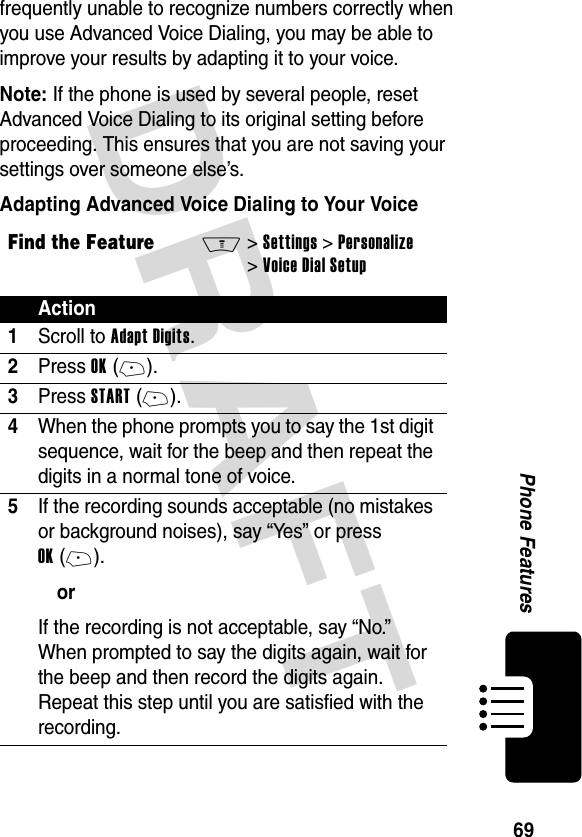
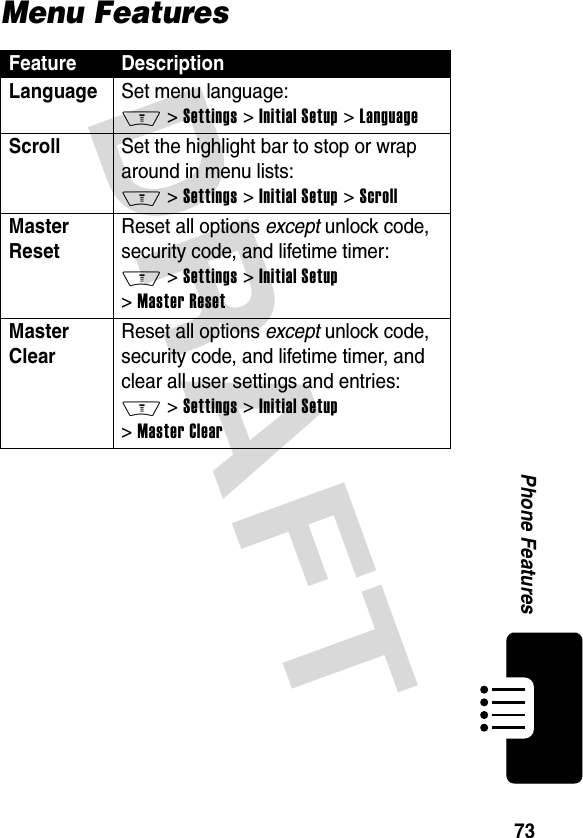
![DRAFT 35Learning to Use Your PhoneCharacter ChartUse this chart as a guide for entering characters with Tap Extended method.Note: This chart may not reflect the exact character set available on your phone. In a URL editor, 1 first shows common characters for that editor.Tap Method Text Entry Rules•Press a keypad key repeatedly to cycle through its characters.•Press S left or right to move the flashing cursor to the left or right in a text message.•The first character of every sentence is capitalized. If necessary, press S down to force the character to 1 . ? ! , @ ' - _ : ; ( ) & “ ~ 1 0 ¿ ¡ % £ $ ¥ + x * / \ [ ] = > < # §2 a b c 23 d e f 34 g h i 45 j k l 56 m n o 67 p q r s 78 t u v 89 w x y z 90 change text case, for capital letters * enter a space (hold to enter a return) # change text entry method (hold for default)](https://usermanual.wiki/Motorola-Mobility/T56ET1.Exhibit-8a-Users-Manual/User-Guide-429416-Page-38.png)

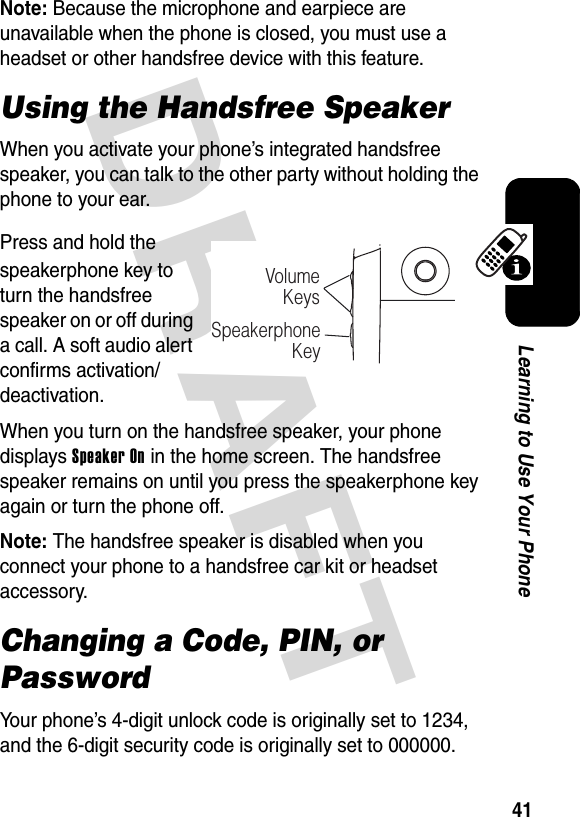
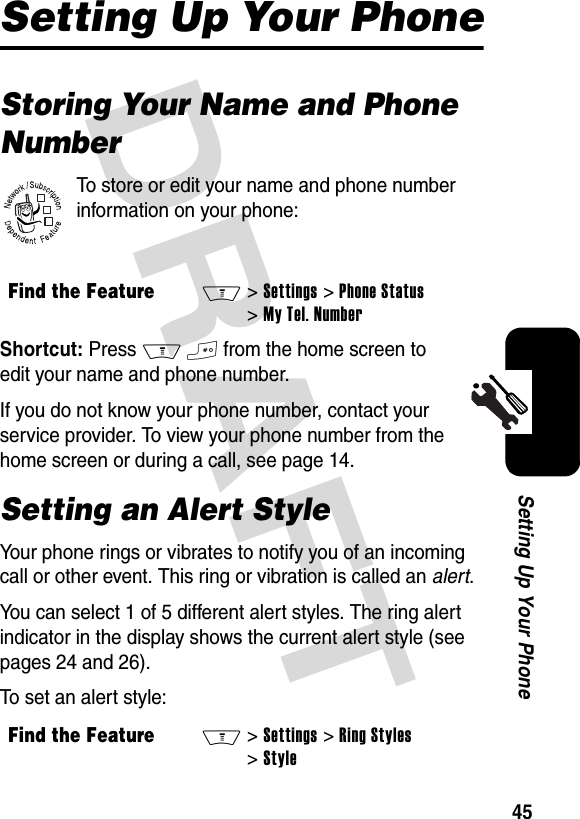
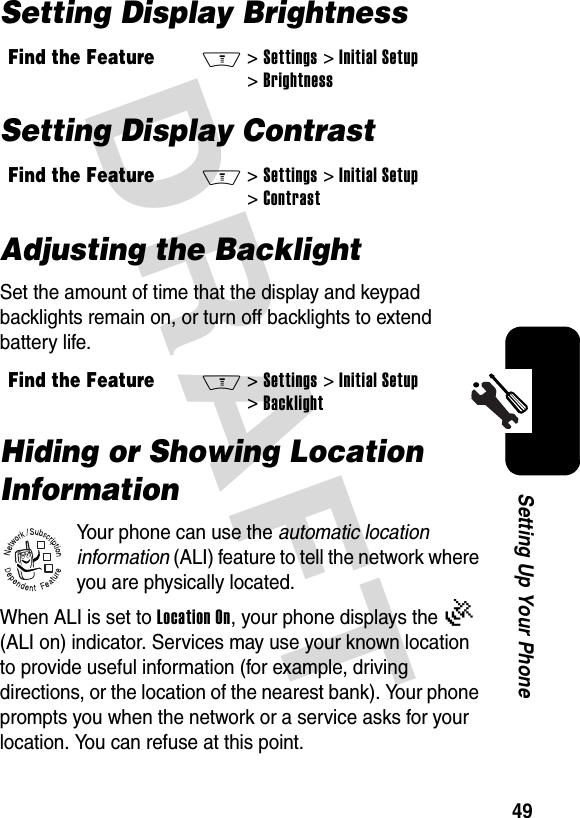
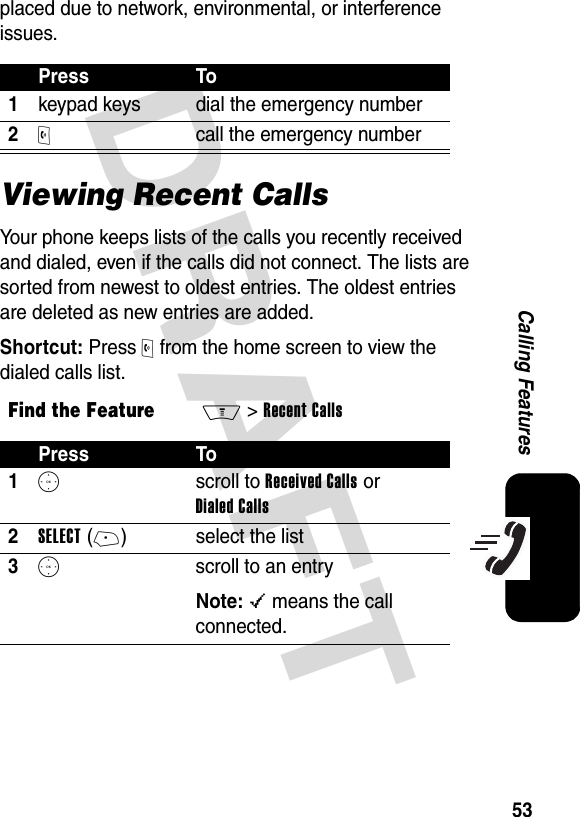
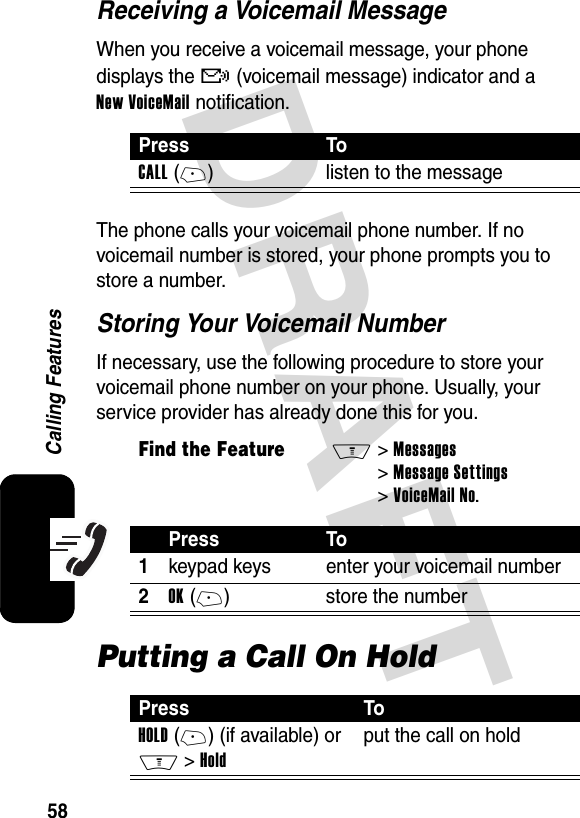
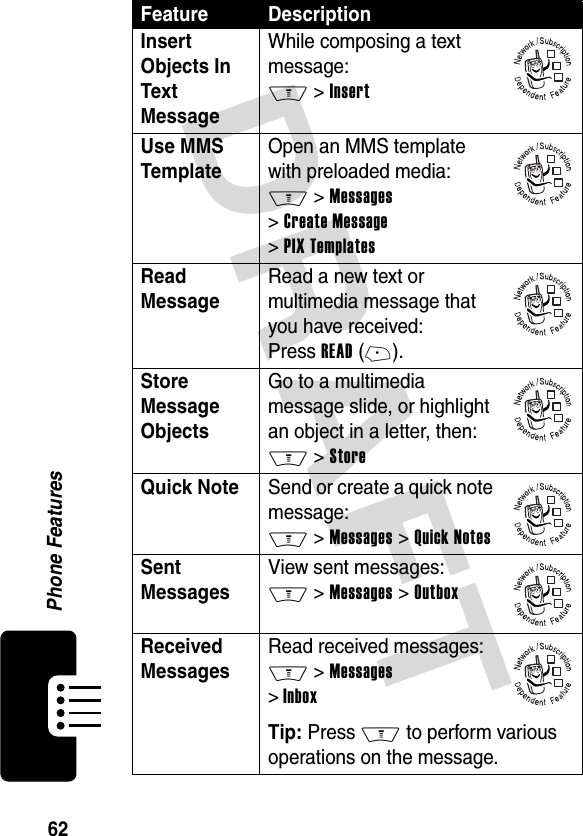
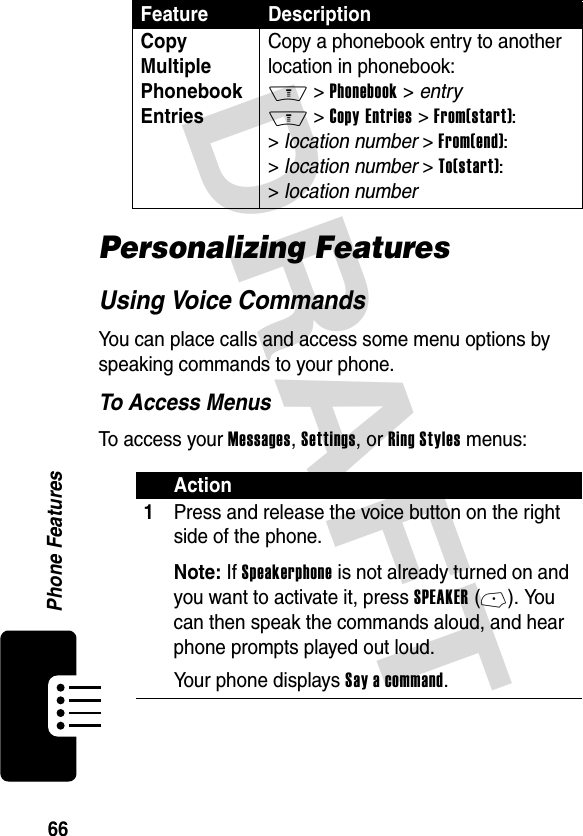
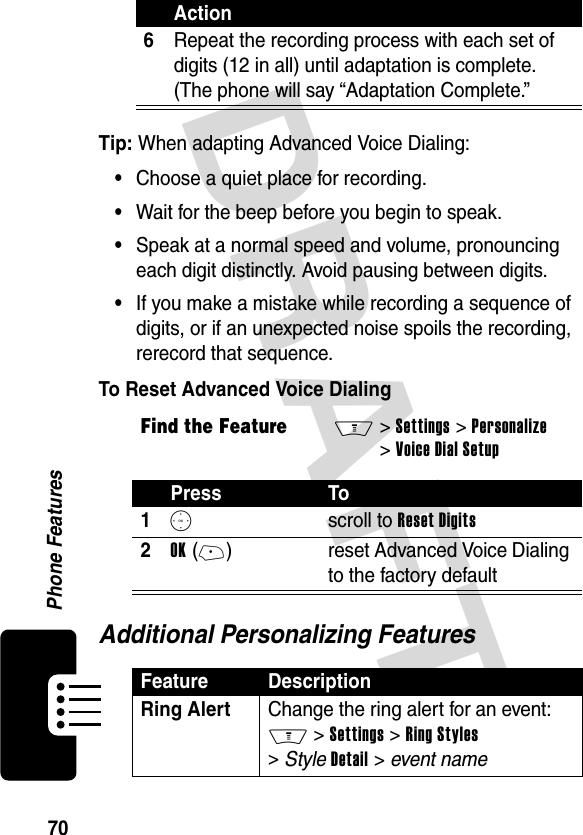
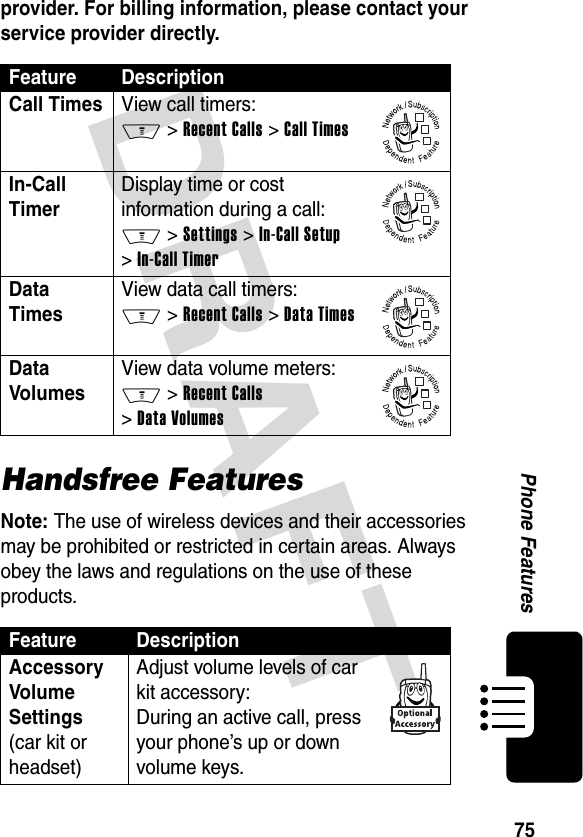
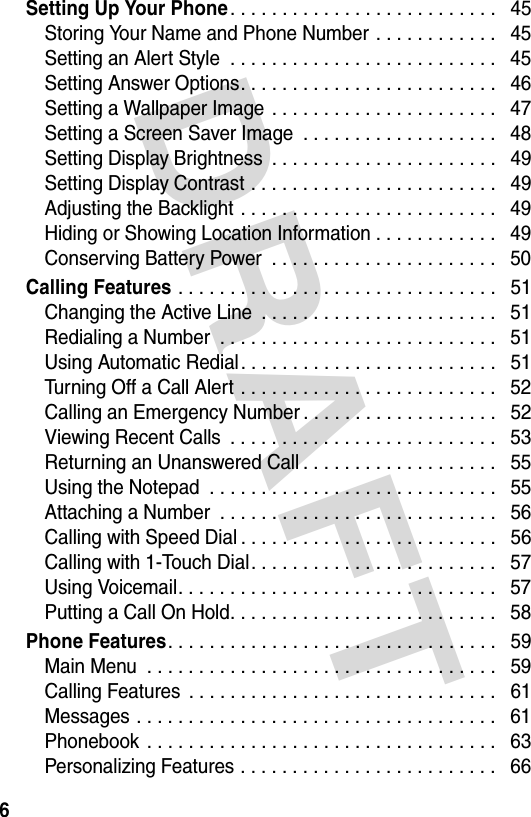
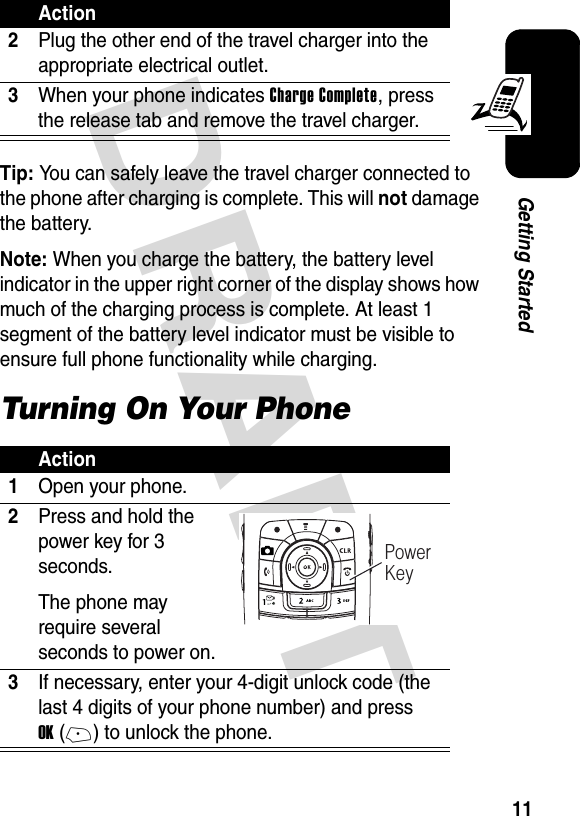
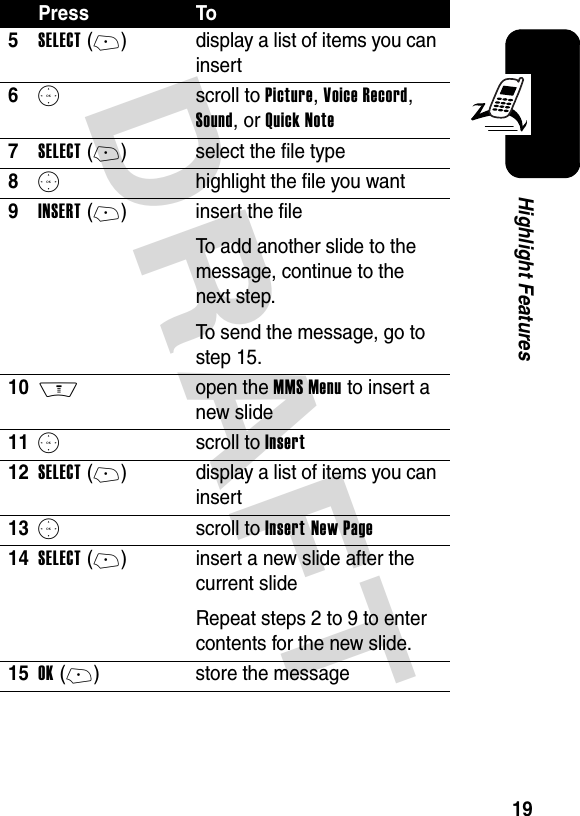
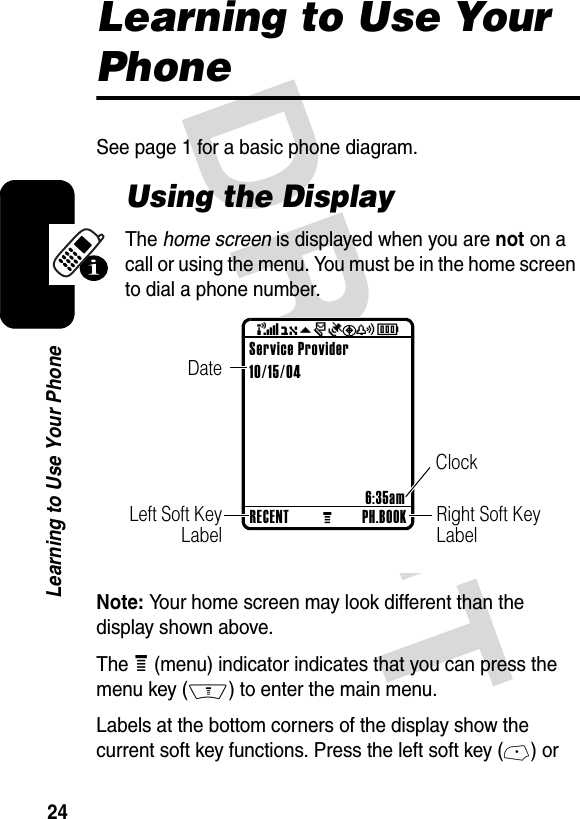
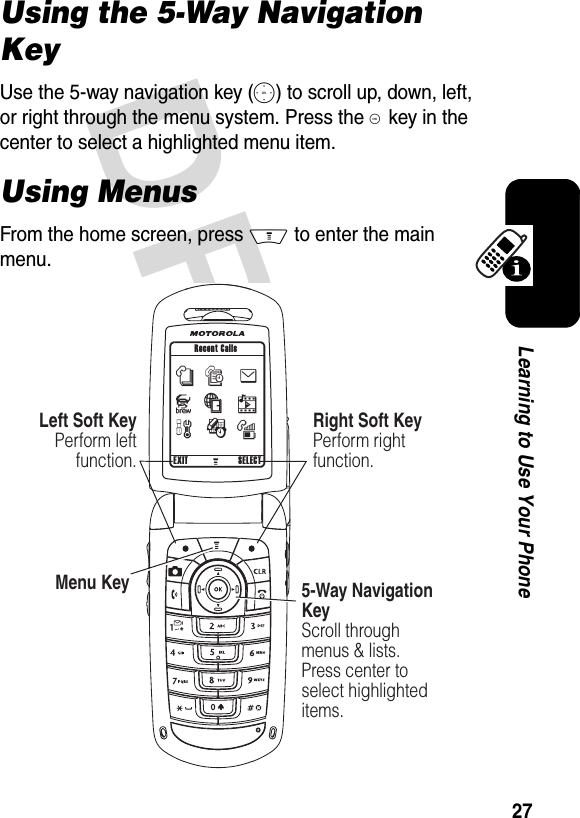
![DRAFT 38Learning to Use Your PhonePress keypad keys to enter the numbers you want. When you finish entering numbers, press # to switch to another entry method.Using Symbol MethodIn a text entry screen, press # to switch entry methods until the [ (symbol) indicator displays.Symbol ChartUse this chart as a guide for entering characters with symbol method.Press To1keypad keys (1 press per symbol)show possible symbol combinations at the bottom of the display2S left or right highlight the combination you want3SELECT(+)or* lock a highlighted combinationYou can press keypad keys to add more symbols to the end of the combination.enter the highlighted combination1 . ? ! , @ ' - _ : ; ( ) & “ ~ 1 0 ¿ ¡ % £ $ ¥ + x * / \ [ ] = > < # §](https://usermanual.wiki/Motorola-Mobility/T56ET1.Exhibit-8a-Users-Manual/User-Guide-429416-Page-41.png)
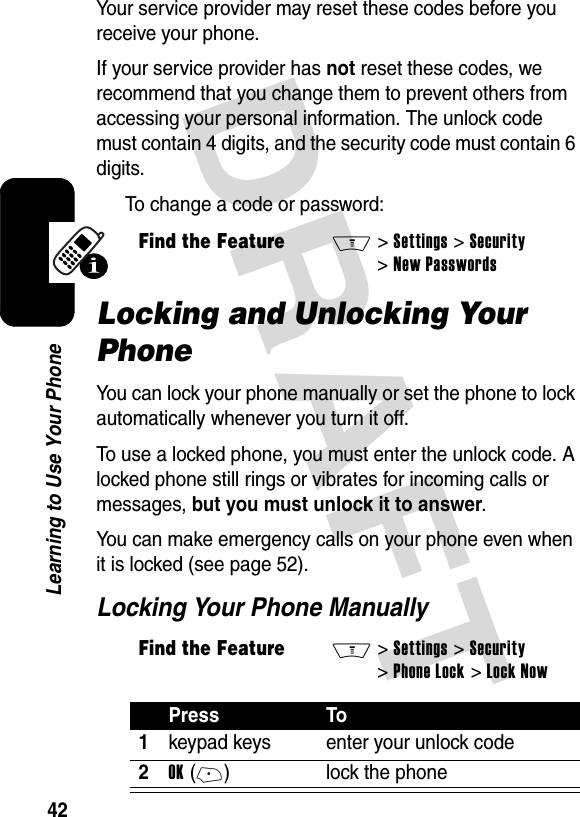
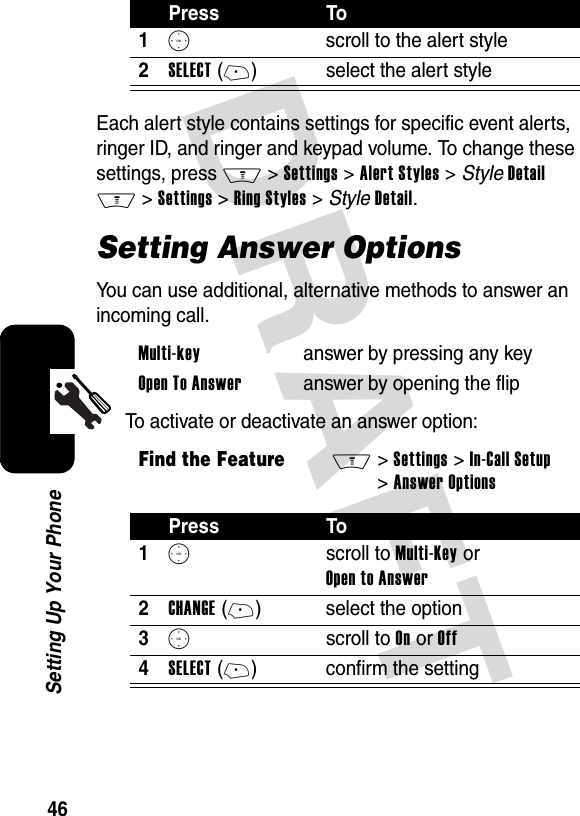
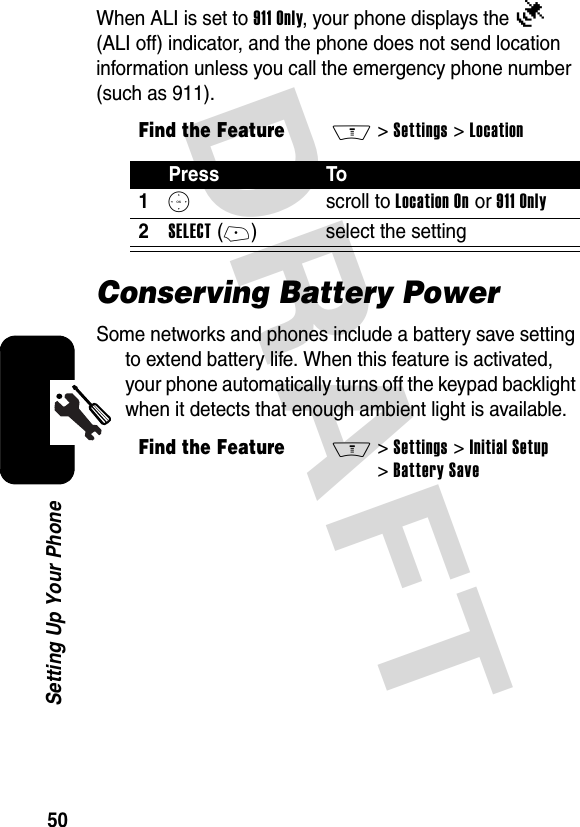
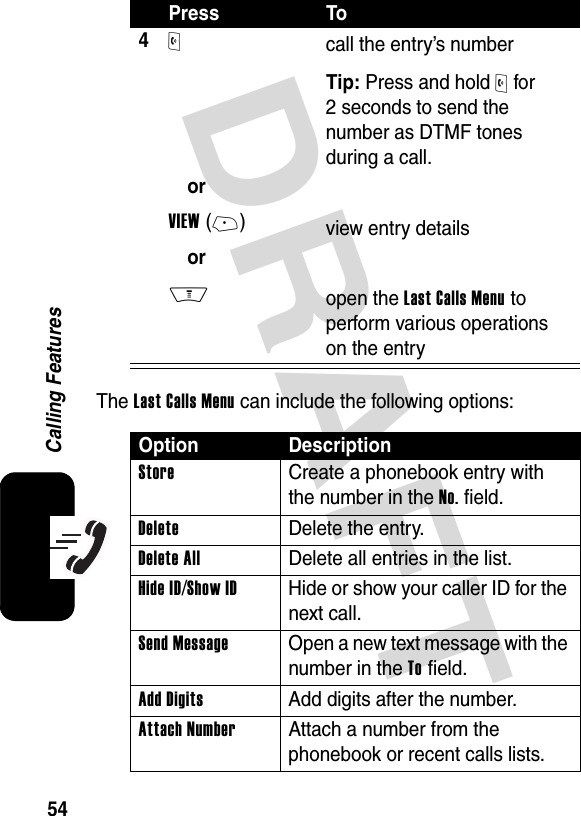
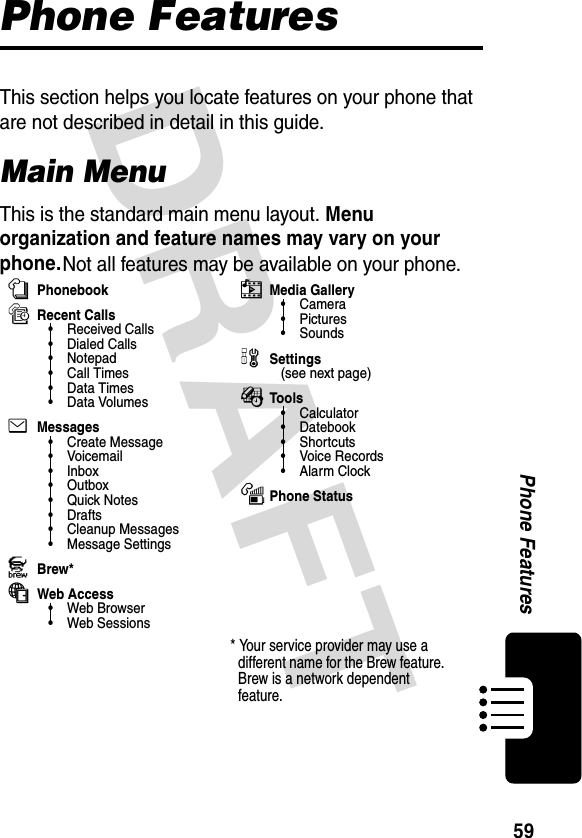
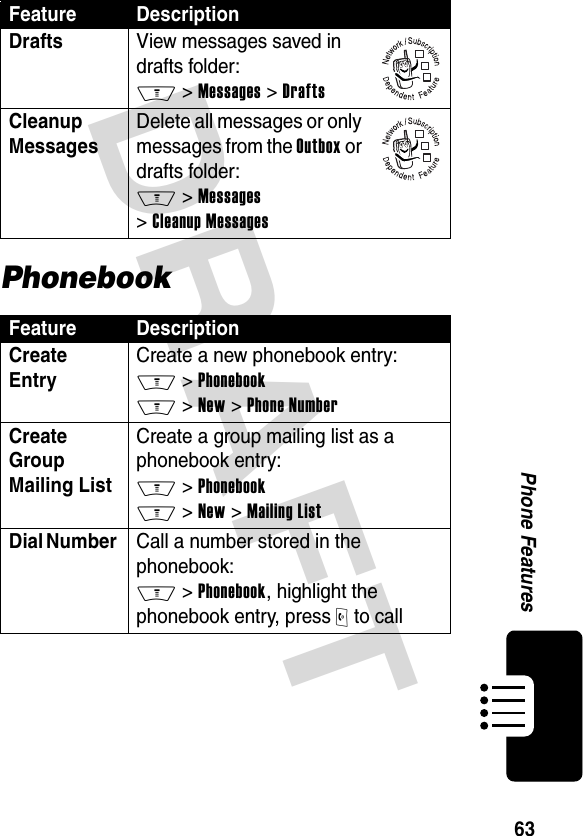
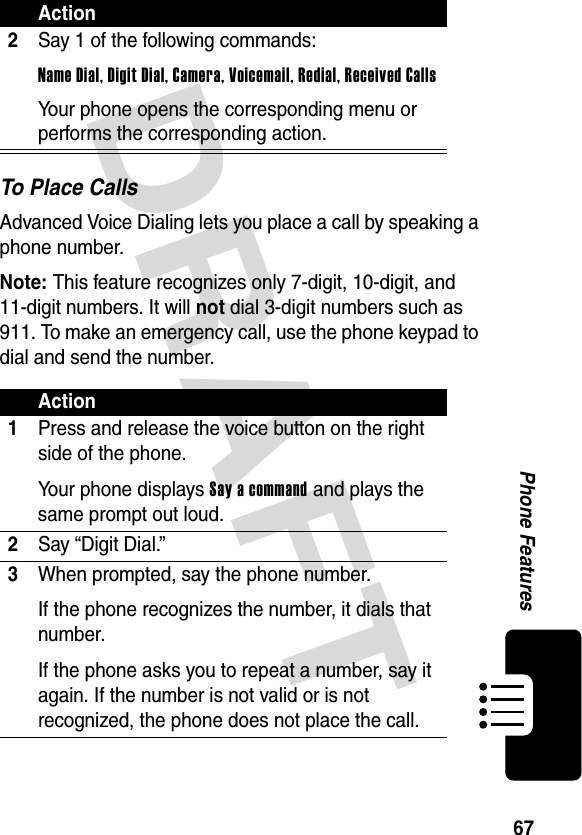
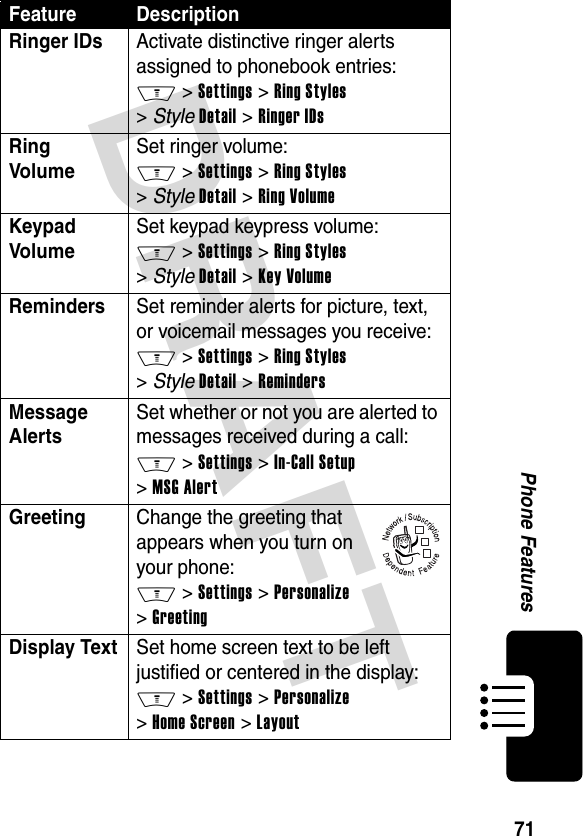
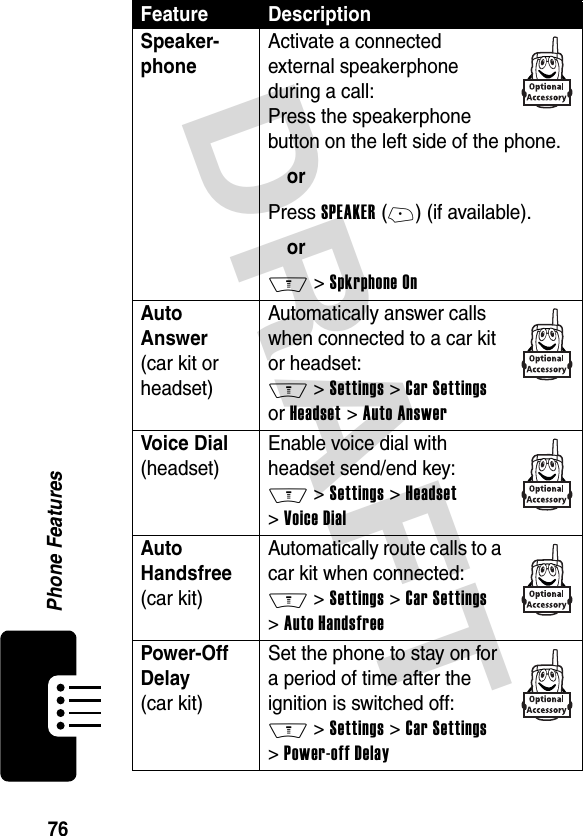
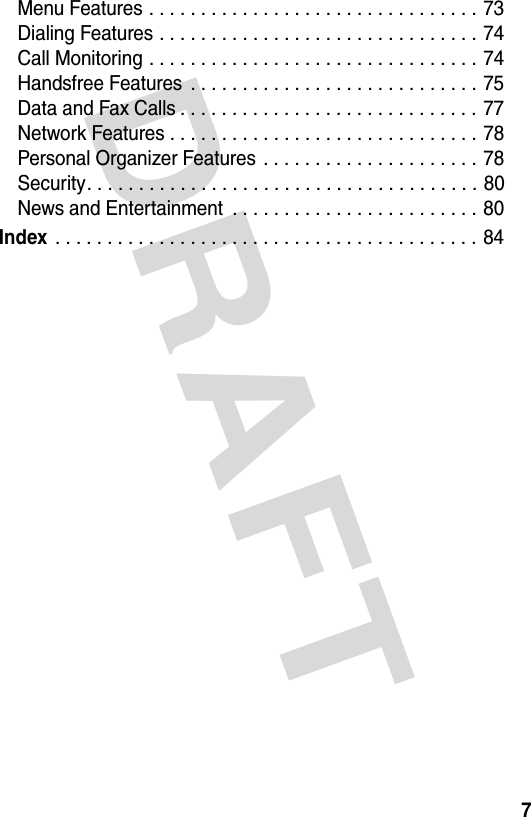
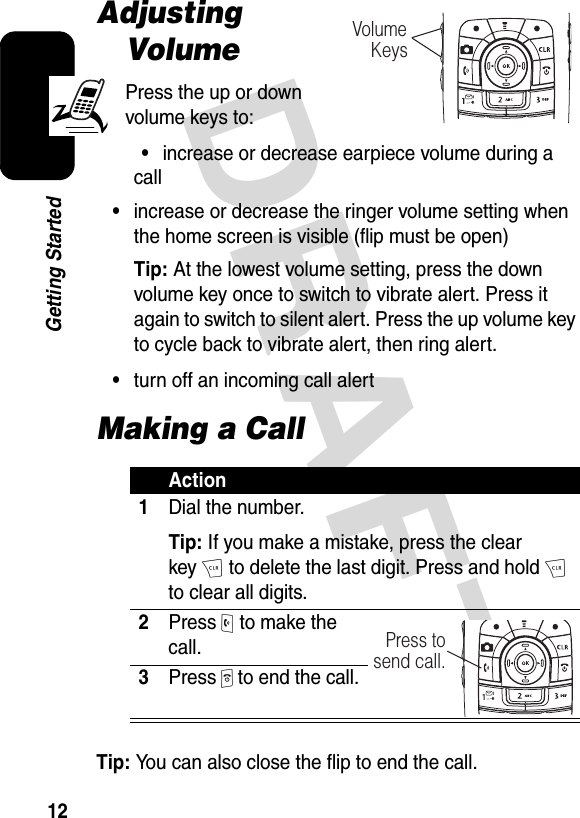
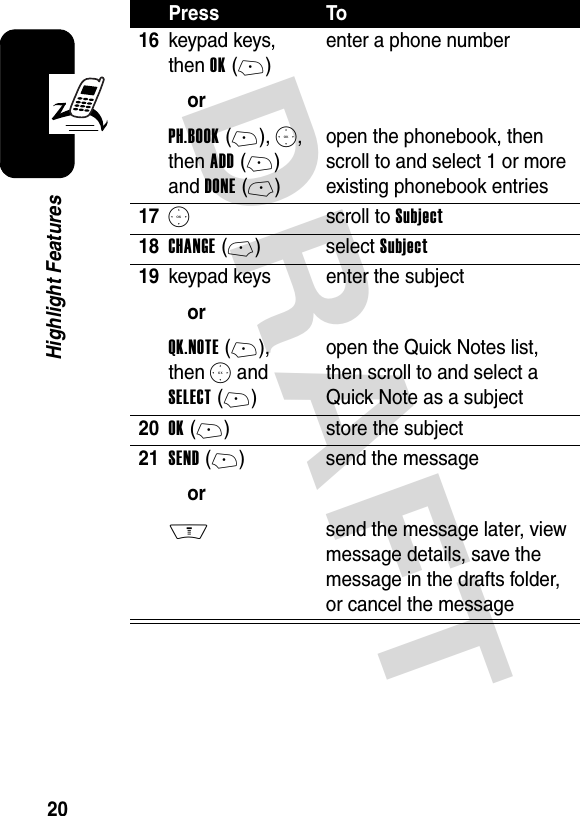
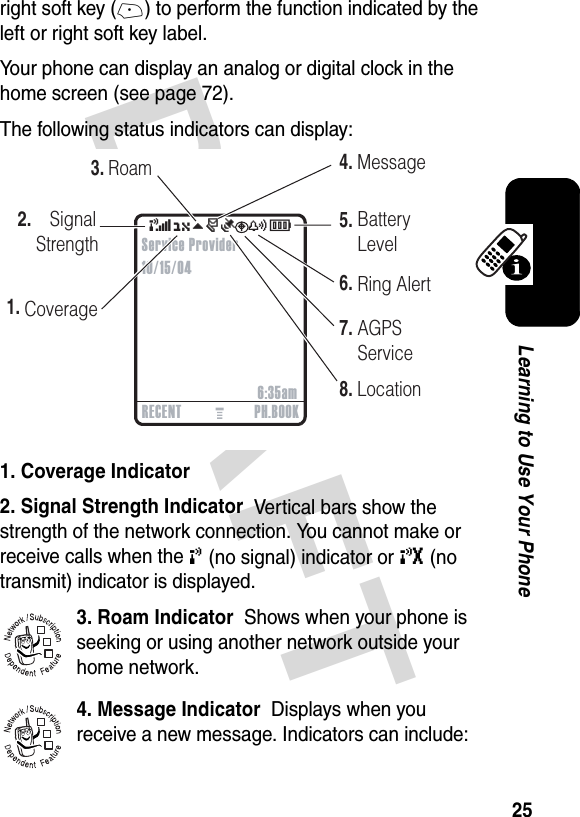
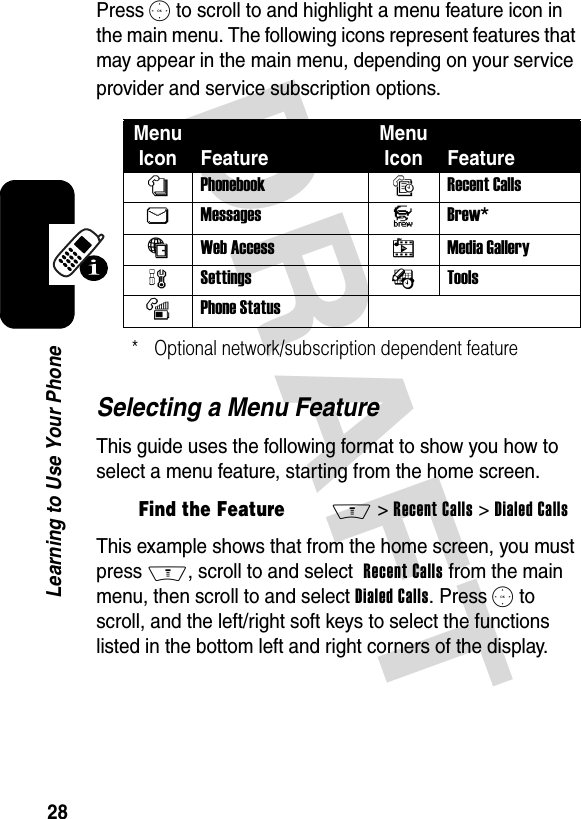
![DRAFT 39Learning to Use Your PhoneNote: This chart may not reflect the exact character set available on your phone. In a URL editor, 1 first shows common characters for that editor.Deleting Letters and WordsPlace the cursor to the right of the text you want to delete, and then:Using the External DisplayWhen the flip is closed, you can use the external display for the following:•View time, date, and phone status information.2 @ _ \3 / : ;4 " & '5 ( ) [ ] { }6 ¿ ¡ ~7 < > =8 $ £ ¥ 9 # % *0 + - x * / \ = > < # §* enter a space (hold to enter a return) # change text entry method (hold for default) ActionPress H to delete 1 letter at a time.Hold H to delete the entire message.](https://usermanual.wiki/Motorola-Mobility/T56ET1.Exhibit-8a-Users-Manual/User-Guide-429416-Page-42.png)