Motorola Mobility T56EL1 Licensed Portable with Bluetooth User Manual UG C330 GSM
Motorola Mobility LLC Licensed Portable with Bluetooth UG C330 GSM
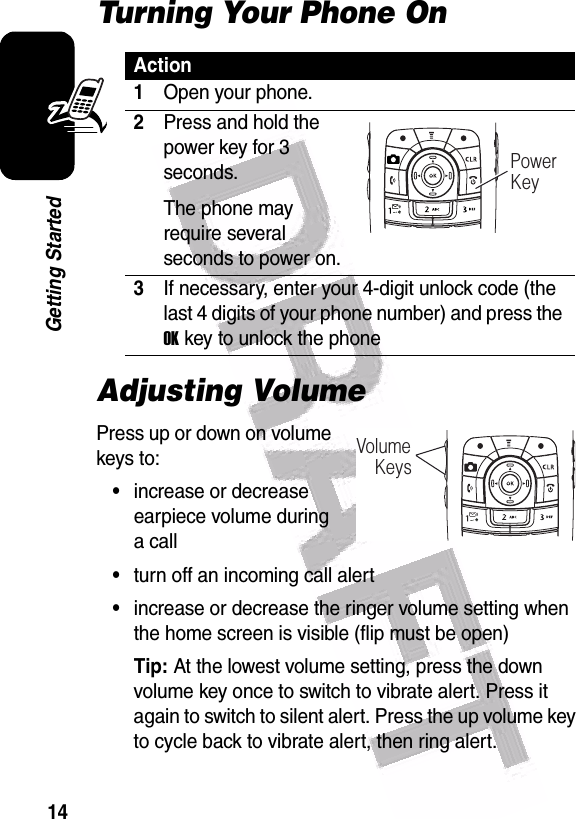
UserManual.wiki
>
Motorola Mobility
>
T56EL1 User Manual
>
Exhibit 8 Users Manual
Contents
1.
Exhibit 8 Users Manual
2.
Supplemental Response to TC4417
3.
Supplemental Response to TC4416
4.
Exhibit 8a Users Manual Addendum
Exhibit 8 Users Manual
Navigation menu
Upload a User Manual
Namespaces
Wiki Guide
HTML
PDF
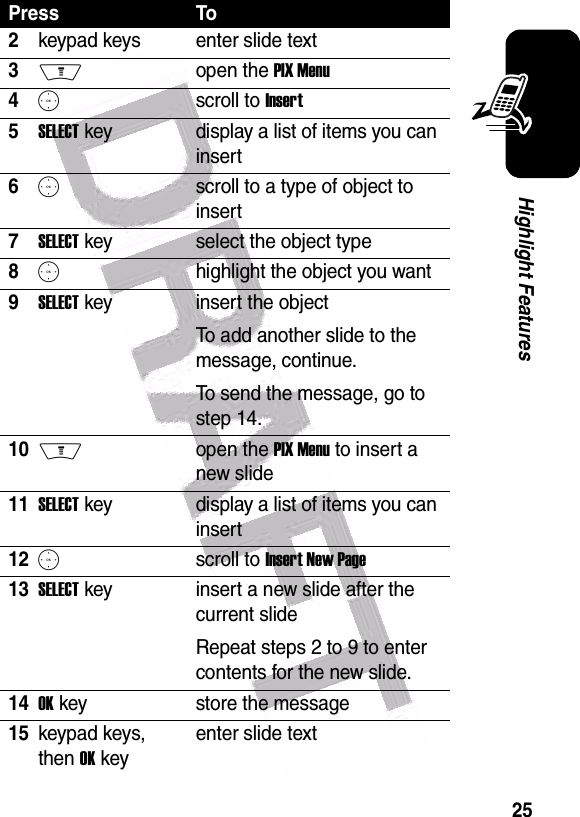
Info
Views
User Manual
Discussion / Help
Navigation

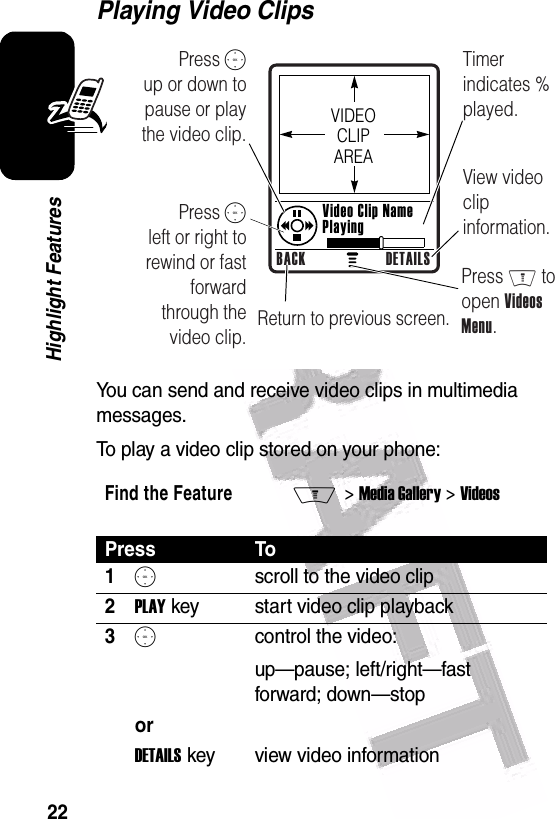
![3Set Photo as Picture Caller IDAfter you capture a photo, assign it to a Contacts entry to enable picture caller ID:STORE > Apply as Contacts EntrySend Multimedia MessageSend a multimedia message with pictures, animations, sounds, and videos:M > Messaging > Create Message > New PIX MessageSend Text MessageSend a text message:M > Messaging > Create Message > New TXT MessageRead Multimedia MessageRead a new multimedia message or letter that you have receivedPress READ key.Play Video ClipPlay a video clip:M > Media Gallery > Videos > video clip > PLAYWireless ConnectionSet up a Bluetooth® wireless connection to a headset accessory, car kit, or external device:M > Settings > Connection > Bluetooth Link > Handsfree > [Look For Devices]Note: If the Bluetooth power is turned off in your phone., you will be prompted to turn it on.Feature Description032380o032380o032380o](https://usermanual.wiki/Motorola-Mobility/T56EL1.Exhibit-8-Users-Manual/User-Guide-506231-Page-6.png)


![28Highlight FeaturesTo connect your phone to a headset accessory or handsfree device:Note: If the Bluetooth power is turned off in your phone., you will be prompted to turn it on.Your phone displays a list of devices located within range of the phone. If your phone is already connected to a device, your phone lists that device and marks it with a o (in use) indicator.To connect to a device, highlight the device name and press the SELECT key.The device may request permission to bond with your phone. Press the YES key and enter the correct PIN code to create a secure connection with the device. When the connection is made, the à (Bluetooth) indicator or a Bluetooth message displays in the home screen.Note: The default PIN code is 0000.For more information about using Bluetooth wireless connections, refer to the user’s guides for your Bluetooth devices.TTY OperationYou can use an optional TTY device with your phone to send and receive calls. You must plug the TTY device into Find the FeatureM> Settings > Connection > Bluetooth Link > Handsfree > [Look For Devices]](https://usermanual.wiki/Motorola-Mobility/T56EL1.Exhibit-8-Users-Manual/User-Guide-506231-Page-31.png)

![34Learning to Use Your PhoneUsing MenusFrom the home screen, press M to enter the main menu.Press S to scroll to and highlight a menu feature icon in the main menu. The following icons represent features that may display in the main menu, depending on your service provider and service subscription options.Note: Features marked with * are optional network/subscription dependent features.032420o nwse]LhÉm Left Soft KeyPerform leftfunction.Menu Key 5-Way Navigation KeyScroll through menus & lists. Press center to select highlighted items.Recent CallsRight Soft KeyPerform rightfunction.EXIT SELECT](https://usermanual.wiki/Motorola-Mobility/T56EL1.Exhibit-8-Users-Manual/User-Guide-506231-Page-37.png)


![41Learning to Use Your PhoneCharacter ChartUse this chart as a guide for entering characters with Tap method.Note: This chart may not reflect the exact character set available on your phone. In a URL editor, 1 first shows common characters for that editor.Tap Method Text Entry Rules•Press a keypad key repeatedly to cycle through its characters.•Press S left or right to move the flashing cursor to the left or right in a text message.•The first character of every sentence is capitalized. If necessary, press S down to force the character to 1. ? ! , @ ' - _ : ; ( ) & " ~ 1 0 ¿ ¡ % £ $ ¥ ¤ £ + x * / \ [ ] = > < # § 2a b c 23d e f 34g h i 45j k l 5 6m n o 67p q r s 7 8t u v 89w x y z 9 0change text case, for capital letters*enter a space (hold to enter a return)#change text entry method (hold for default)](https://usermanual.wiki/Motorola-Mobility/T56EL1.Exhibit-8-Users-Manual/User-Guide-506231-Page-44.png)

![44Learning to Use Your PhonePress keypad keys to enter the numbers you want. When you finish entering numbers, press # to switch to another entry method.Using Symbol MethodIn a text entry screen, press # to switch entry methods until the [ (symbol) indicator displays.Symbol ChartUse this chart as a guide for entering characters with symbol method.Press To1keypad keys (1 press per symbol)show possible symbol combinations at the bottom of the display2S left or right highlight the combination you want3SELECT key orlock a highlighted combinationYou can press keypad keys to add more symbols to the end of the combination.*enter the highlighted combination1. ? ! , @ ' - _ : ; ( ) & " ~ 1 0 ¿ ¡ % £ $ ¥ ¤ £ + x * / \ [ ] = > < # § 2@ _ \](https://usermanual.wiki/Motorola-Mobility/T56EL1.Exhibit-8-Users-Manual/User-Guide-506231-Page-47.png)
![45Learning to Use Your PhoneNote: This chart may not reflect the exact character set available on your phone. In a URL editor, 1 first shows common characters for that editor.Deleting Letters and WordsPlace the cursor to the right of the text you want to delete, and then:Using the External DisplayWhen the flip is closed, you can use the external display for the following:•View time, date, and phone status information.3/ : ;4" & '5( ) [ ] { }6¿ ¡ ~7< > =8$ £ ¥ ¤ £9# % *0+ - x * / = > < # § *enter a space (hold to enter a return)#change text entry mode (hold for default)ActionPress the H key to delete one letter at a time.Hold the H key to delete all the text.](https://usermanual.wiki/Motorola-Mobility/T56EL1.Exhibit-8-Users-Manual/User-Guide-506231-Page-48.png)


![68Phone FeaturesContactsDraftsView messages saved in the drafts folder:M > Messaging > DraftsErase MessagesDelete all messages or only messages from the Outbox or drafts folder:M > Messaging > Erase MessagesFeature DescriptionCreate EntryCreate a new Contacts entry:M > ContactsM > [New Entry] > Phone Number or Email AddressCreate Group Mailing ListCreate a group mailing list as a Contacts entry:M > ContactsM > New > Mailing ListDial NumberCall a number stored in Contacts:M > Contacts, highlight the Contacts entry, press O to callFeature Description032380o032380o](https://usermanual.wiki/Motorola-Mobility/T56EL1.Exhibit-8-Users-Manual/User-Guide-506231-Page-71.png)

![71Phone FeaturesPersonalizing FeaturesUsing Voice CommandsYou can place calls and access some menu options by speaking commands to your phone.To Access MenusTo access your Message, Settings, or Ring Styles menus:Copy Contacts EntryCopy a Contacts entry to another location in Contacts:M > Contacts > entryM > Copy Entry > location numberCopy Multiple Contacts EntriesCopy multiple Contacts entries to other Contacts locations:M > Contacts > entryM > Copy Entries > From[start]: > starting location number > From[end]: > ending location number > To[start]: > new starting location numberFeature Description](https://usermanual.wiki/Motorola-Mobility/T56EL1.Exhibit-8-Users-Manual/User-Guide-506231-Page-74.png)