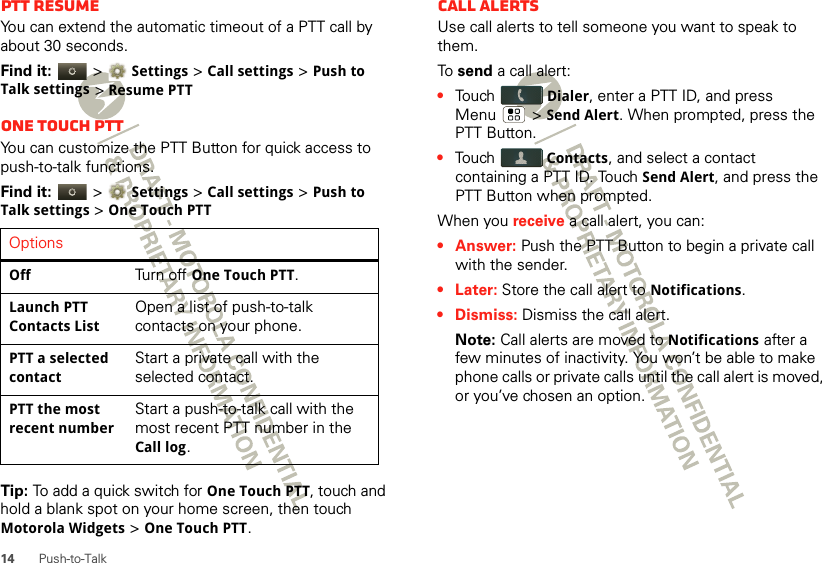
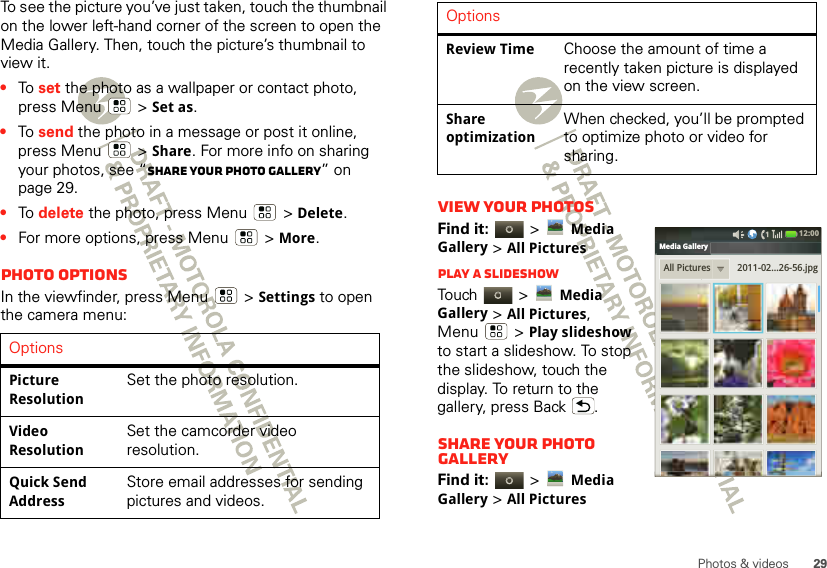
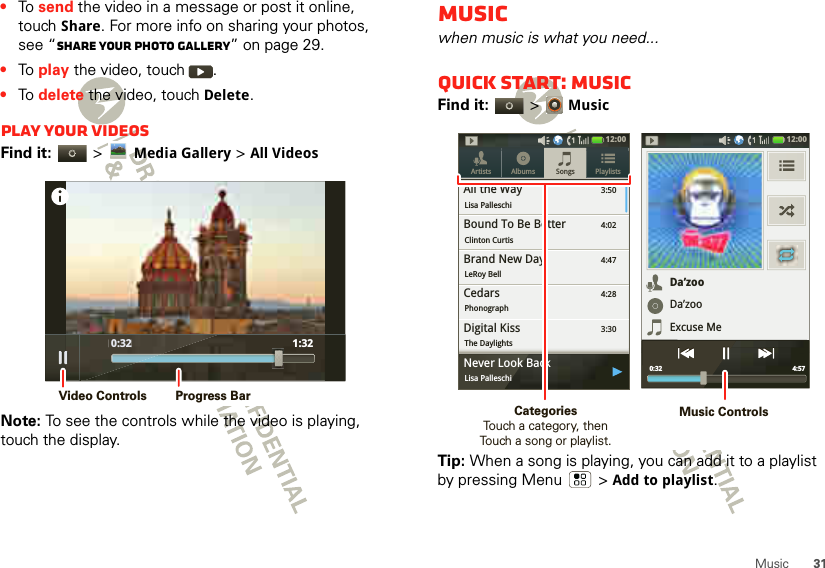
Motorola Mobility P56MH1 i940 iDEN MOBILE WITH WI-FI AND BLUETOOTH User Manual Exhibit 12
Motorola Mobility LLC i940 iDEN MOBILE WITH WI-FI AND BLUETOOTH Exhibit 12
Contents
- 1. Users Guide 1
- 2. Users Guide 2
- 3. USERS MANUAL 1
- 4. USERS MANUAL 2
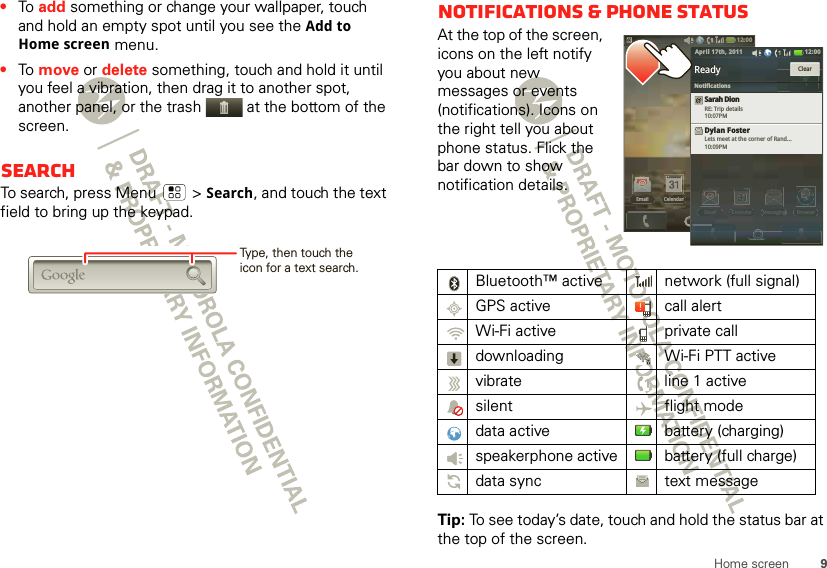
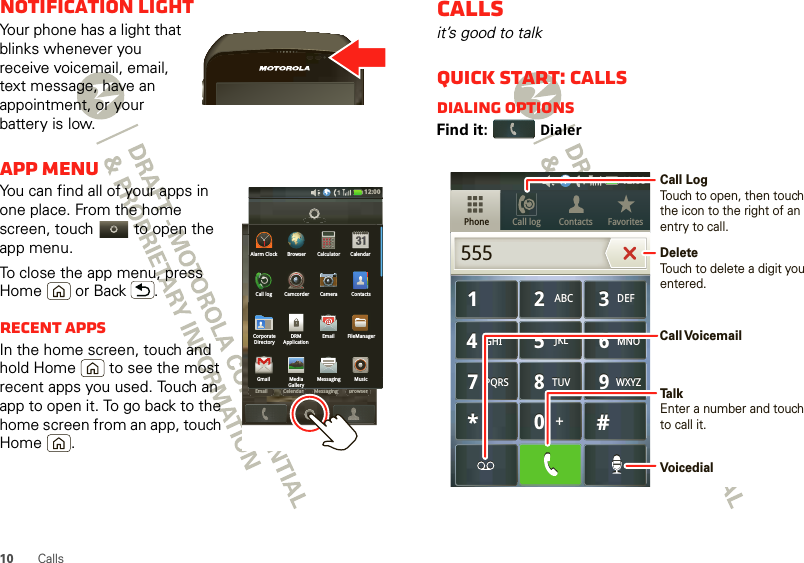
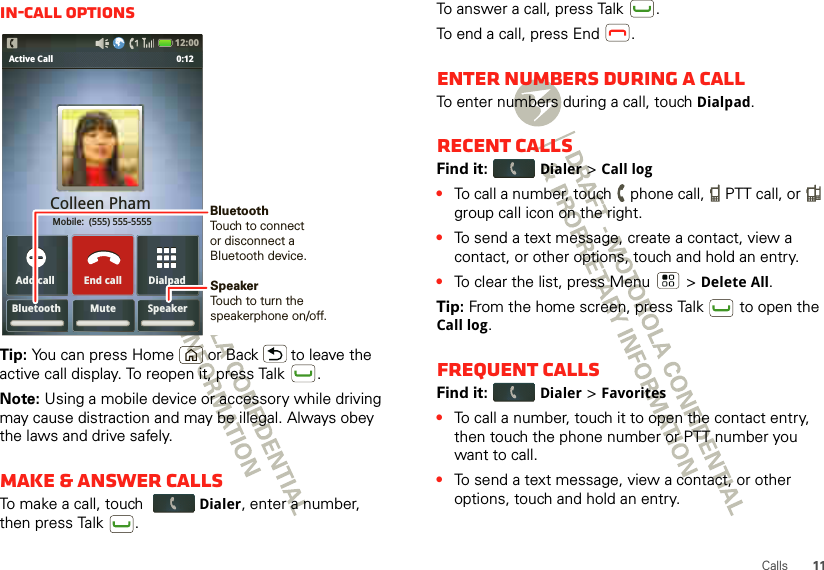
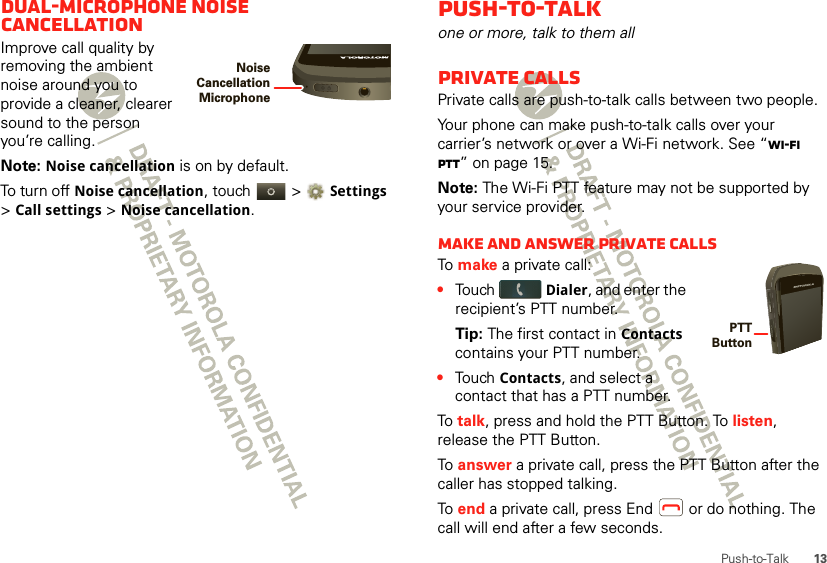
Users Guide 1