Micro Star S260 MEGA BOOK User Manual Part 3
Micro Star International Co Ltd MEGA BOOK Part 3
UserManual.wiki
>
Micro Star
>
S260 User Manual
>
User Manual Part 3
Contents
1.
User Manual Part 1
2.
User Manual Part 2
3.
User Manual Part 3
User Manual Part 3
Navigation menu
Upload a User Manual
Namespaces
Wiki Guide
HTML
PDF
Info
Views
User Manual
Discussion / Help
Navigation
![65 Advanced Settings y Primary IDE Master/Slave The two items display the types of the primary master/slave IDE devices installed in the computer. Press [Enter] to bring up a window showing the detailed information of the device, including the device name, vendor, LBA mode, PIO mode and more. y Legacy USB Support If you want to use USB device, like mouse, keyboard, portable disk, in DOS system or boot your system by USB device, you should enable this function by select Enabled.](https://usermanual.wiki/Micro-Star/S260.User-Manual-Part-3/User-Guide-535099-Page-1.png)
![67 Security Settings y Change Supervisor/User Password When you select the function, a message box will appear on the screen as below: Type the password you want, up to six characters in length and press [Enter]. The password typed now will replace any previously set password from CMOS memory. You may also press [ESC] to abort the selection and not enter a password. Enter New Password](https://usermanual.wiki/Micro-Star/S260.User-Manual-Part-3/User-Guide-535099-Page-3.png)
![68 About Supervisor Password and User Password Supervisor Password allows the user to enter and change the settings of the setup menu; User Password only allows the user to enter the setup menu, but do not have the right to make changes. Things to know… When the Supervisor Password is set, the new item User Access Level and Password Check will be added in the menu. You can make further settings of access right in the User Access Level item. Setting options: No Access, View Only, Limited and Full Access. The Password Check item is used to specify the type of BIOS password protection that is implemented. Settings are described below: Setup The password prompt appears only when end users try to run Setup. Always A password prompt appears every time when the computer is powered on or when end users try to run Setup. To clear a set password, just press [Enter] when you are prompted to enter the password. A message box will show up confirming the password will be disabled. Once the password is disabled, the system will boot and you can enter Setup without entering any password.](https://usermanual.wiki/Micro-Star/S260.User-Manual-Part-3/User-Guide-535099-Page-4.png)

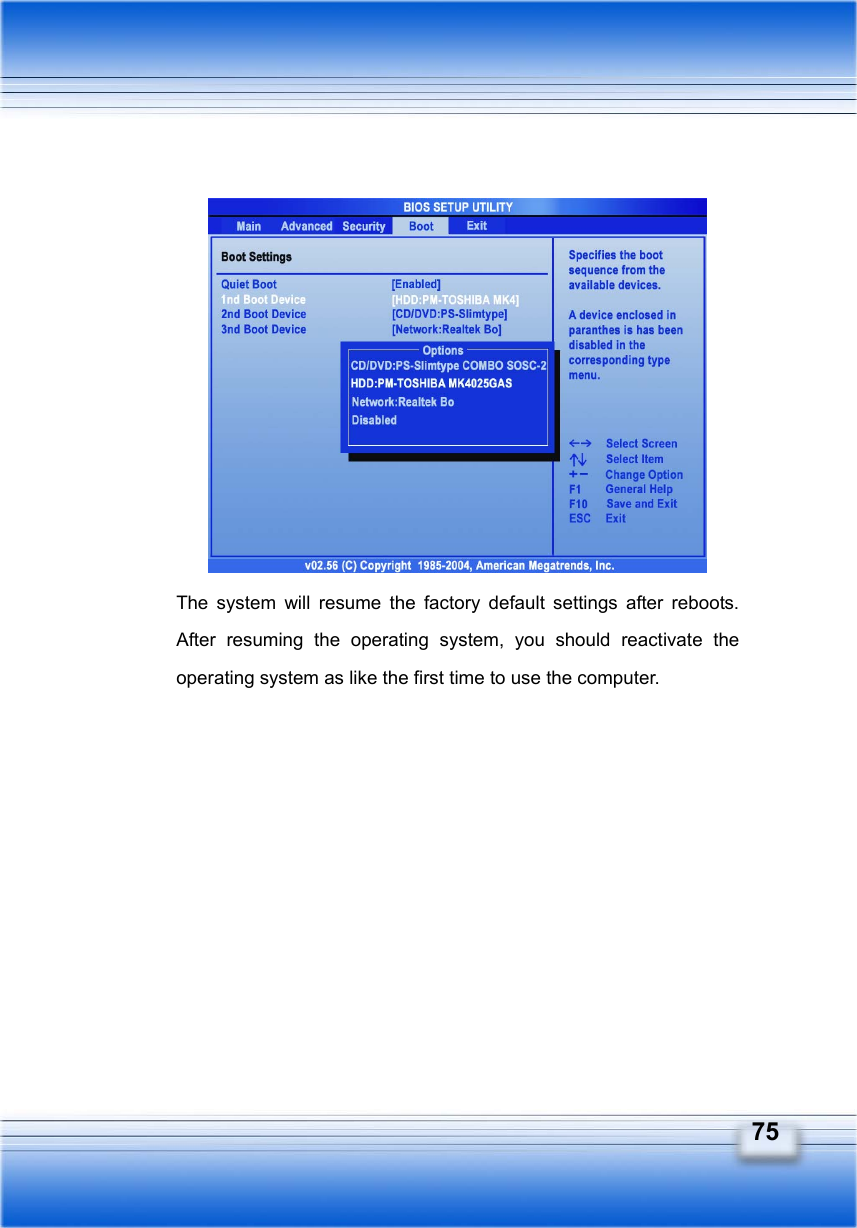
![74 Using the Recovery CD The Recovery CD is a compact disk that records the sources of operating system and important data and can be used to restore the hard disk to its original state. When the operating system of your computer is damaged and can not work properly any more, you can use the Recovery CD to resume the system in its original state. Resuming the Operating System To resume the operating system from the Recovery CD. Insert the Recovery CD into the CD/DVD-ROM drive. Press the [Del] key on the keyboard to enter the BIOS Setup Utility when the system boots up. In the BIOS Setup Utility, set the CD/DVDVD-ROM drive as the first boot device (See Boot Menu in BIOS Setup for more instruction). Choose to restore the operating system from the Recovery CD when prompted. Then, follow the on-screen instructions to complete the procedures. The system will reboot automatically when completed.](https://usermanual.wiki/Micro-Star/S260.User-Manual-Part-3/User-Guide-535099-Page-10.png)


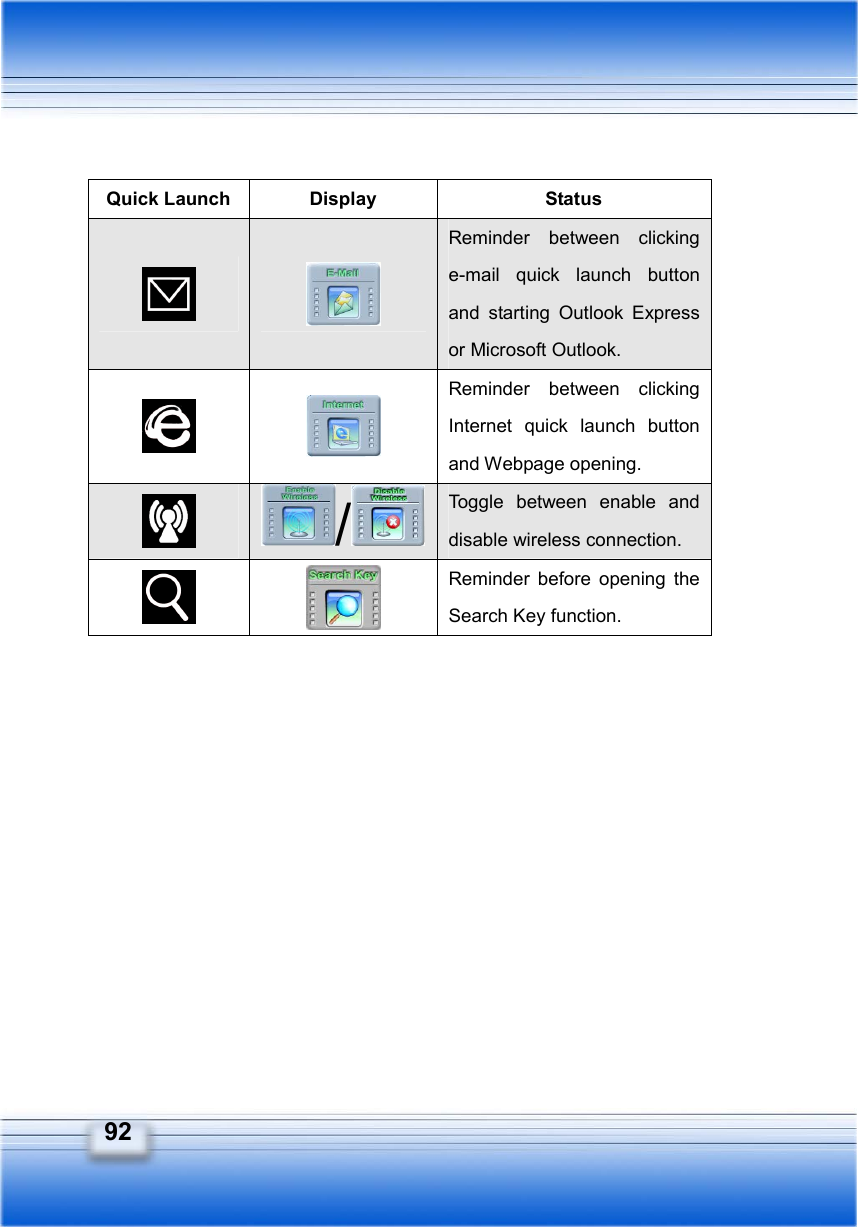
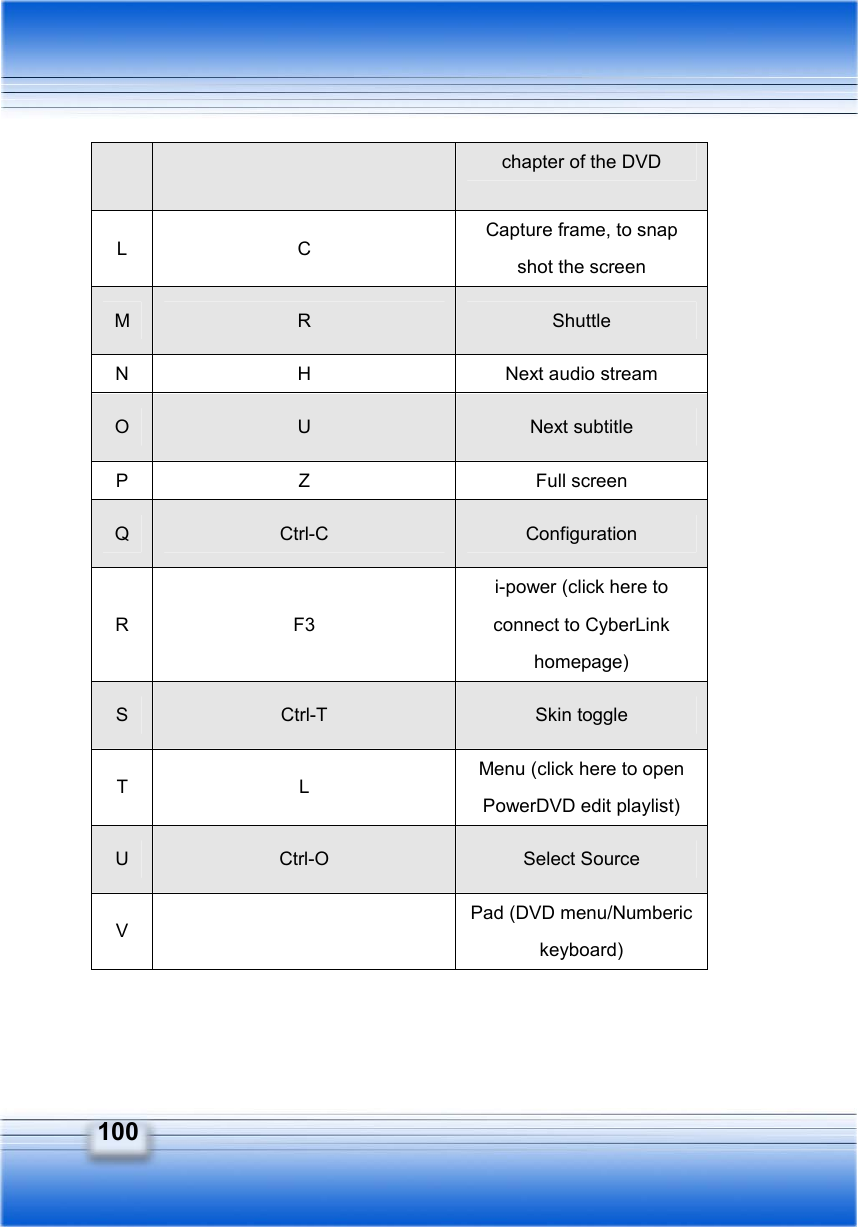
![91 OSD (On-Screen Display) Your Notebook PC is already installed a special OSD interface. It gives you vivid and friendly displays on your screen when you are enabling Function Keys and Quick Launch Buttons. Take the tables below as your reference and know every function with its related keys and reminders. Function Keys [Fn] + [Fx] Display Status +NA Toggle between internal and external displays without any status reminder. + Adjustable scroll bar to increase brightness. + Adjustable scroll bar to decrease brightness. + Adjustable scroll bar to increase volume. + Adjustable scroll bar to decrease volume. +/ Toggle between mute and sound effect modes. + Reminder before getting into Hibernation.](https://usermanual.wiki/Micro-Star/S260.User-Manual-Part-3/User-Guide-535099-Page-27.png)