Mertik Maxitrol and KG B6R Handset of remote electronic ignition and control system for gas applications User Manual GV60 symax II OI EN 28 10 2013 Draft indd
Mertik Maxitrol GmbH & Co. KG Handset of remote electronic ignition and control system for gas applications GV60 symax II OI EN 28 10 2013 Draft indd
Contents
- 1. Instructions part 1
- 2. Instructions part 2
- 3. Compliance statements
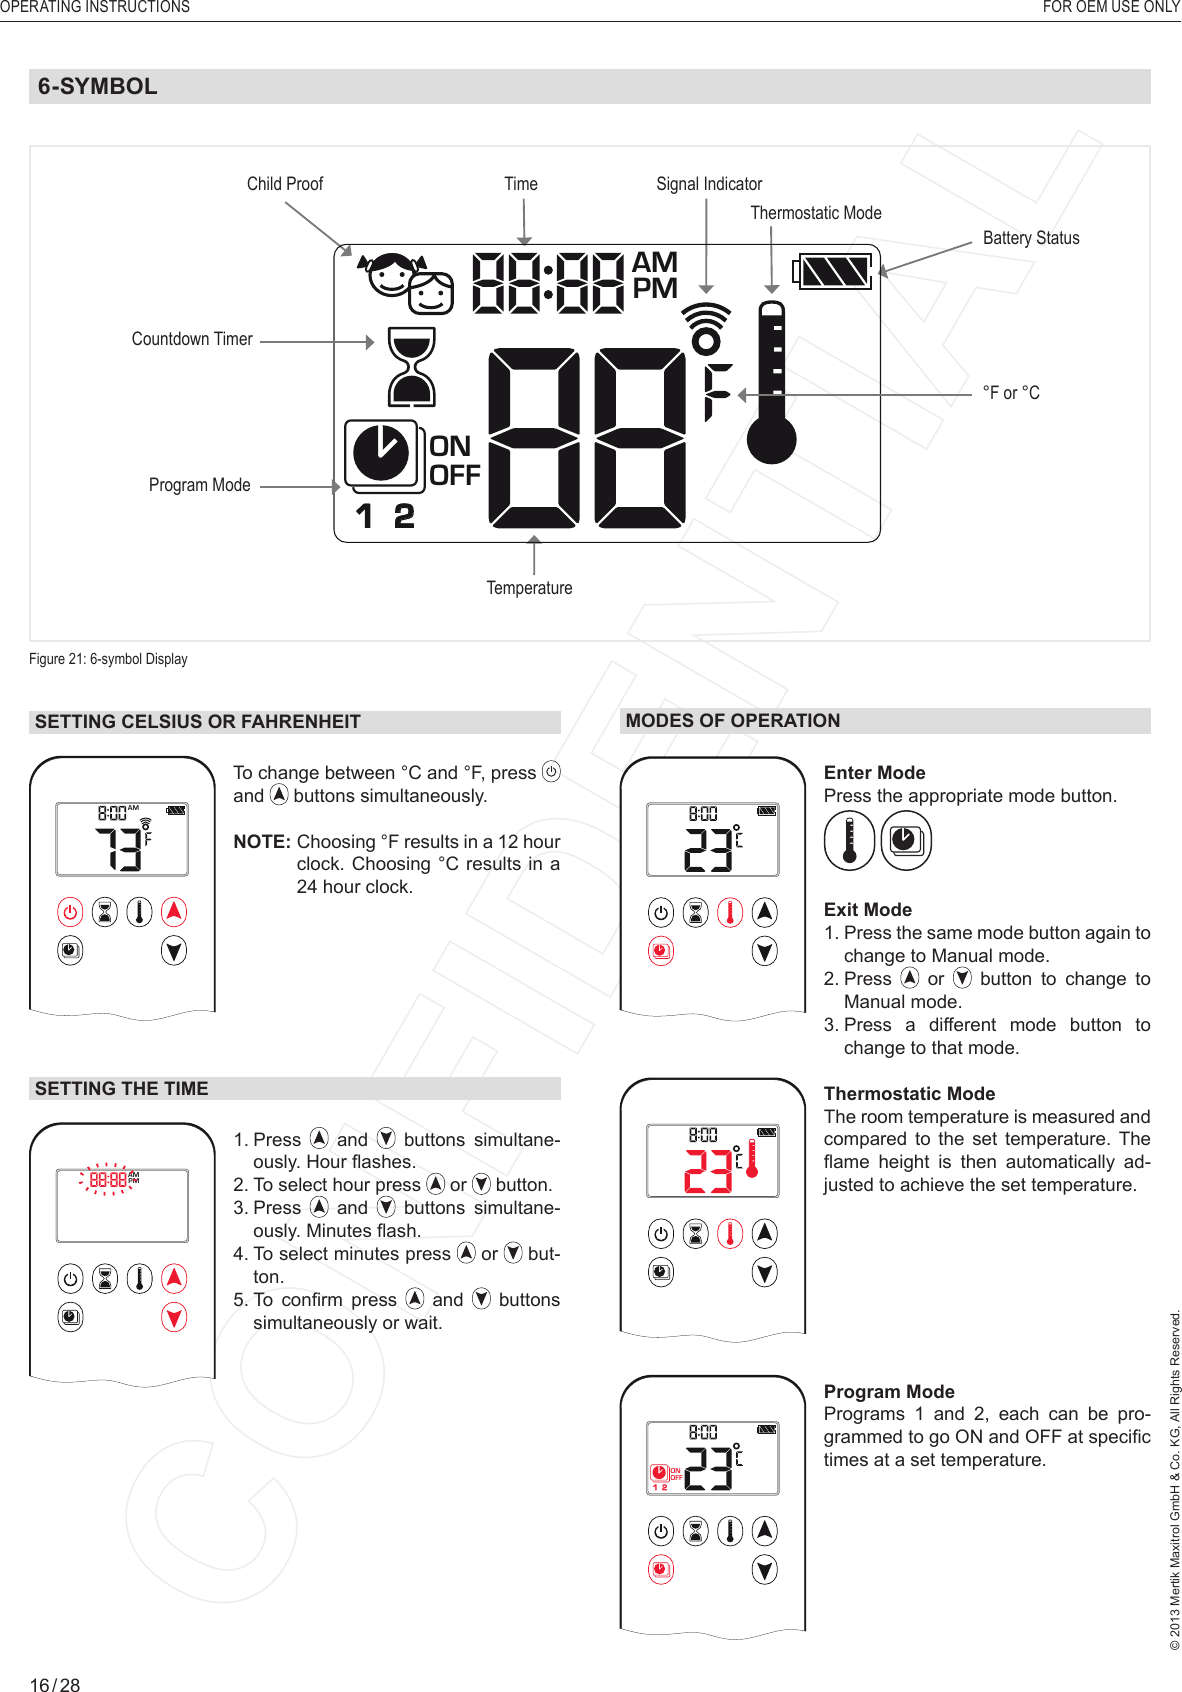
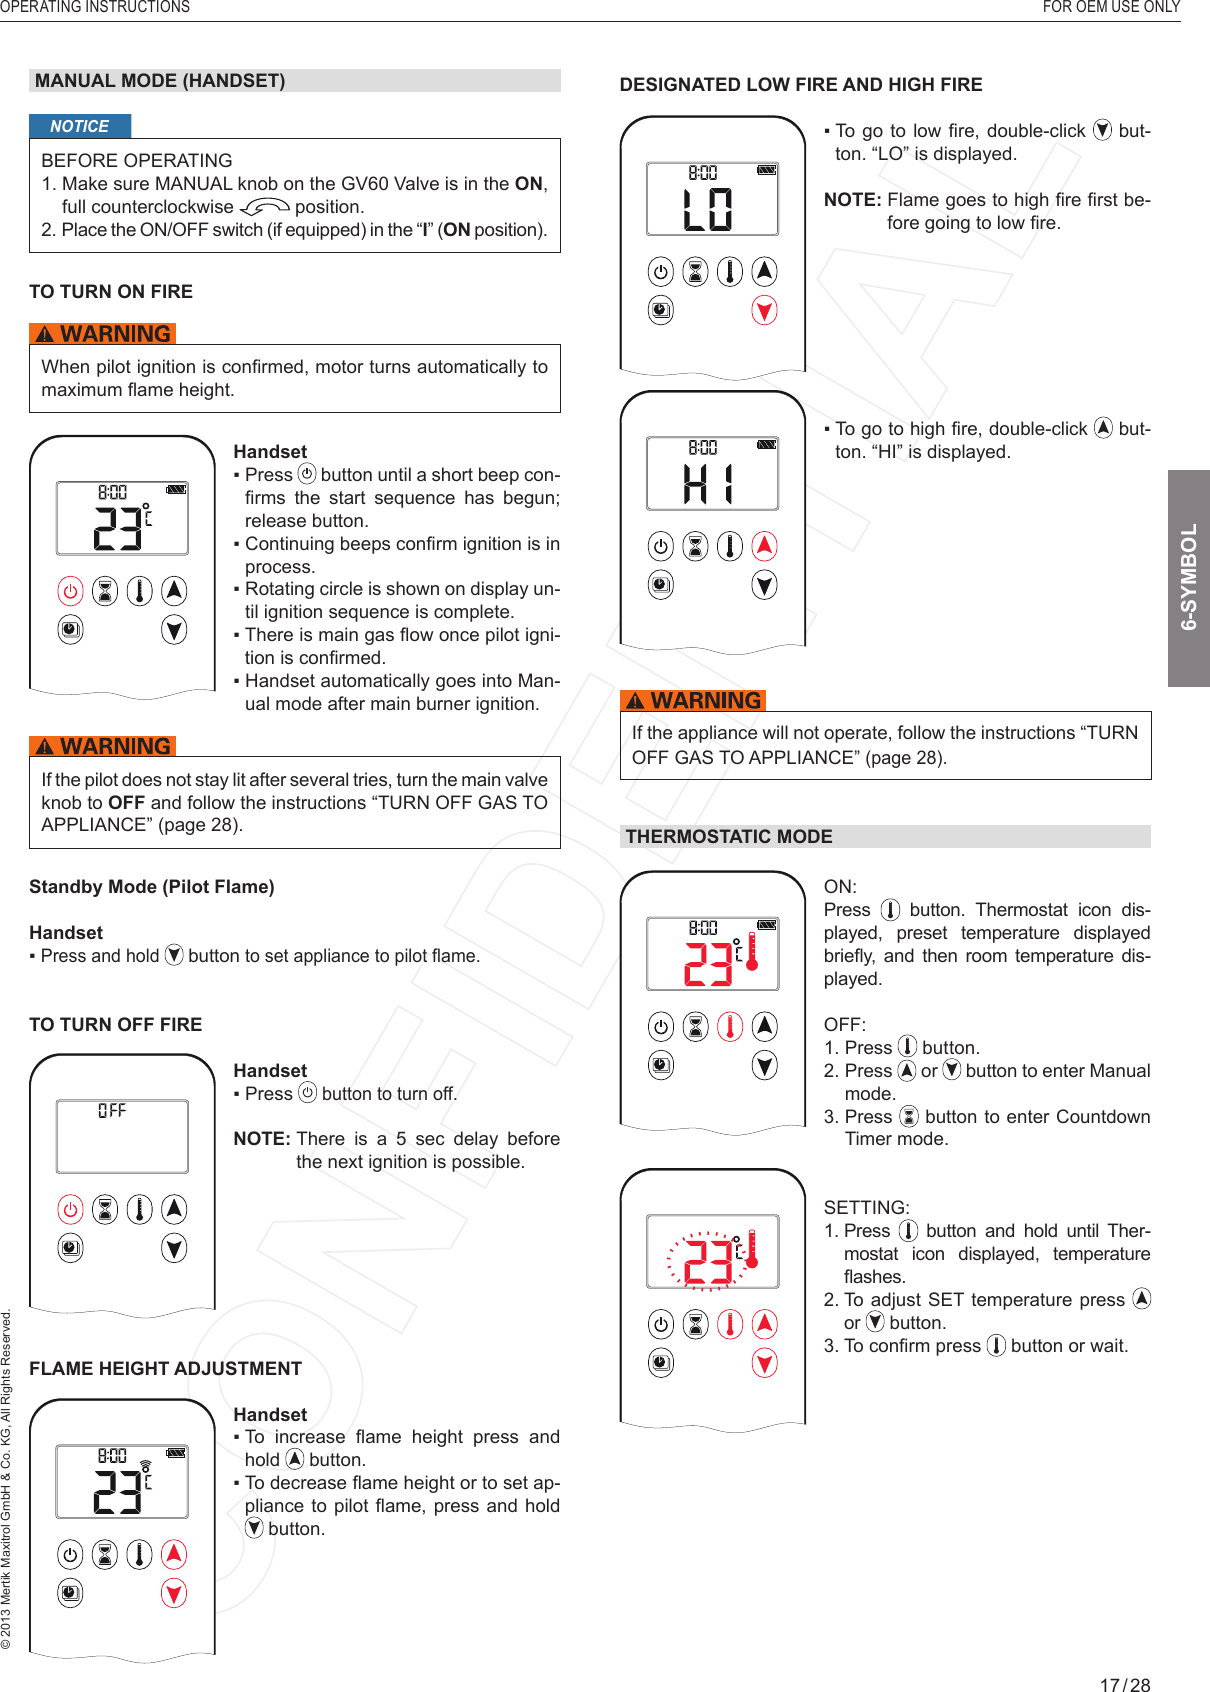
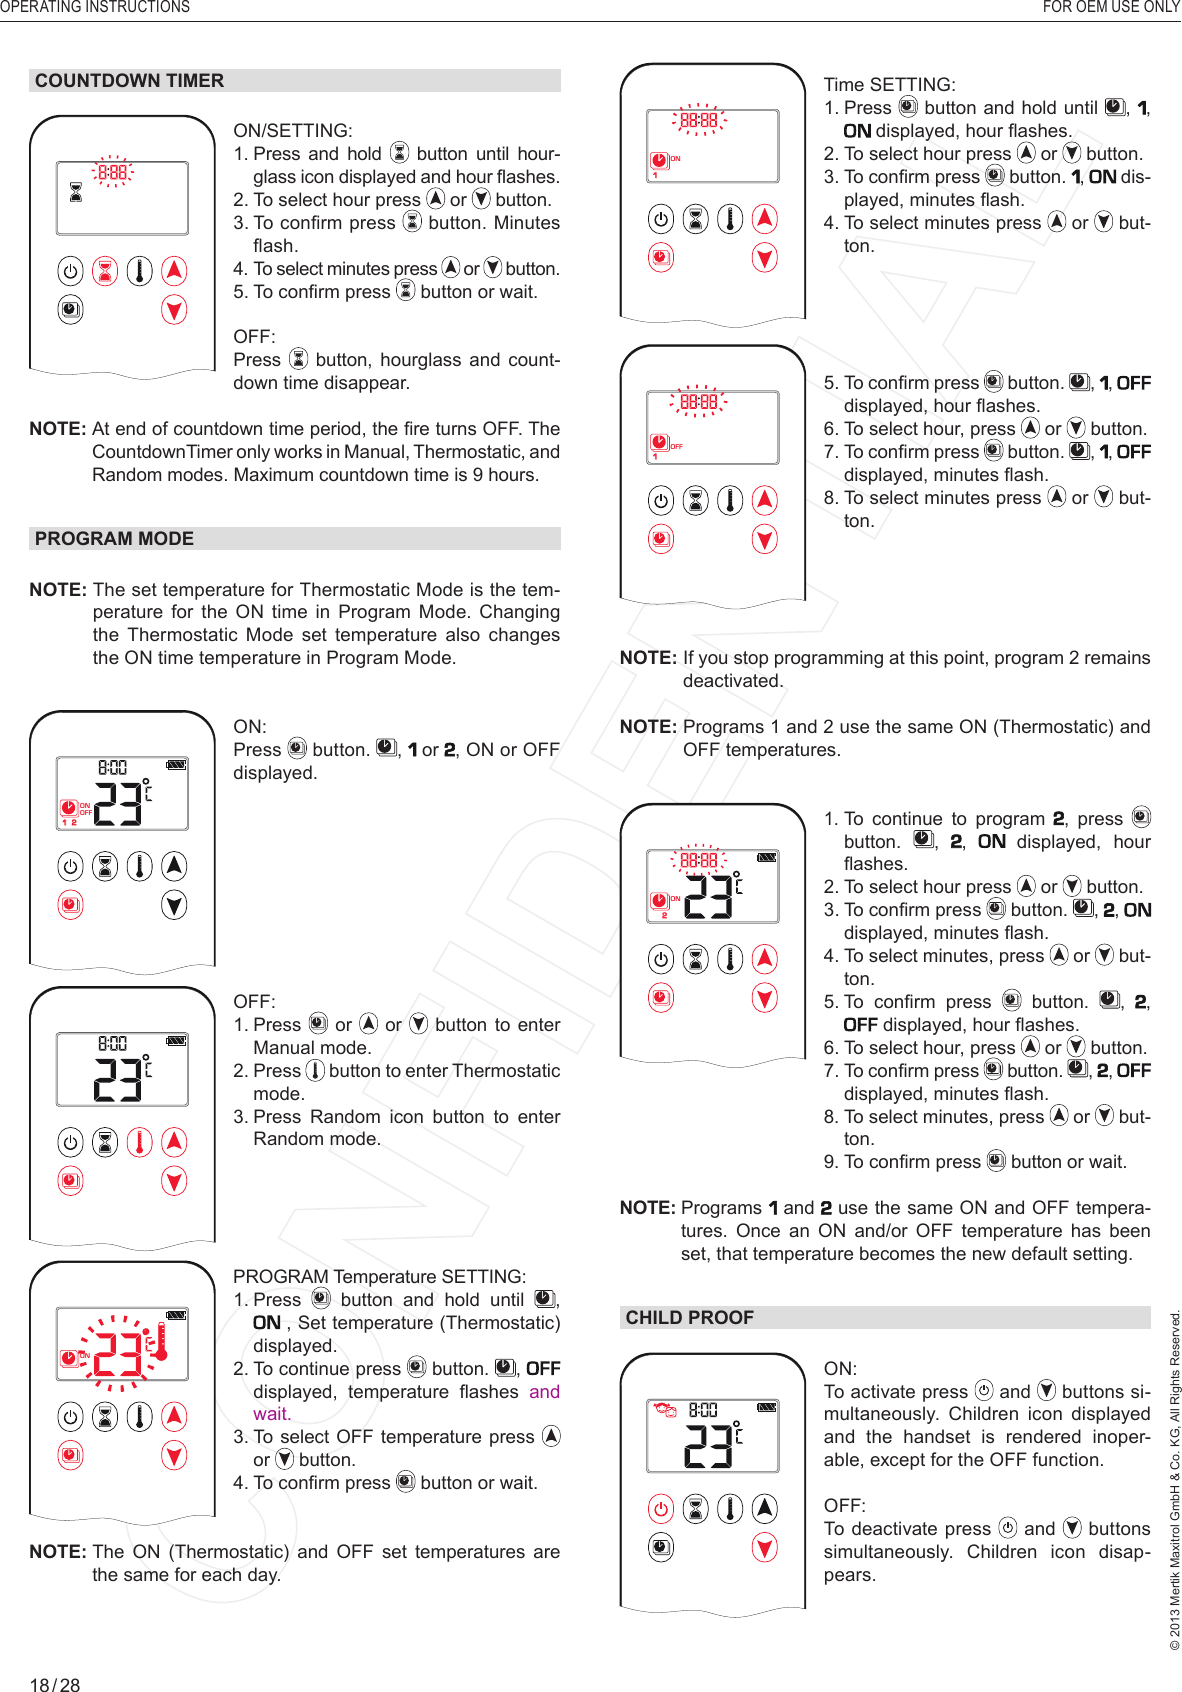
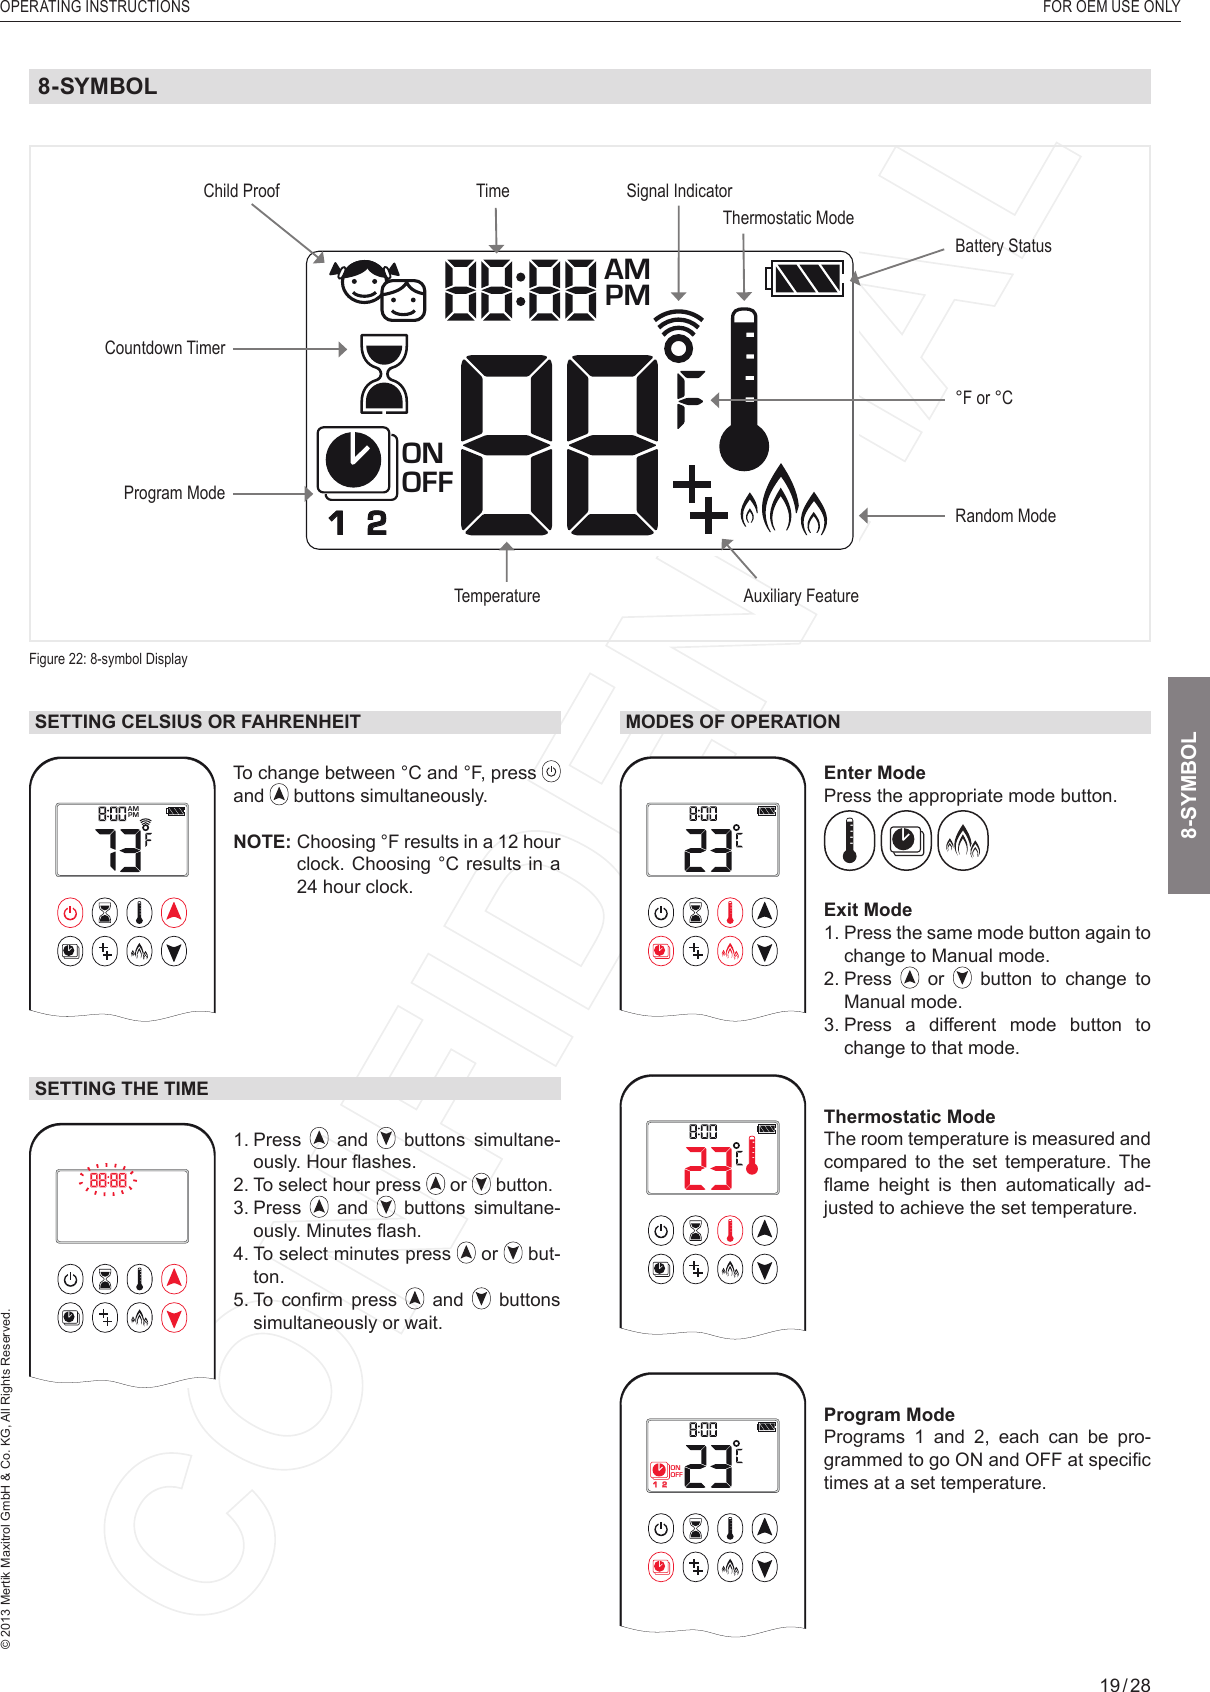
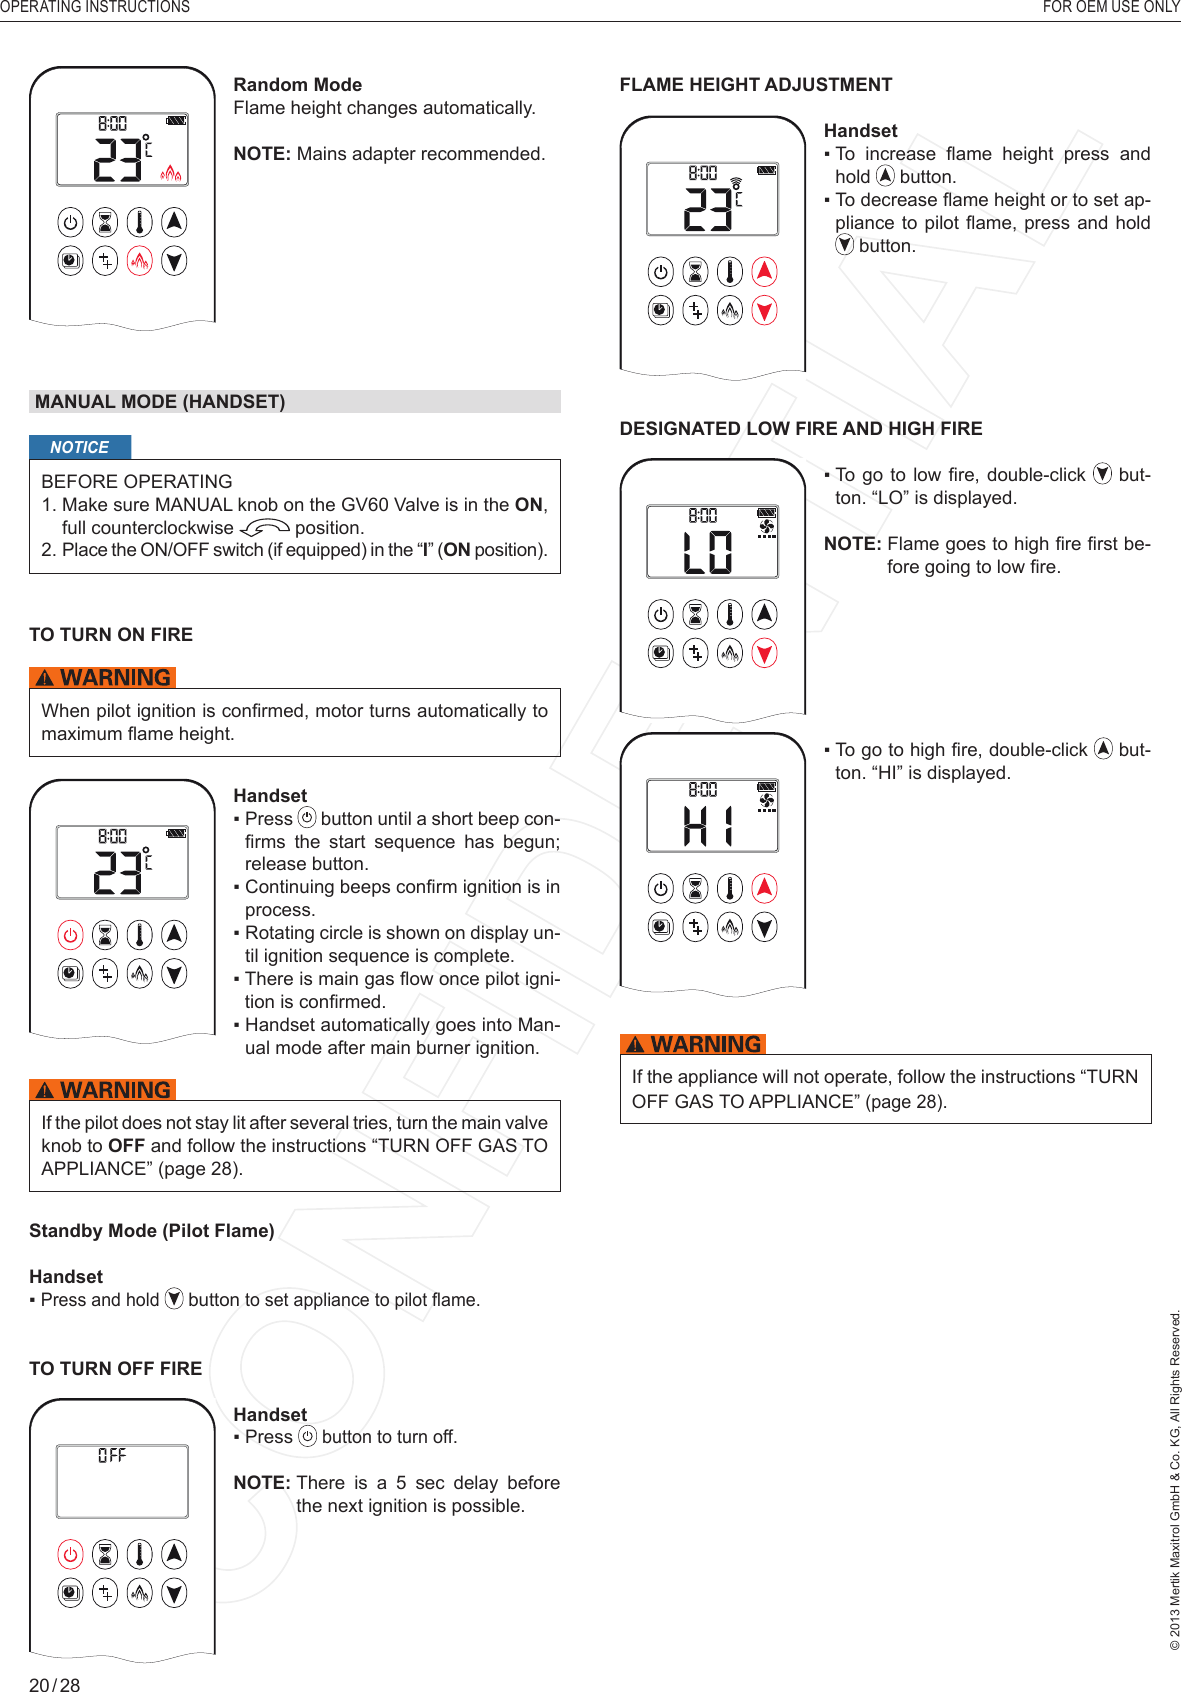
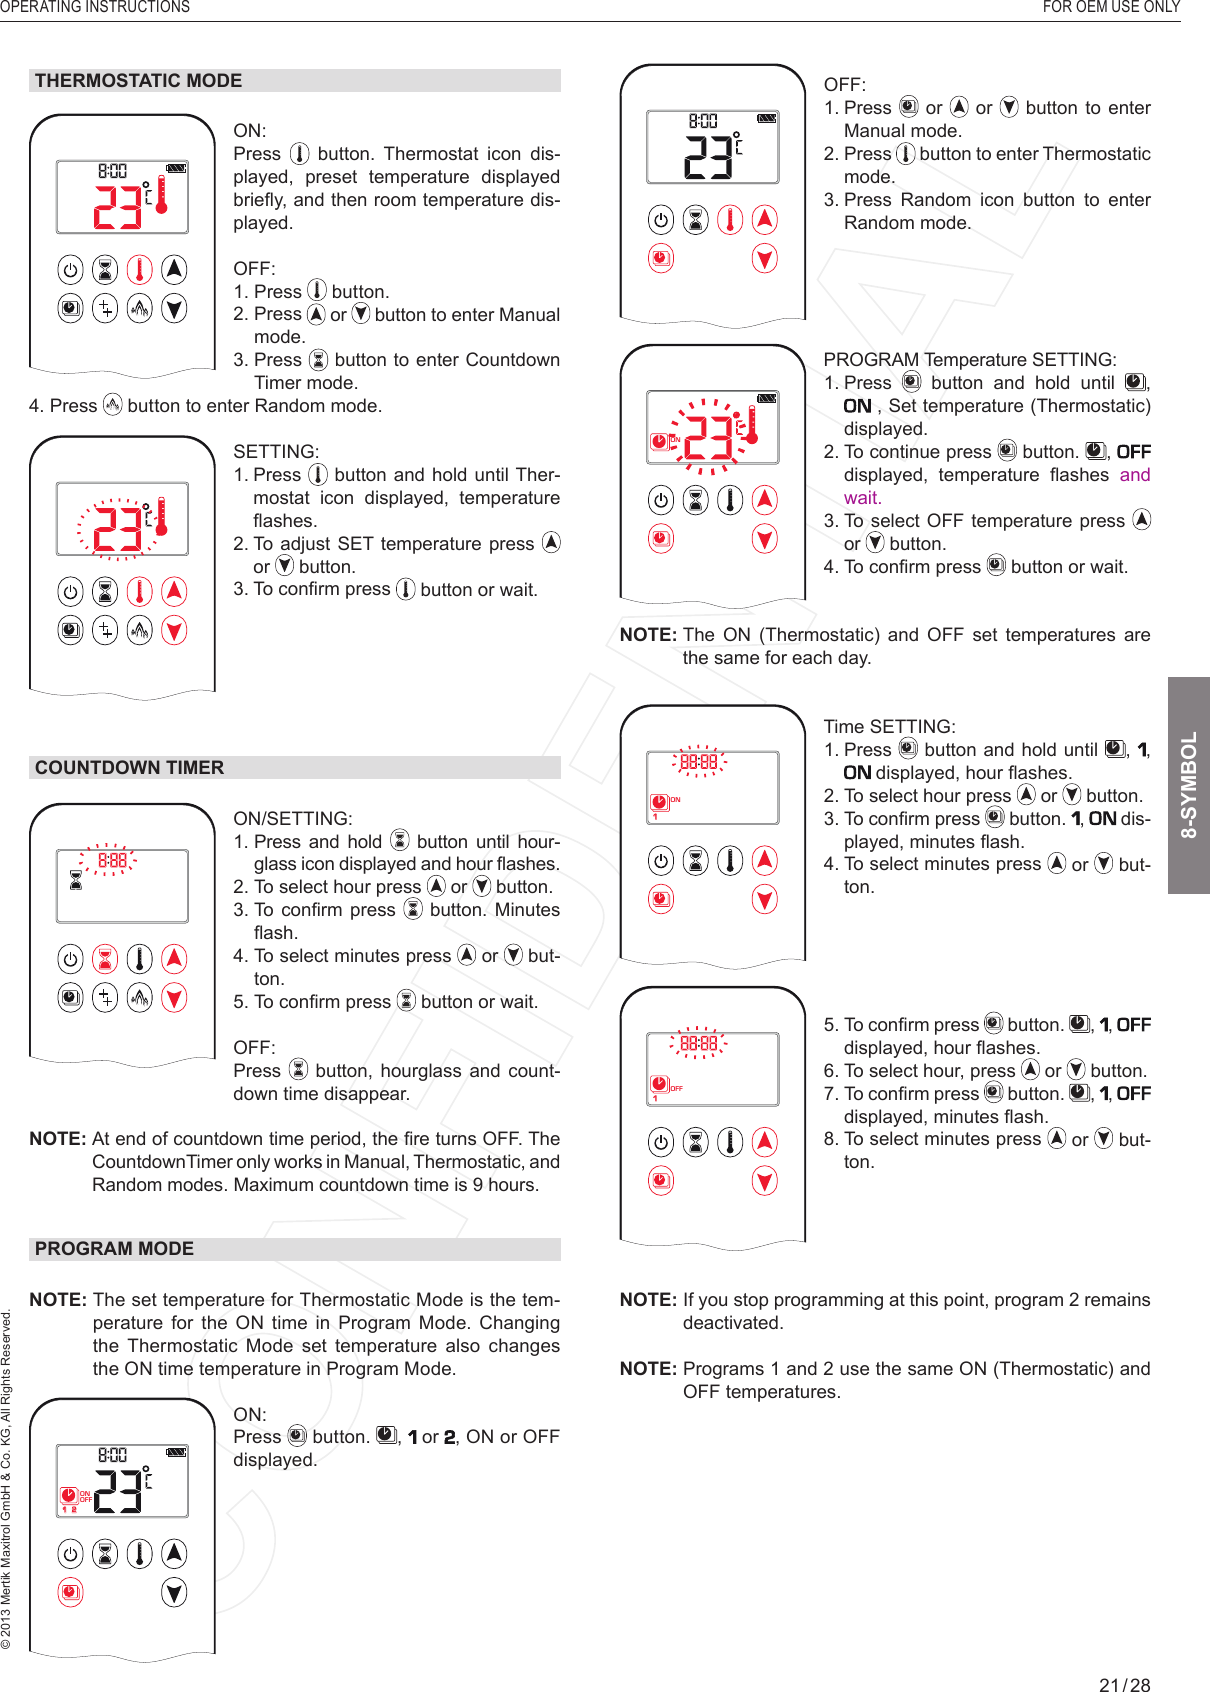
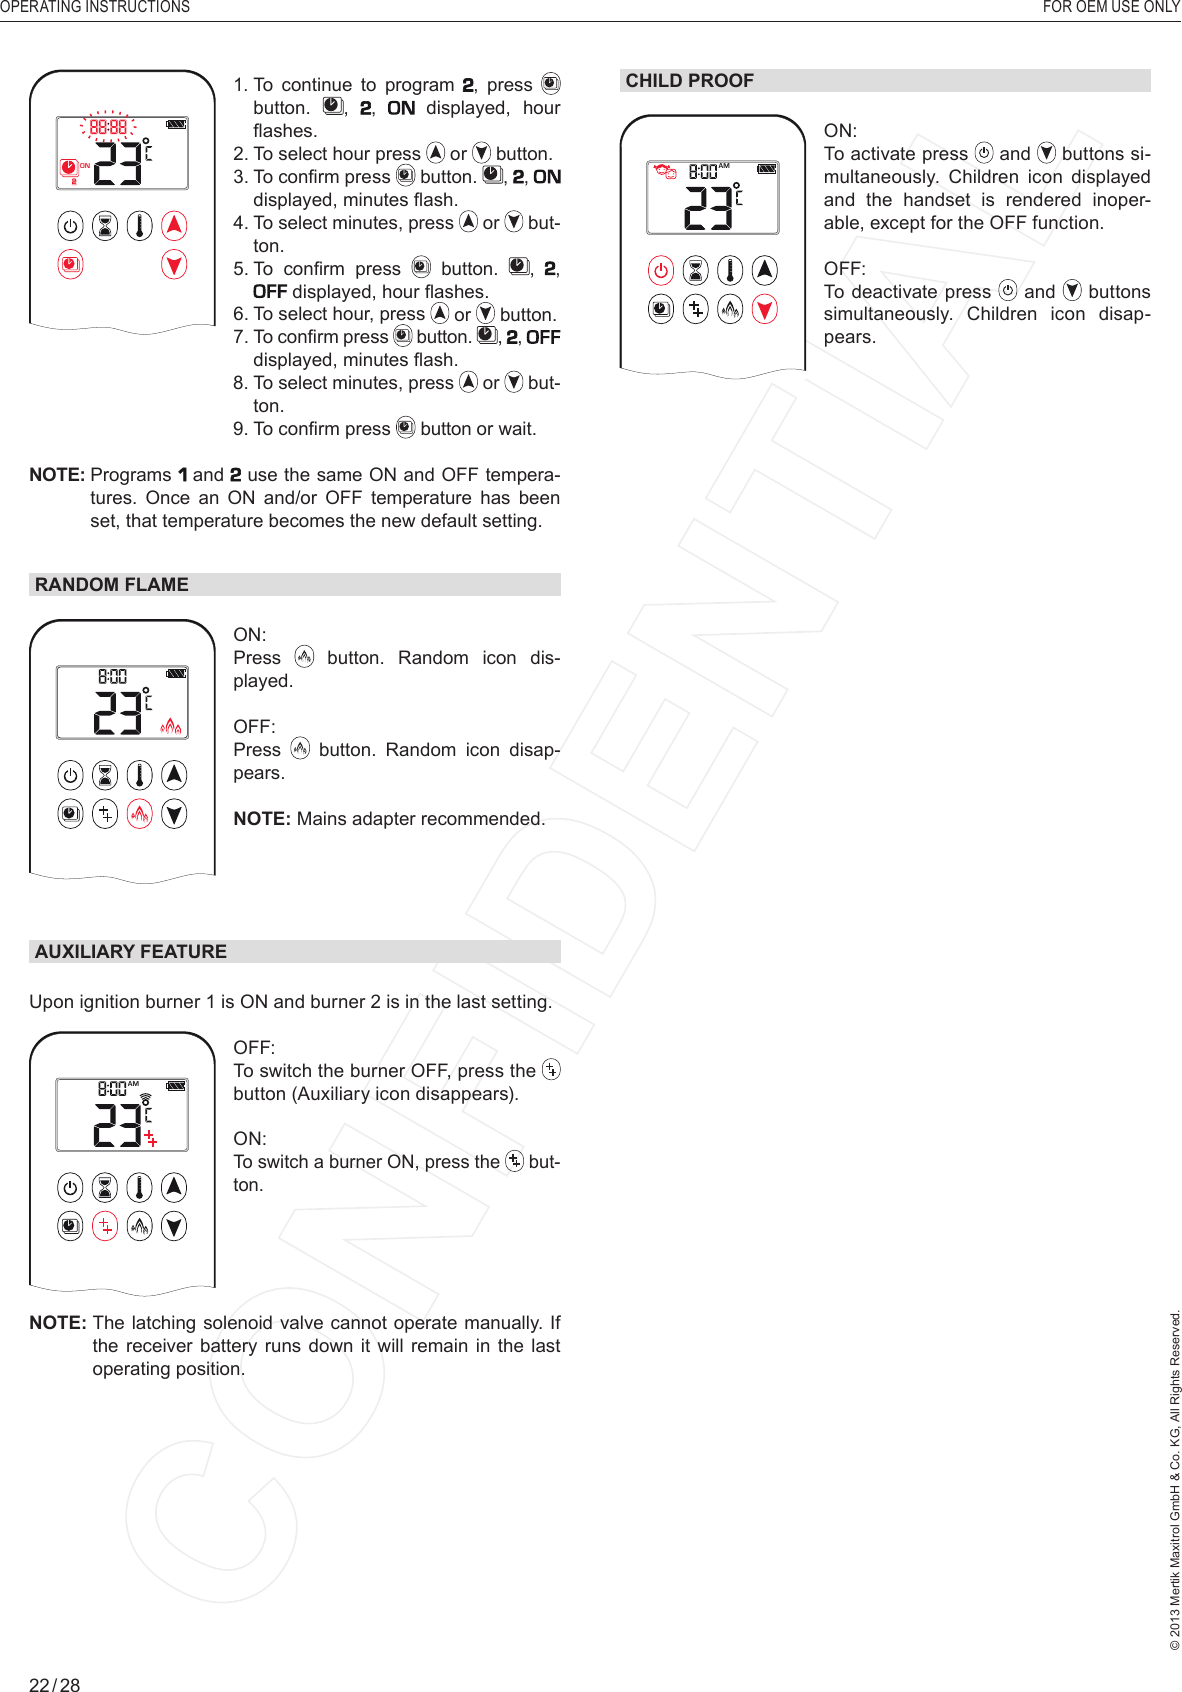
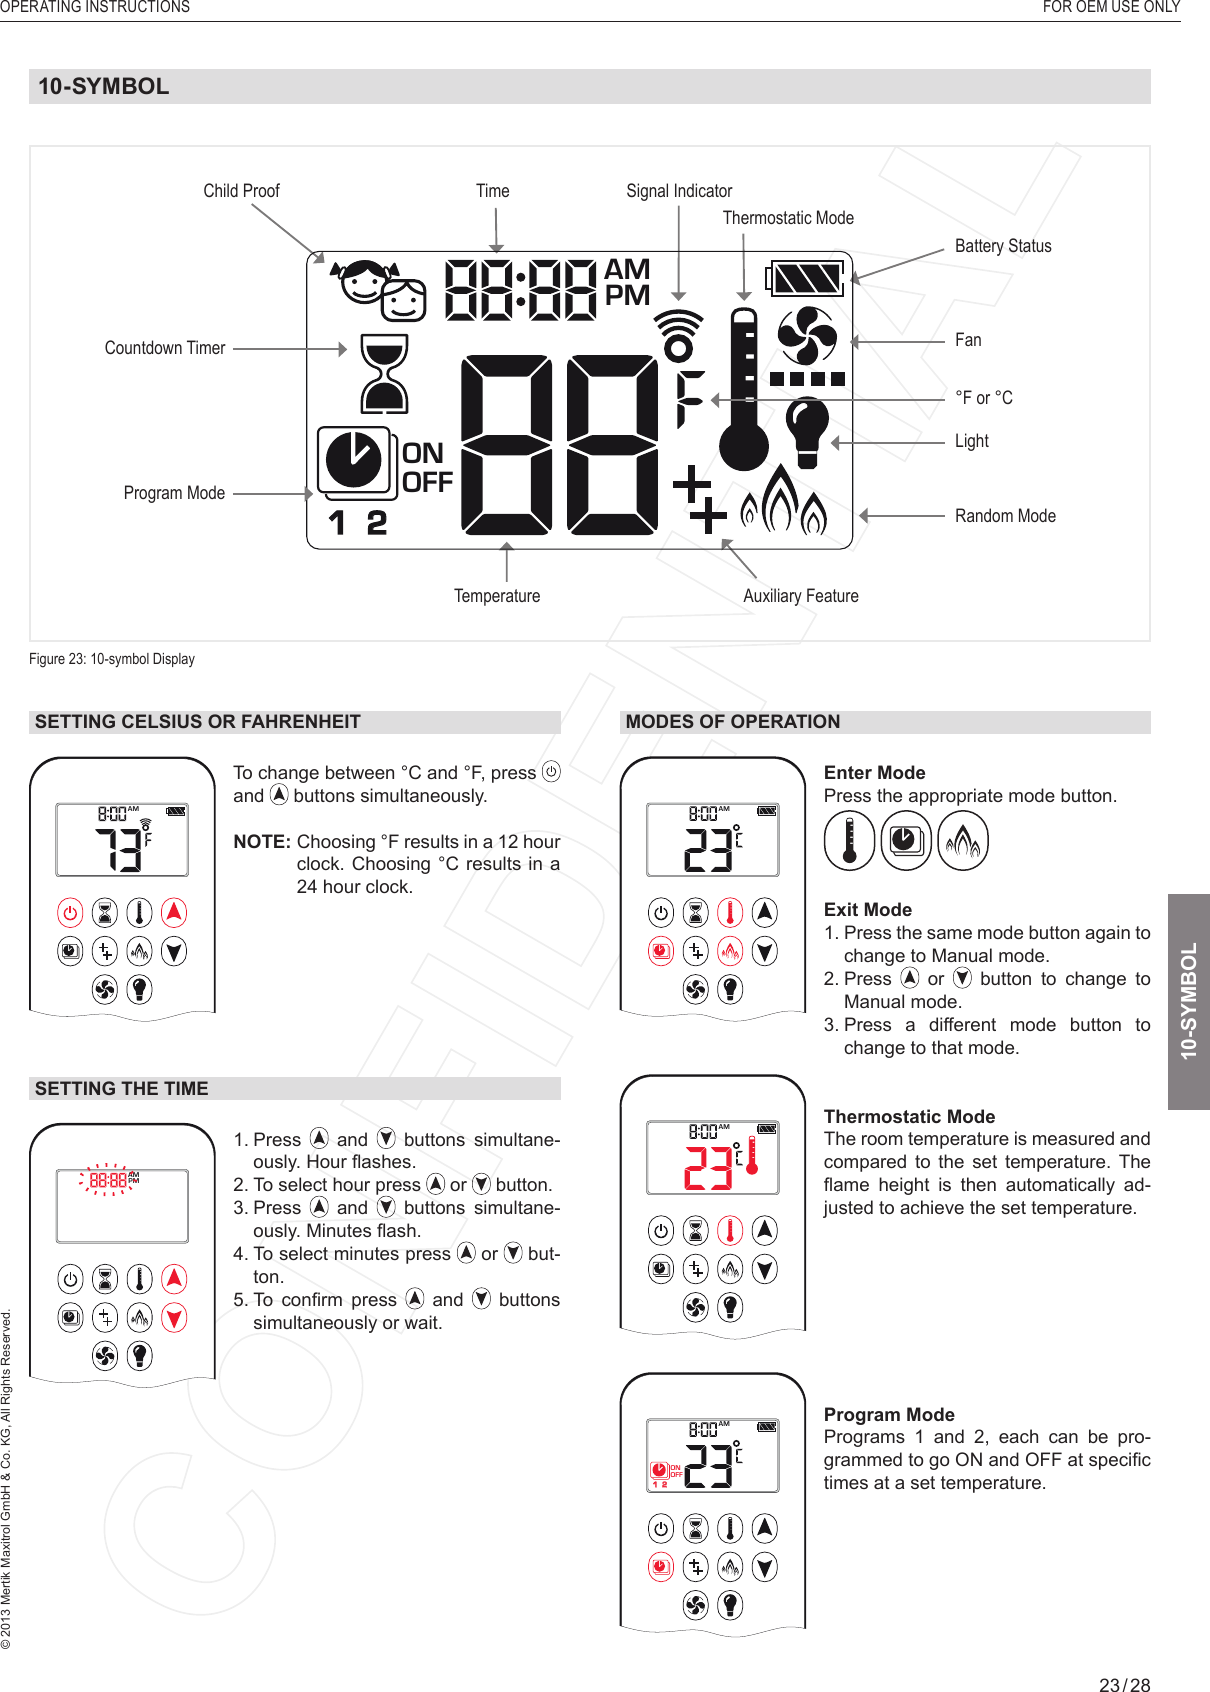
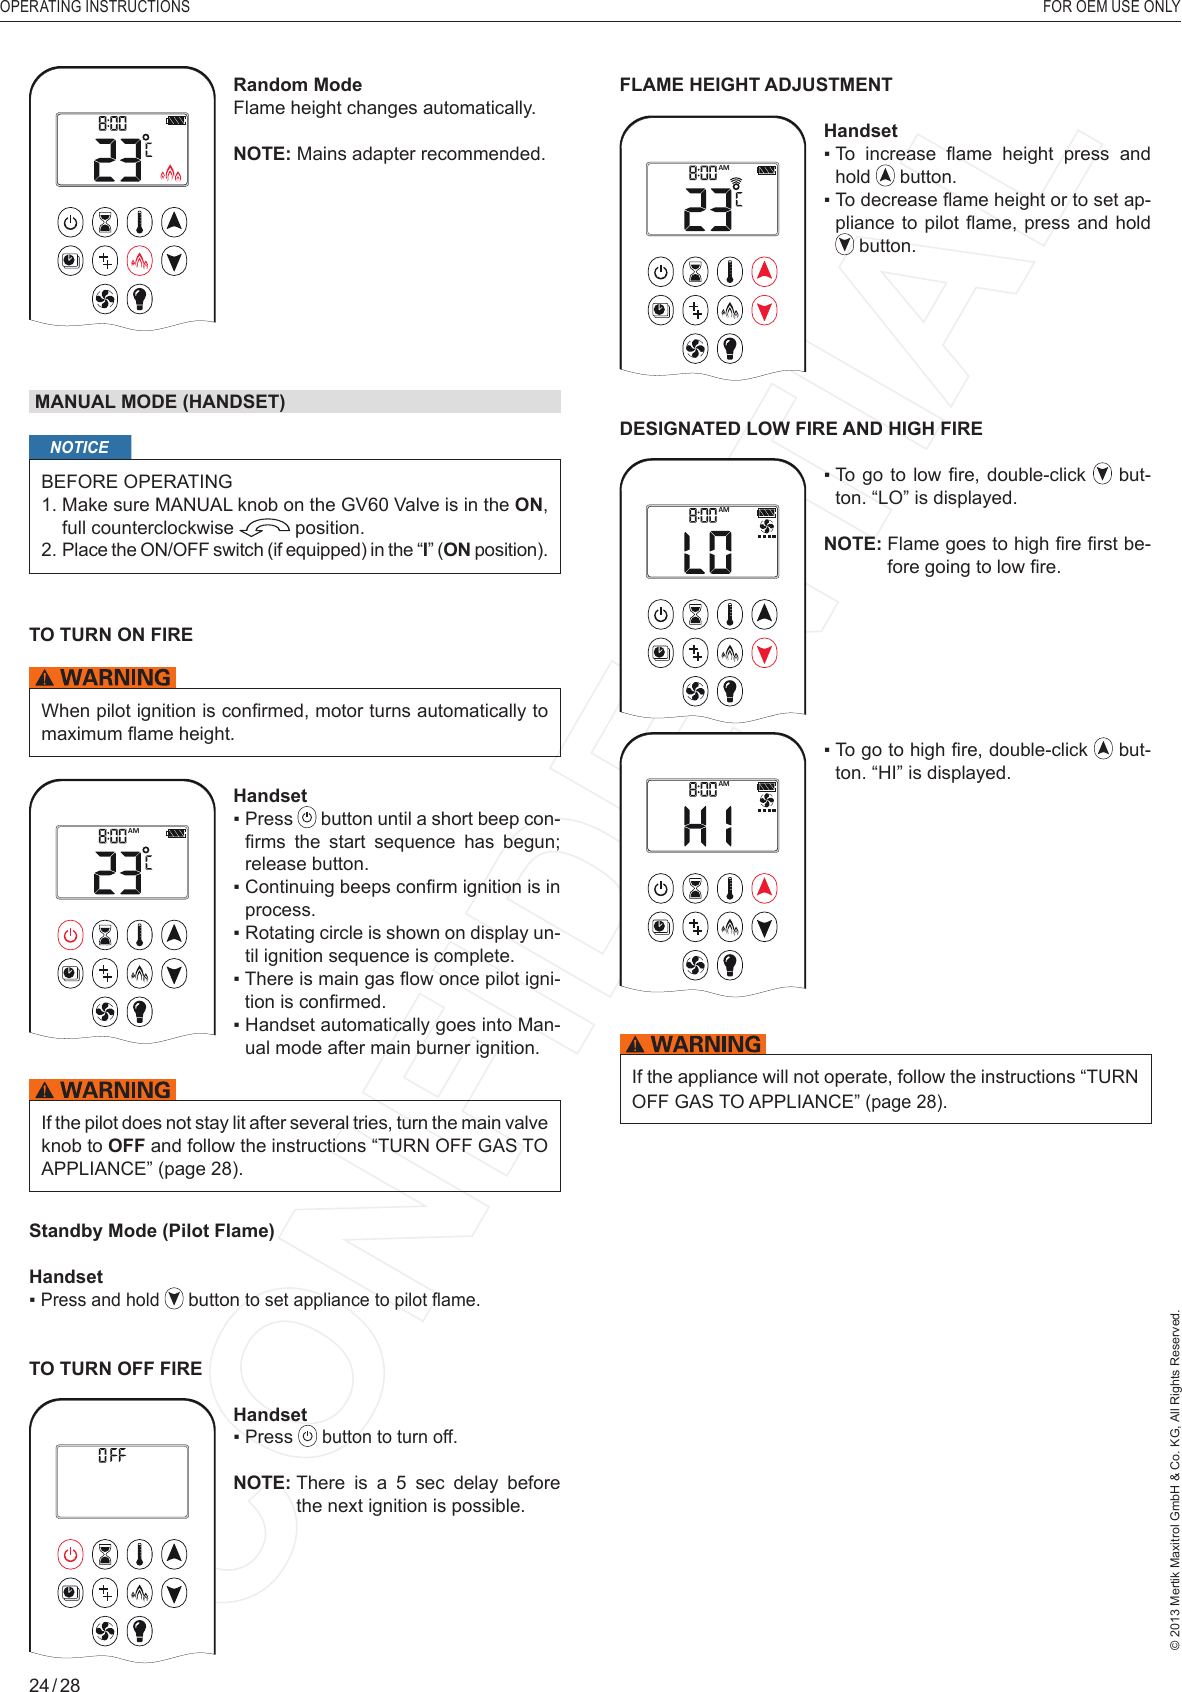
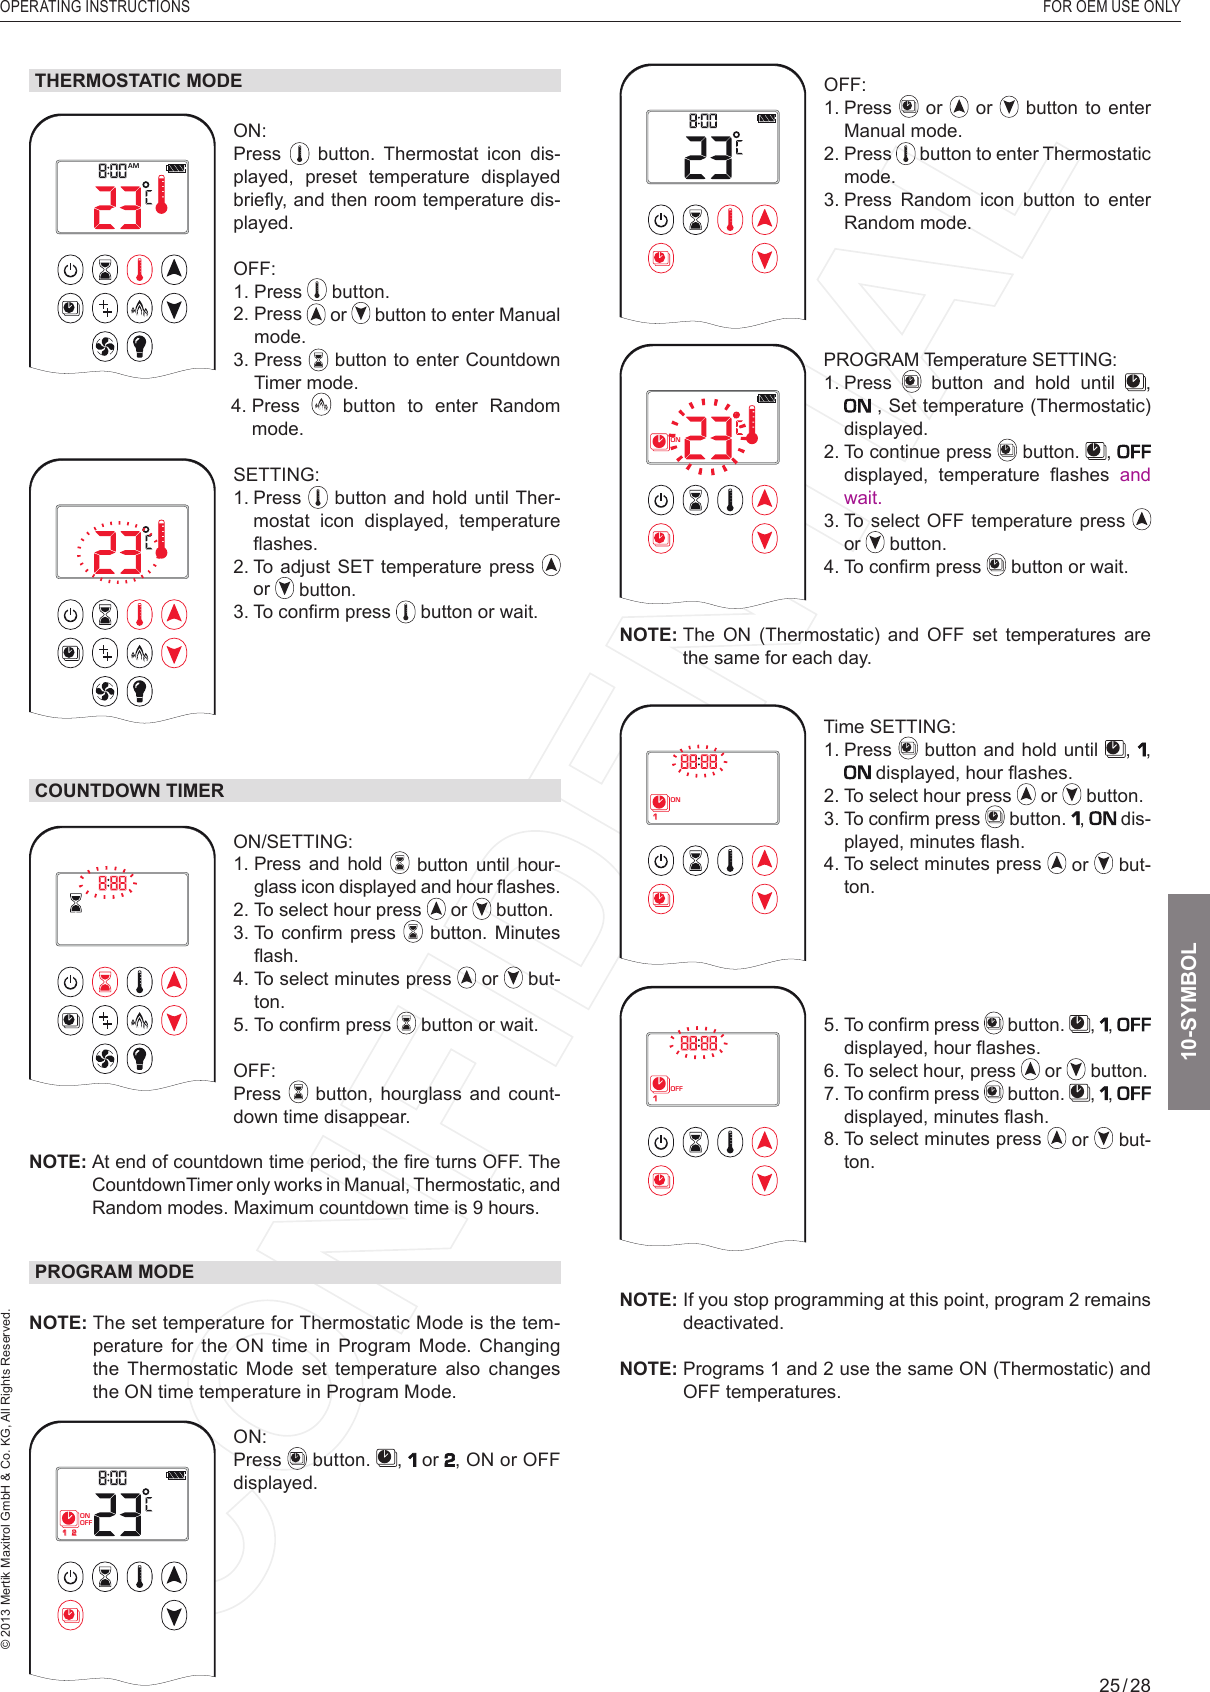
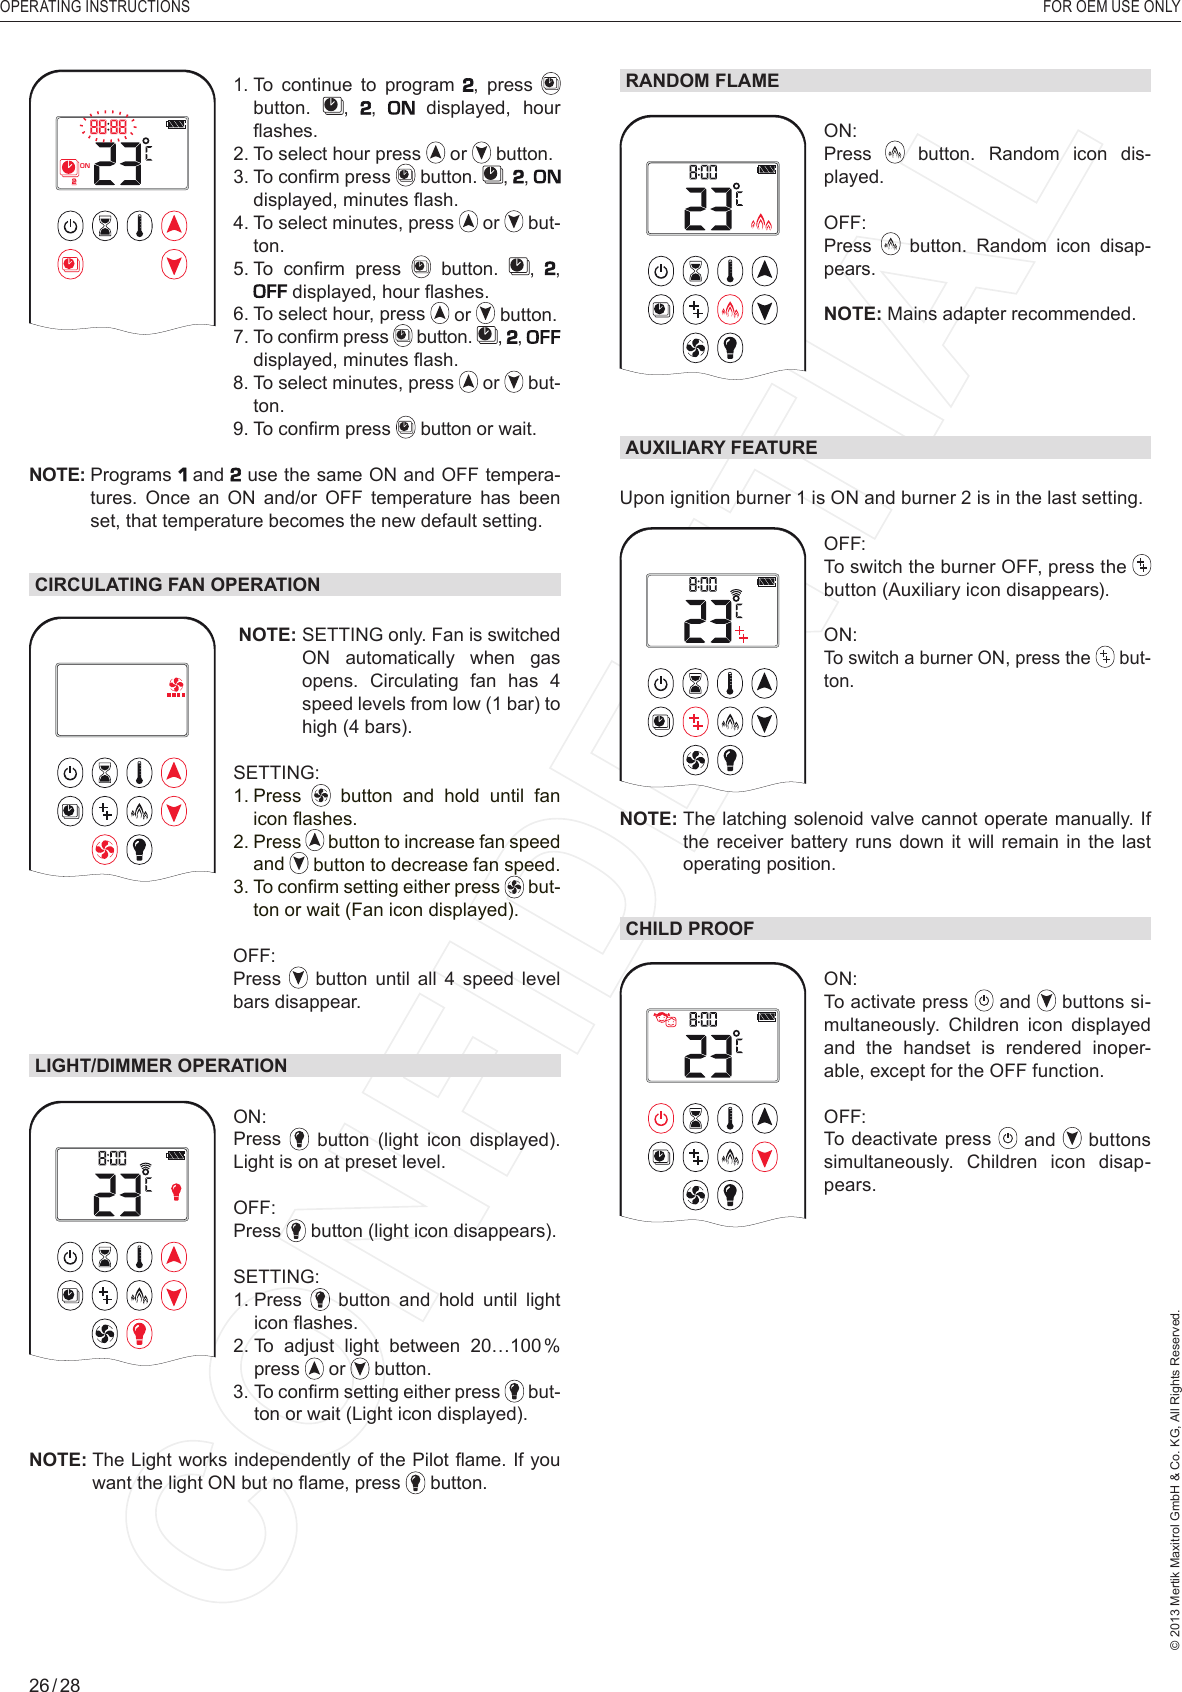
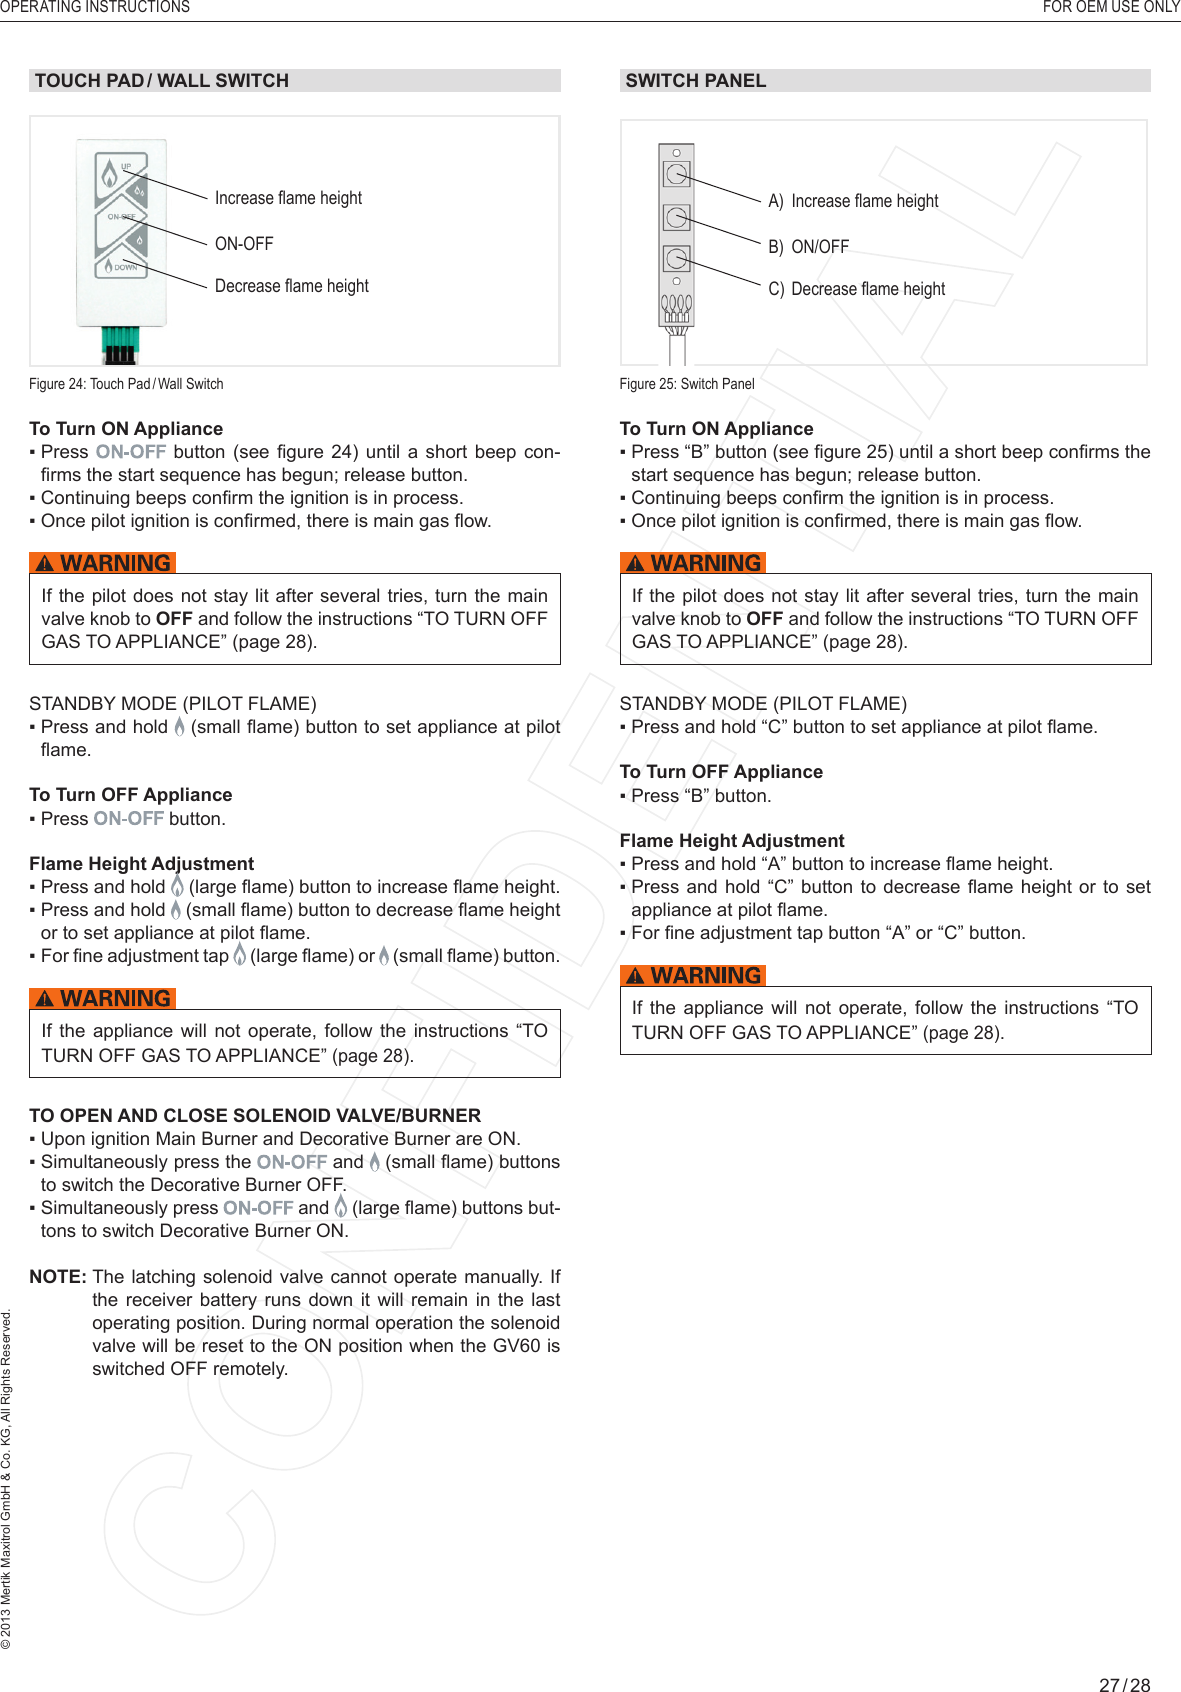
Instructions part 2