Long Range Solutions TX9601 Paging transmitter with keypad and display User Manual Layout 1
Long Range Systems, LLC Paging transmitter with keypad and display Layout 1
UserManual.wiki
>
Long Range Solutions
>
TX9601 User Manual
User Manual
Navigation menu
Upload a User Manual
Namespaces
Wiki Guide
HTML
PDF
Info
Views
User Manual
Discussion / Help
Navigation
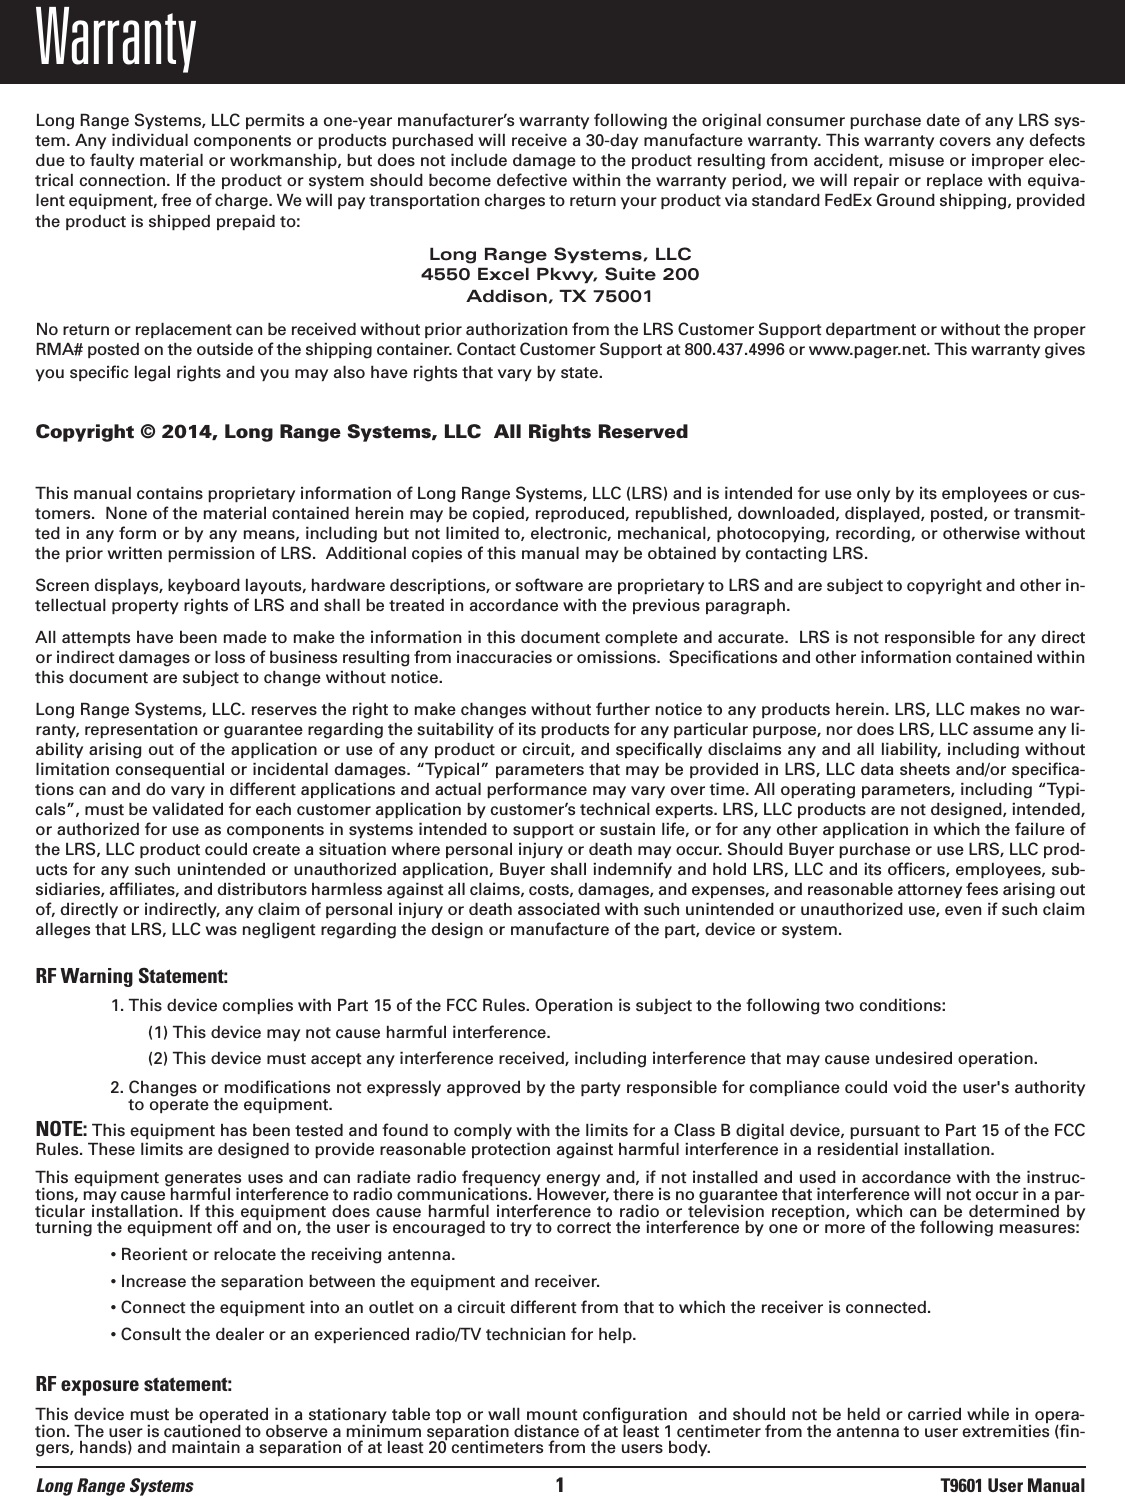
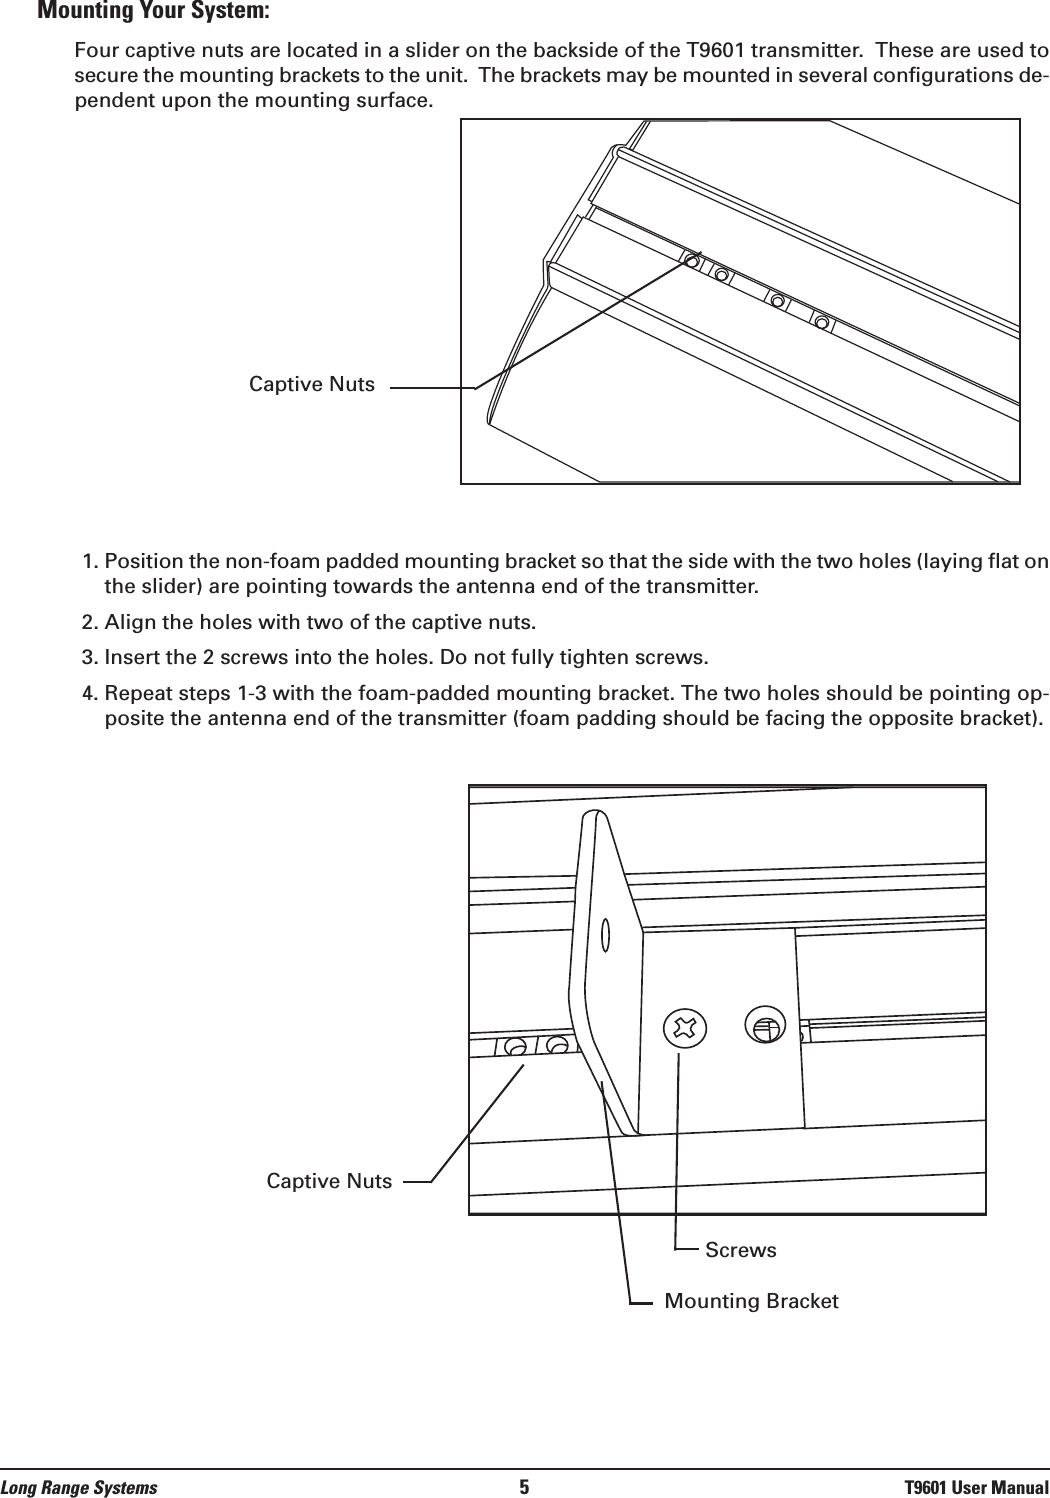

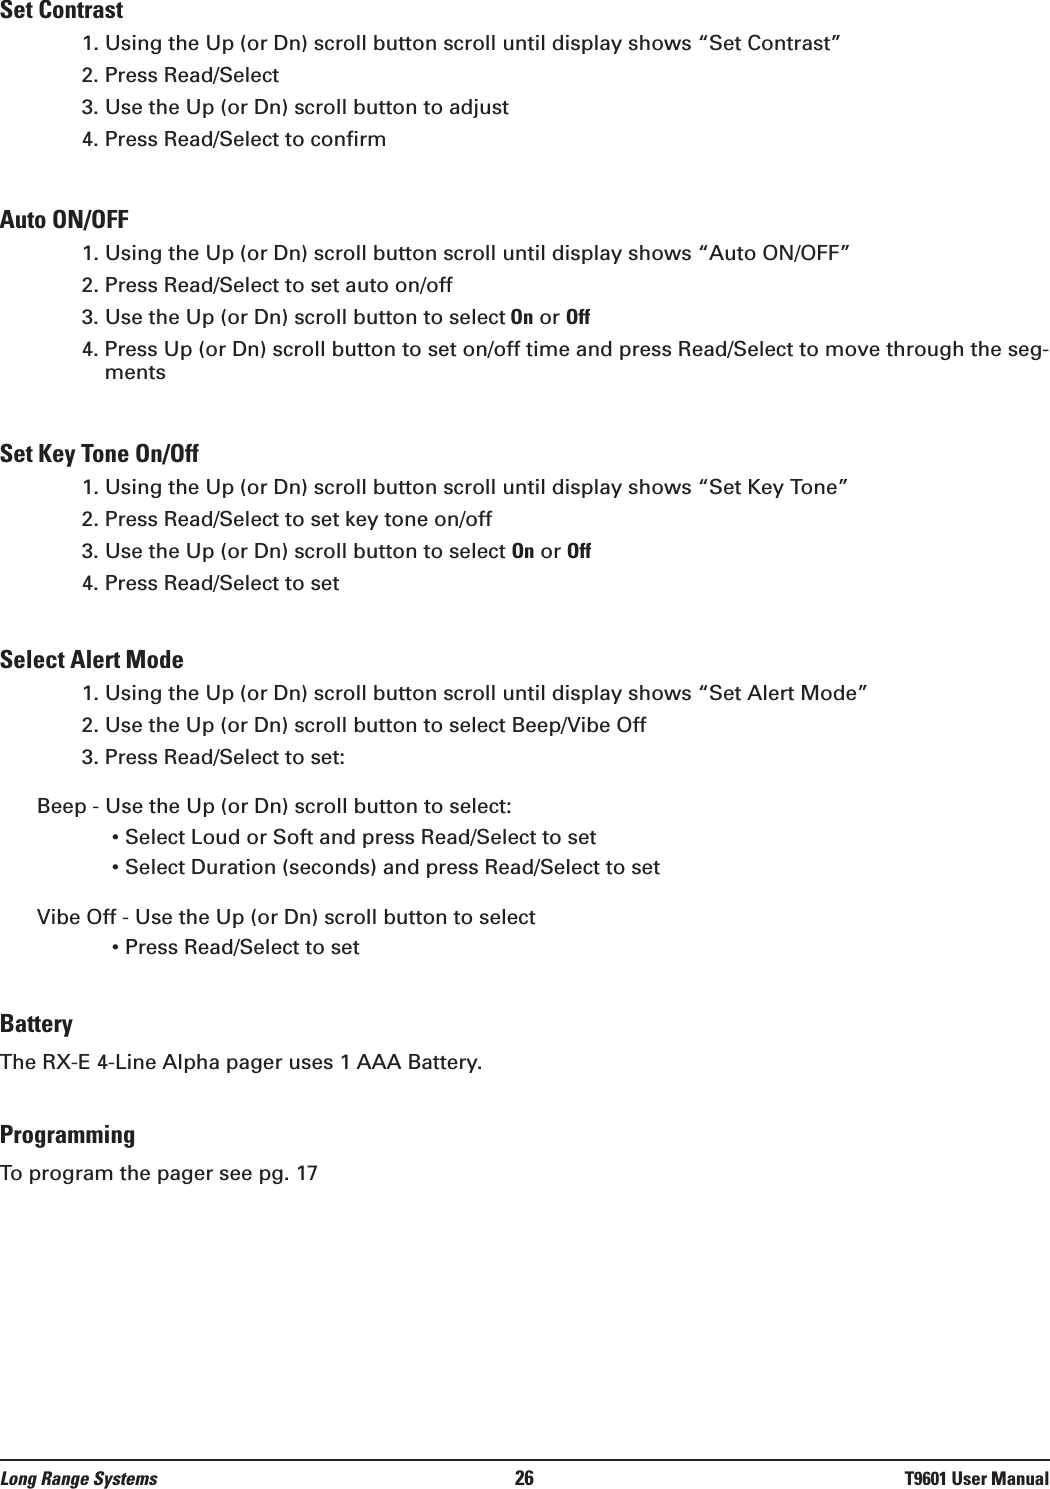
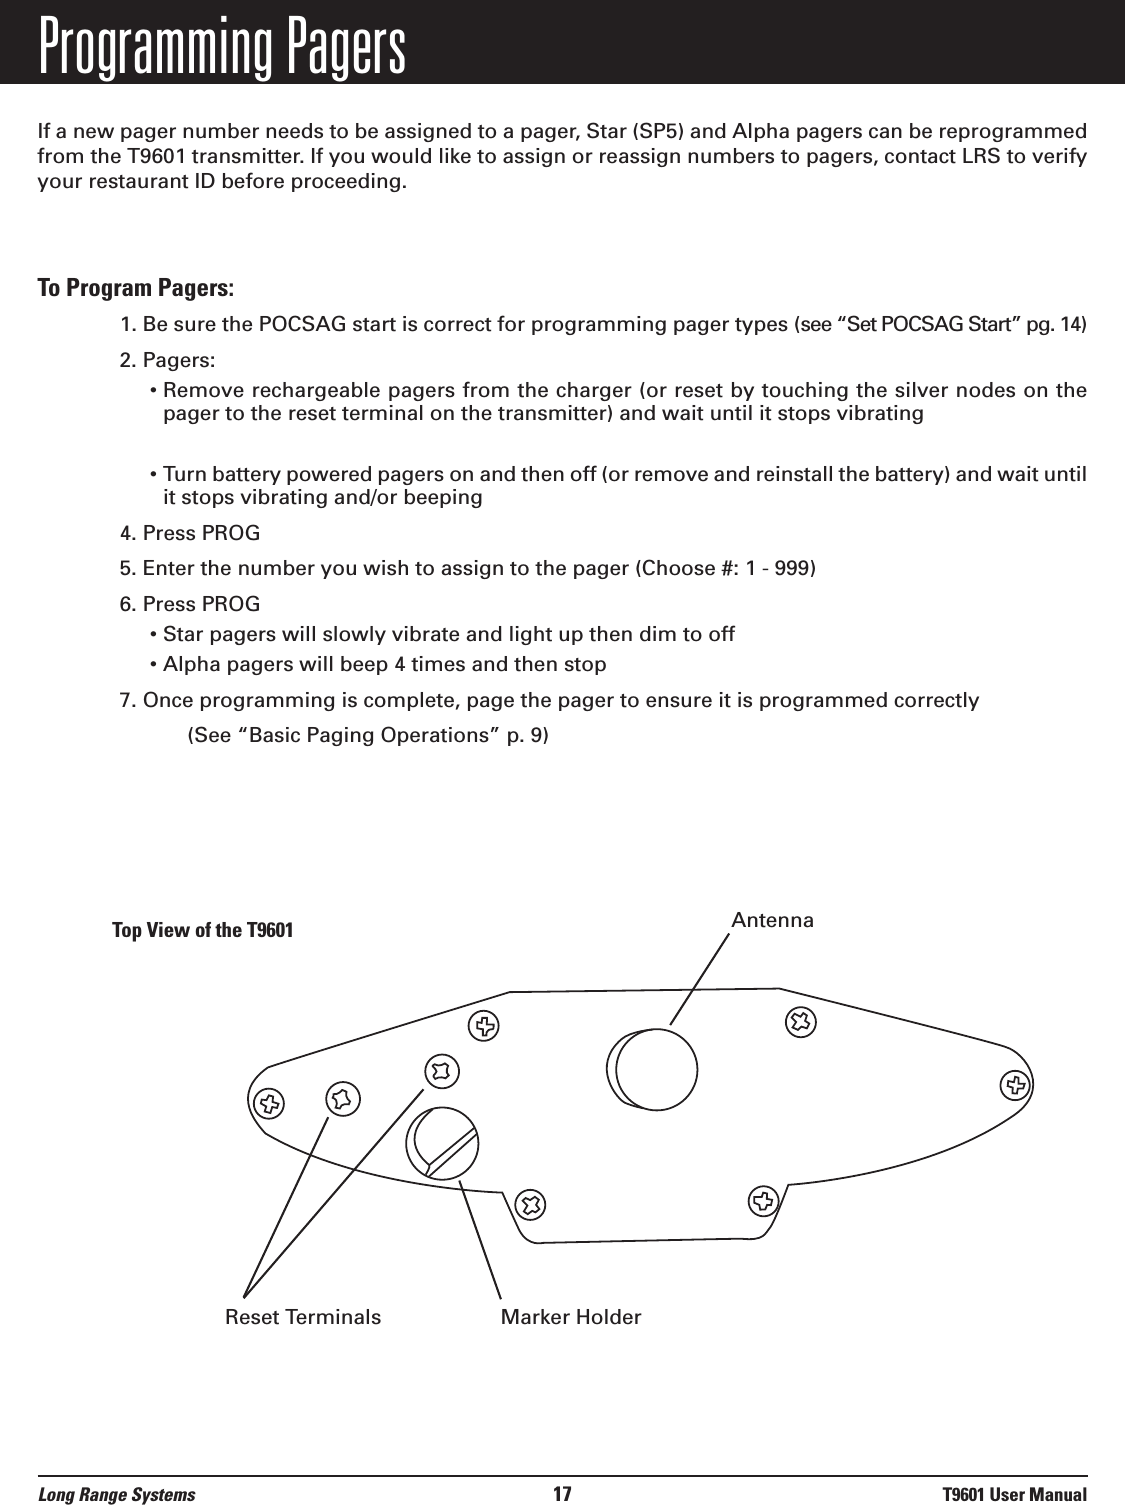
![Basic Paging OperationsThe T9601 factory defaults are the most commonly used settings (System ID = 0, Vibration Mode = 1).Paging For pagers numbered 1 – 16:1. Press the pager number on the keypad unit2. The unit will automatically send a page For pagers numbered 17 and higher:NOTE: Pagers can be numbered up to 9991. Press PGR 2. Enter the pager number (using #’s 1 – 9 and 10 [as zero]) 3. Press ENT When a page is sent and received:• Star Pagers – will flash and vibrate• Rechargeable and battery operated Alpha Pagers – will display “Kitchen <Station #>“ Example:Kitchen 1Page A Manager Pager1. Press PGR 2. Enter the manager pager number3. Press ENT When manager pager is set and a page is received:• Rechargeable and battery operated Alpha Pagers – will display “Manager to Kitchen <Station#>” Example: Manager to Kitchen 1All Call Page If all pagers need to be called at once, 1. Press PGR 2. Press 0 3. Press the ENTAlternate Method if “All Call” is enabled (See p. 10 “Set Up All Call”)1. Press button “16” on transmitter keypad When All Call Page is enabled and a page is received:• Star Pagers will flash and vibrate• Rechargeable and battery operated Alpha Pagers will display “All Page Kitchen <Station #>”Example: All Page Kitchen 1Long Range Systems 9T9601 User Manual](https://usermanual.wiki/Long-Range-Solutions/TX9601/User-Guide-2326062-Page-10.png)
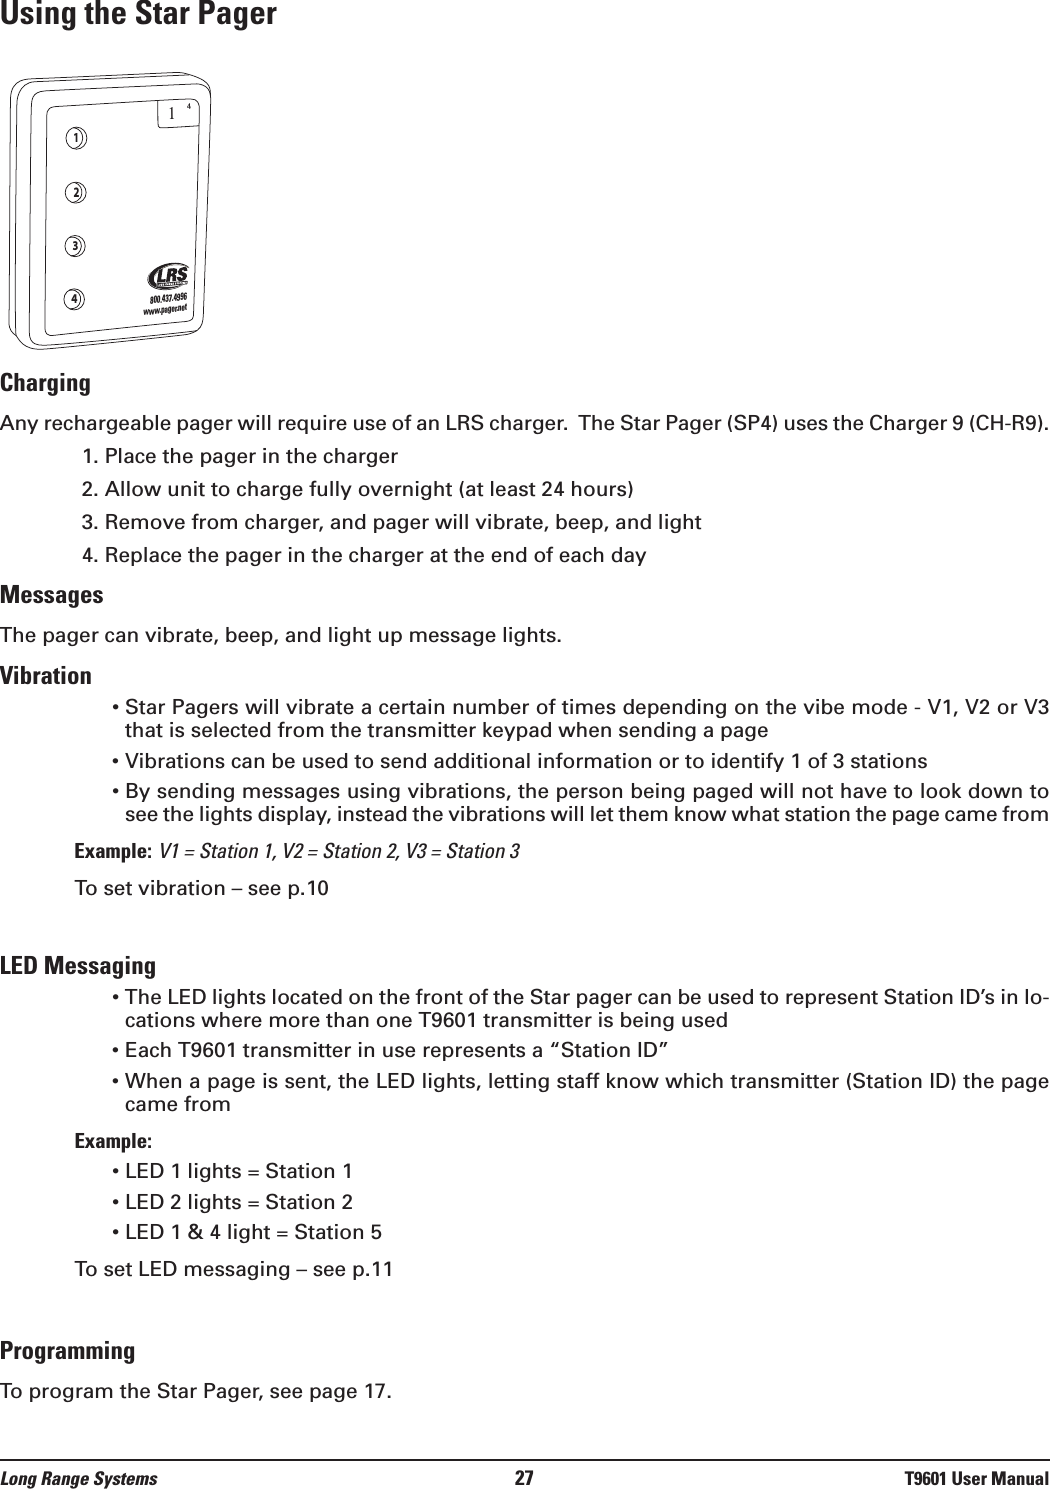
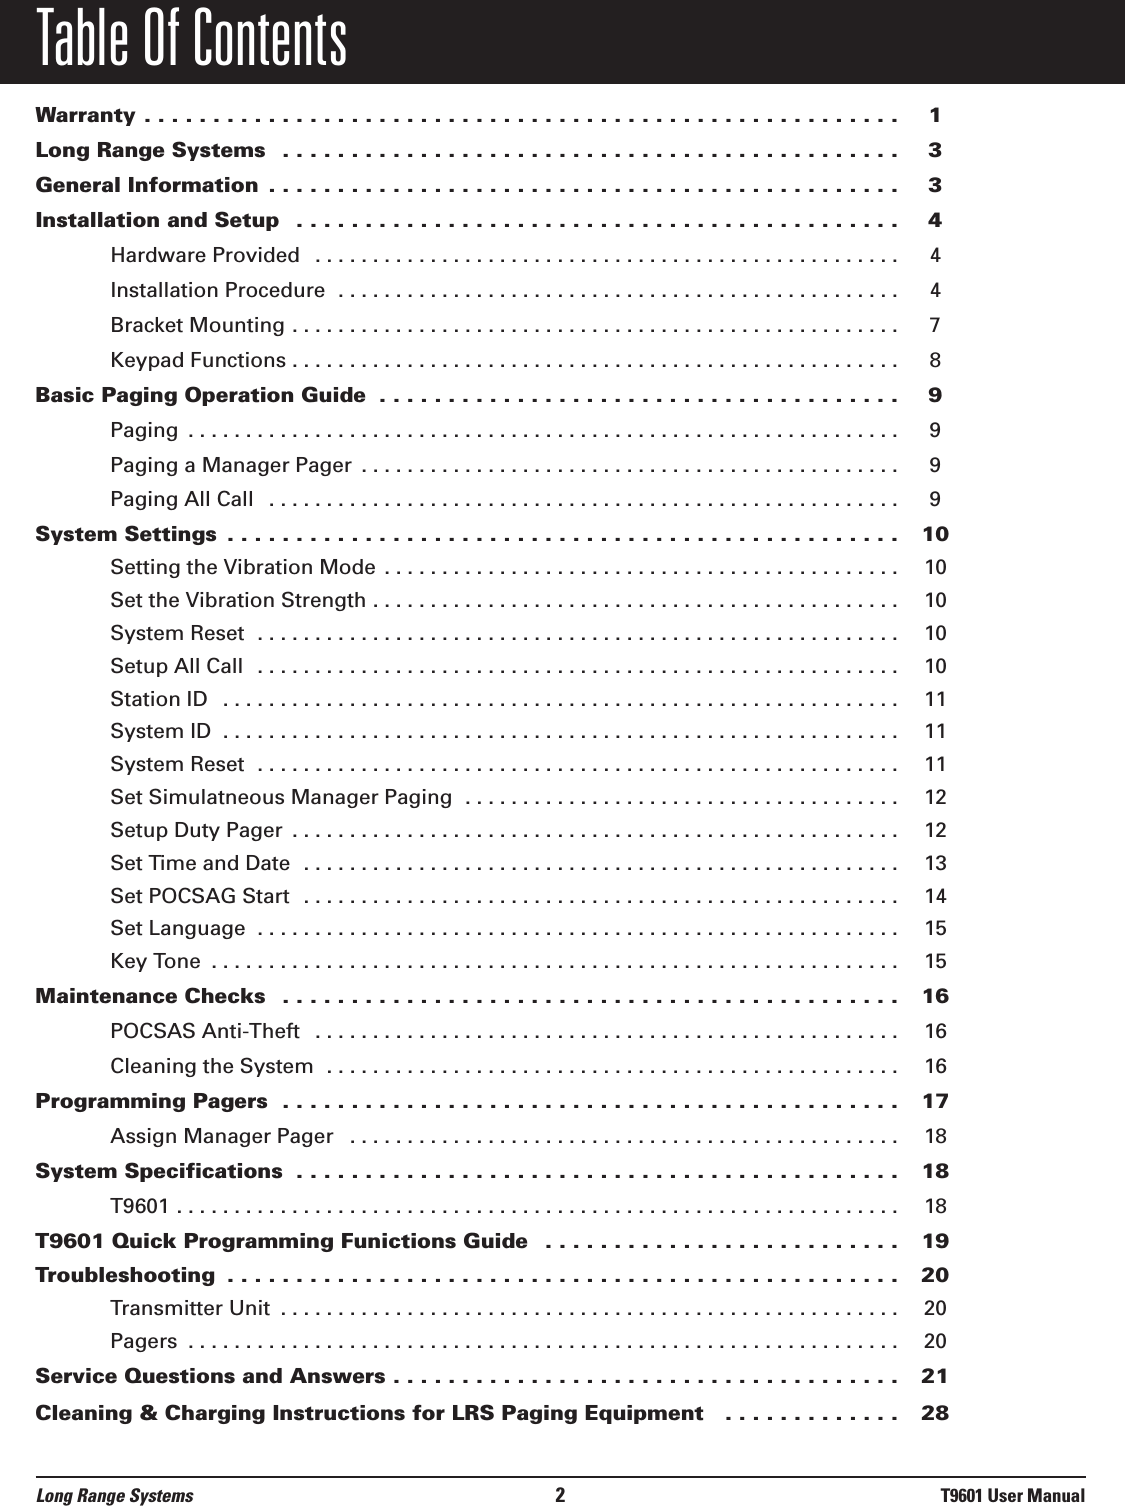
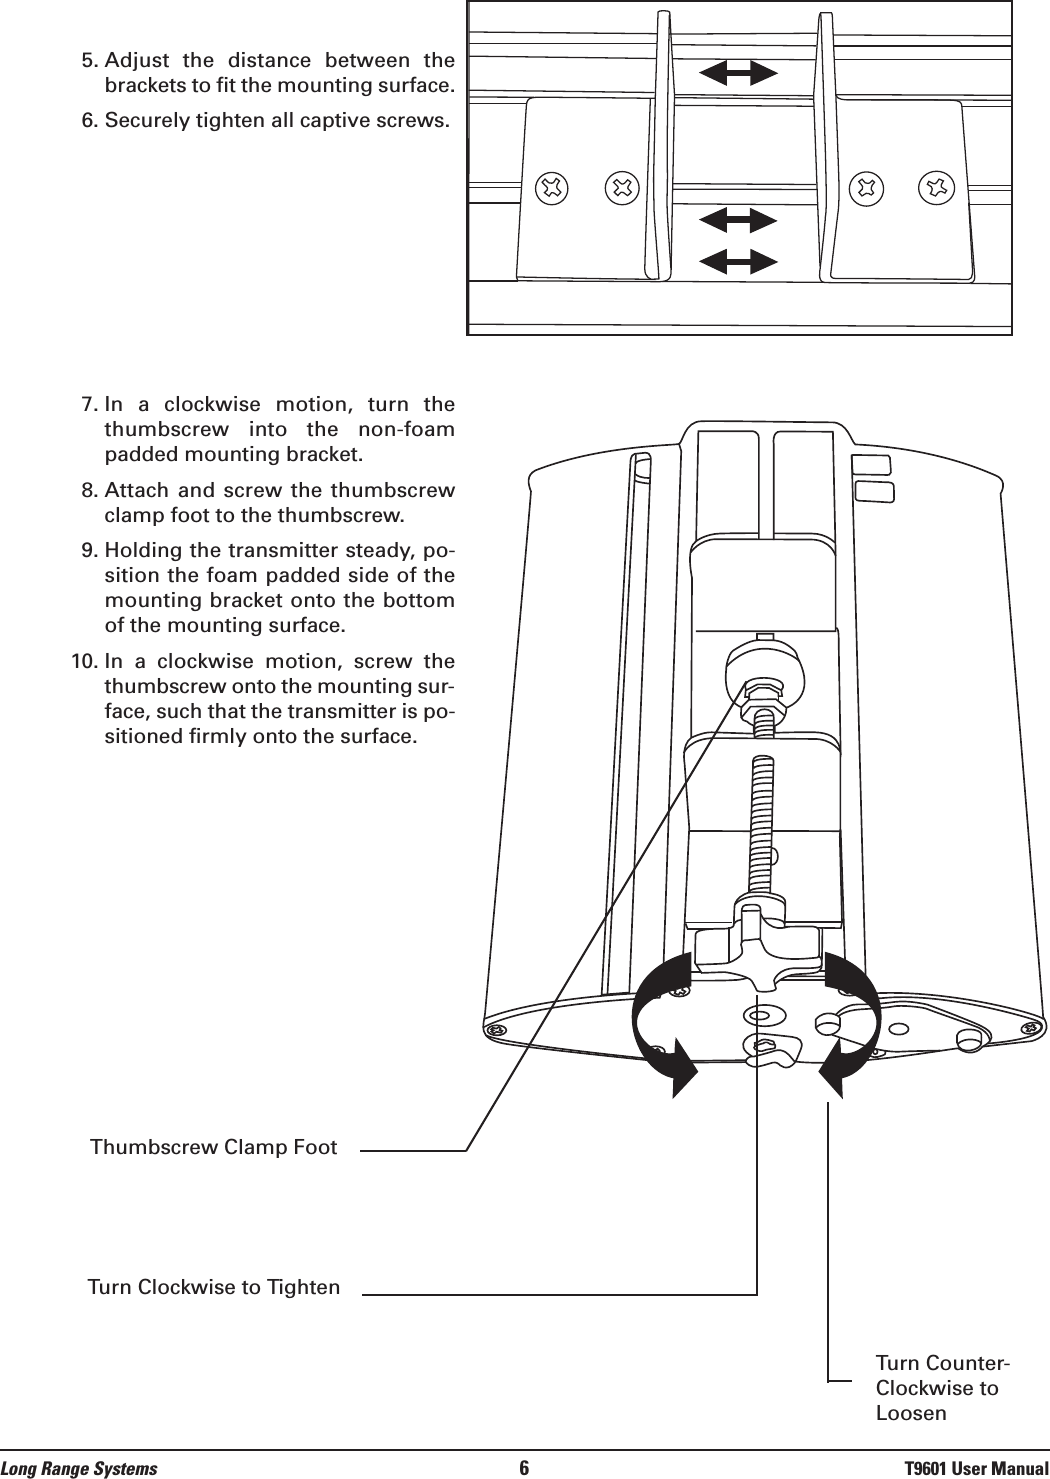
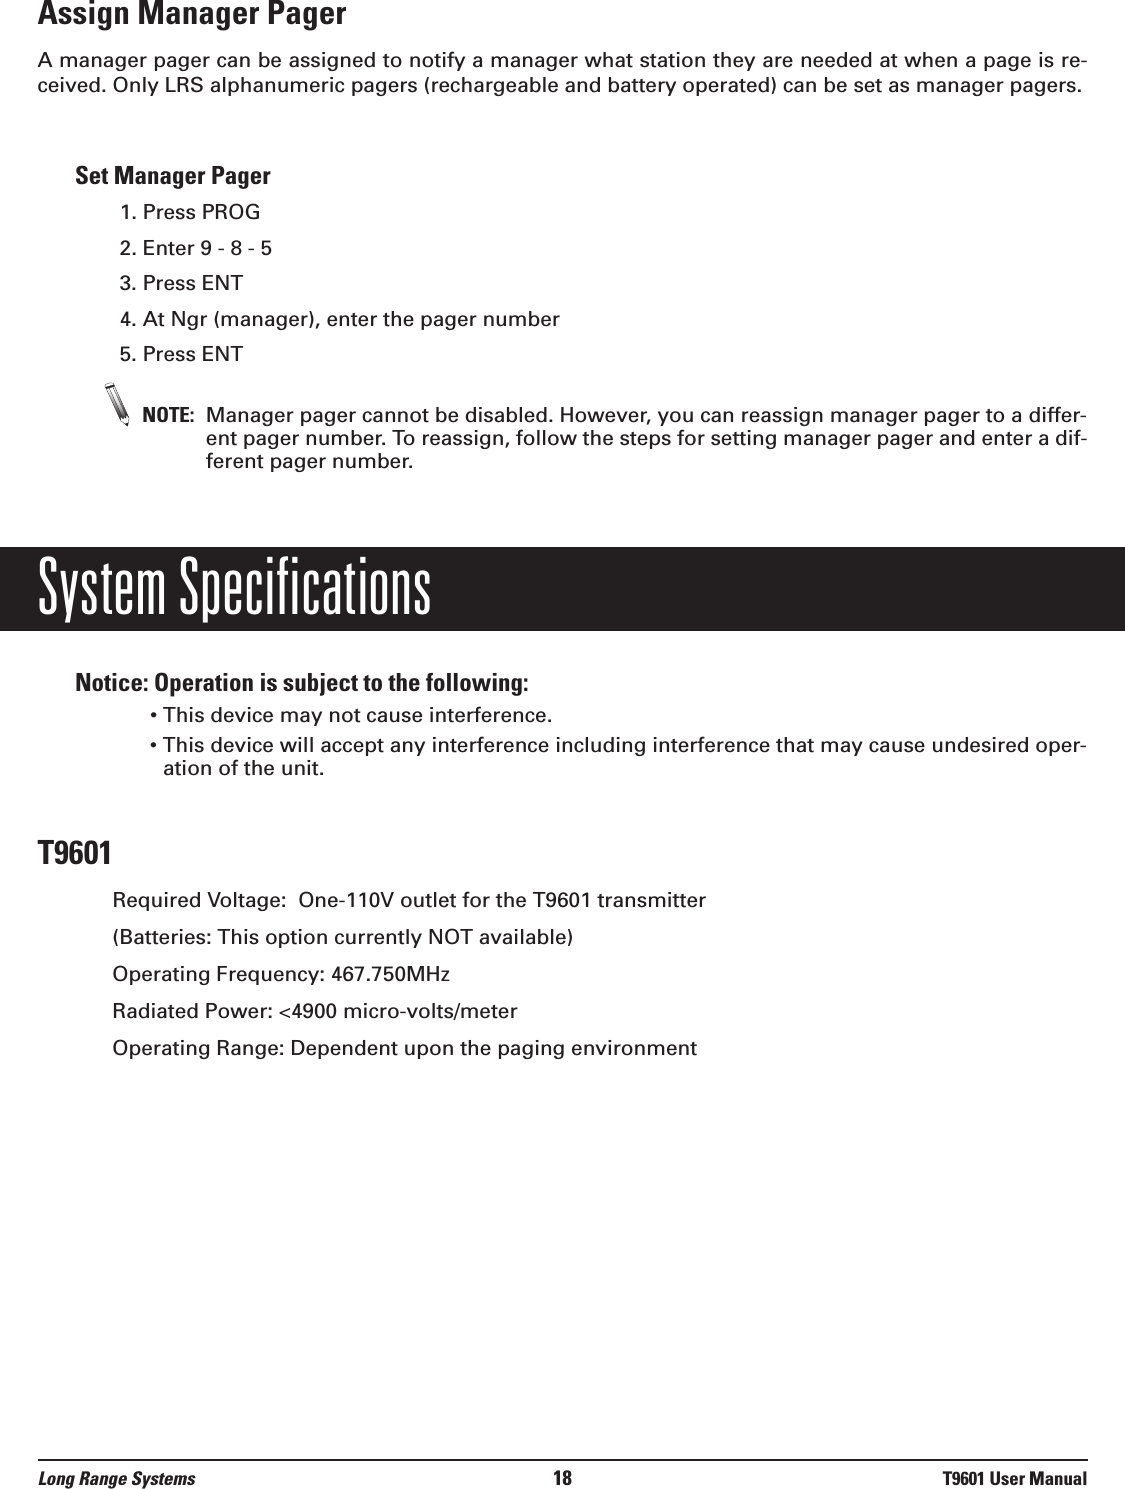
![4. LCD screen on transmitter will display OnWhen a simultaneous manager page is received:• Rechargeable and battery operated Alpha Pagers – will display “Server #: Kitchen <Station #>”Example: Server 5: Kitchen 1To turn off:1. Press PROG2. Enter 9 - 5 - 23. Press ENT4. The LCD screen on the transmitter will display OffSetup Duty PagerDuty pager is used to remind someone of a task that must be completed at specified intervals. A duty re-minder page is sent to the assigned pager at preset time intervals. The system’s “time” must be set prior toenabling duty pager. To Enable:1. Press PROG2. Enter 9 - 8 - 03. Press ENT• At dut (duty), enter the pager number• Press ENT• At INT, enter the time (interval) in minutes for the reminder page• Press ENT• At Str, enter the time of day the task begins: hh (hour) mm (minute) (ex: 10 00)• Press ENT• Press PGR for A (AM) or ENT for P (PM)• At Stp, enter the time of day the task ends: hh (hour) mm (minute) (ex: 12 00) • Press ENT • Select A (AM) [by pressing PGR] or P (PM) [by pressing ENT]When duty pager is set and an interval page is received:• Star Pagers – will flash and vibrate• Rechargeable and battery operated Alpha Pagers – will display “Reminder Message: Kitchen<Station #>” Example: Reminder Message: Kitchen 1To Disable:1. Press PROG2. Enter 9 - 8 - 03. Press ENT4. At dut (duty), enter “0”5. Press ENTLong Range Systems 12 T9601 User Manual](https://usermanual.wiki/Long-Range-Solutions/TX9601/User-Guide-2326062-Page-13.png)

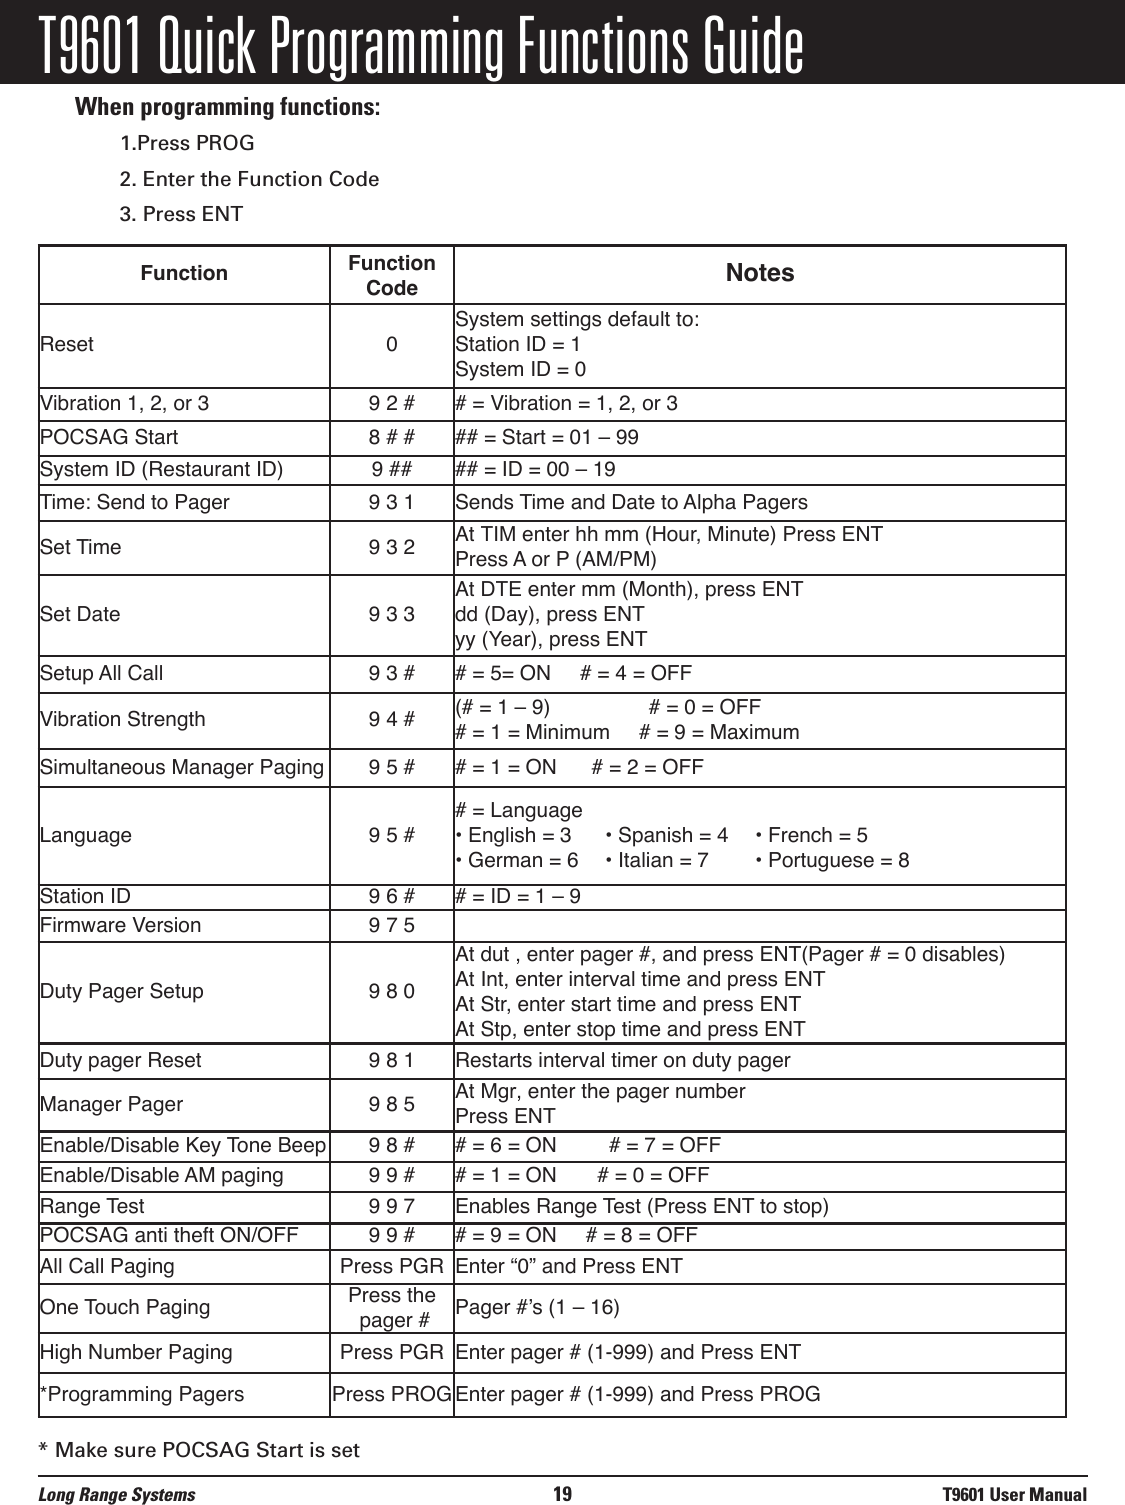
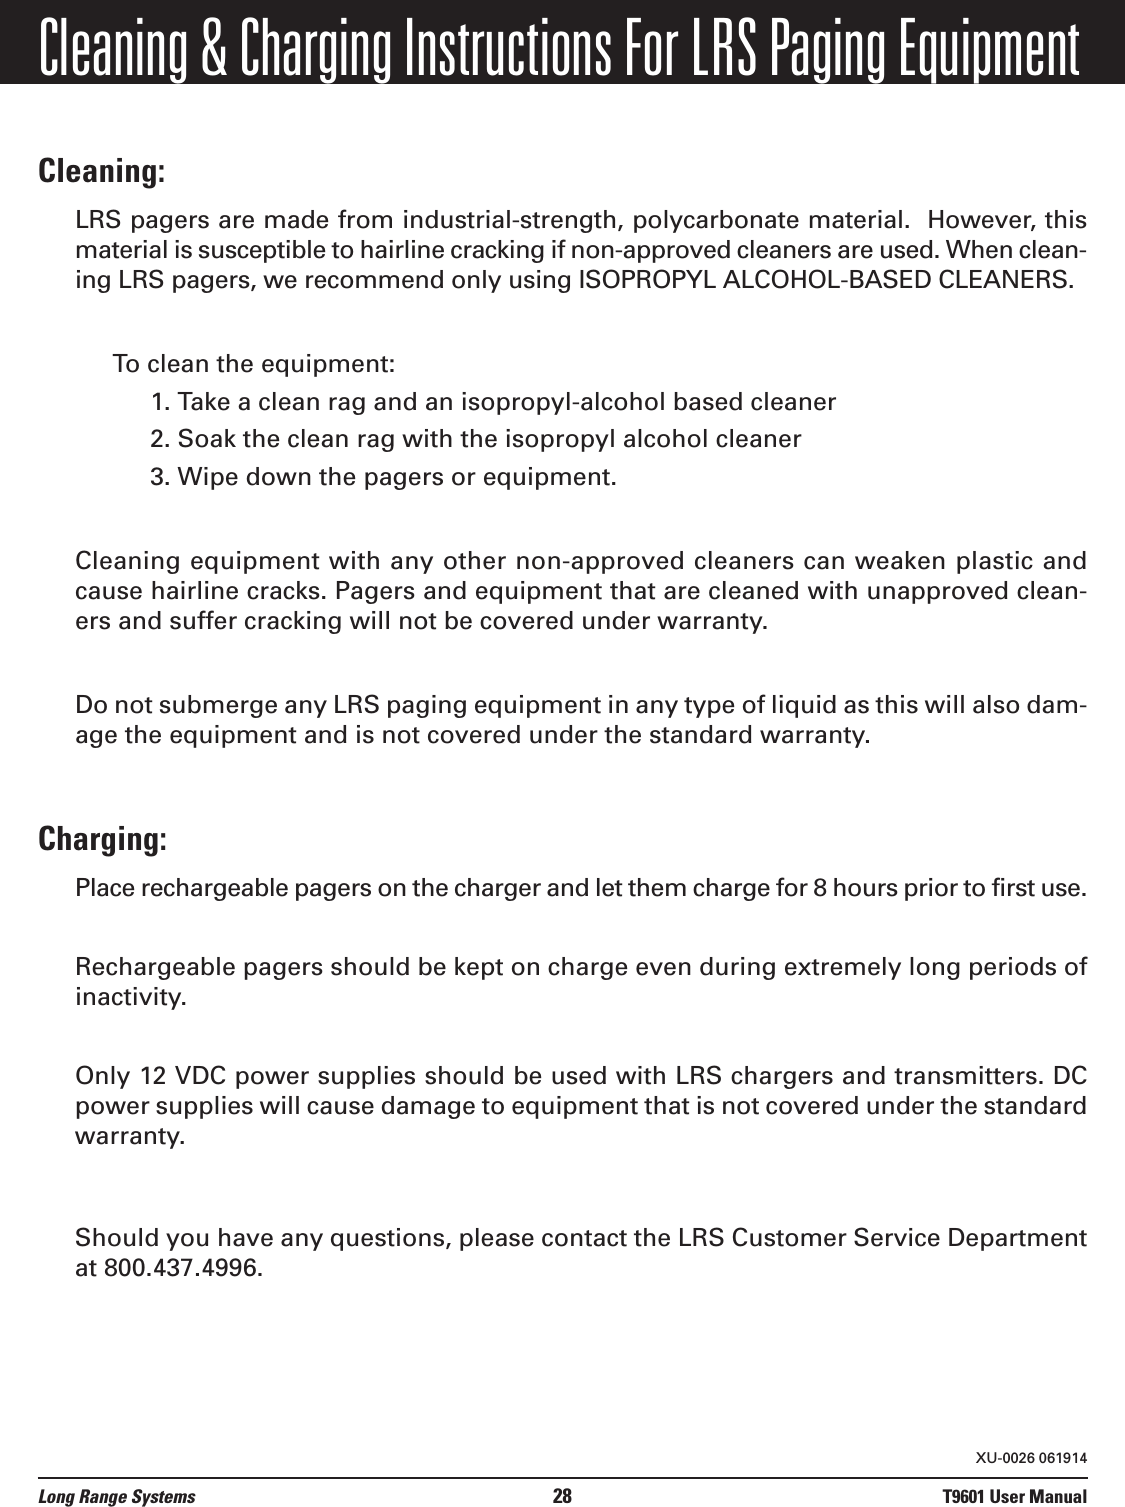
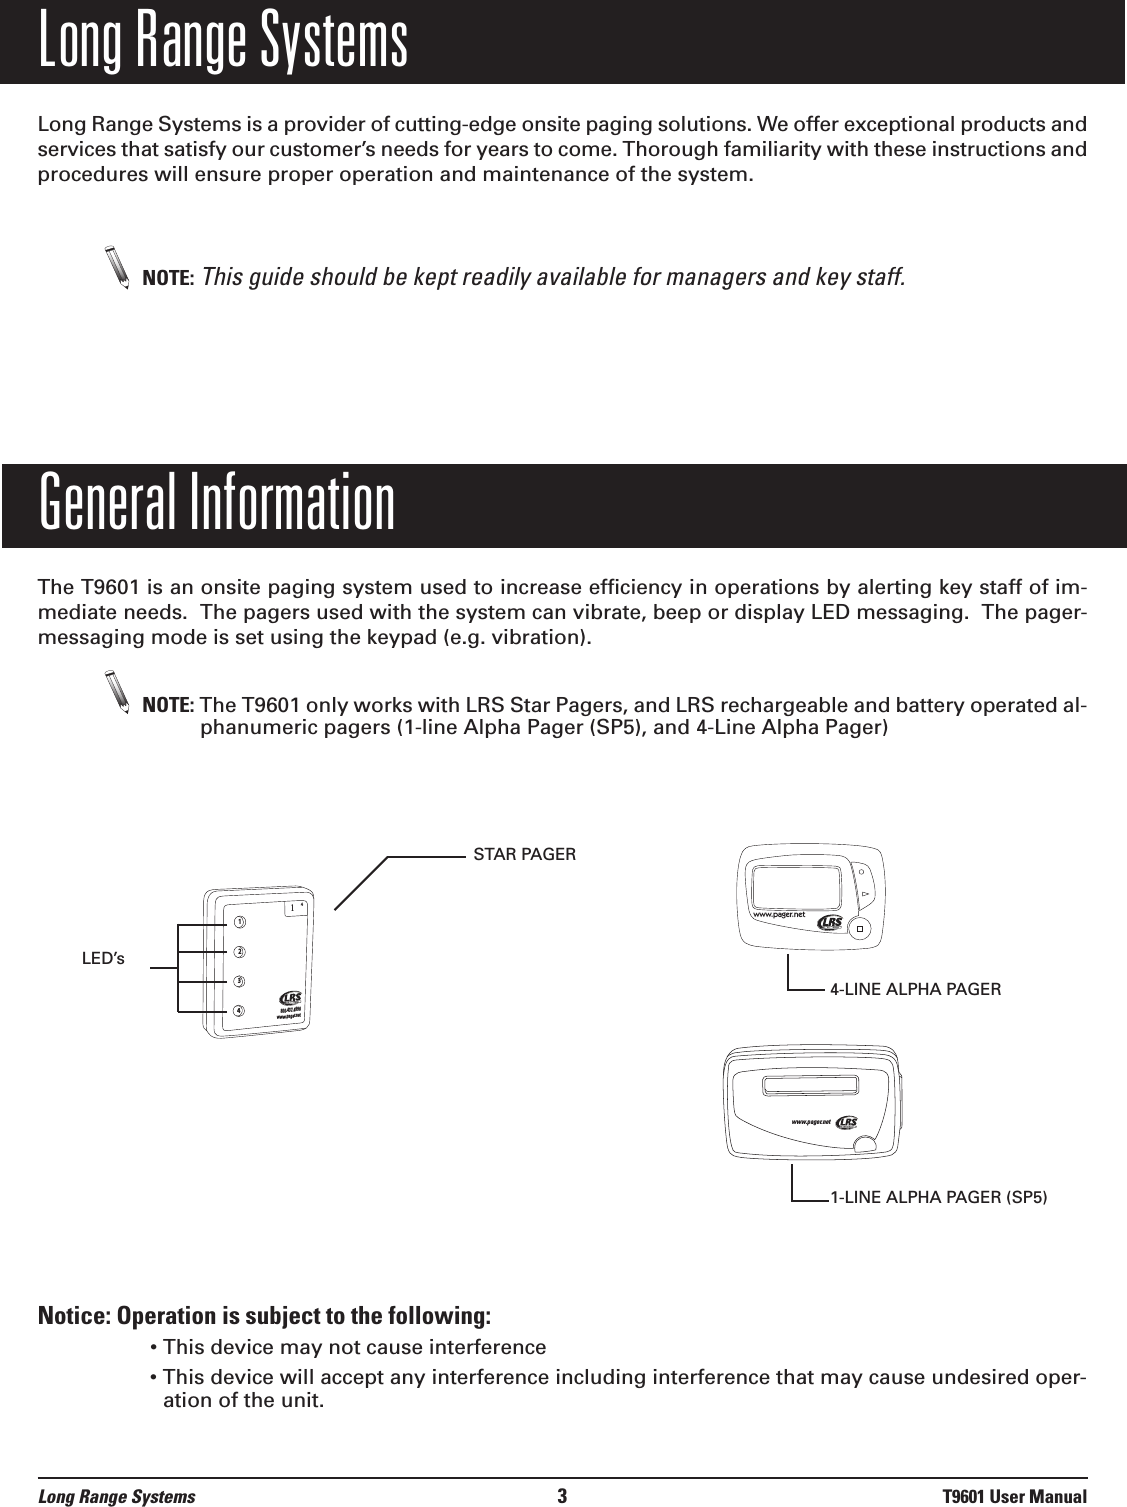
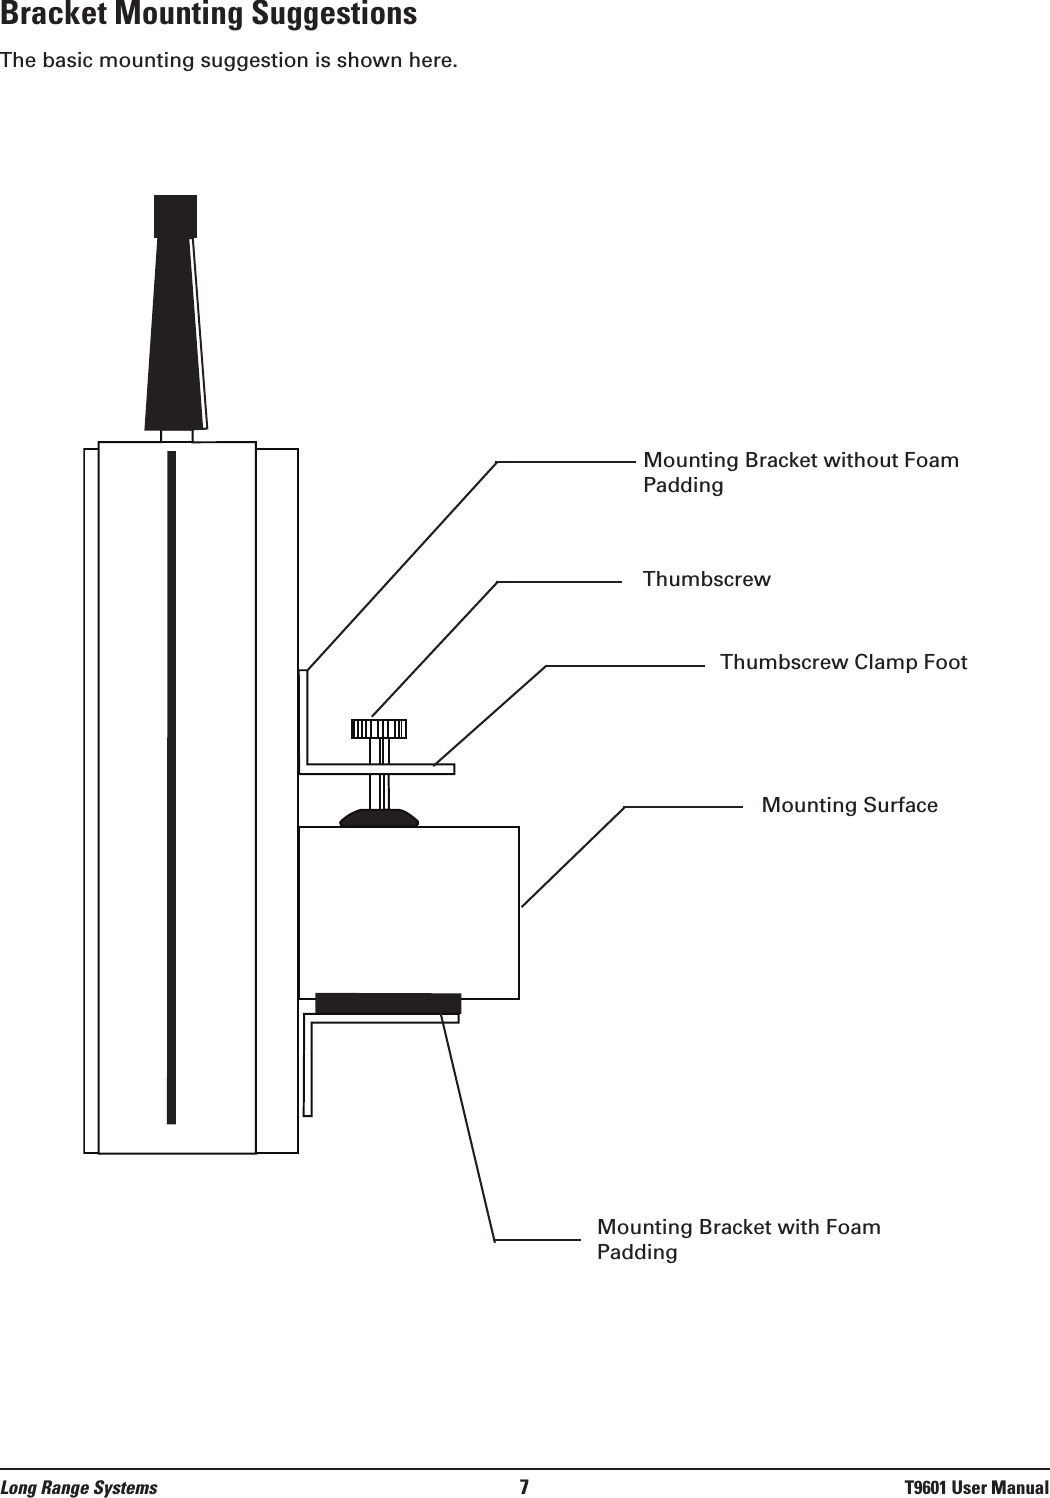
![LRS Pagers Available for the T9601Using the SP5 1-Line Rechargeable Alpha Numeric PagerChargingAny rechargeable pager will require the use of an LRS charger. The SP5 uses the Charger 5 (CH-R5). 1. Place the pager in the charger2. Allow unit to charge fully overnight (at least 24 hours)3. Remove from charger and the pager will vibrate or beep4. The LCD will show:• C1: [System ID] Pager ID (Ex. C1: [0] 91)• Programming Active• Blank screen or Date and Time (if set) (Ex. 10/07/2008 12:05 am)5. Return the pager to the charger at the end of each dayMenusTo access the vibe/contrast menu:1. Remove the pager from the charger. 2. While vibrating or beeping, press and hold the Select button for 8 seconds. The menu will display:3. If you PRESS and RELEASE the Select Button, the menu selector will scroll to the right and will high-light “Contrast4. To exit this menu wait 8 seconds5. To re-enter the vibe/contrast menu at anytime, repeat Step 1VibeTo set the Vibration Level:1. Remove the pager from the charger 2. While vibrating or beeping, press and hold the Select Button for 5-8 secondsVIBE CONTRASTVIBE CONTRASTwww.pager.netLong Range Systems 22 T9601 User ManualSelect Button](https://usermanual.wiki/Long-Range-Solutions/TX9601/User-Guide-2326062-Page-23.png)
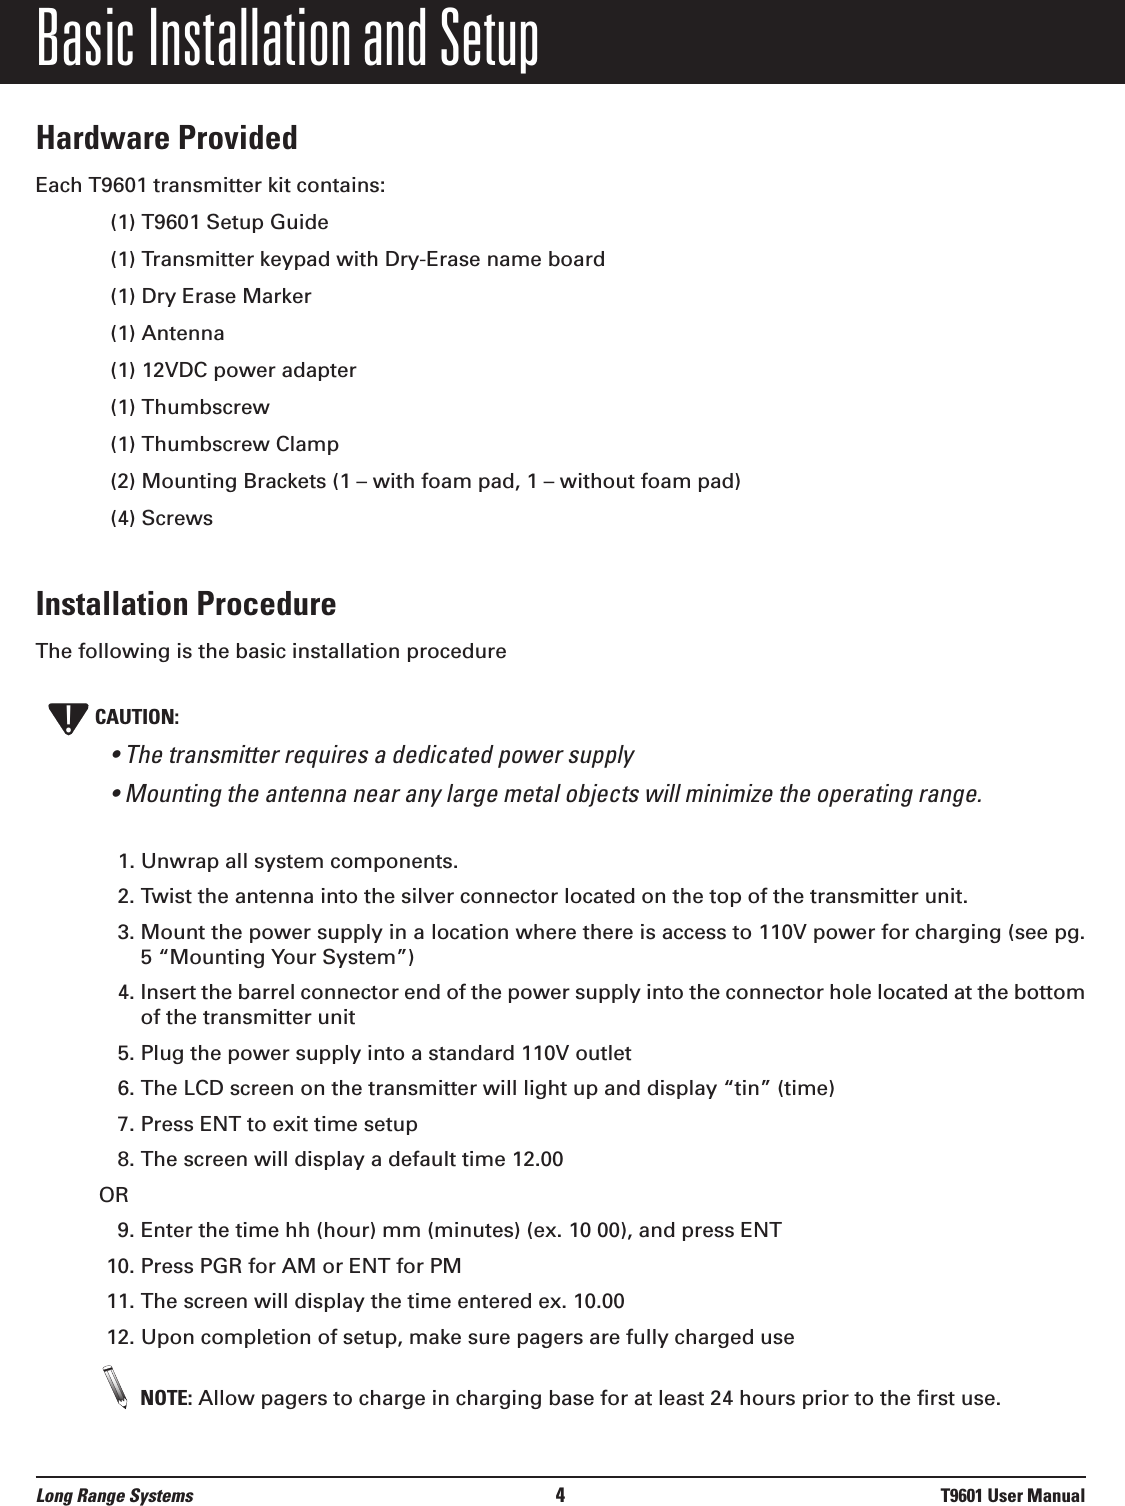
![3. Highlight the Vibe selection then PRESS and HOLD the Select Button until the screen shows.4. Press or hold the Select Button until the desired vibration level is selected 5. If holding down on the Select Button, the vibe level will increase to max and then decrease to-wards the minimum 6. Release the Select Button when desired vibration level has been reached7. To exit, wait 8 seconds and the pager will go back to the vibe/contrast menuContrastTo set the Contrast Level1. Remove the pager from the charger2. While vibrating or beeping, press and hold the Select Button for 5-8 seconds3. Highlight the Contrast selection then PRESS and HOLD the Select Button until the screen shows.4. Press or hold the Select Button until the desired contrast is selected 5. If holding down on the Select Button, the contrast level will increase to Max (NOTE: screen couldbe dark and hard to read) 6. Release the Select Button and press or hold again to change the level back towards the minimumor until your desired contrast is selected7. To exit, wait 8 seconds and the pager will go back to the vibe/contrast menu 8. To exit this menu wait 8 additional secondsSettingsTo view the current pager settings1. Remove pager from the charger or reset on the T9601 reset terminals.2. Press the Select Button repeatedly to scroll through the settings:C1: [System ID number] and Pager ID numberC2: [System ID number] and All Page numberC3: [System ID number] and System ID numberG: Group numberEnc: Encryption enabled (128) or noneVer: Current Firmware Version3. To exit, wait 8 seconds.VIBE CONTRASTCONTRAST:VIBE CONTRASTVIBELong Range Systems 23 T9601 User Manual](https://usermanual.wiki/Long-Range-Solutions/TX9601/User-Guide-2326062-Page-24.png)
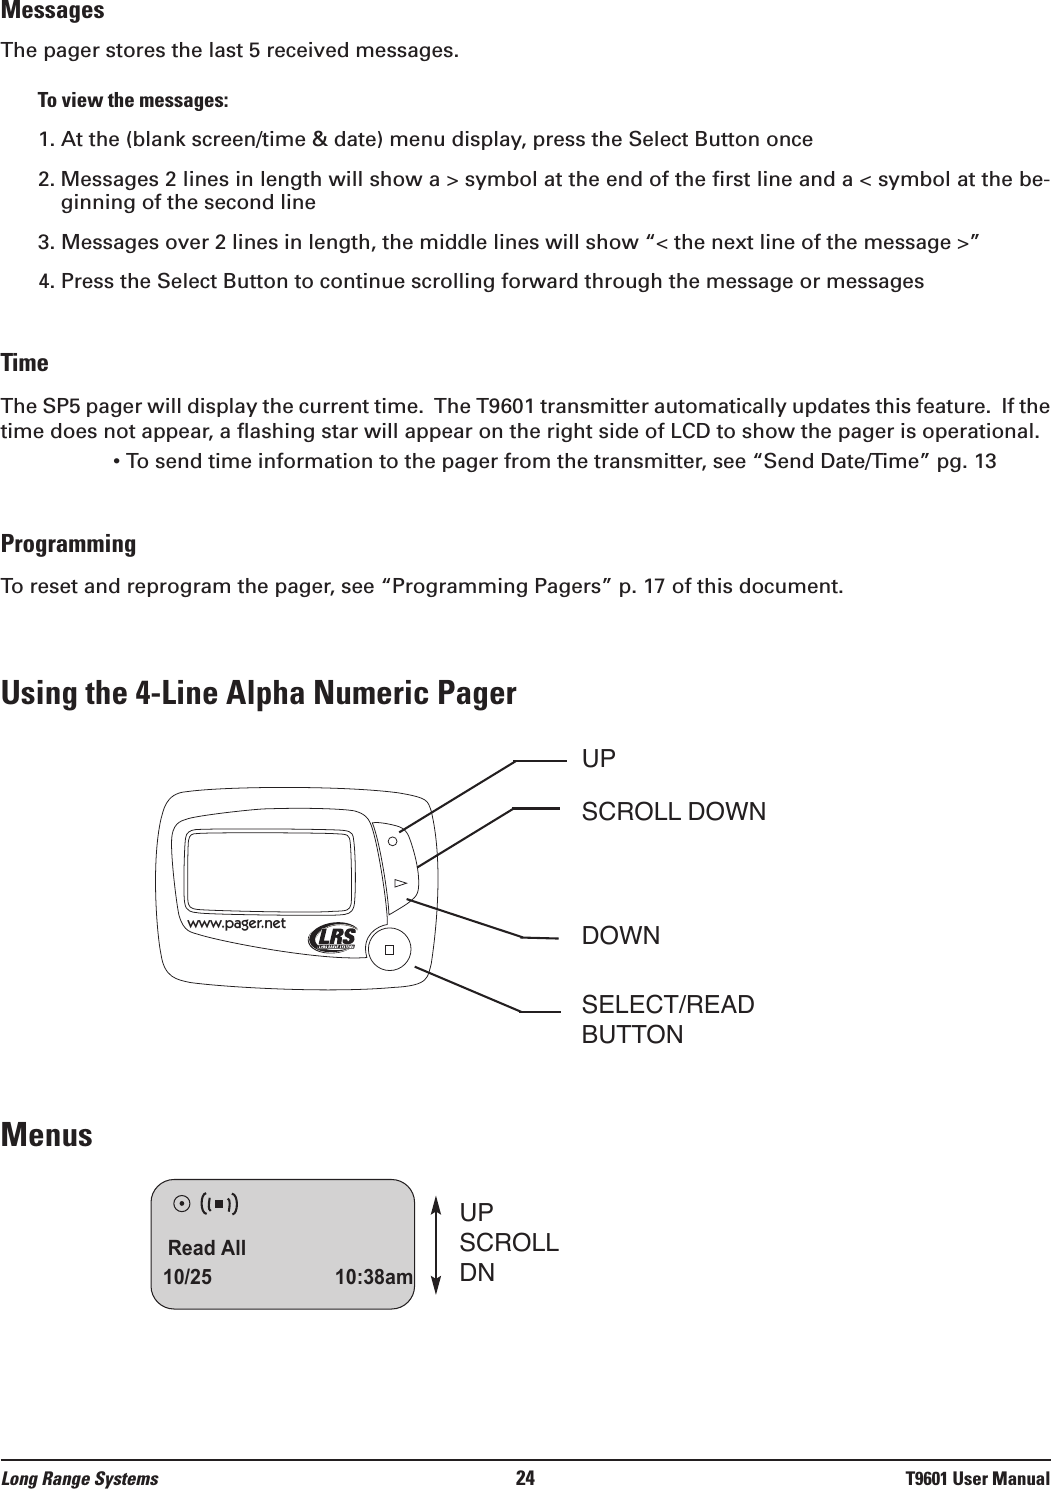
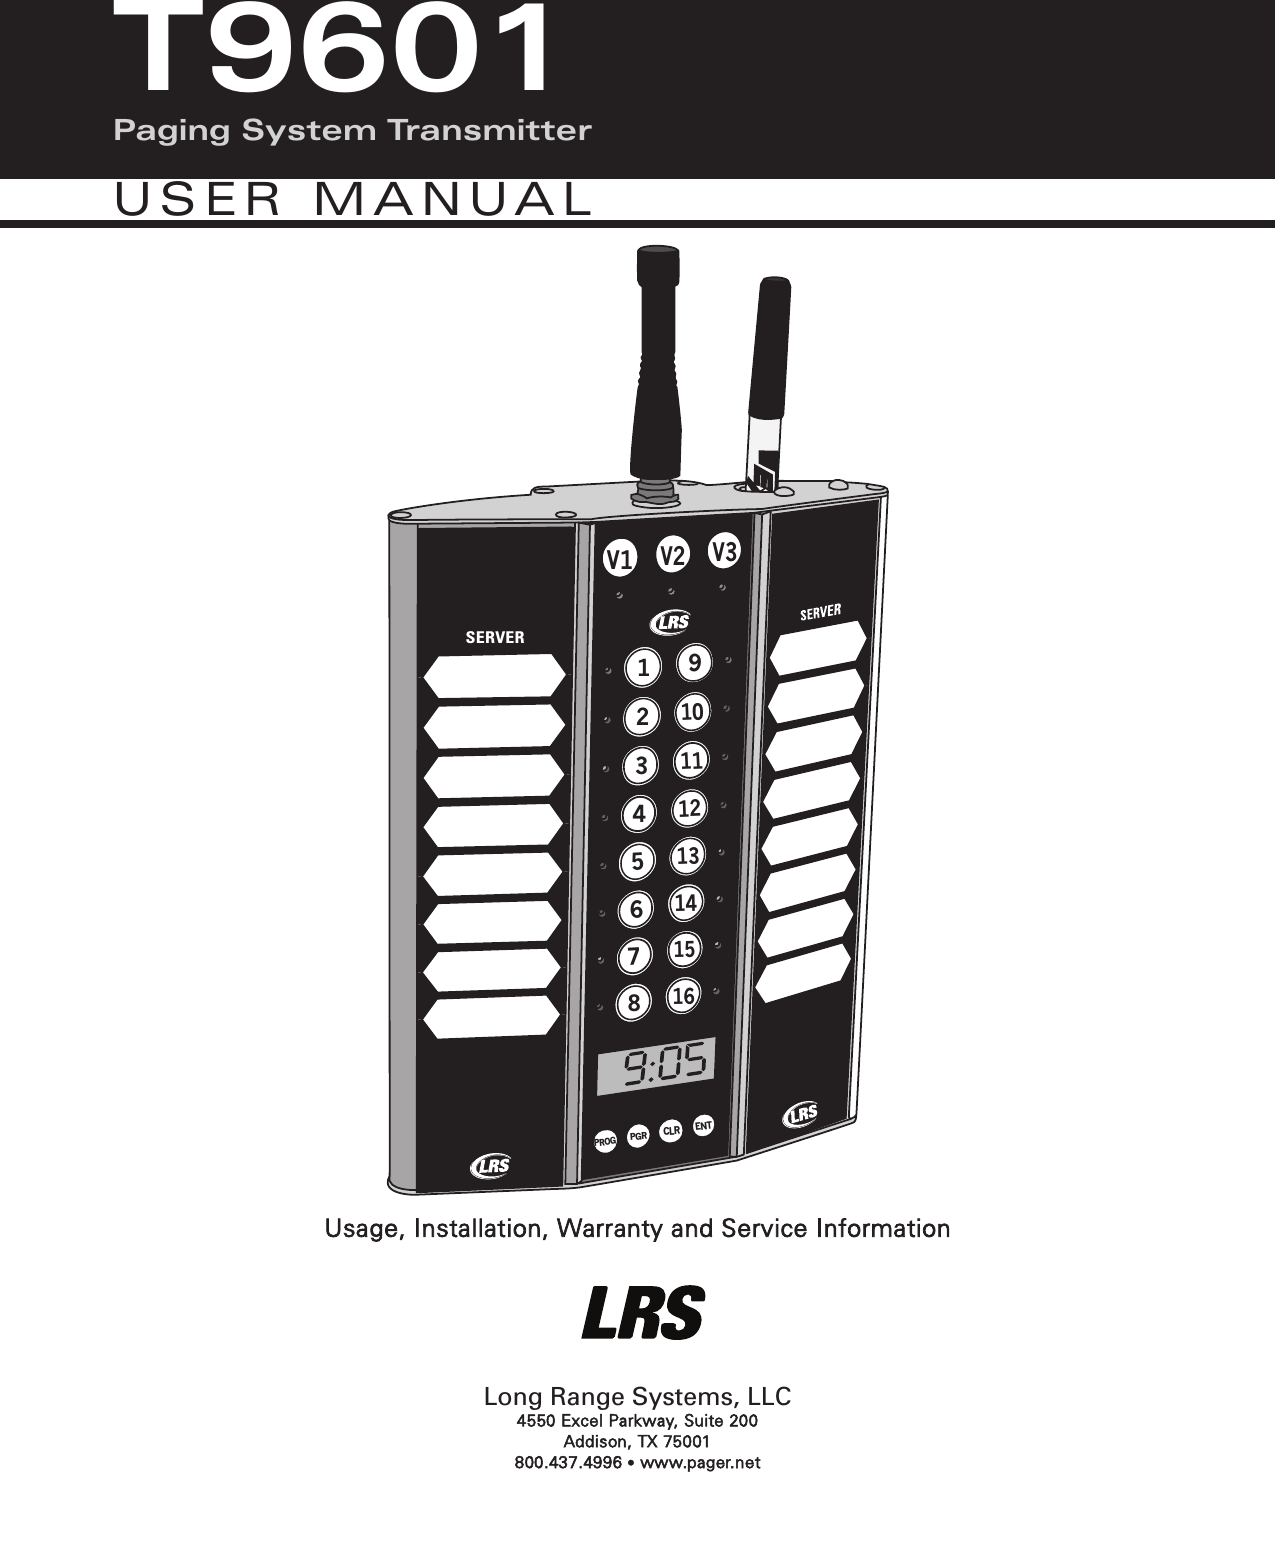
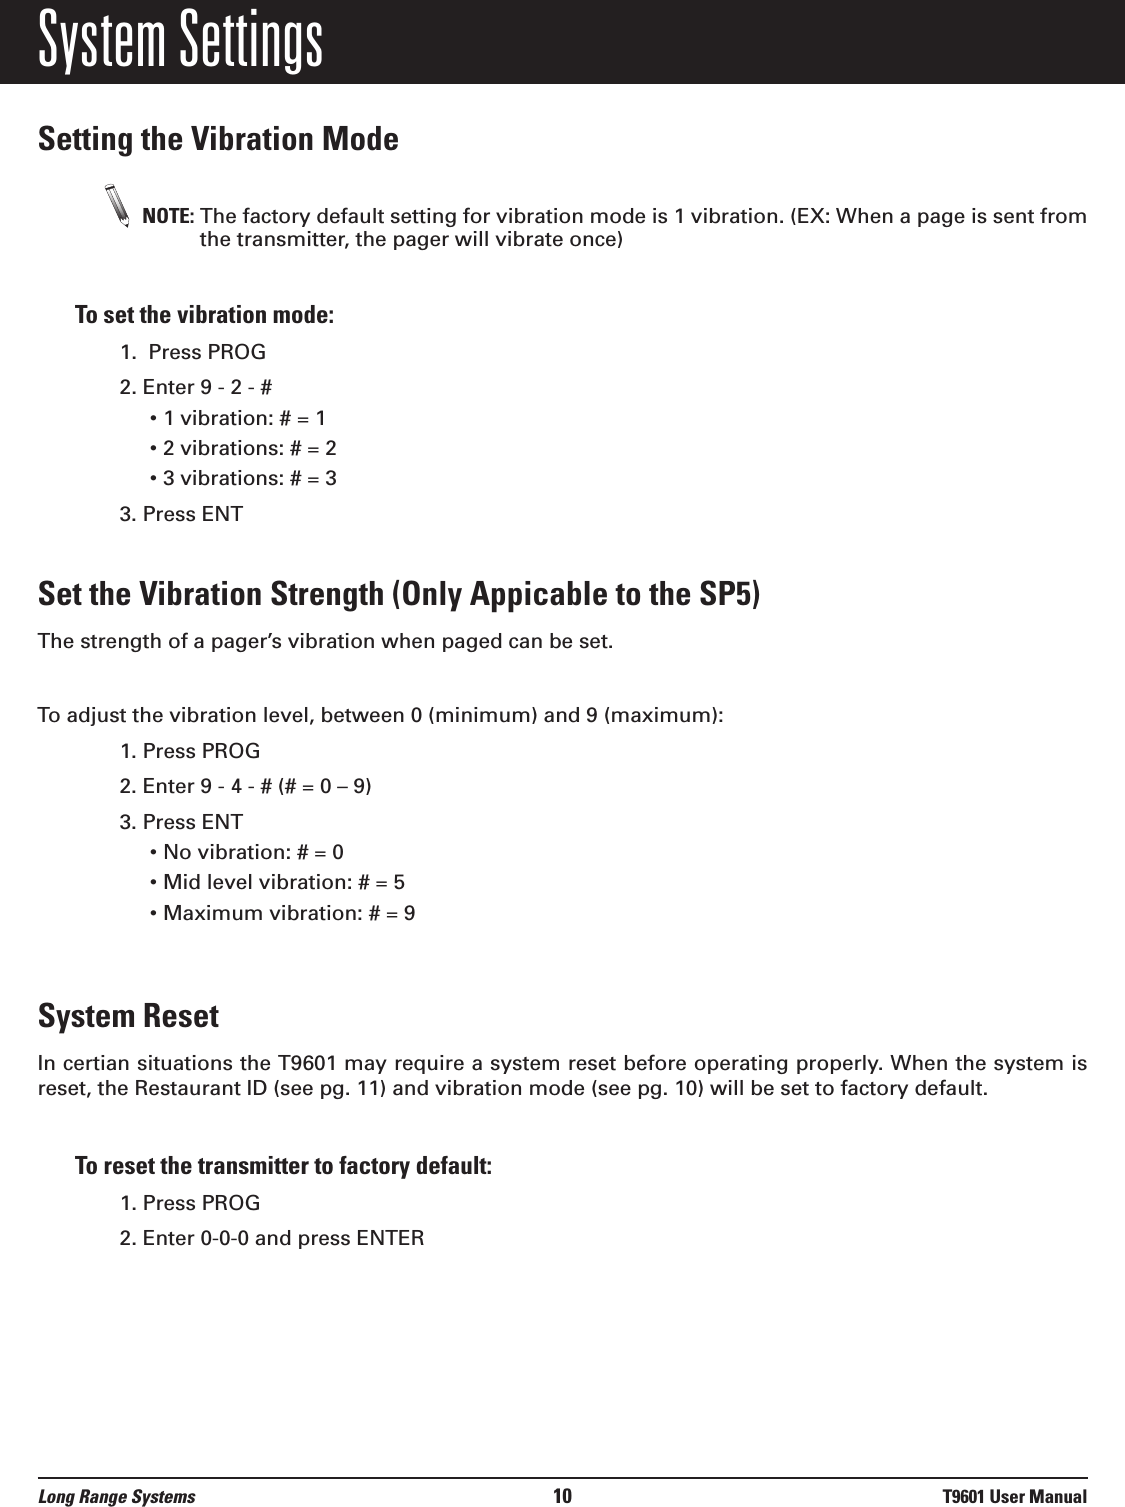
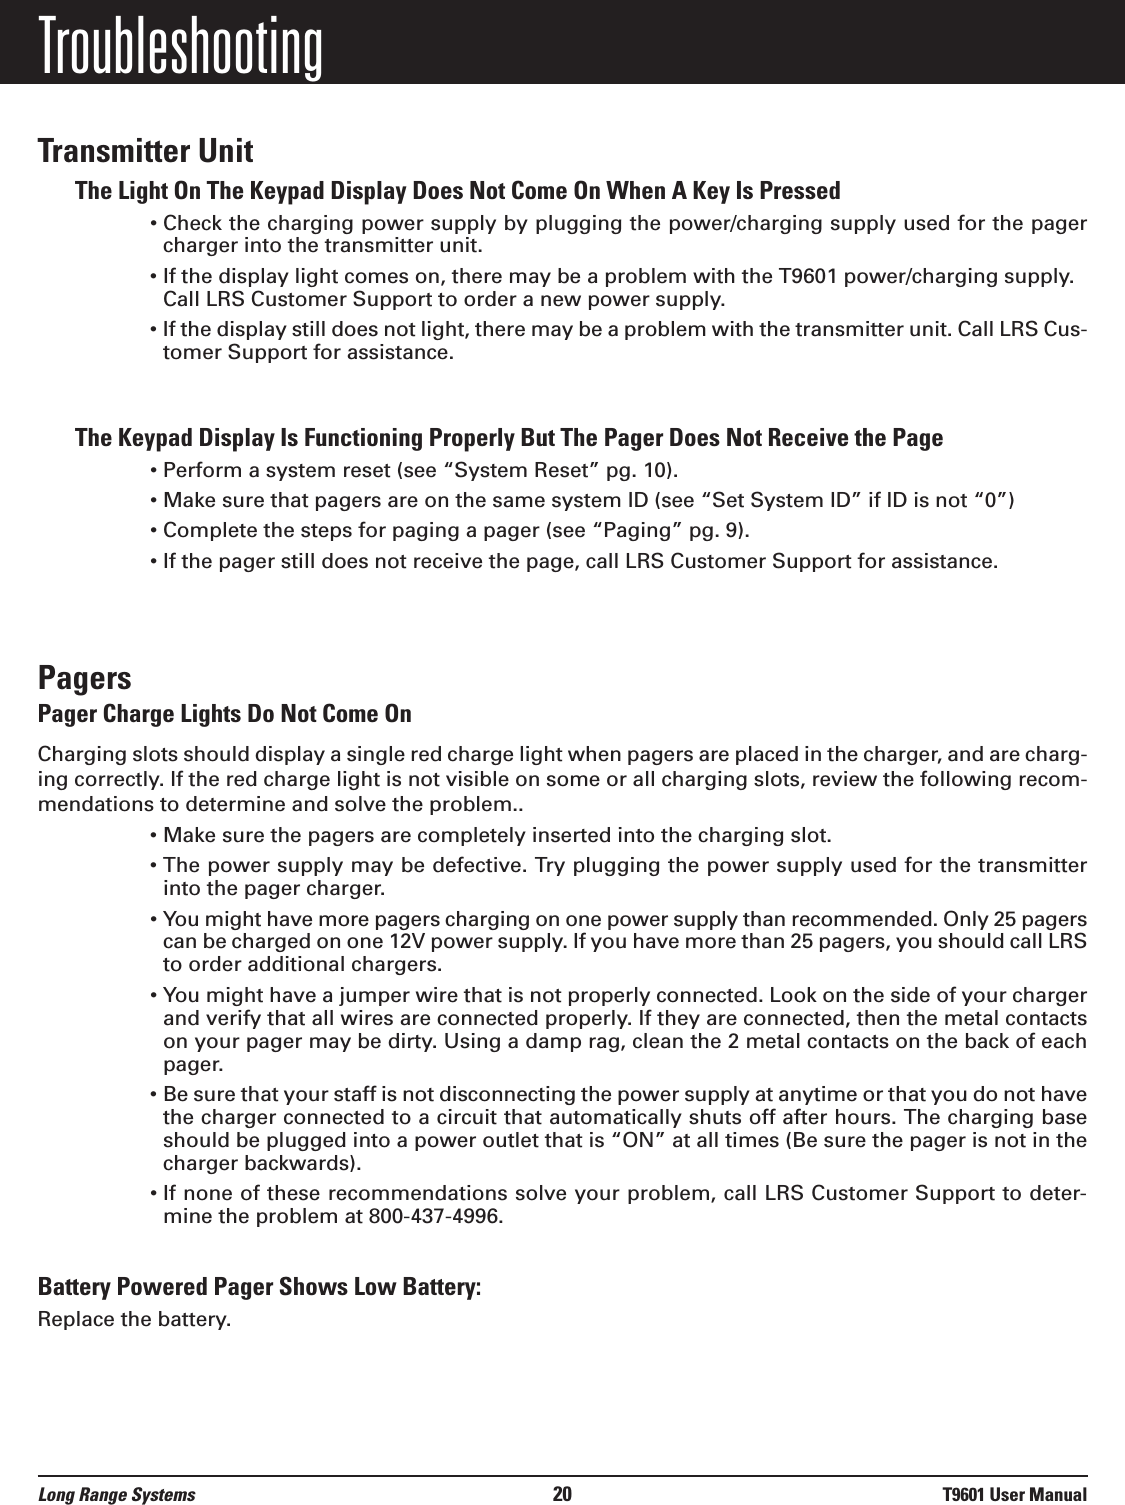
![Selecting functions1. From Read All screen, press Up (or Dn) Scroll button until desired selection displays2. Press Read/Select button to select item3. Press Up (or Dn) Scroll button to choose/adjust 4. Press Read/Select to confirm/setPower On/OffSet ON (if unit is off)1. Press and hold Scroll Up until YES/NO shows.2. At “Power ON?” use Up (or Dn) Scroll button to select YES3. Press Read/Select button to setSet OFF1. Using the Up (or Dn) scroll button scroll until display shows “Power OFF?”2. Press Read/Select button to set power on/off3. At “Power OFF?” screen, use Up (or Dn) Scroll button to select YES4. Press Read/Select button to setRead Message• Messages are displayed upon receipt.• Press Read/Select to display.To review stored messages:1. Select “Read All?”2. Press Read/Select to display messages and time stamps3. Use the Up (or Dn) Scroll button to scroll through messagesDelete Messages1. Using the Up (or Dn) scroll button, scroll until display shows “Delete All?”2. Press Read/Select 3. Use the Up (or Dn) scroll button to select Yes or No4. Press Read/Select button to confirmTime/Date Set1. Using the Up (or Dn) scroll button scroll until display shows “Set Time/Date”2. Press Read/Select to set time/date3. Press Up (or Dn) scroll button to set each time or date segment and press Read/Select to movethrough the segmentsUPSCROLLDN[01/16] 01/02/200810:04 AMAppel TelephoniqueLong Range Systems 25 T9601 User Manual](https://usermanual.wiki/Long-Range-Solutions/TX9601/User-Guide-2326062-Page-26.png)