Long Range Solutions BUTLERXP Short range paging system transmitter User Manual Layout 1
Long Range Systems, LLC Short range paging system transmitter Layout 1
UserManual.wiki
>
Long Range Solutions
>
BUTLERXP User Manual
Users Manual
Navigation menu
Upload a User Manual
Namespaces
Wiki Guide
HTML
PDF
Info
Views
User Manual
Discussion / Help
Navigation
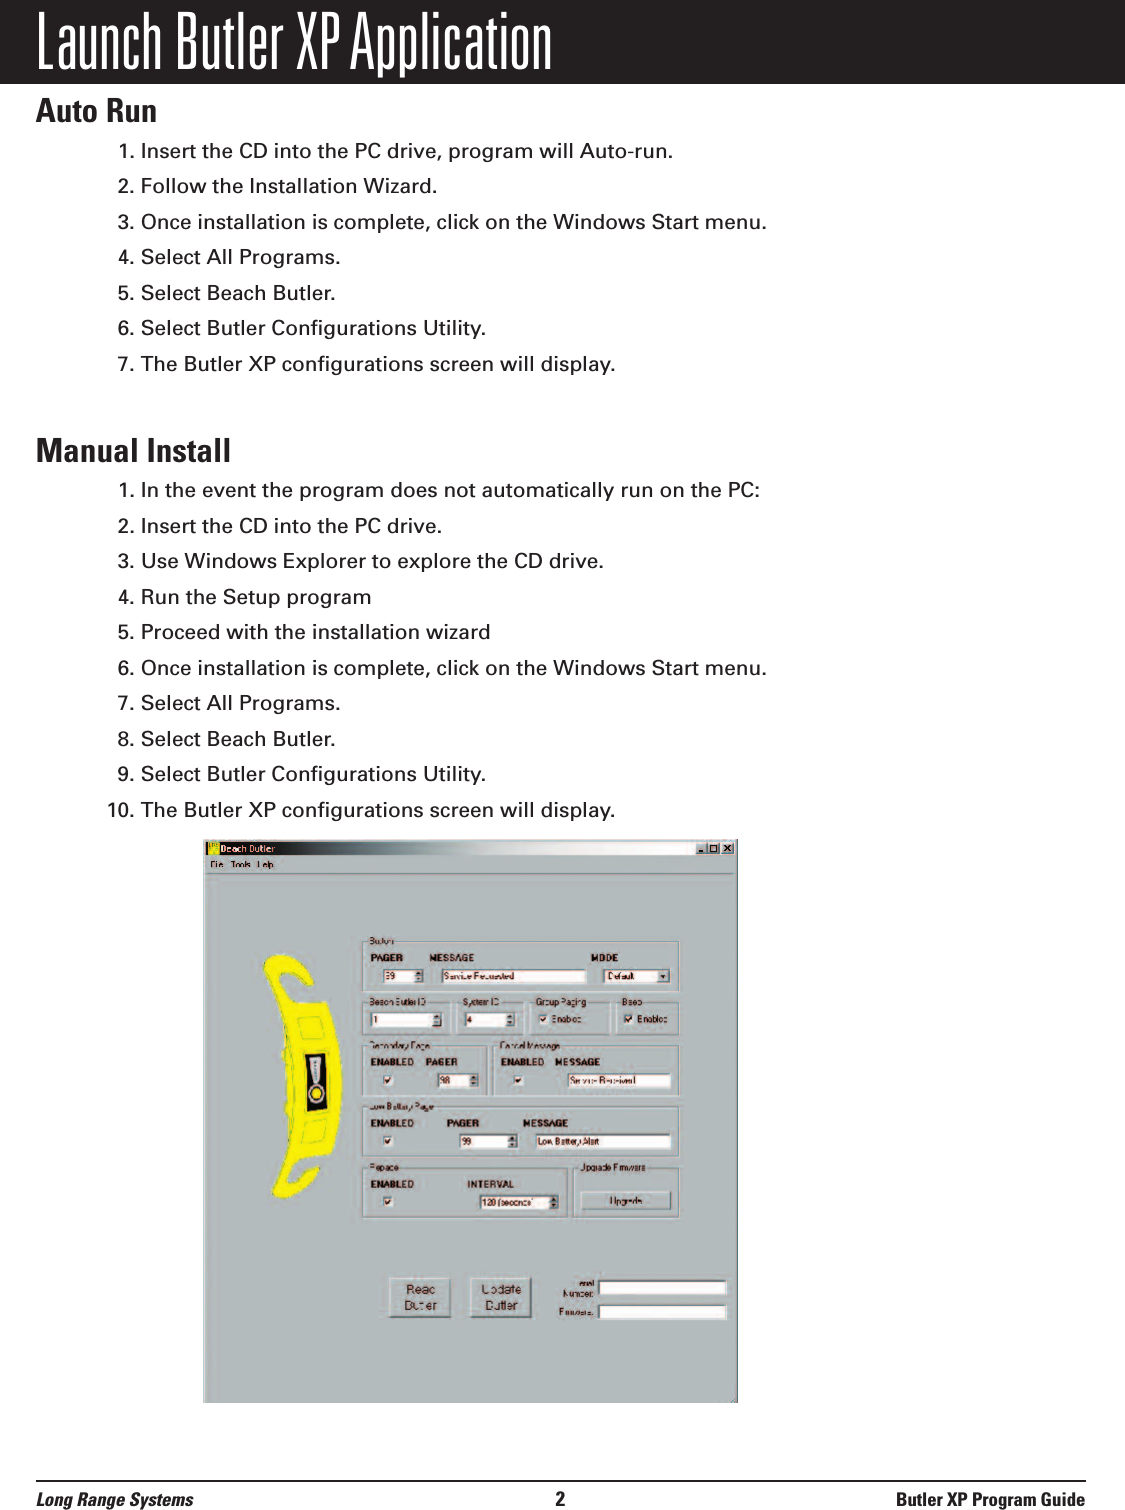
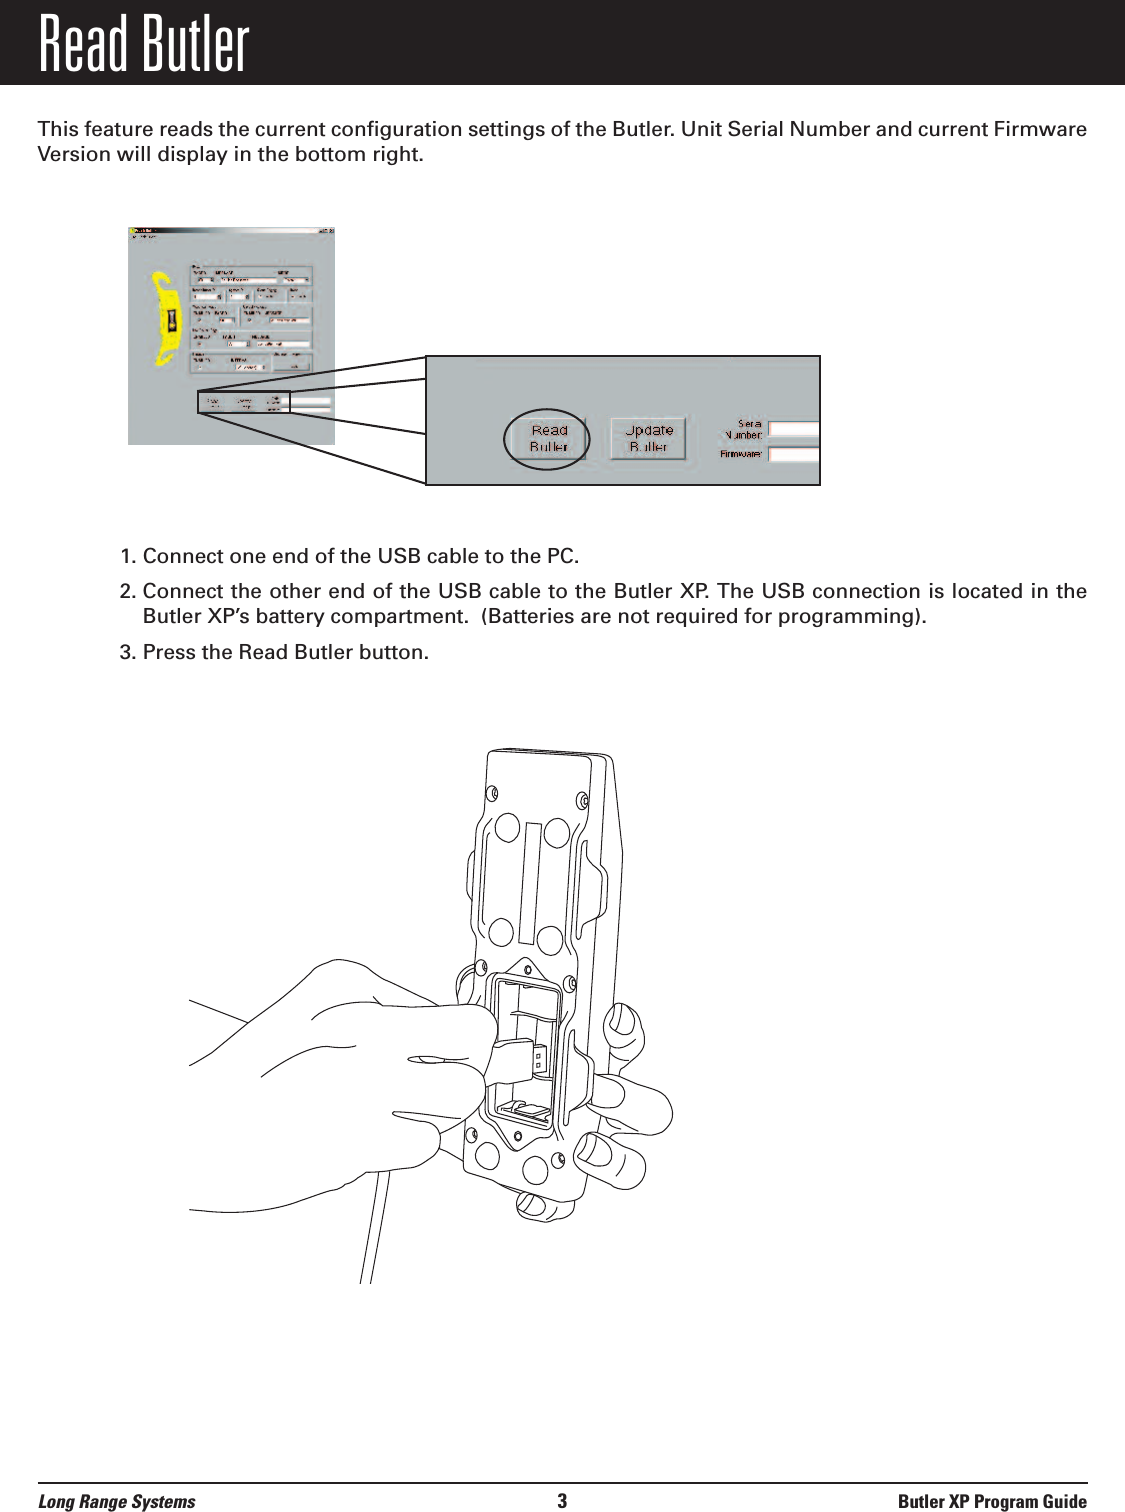
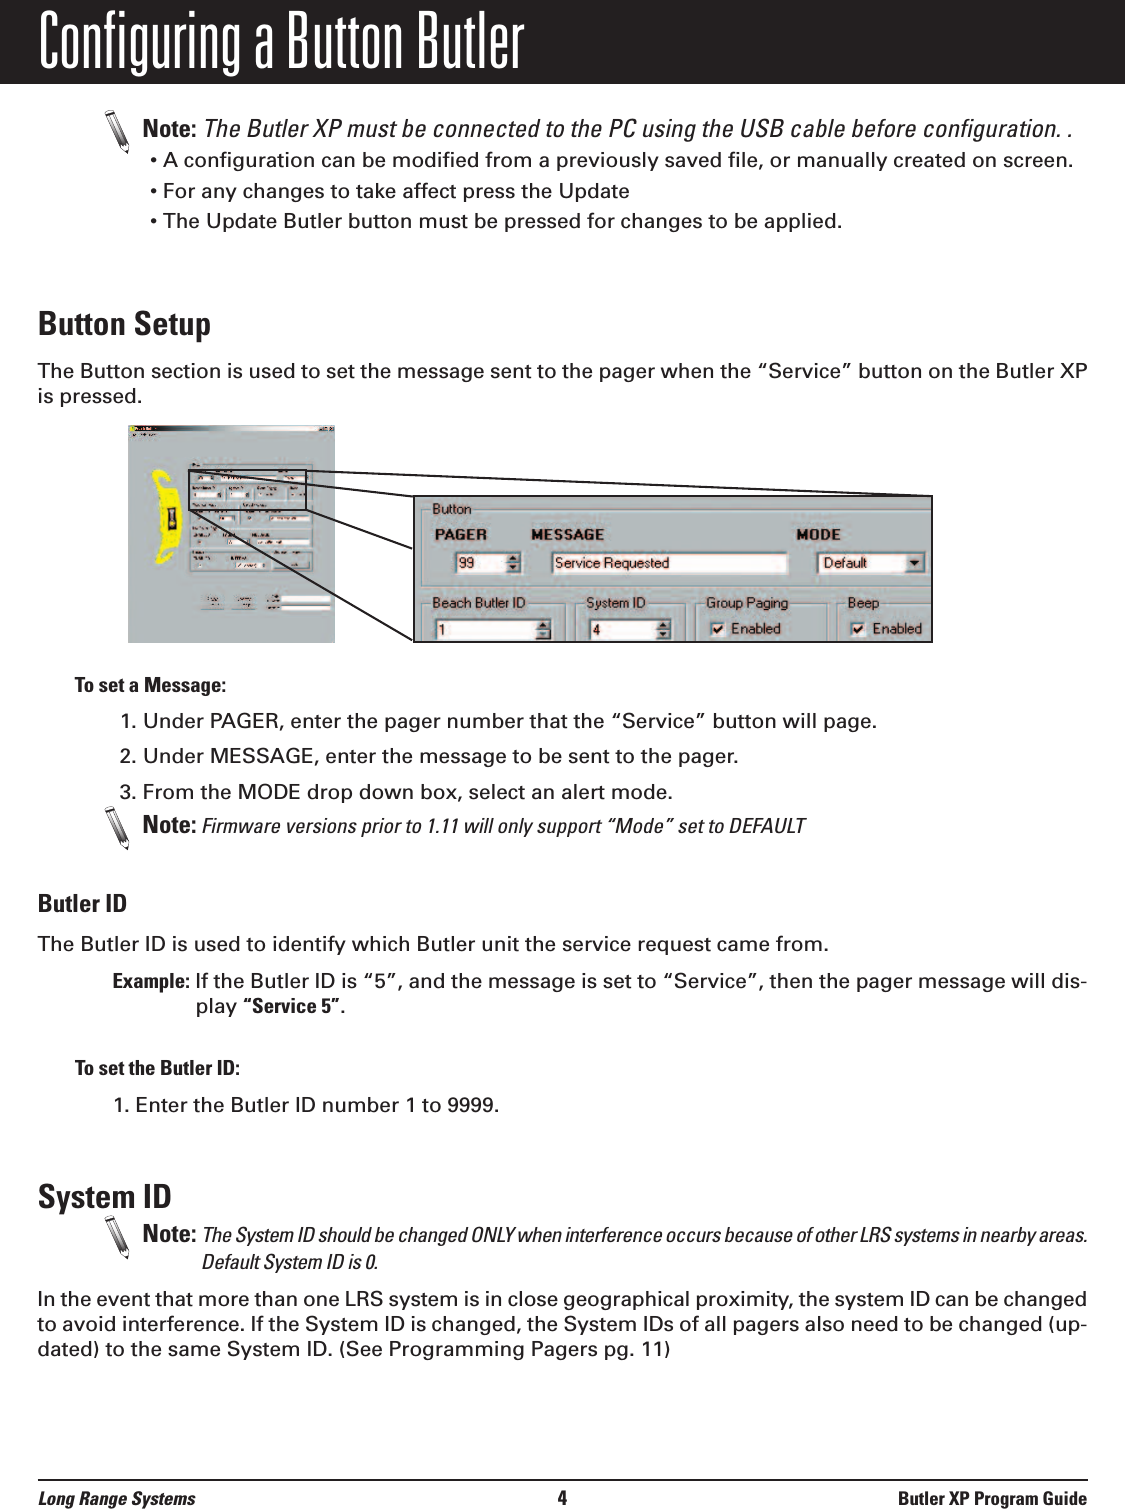
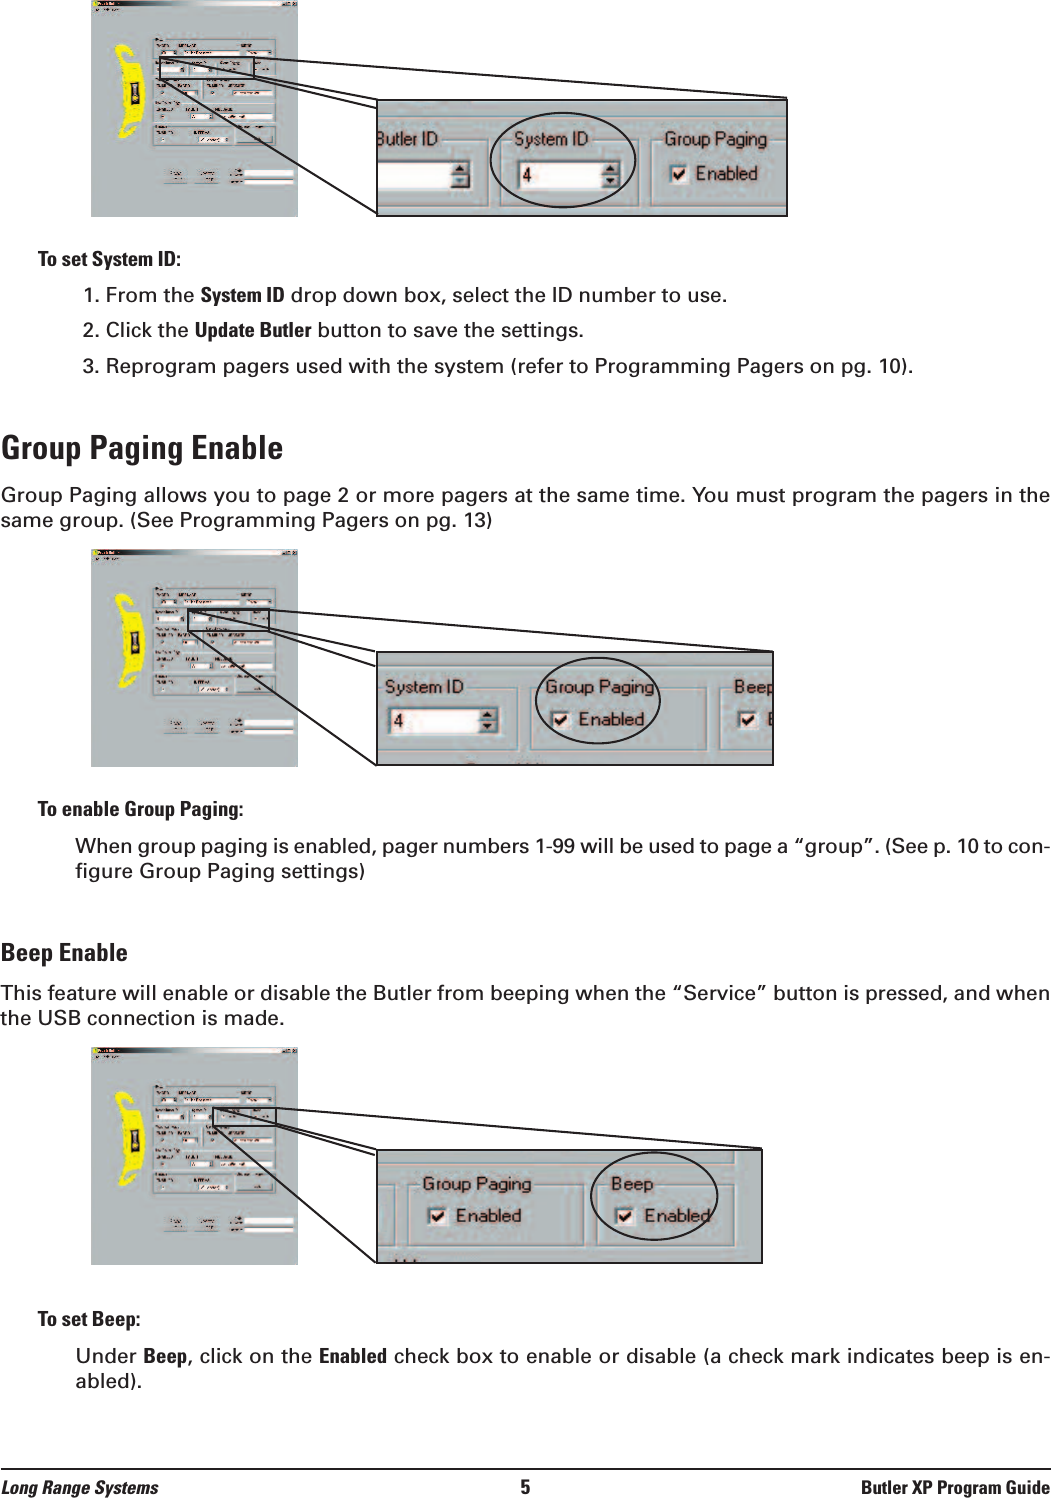

![11. Replace the battery and wait for the screen display to go blank (wait about 10 seconds).12. Press Program to program the pager. A message box will appear to indicate programming.13. The pager will beep four times to indicate it is being programmed. Programming is completewhen the pager stops beeping.14. Repeat steps 4-6 to program any additional pagers.TroubleshootingIn order for your Button Butler to alert a pager, the Button Butler must be programmed on the same SystemID as the pager, and the pager number must be programmed into the Button Butler.To verify the pager’s System ID:1. Remove the battery from the pager2. Reinsert the battery and read the display.Example: If Pager Number = 1, Page All = 911, System ID = 0The display will read:• C1: [0]1 Pager Number (1) • C2: [0]911 Page All (911) • C3: [0]0 System ID (0) To verify the Button Butler’s System ID:1. Plug one end of the USB to the PC and the other end to the Button Butler. 2. Open the Butler Configurations Utility.3. Click the Read Butler button.4. The current system ID will be displayed under System IDLong Range Systems 11 Butler XP Program Guide](https://usermanual.wiki/Long-Range-Solutions/BUTLERXP/User-Guide-2261480-Page-12.png)