Koss COBALT01 Bluetooth Stereo Headset User Manual User s manual
Koss Corporation Bluetooth Stereo Headset User s manual
UserManual.wiki
>
Koss
>
COBALT01 User Manual
Manual
Navigation menu
Upload a User Manual
Namespaces
Wiki Guide
HTML
PDF
Info
Views
User Manual
Discussion / Help
Navigation
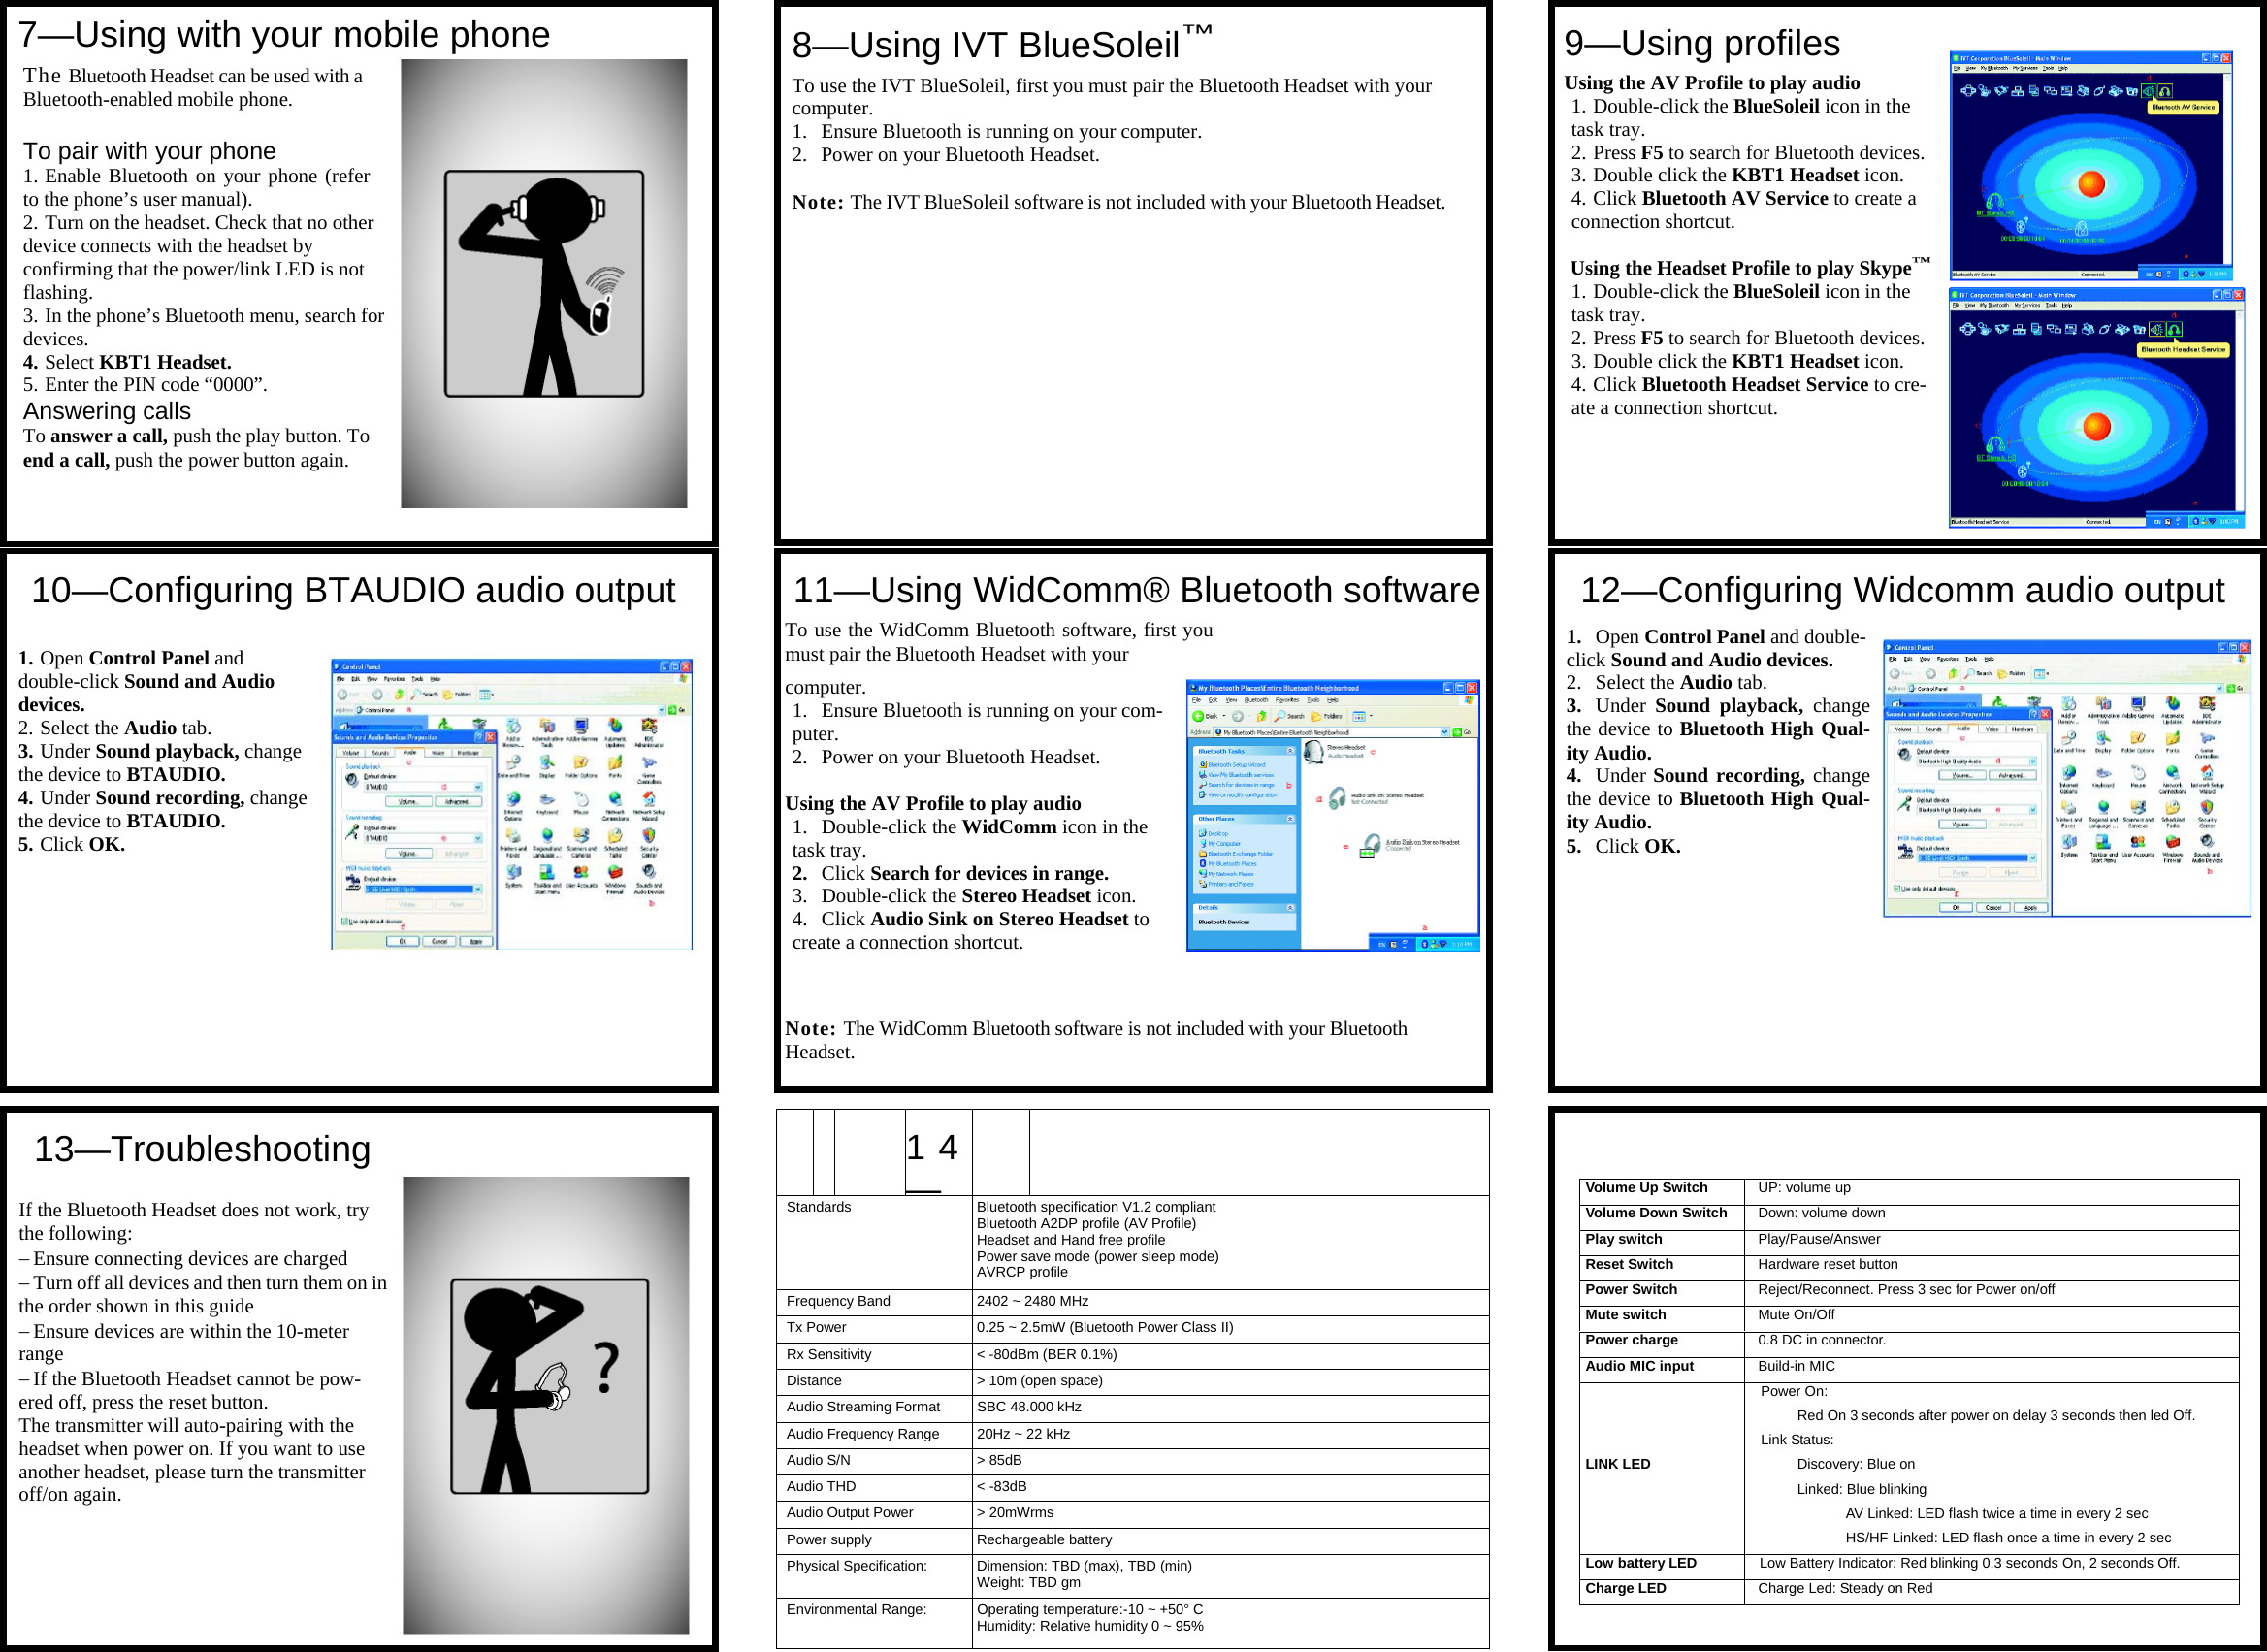
![Bluetooth A/V Transmitter (Package A) - 1—Check the package contents The Bluetooth ships with two package configurations: Package A and Package B. Unpack the contents of the package you purchased and check that the following items are included: Audio Cable (Package A)Quick Guide Power Adapter Bluetooth A/V Transmitter (Package A) Bluetooth Audio Dongle (Package B) 6—Wait for devices to connect The devices connect (pair) after 90 seconds. The blue power/link LEDs on both headset and transmitter flash when connected. 5—Pair with Bluetooth Headset (cont.)You can pair the Bluetooth Headset with an Audio Dongle attached to your computer. 1. Plug the Audio Dongle into a USB port on your computer and ensure Bluetooth is running on the computer. 2. Power on your Bluetooth Headset. 2—Charge the batteryThe battery lasts eight hours and is recharged using the power adapter or the USB cable. To recharge: Plug the USB cable into the DC jack on the Bluetooth Headset and connect the other end to your PC. [or] Plug the power adapter into the DC jack on the Bluetooth Headset and connect the other end to an electrical outlet. Note: Before first use, charge the battery fully for ten hours. Thereafter, recharging takes 90 minutes. 3—Turn on the powerTo turn on the power, press and hold the power button (about 3 seconds) until the power LED lights blue. To turn off the power, press and hold thepower button (about 3 seconds) until the powerLED turns off. Link LED power is on Link LED flashing connected to device Charge LED battery is charging, turns off when charged Low Battery LED battery is low, recharge before LED turns off 4—Pair with Bluetooth Headset The Bluetooth Headset can be used with a Bluetooth A/V Transmitter or Bluetooth Audio Dongle. On first use, the devices must be paired. To pair the devices: 1. Connect your transmitter to an audio device. 2. Power on your Bluetooth Headset. 3. Power on the transmitter. Bluetooth A/V Headset](https://usermanual.wiki/Koss/COBALT01/User-Guide-640933-Page-1.png)