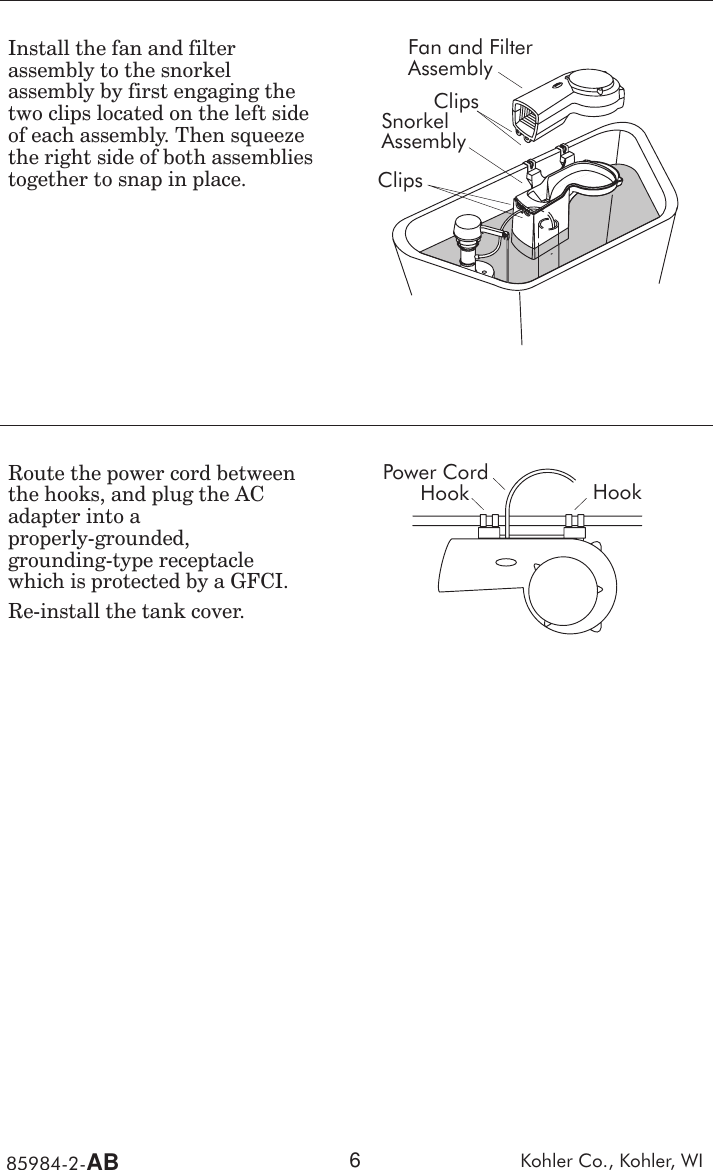
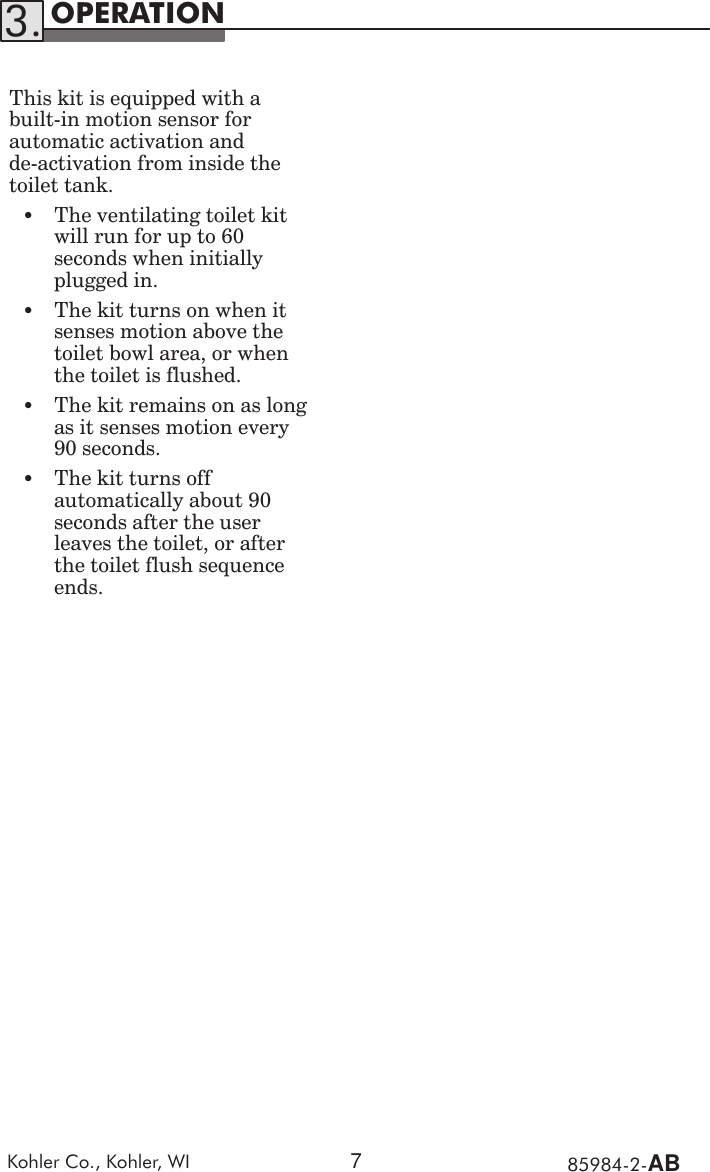
Kohler PNA1 5.8GHZ TOILET VENTILATION ACCESSORY User Manual Revised Users Manual
Kohler Co. 5.8GHZ TOILET VENTILATION ACCESSORY Revised Users Manual
Kohler >
Contents
- 1. INSTALLATION MANUAL
- 2. Revised Users Manual
Revised Users Manual