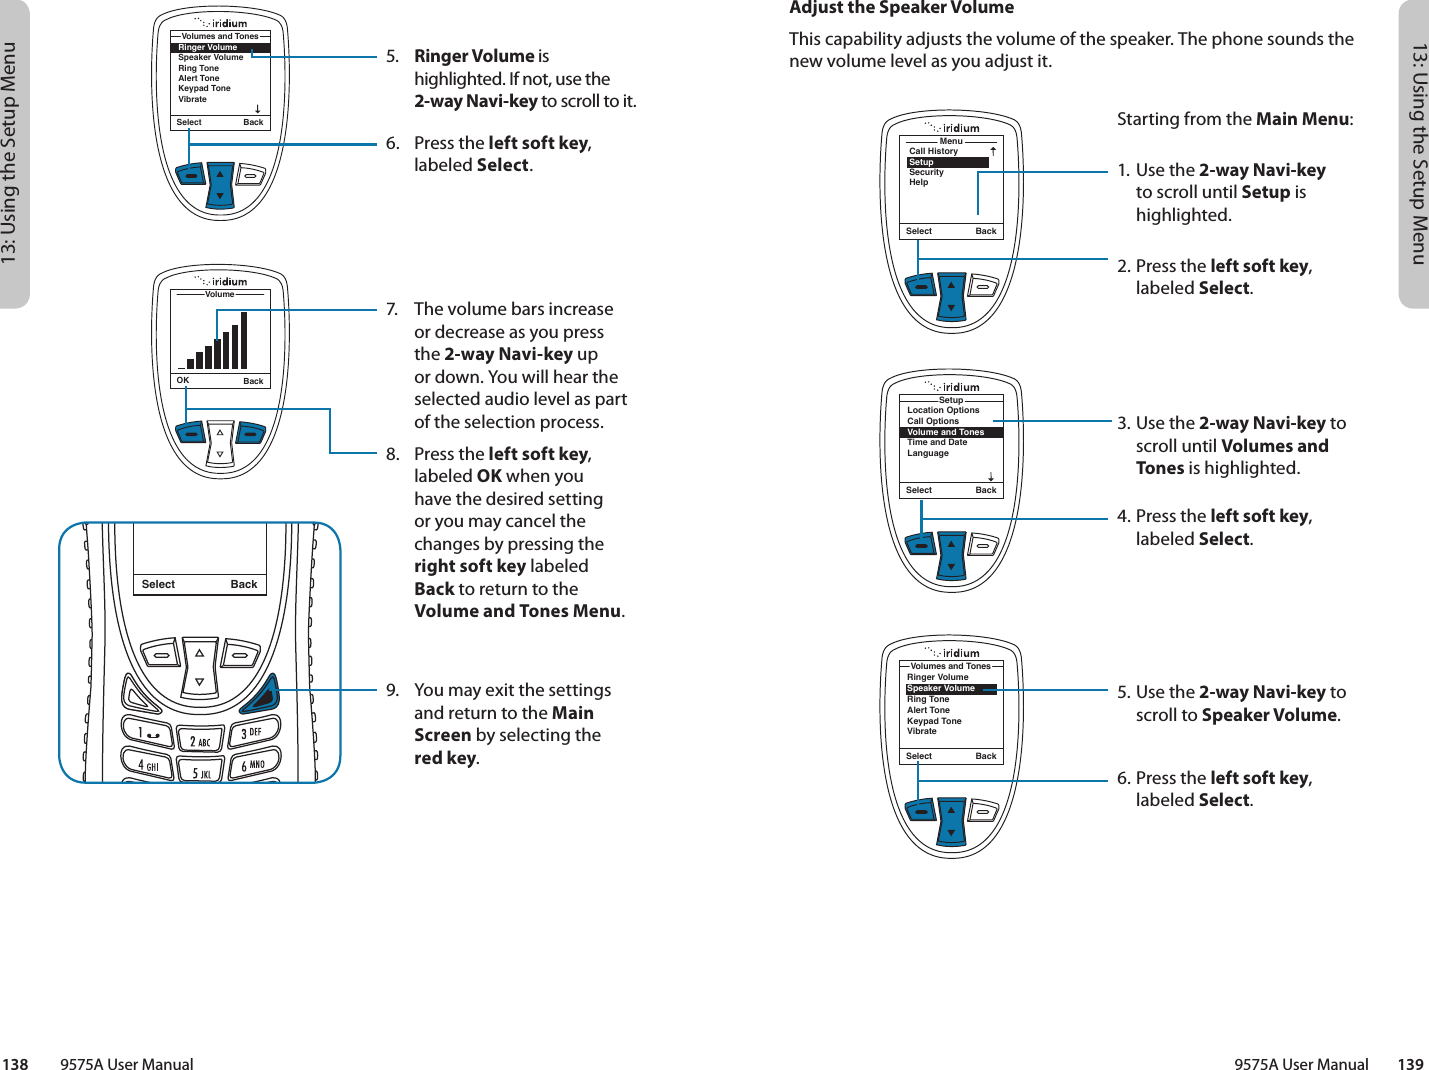
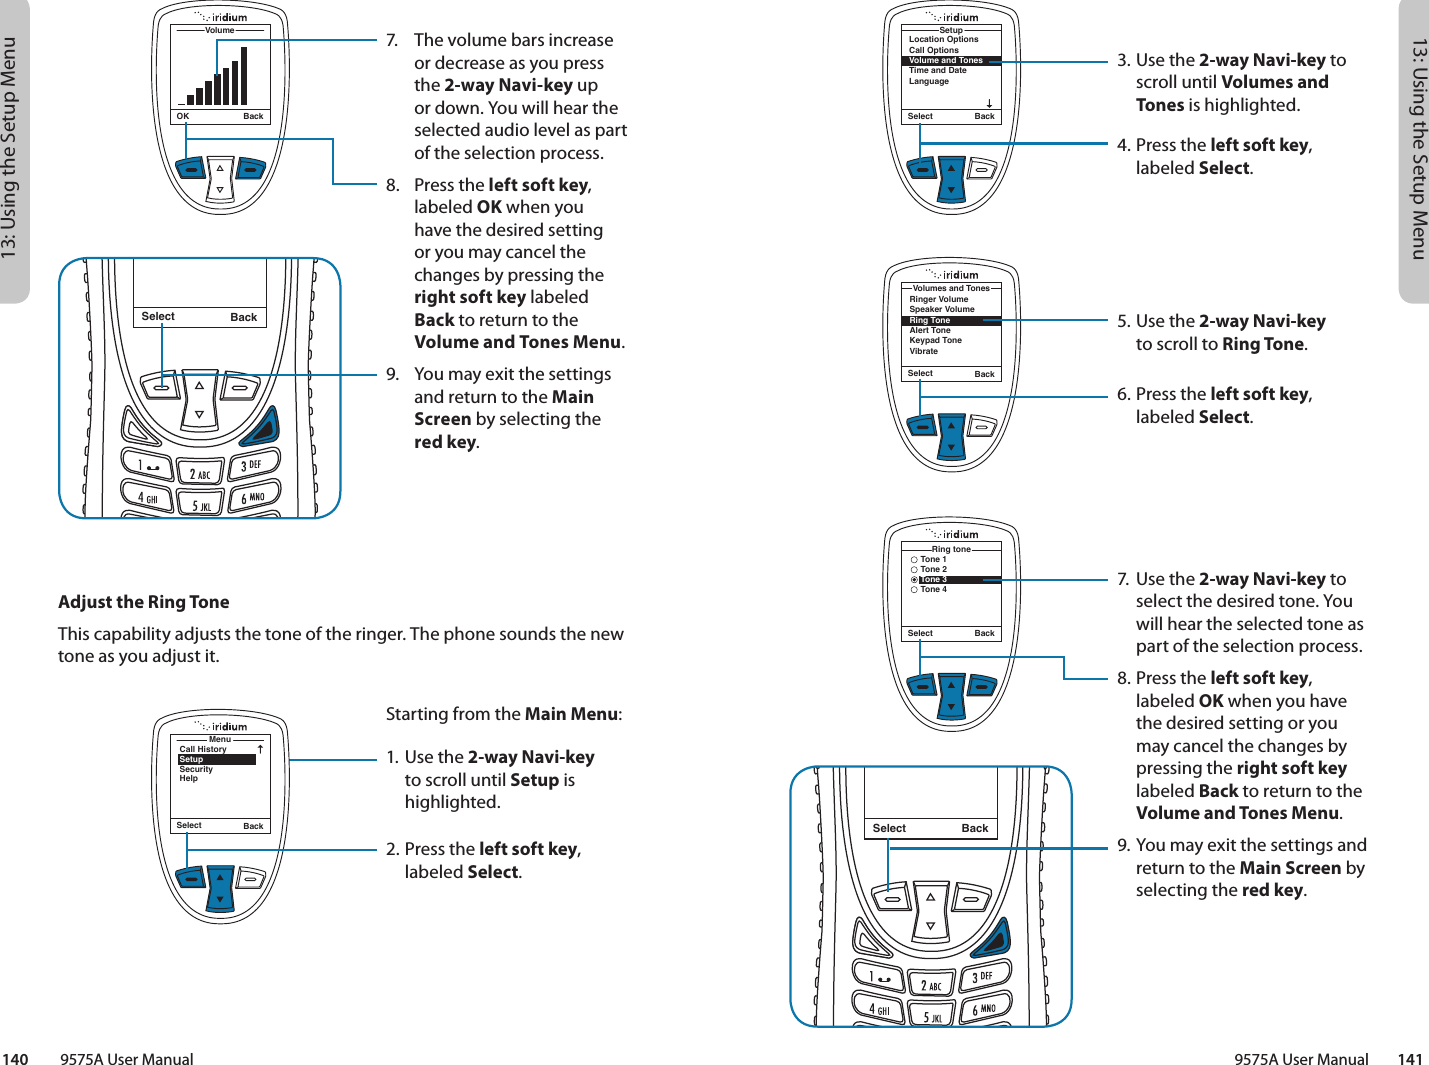
Iridium Satellite 9575N Iridium Satellite Phone User Manual 9575A part2
Iridium Satellite LLC Iridium Satellite Phone 9575A part2
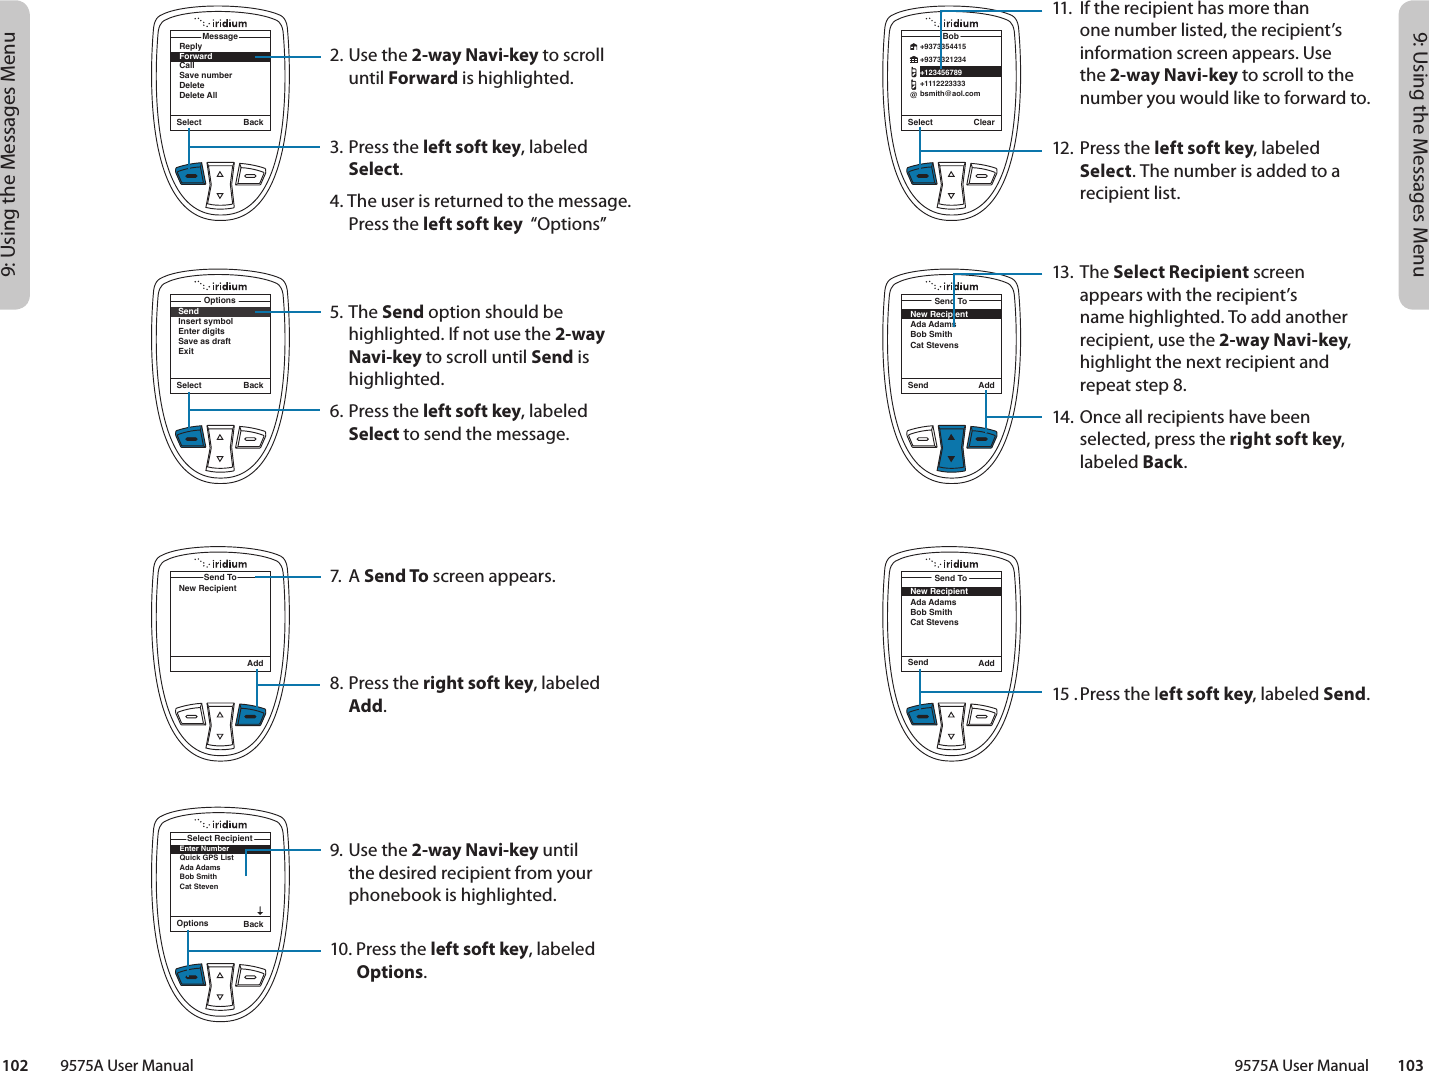
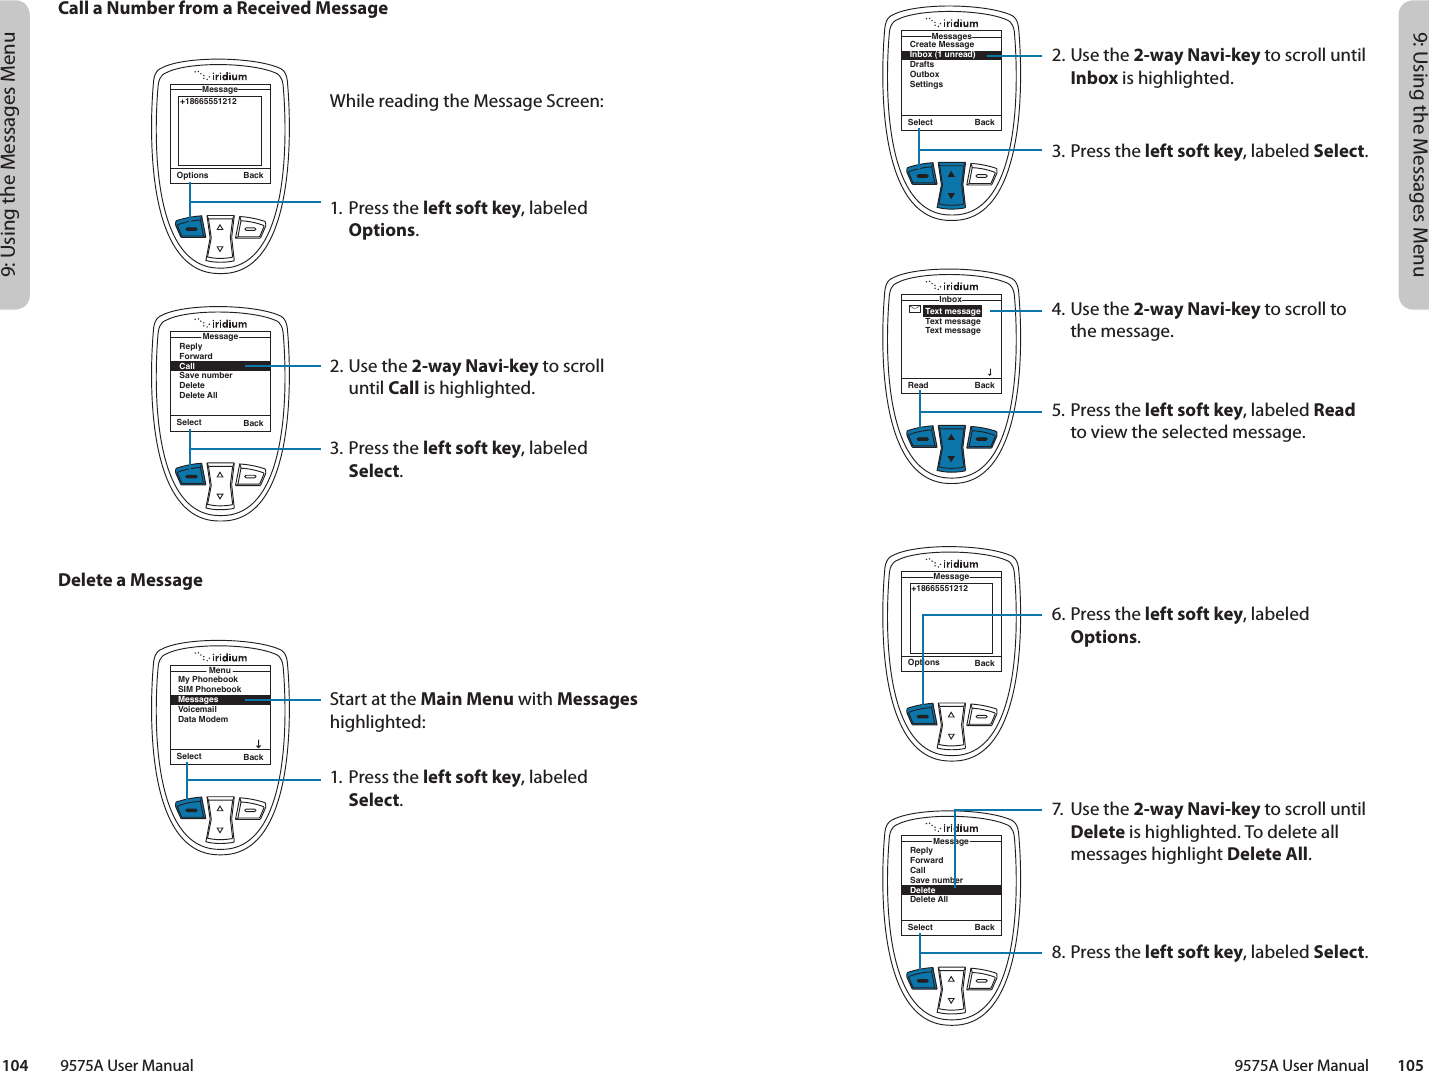
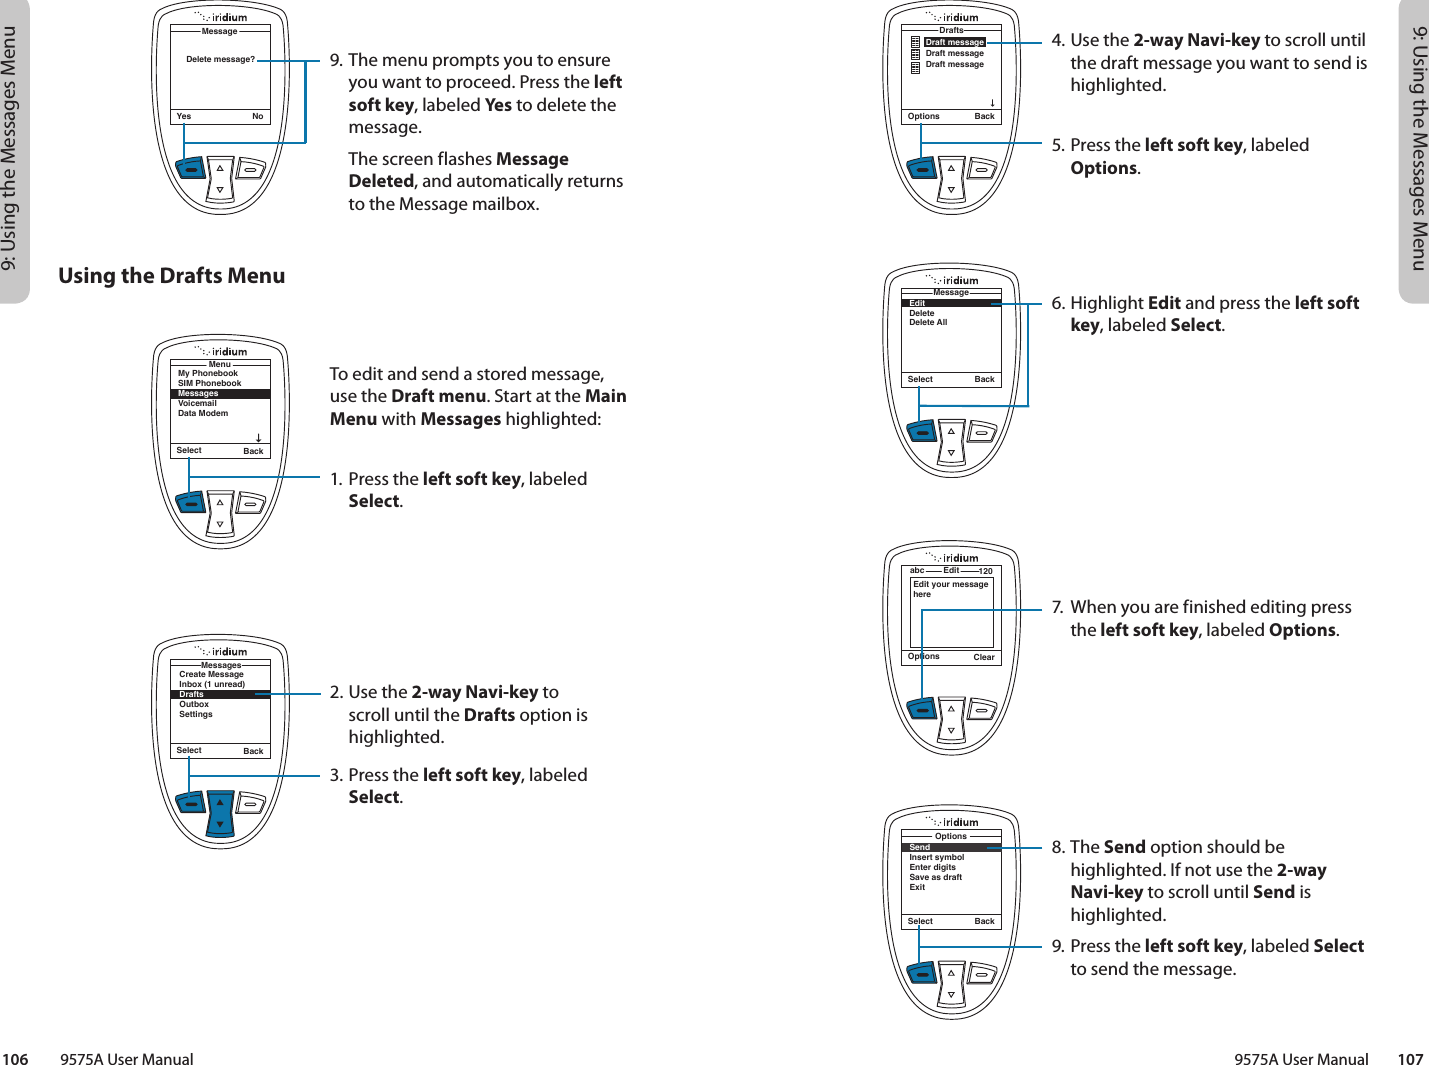
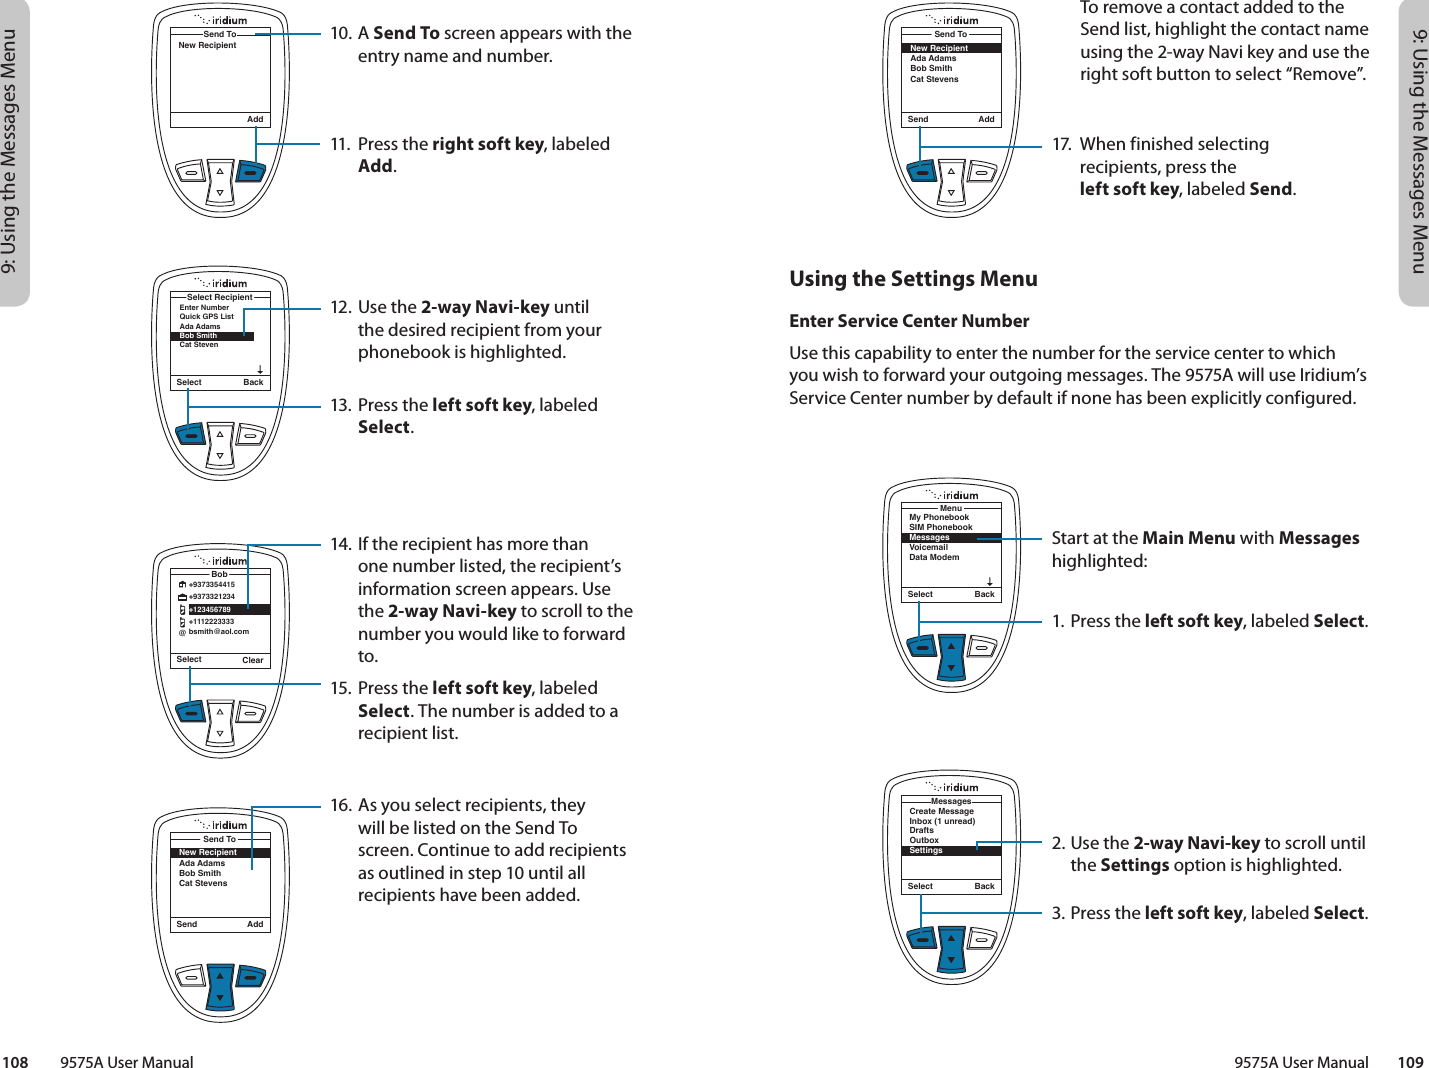
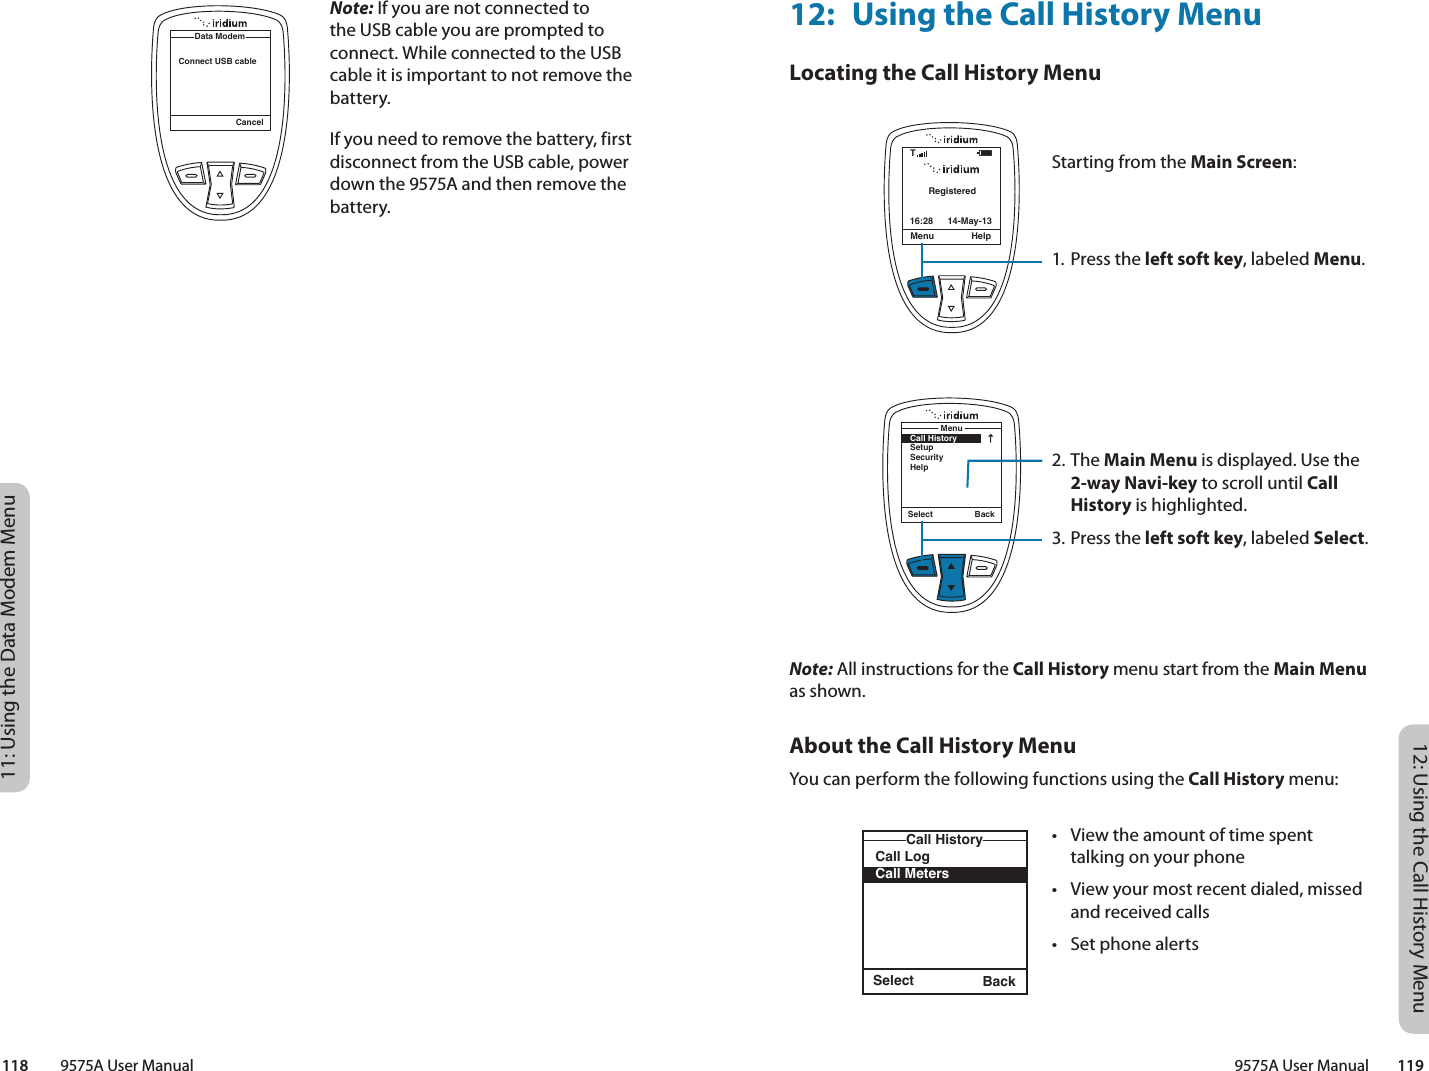
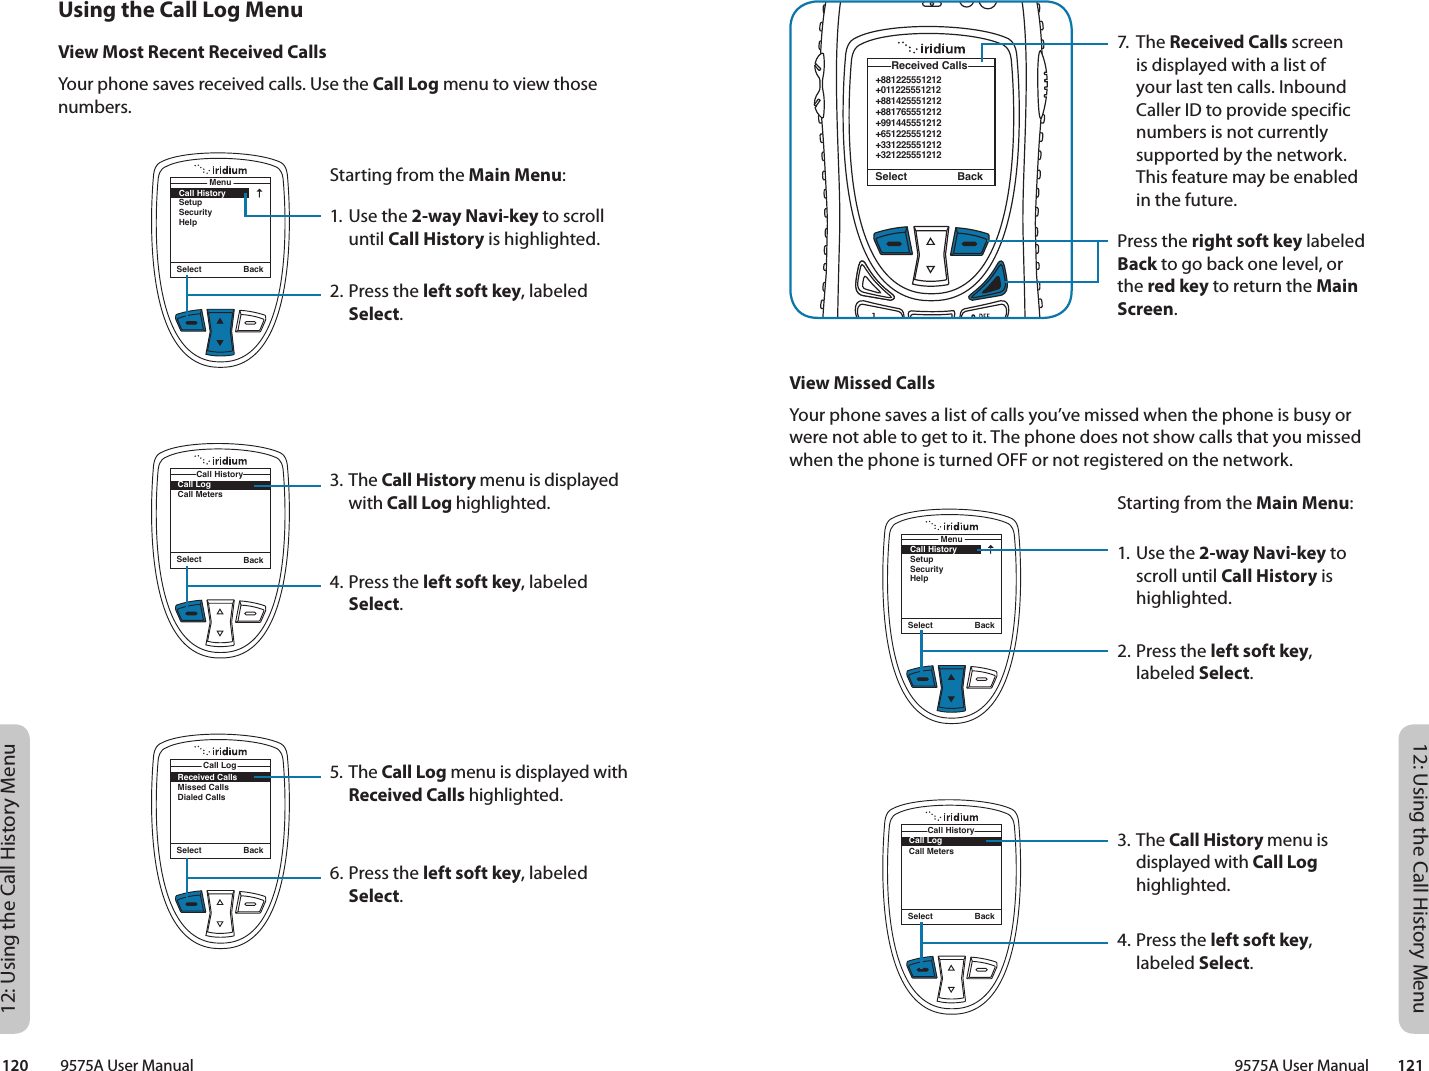
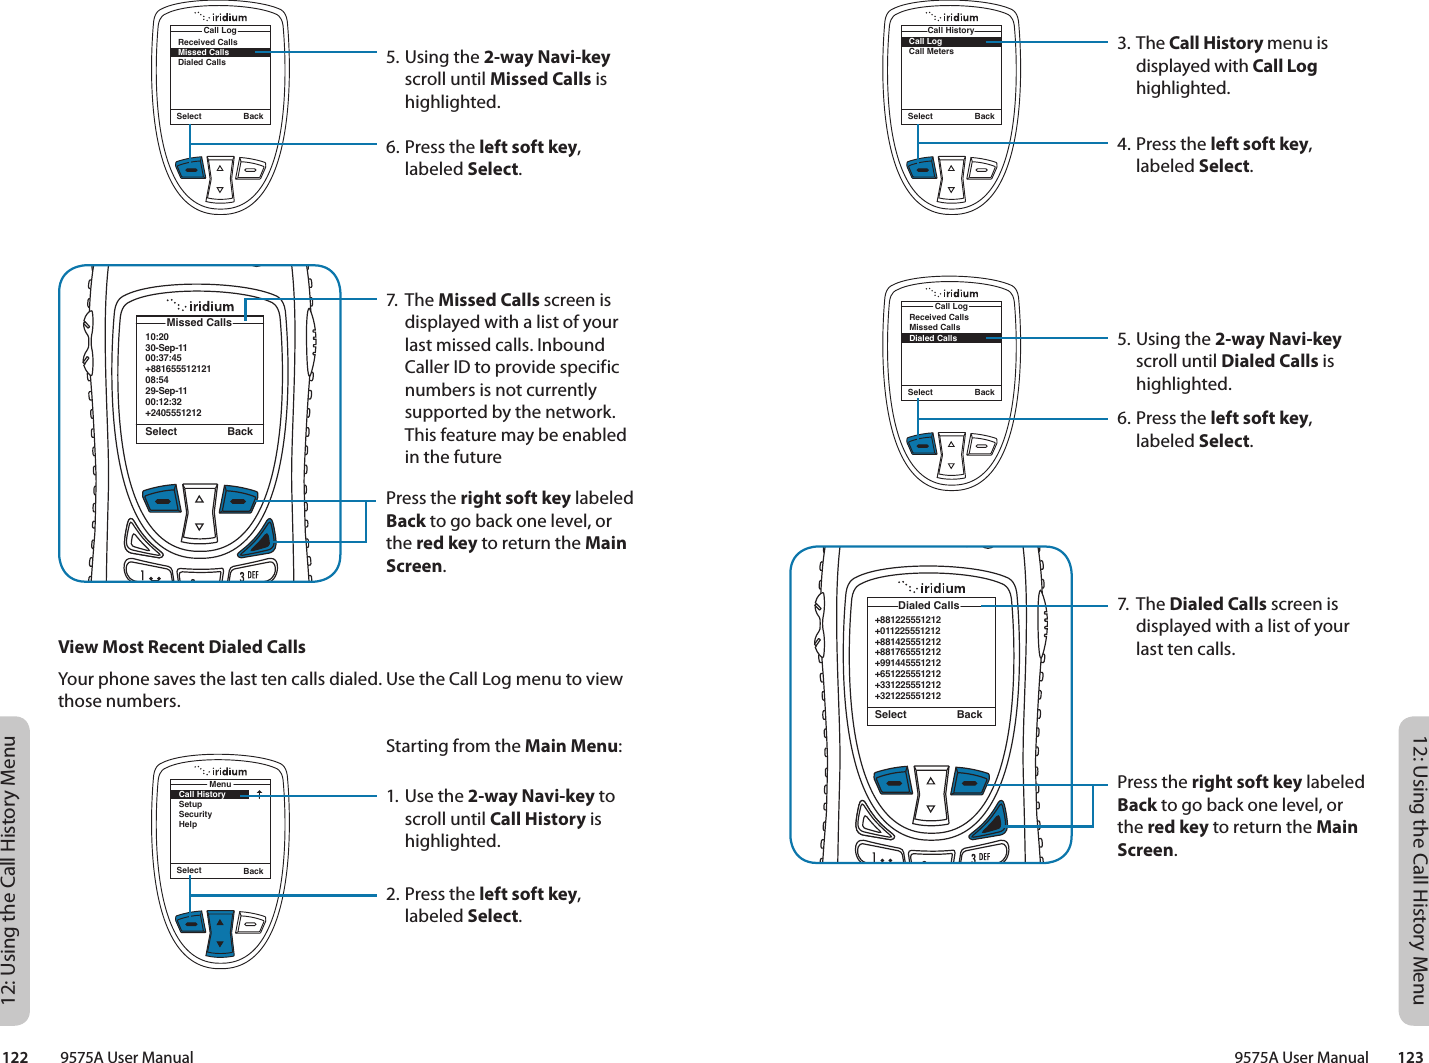
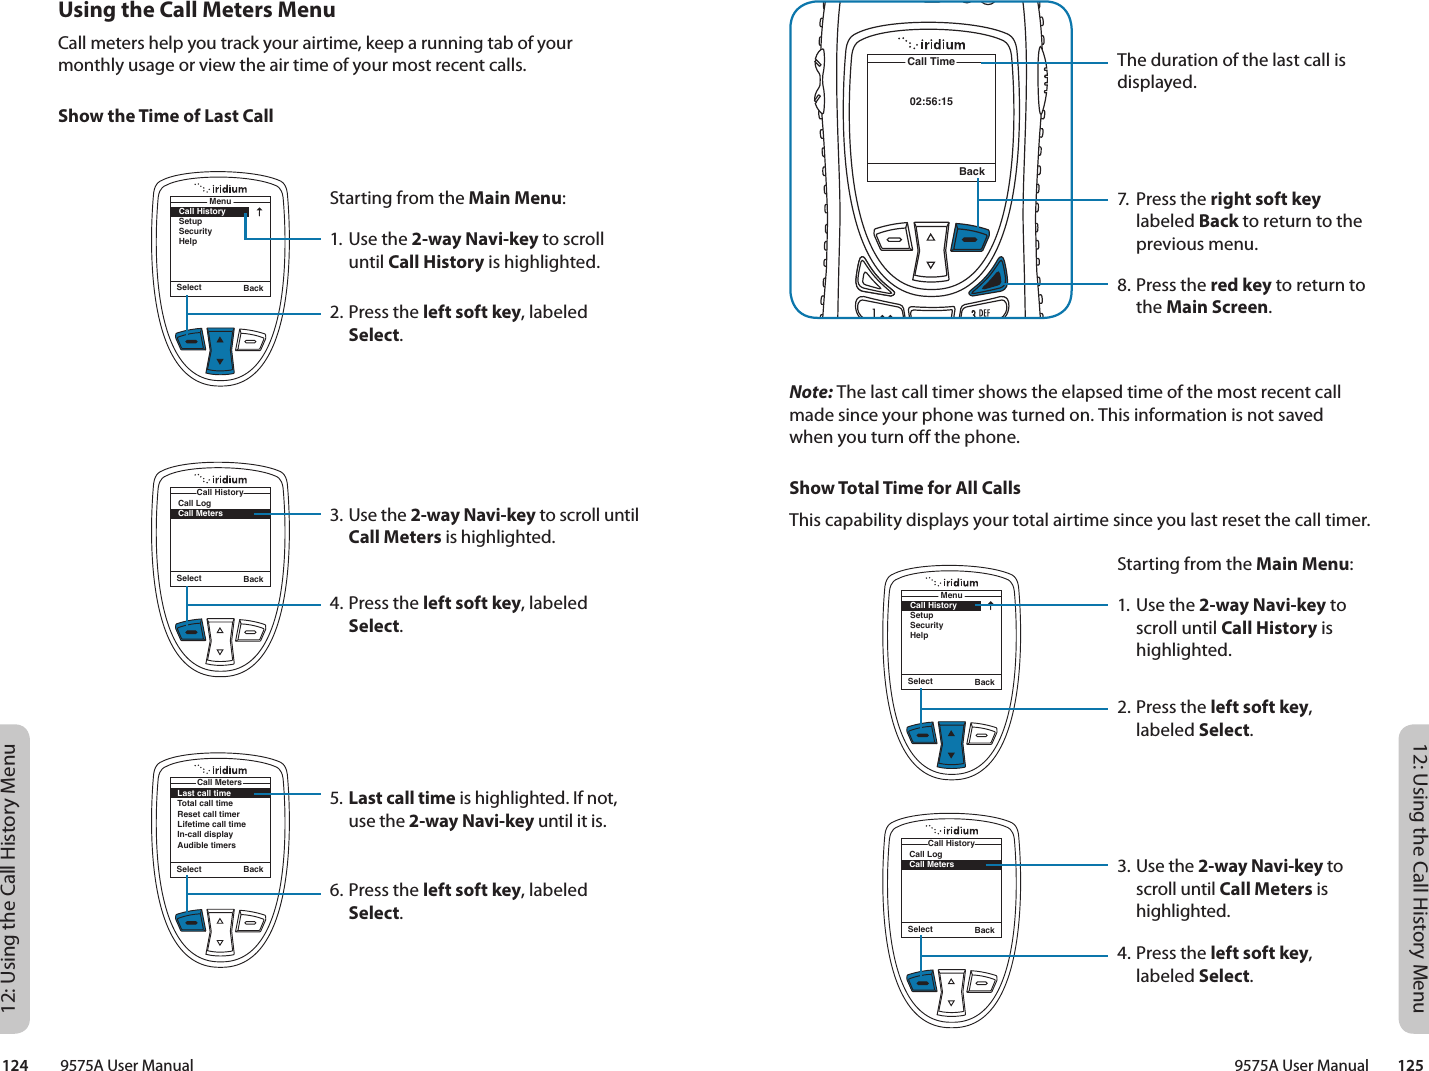
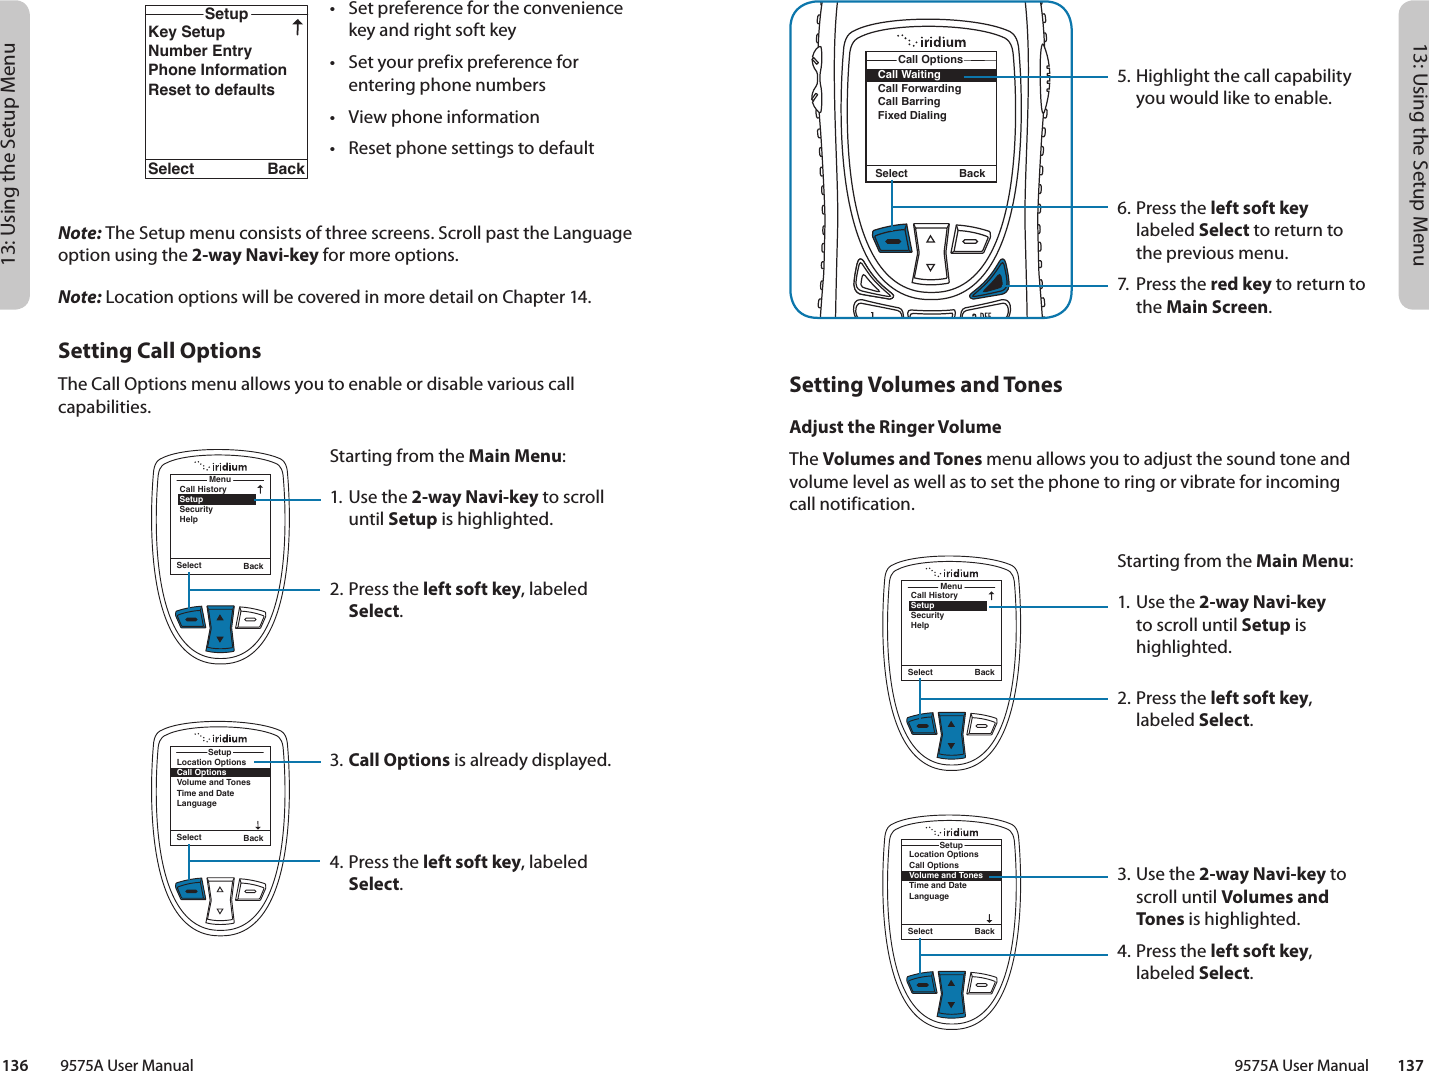
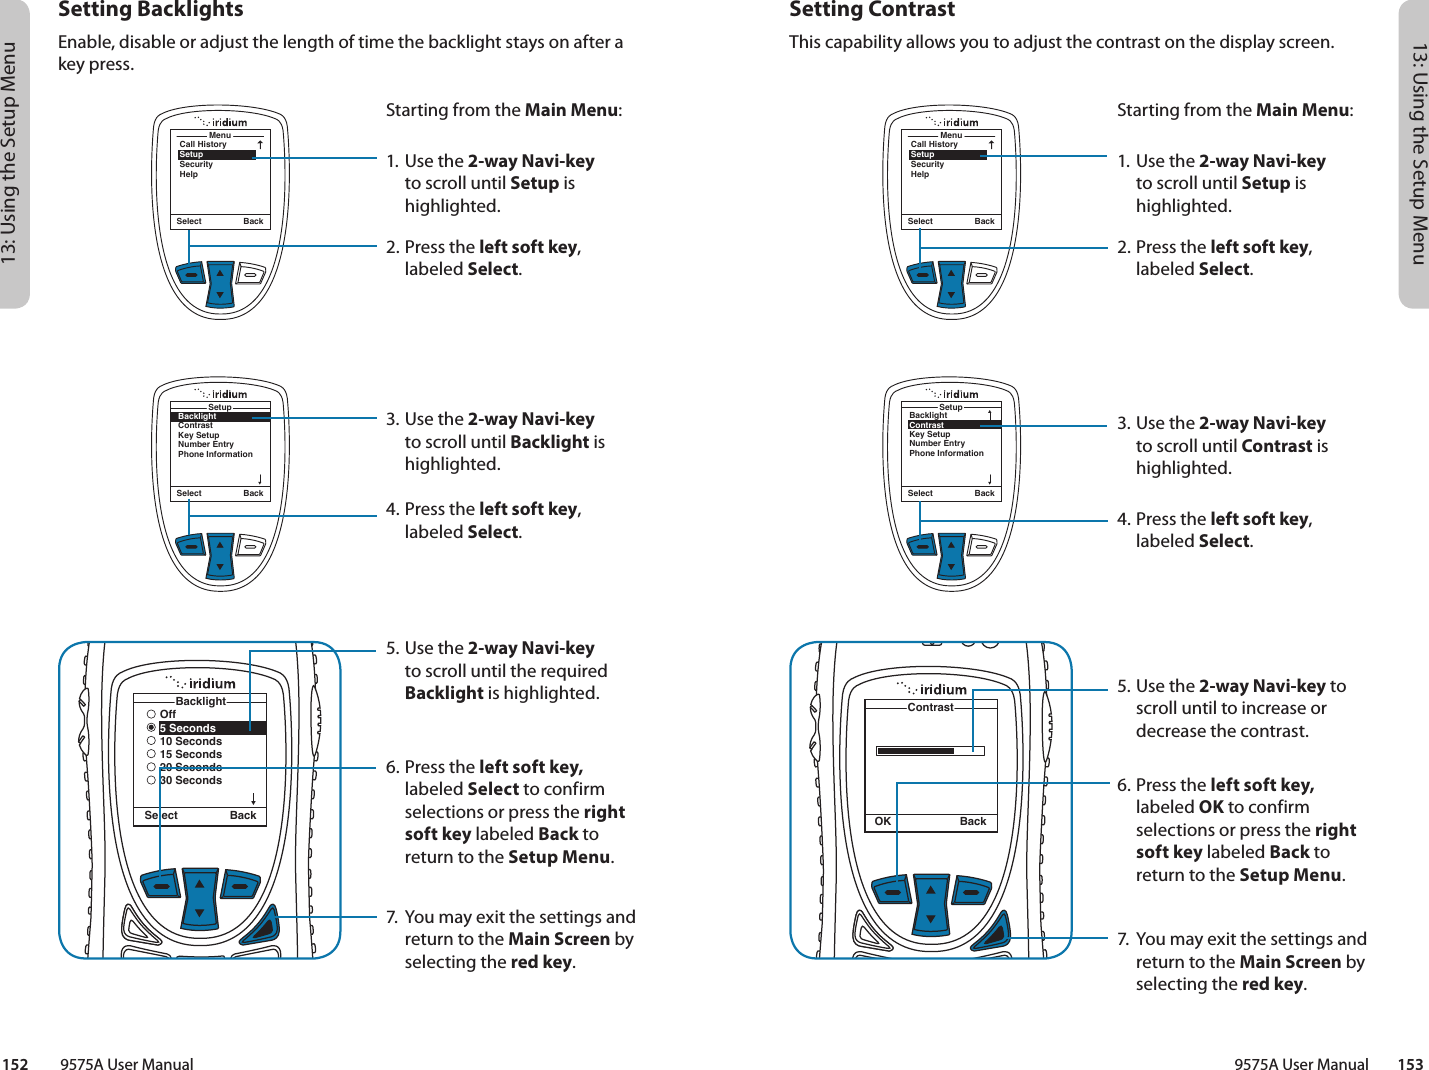
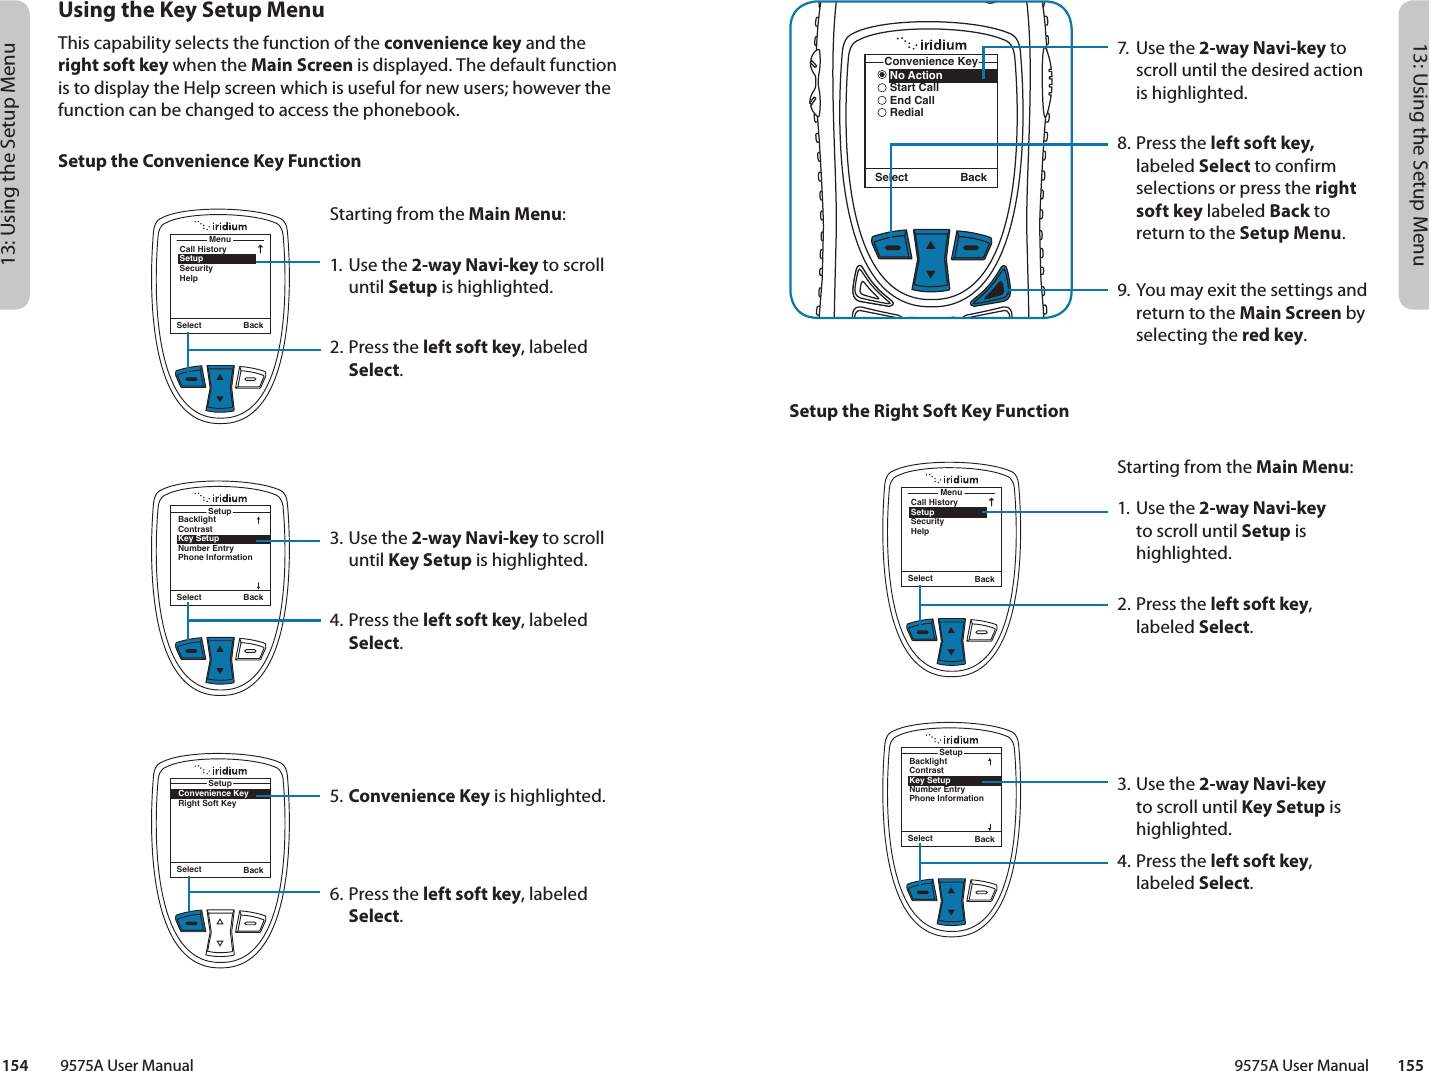
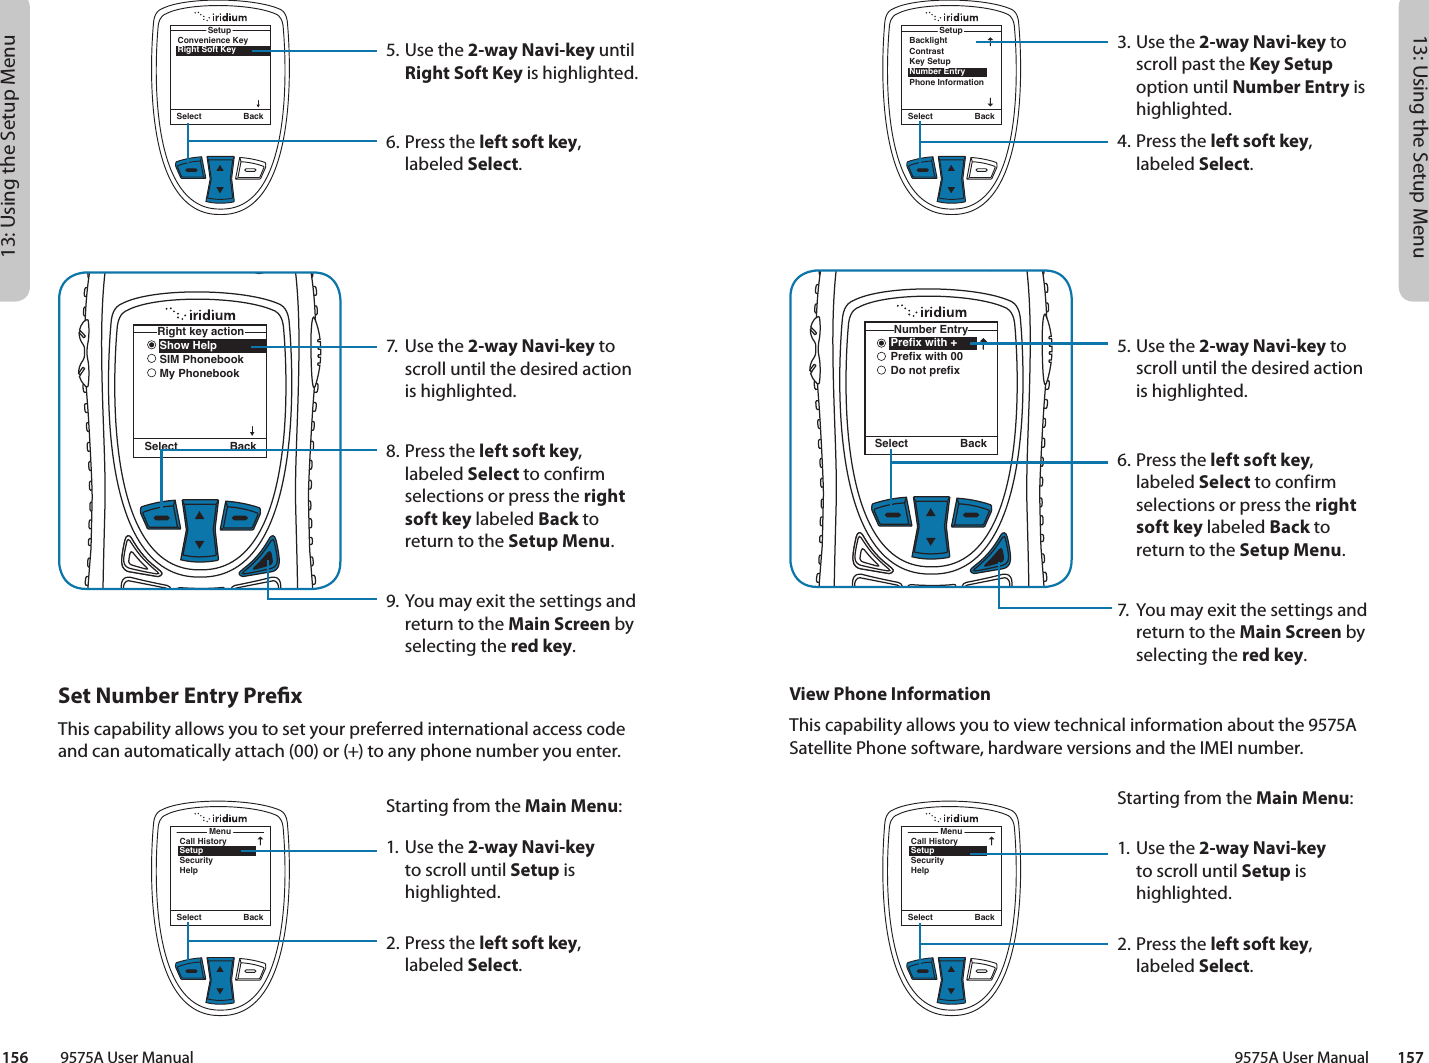
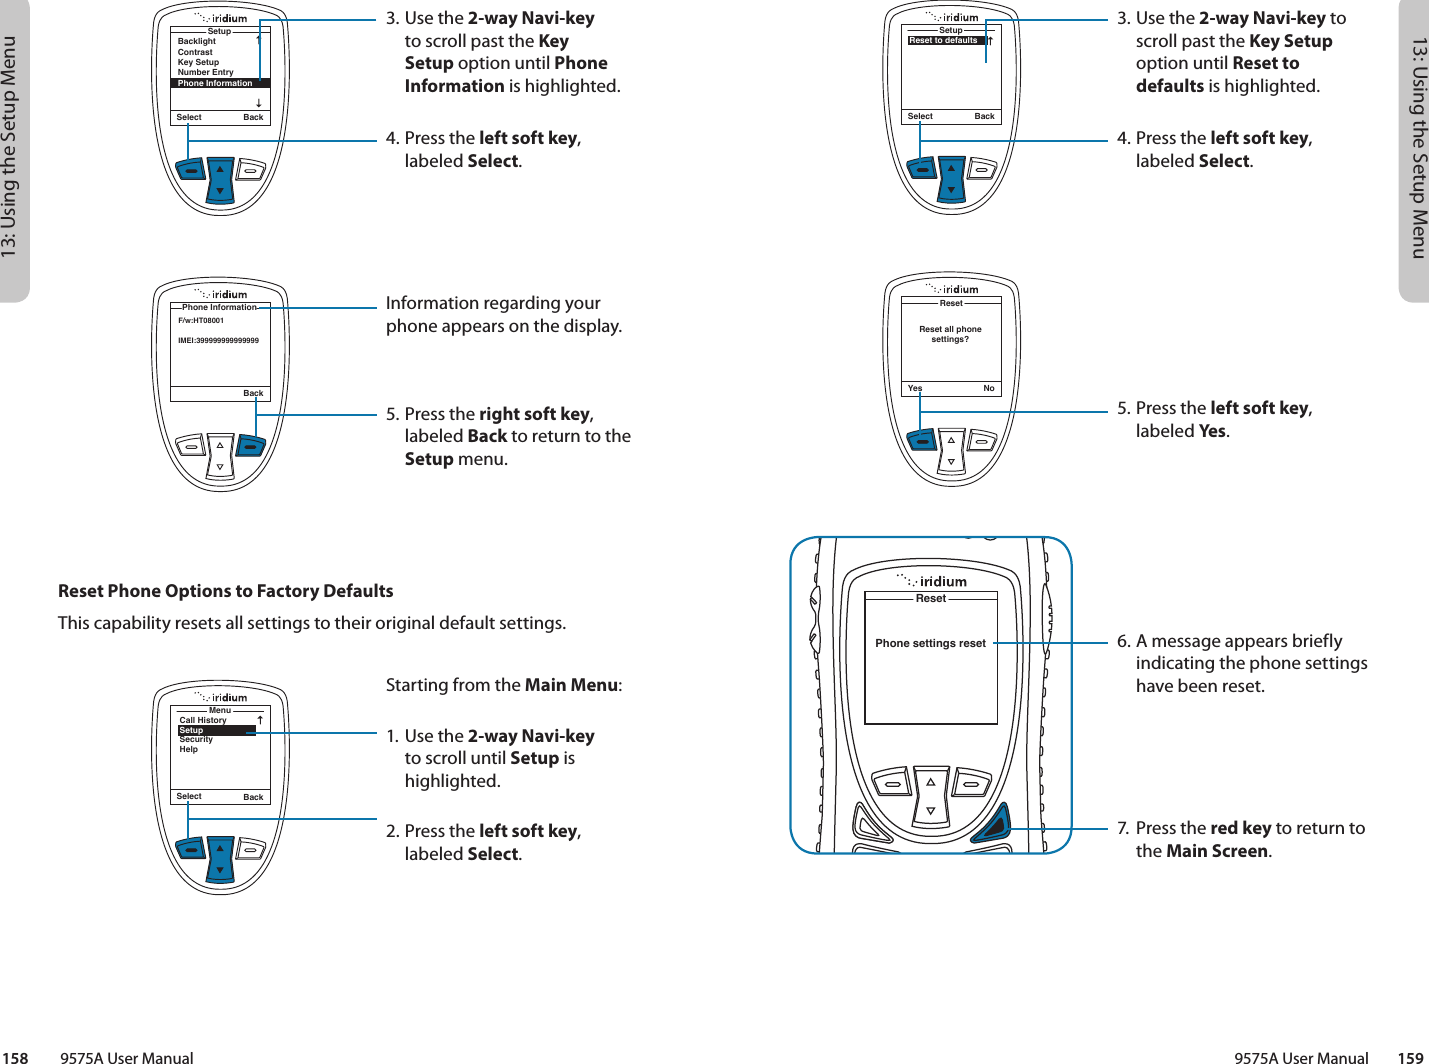
Contents
- 1. User manual part1
- 2. User manual part2
- 3. 9575A user manual part1
- 4. 9575A user manual part2
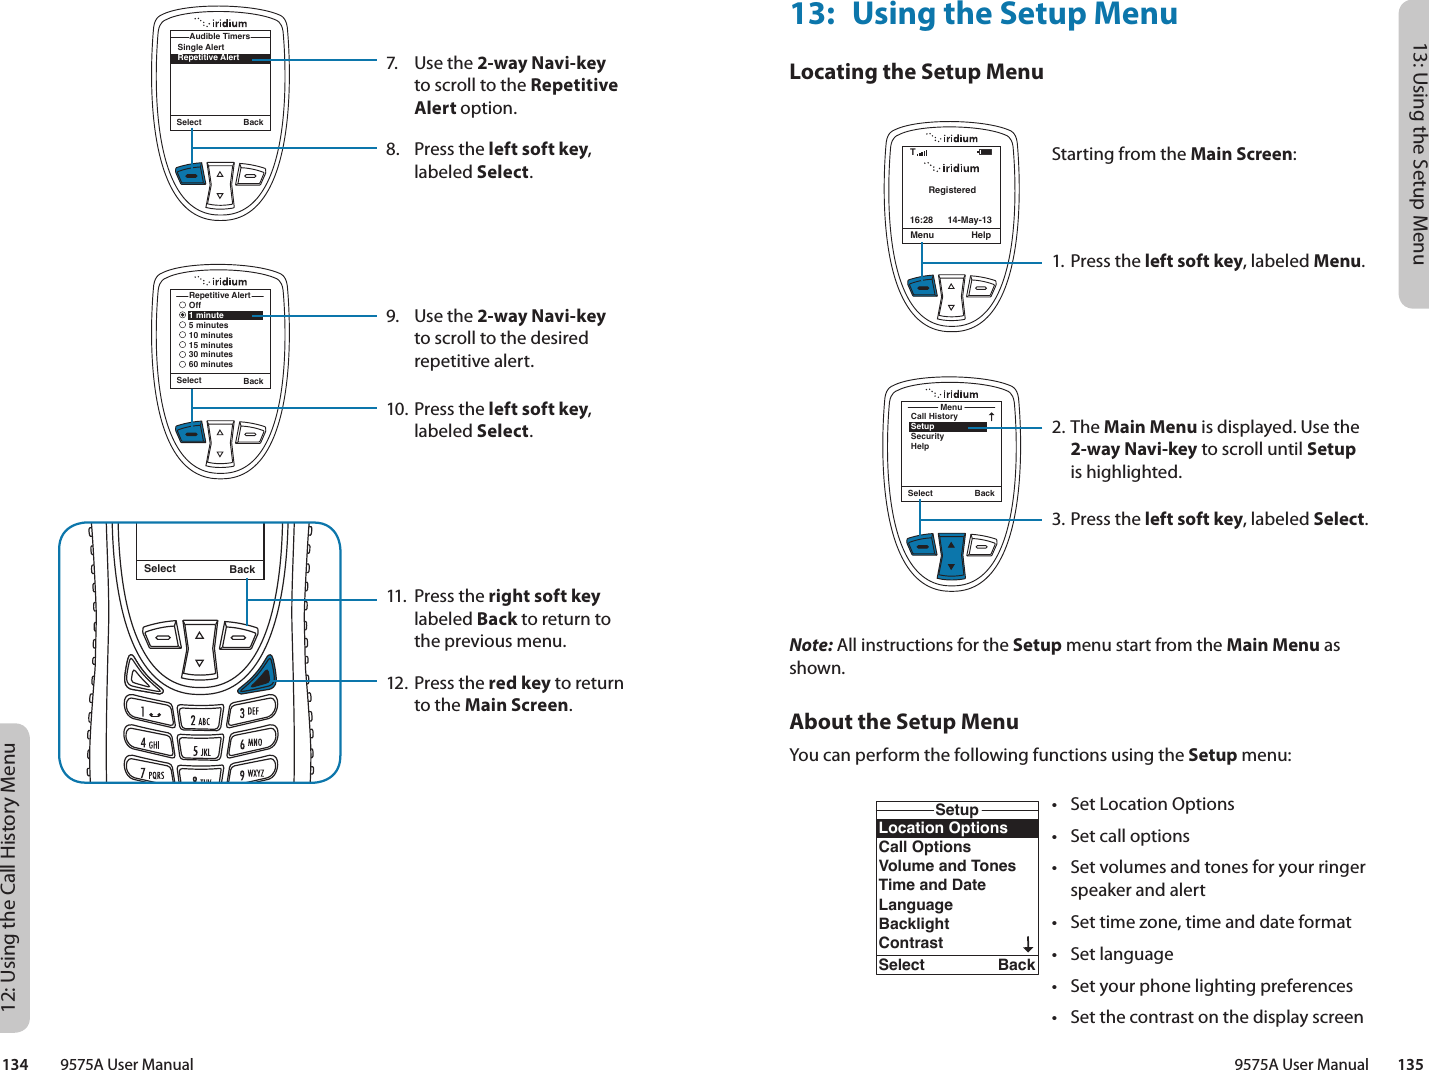
- 5. 9575A user manual part3
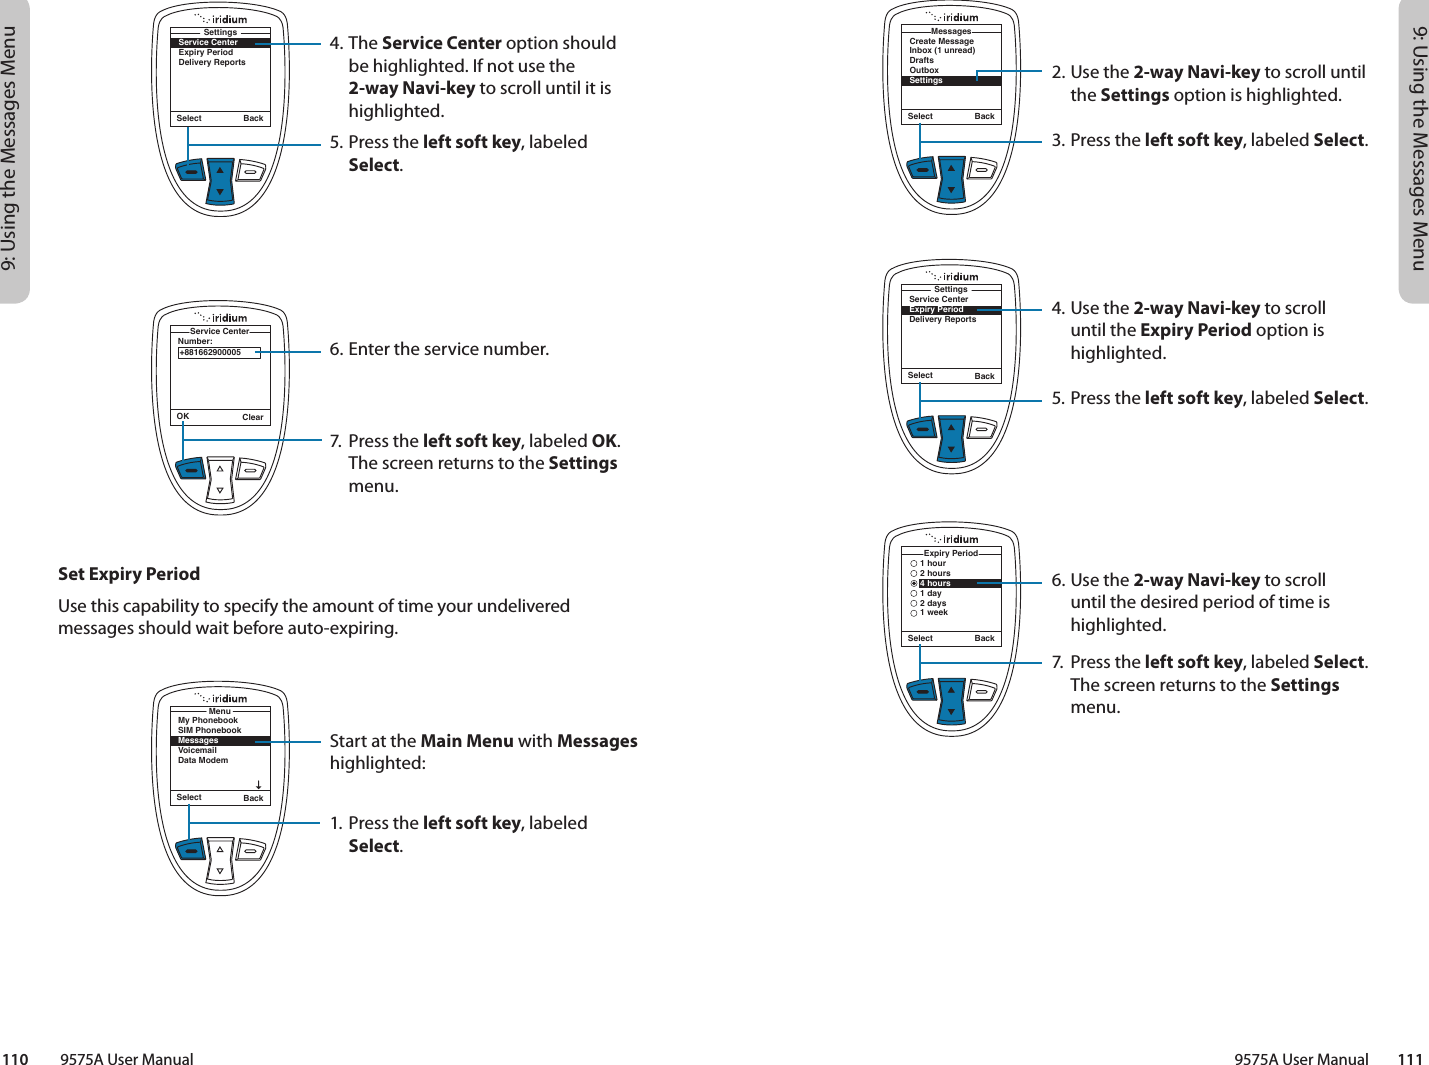
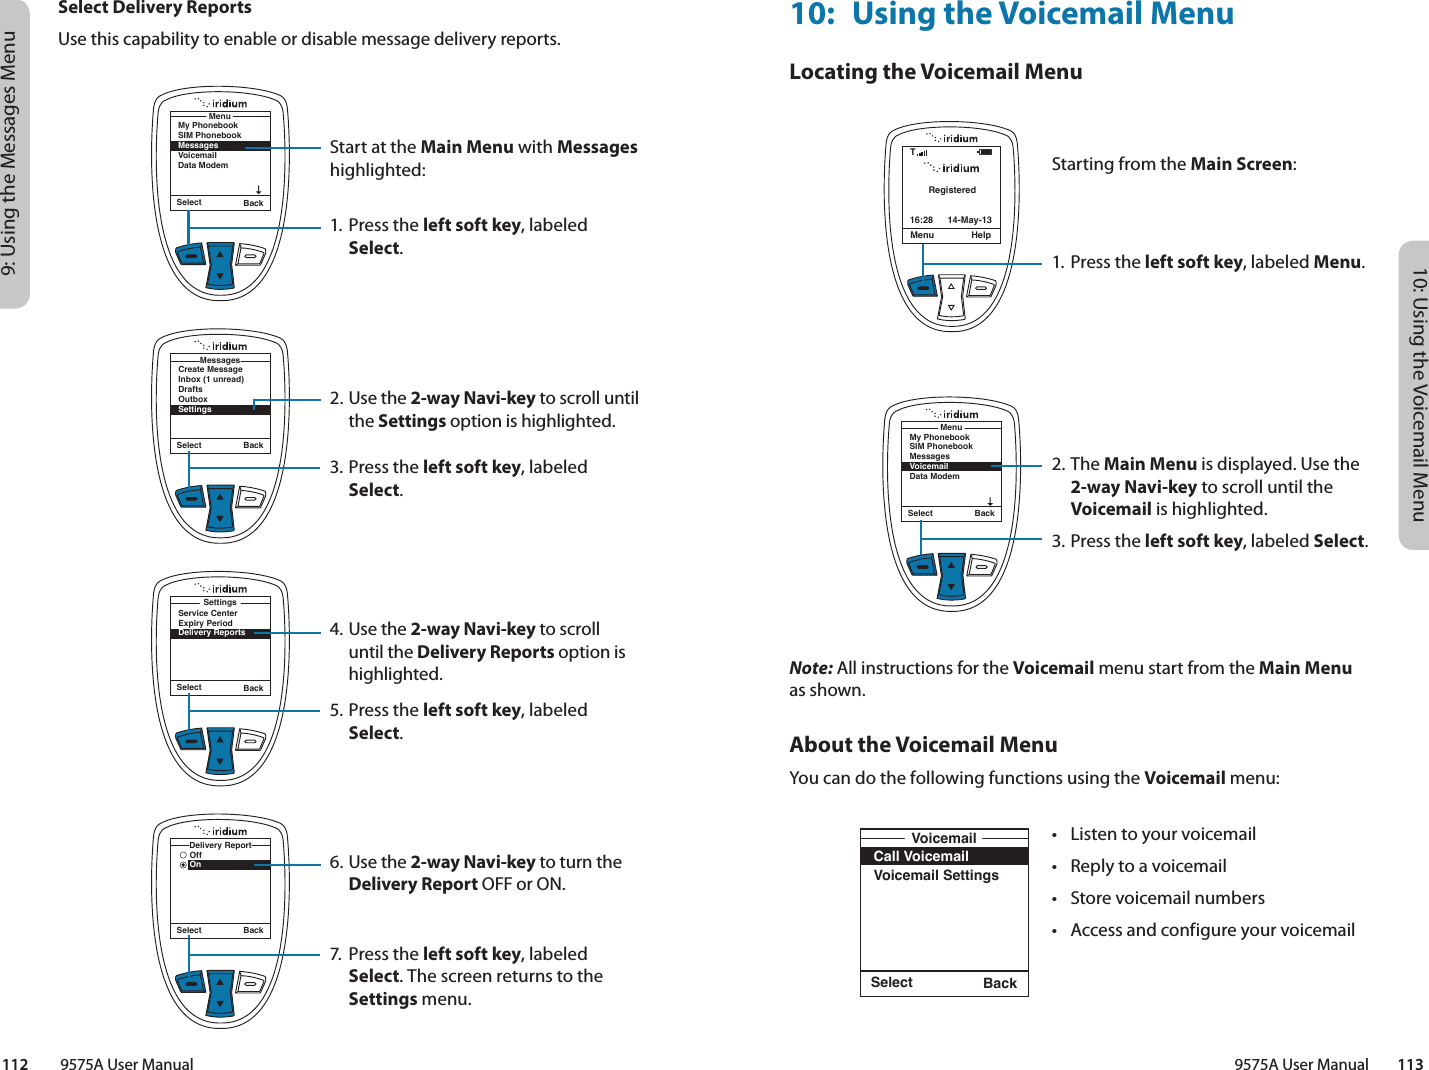
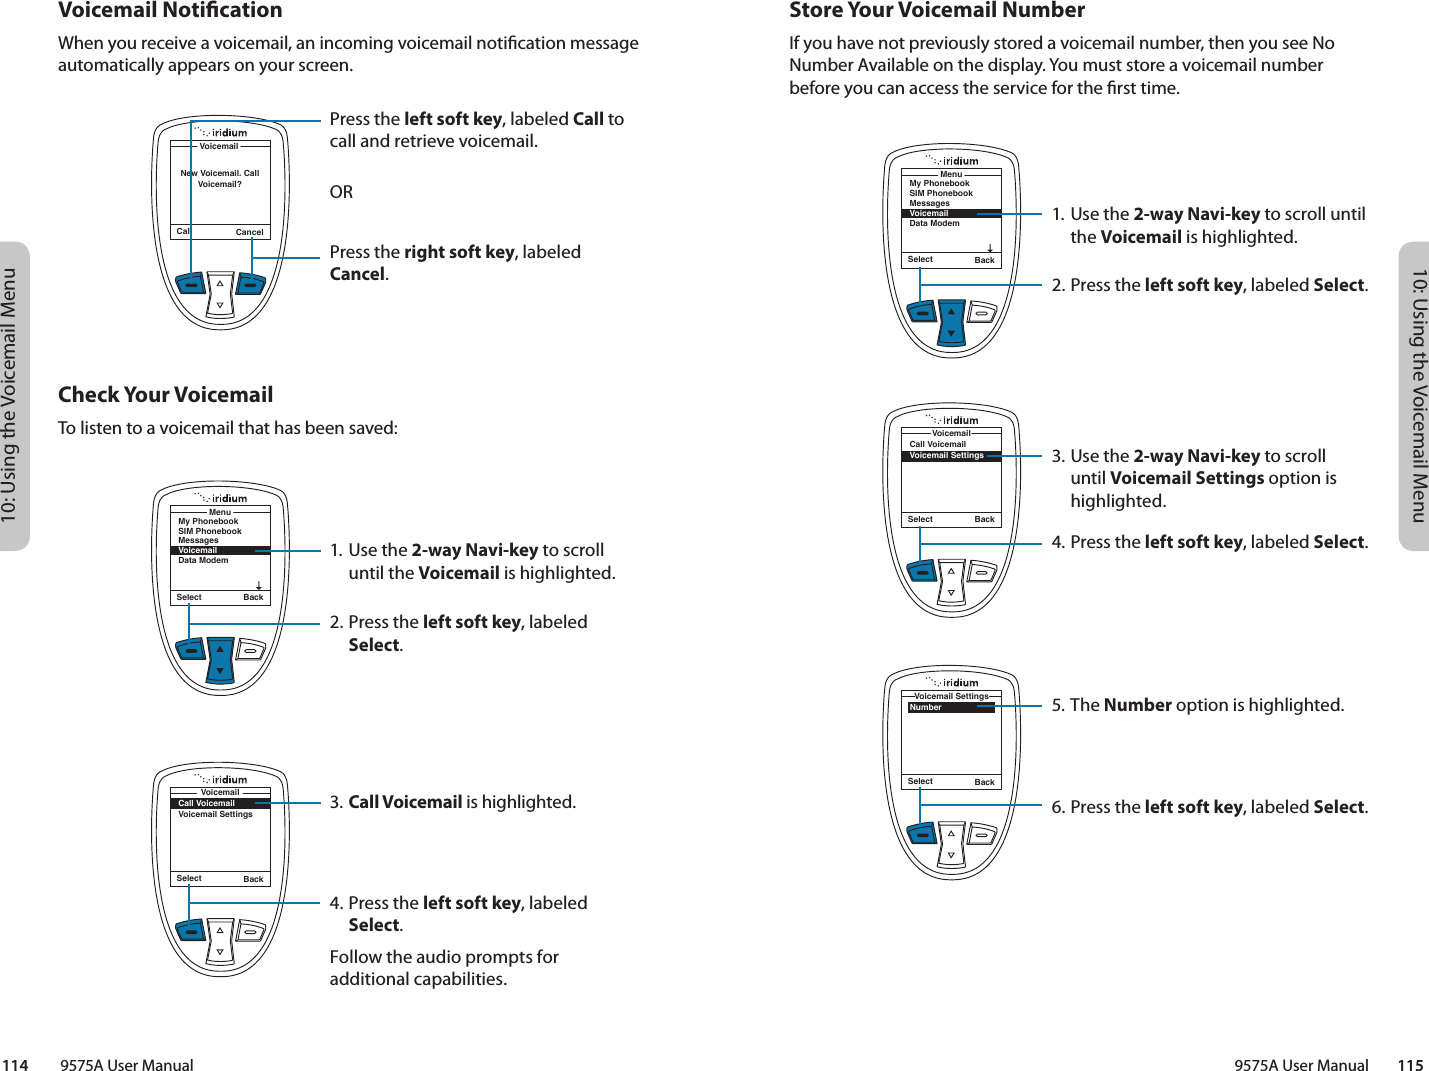
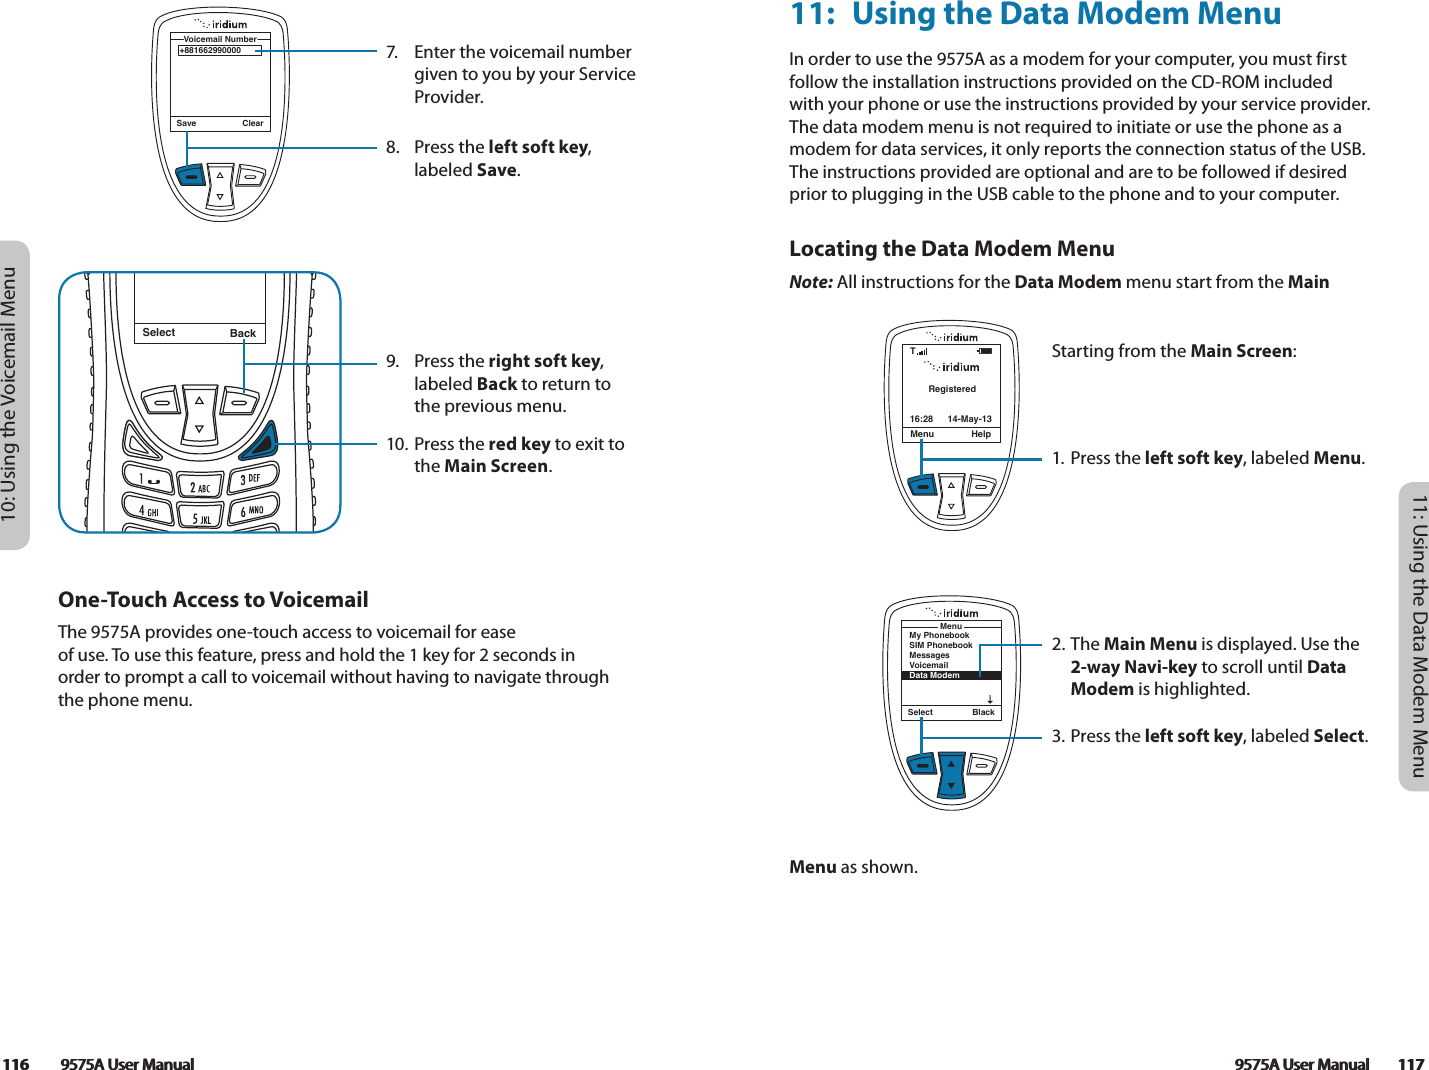
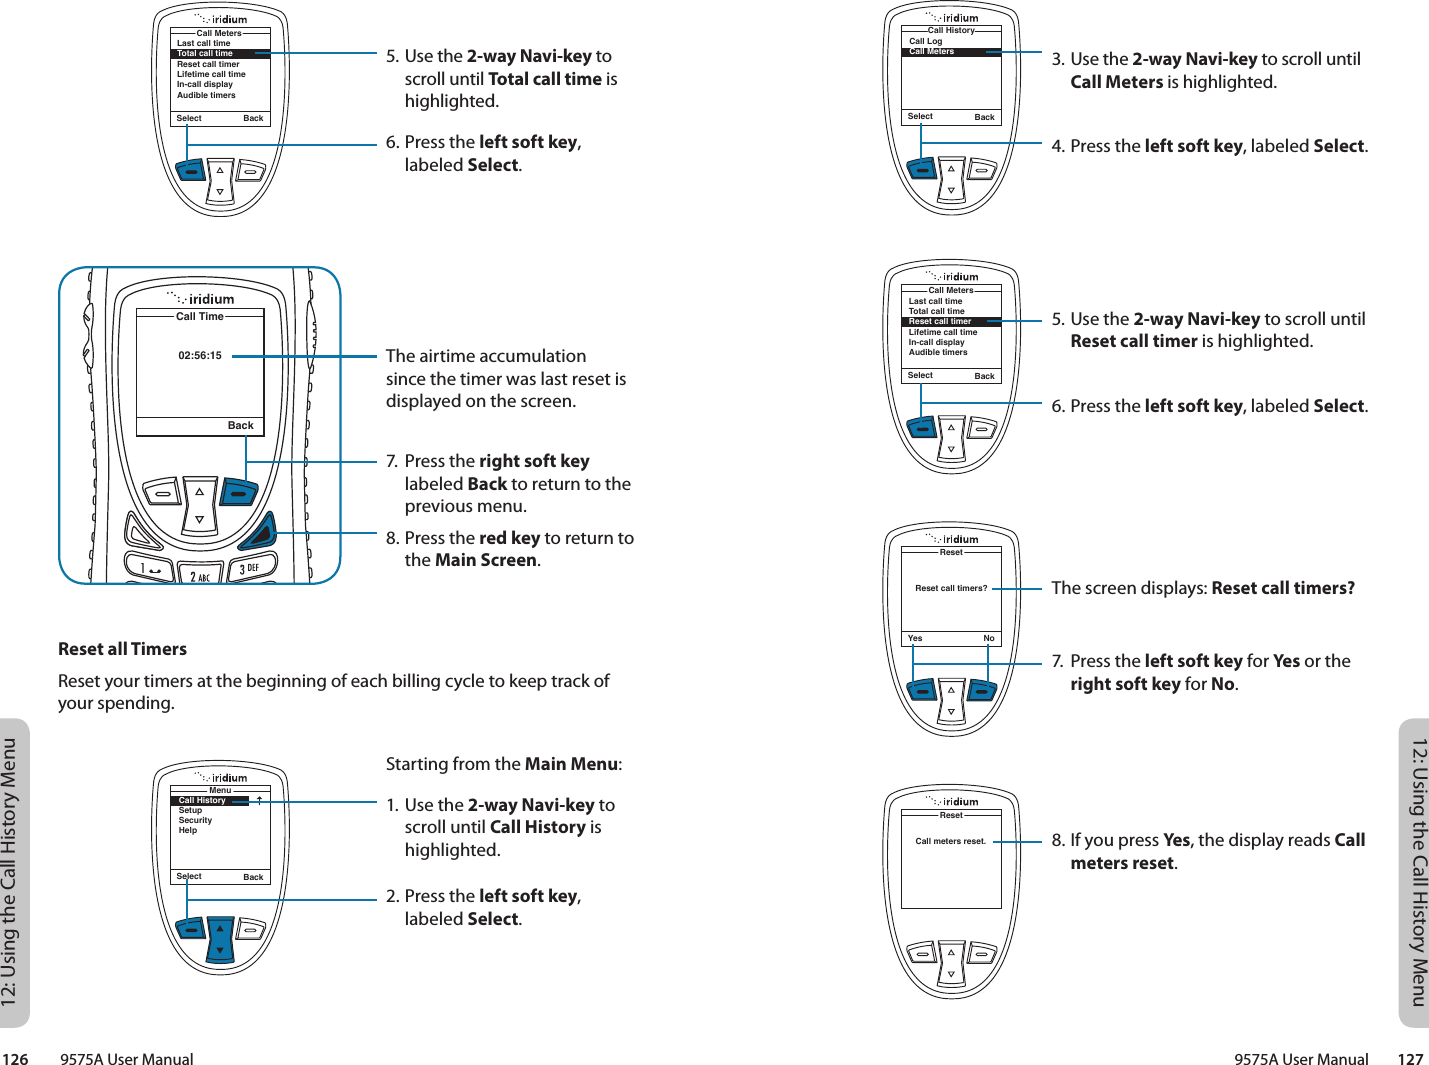
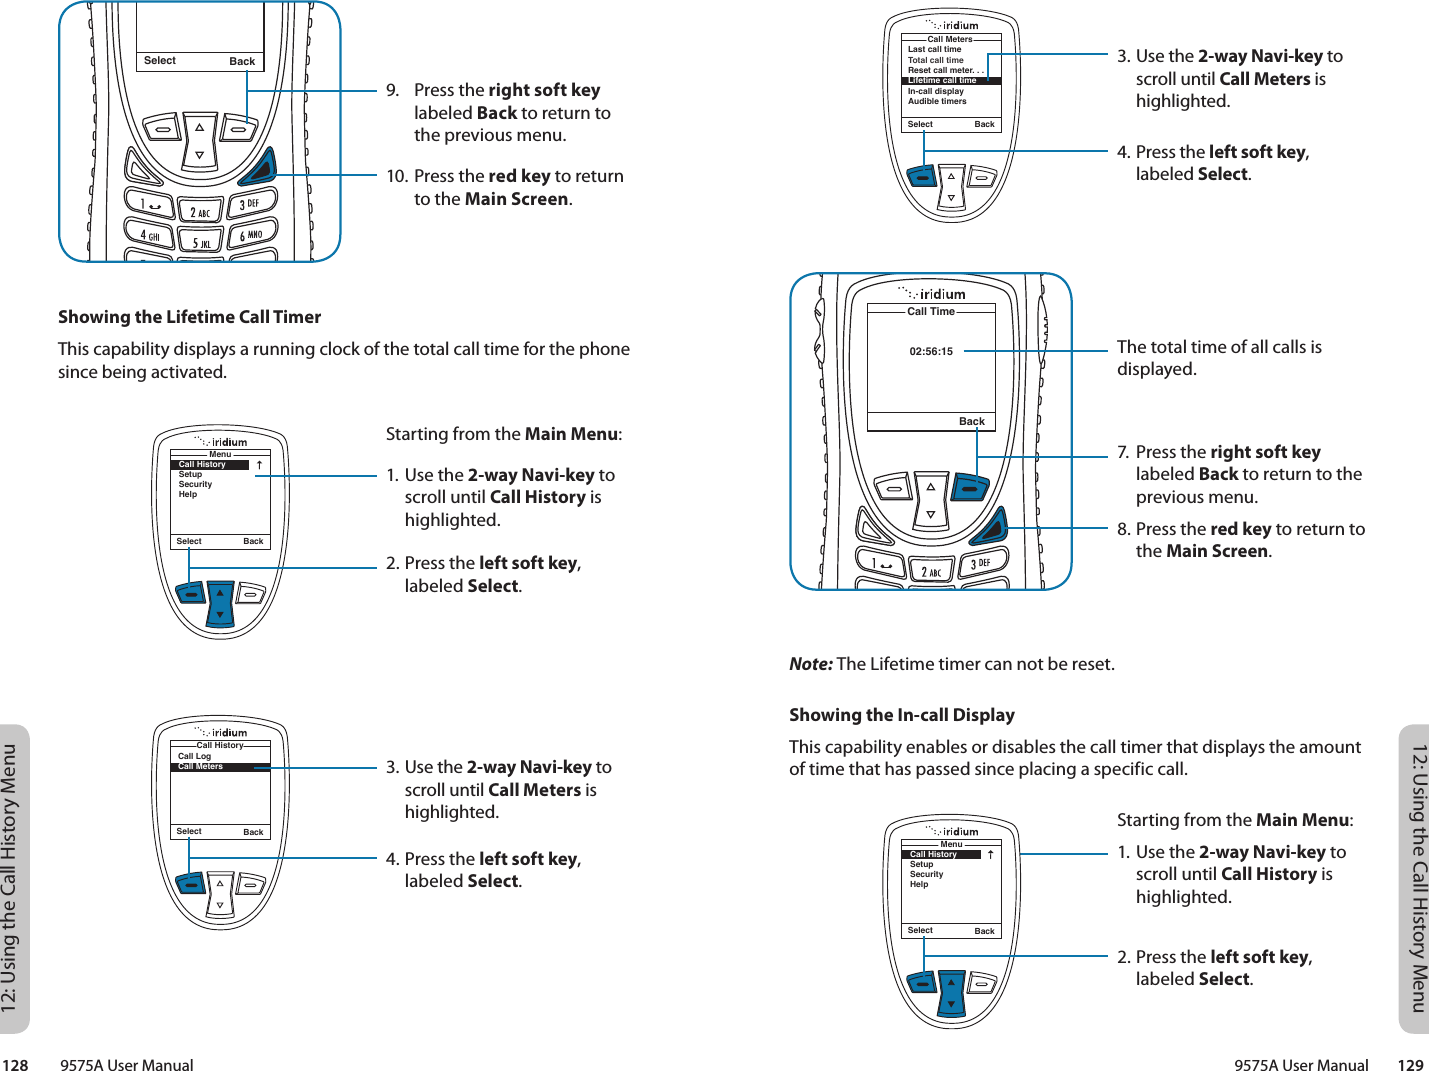
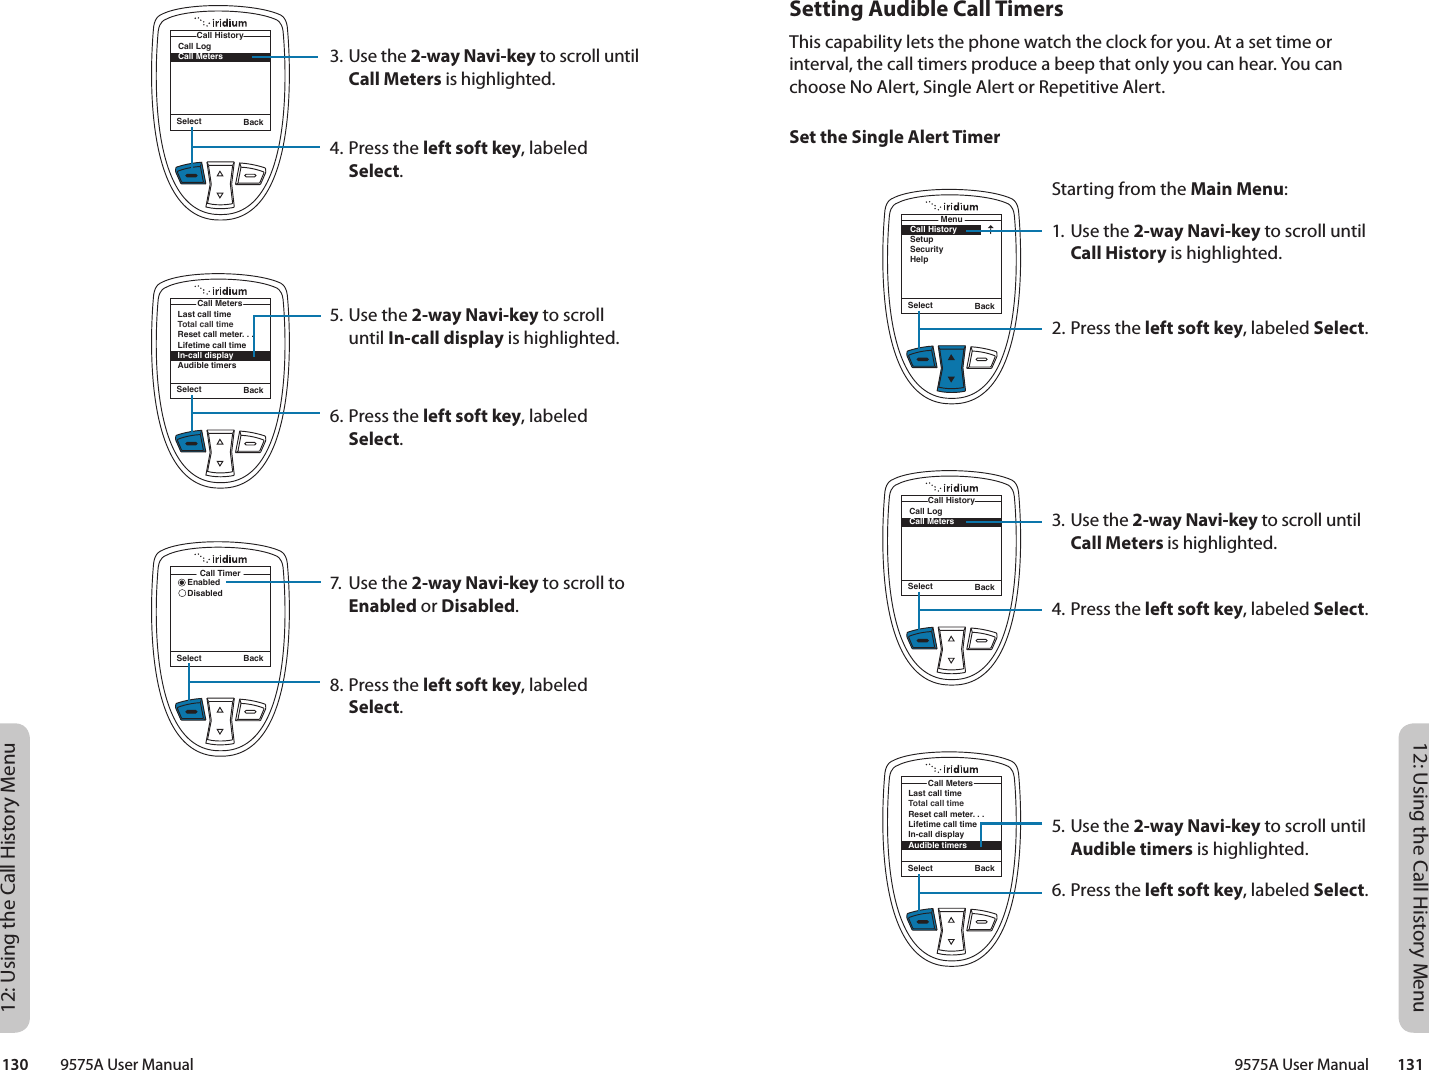
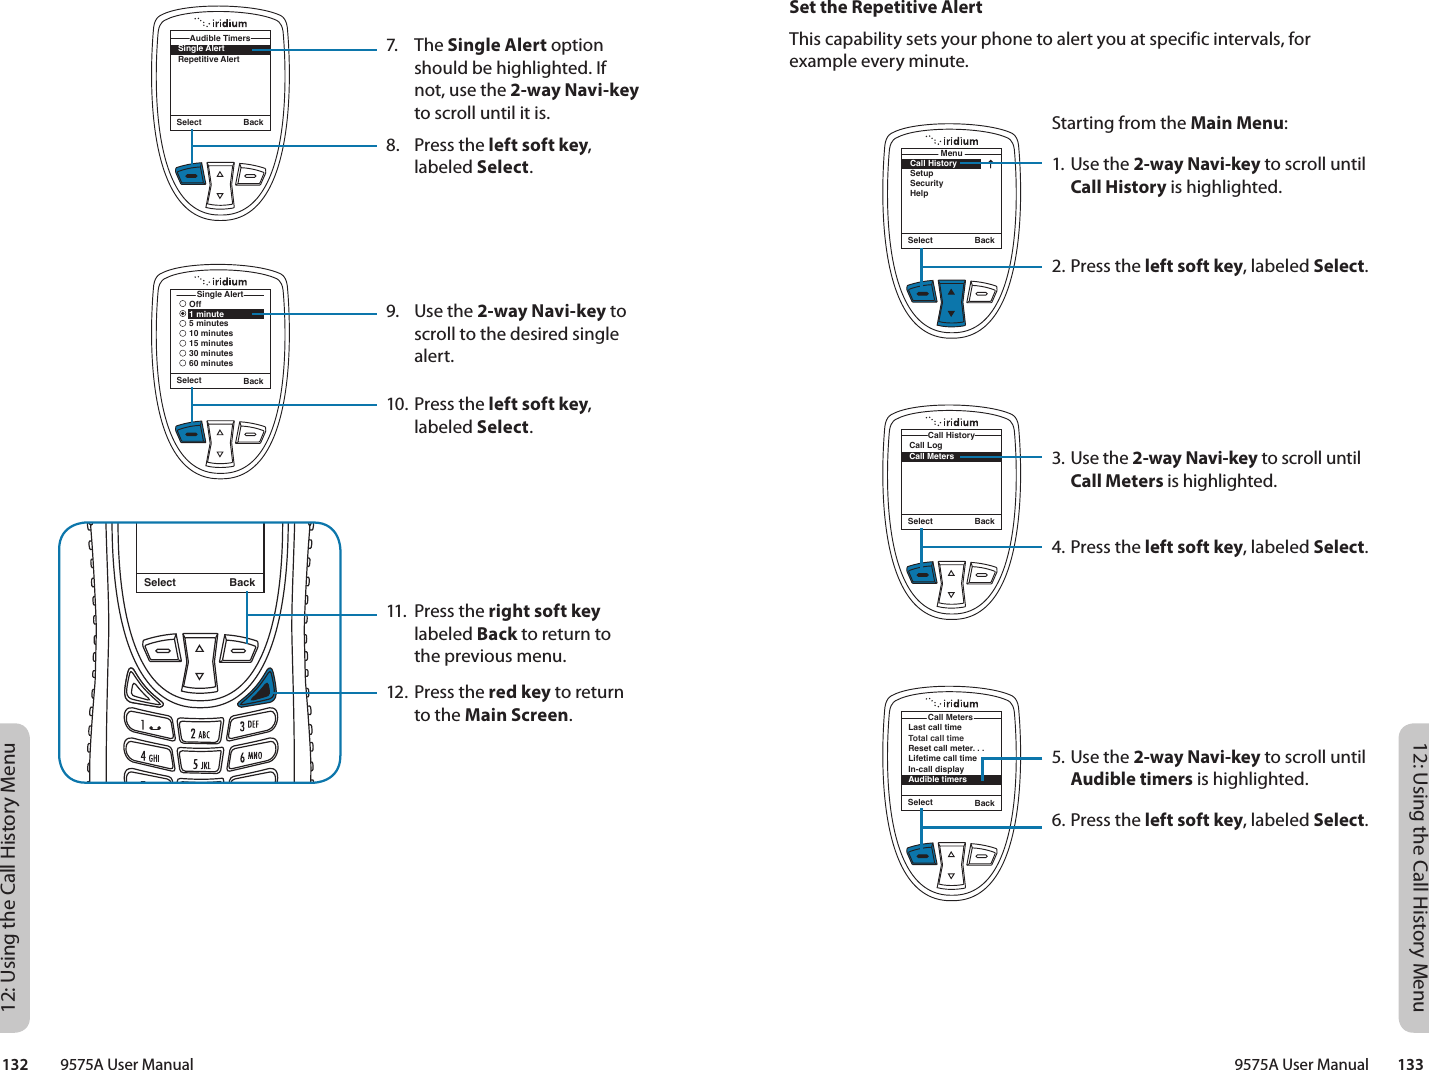
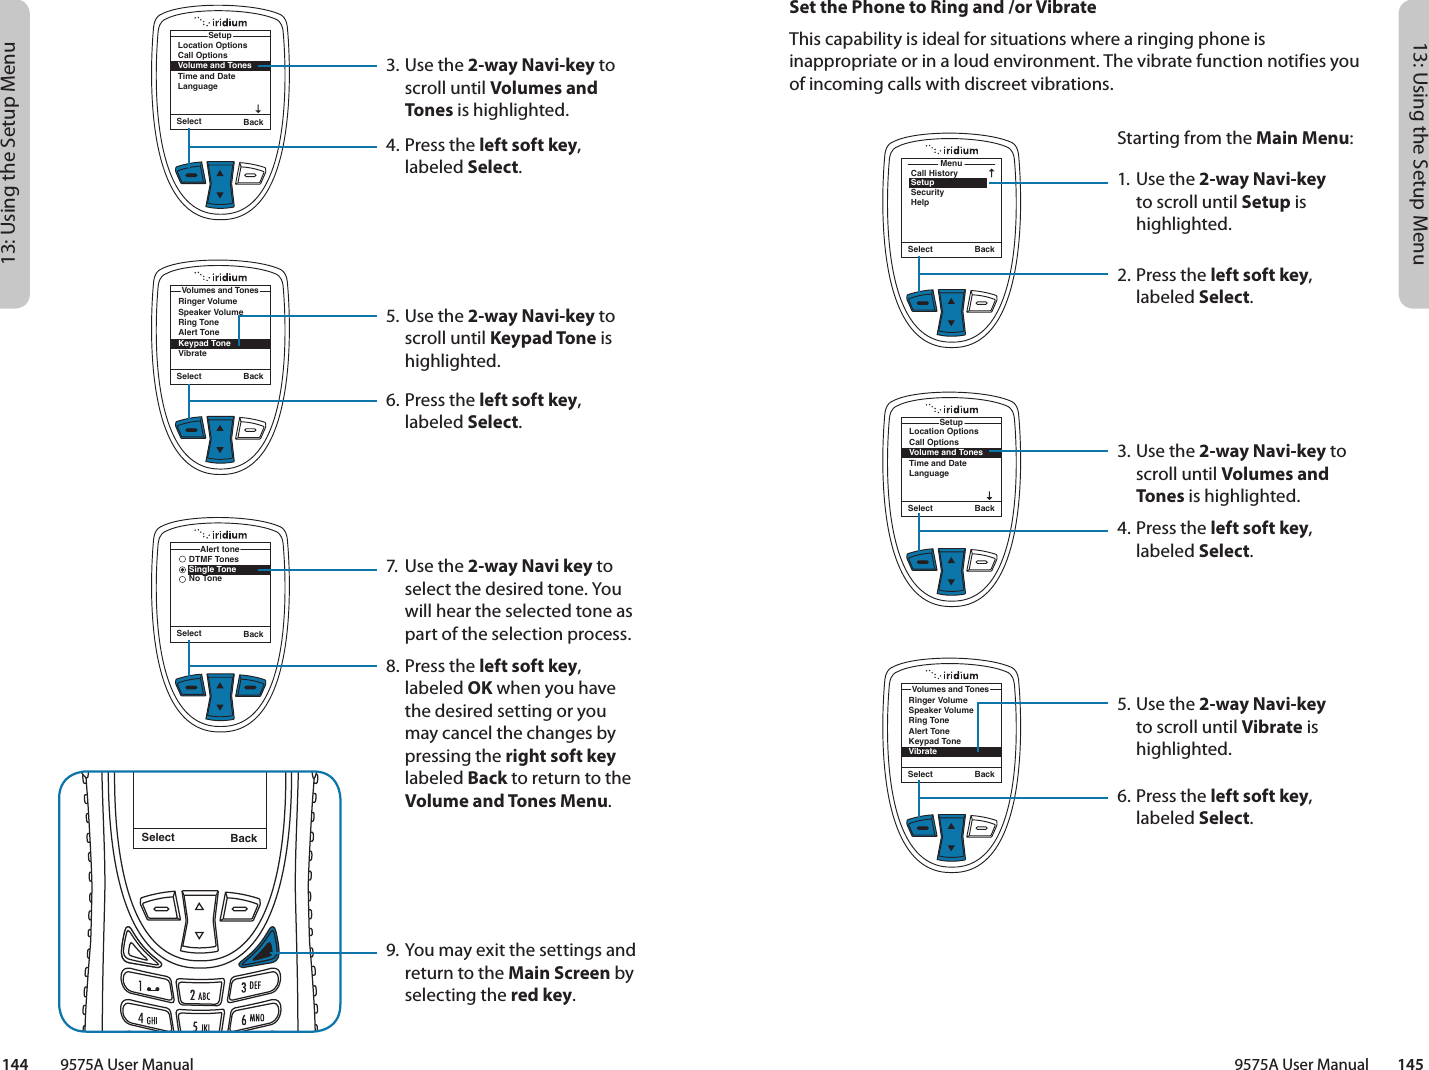
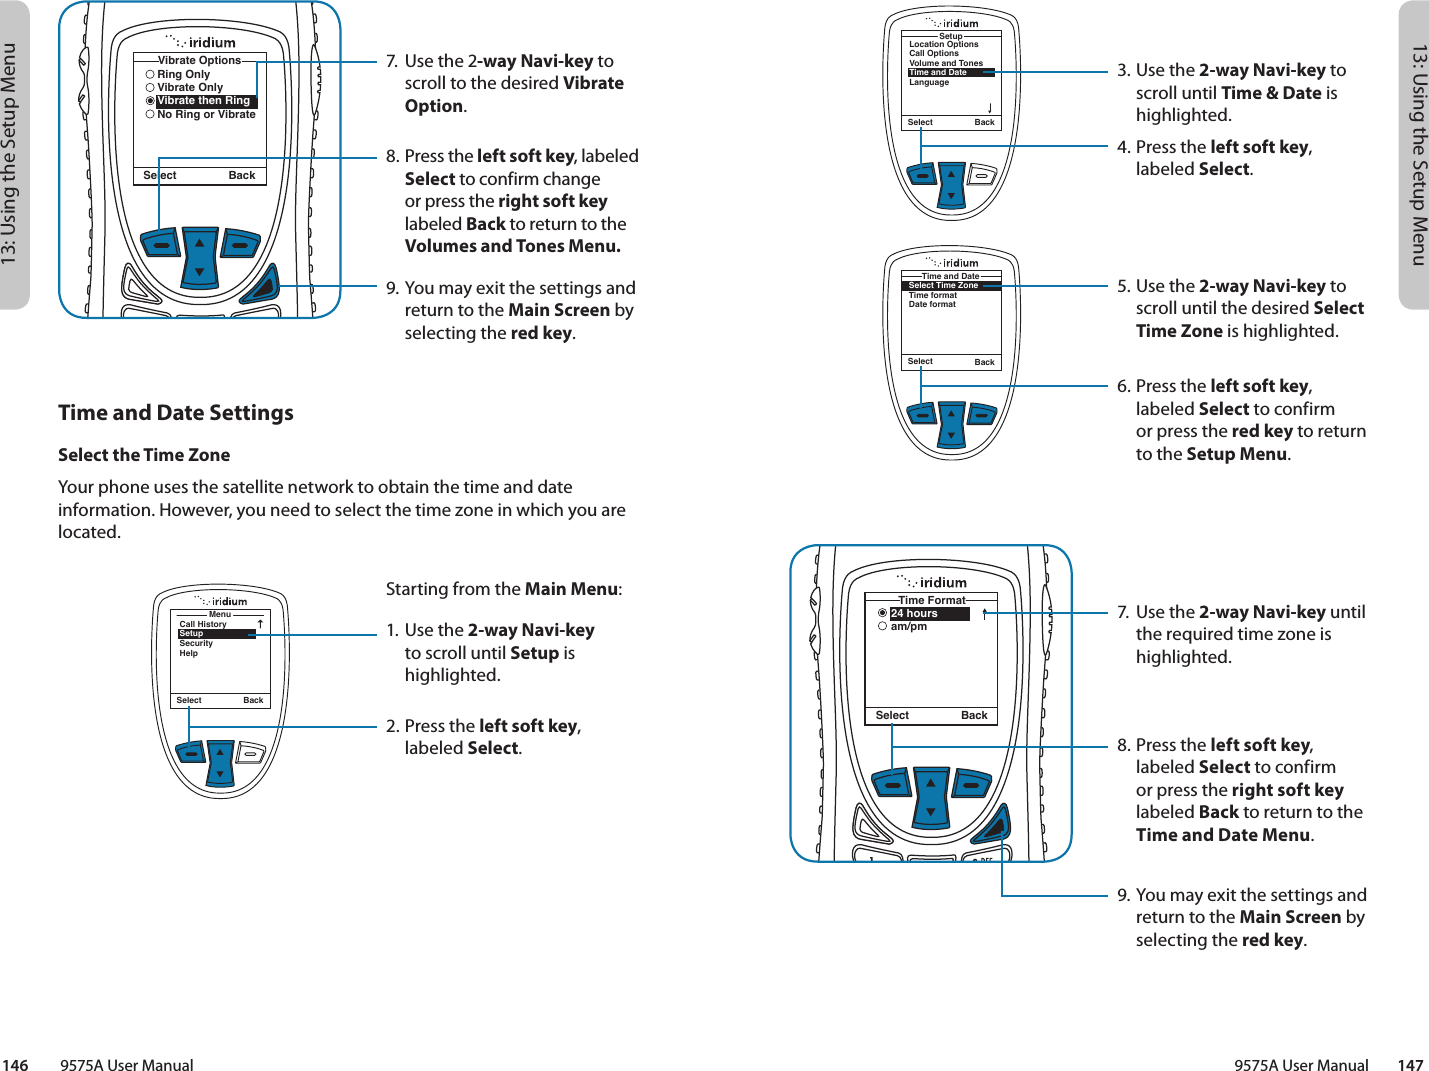
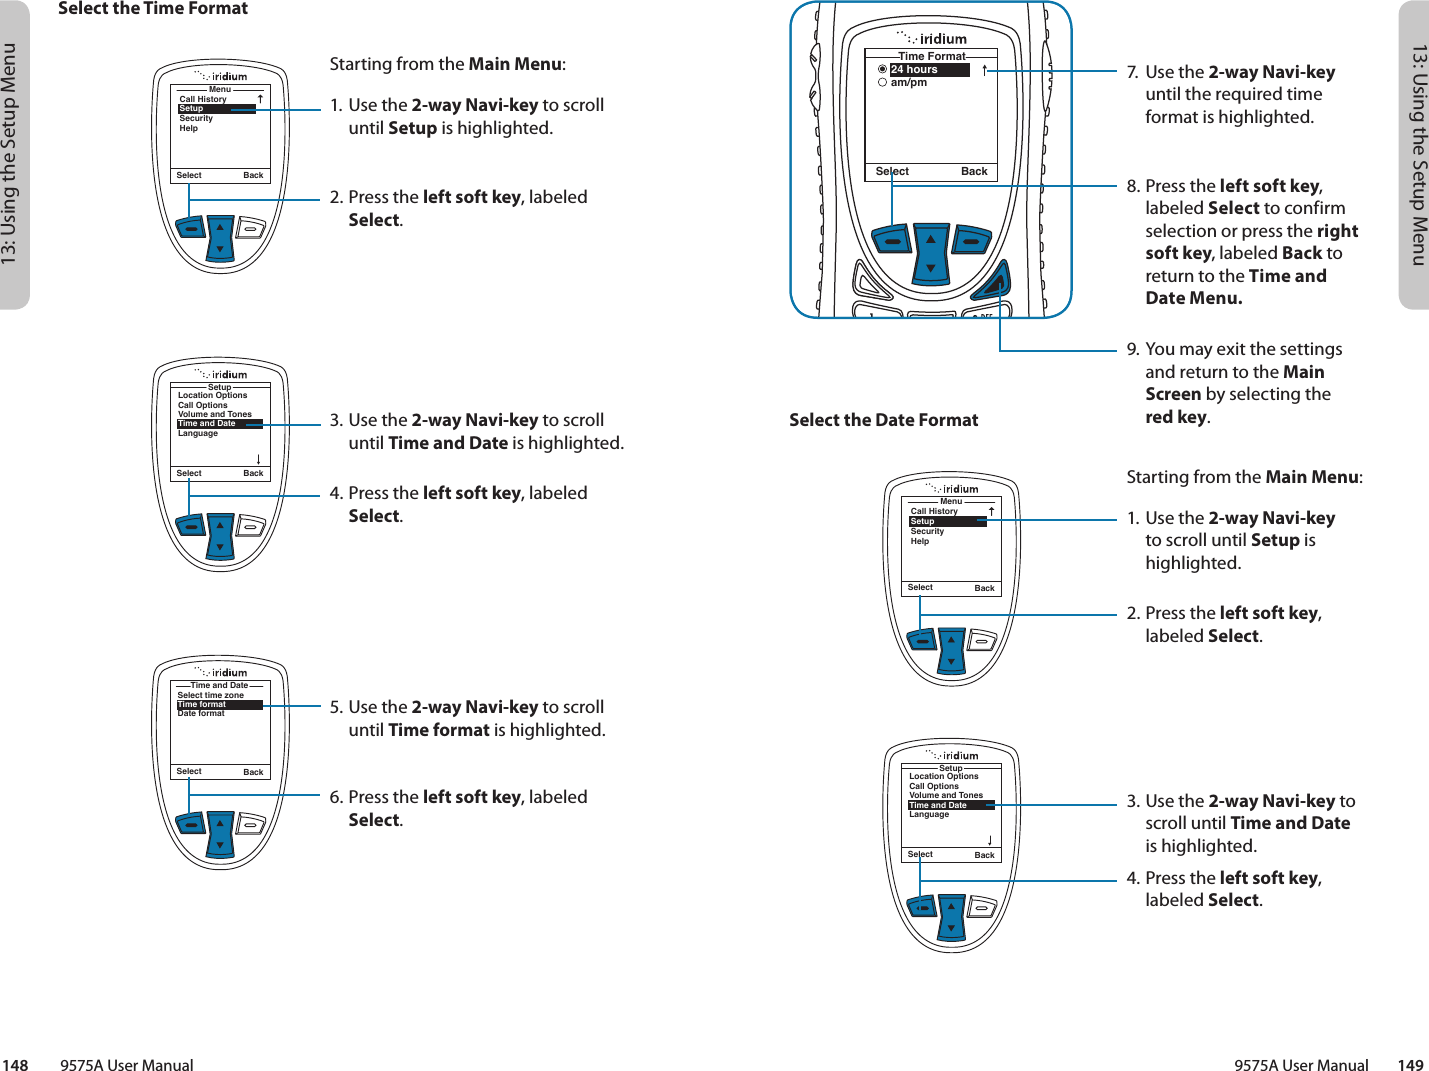
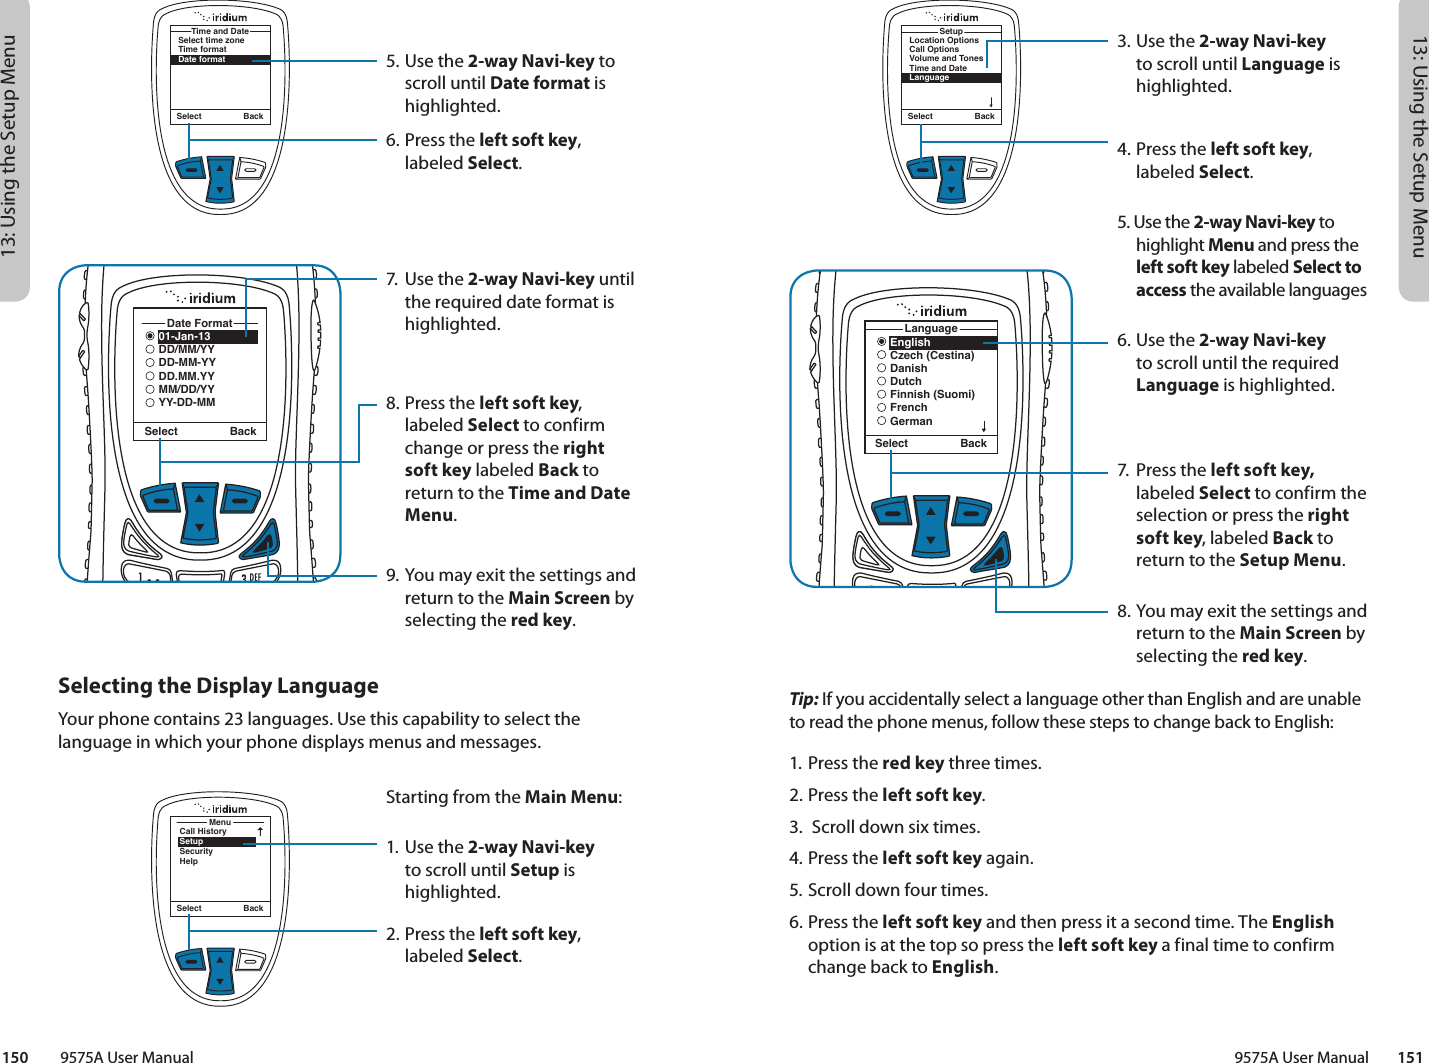
9575A user manual part2