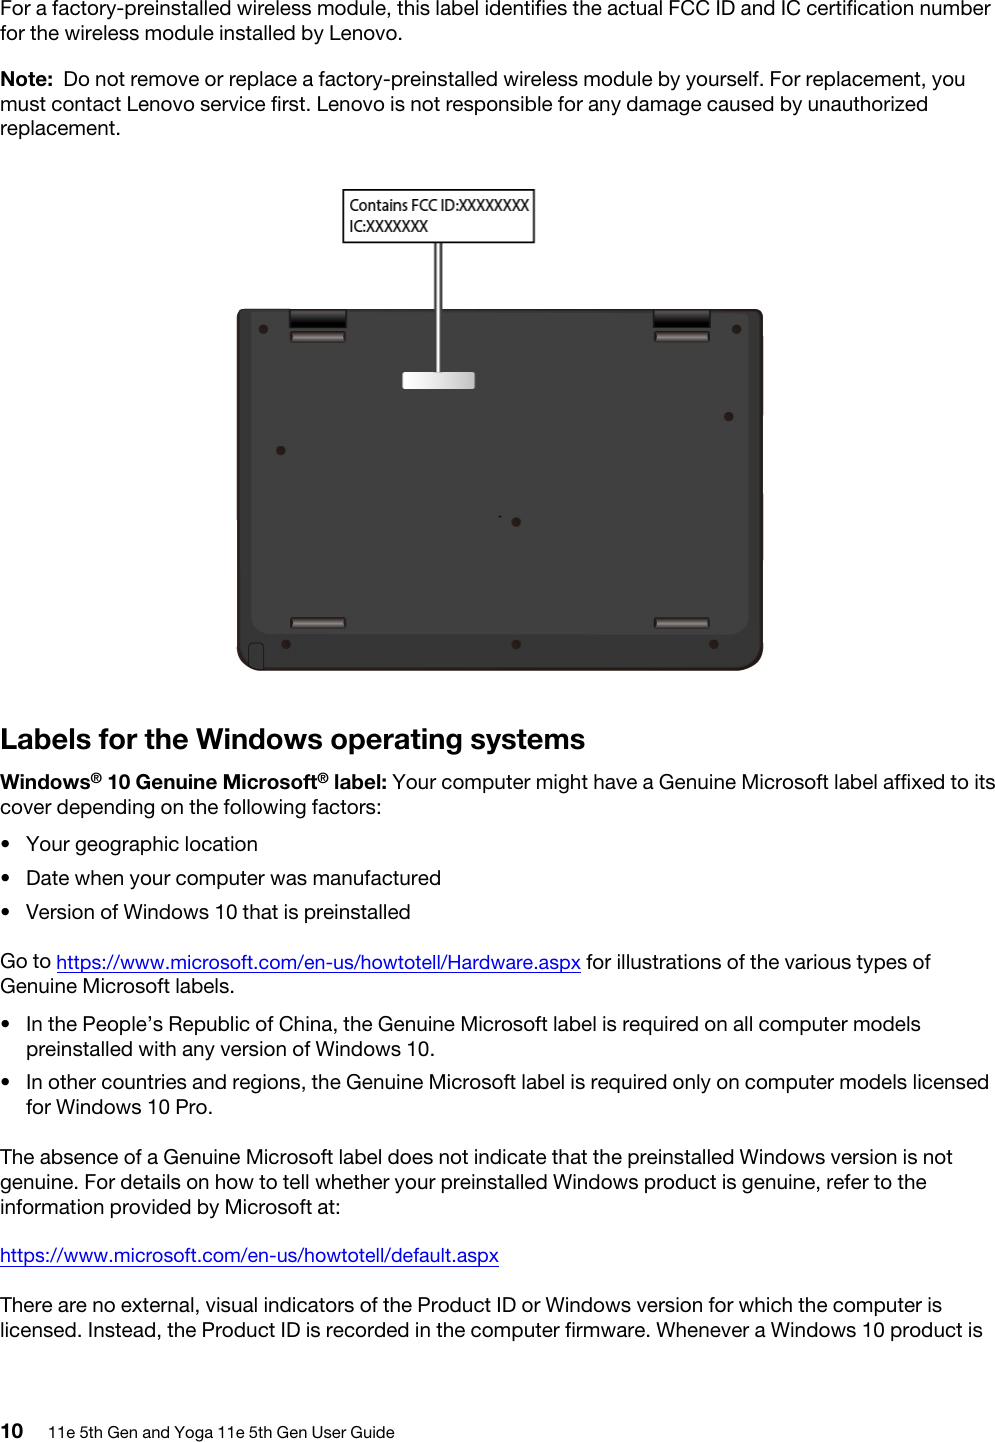
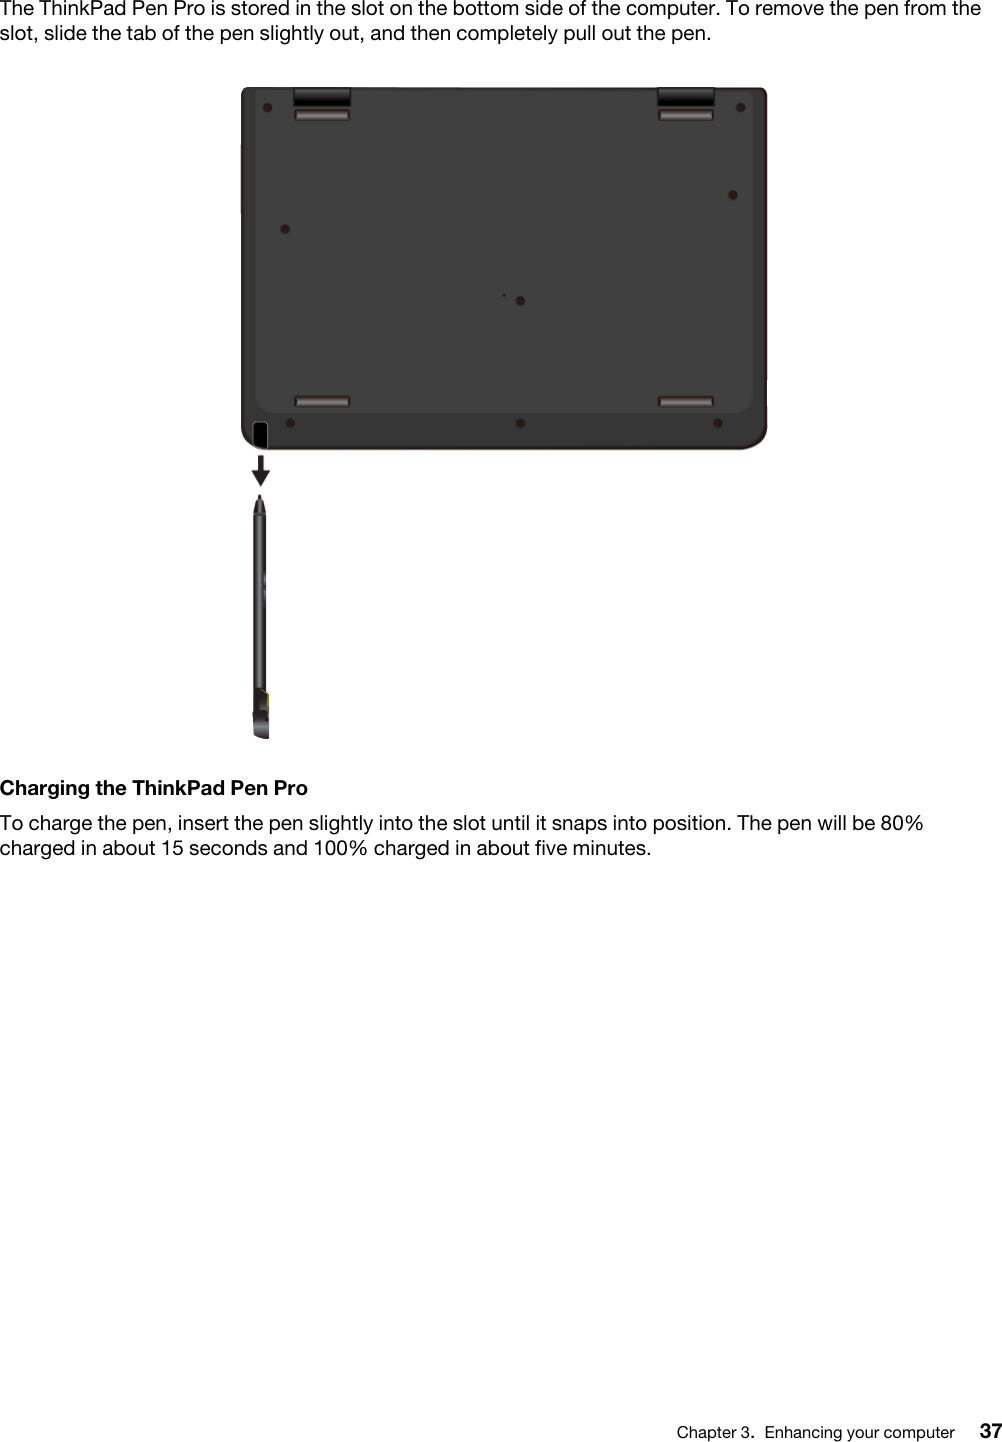
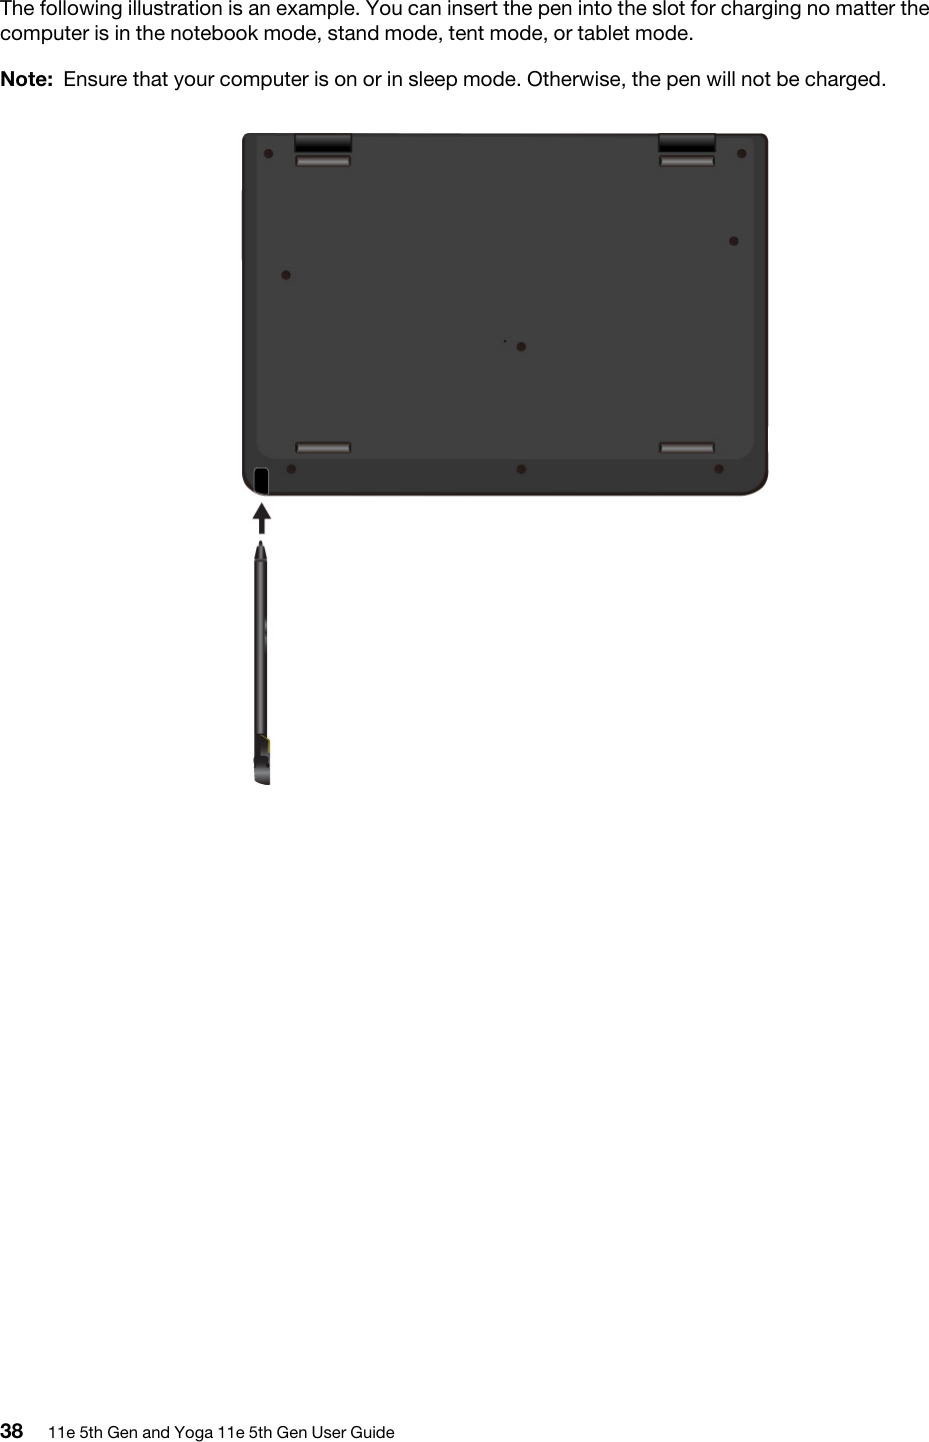
Intel 9260NG Intel Dual Band Wireless-AC 9260 User Manual 11e 5th Gen and Yoga 11e 5th Gen User Guide
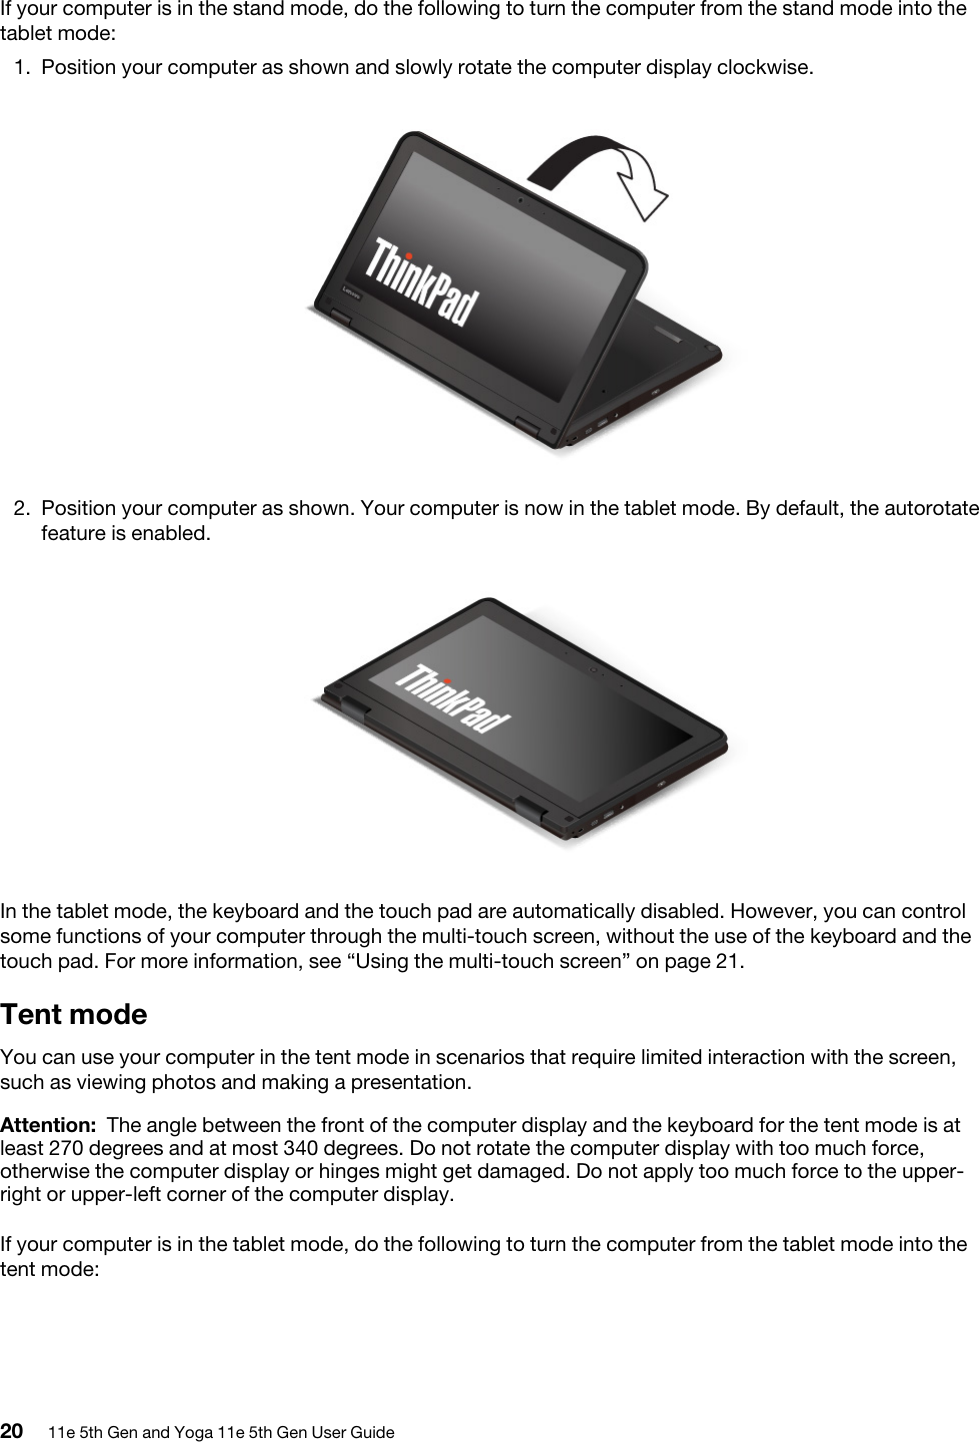
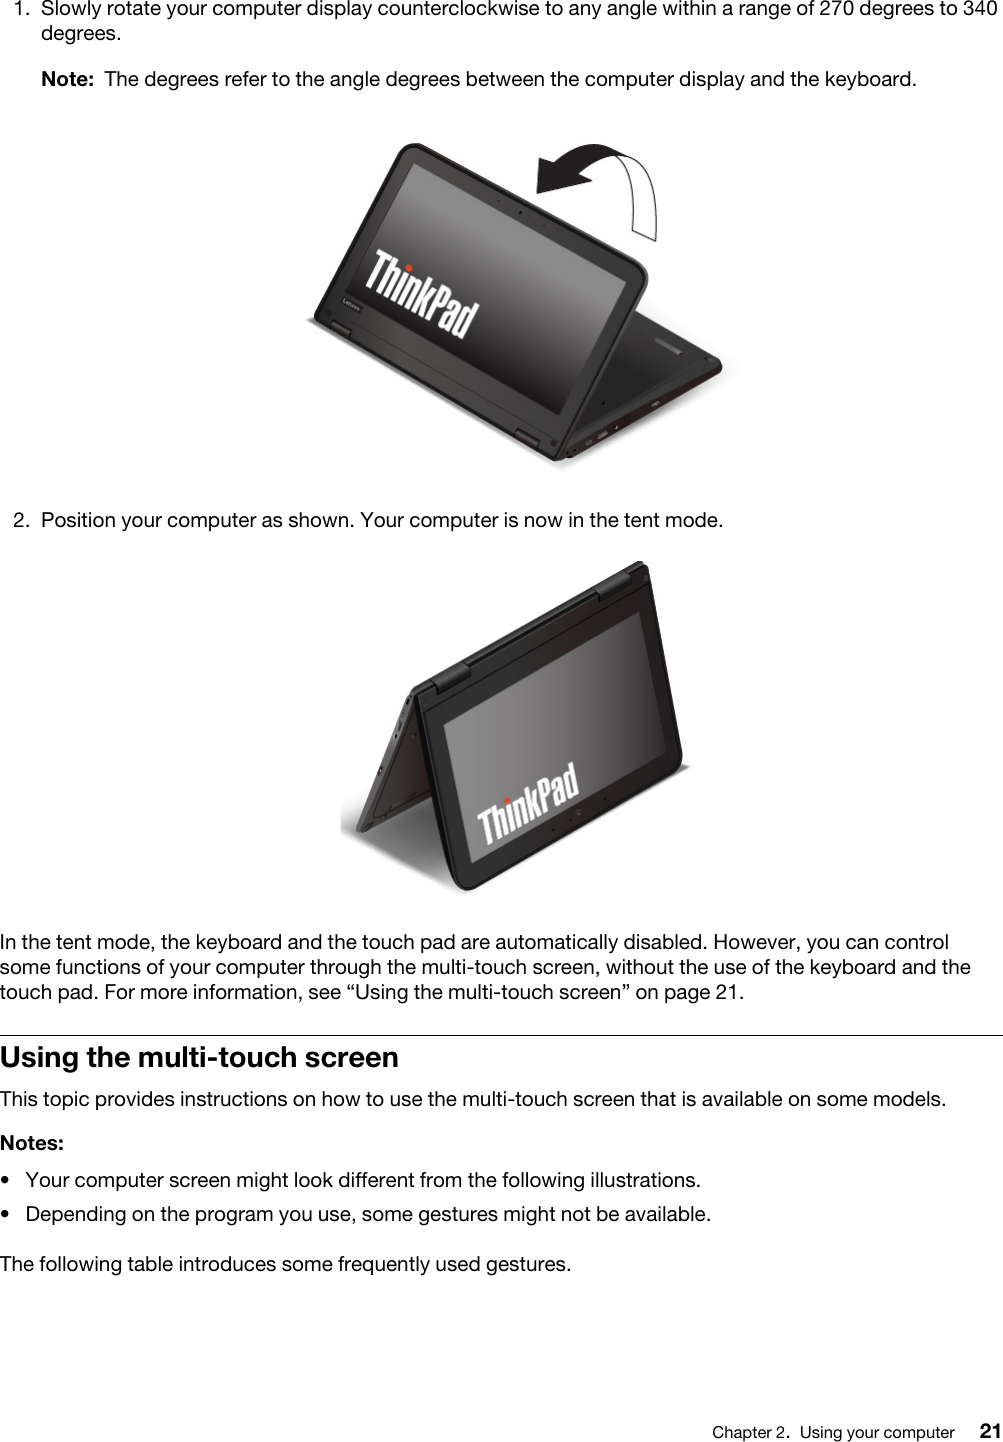
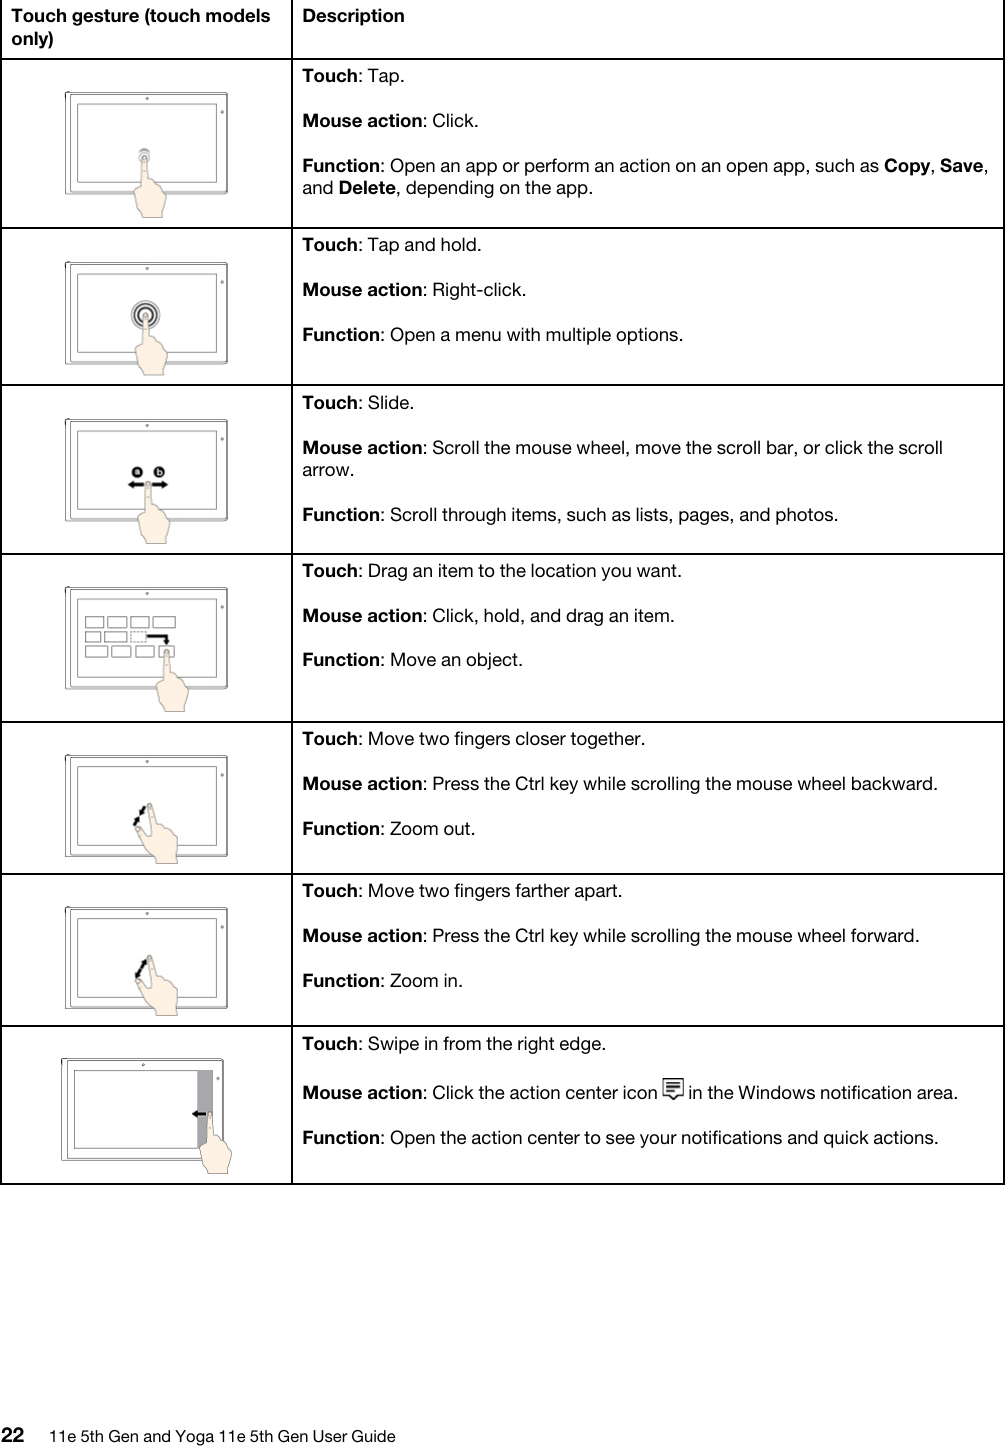
Intel Mobile Communications Intel Dual Band Wireless-AC 9260 11e 5th Gen and Yoga 11e 5th Gen User Guide
Intel >
Contents
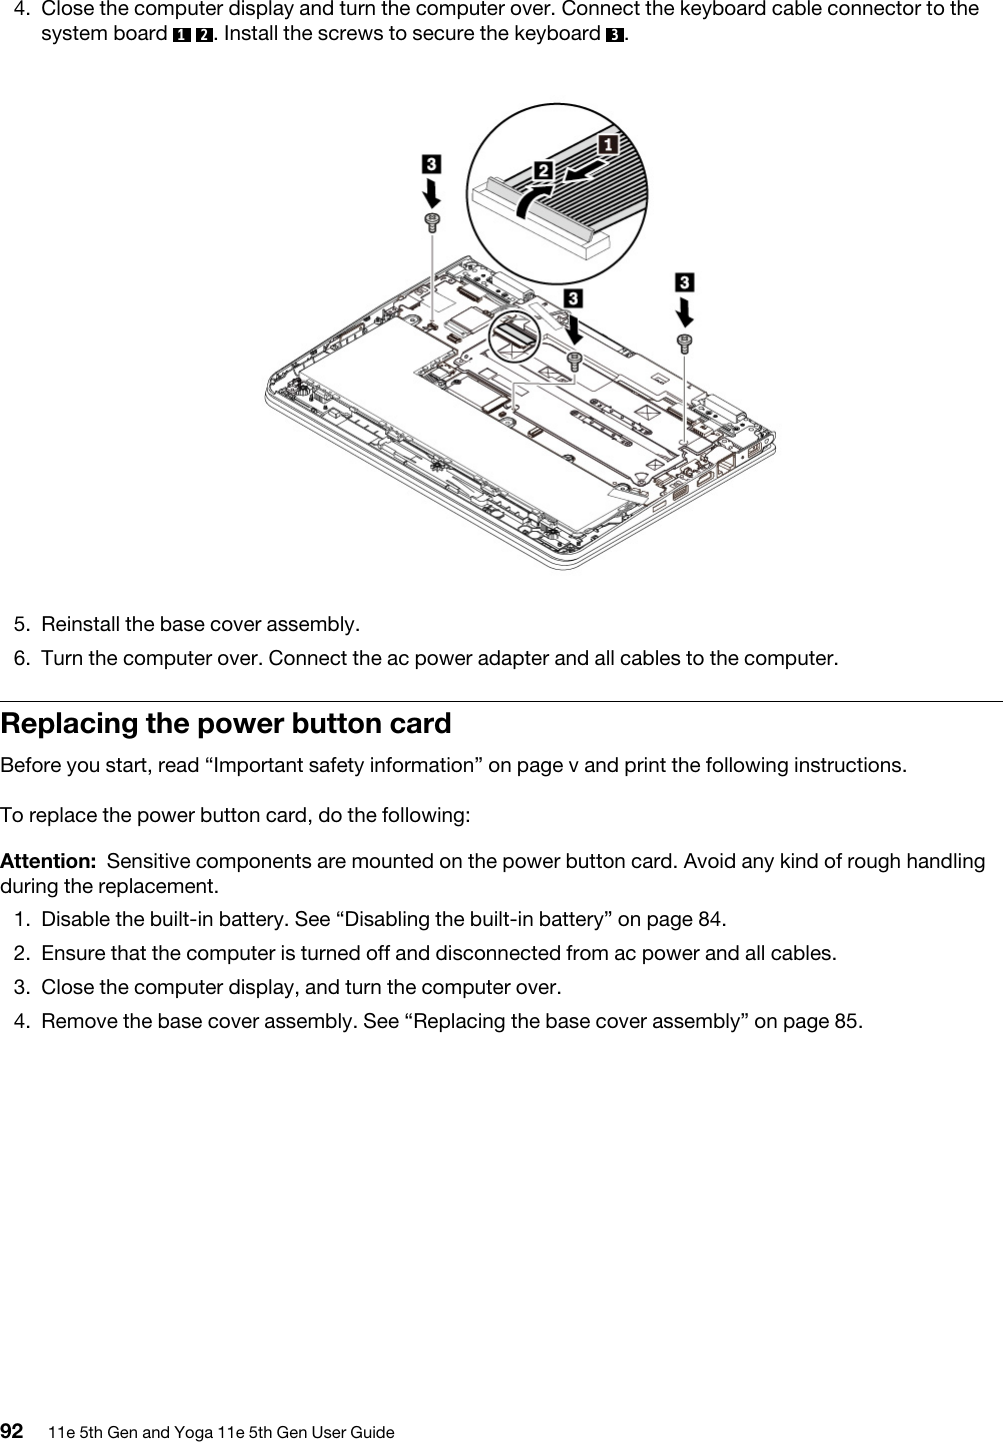
- 1. User Manual
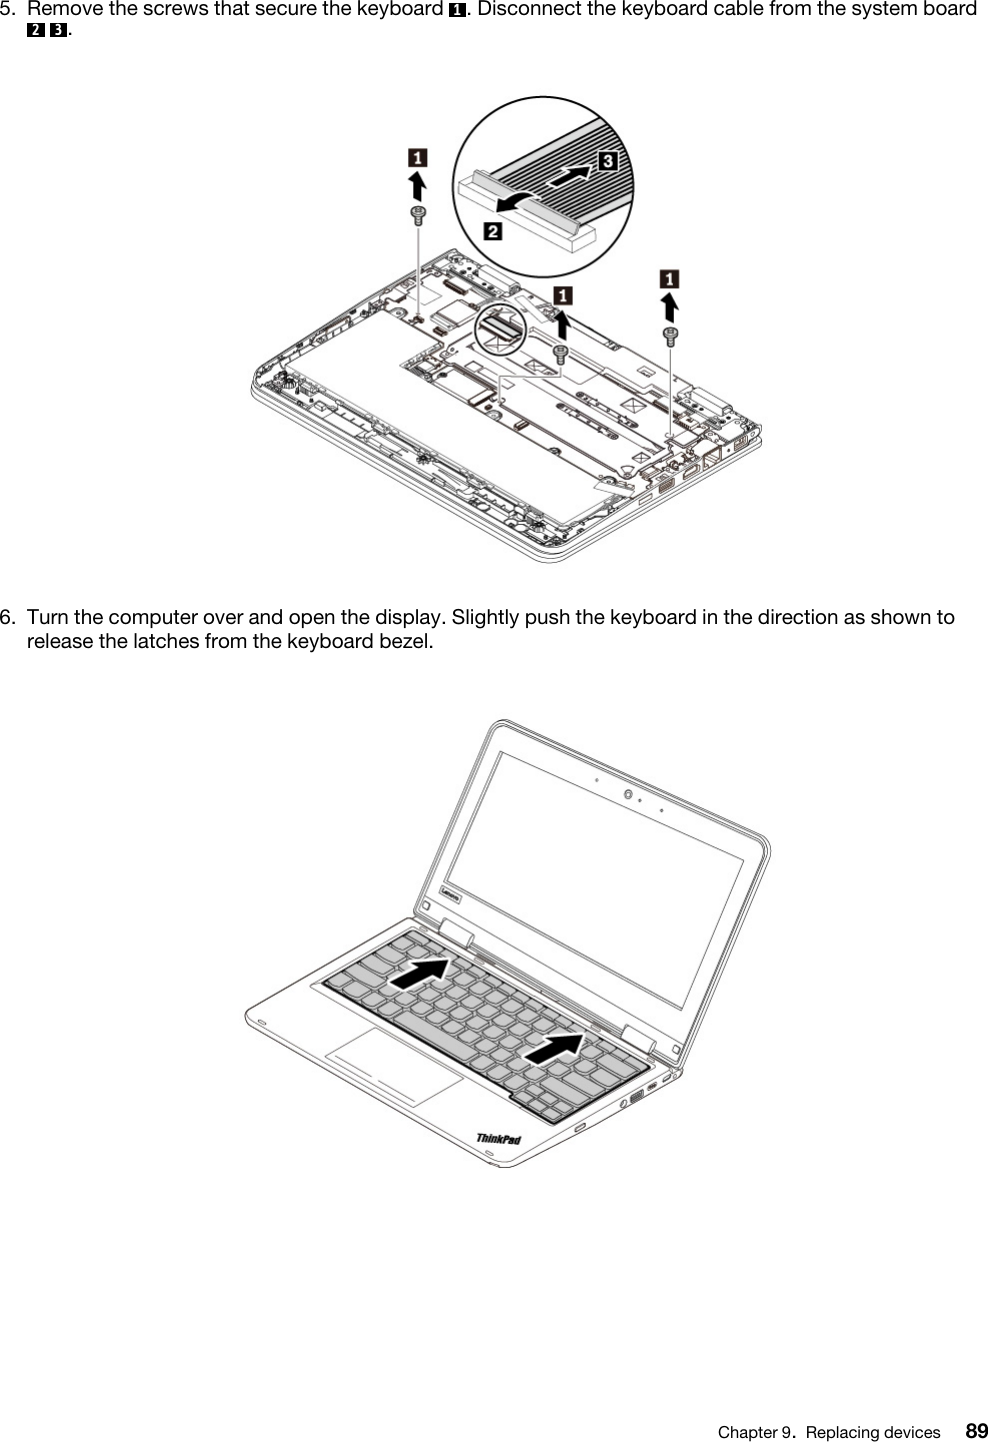
- 2. User Manual 1
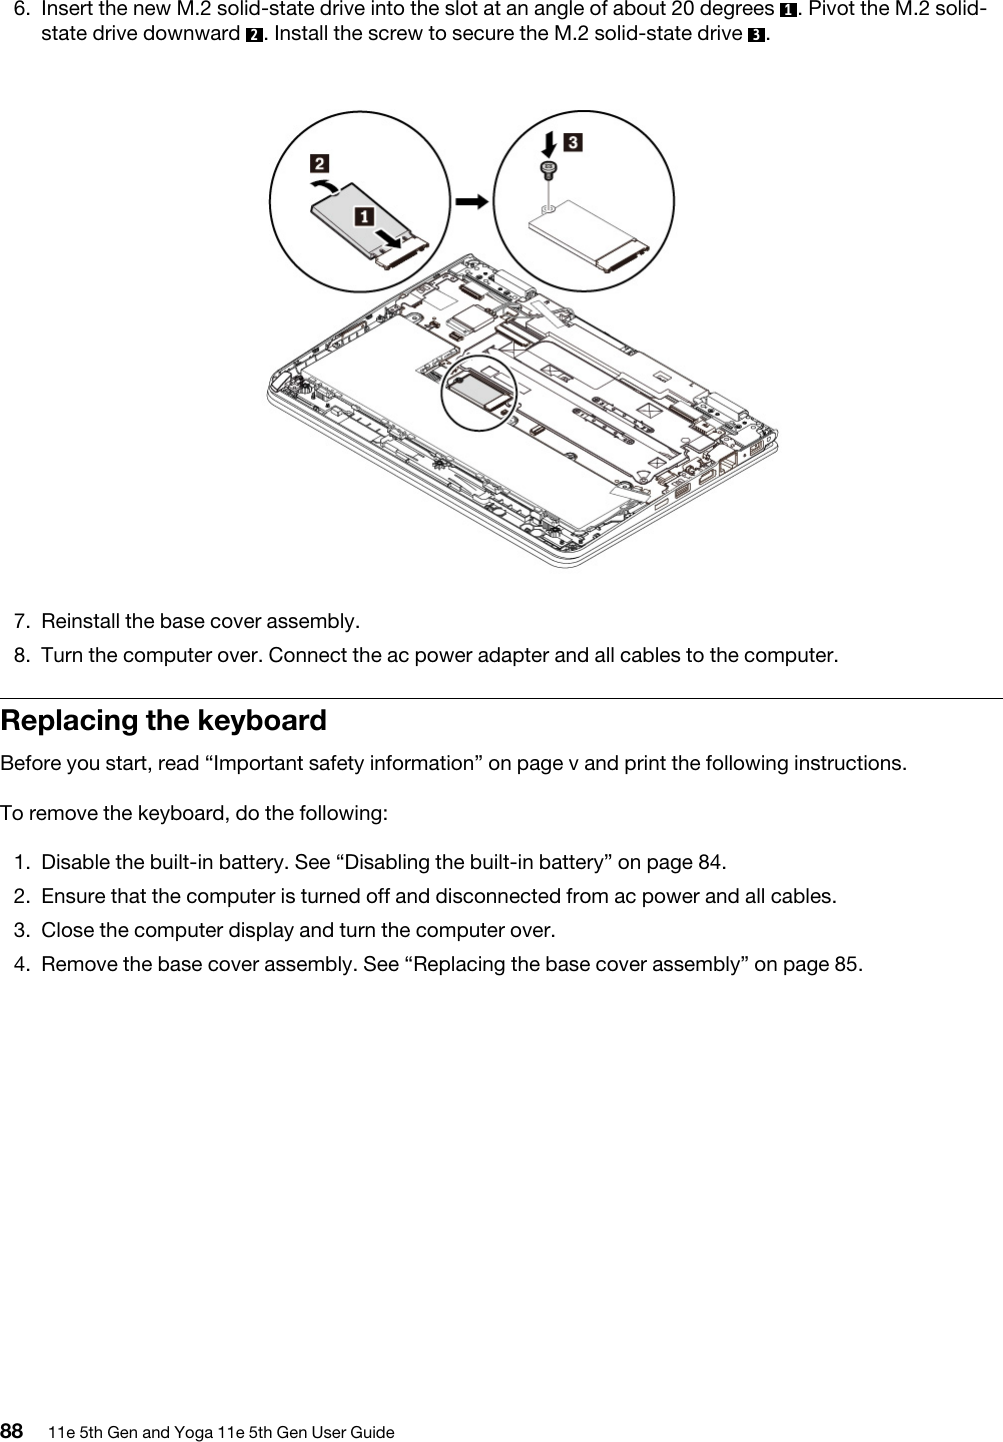
- 3. User Manual 2
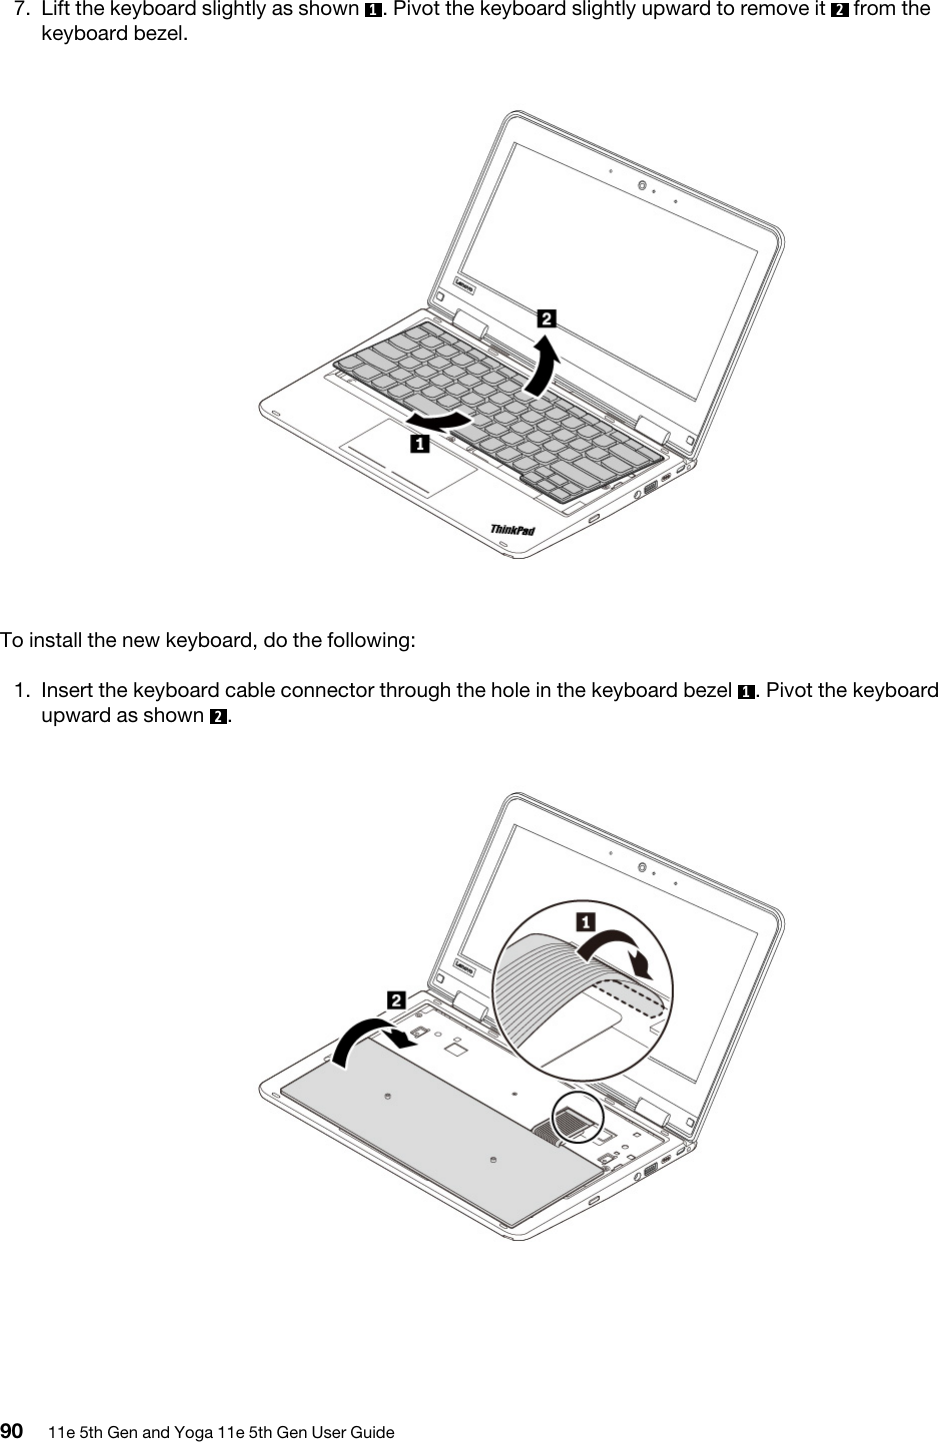
- 4. User Manual Regulatory
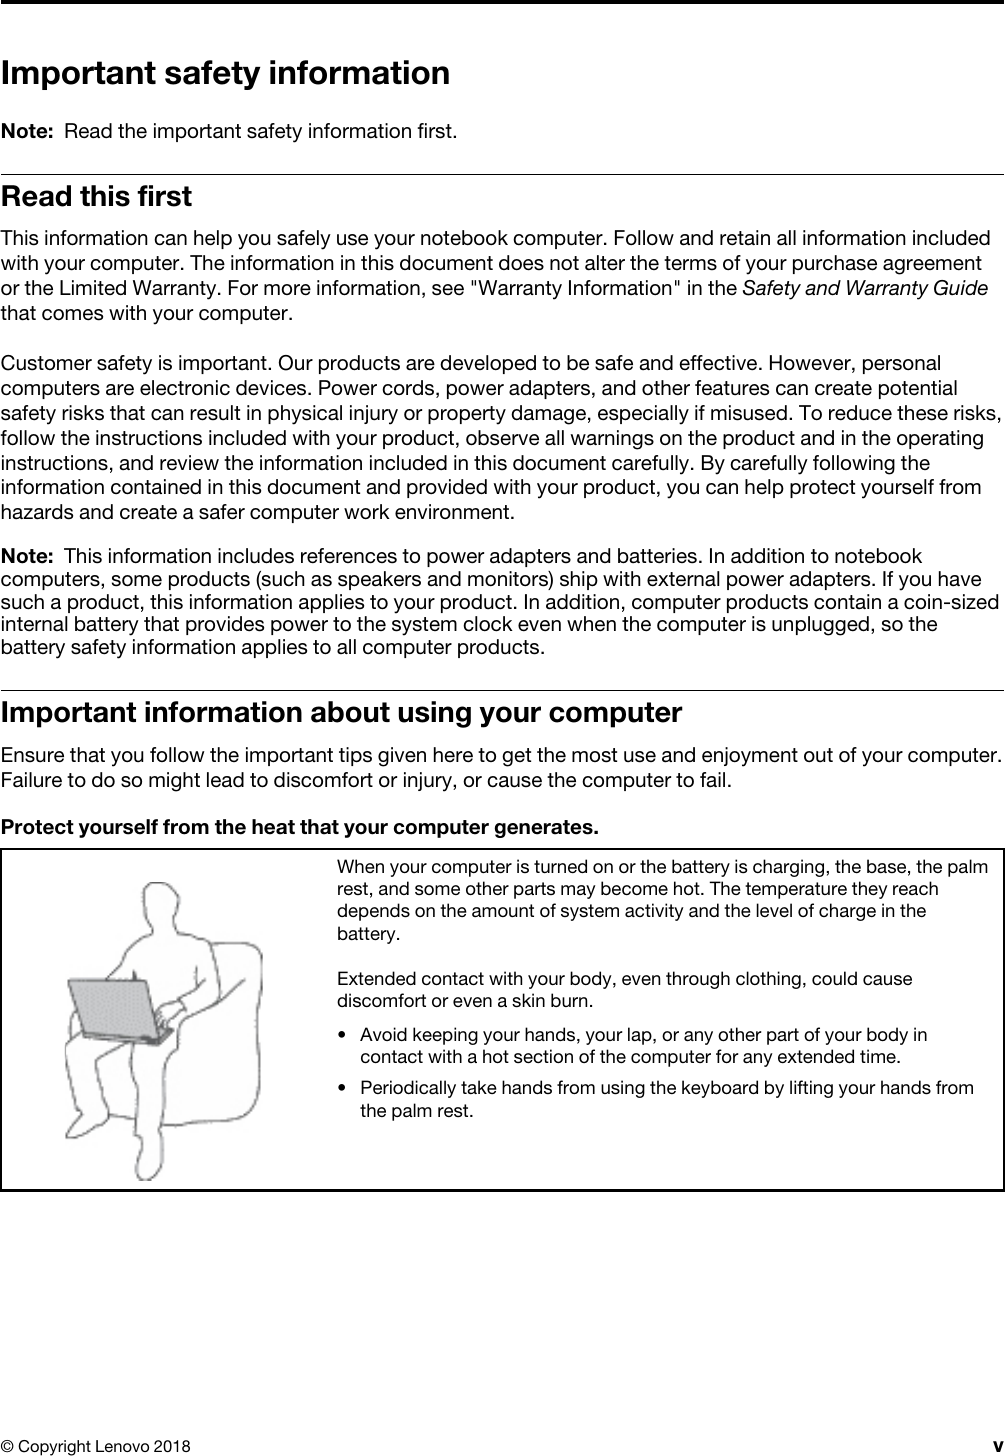
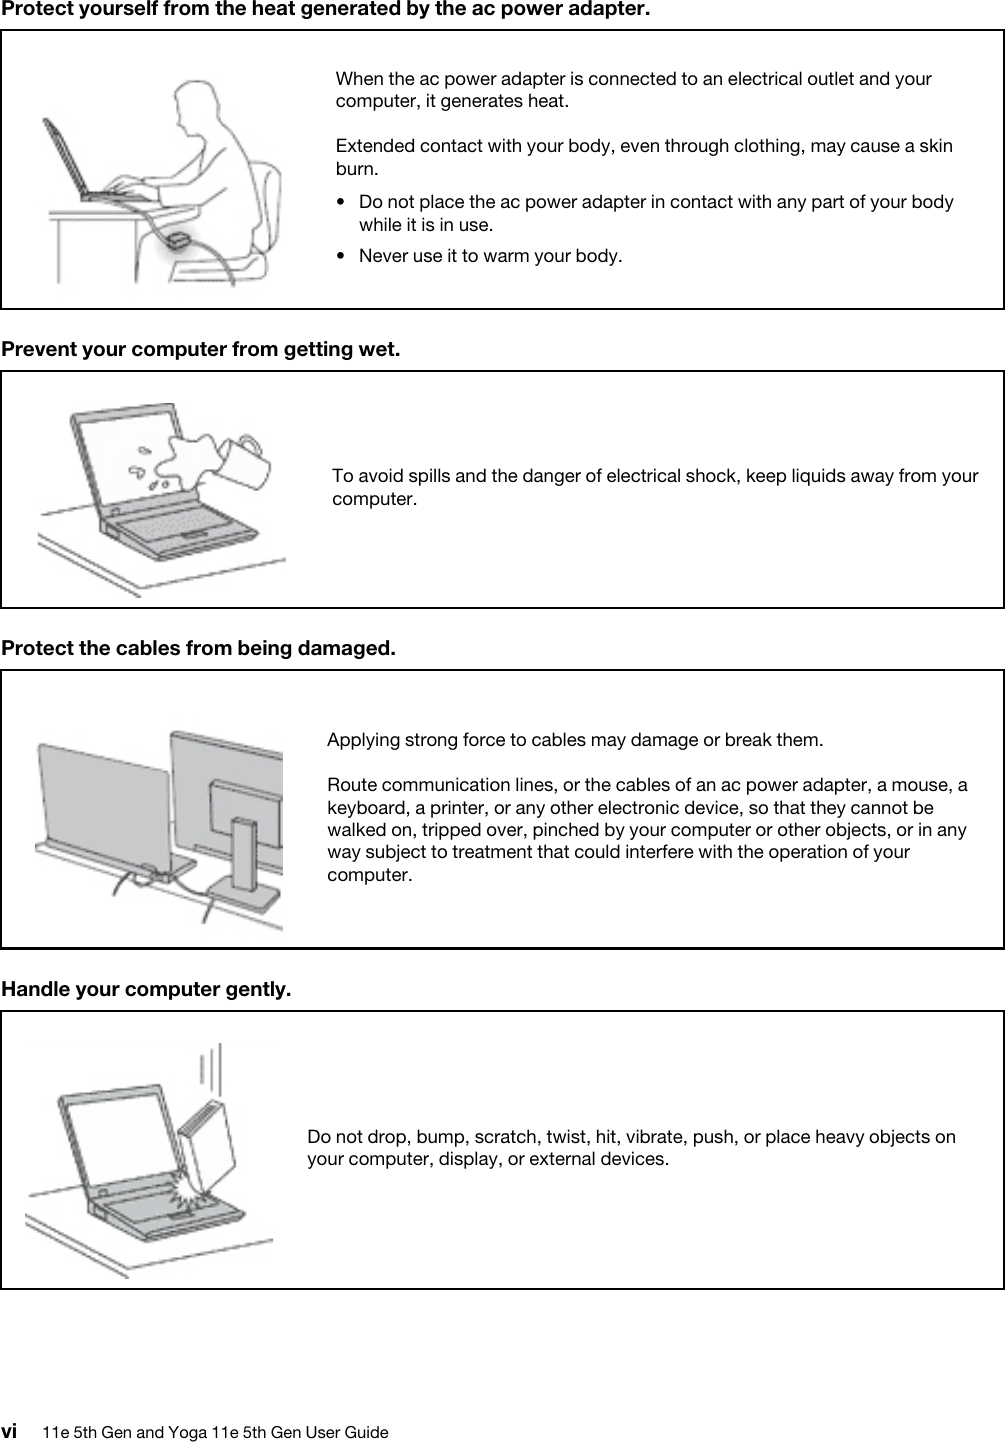
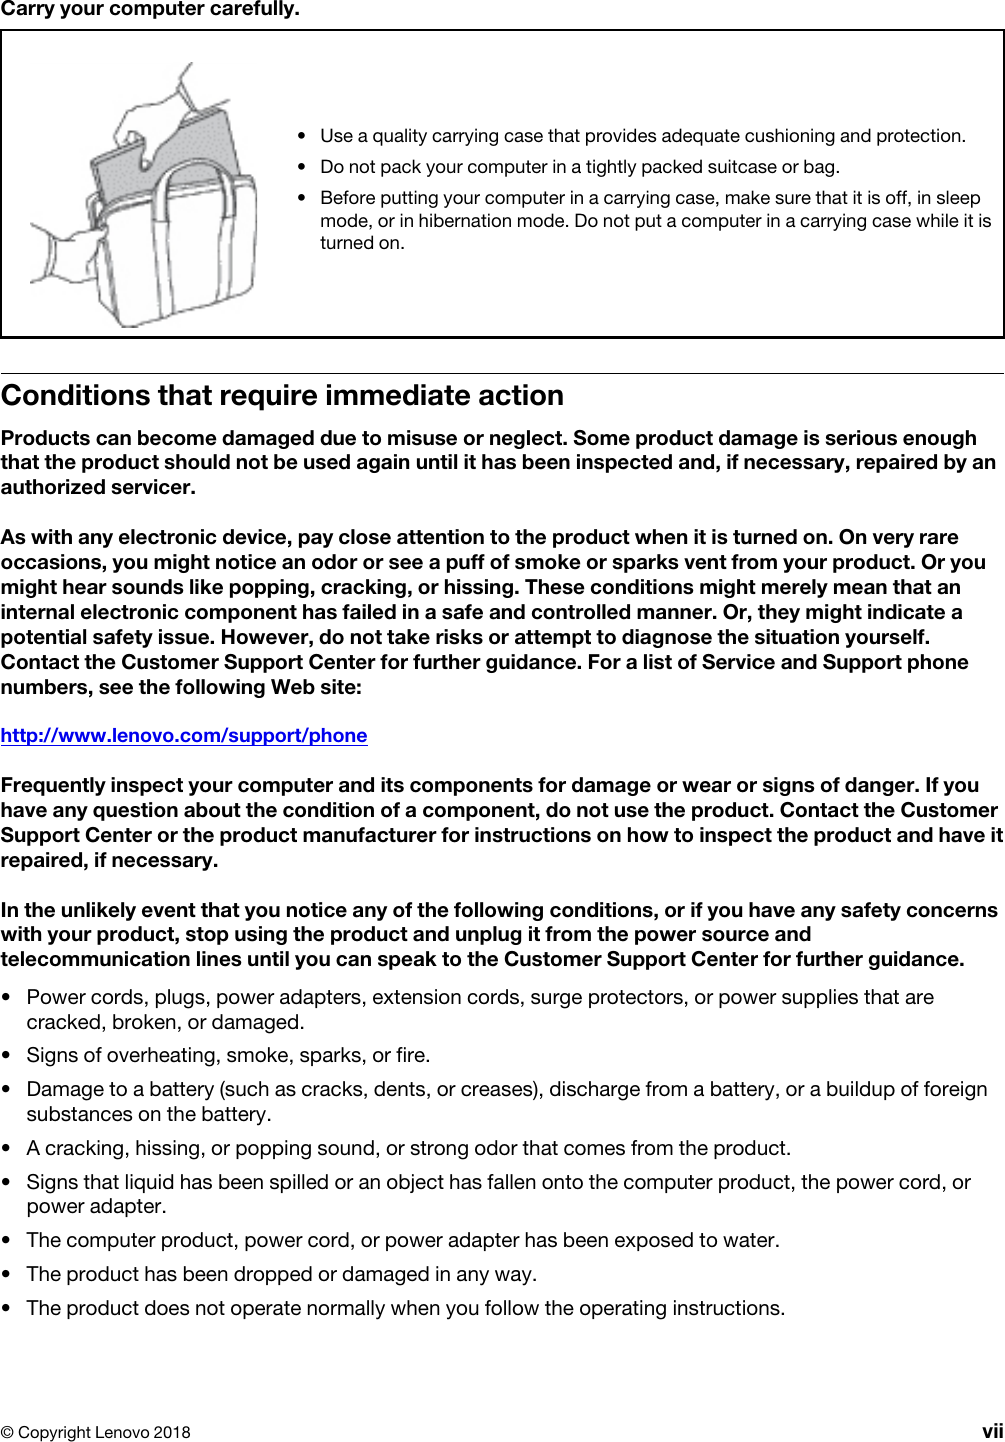
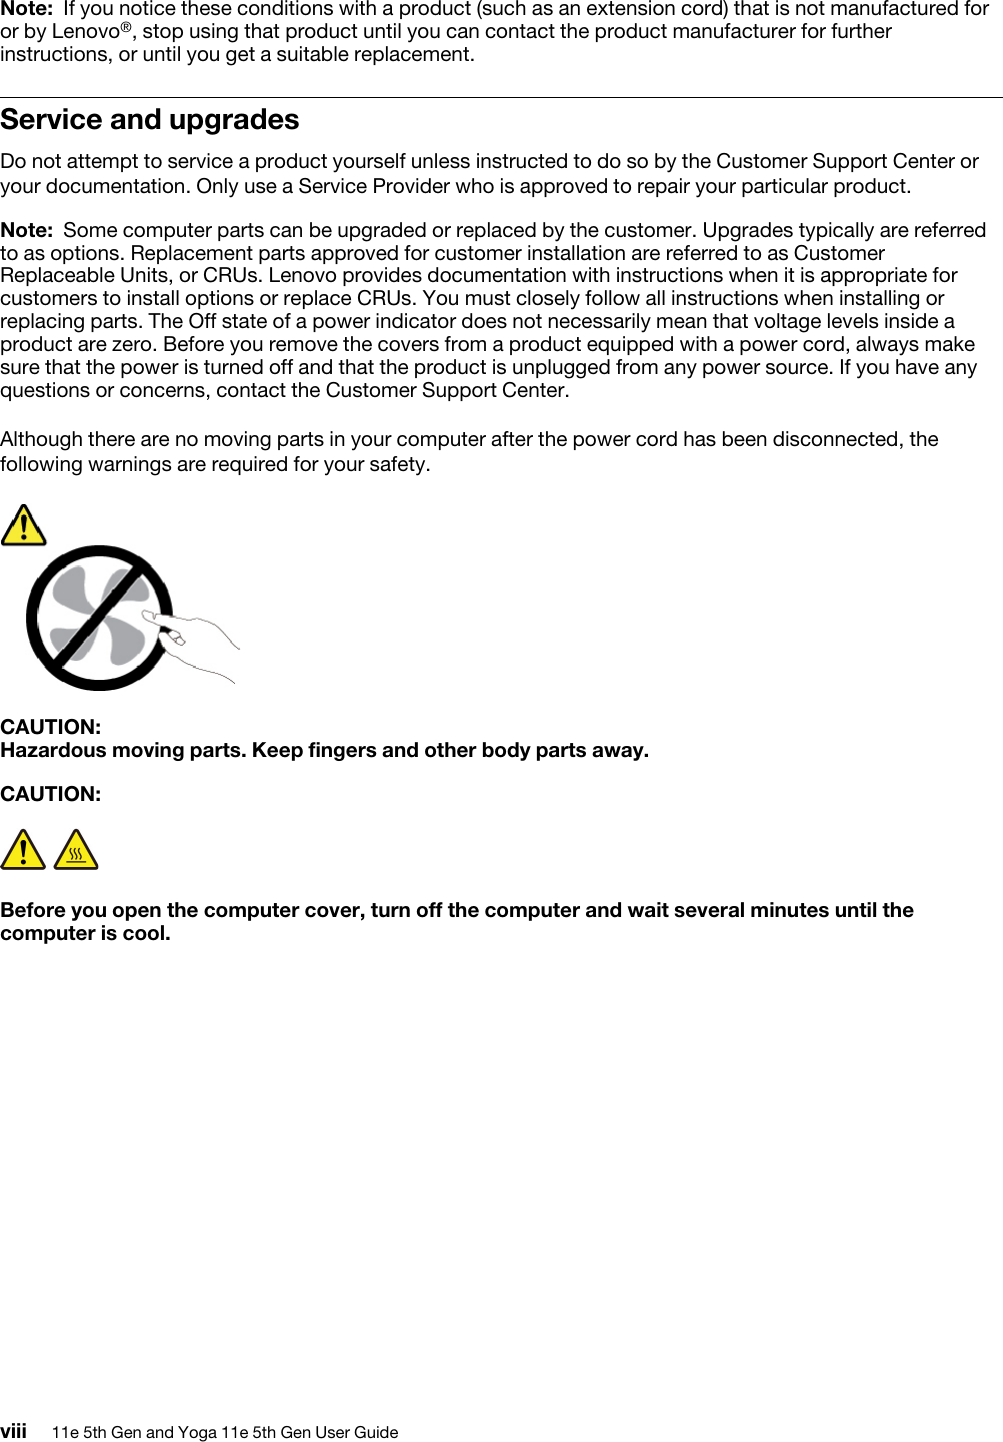
User Manual 1