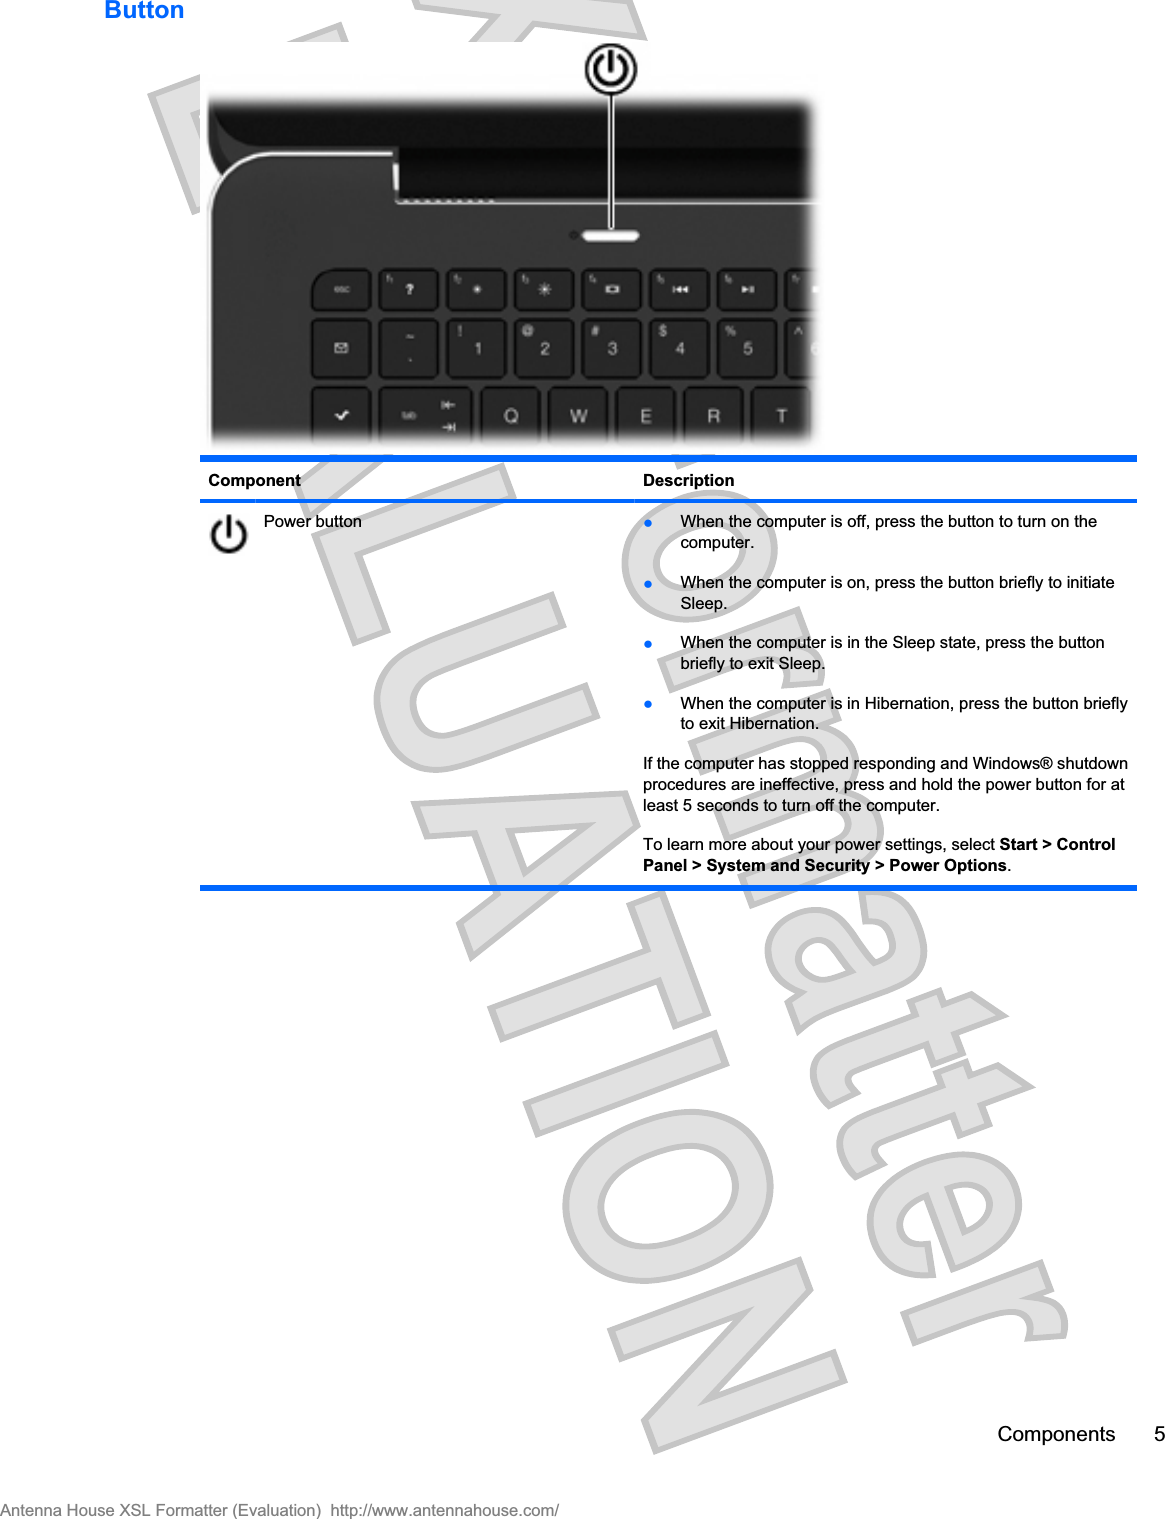
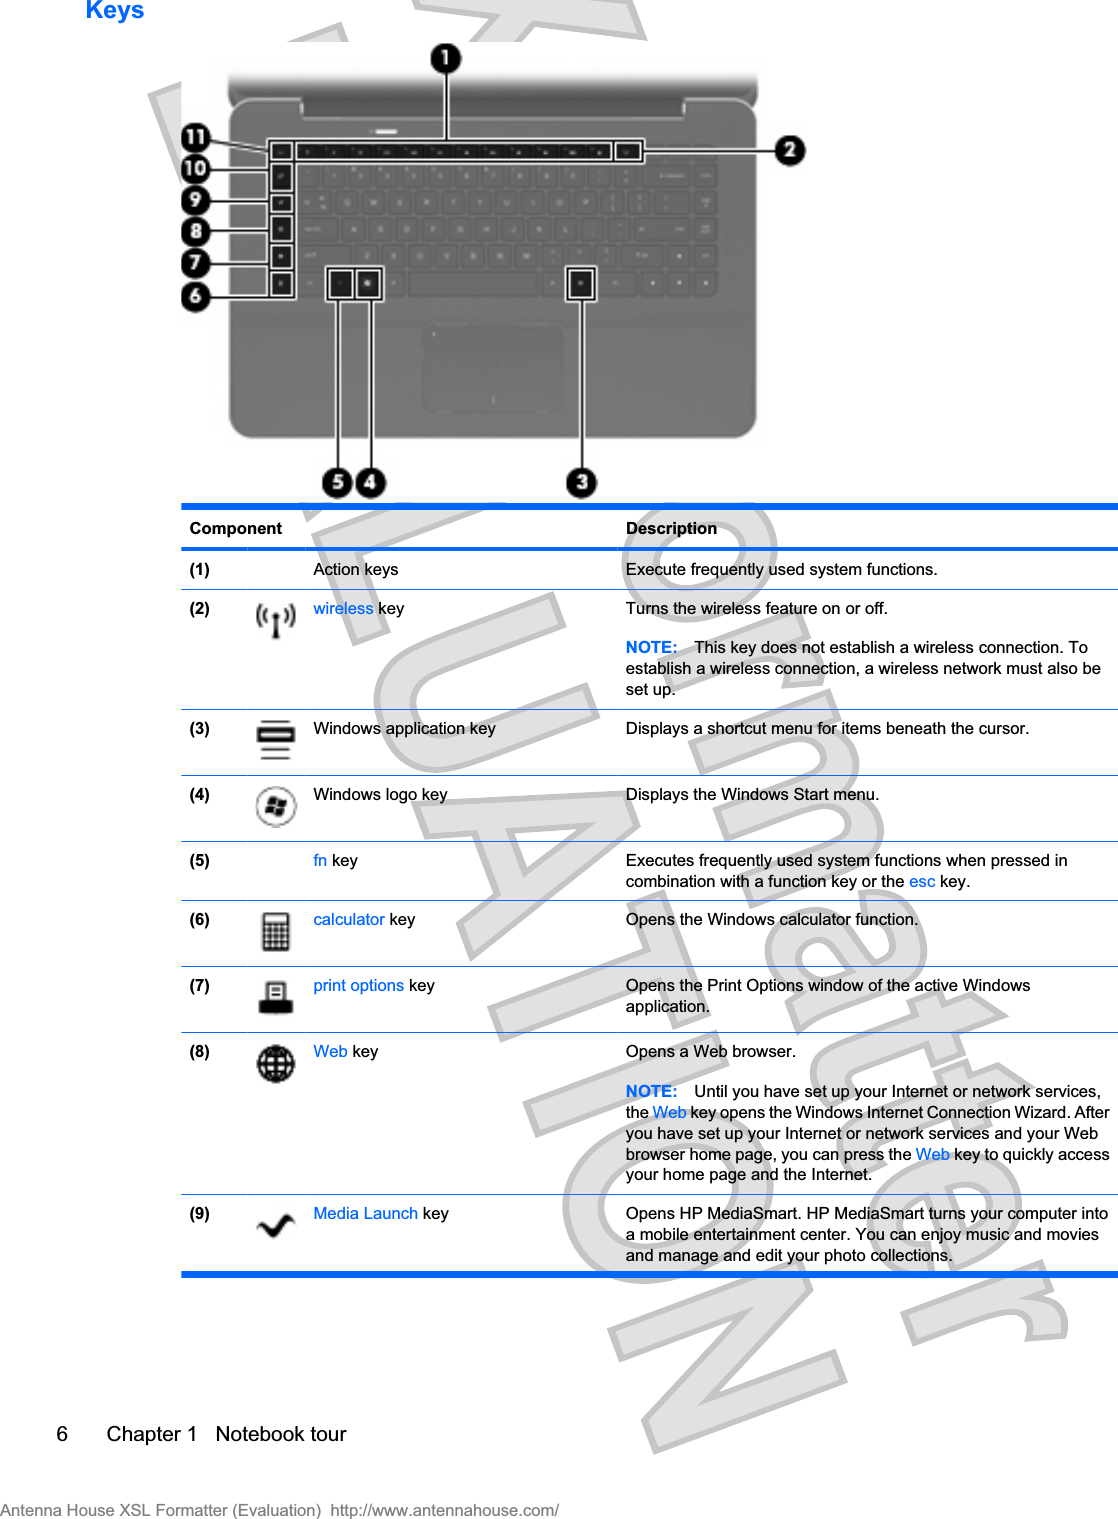
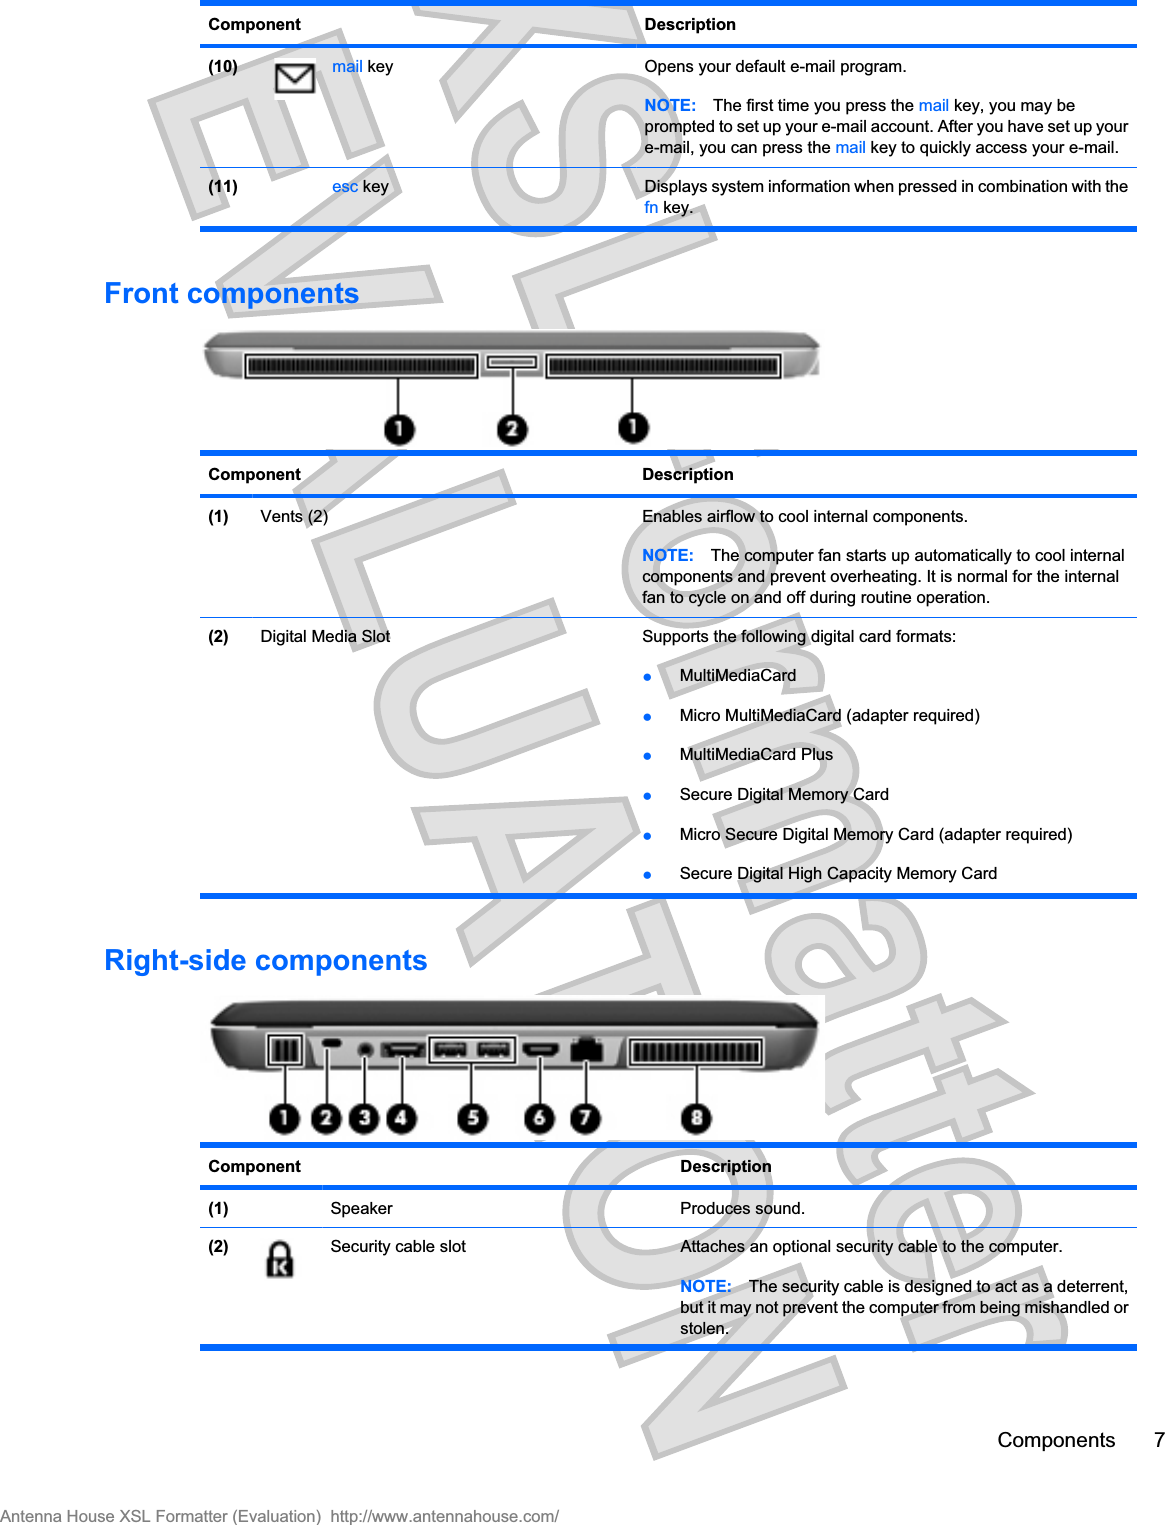
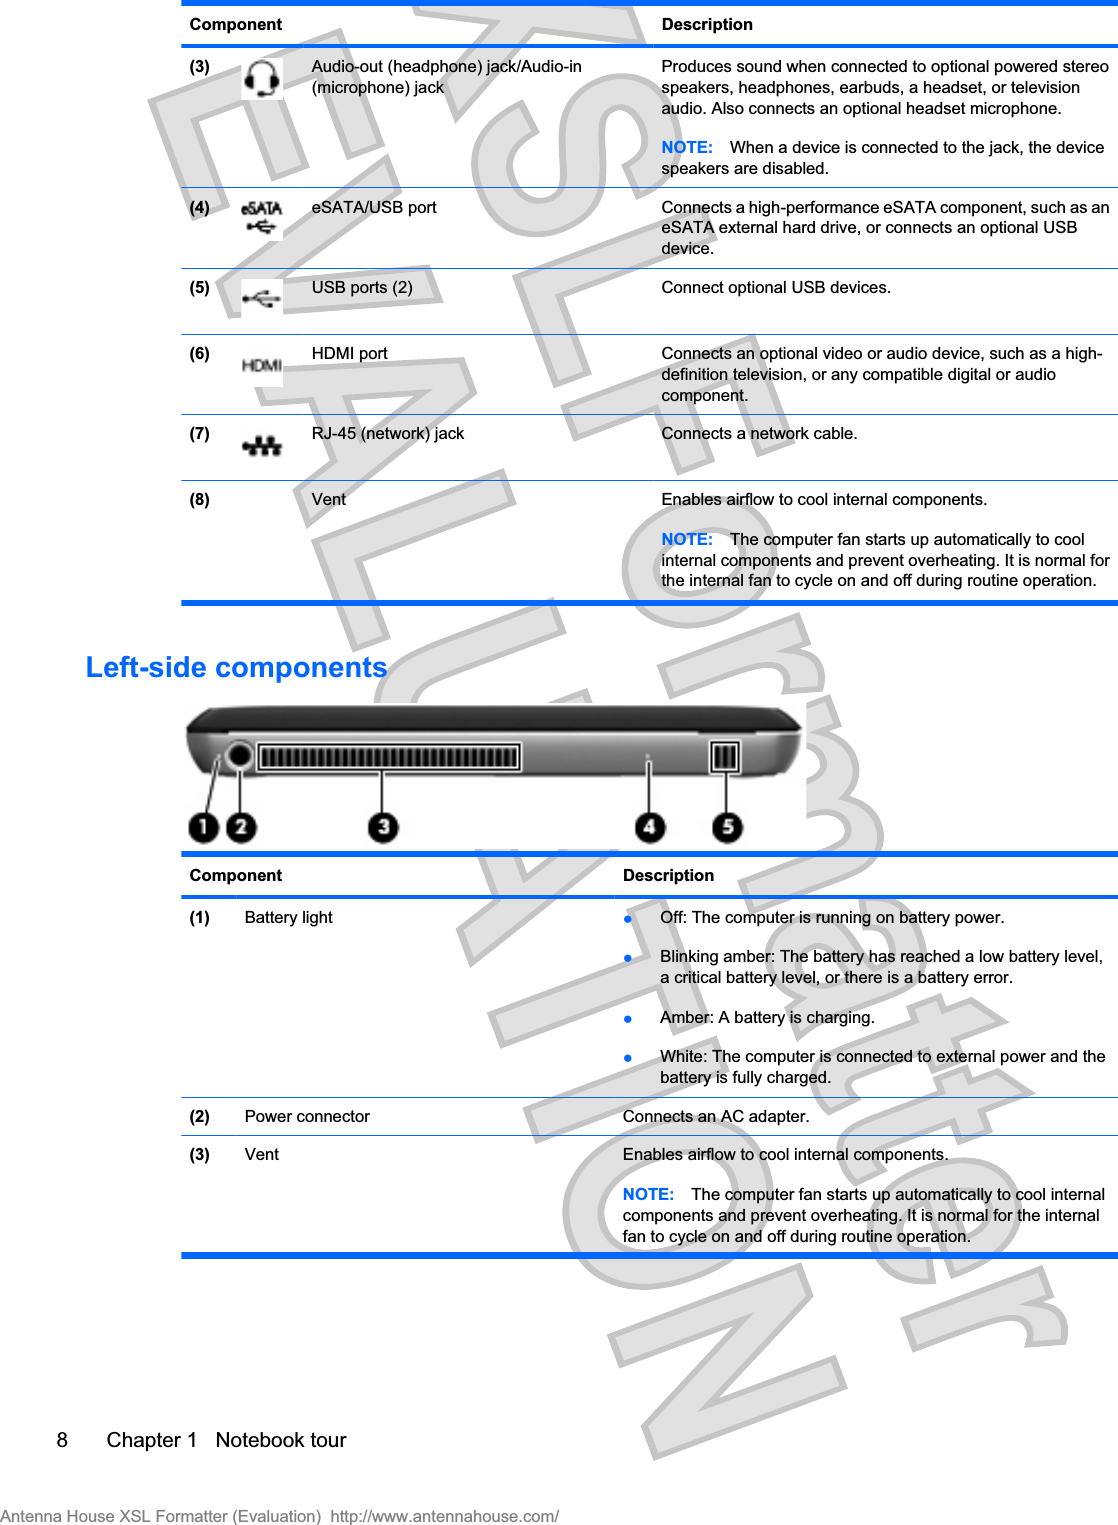
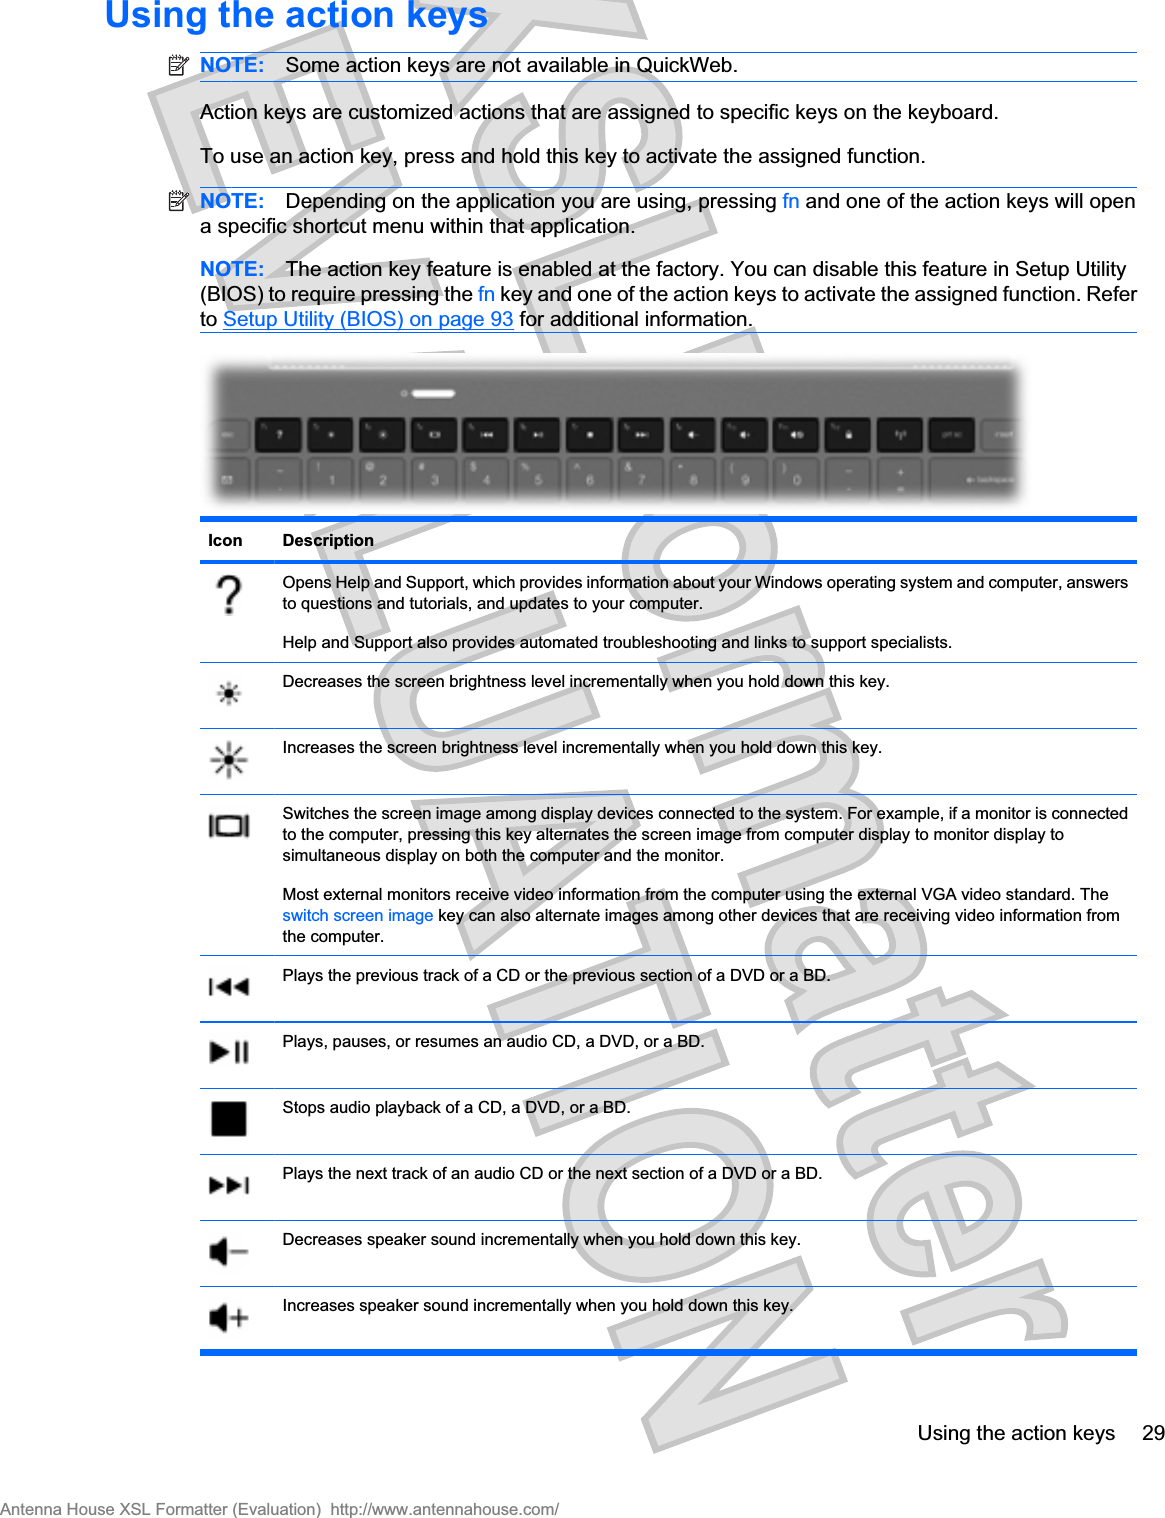
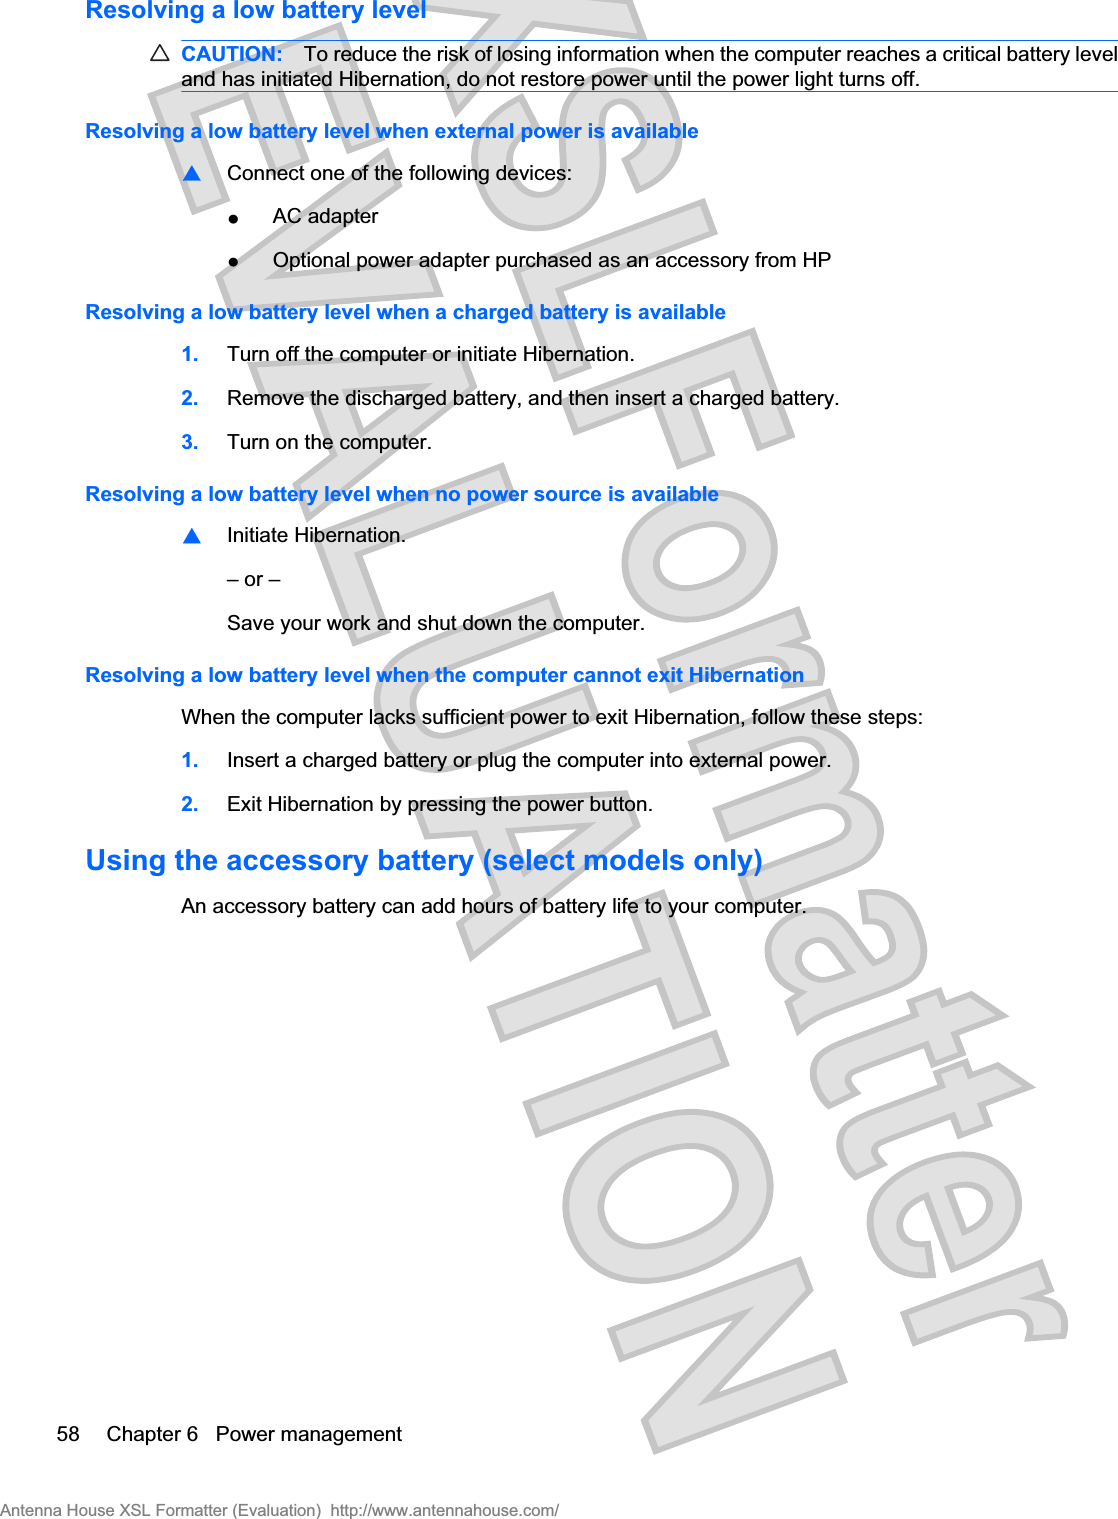
Intel 622ANHU Intel Centrino Advanced-N 6200 User Manual User guide Nikita 1 1 UG 572050 002
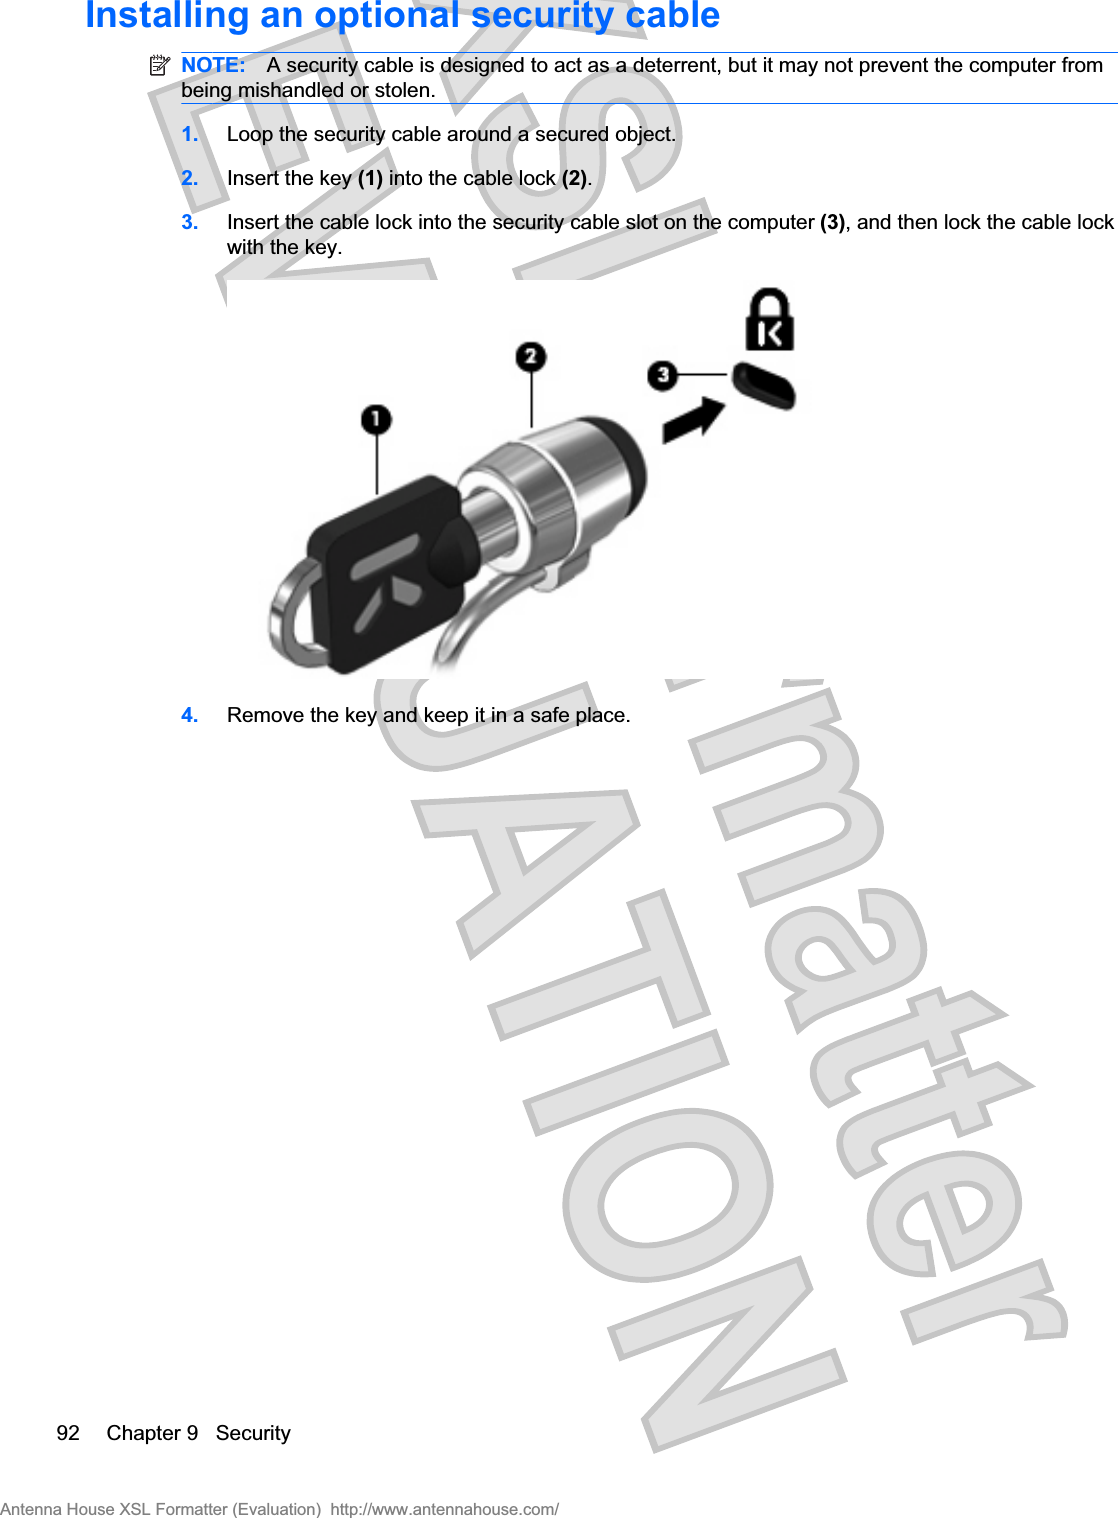
Intel Mobile Communications Intel Centrino Advanced-N 6200 User guide Nikita 1 1 UG 572050 002
Intel >
Contents
- 1. User Manual
- 2. User Manual 1
- 3. User Manual 2
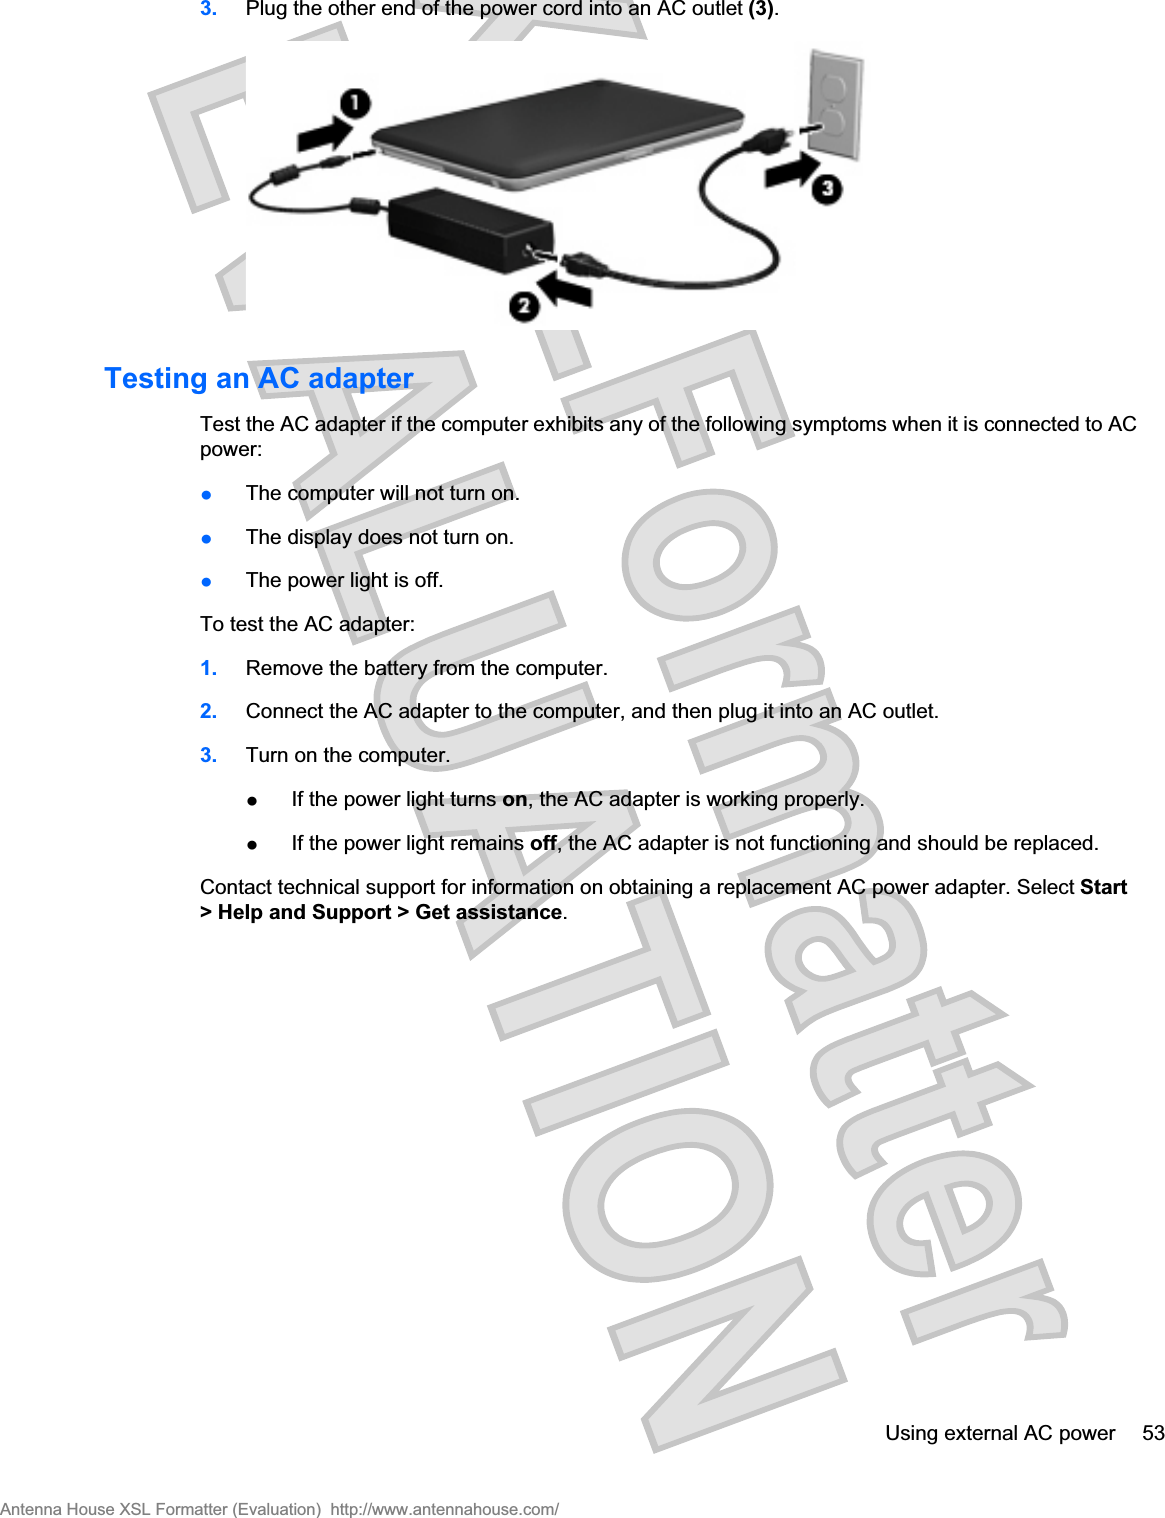
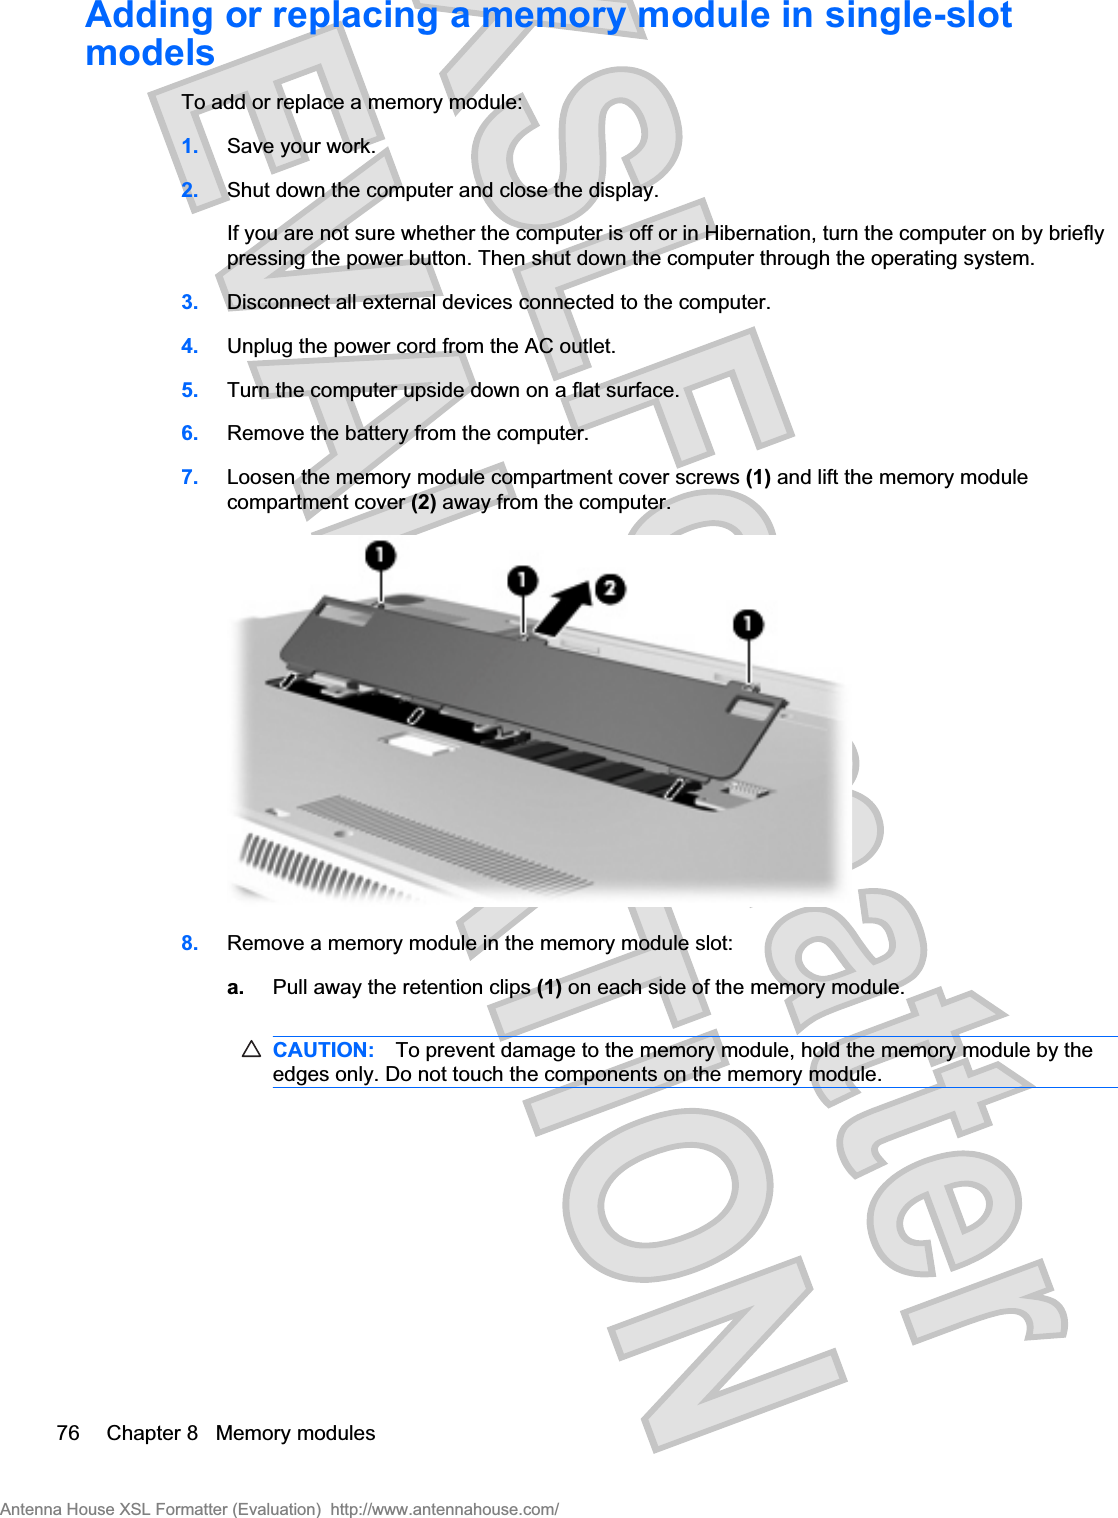
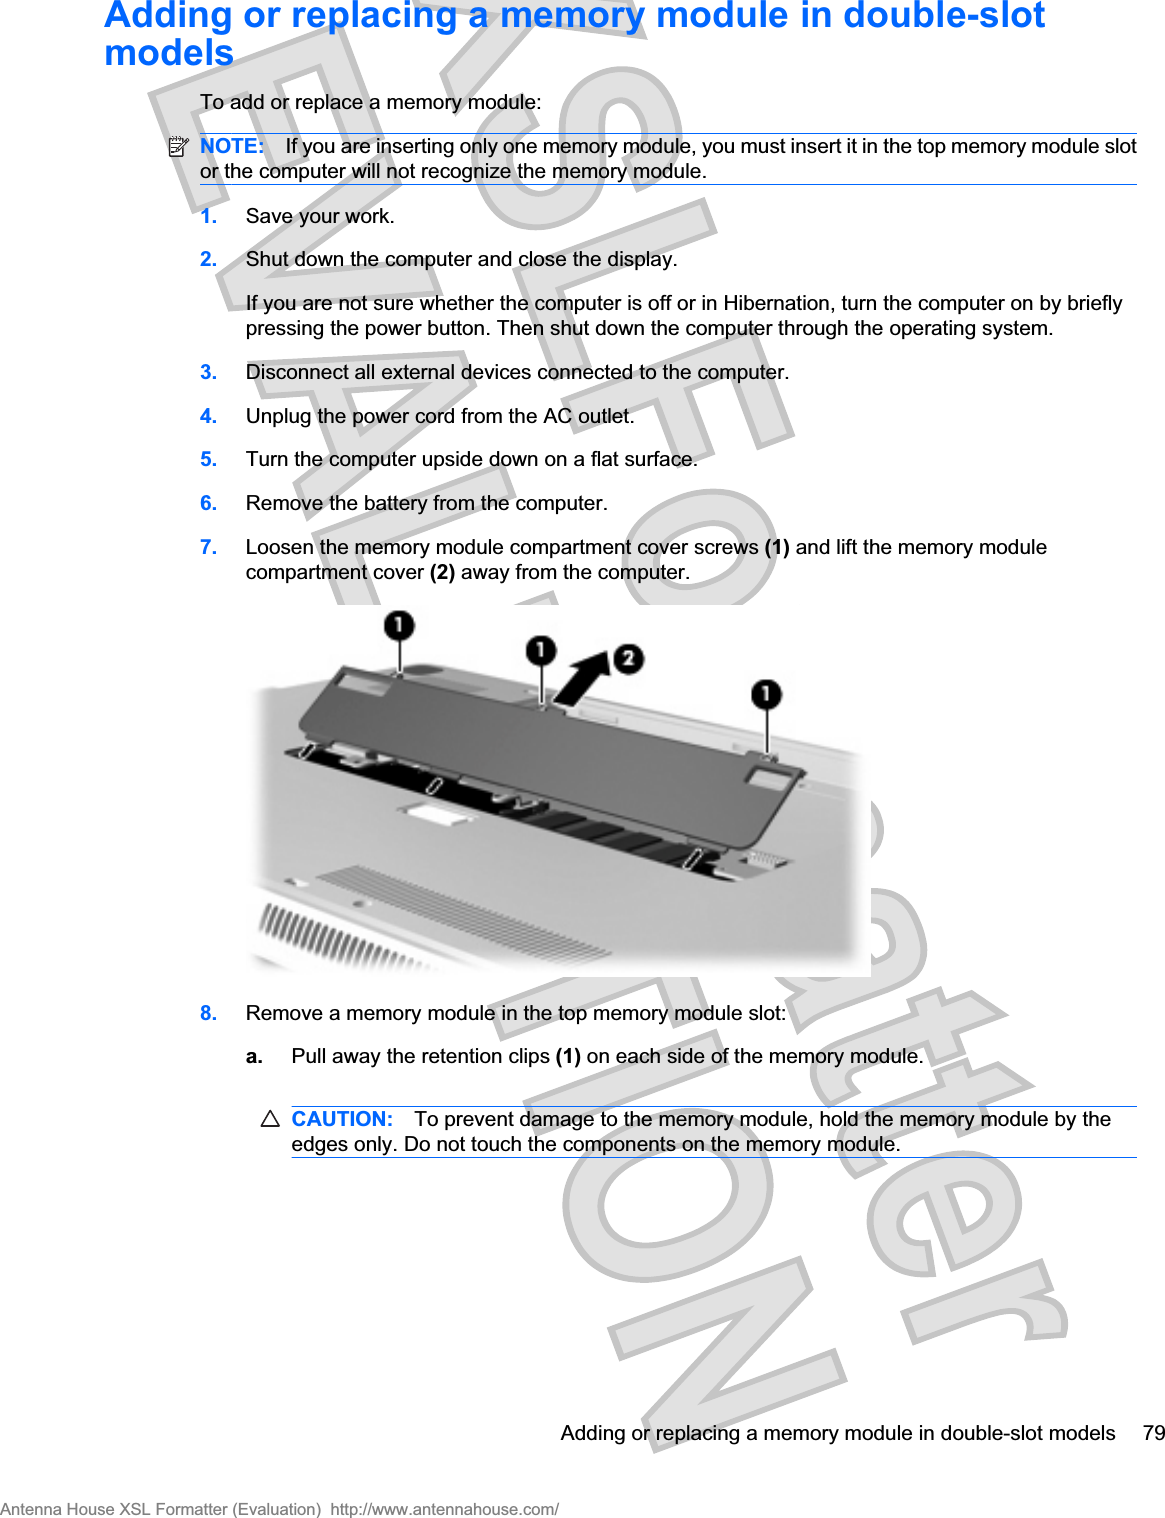
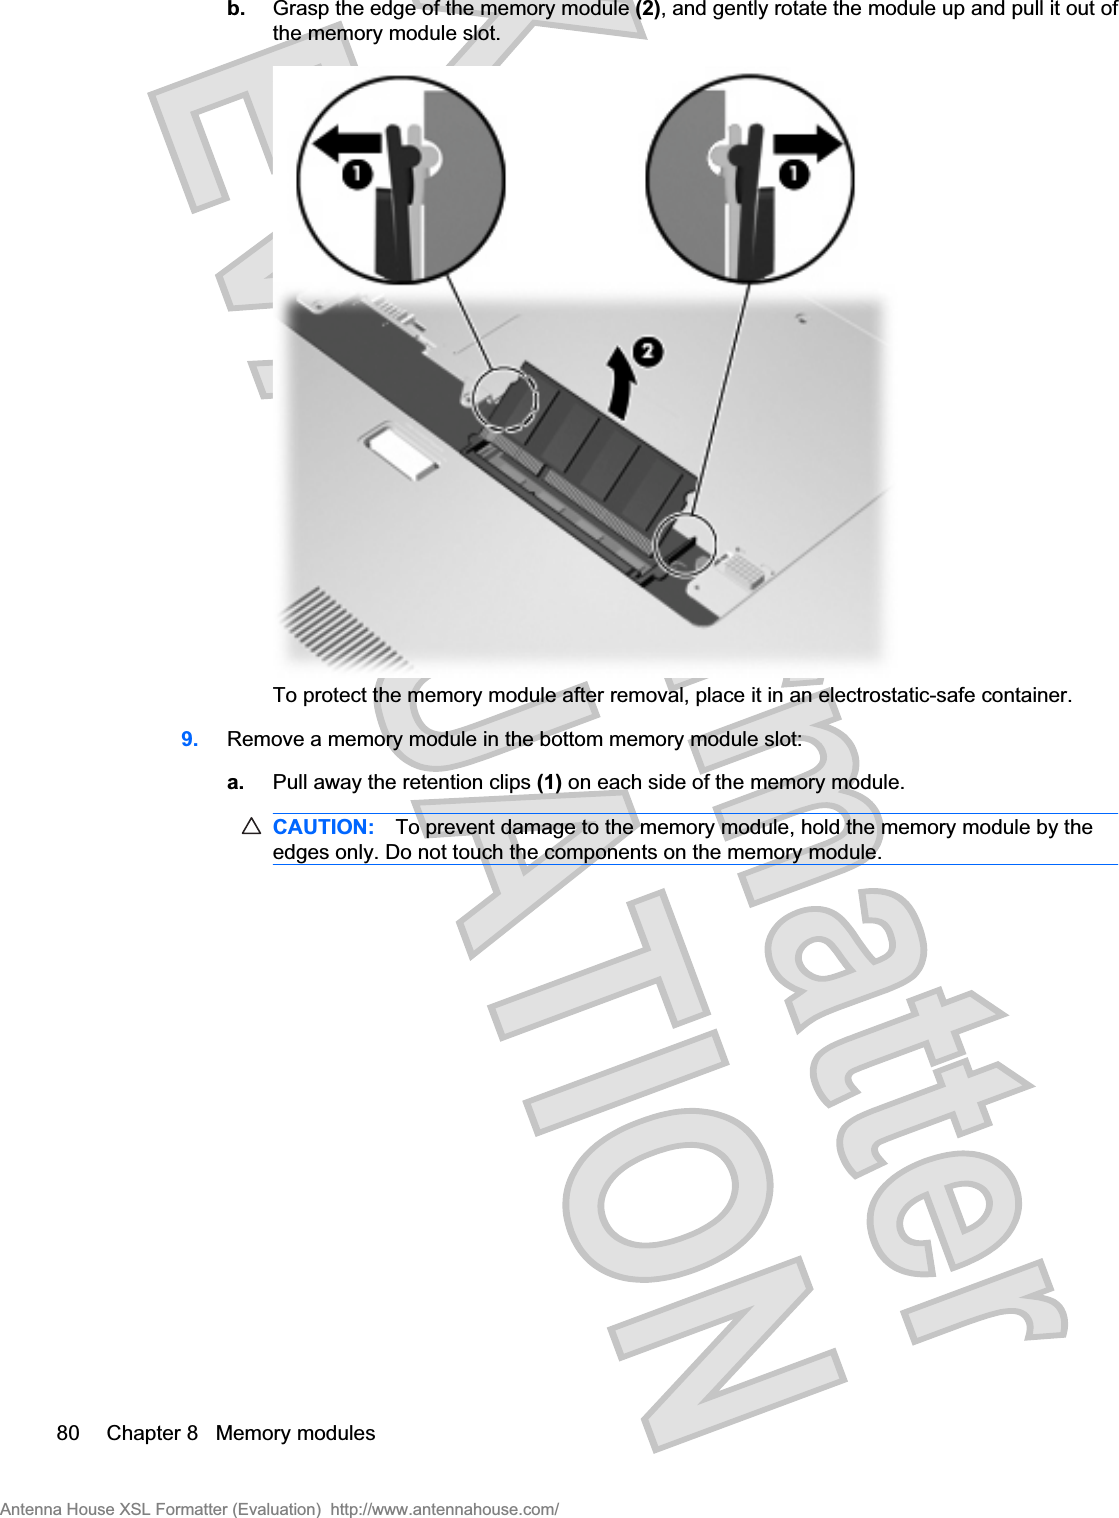
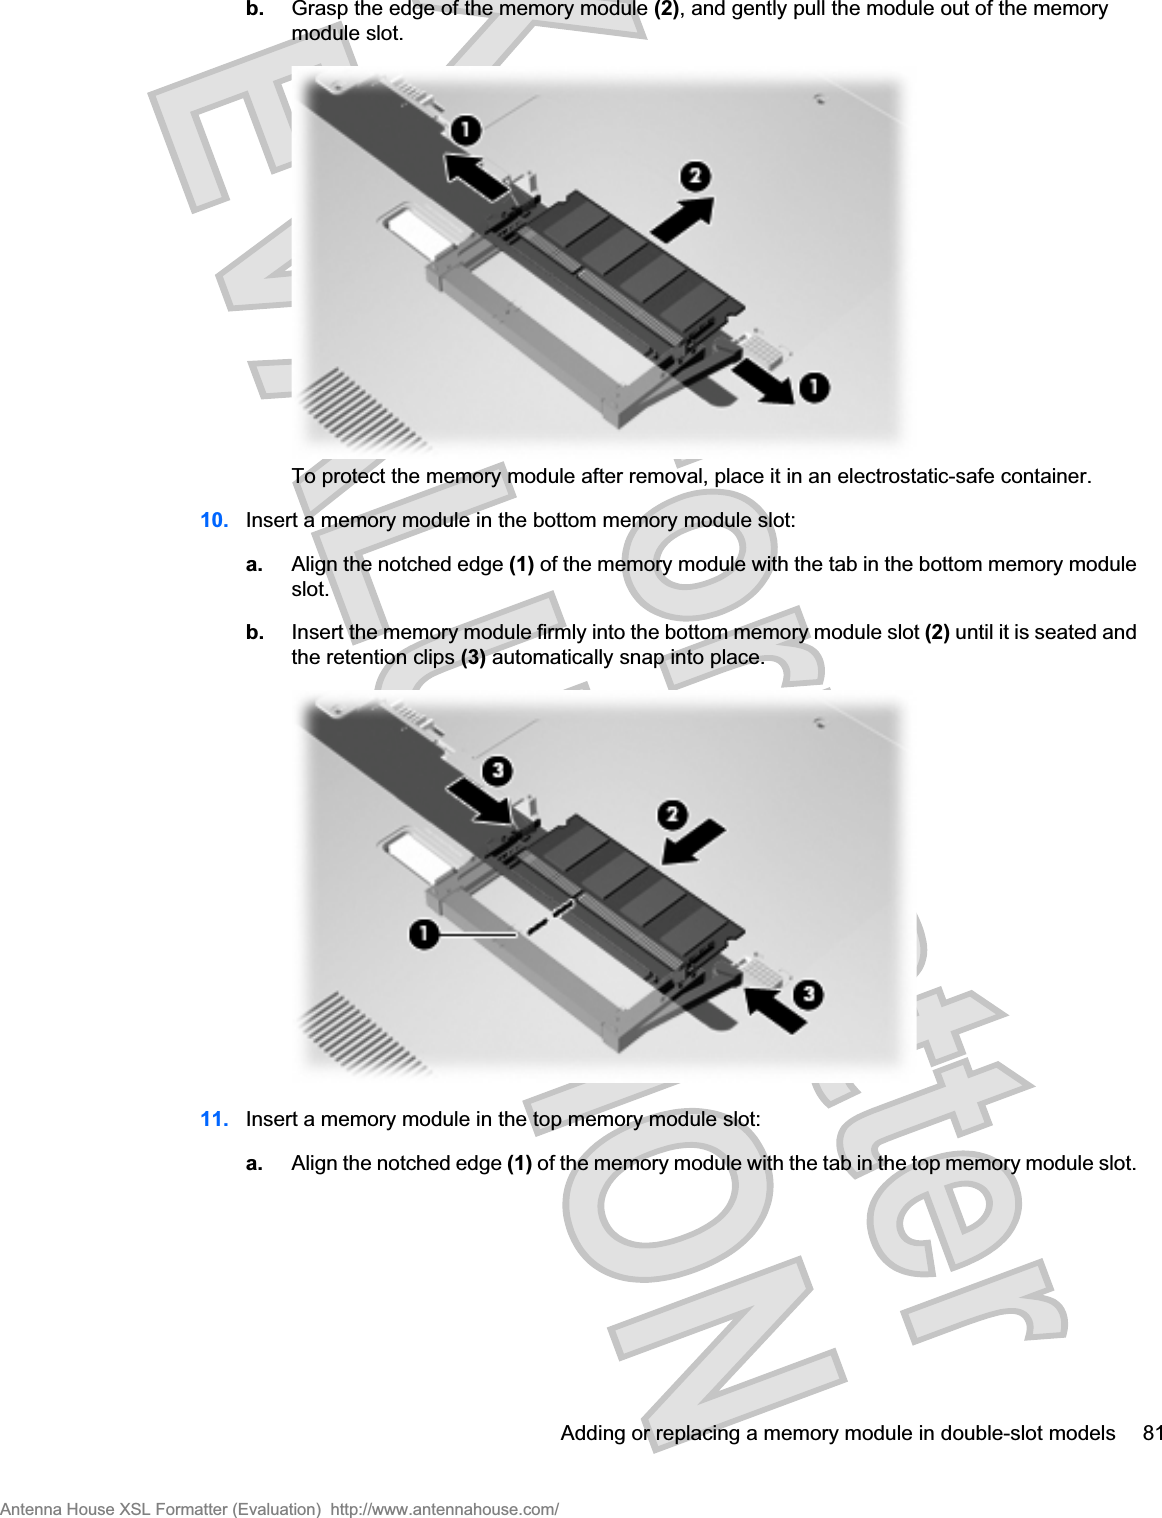
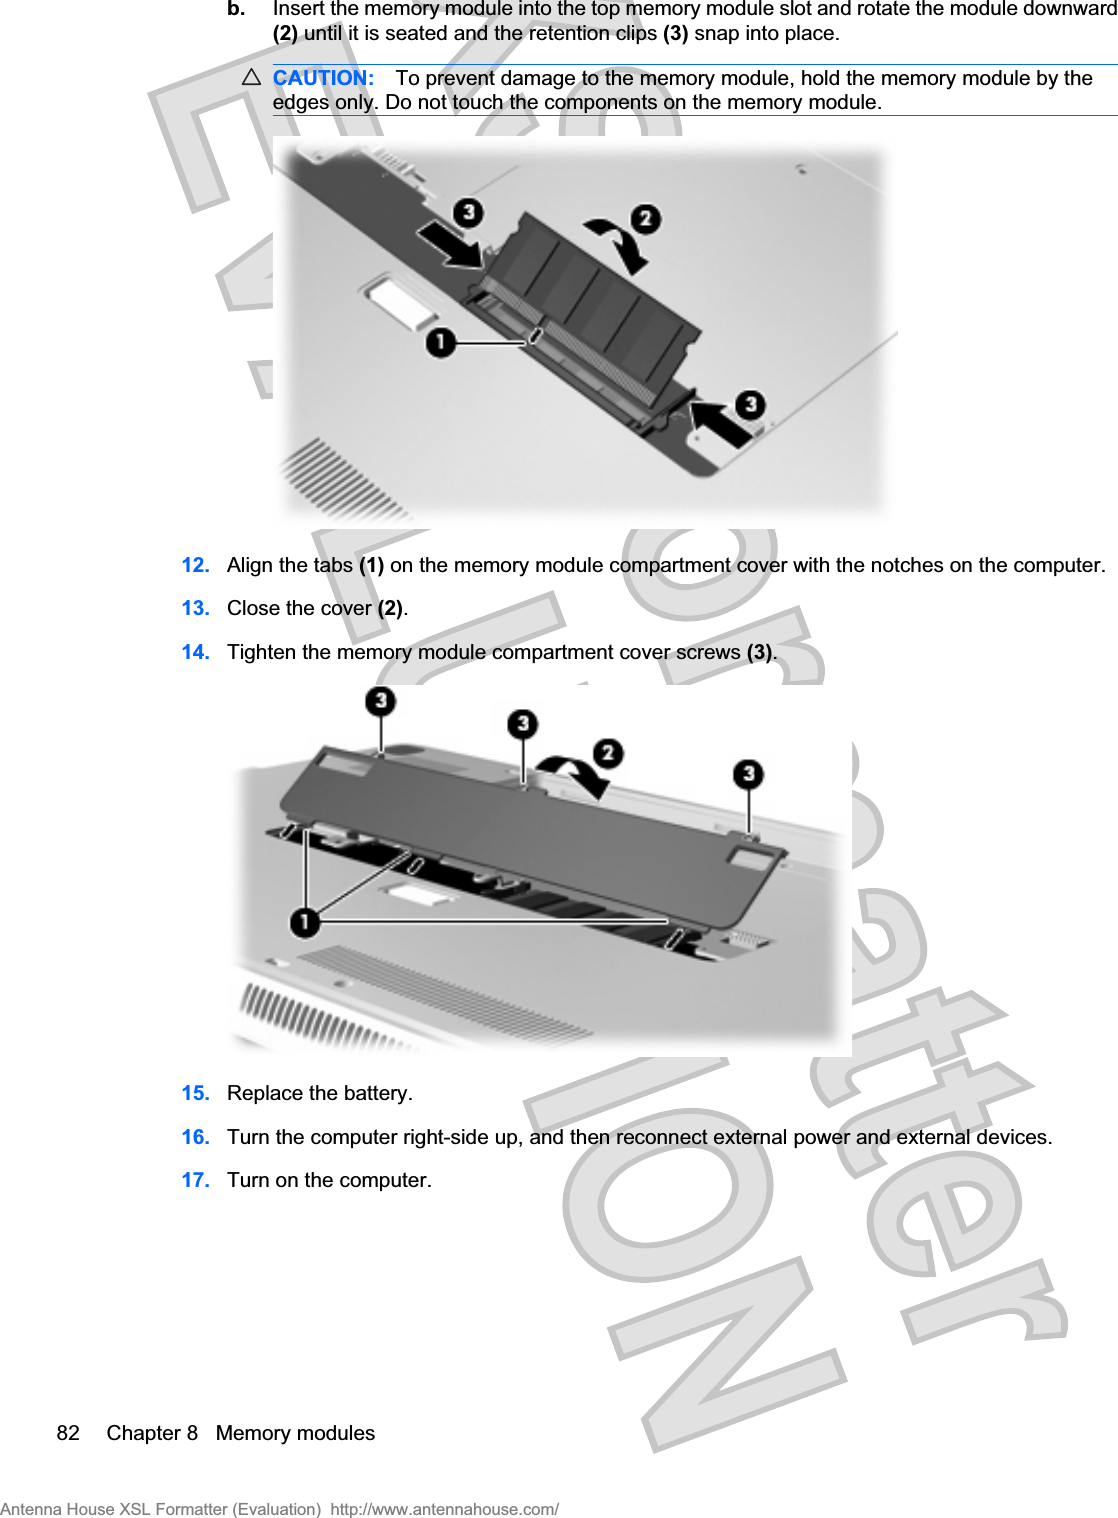
User Manual 1