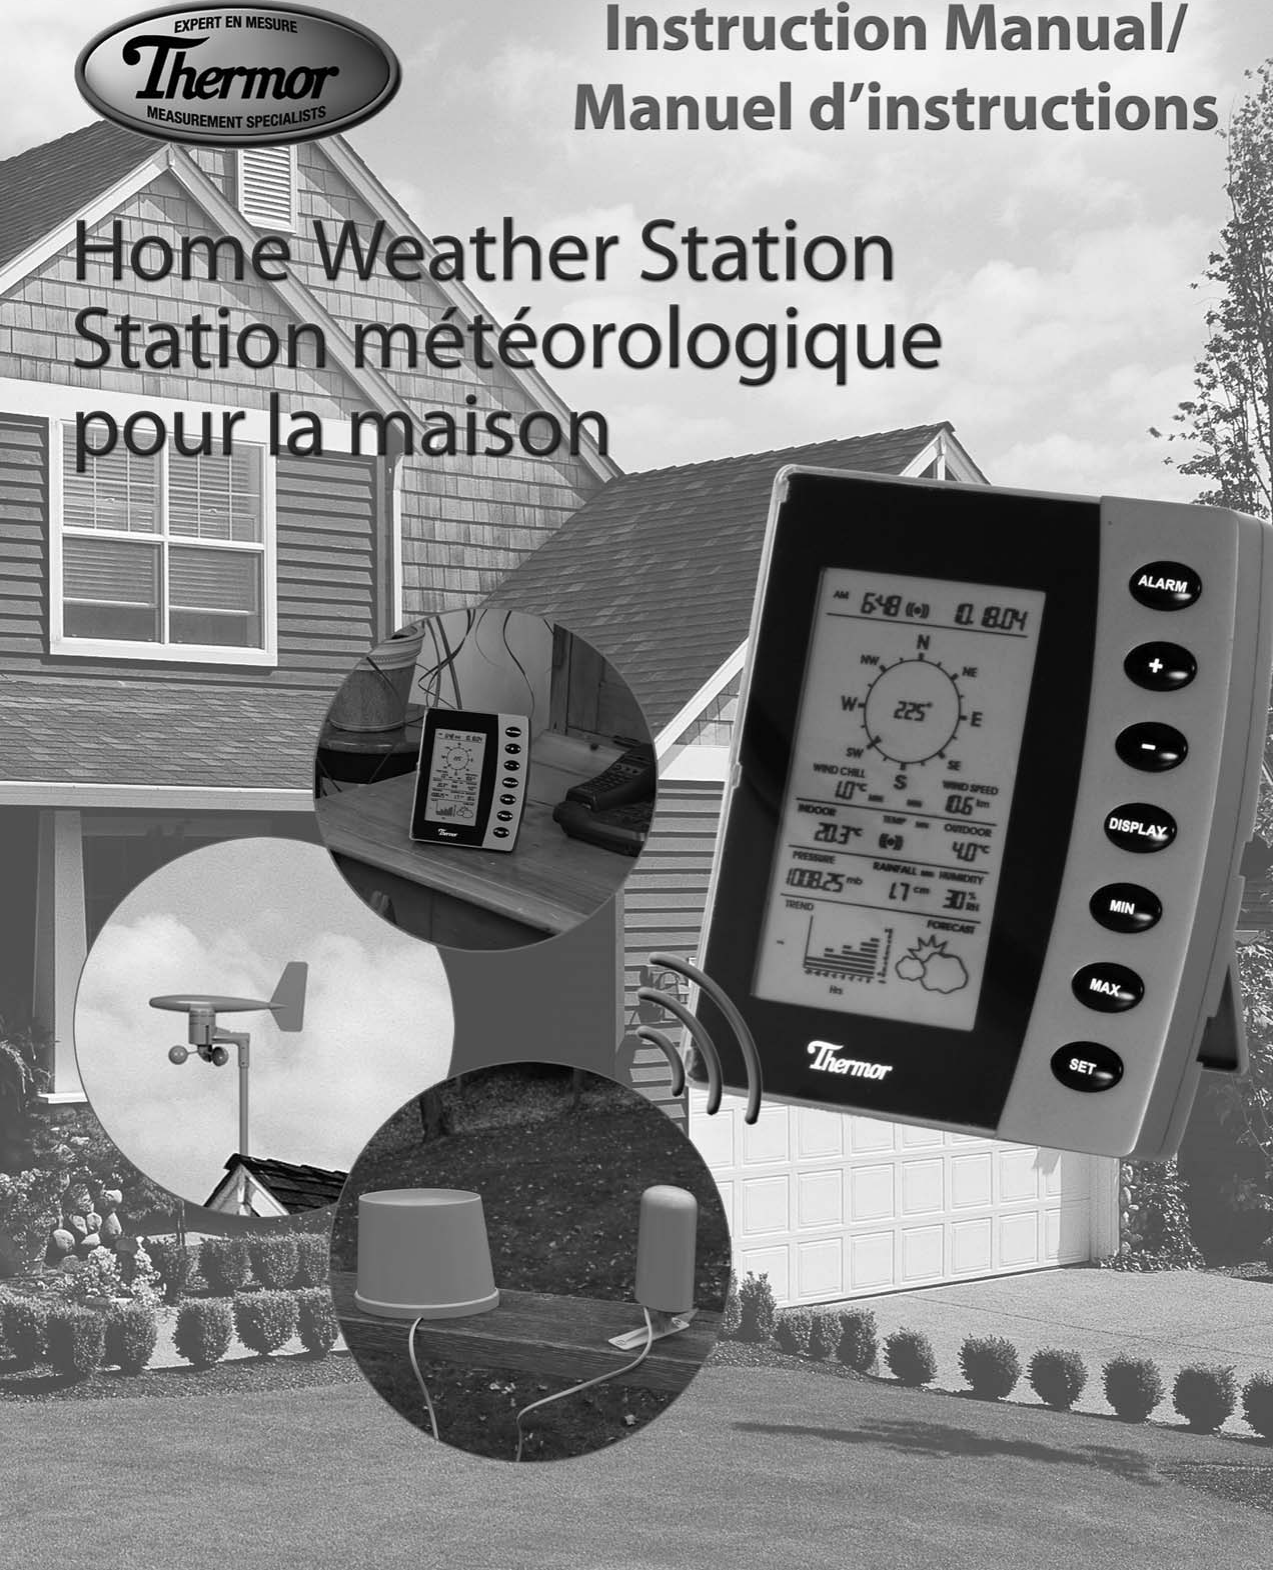
Imperial DG950 Home Weather Station User Manual DG950 Instructions ENG v5
Imperial International Home Weather Station DG950 Instructions ENG v5
UserManual.wiki
>
Imperial
>
DG950 User Manual
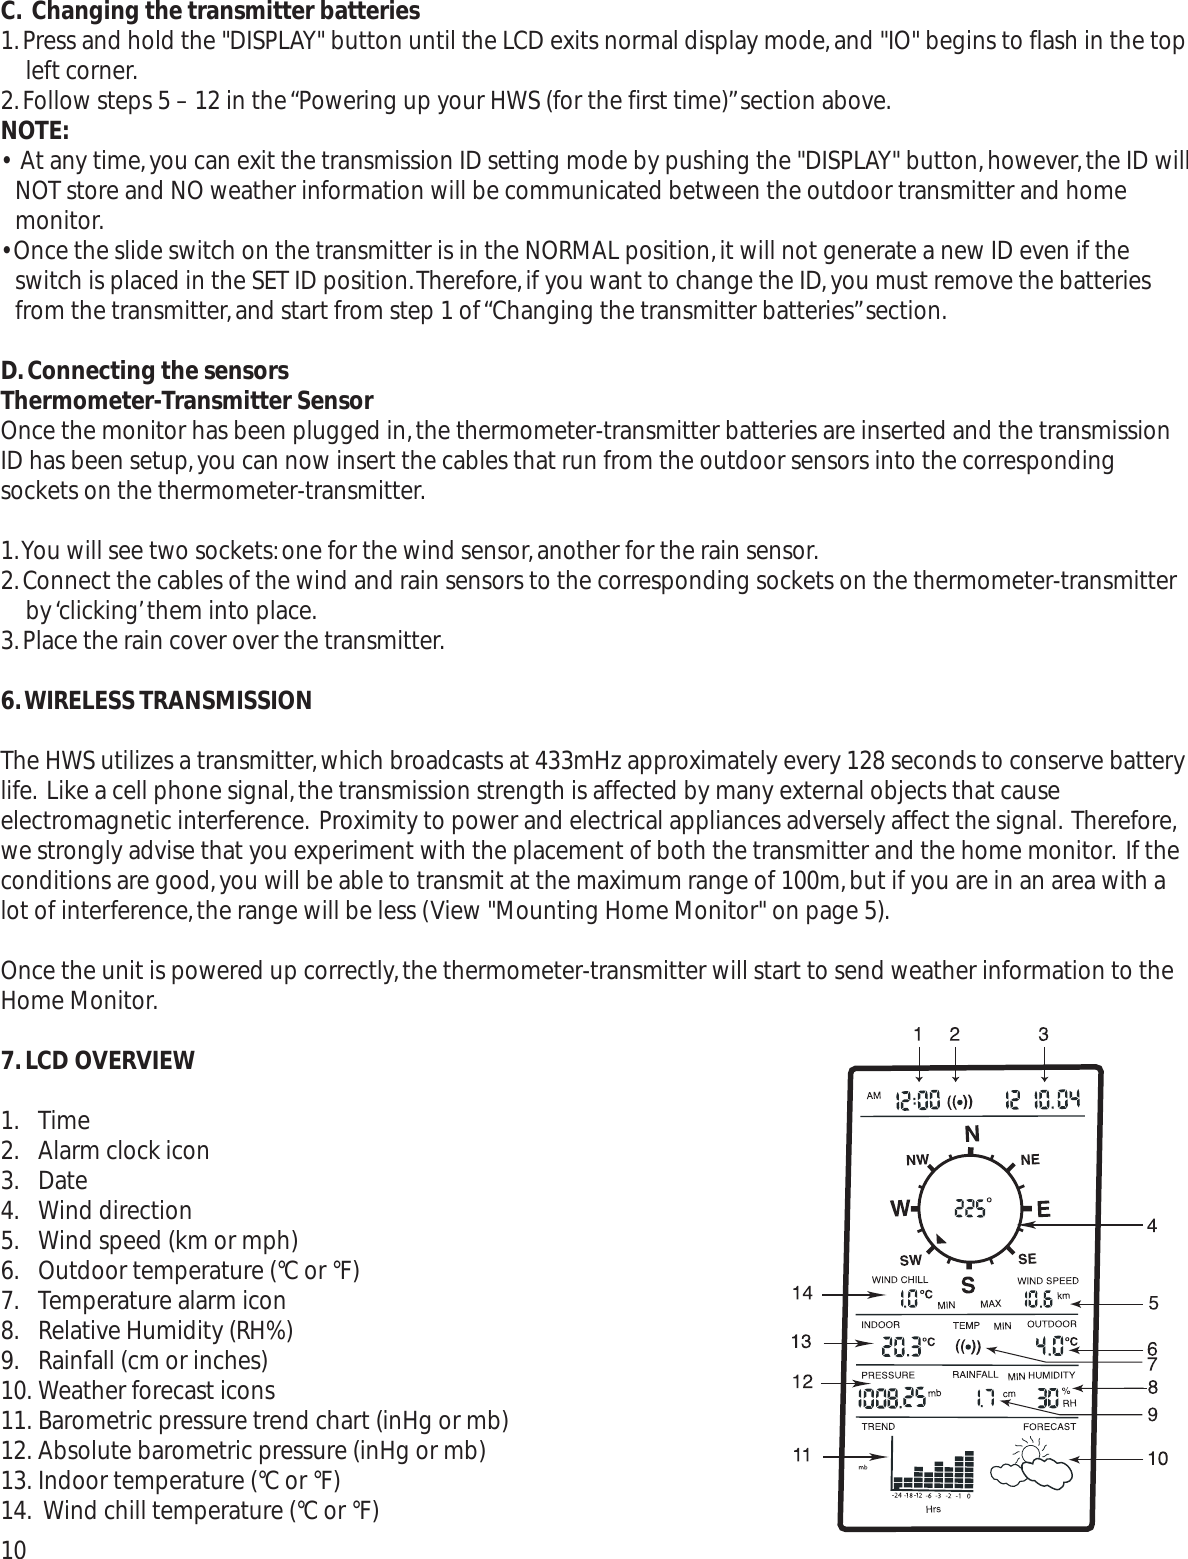
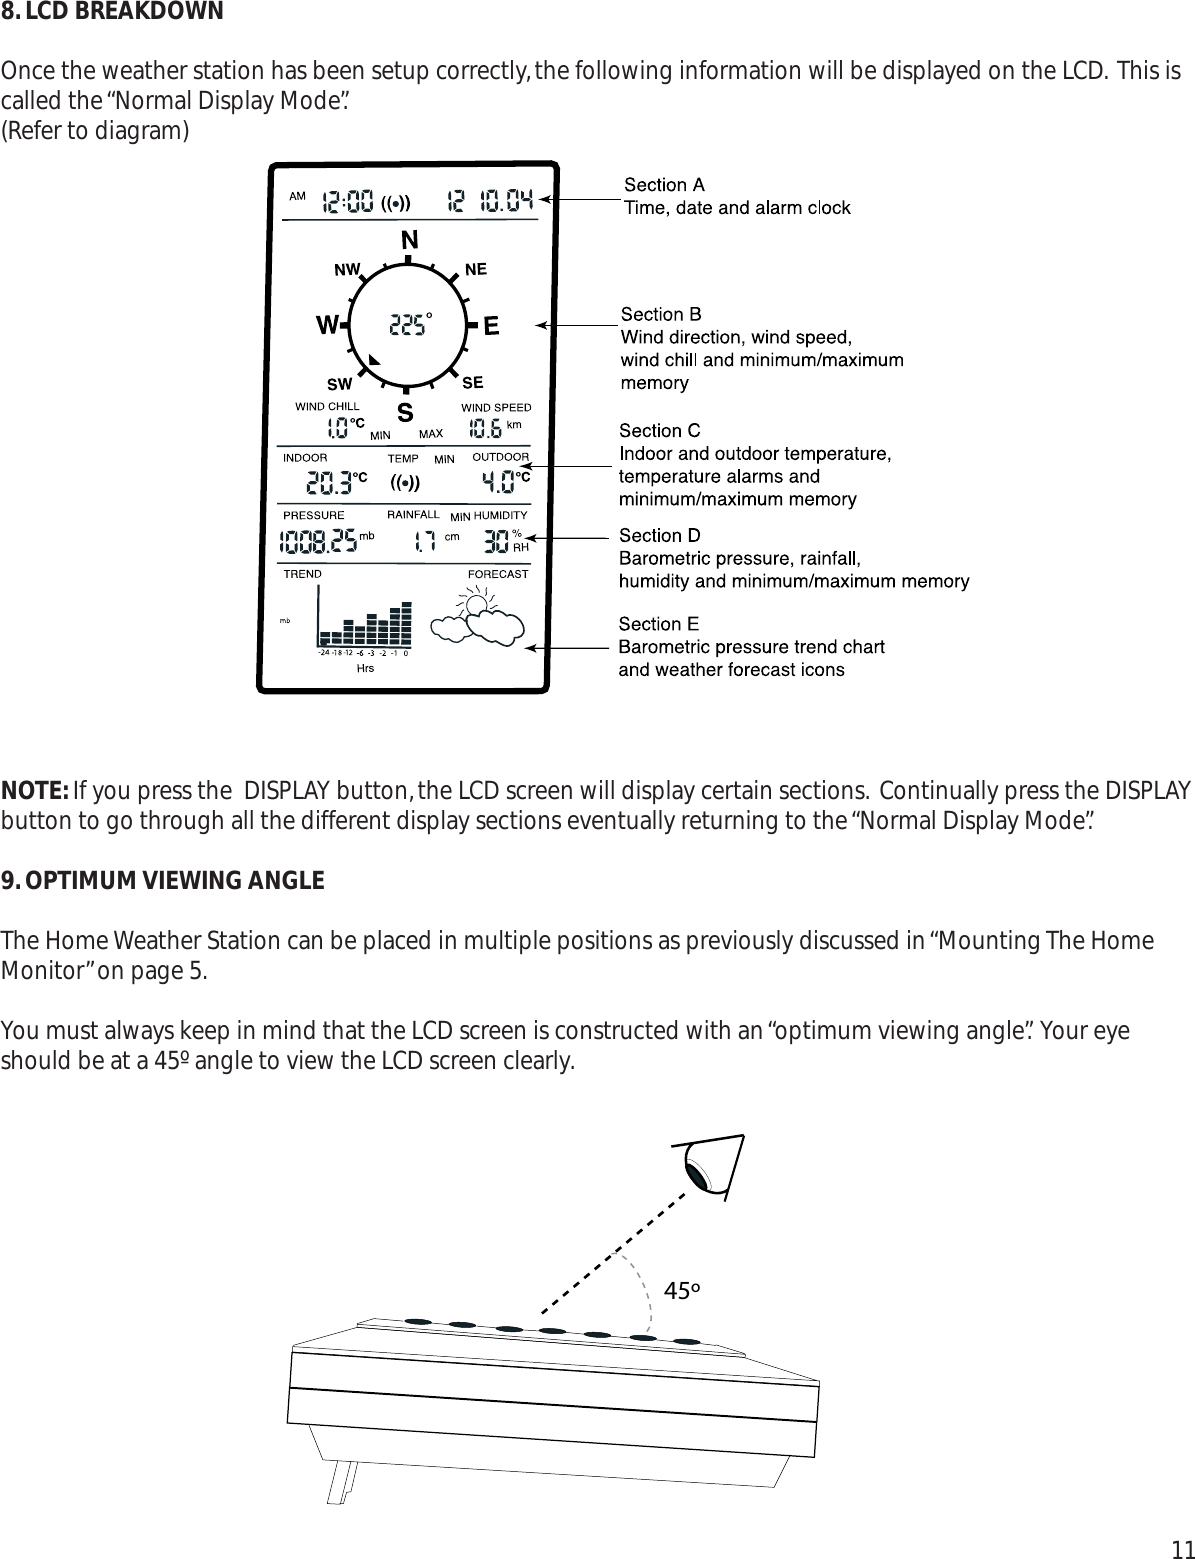
users manual
Navigation menu
Upload a User Manual
Namespaces
Wiki Guide
HTML
PDF
Info
Views
User Manual
Discussion / Help
Navigation
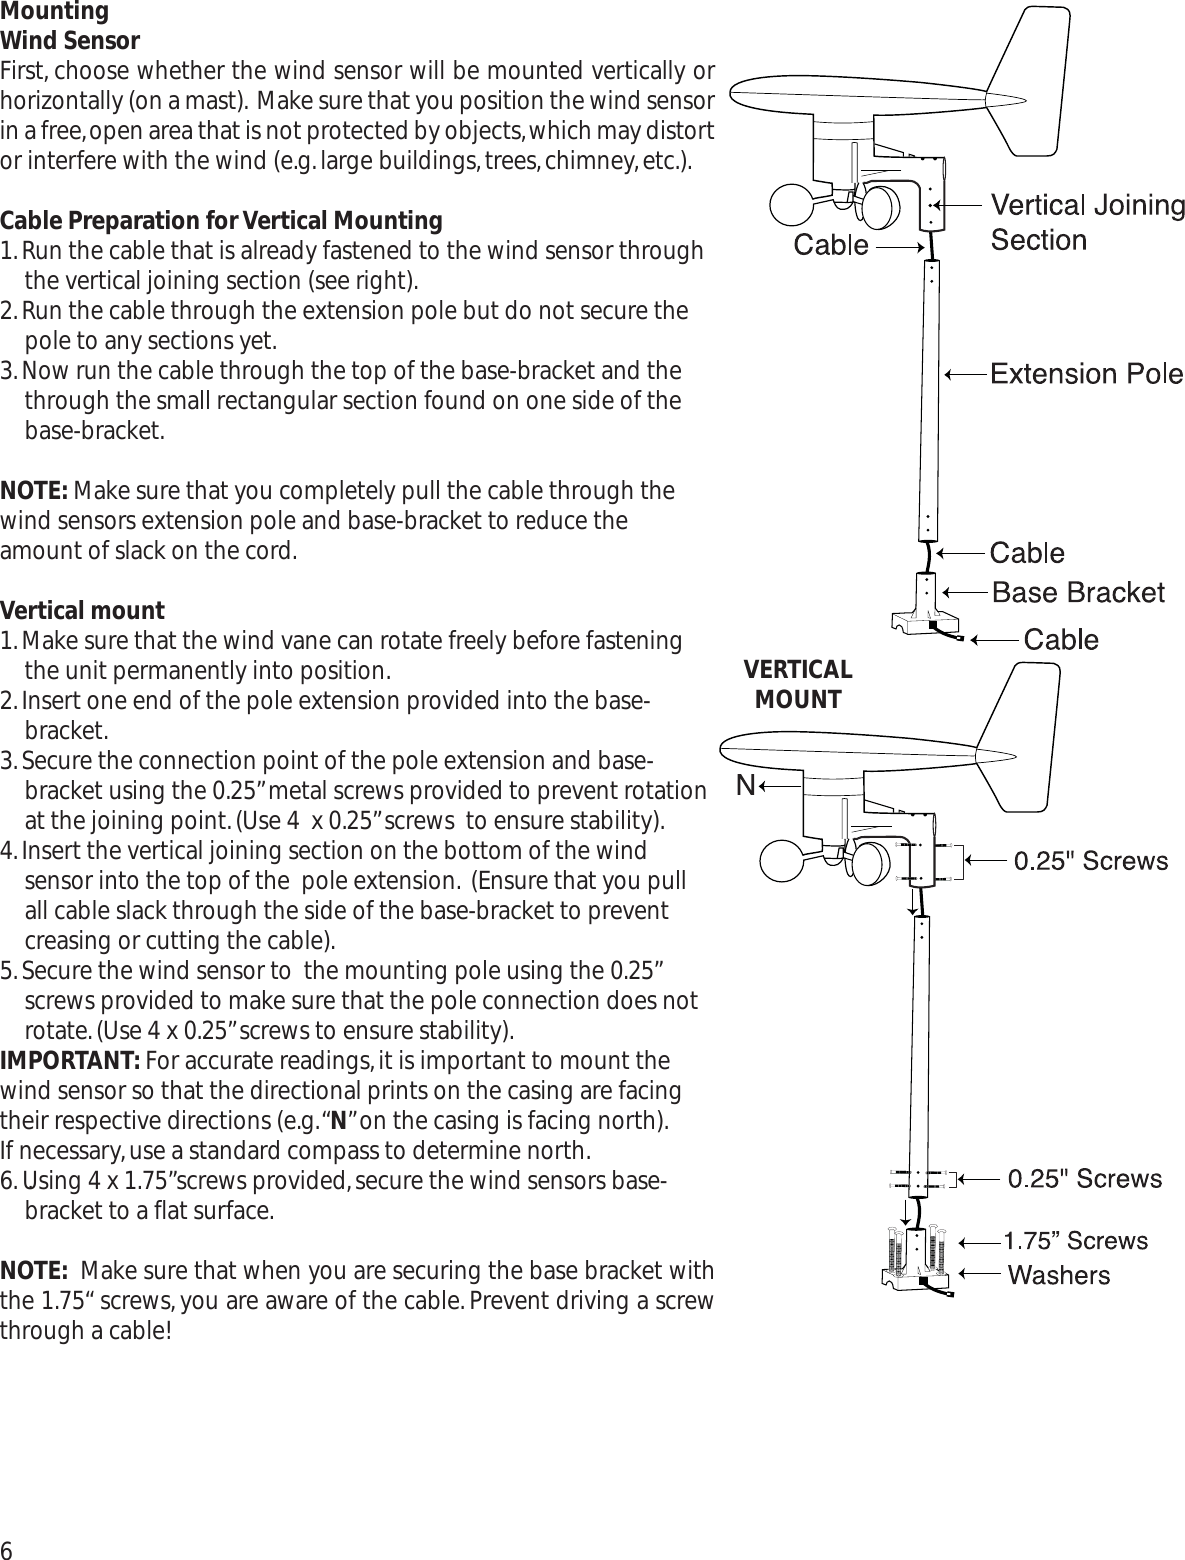
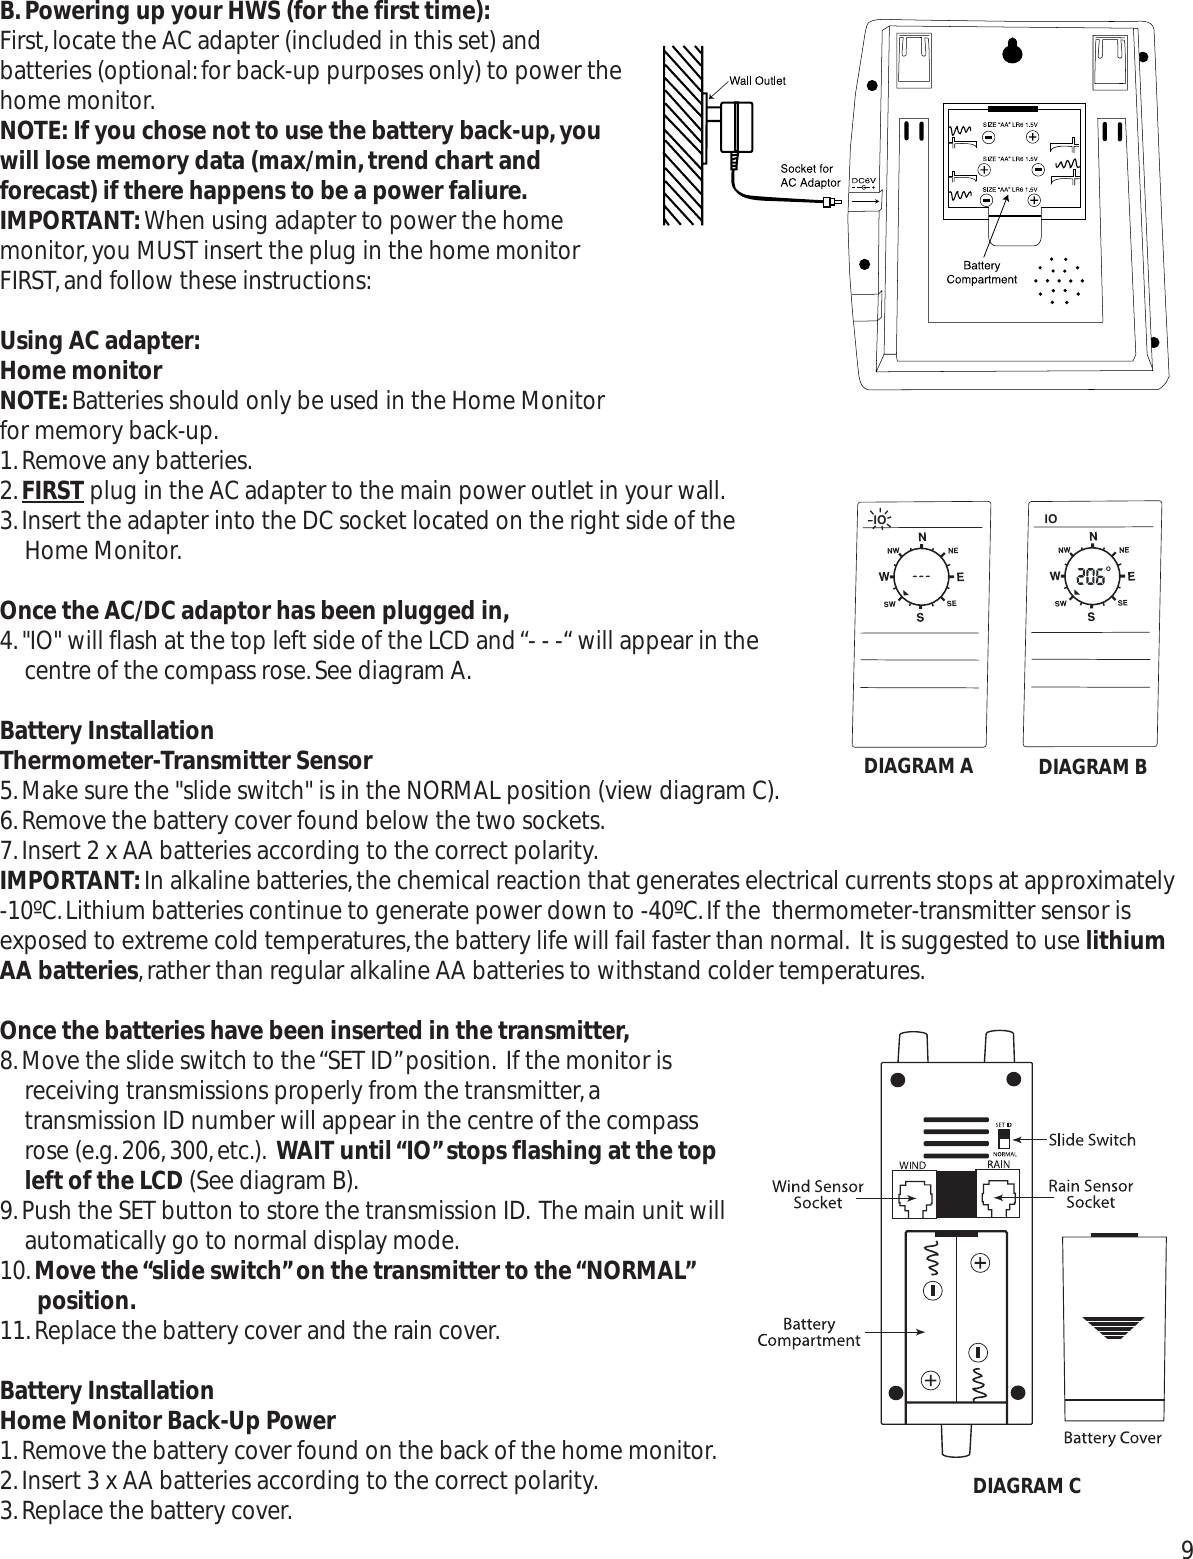
![10.BUTTON BREAKDOWN (Quick Reference)12No. Button1. ALARMbutton2. “+”button3. “-”button4. DISPLAYbutton5. MINbutton6. MAXbutton7. SETbuttonFunction• Press and release to enter “Alarm Set Mode”• Toggles between the multiple segments of the “Alarm Set Mode”• Turns all sounding alarms off (Alarm clock,indoor/outdoor temperature alarms)• Increases values in the “Set Display Mode”(time and date)• Increases values in “Alarm Display Mode”(clock alarm,indoor temperature alarm and outdoortemperature alarm)• Press and hold to reset cumulative rainfall memory• Toggles between mode settings in the “Set Display Mode”(°C,°F,km,mph,mb,inch/inHg,cm,inch) • Decreases values in the “Set Display Mode”(time and date)• Decreases values in the “Alarm Display Mode”(clock alarm,indoor temperature alarm and out-door temperature alarm)• Toggles between mode settings in the “Set Display Mode”(°C,°F,km,mph,mb,inch/inHg,cm,inch)• Activates backlight in "Normal Display Mode"• Runs through 10 different display combinations with assorted sections on the LCD• Press and hold to enter "ID setting mode" if changing transmitter batteries.• Displays minimum memory recordings (Wind Chill [˚C only],Wind Speed,Indoor/outdoorTemperature,Pressure,Rainfall and Humidity)• Press and hold to reset ALL minimum memory recordings• Displays maximum memory recordings (Wind Chill [˚C only],Wind Speed,Indoor/outdoorTemperature,Pressure,Rainfall and Humidity)• Press and hold to reset ALL maximum memory recordings• Press and hold to enter “Set Display Mode”• Toggles between the multiple segments of the “Set Display Mode”• Activates alarms in the “Alarm Set Mode”(clock alarm,indoor temperature alarm and outdoortemperature alarm)• Press to store the transmission ID when in the "ID setting mode"](https://usermanual.wiki/Imperial/DG950/User-Guide-521428-Page-13.png)