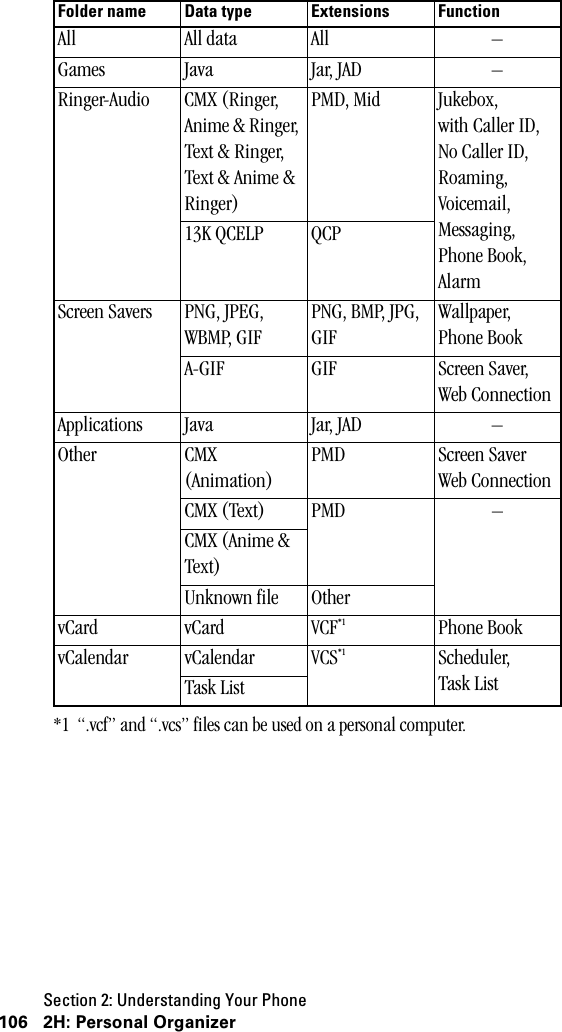
Hitachi SP20 PCS Handset User Manual SprintPCS
Hitachi Ltd PCS Handset SprintPCS
UserManual.wiki
>
Hitachi
>
SP20 User Manual
>
updated Users Manual
Contents
1.
Revised Users manual
2.
revised users manual
3.
updated Users Manual
4.
Revised RF Exposure Manual info
updated Users Manual
Navigation menu
Upload a User Manual
Namespaces
Wiki Guide
HTML
PDF
Info
Views
User Manual
Discussion / Help
Navigation


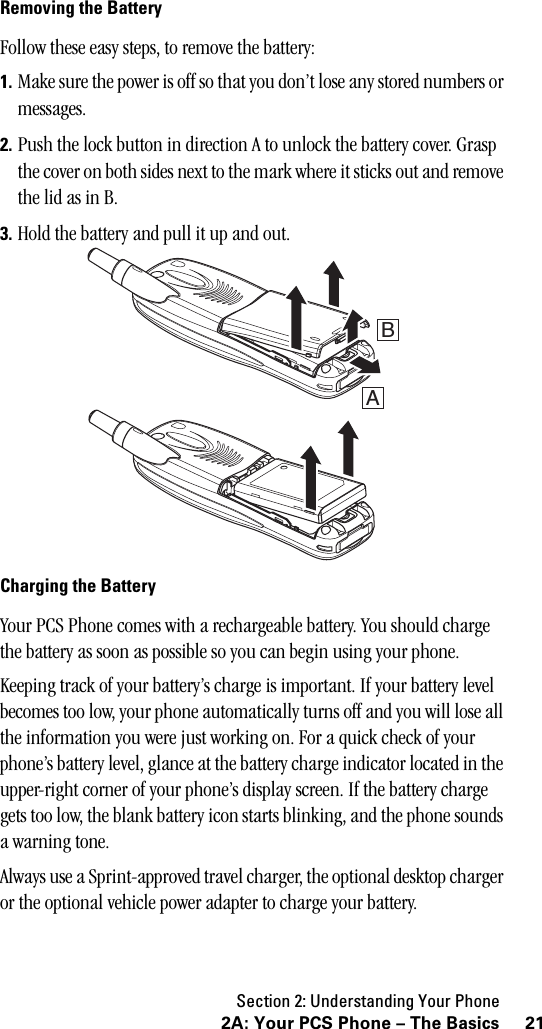

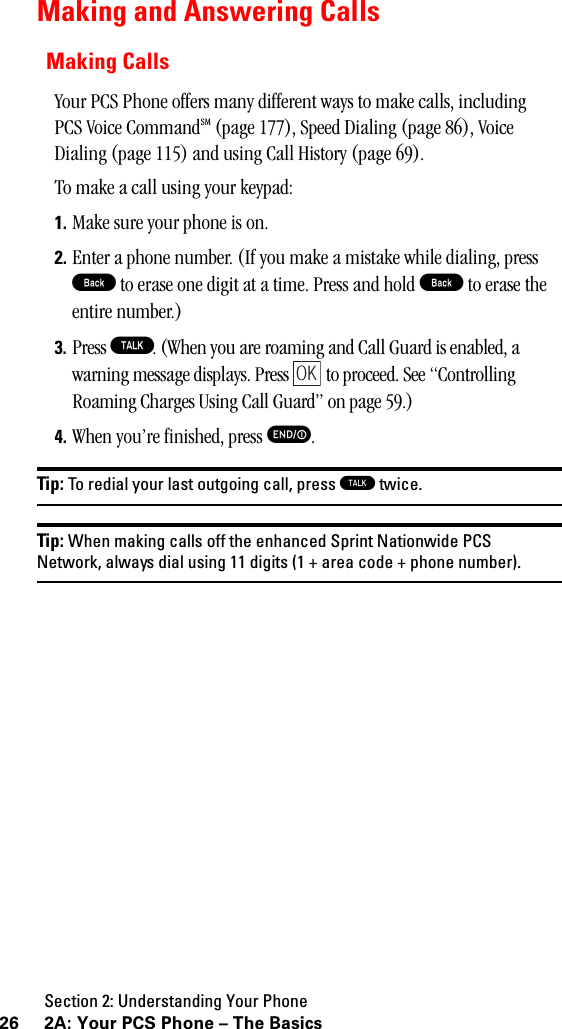
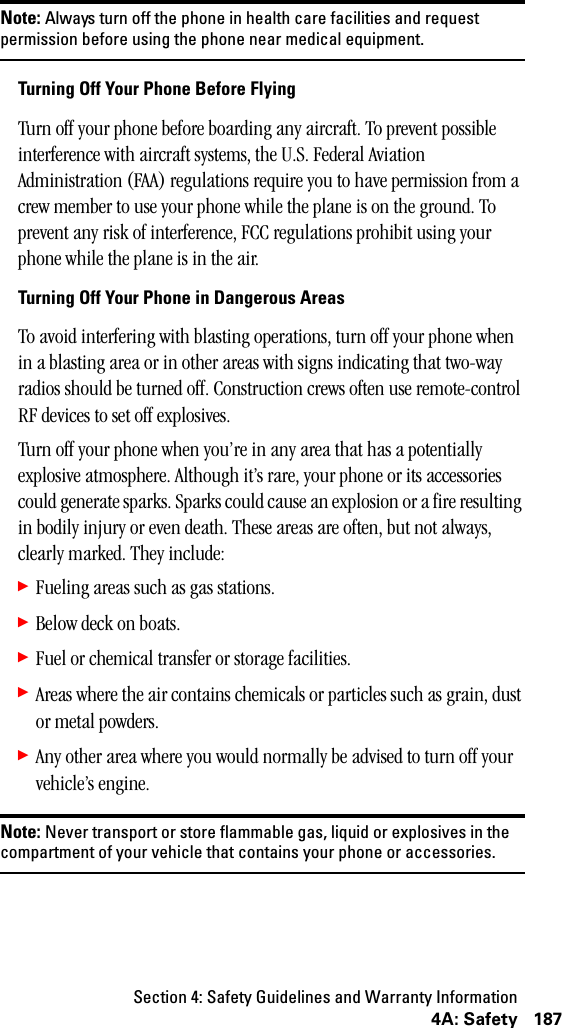
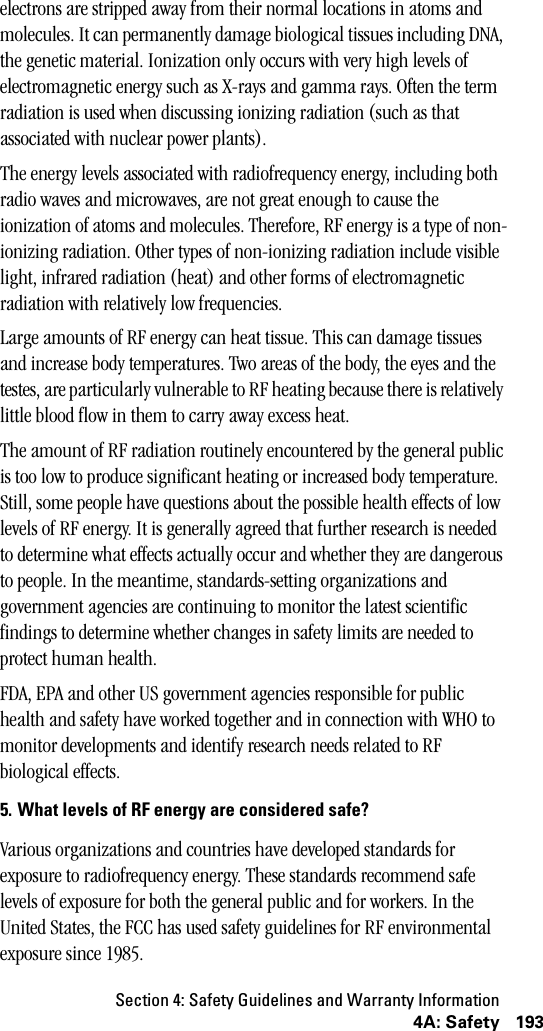
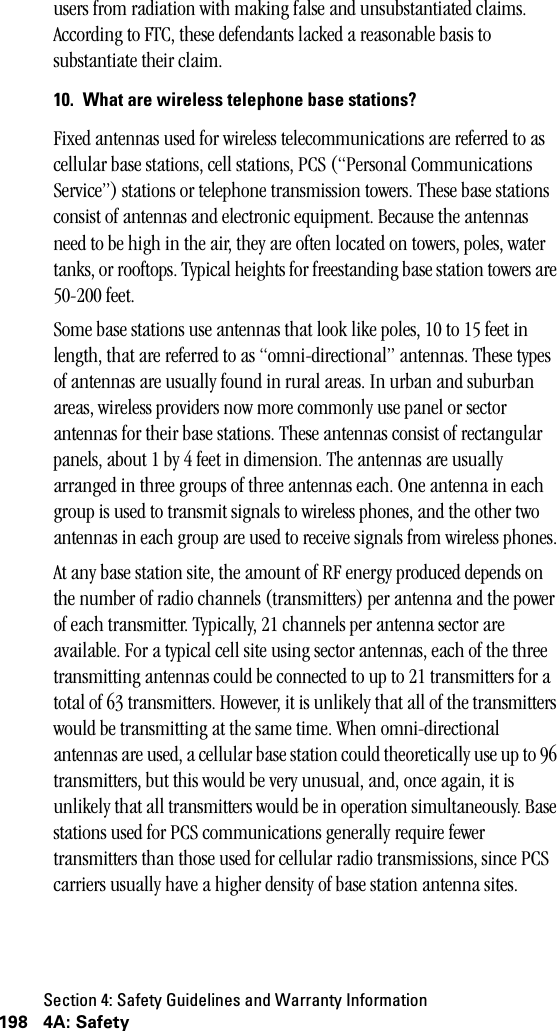
![Section 2: Understanding Your Phone292A: Your PCS Phone – The BasicsTo dial phone numbers with pauses:1. Enter the phone number.2. Press to display the option menu.3. Highlight either Hard Pause [P] or Time Pause [T] and press . Hard Pauses are displayed as a “P” and Time Pauses as a “T”.4. Enter additional numbers.5. When finished, press T.When dialing a number with a hard pause, press T to send the next set of numbers.Dialing Options is displayed when you enter numbers in the Standby mode.To select an option:1. Press to display the option menu.2. Highlight one of options and press .䊳Call to dial the phone number.䊳Save Phone #s to save the phone number in your Internal Phone Book. (See “Adding a New Internal Phone Book Entry” on page 79.)䊳Prepend to add numbers to the beginning of the phone number.䊳Hard Pause [P] to insert a hard pause. (See “Dialing Phone Numbers With Pauses” on page 28.)䊳Time Pause [T] to insert a time pause. (See “Dialing Phone Numbers With Pauses” on page 28.)In-Call OptionsDuring a call, you can display the following menu options by pressing .To select an option, highlight one of options and press .䊳Turn Mute ON to mute your phone’s microphone. Select Turn MuteOFF to reactivate the microphone.OptionsOKOptionsOptionsOKOptionsOK](https://usermanual.wiki/Hitachi/SP20.updated-Users-Manual/User-Guide-279069-Page-38.png)


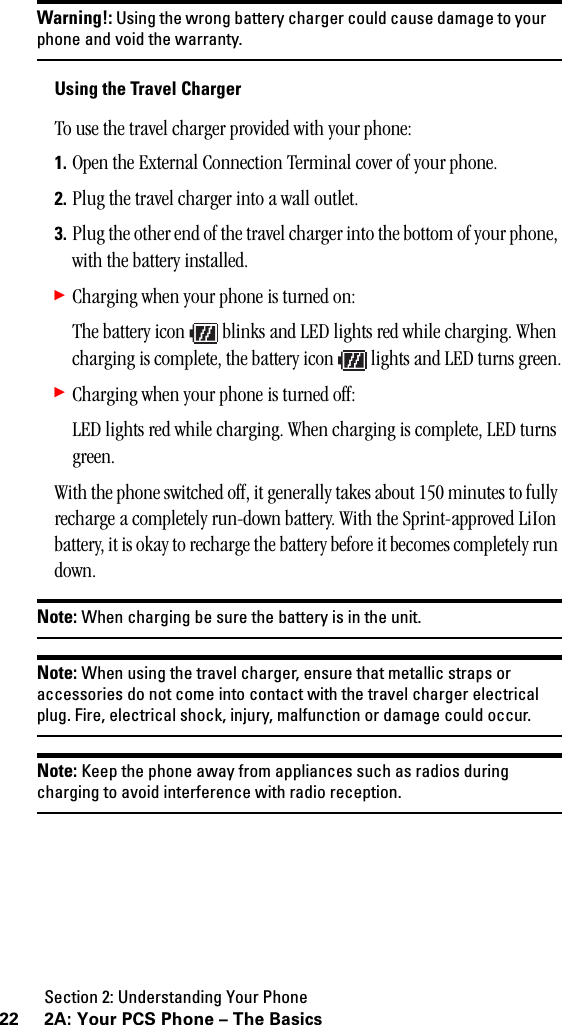
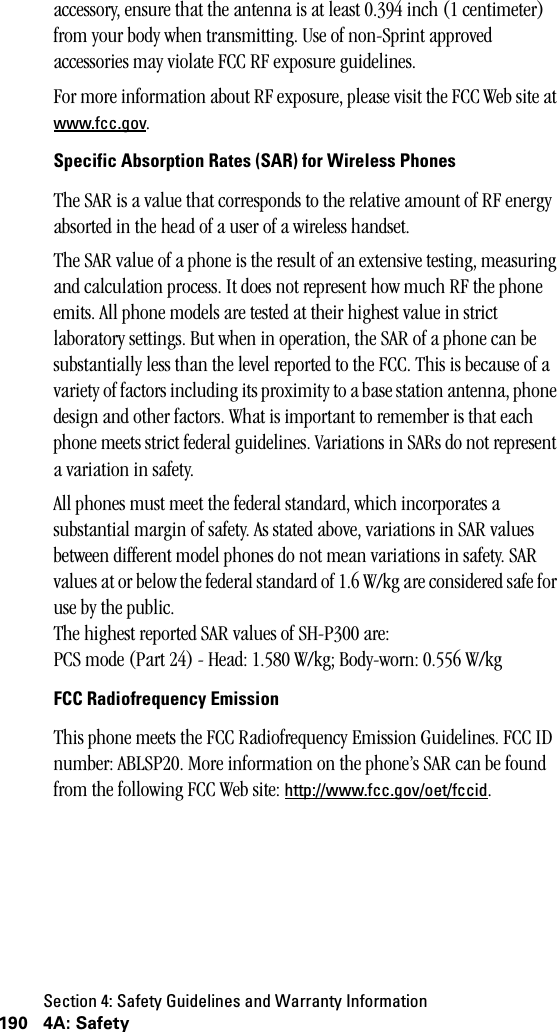
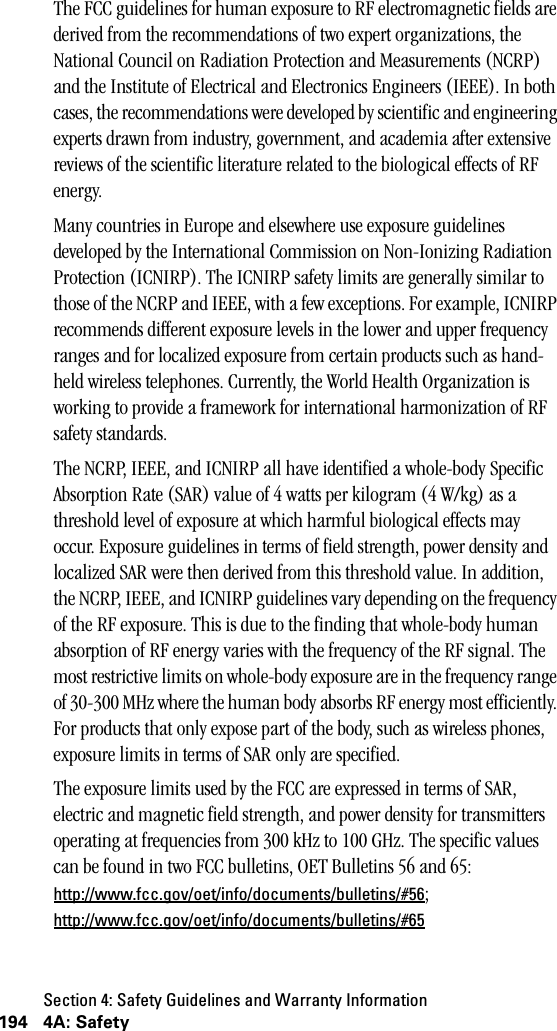
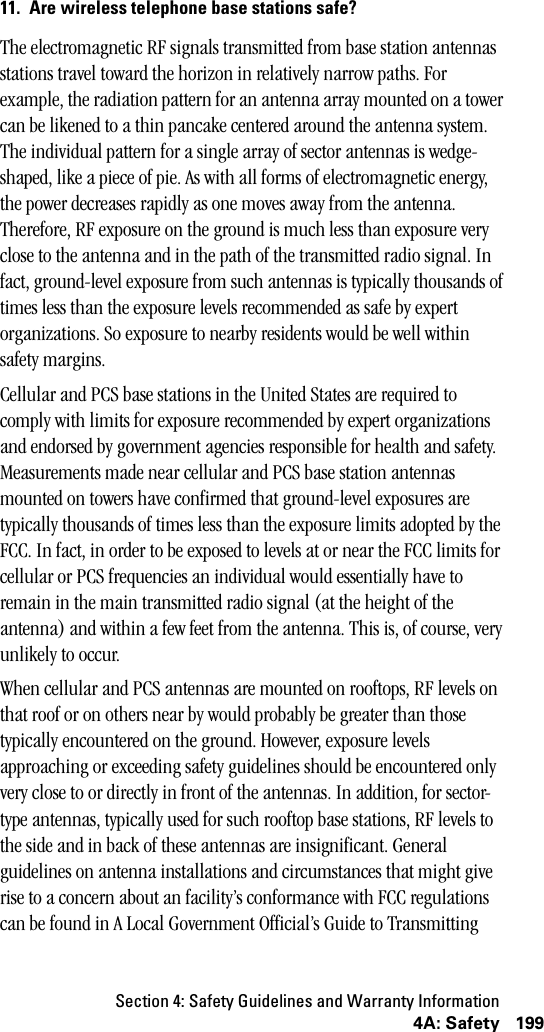
![Section 2: Understanding Your Phone1112H:PersonalOrganizerOptions During Folder Content Data List DisplayWhile the list showing the data in a folder is displayed, highlight the desired data and press . Then highlight one of the options and press .䊳Apply To:: Sets or deletes data. (See “Specifying Data” on page 108.)䊳Erase: Erases the highlighted data. (See “Erasing Data” on page 110.)䊳Rename: Renames the data (up to 40 characters).䊳Property: Displays detailed data information.䊳Attach Email: Attaches the data to an e-mail message and sends the message.䊳Packet Guard: Controls connection to networks when Java applications are running. Select OK (Invocation) [Alert before connecting], NG (Invocation) [Alert before connecting to change settings], OK (Always) [Always connect to networks] or NG (Always) [Never connect to networks].䊳Information: Connects to a URL where MIDlet can be downloaded.䊳Storefront: Connects to a URL for upgrades or other services.䊳Java Info: Displays the trademark information of the selected Java application.Playing Downloaded MelodiesYou can use your phone to play the melodies stored in the Jukebox. There are various playback options, including random playback, and you can change the melody order. If a melody includes images or text, they are played back at the same time as the melody.Storing a MelodyYou can store up to 20 melodies in the Jukebox.Melodies downloaded from the Web or received as e-mail attachments are first stored in a data folder and can then be stored in the Jukebox from the data folder. For more information on storing melodies, see “Specifying Data” on page 108.OptionsOK](https://usermanual.wiki/Hitachi/SP20.updated-Users-Manual/User-Guide-279069-Page-120.png)


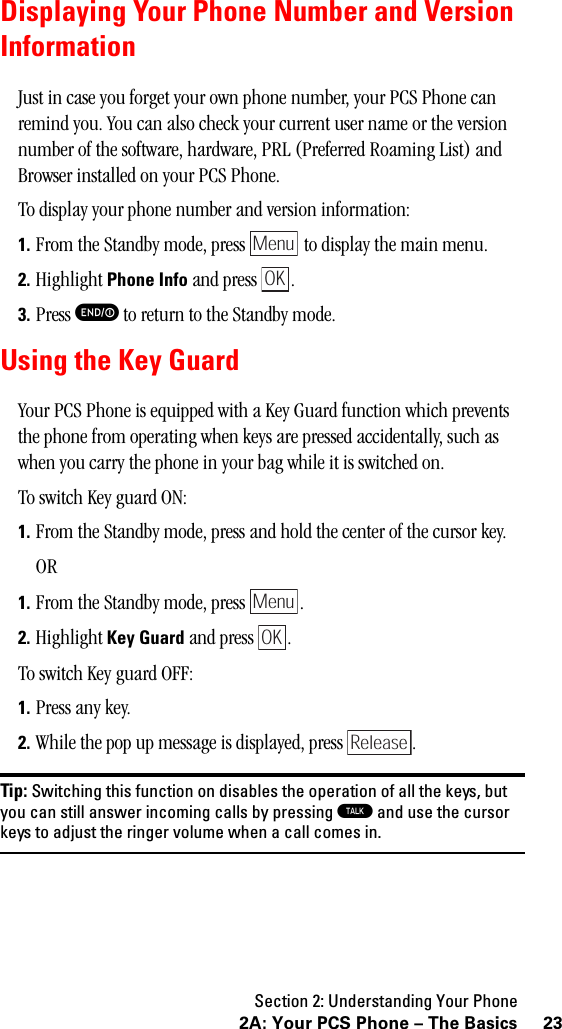
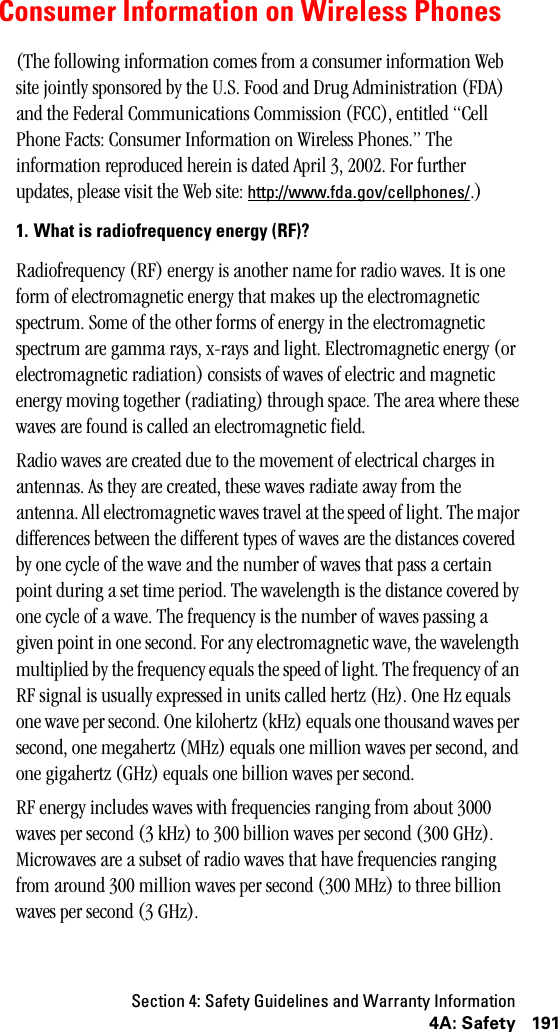
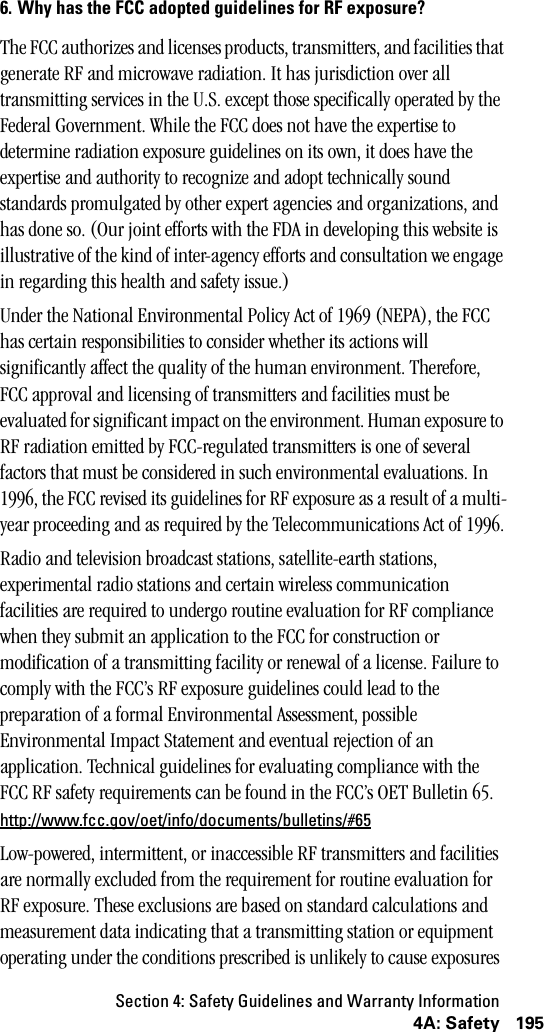
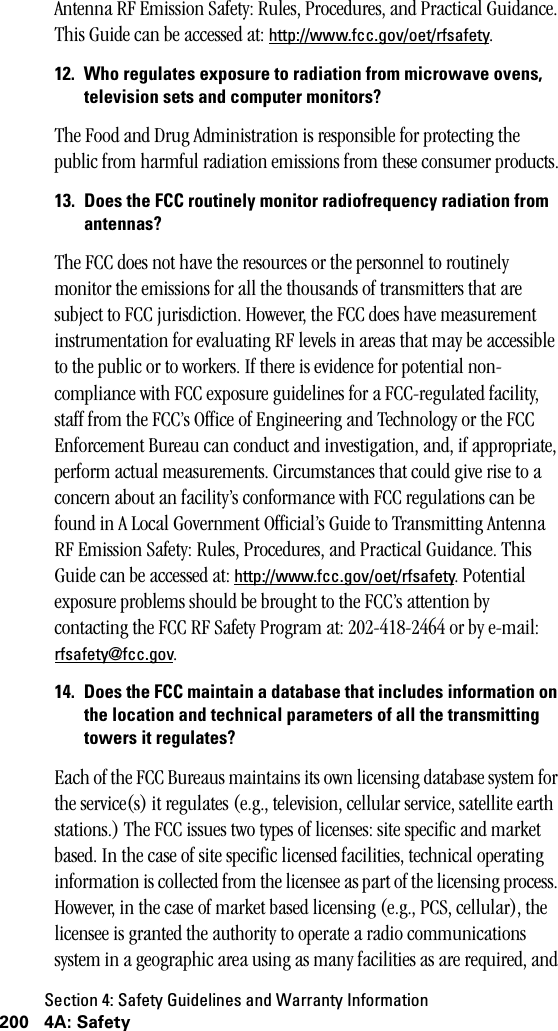
![Section 3: Using PCS Service Features1613B: PCS VisionMessagingNow you can send and receive email and instant messages, as well as chat on select PCS Phones. With chat, you can have a conversation without talking. Join in a Web-based chat room to exchange information on a specific topic or read conversations that others have posted – even launch a one-on-one chat for a more in-depth conversation.Message TypesThere are many types of PCS Text Messaging available on your phone. (PCS Voicemail provides voicemail-to-mailbox messaging. For information on using your phone’s voicemail feature, see “Using Voicemail” on page 144.)䊳Voicemail automatically captures calls when you can’t answer your phone or it is turned off. The voicemail system sends a notification to your phone when you have new voice messages.䊳PCS Messages [appears on your phone’s menu as Notifications] include numeric pages, PCS Messages*, PCS Updates* and alerts that notify you of new PCS Short Mail* and PCS Email*. (For more information, see “Sending PCS Messages” on page 162, “Signing Up for PCS Updates” on page 164, “Using PCS Short Mail” on page 165 or “Using PCS Email” on page 167.)*You may need to chose the PCS Vision option to use these features, depending on your service plan.Note: PCS Vision services may not be available in certain Affiliate areas.](https://usermanual.wiki/Hitachi/SP20.updated-Users-Manual/User-Guide-279069-Page-170.png)
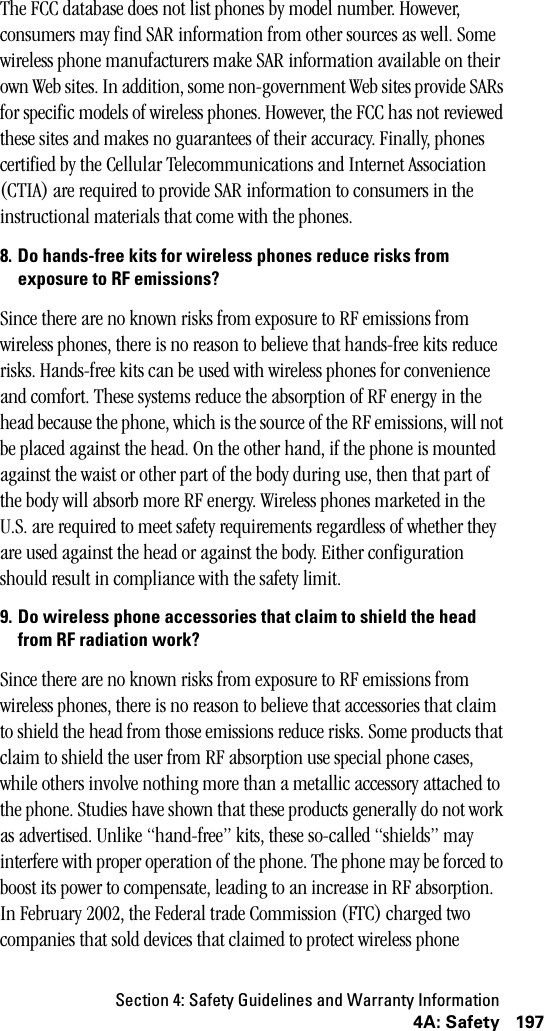
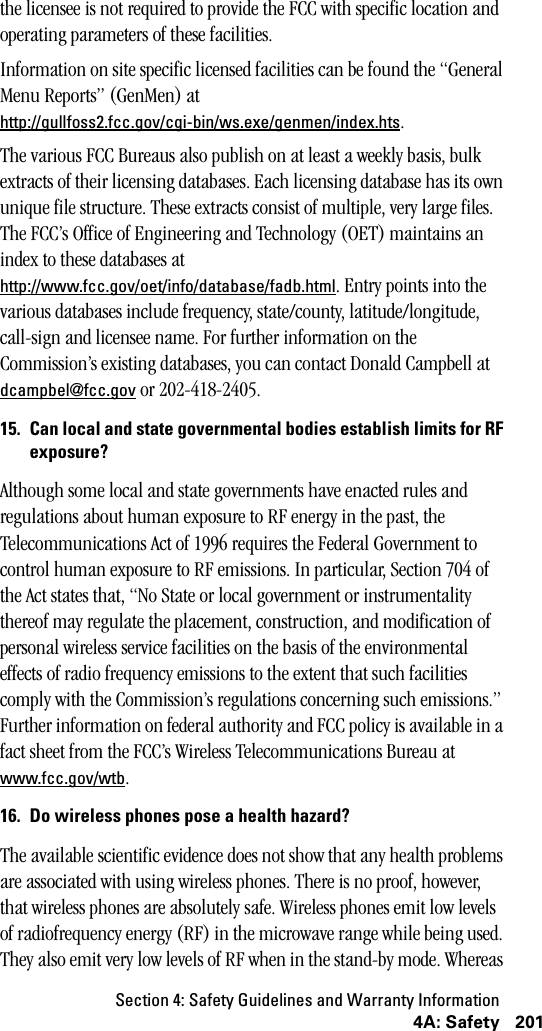
![Section 3: Using PCS Service Features168 3B: PCS Vision6. Select Send and press the Soft Key left when your message is ready to be delivered.ChatPCS VisionSM gives you the ability to join wireless chatrooms from your PCS Phone. Send messages including text and icons to many chatroom participants or launch one-on-one (private) chatrooms. To access a chatroom from the browser:1. Launch the browser.2. Select the Messaging folder.3. Select Chat and select the chatroom you’d like to enter.4. Use your keypad to enter a temporary screen name.5. Scroll through postings to read messages posted by other users.Note: To avoid inadvertent data usage charges, you should log out ofchatrooms when you are ready to exit.To send a message:1. Select [Add Text].2. Use your keypad to enter your message.3. Select Send.To set up a private chatroom:1. Select 1->1 with the Soft Key.Note: You can also download and use a Java-based chat client on yourPCS Phone.](https://usermanual.wiki/Hitachi/SP20.updated-Users-Manual/User-Guide-279069-Page-177.png)


![Section 4: Safety Guidelines and Warranty Information196 4A: Safetyin excess of the guidelines under normal conditions of use. Such exclusions are not exclusions from compliance, but, rather, exclusions from routine evaluation. The FCC’s policies on RF exposure and categorical exclusion can be found in Section 1.1307(b) of the FCC’s Rules and Regulations [(47 CFR 1.1307(b)].7. How can I obtain the Specific Absorption Rate (SAR) value for mywireless phone?The FCC requires that wireless phones sold in the United States demonstrate compliance with human exposure limits adopted by the FCC in 1996. The relative amount of RF energy absorbed in the head of a wireless telephone-user is given by the Specific Absorption Rate (SAR), as explained above. The FCC requires wireless phones to comply with a safety limit of 1.6 watts per kilogram (1.6 W/kg) in terms of SAR.Information on SAR for a specific phone model can be obtained for many recently manufactured phones using the FCC identification (ID) number for that model. The FCC ID number is usually printed somewhere on the case of the phone. Sometimes it may be necessary to remove the battery pack to find the number. Once you have the ID number, go to the following Web address: www.fcc.gov/oet/fccid. On this page, you will see instructions for entering the FCC ID number. Type the FCC ID number exactly as requested (the Grantee Code is the first three characters, the Equipment Product Code is the rest of the FCC ID number). Then click on “Start Search.” The “Grant of Equipment Authorization” for your telephone should appear. Read through the grant for the section on “SAR Compliance,” “Certification of Compliance with FCC Rules for RF Exposure” or similar language. This section should contain the value(s) for typical or maximum SAR for your phone.Phones and other products authorized since June 2, 2000, should have the maximum SAR levels noted directly on the “Grant of Equipment Authorization.” For phones and products authorized between about mid-1998 and June 2000, detailed information on SAR levels is typically found in the exhibits associated with the grant. Once a grant is accessed, the exhibits can be viewed by clicking on “View Exhibit.” Grants authorized prior to 1998 are not part of the electronic database but, rather, have been documented in the form of paper records.](https://usermanual.wiki/Hitachi/SP20.updated-Users-Manual/User-Guide-279069-Page-205.png)

![Section 4: Safety Guidelines and Warranty Information208 4A: Safetyits standards and are used according to the manufacturer’s recommendations are safe for consumer and industrial use. More information is available from: www.fda.gov/cdrh.The EPA has, in the past, considered developing federal guidelines for public exposure to RF radiation. However, EPA activities related to RF safety and health are presently limited to advisory functions. For example, the EPA now chairs an Inter-agency Radiofrequency Working Group, which coordinates RF health-related activities among the various federal agencies with health or regulatory responsibilities in this area.OSHA is responsible for protecting workers from exposure to hazardous chemical and physical agents. In 1971, OSHA issued a protection guide for exposure of workers to RF radiation [29 CFR 1910.97]. However, this guide was later ruled to be only advisory and not mandatory. Moreover, it was based on an earlier RF exposure standard that has now been revised. At the present time, OSHA uses the IEEE and/or FCC exposure guidelines for enforcement purposes under OSHA’s “general duty clause” (for more information see: http://www.osha-slc.gov/SLTC/radiofrequencyradiation/index.html).NIOSH is part of the U.S. Department of Health and Human Services. It conducts research and investigations into issues related to occupational exposure to chemical and physical agents. NIOSH has, in the past, undertaken to develop RF exposure guidelines for workers, but final guidelines were never adopted by the agency. NIOSH conducts safety-related RF studies through its Physical Agents Effects Branch in Cincinnati, Ohio.The NTIA is an agency of the U.S. Department of Commerce and is responsible for authorizing Federal Government use of the RF electromagnetic spectrum. Like the FCC, the NTIA also has NEPA responsibilities and has considered adopting guidelines for evaluating RF exposure from U.S. Government transmitters such as radar and military facilities.The Department of Defense (DOD) has conducted research on the biological effects of RF energy for a number of years. This research is now conducted primarily at the U.S. Air Force Research Laboratory located at Brooks Air Force Base, Texas. The DOD Web site for RF biological effects](https://usermanual.wiki/Hitachi/SP20.updated-Users-Manual/User-Guide-279069-Page-217.png)