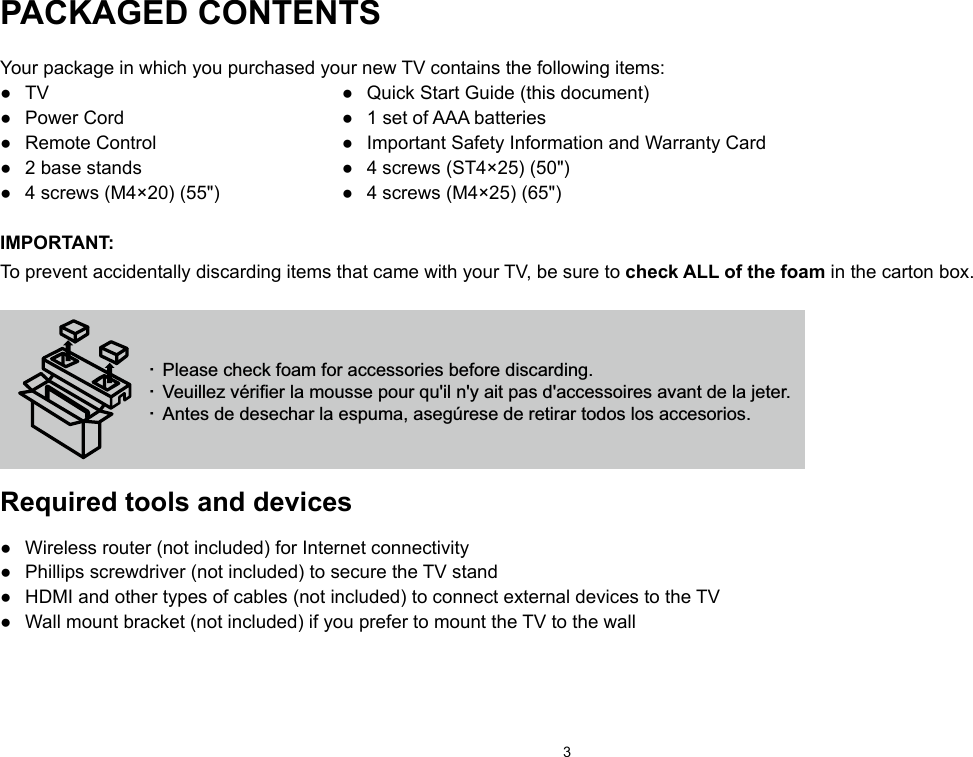
Hisense Electric LCDF0126 Part15 Subpart B-LED LCD TV User Manual TempConfidential W9HLCDF0126 3
Hisense Electric Co., Ltd. Part15 Subpart B-LED LCD TV TempConfidential W9HLCDF0126 3
Contents
- 1. TempConfidential_W9HLCDF0126__User Manual 1-1
- 2. TempConfidential_W9HLCDF0126_User Manual 1-2-1
- 3. TempConfidential_W9HLCDF0126_User Manual 1-2-2
- 4. TempConfidential_W9HLCDF0126_User Manual 1-3
- 5. TempConfidential_W9HLCDF0126_User Manual 2-1
- 6. TempConfidential_W9HLCDF0126_User Manual 2-2
- 7. TempConfidential_W9HLCDF0126_User Manual 2-3-1
- 8. TempConfidential_W9HLCDF0126_User Manual 2-3-2
- 9. TempConfidential_W9HLCDF0126_User Manual 3
TempConfidential_W9HLCDF0126_User Manual 3


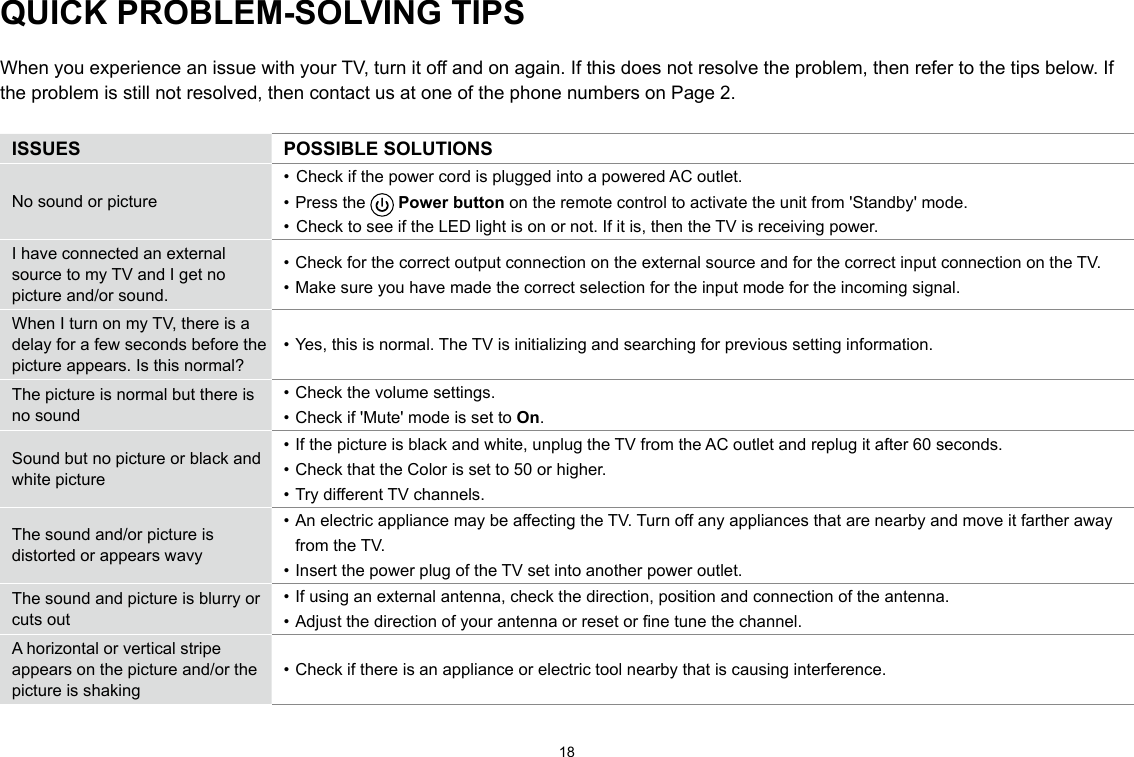
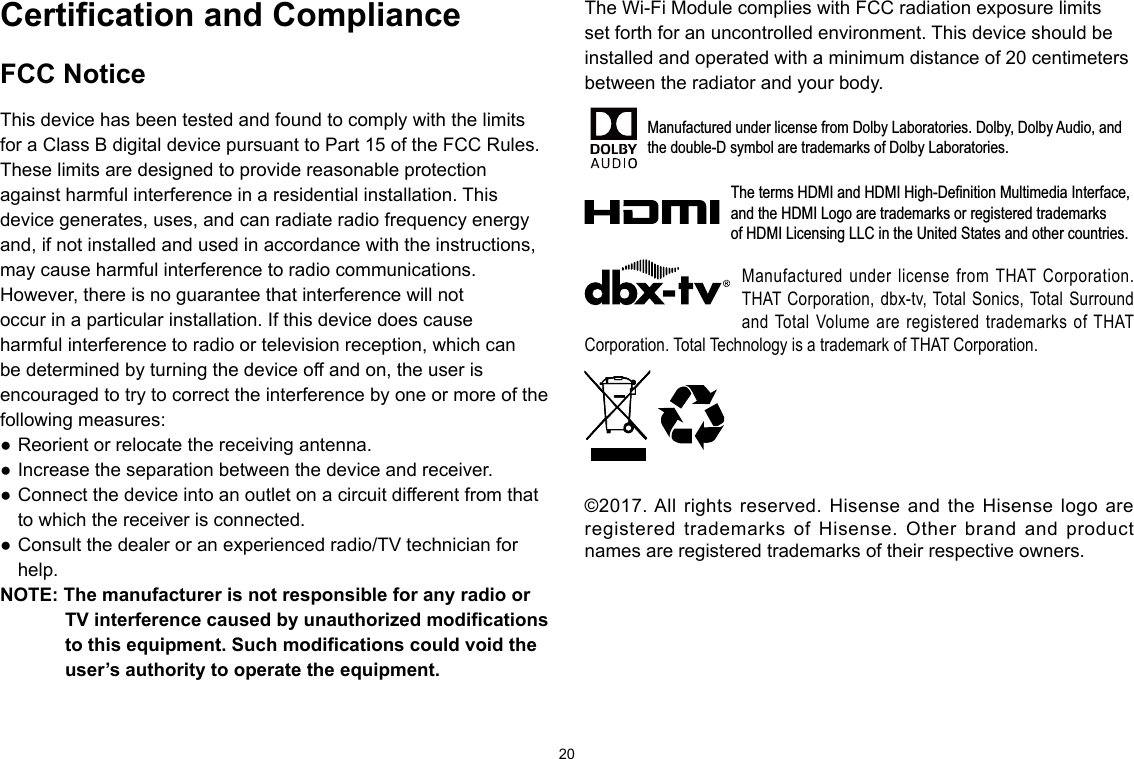
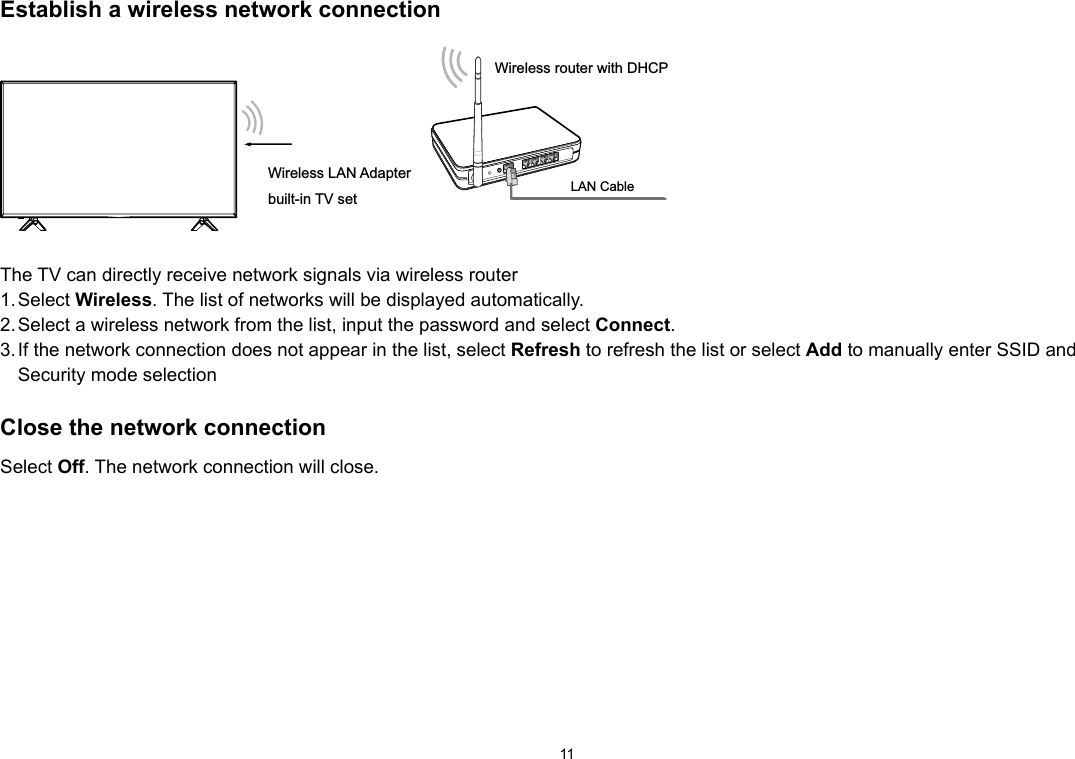
![10STEP 3. Establish a network connection1. Press the [ ] button on the remote control, press[ ˅ ] button to select Settings and then press [OK] to enter the Settings menu.2. Select Network → Network Configuration. TV JACKModem Cable LAN CableLAN CableExternal Modem(ADSL / VDSL / Cable TV) IP Sharer (Router)(with DHCP server) LANEstablish a wired network connectionAutomatically obtain an IP address1. Select Ethernet. The TV will automatically obtain an IP address and connect to the network. NOTE: The default option of IP Settings Mode is DHCP. 2. If the connection fails then "Disconnected" will display for the Ethernet status. Retry or enter the IP Settings, select Manual to input the information again.Manually enter the IP address1. Select Manual.2. Enter the IP Address, Netmask, Gateway, DNS 1 and DNS 2 in the menu. Next, select Save.](https://usermanual.wiki/Hisense-Electric/LCDF0126.TempConfidential-W9HLCDF0126-User-Manual-3/User-Guide-3502749-Page-13.png)
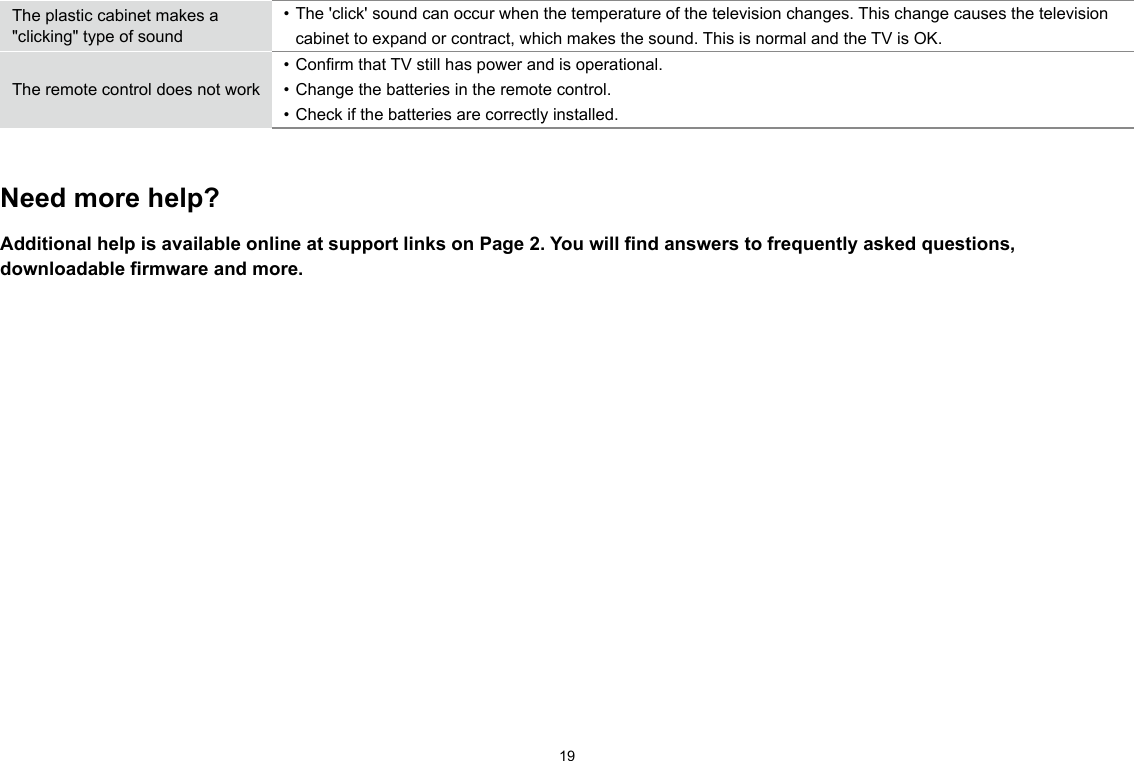
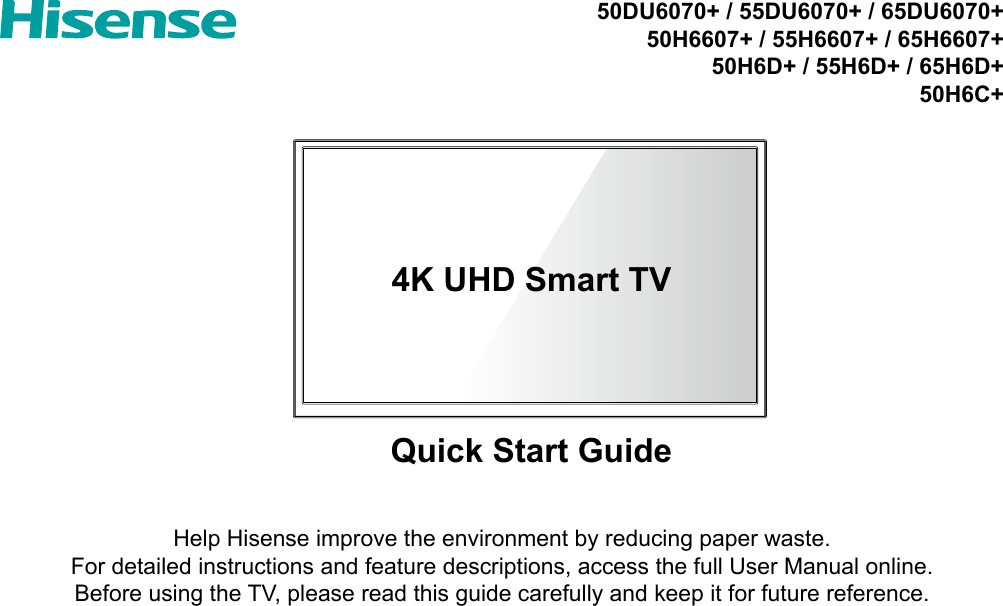
![15Press the Power button on the remote to turn on the TV. A splash screen that shows the logo appears. Next, the First-Time Setup Menu begins by prompting you to choose your Language, Country, and Time Zone.STEP 6. Complete the first-time setup menuAfter the splash screen that shows the logo appears, begin the first-time setup menu.Screen TaskLanguage and Location• Using the D-pad arrows of your remote, choose your Language, Country and Time Zone. End User License Agreement• Choose Decline or Agree, then select Conrmicon and press [OK].TV Usage • Select Home Mode (which appears by default). • NOTE: ‘Store mode’ should only be selected by Retailers who plan to demonstrate the TV.Network Connection• If your TV does not automatically detect an Eth-ernet connection, then use a wireless network. Select your network from the list that displays, input the password. Also you can add a hidden network. 1Time ZonePacificArizonaMountainCentralIndianaEasternCountryMexicoPanamaCosta RicaNicaraguaUSALanguageFrançaisEspañol12345TimMCountryMexicoPanamaCosta RicaNicaraguauauaUSALLaaLaLaLaLaangngngngngngggauauauauauauageggegegegegegFraFrFraançançançaisisisEEspEspEspEsppñañoañoañoañolllllEnglishCanada](https://usermanual.wiki/Hisense-Electric/LCDF0126.TempConfidential-W9HLCDF0126-User-Manual-3/User-Guide-3502749-Page-18.png)