Hisense Electric LCDD0064 LED LCD TV User Manual W9HLCDD0064 7
Hisense Electric Co., Ltd. LED LCD TV W9HLCDD0064 7
UserManual.wiki
>
Hisense Electric
>
LCDD0064 User Manual
>
W9HLCDD0064_User Manual 7
Contents
1.
W9HLCDD0064_User Manual 1
2.
W9HLCDD0064_User Manual 2
3.
W9HLCDD0064_User Manual 3
4.
W9HLCDD0064_User Manual 5
5.
W9HLCDD0064_User Manual 6
6.
W9HLCDD0064_User Manual 7
7.
W9HLCDD0064_User Manual 8
8.
W9HLCDD0064_User Manual 4
9.
W9HLCDD0064_User Manual 9
W9HLCDD0064_User Manual 7
Navigation menu
Upload a User Manual
Namespaces
Wiki Guide
HTML
PDF
Info
Views
User Manual
Discussion / Help
Navigation
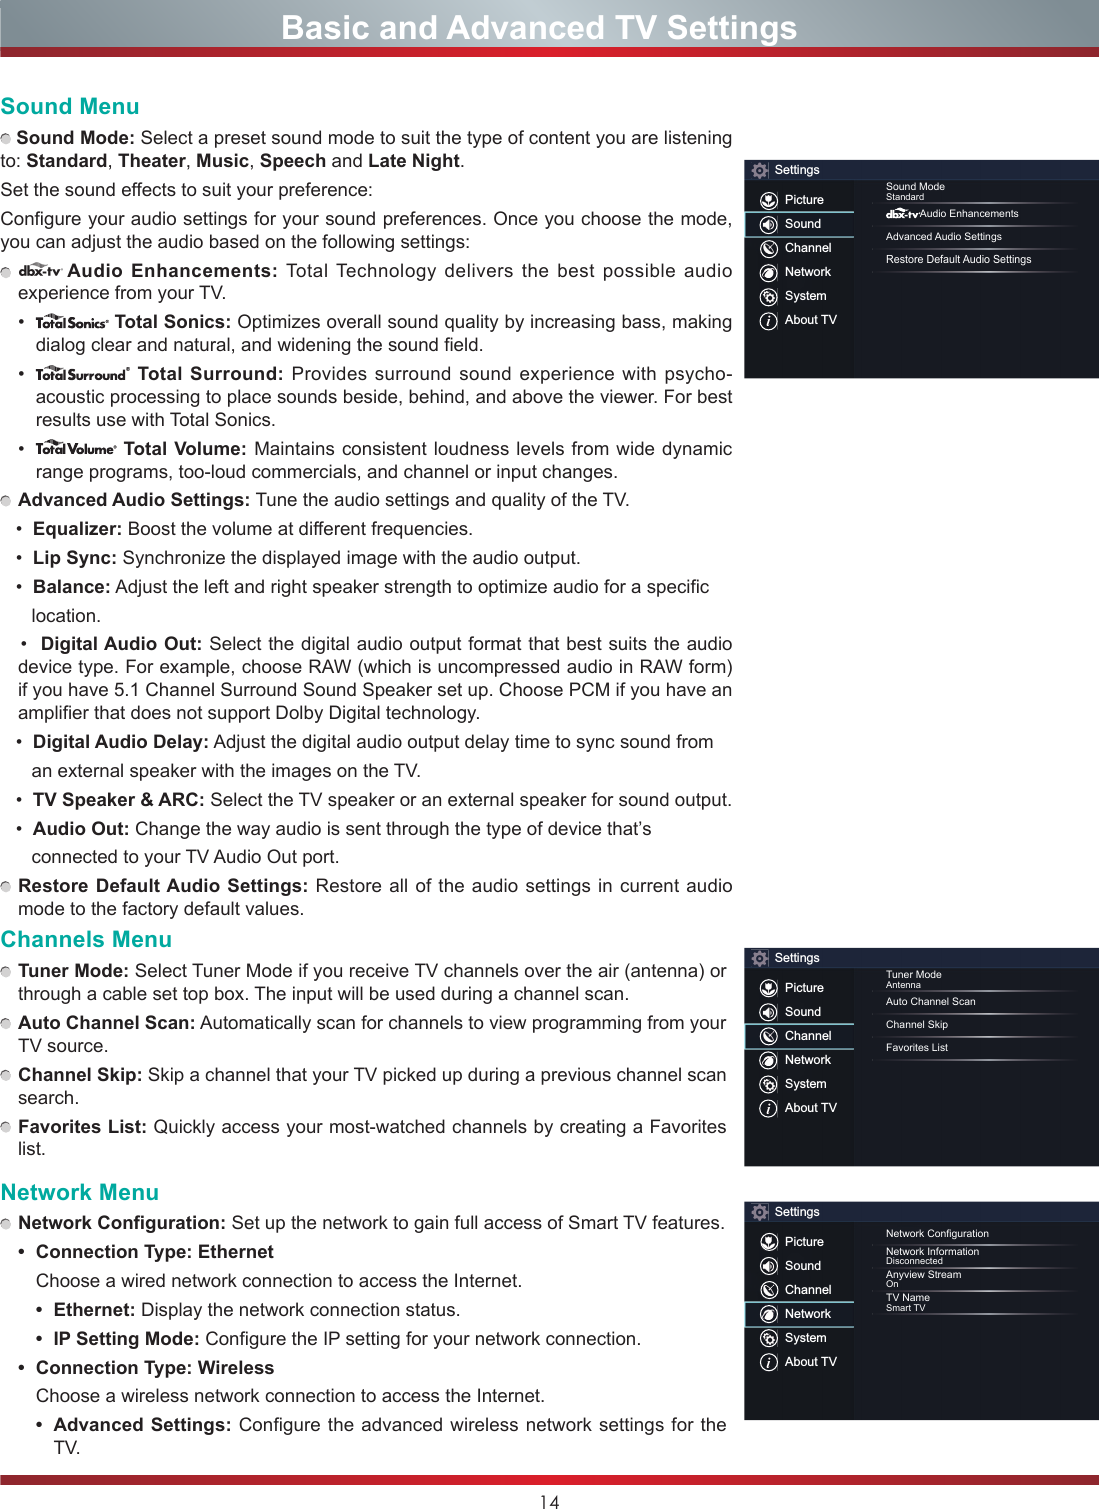
![11Completing the First-Time Setup MenuNow that you have attached the TV stand and connected your external devices, it's time to complete the first-time setup menu. Completing the First-Time Setup MenuPress the [Power] button on the remote to turn on the TV. A splash screen that shows the Hisense logo appears. Next, the First-Time Setup Menu begins by prompting you to choose your Language, Country, and Time Zone. After the splash screen that displays the Hisense logo appears, begin the first-time setup menu. Screen TaskLanguage and LocationLANGUAGE AND LOCATIONLanguageLanguage ModeTerms Network Input DoneEnglish United State SelectCountry Time Zone1. Using the D-pad arrows of your remote, choose your Language, Country and Time Zone. 2. Next, navigate to the Forward arrow and press OK.TIP: The edge of the drop-down boxes and the back and forward arrows change to blue when you select them.Terms of ServiceTERMS OF SERVICEAccept allAccept EULAAccept Terms of Serv...Language ModeTerms Network Input DoneThe EULA and Terms must be accepted in order to continue.1. Press [OK] on your remote to select Accept All. 2. When you’re done, then navigate to the Forward arrow and press [OK]. TV Usage ModeTV USAGE MODETV ModeHomeLanguageHome ModeIn Home Mode, your TV will automatically adjust the brightness of your screen based on the ambient light in the room. This mode is ENERGY STAR certified.ModeTerms Network Input DoneSelect Home (which appears by default) and then navigate to the Forward arrow to press [OK].Note: ‘Store mode’ should only be selected by Retailers who plan to demonstrate the TV.](https://usermanual.wiki/Hisense-Electric/LCDD0064.W9HLCDD0064-User-Manual-7/User-Guide-3180552-Page-1.png)
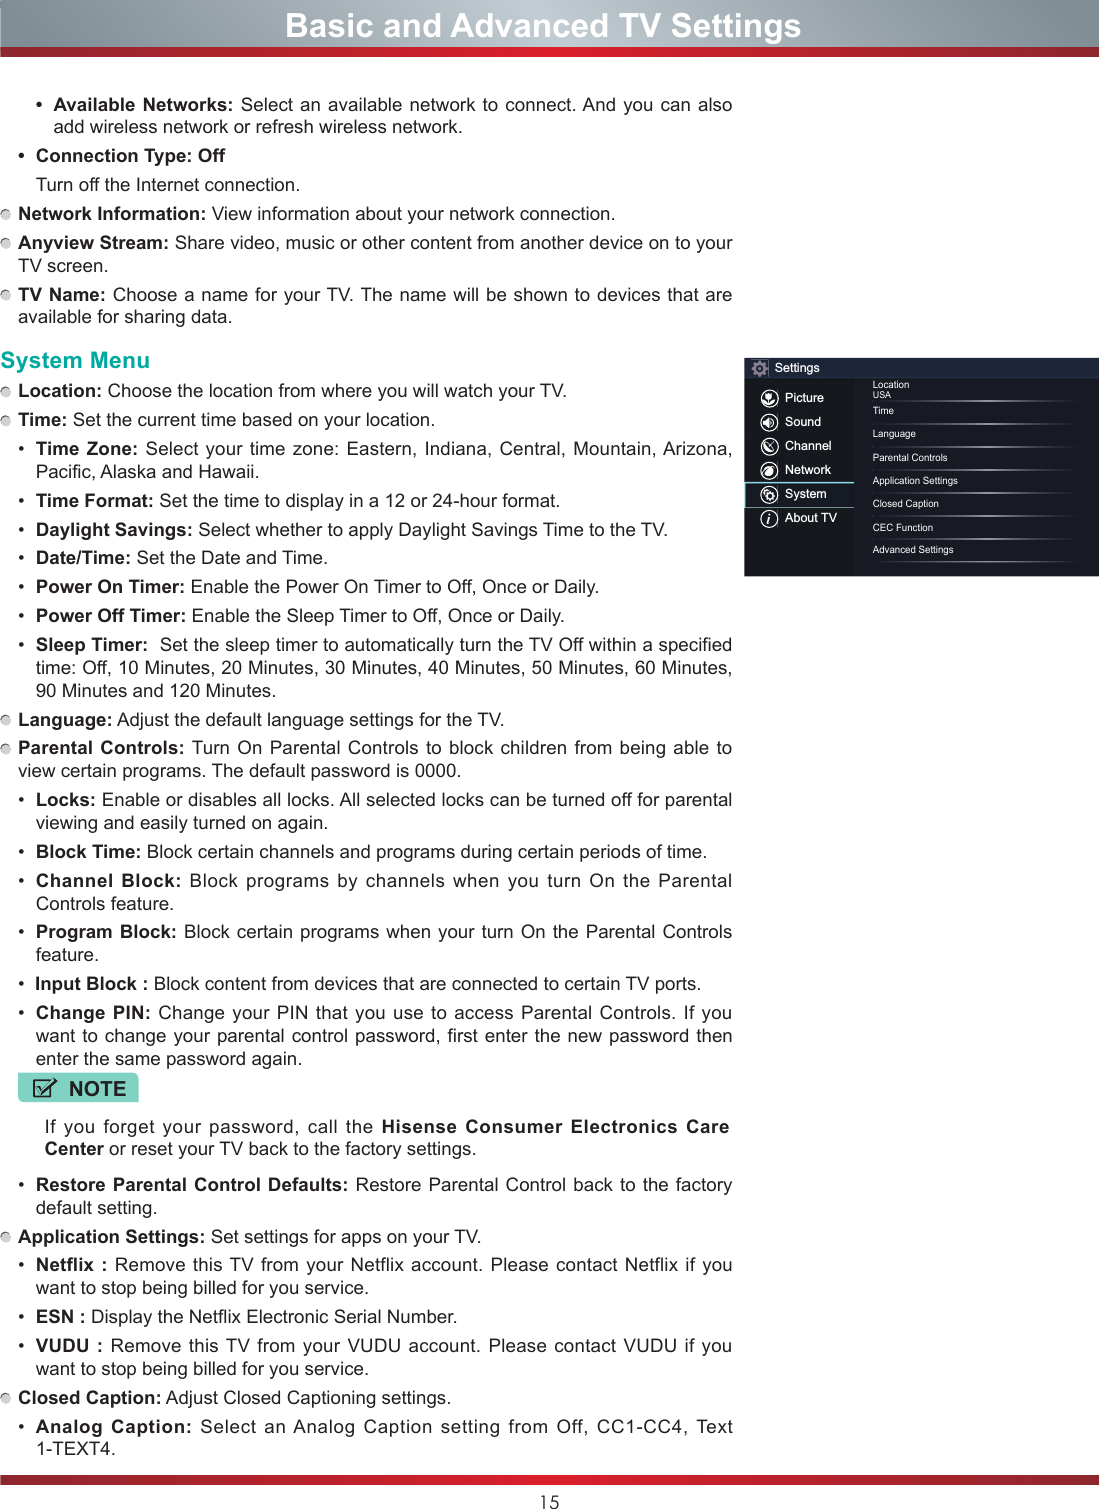
![12Completing the First-Time Setup MenuScreen TaskNetwork ConnectionNETWORK CONNECTIONLanguage TermsEthernetConnecting EthernetConfigureWiFiMode Network Input DoneIf your TV does not automatically detect an Ethernet con-nection, then select Wi-Fi. When you’re done, select your network from the list that displays and move to the next screen.TV Input Source Select how you receive your TV channels. Choosefrom one of the following sources below and then moveto the next screen.•TV•AV•Component•HDMINOTE: If you use an antenna to receive channels, thenyoumustcompletetherst-timesetupmenuinorder to run a channel scan.Congratulations! Your TV is now ready to use.Press [OK] on your remote if you are fine with the selections that appear on the screen. Otherwise, navigate to the back arrow on the screen to change your selection.First-time Setup Menu (continued) CONGRATULATIONS !Your TV is now ready to use TV SelectionsEnglish United States Eastern Home Mode Ethernet TVOKLanguage Terms Mode Network Input DoneLanguage Terms Mode Network Input DoneREMOTE BUTTON SETUPAVHDMI2HDMI1COMPONENTTV](https://usermanual.wiki/Hisense-Electric/LCDD0064.W9HLCDD0064-User-Manual-7/User-Guide-3180552-Page-2.png)
![13Your Hisense TV comes with many TV setting features to allow you to customize the picture based on your viewing preference and environment. Accessing the Quick Setup MenuYou can press the [Quick Setup menu] button [ ] and press the right arrow on the D-pad to view the full menu settings. The Quick Setup menu consists of the following settings:• Picture• Sound• Channel• Network• System• About TV Basic and Advanced TV SettingsPicture MenuIf you’d like to configure the settings for your picture, then there are six types of picture modes available: Vivid, Standard, Theater, Energy Saving, Game and Sport.Once you choose the mode, you can adjust the picture based on the following settings: Brightness: Adjust the Brightness level to generate lighter or darker images. Contrast: Adjust the Contrast level to increase or decrease how bright images appear. Color: Adjust the color intensity of the picture for a more vibrant image. Aspect Ratio: Adjust the Aspect Ratio to stretch or zoom in on your picture. You can choose from the following settings: Normal, Zoom, Wide, Cinema, 1:1 PIXEL MAP, Panoramic, Direct, Auto. Backlight: This TV has a Dynamic Backlight Control setting that you can set to off, high or low. The Backlight setting enables you to adjust how bright you want images to appear. In addition, an Eco Sensor setting is available that will enable the TV to automatically adjust the picture settings according to the amount of ambient light in your room. This is a money-saving feature because it reduces power consumption. Advanced Picture Settings: Adjust advanced picture settings based on your viewing preference. •Display: Adjust advanced picture settings in the component source. •OverScan: Change the video size settings to slightly crop the edges of the displayed image.•Tint: Adjust the colors from a green to magenta tint to view the natural skin tones of people on the screen. •Sharpness: Adjust how sharp or soft edges of images appear.•Noise Reduction: Improve how clear the picture appears by reducing noise. •Adaptive Contrast: Automatically darken dark areas and lighten light areas of images to see more details.•Color Temperature: Select a preset color temperature.•White Balance: Adjust the intensity of red, green and blue lights to view the true colors of all images in the picture.•Color Tuner: Adjust the Hue, Saturation and Brightness of color settings. Restore Default Picture Settings: Restore all the picture settings in the current picture mode to the factory default values.SettingsPictureSoundChannelNetworkSystemAbout TVPicture ModeStandardBrightness50Contrast50Color50Aspect RatioWideBacklightAdvanced Picture SettingsRestore Default Picture Settings](https://usermanual.wiki/Hisense-Electric/LCDD0064.W9HLCDD0064-User-Manual-7/User-Guide-3180552-Page-3.png)