Hanwha Techwin DIGIMAXV800 Digital Camera User Manual v800en c V19
Samsung Techwin Co Ltd Digital Camera v800en c V19
UserManual.wiki
>
Hanwha Techwin
>
DIGIMAXV800 User Manual
>
Users Manual 3 of 3
Contents
1.
Users Manual 1 of 3
2.
Users Manual 2 of 3
3.
Users Manual 3 of 3
Users Manual 3 of 3
Navigation menu
Upload a User Manual
Namespaces
Wiki Guide
HTML
PDF
Info
Views
User Manual
Discussion / Help
Navigation
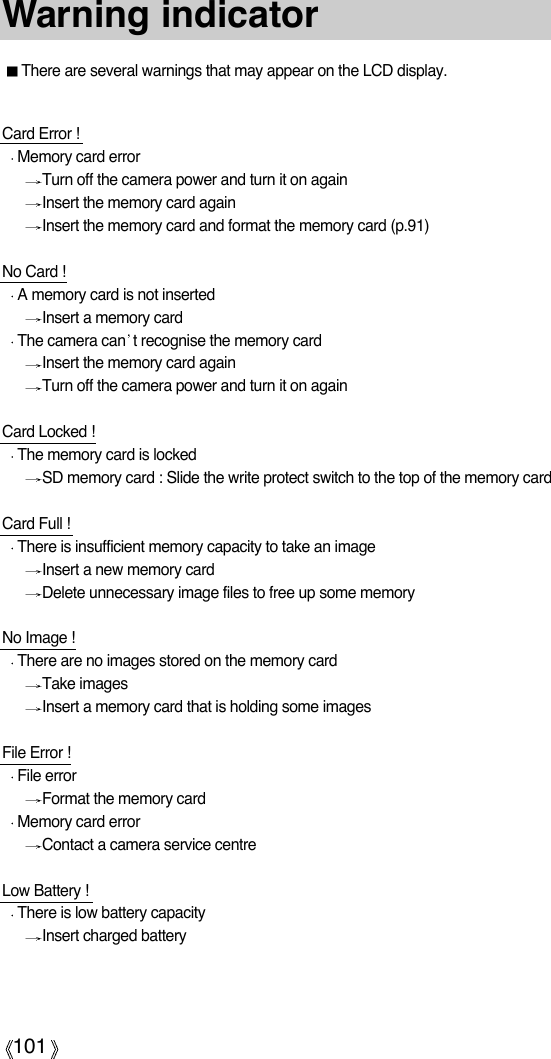
![83PictBridgeYou can use the USB cable to connect this camera to a printer that supports PictBridge (soldseparately) and print the stored images directly. TIFF, Movie clips and voice files cannot beprinted. You can set up the following settings from the PictBridge menu.Images : Select the pictures to be printed.PRINTER SETUP : Setting up printing(Auto Set/Custom Set)Print : Printing picturesDPOF Print : Printing the DPOF filesReset : Initialising the PictBridge functionsConnecting the Camera to a Printer1. Press the POWER button to turn on the camera.2. In a mode other than Voice Recording mode, press theMENU button.3. Press the LEFT/ RIGHT button and select [Setup] menutab.4. Select [USB] menu by pressing the UP/ DOWN buttonand press the RIGHT button.5. Select [Printer] menu by pressing the UP/ DOWN buttonand press the OK button.6. Press the menu button twice and the menu will disappear.7. Use the supplied USB cable to connect the camera to the printer as shown below.8. Turn on the printer to connect the camera to the printer.If you selected [Computer] in Step 5, when you connect the camera to your printer, the Modedial lamp(Green) will illuminate and the connection will not be established. In this case,disconnect the USB cable, and then follow the procedure from Step 2 and onward.Back: Set : OKSetup ImprintSound ComputerUSB Printer](https://usermanual.wiki/Hanwha-Techwin/DIGIMAXV800.Users-Manual-3-of-3/User-Guide-572104-Page-1.png)
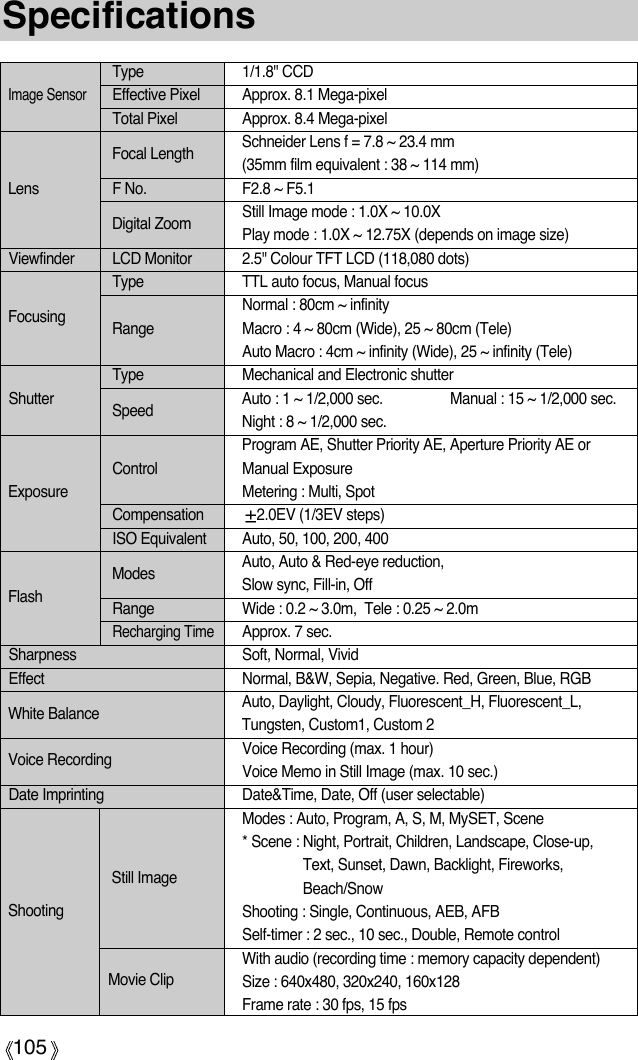
![84PictBridge: Picture SelectionSelect pictures to print1. Connect the camera to your printer. The USB menu mustbe set to [Printer] before you connect the camera to theprinter. (See p.83)2. The [Images] menu will appear.3. Use the UP and DOWN buttons to select the desiredsubmenu value, and then press the OK button.When [One Pic] is selected : The PictBridge function willbe applied only to the picture currently displayed.When [All Pics] is selected : The PictBridge function will be applied to all pictures,excluding TIFF, movie clips and voice files.[ When [One Pic] is selected ] [ When [All Pics] is selected ]- Press the Up/Down button to select the number of prints. - Use the Left/Right button to select another picture and select the number of prints foranother picture.- After setting the number of prints, press the OK button to save.- Press the Shutter button to return to the menu without setting the number of prints.0Exit:Shutter Set:OKSetting the Number of Copies to Print- Select [One Pic] or [All Pics]. A screen where you can set the number of copies to print willappear as shown below.PREV NEXT0Exit:Shutter Set:OKMove : One PicAll PicsImages](https://usermanual.wiki/Hanwha-Techwin/DIGIMAXV800.Users-Manual-3-of-3/User-Guide-572104-Page-2.png)
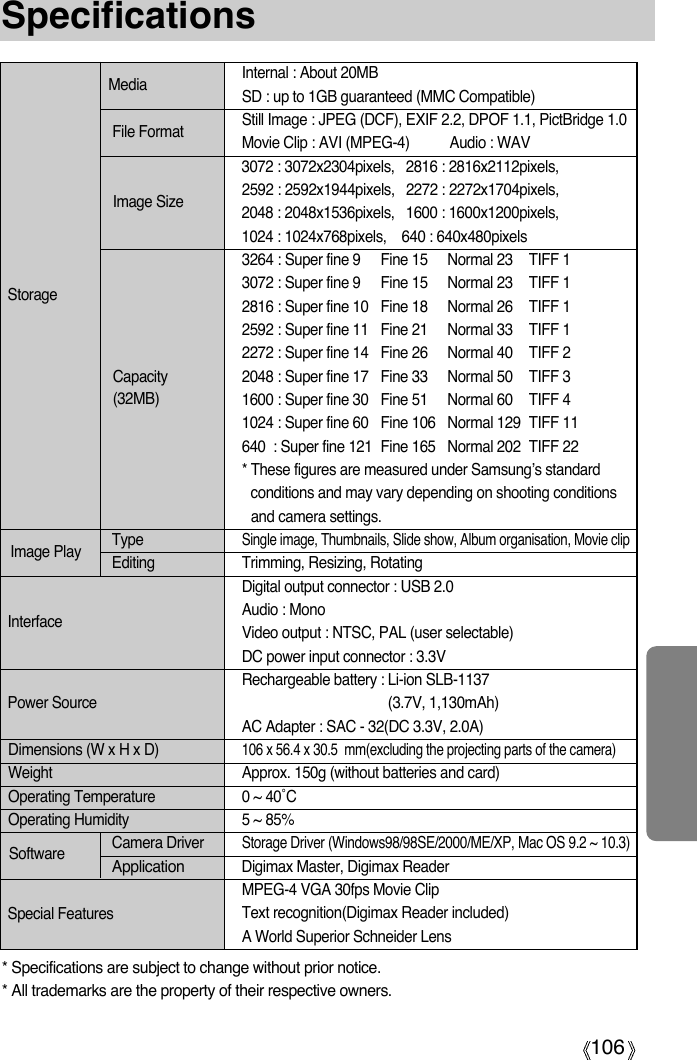
![85PictBridge: Print SettingMenuSize Setting the size of the printing paperAuto, Postcard, 4x6, 2L, A4, Letter, A3LayoutSetting the number of pictures to be printed on a sheet of paperAuto, Full, 1, 2, 4, 8, 9, 16Type Setting the quality of the printing paper Auto, Plain, Photo, FastphotoQualitySetting the quality of the picture to be printedAuto, Draft, Normal, FineDate Setting whether to print the date Auto, Off, OnFile Name Setting whether to print the file name Auto, Off, OnAUTO SET1. Connect the camera to your printer. The USB menumust be set to [Printer] before you connect the camerato the printer. (See p.83)2. Use the LEFT and RIGHT buttons to select the [AutoSet] menu tab.3. Use the UP and DOWN buttons to select the desiredsubmenu value, and then press the OK button.[No] : [Custom Set] values are kept.[Yes] : All values in the [Custom Set] are automatically changed.Some menu options are not supported in all manufacturer and printer models. If notsupported, the menus are still displayed in the LCD, but are not selectable.If the setting values are not changed in the automatic/manual setting, the setting values areautomatically kept.1. Connect the camera to your printer. The [USB] menumust be set to [Printer] before you connect the camera tothe printer.(See p.83)2. Use the LEFT and RIGHT buttons to select the [CustomSet] menu tab.3. Use the UP and DOWN buttons to select the desiredsubmenu value, and then press the RIGHT button.4. Use the UP and DOWN buttons to select the desiredsubmenu value, and then press the OK button.CUSTOM SET : You can select the Paper Size, Print Format, Paper Type, Print Quality, DatePrint, and File Name Print menus for printed pictures.Function Sub menuThe menus you can set up are as follows:Move : NoYesAuto SetCustom SetBack:Set : OKSize AutoLayOut PostcardType 4X6](https://usermanual.wiki/Hanwha-Techwin/DIGIMAXV800.Users-Manual-3-of-3/User-Guide-572104-Page-3.png)
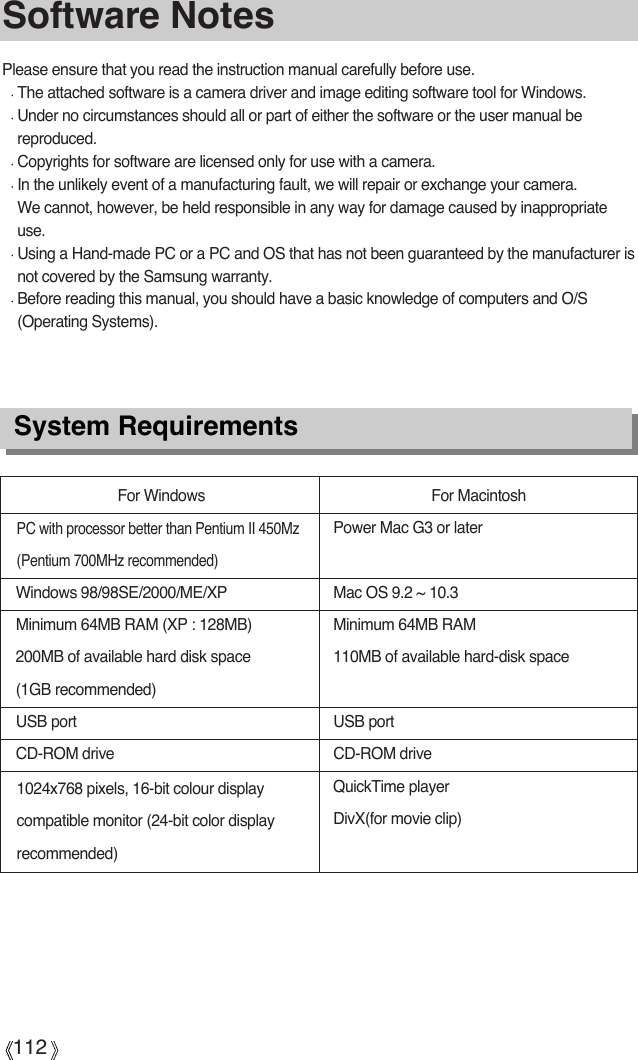
![86PictBridge: PrintingPrinting Pictures1. Connect the camera to your printer. The USB menumust be set to [Printer] before you connect the camerato the printer. (See p.83)2. Use the LEFT and RIGHT buttons to select the [Print]menu tab.3. Use the UP and DOWN buttons to select the desiredsubmenu value, and then press the OK button.[Standard] : Print the pictures stored in the memorycard in set numbers. One picture is printed on one piece of paper.[Index] : Print multiple images on one sheet of paper.1. Connect the camera to your printer. The [USB] menumust be set to [Printer] before you connect the camerato the printer. (See p.83)2. Use the LEFT and RIGHT buttons to select the [DPOFPrint] menu tab.3. Use the UP and DOWN buttons to select the desiredsubmenu value, and then press the OK button.[No] : Cancel the printing[Yes] : Directly print the file with the DPOF informationDepending on the manufacturer and printer model, some menus may not be available.With a printer without supporting the DPOF, the menu is still displayed but not available.4. The screen shown on the right will appear and thepicture will be printed. If no picture is selected, the [NoImage !] message will be displayed. Press the Menu/OKbutton while printing to cancel the printing and the [Print]menu is displayed.Number of pictures in a index print varies depends onthe printer used.DPOF PRINT : This allows you to directly print the files with DPOF information.PrintMove:StandardIndexNow Printing1/1Cancel : OKDPOF PrintMove:NoYes](https://usermanual.wiki/Hanwha-Techwin/DIGIMAXV800.Users-Manual-3-of-3/User-Guide-572104-Page-4.png)
![87PictBridge : RESETInitialises user-changed configurations.1. Connect the camera to your printer. The [USB] menumust be set to [Printer] before you connect the camerato the printer. (See p.83)2. Use the LEFT and RIGHT buttons to select the [Reset]menu tab.3. Use the UP and DOWN buttons to select the desiredsubmenu value, and then press the OK button.- If [No] is selected : Settings will not be reset.- If [Yes] is selected : All print and image settings will be reset.Default print setting varies depending on the printer manufacturer.For your printer’s default setting, refer to the user’s guide that came with your printer.ResetMove:NoYes](https://usermanual.wiki/Hanwha-Techwin/DIGIMAXV800.Users-Manual-3-of-3/User-Guide-572104-Page-5.png)
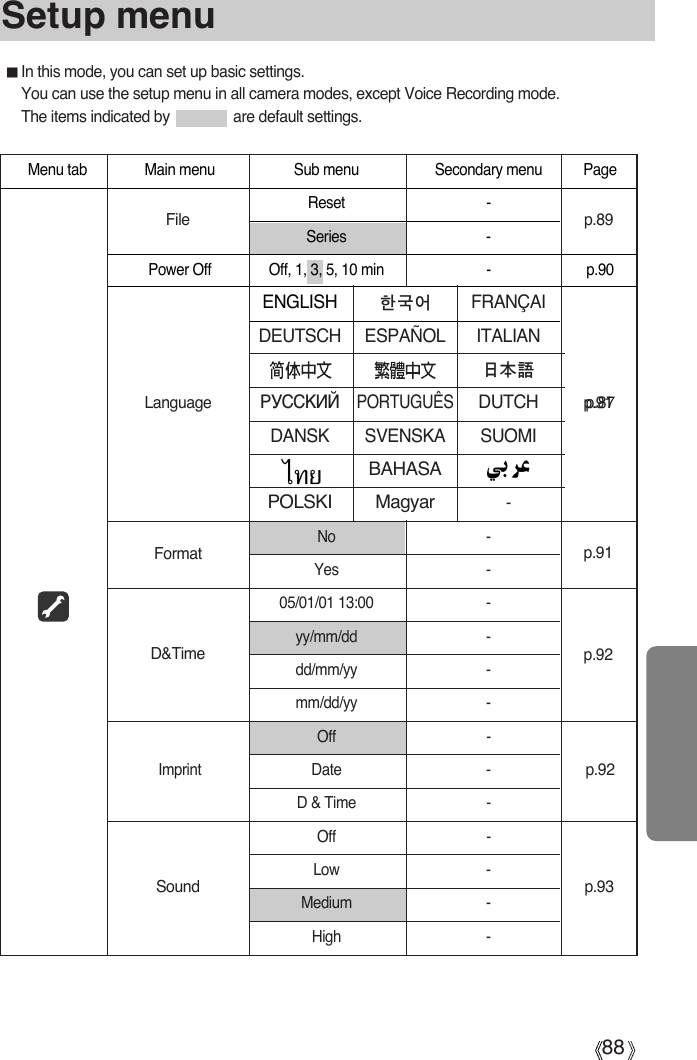
![89Setup menuThis function allows the user to select the file naming format.Assigning File Names1. In any mode with the exception of Voice Recording mode,press the MENU button.2. Press the LEFT/ RIGHT button and select the [Setup]menu tab.3. Select the [File] menu by pressing the UP/ DOWN buttonand press the RIGHT button.4. Select a desired sub menu by pressing the UP/ DOWNbutton and press the OK button.[Reset] : After using the reset function, the next file name will be set from 0001 evenafter formatting, deleting all or inserting a new memory card.[Series] : New files are named using numbers that follow the previous sequence, evenwhen a new memory card is used, or after formatting, or after deleting allpictures5. Press the menu button twice and the menu will disappear.File name* Menus are subject to change without prior notice.Back:Set : OKFileResetPower Off SeriesLanguage3072SetupMenu tab Main menu Sub menu Secondary menu PageComputer -Printer -Off -On -Dark -LCD Normal - p.94Bright -NTSC -PAL -Quick View Off/ 0.5, 1, 3sec -p.96No -Yes -USBVideo OutAF LampResetp.93p.94p.95p.96](https://usermanual.wiki/Hanwha-Techwin/DIGIMAXV800.Users-Manual-3-of-3/User-Guide-572104-Page-7.png)
![90File nameThe first stored folder name is 100SSCAM, and the first file name is SV200001.File names are assigned sequentially from SV200001 SV200002 ~ SV209999.The folder number is assigned sequentially from 100 to 999 as follows: 100SSCAM 101SSCAM ~ 999SSCAM.The files used with the memory card conform to the DCF(Design rule for Camera Filesystems) format.INFORMATIONEven if the batteries or AC adapter are removed and inserted again, the power off settingwill be preserved.Note that the automatic power off function will not operate if the camera is in PC mode, slideshow, playing back a voice recording, playing back a movie clip or during composite shooting.INFORMATIONAuto power offSetting Power Off1. In any mode with the exception of Voice Recording mode,press the MENU button.2. Press the LEFT/ RIGHT button and select the [Setup]menu tab.3. Select the [Power Off] menu by pressing the UP/ DOWNbutton and press the RIGHT button.4. Select a desired sub menu by pressing the UP/ DOWNbutton and press the OK button.[Off] : The power off function will not operate.[1, 3, 5, 10min] : The power will turn off automatically if not used for the period of timespecified.5. Press the menu button twice and the menu will disappear.This function switches the camera off after a set amount of time in order to preventunnecessary battery drainage.Back:Set : OKFileOffPower Off 1 minLanguage 3 min3072Setup](https://usermanual.wiki/Hanwha-Techwin/DIGIMAXV800.Users-Manual-3-of-3/User-Guide-572104-Page-8.png)
![91Language Setting Language1. In any mode with the exception of Voice Recording mode,press the MENU button.2. Press the LEFT/ RIGHT button and select the [Setup]menu tab.3. Select the [Language] menu by pressing the UP/ DOWNbutton and press the RIGHT button.4. Select a desired sub menu by pressing the UP/ DOWNbutton and press the OK button. LANGUAGE sub menu : English, Korean, French, German, Spanish, Italian, S. Chinese,T. Chinese, Japanese, Russian, Portuguese, Dutch, Danish, Swedish, Finnish, Thai,BAHASA(MALAY/ INDONESIAN) and Arabic. 5. Press the menu button twice and the menu will disappear.Formatting a Memory Card1. In any mode other than Voice Recording mode, press theMENU button.2. Press the LEFT/ RIGHT button and select the [Setup]menu tab.3. Select the [Format] menu by pressing the UP/ DOWNbutton and press the RIGHT button.4. Select a desired sub menu by pressing the UP/ DOWNbutton and press the OK button.If [No] is selected : The memory card will not be formatted. Press the menu button twice and the menu display will disappear. If [Yes] is selected : A [Please Wait !] message appears and the memory card will beformatted. If you ran FORMAT in Play mode, a [No Image !]message will appear.There is a choice of languages that can be displayed on the LCD monitor. Even if the batteries orAC adapter are removed and inserted again, the language setting will be preserved.Formatting a memory cardThis is used for formatting the memory card. If you run [Format] on the memory card, allimages, including the protected images, will be deleted. Be sure to download importantimages to your PC before formatting the memory card.Be sure to run [Format] on the following types of memory card.- A new memory card, or an unformatted memory card.- A memory card that has a file this camera can t recognise or one that has been takenfrom another camera.Always format the memory card using this camera. If you insert a memory card that hasbeen formatted using other cameras, memory card readers, or PCs, you will get a [CardError!] message.INFORMATIONBack:Set : OKFileEnglishPower OffLanguageFrançais3072SetupBack:Set : OKPower OffLanguage NoFormatYes3072Setup](https://usermanual.wiki/Hanwha-Techwin/DIGIMAXV800.Users-Manual-3-of-3/User-Guide-572104-Page-9.png)
![92Setting up the Date/ Time/ Date typeYou can change the date and time that will be displayed on the captured images and set upthe date type.Setting Date/Time & Selecting Date Format1. In any mode with the exception of Voice Recording mode,press the MENU button.2. Press the LEFT/ RIGHT button and select the [Setup]menu tab.3. Select the [D & Time] menu by pressing the UP/ DOWNbutton and press the RIGHT button.4. Use the UP, DOWN, LEFT, and RIGHT buttons to selectthe desired submenu value, and then press the OK button.RIGHT button : Selects the year/month / day/hour / minute date type.LEFT button : Moves the cursor to the [D & Time] main menu if the cursor is at the first itemof the date and time setup. In all other cases, the cursor will be shifted to theleft of its current position.UP and DOWN buttons : Changes the setting value.- Date type : [yy/mm/dd] /[dd/mm/yy] /[mm/dd/yy]5. Press the menu button twice and the menu will disappear.There is an option to include DATE/TIME on still images.Date Imprinting1. In any mode with the exception of Voice Recording mode,press the MENU button.2. Press the LEFT/ RIGHT button and select the [Setup]menu tab.3. Select the [Imprint] menu by pressing the UP/ DOWNbutton and press the RIGHT button.4. Use the UP and DOWN buttons to select the desired dateimprint type, and then press the OK button.[Off] : The DATE & TIME will not be imprinted on the image file.[Date] : Only the DATE will be imprinted on the image file.[D & Time] : The DATE & TIME will be imprinted on the image file.5. Press the menu button twice and the menu will disappear.* The Date & Time are imprinted at the bottom right side of the still image.* The date will be imprinted as a DATE TYPE setting.* TIME is imprinted in the following way : [Hour : Minute] and hours are shown using the 24hour clock.* The imprint function is applied only to still images except for the images taken in the [Text]scene mode. Imprinting the recording dateBack:Set : OKFormat OffD & Time Datelmprint D & Time3072SetupBack:Set : OKLanguageFormatD & Time3072Setup05 / 01/ 01 01:00yy/mm/dd](https://usermanual.wiki/Hanwha-Techwin/DIGIMAXV800.Users-Manual-3-of-3/User-Guide-572104-Page-10.png)
![93Sound Connecting an External Device (USB)If you set the operation sound to ON, various sounds will be activated for camera startup,when button are pressed, and if there is a card error, so that you can be aware of the cameraoperation status.Setting Operation Sounds1. In any mode with the exception of Voice Recording mode,press the MENU button.2. Press the LEFT/ RIGHT button and select the [Setup]menu tab.3. Select the [Sound] menu by pressing the UP/ DOWNbutton and press the RIGHT button.4. Select a desired sub menu by pressing the UP/ DOWNbutton and press the OK button.[Sound] sub menu : Off/ Low/ Medium/ High5. Press the menu button twice and the menu will disappear.You can select an external device to which you want to connect the camera using the USBcable.Selecting an External Device1. In any mode with the exception of Voice Recording mode,press the MENU button.2. Press the LEFT/ RIGHT button and select the [Setup]menu tab.3. Select the [USB] menu by pressing the UP/ DOWN buttonand press the RIGHT button.4. Select a desired sub menu by pressing the UP/ DOWNbutton and press the OK button.[Computer] : Select this if you want to connect the camera to your PC. Refer to page 120 for instructions on how to connect the camera to yourPC.[Printer] : Select this if you want to connect the camera to your printer. Refer to page 83 for instructions on how to connect the camera to yourprinter.5. Press the menu button twice and the menu will disappear.Back:Set : OKD & Time Offlmprint LowSound Medium3072SetupBack:Set : OKlmprintSound ComputerUSB Printer3072Setup](https://usermanual.wiki/Hanwha-Techwin/DIGIMAXV800.Users-Manual-3-of-3/User-Guide-572104-Page-11.png)
![94Auto Focus lampLCD brightnessYou can adjust the LCD brightness.Adjusting LCD Brightness1. In any mode with the exception of Voice Recording mode,press the MENU button.2. Press the LEFT/ RIGHT button and select the [Setup]menu tab.3. Select the [LCD] menu by pressing the UP/ DOWN buttonand press the RIGHT button.4. Select a desired sub menu by pressing the UP/ DOWNbutton and press the OK button.[LCD] sub menu : Dark, Normal, Bright5. Press the menu button twice and the menu will disappear.You can turn on and off the Auto Focus lampHow to set up the lamp1. In any mode with the exception of Voice Recording mode,press the MENU button.2. Press the LEFT/ RIGHT button and select the [Setup]menu tab.3. Select the [AF Lamp] menu by pressing the UP/ DOWNbutton and press the RIGHT button.4. Select a desired sub menu by pressing the UP/ DOWNbutton and press the OK button.If [Off] is selected : The AF lamp will not light up.If [On] is selected : The AF lamp will light up.If you select [Off] menu and take an image in poorly lit condition or select the [Night]scene mode, the camera may not take exact focus.Back:Set : OKSoundUSB OffAF Lamp On3072SetupBack:Set : OKUSB DarkAF Lamp NormalLCD Bright3072Setup](https://usermanual.wiki/Hanwha-Techwin/DIGIMAXV800.Users-Manual-3-of-3/User-Guide-572104-Page-12.png)
![95Selecting Video out typeThe Video output signal from the camera can be NTSC or PAL. Your choice of output will be governed by the type of device (monitor or TV, etc.) to which thecamera is connected. PAL mode can support only BDGHI.Setting the Video Out Type1. In any mode with the exception of Voice Recording mode,press the MENU button.2. Press the LEFT/ RIGHT button and select the [Setup]menu tab.3. Select the [Video Out] menu by pressing the UP/ DOWNbutton and press the RIGHT button.4. Select a desired sub menu by pressing the UP/ DOWNbutton and press the OK button.[Video Out] sub menu : NTSC, PAL5. Press the menu button twice and the menu will disappear.NTSC : U.S.A, Canada, Japan, South Korea, Taiwan, Mexico.PAL : Australia, Austria, Belgium, China, Denmark, Finland, Germany, U.K., Holland,Italy, Kuwait, Malaysia, New Zealand, Singapore, Spain, Sweden, Switzerland,Thailand, Norway.When using a TV as an external monitor, you will need to select the external or AVchannel of the TV.There will be a digital noise on the external monitor, but it is not a malfunction.If the image is not in the centre of the screen, use the TV controls to centre it.When the camera is connected to an external monitor, the menu will be visible on theexternal monitor and the menu functions are the same as those indicated on the LCDmonitor.INFORMATIONConnecting to an external monitorIn RECORDING/ PLAY mode, you canview the stored still images or movie clipsby connecting the camera to an externalmonitor via the AV cable. When thecamera is connected to an externalmonitor, the LCD monitor will be turnedoff automatically.Yellow Colour-VideoWhite Colour-VoiceBack:Set : OKAF LampLCD NTSCVideo Out PAL3072Setup](https://usermanual.wiki/Hanwha-Techwin/DIGIMAXV800.Users-Manual-3-of-3/User-Guide-572104-Page-13.png)
![96Quick viewIf you enable Quick View before capturing an image, you can view the image you justcaptured on the LCD monitor for the duration set in the [Quick View] setup. Quick view ispossible only with still images.Setting Quick View1. In any mode with the exception of Voice Recording mode,press the MENU button.2. Press the LEFT/ RIGHT button and select the [Setup]menu tab.3. Select the [Quick View] menu by pressing the UP/ DOWNbutton and press the RIGHT button.4. Select a desired sub menu by pressing the UP/ DOWNbutton and press the OK button.[off] : The quick view function can’t be activated.[0.5, 1, 3sec] : The captured image is briefly displayed during the selected time.5. Press the menu button twice and the menu will disappear.InitialisationAll camera menu and function settings will be restored to their default values. However, values for DATE/ TIME, LANGUAGE, and VIDEO OUT will not be changed.Initialising the Camera1. In any mode with the exception of Voice Recording mode,press the MENU button.2. Press the LEFT/ RIGHT button and select the [Setup]menu tab.3. Select the [Reset] menu by pressing the UP/ DOWNbutton and press the RIGHT button.4. Select a desired sub menu by pressing the UP/ DOWNbutton and press the OK button.If [No] is selected : Settings will not be restored to their defaults.If [Yes] is selected : All settings will be restored to their defaults.Back:Set : OKLCD OffVideo Out 0.5 secQuick View 1 sec3072SetupBack:Set : OKVideo OutQuick View NoReset Yes3072Setup](https://usermanual.wiki/Hanwha-Techwin/DIGIMAXV800.Users-Manual-3-of-3/User-Guide-572104-Page-14.png)
![97Setting up the MYCAM menuYou can set up a start up image, start up sound and shutter sound. Every camera workingmode (with the exception of Voice recording mode) has the MyCAM menu.The items indicated by are default settings.Menu tab Main menu Sub menu PageOff LOGOUser Image 1 User Image 2Off Sound 1Sound 2 Sound 3Off Sound 1Sound 2 Sound 3S.ImageS.SoundSH.Soundp.97p.98p.98You can select the image that is first displayed on the LCD monitor whenever the camera isturned on.Setting a Startup Image1. In any mode with the exception of Voice Recording mode,press the MENU button.2. Press the LEFT/ RIGHT button and select the [Mycam]menu tab.3. Select the [S.Image] menu by pressing the UP/ DOWNbutton and press the RIGHT button.4. Select a desired sub menu by pressing the UP/ DOWNbutton and press the OK button.5. Press the menu button twice and the menu will disappear.Start up imageUse a saved image for the start-up image with the [User Image] in the [Resize] menu inthe play mode.The start-up image will not be deleted by deleting all images or [Format] menu.The User images will be deleted by [Reset] menu.INFORMATION* Menus are subject to change without prior notice.Back:Set : OKS.ImageS.SoundSH.Sound3072Mycam](https://usermanual.wiki/Hanwha-Techwin/DIGIMAXV800.Users-Manual-3-of-3/User-Guide-572104-Page-15.png)
![98Start up soundYou can select the shutter sound.Selecting the Shutter Sound1. In any mode with the exception of Voice Recording mode,press the MENU button.2. Press the LEFT/ RIGHT button and select the [Mycam]menu tab.3. Select the [SH.Sound] menu by pressing the UP/ DOWNbutton and press the RIGHT button.4. Select a desired sub menu by pressing the UP/ DOWNbutton and press the OK button.5. Press the menu button twice and the menu will disappear.Shutter soundSetting the Startup Sound1. In any mode with the exception of Voice Recording mode,press the MENU button.2. Press the LEFT/ RIGHT button and select the [Mycam]menu tab.3. Select the [S.Sound] menu by pressing the UP/ DOWNbutton and press the RIGHT button.4. Select a desired sub menu by pressing the UP/ DOWNbutton and press the OK button.5. Press the menu button twice and the menu will disappear.Back:Set : OK3072MycamS.Image OffS.Sound Sound1SH.Sound Sound2Back:Set : OK3072MycamS.Image OffS.Sound Sound1SH.Sound Sound2You can select the sound that is activated whenever the camera is turned on.](https://usermanual.wiki/Hanwha-Techwin/DIGIMAXV800.Users-Manual-3-of-3/User-Guide-572104-Page-16.png)
![102Warning indicatorPlease check the followingBefore contacting a service centreLow Light !When taking pictures in dark placesUse a tripod and take pictures in Flash Photography modeSet USB[USB] sub menu and connected device are not matched.Reconfigure [USB] in the [Setup] menu. Out Of NumberWhen selecting too many printing pages in the PictBridge menu. Select printing page within the limitation. The camera doesn’t switch onThere is low battery capacity.Insert charged battery. Batteries are inserted incorrectly with the reverse polarities.Insert the batteries according to the polarity marks (+, -).The camera power ceases while in use.The batteries are exhausted.Insert charged battery.The Camera is turned off automatically.Turn off the camera power and turn it on again.Batteries drain quicklyThe Camera is being used in low temperatures.Keep the camera in warm conditions (i.e. inside a coat or jacket) and only remove it inorder to take images.](https://usermanual.wiki/Hanwha-Techwin/DIGIMAXV800.Users-Manual-3-of-3/User-Guide-572104-Page-20.png)
![103Before contacting a service centreCamera does not take images when pressing the Shutter buttonThere is insufficient memory capacity.Delete unnecessary image filesThe memory card has not been formattedFormat the memory card (p.91)The memory card is exhaustedInsert a new memory cardThe memory card is lockedRefer to [Card Locked !] error message (p.101)The camera’s power is offTurn the camera power onThe batteries are exhaustedInsert charged battery. Batteries are inserted incorrectly with the reverse polarities.Insert the batteries according to the polarity marks (+, -).The camera suddenly stops working while in use The camera was stopped due to a malfunctionRemove /re-insert batteries and switch the camera onThe images are unclearA picture was taken within 0.8 m from the subject without setting an appropriate macro modeIf the subject is closer than 0.8m, select macro shot modeTaking a picture beyond the flash rangeTake a picture within the flash rangeThe lens is smudged or dirtyClean the lensThe flash does not fireFlash off mode has been selectedDis-engage flash off modeThe camera mode can’t use the flashRefer to the FLASH instruction (p.34)Incorrect date and time is displayedThe date and time have been set incorrectly or the camera has adopted the default settingsReset the date and time correctly](https://usermanual.wiki/Hanwha-Techwin/DIGIMAXV800.Users-Manual-3-of-3/User-Guide-572104-Page-21.png)
![104Before contacting a service centreThe images don't play backIncorrect file name (Violation of DCF format)Do not change the image file nameColour of image is different to the original scene White balance setting is incorrectSelect appropriate White balanceImages are too brightExposure is excessiveReset exposure compensationNo image on external monitorThe external monitor has not been connected properly with the cameraCheck the connection cablesThere are incorrect files in the memory cardInsert a memory card that has correct filesWhen using the PC’s explorer, the [Removable Disk] file does not showCable connection is incorrectCheck the connectionThe camera is offTurn the camera onThe operating system is not Windows 98, 98SE, 2000, ME, XP/ Mac OS 9.2 ~ 10.3.Alternatively the PC does not support USBInstall Windows 98, 98SE, 2000, ME, XP/ Mac OS 9.2 ~ 10.3 to PC that supports USBThe camera driver is not installedInstall a [USB Storage Driver]](https://usermanual.wiki/Hanwha-Techwin/DIGIMAXV800.Users-Manual-3-of-3/User-Guide-572104-Page-22.png)
![113About the softwareAfter inserting the software CD provided with this camera into the CD-ROM drive, the followingwindow should automatically run.Before connecting the camera to the PC,you should first install the camera driver.Camera driver : This enables images to transfer between the camera and PC.This camera uses the USB Storage Driver as the camera driver. You can use the camera asa USB card reader. After installing the driver and connecting this camera to the PC, you canfind [Removable Disk] in [Windows Explorer] or [My computer]. A USB Storage Driver isprovided only for Windows. A USB Driver for MAC is not included with the Application CD.But you can use the camera with Mac OS 9.2 ~ 10.3.XviD codec : This makes movie clips(MPEG-4) recorded with this camera play back on a PC.To play back a movie clip recorded with this camera, you must install the XviD codec. If amovie clip recorded with this camera does not play well, install this codec. This software isonly compatible with Windows.If a movie clip can’t play back on the Mac OS, please visit the following site.http://www.divx.com/divx/mac/ If a movie clip can’t play back on the Mac OS, use a media player that supports XviD codec(Mplayer, VLC(VideoLan Client) media player).Digimax Viewer : This is a program for viewing stored images.You can see the stored images in the memory directly on a PC monitor. You can also copy,move or delete the images and enlarge/downscale the image sizes with Digimax Viewer.This software is only compatible with Windows.](https://usermanual.wiki/Hanwha-Techwin/DIGIMAXV800.Users-Manual-3-of-3/User-Guide-572104-Page-26.png)
![114About the softwareBe sure to check the system requirements before installing the driver.You should allow 5~10 seconds for running the automatic setup program according to thecapability of the computer. If the frame does not show, run the [Windows Explorer] andselect [Samsung.exe] in the CD-ROM Drive root directory.INFORMATIONDigimax Reader : Text recognition programYou can save an image file that was captured in the TEXT mode as a text file with thisprogram. This software is only compatible with Windows.PhotoImpression : Image editing program.You can edit or store still images that you download from the camera. This software is onlycompatible with Windows.](https://usermanual.wiki/Hanwha-Techwin/DIGIMAXV800.Users-Manual-3-of-3/User-Guide-572104-Page-27.png)
![115Setting up the application softwareTo use this camera with a PC, install the application software first.After this has been done, the stored images in the camera can be moved to the PC and can beedited by an image editing program.You can visit the Samsung web-site through the internet.http://www.samsungcamera.com : Englishhttp://www.samsungcamera.co.kr : Korean1. Click the [Install] menu in the Autorun frame.The camera driver is installed automatically.Close other programs before installing the application software.Before installing the application software, disconnect the USB connection.INFORMATION2. Installation is complete.Click the [Finish] button.[Click !][Click !]3. The Software License Agreement window forDirectX will be displayed.If you agree to this, select [I accept the agreement]and click [Next >] button. the window will thenmove to the next step. If you disagree, select [I do not accept the agreement] and click [Cancel]button.The installation program will be cancelled.[Click !]](https://usermanual.wiki/Hanwha-Techwin/DIGIMAXV800.Users-Manual-3-of-3/User-Guide-572104-Page-28.png)
![116Setting up the application software6. A windows to check whether the PC has XviD codec or notwill display. [Preview] : You can check the movie clip displaycondition. [Install] : The XviD codec is installed. [Cancel] : The XviD codec is not installed and a window forinstalling the application softwares will display.If you didn’t click the [Preview] button, the [Install] button can’t be selected. [Click !]4. A window will open. Click the [Next(N) >] button.5. DirectX Installation is completed.Click the [Finish] button and Digimax Masterinstallation will be started.* The system will not reboot even if you clickthe [Finish] button.* The screen shot of step 5 can be differentwith the illustration according to the systemrequirements.[Click !][Click !]](https://usermanual.wiki/Hanwha-Techwin/DIGIMAXV800.Users-Manual-3-of-3/User-Guide-572104-Page-29.png)
![1179. The Software License Agreement window will bedisplayed. If you agree to this, select [I accept theagreement] and click [Next>] button. the window willthen move to the next step. If you disagree, select [I donot accept the agreement] and click [Cancel] button.The installation program will be cancelled.The XviD codec is distributed according to the GNU General Public License and everyonecan copy, distribute and change this codec. For more information, see the Licensedocuments. [Click !]7. If an error listed below takes place during the preview,click the [Install] button to install the XviD codec. - Only a voice plays back. - An error message displays and the movie clip doesnot play back. * A window shown alongside may display accordingto the system requirements.8. The XviD codec installation window will be displayedas shown alongside. Click the [Next(N)>] button. Setting up the application software[Click !][Click !]](https://usermanual.wiki/Hanwha-Techwin/DIGIMAXV800.Users-Manual-3-of-3/User-Guide-572104-Page-30.png)
![118Setting up the application software10. The XviD information window will display. Click the [Next>] button. 11. The destination selection window will open. Click [Next >] button.To copy to the files to another folder, click [Browse...]and choose a folder you want.[Click !][Click !]13. The [Select Additional Tasks] window will display. Select the additional tasks and click the [Next>] button. 12. A window will open, asking you to choose a folder towhich program icons will be added. Click [Next >] button. If you want to add the program icons to a different folder,choose another folder, and then click [Next >] button.[Click !][Click !]](https://usermanual.wiki/Hanwha-Techwin/DIGIMAXV800.Users-Manual-3-of-3/User-Guide-572104-Page-31.png)
![119Setting up the application software14. The XviD codec is ready to install. Click the [Install] button.[Click !]15. Installation is complete.Click the [Finish] button.[Click !]If you select [Exit] at step 13, the application program installation will be cancelled.INFORMATION 16. A window where you can choose the programyou want to install will appear. Click [Install].For information on application software, pleaserefer to page 108.[Click !]7. The Digimax Master installation window will bedisplayed as shown alongside. Click the [Next >]button.[Click !]](https://usermanual.wiki/Hanwha-Techwin/DIGIMAXV800.Users-Manual-3-of-3/User-Guide-572104-Page-32.png)
![120Setting up the application software8. A window will open. Click the [Next >] button.9. A destination selection window will open. Click [Next >].To copy to the files to another folder, click [Browse..]and choose a folder you want.11. Click [Install(I)] button and Digimax Master starts installing.10. A window will open, asking you to choose a folder towhich program icons will be added. Click [Next >] button.If you want to choose another folder, click [Browse..] andchoose a folder you want.●If you select [Cancel] at step 7, a window for installing Digimax Reader will be displayed.INFORMATION[Click !][Click !][Click !][Click !]](https://usermanual.wiki/Hanwha-Techwin/DIGIMAXV800.Users-Manual-3-of-3/User-Guide-572104-Page-33.png)
![121Setting up the application software13. A window will be displayed as shown alongside.Click the [INSTALL] button.- Check the [MANUAL] button. Instructions for usingDigimax reader will be displayed.- Click the [EXIT] button and Digimax readerinstallation will be cancelled and a window forrestarting the computer.14. A window will open. Click the [Next >] button.[Click !]15. The Software License Agreement window will bedisplayed. If you agree to this, click [Yes],the window will then move to the next step.If you disagree, click [No] and the installationprogram will be cancelled.12. Digimax Master installation is successfully completed.Click the [Finish] button to install Digimax Reader.* The screen shot of step 12 can be different with theillustration according to the system requirements.[Click !][Click !][Click !]](https://usermanual.wiki/Hanwha-Techwin/DIGIMAXV800.Users-Manual-3-of-3/User-Guide-572104-Page-34.png)
![122Setting up the application software16. A destination selection window will open.Click the [Next >] button.To copy to the files to another folder, click[Browse...] and choose a folder you want.[Click !]17. Digimax Reader Installation is completed.The system will not reboot even if the [Yes, Iwant to restart the computer now] option isselected.※The screen shot of step 17 can be different with the illustration according to the systemrequirements.18. To apply changes, you must restart the computer.Select [Yes, I want to restart my computer now], andthen click the [OK] button. 19. After restarting the computer, connect the PC to the camera with the USB cable.20. Turn the camera power on.[Found New Hardware Wizard] will open and the computer will recognise the camera.* If your OS is Windows XP, an image viewerprogram will open.If the download window of Digimax Master opens,the camera driver was setup successfully.[Click !][Click !]](https://usermanual.wiki/Hanwha-Techwin/DIGIMAXV800.Users-Manual-3-of-3/User-Guide-572104-Page-35.png)
![123Setting up the application software●If you have installed the camera driver, [Found New Hardware Wizard] may not open.●On a Windows 98 or 98 SE system, the Found New Hardware Wizard dialog box opensand a window asking you to select a driver file may appear. In this case, specify "USBDriver" in the CD supplied. (for Windows 98 and 98 SE).●Before connecting the camera to the PC, You should first install the camera driver.●After installing the camera driver, you have to restart your PC.●If you connect the camera to the PC before installing the camera driver, the [Found NewHardware Wizard] will open.In this case, cancel the [Found New Hardware Wizard] and disconnect the camera.Install the camera driver and connect the camera to the PC again.●Should the computer not find the camera driver after installation, please try one or more ofthe following measures.1. Delete the camera driver (p.123), and re-install the driver.2. Refer to FAQ (p.132) to check for a possible solution to the problem.3. If your PC’s central processing unit is VIA chip (This is shown in the USB HostController), download the patch file from the Samsung Camera web page.(http://www.samsungcamera.com)INFORMATION21. If you can see [Removable Disk] under [My computer],the camera driver installation was successful.Now you can transfer image files from the camera toPC via the USB cable.](https://usermanual.wiki/Hanwha-Techwin/DIGIMAXV800.Users-Manual-3-of-3/User-Guide-572104-Page-36.png)
![124Starting PC modeIf you connect the USB cable to a USB port on your PC and then turn on the power, thecamera will automatically switch to "computer connection mode".In this mode, you can download stored images to your PC through the USB cable.The LCD monitor is always turned off in PC mode.The auto focus lamp will blinks when the files are transferring via the USB connection.Connecting the camera to a PC1. Turn the PC power on.2. Turn the camera power on.3. In any mode other than Voice Recording mode, pressthe MENU button.4. Press the LEFT/ RIGHT button and select the [Setup]menu tab.5. Select the [USB] menu by pressing the UP/ DOWNbutton and press the RIGHT button.6. Use the UP and DOWN buttons to select [Computer],and then press the OK button.7. Press the menu button twice and the menu will disappear.8. Connect the PC and the camera via the USB cable.- Insert the small plug of the USB cable into the camera USB connection terminal.- Insert the large connector of the USB cable into the USB port of the PC.- The plugs must be firmly inserted.The camera driver must be installed before using PC mode.To save battery power, it is recommended that you use an AC adapter (Optional) whenconnecting the camera to a computer.INFORMATIONDisconnecting the camera and PC : Refer to page 125 (Removing the removable disk).If you selected [Printer] in Step 6, when youconnect the camera to your computer, the[Connecting Printer] message will bedisplayed on the LCD monitor and theconnection will not be established. In thiscase, disconnect the USB cable, and thenfollow the procedure from Step 3 andonward.Back: Set : OKSetup ImprintSound ComputerUSB Printer](https://usermanual.wiki/Hanwha-Techwin/DIGIMAXV800.Users-Manual-3-of-3/User-Guide-572104-Page-37.png)
![125Starting PC mode3. Select an image and press the right mousebutton.4. A pop-up menu will open.Click [Cut] or [Copy] menu.- [Cut] : cuts a selected file.- [Copy] : copies files.Downloading stored imagesYou can download the still images stored on the camera to your PC's hard disk and printthem or use a photo editing software to edit them.1. Connect the camera to your PC with the USB cable.2. On your computer's desktop display, select[My computer] and double click [Removable DiskDCIM 100SSCAM].The image files will then be displayed.5. Click a folder where you want to paste the file.](https://usermanual.wiki/Hanwha-Techwin/DIGIMAXV800.Users-Manual-3-of-3/User-Guide-572104-Page-38.png)
![126Starting PC Mode6. Press the right mouse button and a pop-up menuwill open. Click [Paste].7. An image file is transferred from the camera toyour PC.- By using [Digimax Viewer], you can see the stored images in the memory directly on the PCmonitor and you can copy or move the image files.](https://usermanual.wiki/Hanwha-Techwin/DIGIMAXV800.Users-Manual-3-of-3/User-Guide-572104-Page-39.png)
![127Removing the USB Driver for Windows 98SE■To remove the USB driver, refer to the process shown below.1. Trace [Start →Settings] and click [Control Panel].4. Click the [OK] button.The camera is removed from the system.2. Double-click [System].3. Select [Device manager →Hard Disk Controller →Samsung Digital Camera] and click the [Delete]button.[Click !]](https://usermanual.wiki/Hanwha-Techwin/DIGIMAXV800.Users-Manual-3-of-3/User-Guide-572104-Page-40.png)
![1285. Trace [Start →Settings →Control Panel] anddouble click [Add/Remove programs].6. The [Add/Remove Programs Properties] windowwill open. Click [Digimax V800] and click the[Add/Remove] button.7. Uninstallation is complete. Click the [Finish] buttonand the window will disappear.[Click !][Click !]](https://usermanual.wiki/Hanwha-Techwin/DIGIMAXV800.Users-Manual-3-of-3/User-Guide-572104-Page-41.png)
![129Removable DiskTo use this camera as a Removable Disk, install (p.110) the USB Driver.1. Before turning the camera power on, connect the camera to the PC with the USB cable.2. Click [Removable Disk] under [My computer] or [Windows Explorer].3. Image files stored in the Removable Disk (DCIM 100SSCAM) can be transferred to thePC.Important information whilst using the Removable DiskThe [Removable Disk] indicator will not show when the camera power is off or the USBcable is removed.We recommend that you should copy the images to the PC to view them. Openingimages directly from the removable disk may be subject to unexpected disconnection.When uploading images from the PC to the camera, ensure that the uploaded file namesare not the same as those already stored on the memory. When you upload a file that is not taken by this camera to Removable Disk, the [FileError!] message will be displayed on the LCD monitor in the PLAY mode, and nothing isdisplayed in THUMBNAIL mode.The auto focus lamp will blink, when a file istransferred (copy or deletion) between the PCand the camera. Do not remove the USB cableuntil the lamp stops blinking. To remove theUSB cable in Windows 2000/ME/XP, use the[Unplug or Eject Hardware] icon on the task bar.INFORMATION](https://usermanual.wiki/Hanwha-Techwin/DIGIMAXV800.Users-Manual-3-of-3/User-Guide-572104-Page-42.png)
![130Removing the removable diskWindows 98/98SE1. Check whether the camera and PC are transferring a file. If the auto focus lamp blinks, youhave to wait until the lamp is turned off.2. Unplug the USB cable.Windows 2000/ME/XP(The illustrations may be different from the real display in accordance with the Windows O/S.)1. Check whether the camera and PC are transferring a file. If the auto focus lamp blinks, youhave to wait until the lamp is turned off.2. Double-click the [Unplug or Eject Hardware]icon on the task bar.3. The [Unplug or Eject Hardware] window willopen. Select the [USB Mass StorageDevice] and click the [Stop] button.4. The [Stop a Hardware device] window willopen. Select the [USB Mass StorageDevice] and click the [OK] button.5. A [Safe to Remove Hardware] window willopen. Click the [OK] button.[Click!][Double-click!][Click!][Click!]](https://usermanual.wiki/Hanwha-Techwin/DIGIMAXV800.Users-Manual-3-of-3/User-Guide-572104-Page-43.png)
![131Removing the removable disk1. A USB Driver for MAC is not included with the software CD as MAC OS supports thecamera driver.2. Check the MAC OS. You can check the MAC OS version during MAC OS start-up. Thiscamera is compatible with MAC OS 9.2 ~ 10.3.3. Connect the camera to the Macintosh and turn the camera power on.4. A new icon will be displayed on the desktop after connecting the camera to the MAC.Using the USB Driver for MACSetting up the USB Driver for MAC1. Double click a new icon on the desktop and the folder in the memory will be displayed.2. Select an image file and copy or move it to MAC.For Mac OS 10.0 or later : First complete uploading from computer to camera and thenremove the removable disk with the Extract command.If a movie clip can°Øt play back on the Mac OS, please visit the followingsite(http://www.divx.com/divx/mac/) and download the codec. Or, use a media player thatsupports the Xvid codec (Mplayer, VLC(VideoLan Client) media player.CAUTION6. A [Unplug or Eject Hardware] window will open.Click the [Close] button and the removable diskwill be removed safely.7. Unplug the USB cable.[Click!]](https://usermanual.wiki/Hanwha-Techwin/DIGIMAXV800.Users-Manual-3-of-3/User-Guide-572104-Page-44.png)
![132Digimax Master■You can download, view, edit and save your digital image and movie clip with this software.This software is only compatible with Windows.■To start the program, click [Start →Programs →Samsung →Digimax Master].●Downloading images1. Connect the camera to your PC.2. A window for downloading images will display afterconnecting the camera and your PC.- To download the captured images, select the[All(A)] button.- Select desired folder in the window and click the[All(A)] button. You can save captured images andselected folder.- If you click the [Cancel] button, downloading will becancelled.3. Click [Next(N) >] button.[Click !][Click !]](https://usermanual.wiki/Hanwha-Techwin/DIGIMAXV800.Users-Manual-3-of-3/User-Guide-572104-Page-45.png)
![133Digimax MasterBefore deleting images from the camera, you should download images to yourcomputer that you wish to keep.Refer to the [Help] menu in Digimax viewer 2.1 for further information.INFORMATION 7. Downloaded images will be displayed.4. Select a destination and make a folder to savedownloaded images and folder.- Folders will be made in order of date and imageswill be downloaded.- Folder name will be made as you want and imageswill be downloaded.- After selecting a folder that was made before,images will be downloaded.5. Click [Next(N) >] button.6. A window will open as shown alongside.The destination of selected folder will be displayedon the upper side of the window.Click the [Start] button to download the images.[Click !][Click !]](https://usermanual.wiki/Hanwha-Techwin/DIGIMAXV800.Users-Manual-3-of-3/User-Guide-572104-Page-46.png)
![134Digimax Reader●Image viewer : You can view the stored images.- Image viewer functions are listed below.①Menu bar : You can select menus.File, Edit, View, Tools, Change functions, Auto download, help, etc.②Image selection window : You can select desired image in this window.③Media type selection menu : You can select image viewer, image edit, movie clip editfunction in this menu.④Preview window : You can preview a image or a movie clip and check the multi mediainformation.⑤Zoom bar : You can change preview size.⑥Folder display window : You can see folder location of selected image.⑦Image display window : Images of selected folder are displayed.※Refer to the [Help] menu in Digimax Master for further information.①⑤⑥⑦②③④](https://usermanual.wiki/Hanwha-Techwin/DIGIMAXV800.Users-Manual-3-of-3/User-Guide-572104-Page-47.png)
![135Digimax Reader●Image edit : You can edit the still image.- Image edit functions are listed below.①Edit menu : You can select the following menus.[Tools] : You can resize or crop the selected image. See the [Help] menu.[Modify] : You can modify image quality. See the [Help] menu.[Retouch] : You can change image or insert effects on the image. See the [Help] menu.②Drawing tools : Tools for editing an image.③Image display window : a selected image displays in this window.④Preview window : You can preview the changed image.※Refer to the [Help] menu in Digimax Master for further information.①②③④](https://usermanual.wiki/Hanwha-Techwin/DIGIMAXV800.Users-Manual-3-of-3/User-Guide-572104-Page-48.png)
![136Digimax Master●Movie edit : You can get the still image, movie clip, narration, music files together in a movie clip.- Movie clip edit functions are listed below.①Edit menu : You can select the following menus.[Add] : You can add a desired multi media in a movie clip.[Edit] : You can change the brightness, contrast, colour and saturation.[Effect] : You can insert an effect.[Text] : You can insert texts.[Narration] : You can insert a narration.[Make] : You can save the edited multi media as a new file name.Frame display window : You can insert multi media in this window. You can selectAVI, Windows media (wmv), Windows media (asf) and movie clip for this camera(a v I, MPEG-4) file types.②Frame display window : You can insert multi media in this window.※Some movie clips that was compressed with a codec that is not compatible with the DigimaxMaster can’t play back in the Digimax Master.※Refer to the [Help] menu in Digimax Master for further information.①②](https://usermanual.wiki/Hanwha-Techwin/DIGIMAXV800.Users-Manual-3-of-3/User-Guide-572104-Page-49.png)
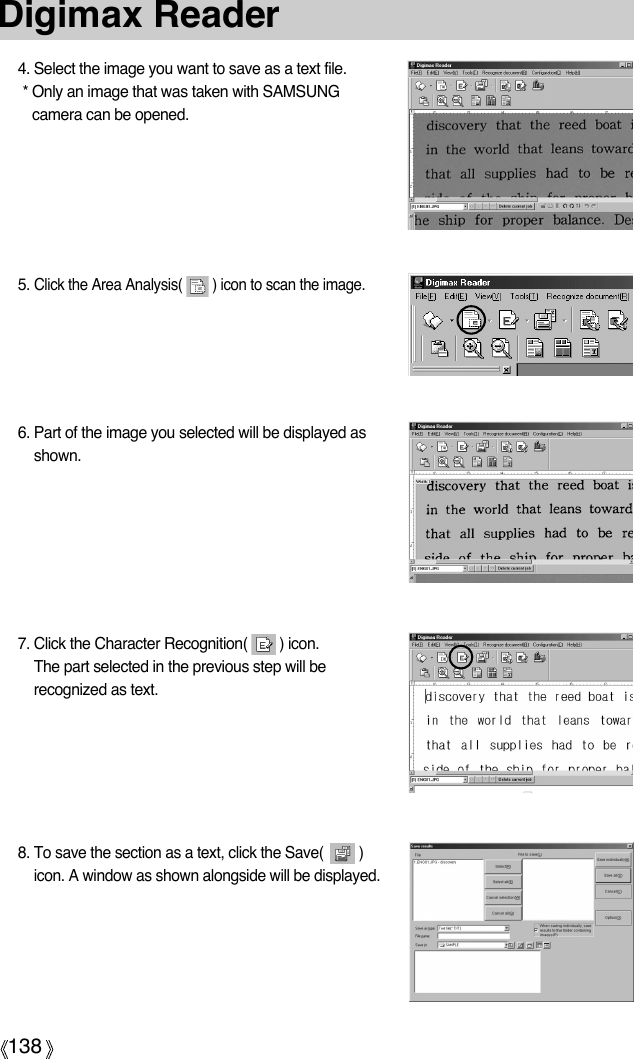
![137Digimax Reader■Digimax Reader is a Text recognition program. You can save an image file that is captured inthe Text mode, as a text file with this program.This software is only compatible with Windows.■To start the program, click [Start →Programs →Digimax Reader Eng].The following screen will appear.■How to use the Digimax Reader1. Connect the camera and the PC with a USB cable and download the images that werestored in the camera to the PC.* Please see page 120 ~ 122 for details on Connecting a camera and PC, Downloadingimages.2. Run the Digimax Reader.3. Click the Open( ) icon as shown alongside.](https://usermanual.wiki/Hanwha-Techwin/DIGIMAXV800.Users-Manual-3-of-3/User-Guide-572104-Page-50.png)
![139Digimax Reader●To get an image that can be recognized as a text : - Keep a distance of 20cm between the subject and the camera.- The subject need to be centered.- Avoid the camera shake to get a good image.●Refer to the [Help] menu in Digimax Reader for further information.INFORMATION 9. Select a file type that you want to.Selectable file type : *.TXT, *.HWP, *.DOC, *.RTFFAQ■Please check the following if the USB connection malfunctions.[Case 1] The camera power is off.→Turn the camera power on. We recommend using an AC power adapter in PCmode.[Case 2] USB Driver is not installed correctly.→Install the USB Driver correctly. Refer to page 110.[Case 3] The USB cable is not connected or you are using a cable with an incorrectspecification.→Use a USB cable with the correct specification.[Case 4] The camera is not recognized by your PC.Sometimes, the camera may appear under [Unknown Devices] in DeviceManager.→Install the camera driver correctly.Turn off the camera, remove the USB cable, plug in the USB cable again, andthen turn on the camera.](https://usermanual.wiki/Hanwha-Techwin/DIGIMAXV800.Users-Manual-3-of-3/User-Guide-572104-Page-52.png)
![140FAQ[Case 5] There is an unexpected error during file transfer→Turn the camera power off and on again. Transfer the file again.[Case 6] How do I know my computer supports a USB Interface?→Check the USB port in your computer or keyboard.→Check the OS version. A USB Interface is available in Windows 98, 98SE,2000, ME, XP.→Check [Universal Serial Bus controllers] in Device Manager. Do the following tocheck [Universal Serial Bus controllers].Win 98/ME : Trace [Start →Settings →Control Panel →System →Device Manager →Universal Serial Bus controllers].Win 2000 : Trace [Start →Settings →Control Panel →System →Hardware →Device Manager →Universal Serial Buscontrollers].Win XP : Trace [Start →Control Panel →Performance andMaintenance →System →Hardware →Device Manager→Universal Serial Bus controllers].There must be USB Host Controller and USB root hub under [Universal SerialBus controllers].In addition, double-click on the USB Universal Host Controller and the USBRoot Hub to check if the Device Status states "This device is working properly".If the Device Status says the device is "not working properly", click the "Driver"tab and then click [Update Driver] or [Reinstall Driver].→When all the conditions mentioned above are met, the computer can supportthe USB interface.[Case 7] When using the USB hub.→There may be a problem in connecting the camera to the PC through the USBhub if the PC and the hub are not compatible. Wherever possible, connect thecamera to the PC directly.[Case 8] Are other USB cables connected to the PC?→The camera may malfunction when it is connected to the PC at the same timeas another USB cable. In this case, disconnect the other USB cable, andconnect only one USB cable to the camera.](https://usermanual.wiki/Hanwha-Techwin/DIGIMAXV800.Users-Manual-3-of-3/User-Guide-572104-Page-53.png)
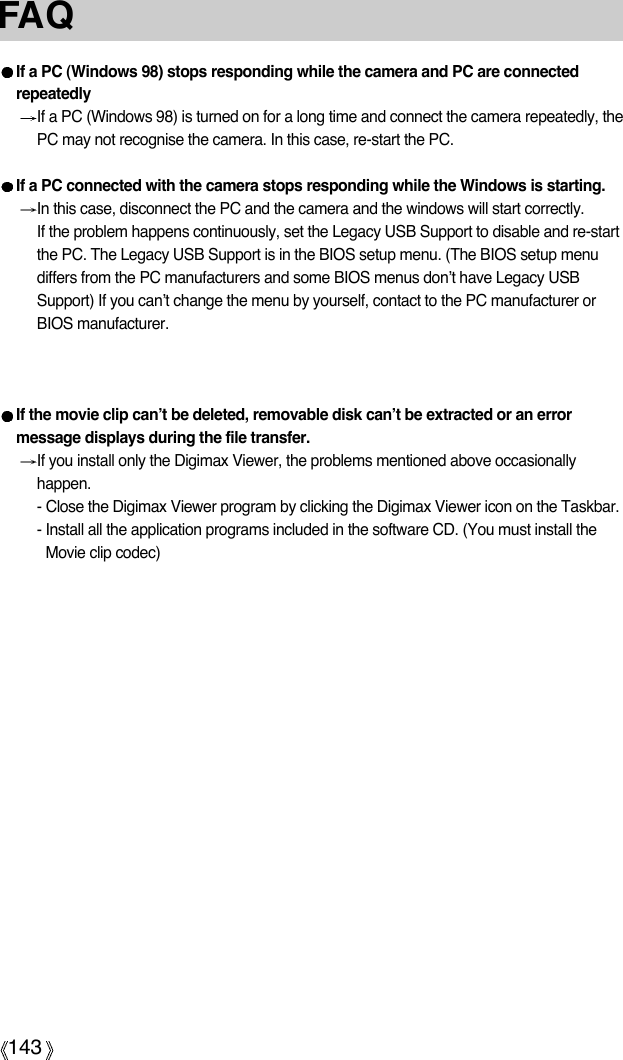
![141[Case 9] When I open the Device Manager (by clicking Start →(Settings) →Control Panel→(Performance and Maintenance) →System →(Hardware) →DeviceManager), there are 「Unknown Devices」or 「Other Devices」entries with ayellow question mark(?) beside them or devices with an exclamation mark(!)beside them.→Right-click on the entry with the question(?) or exclamation (!) mark and select"Remove". Restart the PC and connect the camera the again. For Windows 98PC, remove the camera driver also, restart the PC, and then reinstall the cameradriver.→Double-click on the entry with the question (?) or exclamation (!) mark, click the"Driver" tab, and click [Update Driver] or [Reinstall Driver]. If a message appearsasking you to specify the location of the appropriate device driver, specify "USBDriver" in the CD supplied.[Case 10] In some security programs (Norton Anti Virus, V3, etc.), the computer may notrecognize the camera as a removable disk. →Stop the security programs and connect the camera to the computer. Refer to thesecurity program instructions about how to stop the program. ■When the movie clip doesn’t play back on the PC※When the movie clip recorded by the camera doesn’t play back on the PC, the causes aremostly due to the codec installed on the PC.●When codec for play back the movie clip isn’t installed→Install the codec as listed below. [Installing codec for Windows]1) Insert the CD provided with the camera 2) Run the windows explorer and select [CD-ROM drive:\XviD] folder and click the XviDcodex-1[1].1.0.exe file. [Installing codec for Mac OS]1) Visit the following site for downloading the codec.http://www.divx.com/divx/mac2) Click the [Free Download] button located at the upper right side of the page and a windowfor downloading the DivX codec will display. 3) Select Mac OS you use and click the [Download] button. Save it on a folder you want to. 4) Run the downloaded file and the codec for playing back the movie clip will be installed.※If a movie clip can’t play back on the Mac OS, use a media player that supports XviDcodec (Mplayer, VideoLanClient).](https://usermanual.wiki/Hanwha-Techwin/DIGIMAXV800.Users-Manual-3-of-3/User-Guide-572104-Page-54.png)
![142FAQ●When the DirectX 9.0 or later is not installed→Install the DirectX 9.0 or later1) Insert the CD provided with the camera2) Run the windows explorer and select [CD-ROM drive:\ USB Driver\DirectX 8.1] folder andclick the DXESETUP.exe file.The DirectX will be installed. Visit the following site fordownloading the DirectX.http://www.microsoft.com/directx●If a PC (Windows 98) stops responding while the camera and PC are connected repeatedly→If a PC (Windows 98) is turned on for a long time and connect the camera repeatedly, thePC may not recognise the camera. In this case, re-start the PC. ●If a PC connected with the camera stops responding while Windows is starting. →In this case, disconnect the PC and the camera and Windows will start.If the problem happens continuously, set the Legacy USB Support to disable and re-startthe PC. The Legacy USB Support is in the BIOS setup menu. (The BIOS setup menudiffers from the PC manufacturers and some BIOS menus don’t have Legacy USBSupport) If you can’t change the menu by yourself, contact to the PC manufacturer orBIOS manufacturer. ●If the movie clip can’t be deleted, removable disk can’t be extracted or an error messagedisplays during the file transfer. →If you install only the Digimax Viewer, the problems mentioned above occasionallyhappen. - Close the Digimax Viewer program by clicking the Digimax Viewer icon on the Taskbar.- Install all the application programs included in the software CD. (You must install the Movie clip codec)](https://usermanual.wiki/Hanwha-Techwin/DIGIMAXV800.Users-Manual-3-of-3/User-Guide-572104-Page-55.png)