HARRIS M803VTAC M-803 Vehicular Tactical Unit (VTAC) User Manual Installation Guide

Harris Corporation M-803 Vehicular Tactical Unit (VTAC) Installation Guide

Contents

Installation Guide

WINST-0009 Rev – WIRELESS SYSTEM BUSINESS UNITSUBJECT: M-803 VTAC Installation Instructions DATE: February 19, 2002Page 1 of 19COPYRIGHT ©2002 Printed in U.S.A.M/A-COM1011 Pawtucket BoulevardLowell, MA  018531-877-OPENSKY(1-877-673-6759)1-877-OPENSKYOVERVIEWThis document describes the procedure for installingthe M/A-COM OpenSky® Model VR-803 VehicularTactical Network (V-TAC) in a vehicle, such as anautomobile, truck, or van. This is a general guide only,and assumes that the installation will be performed bya professional radio installer.DISCLAIMERTHE INSTALLATION INSTRUCTIONS PROVIDED IN THIS MANUAL ARE FORREFERENCE, AND DO NOT CREATE A WARRANTY OF ANY KIND AS TO THEFUNCTIONALITY OF THE INSTALLED PRODUCT.  THE ONLY WARRANTIESTHAT APPLY TO THIS PRODUCT ARE THOSE SET FORTH IN THE SALESAGREEMENT.M/A-COM INC. RECOMMENDS THAT BUYER USE ONLY A M/A-COMAUTHORIZED REPRESENTATIVE TO INSTALL THIS PRODUCT.THE WARRANTIES PROVIDED TO BUYER UNDER THE TERMS OF SALESHALL BE NULL AND VOID IF THIS PRODUCT IS INSTALLED OR SERVICEDIMPROPERLY, AND M/A-COM SHALL HAVE NO FURTHER OBLIGATION TO THEBUYER FOR ANY DAMAGE CAUSED TO THE PRODUCT OR TO ANY PERSONOR PERSONAL PROPERTY.MAT ERIALSThere are three main components to the VR-803 V-TAC: the Full-Duplex MobileRadio Unit (MRU); the Vehicular Repeater Base Unit (VRB); and the RF Combiner.The V-TAC is designed to mount on the floor or on a tray in the trunk or unoccupiedsection of a vehicle. The V-TAC is designed to be operated with an externally-mounted antenna. The Installation Kit (M/A-COM Part #MAMROS0019) needed toinstall the V-TAC is described below. The V-TAC is intended to be used with a CH-103 Control Head with Installation Kit, sold separately.Table I lists the accessories that are included in the kit. Table II lists additionaloptions and accessories that may be purchased separately. (Note: The InstallationKit does not include an antenna. An antenna must be purchased separately, and theV-TAC may not be installed unless an antenna is to be installed at the same time.)
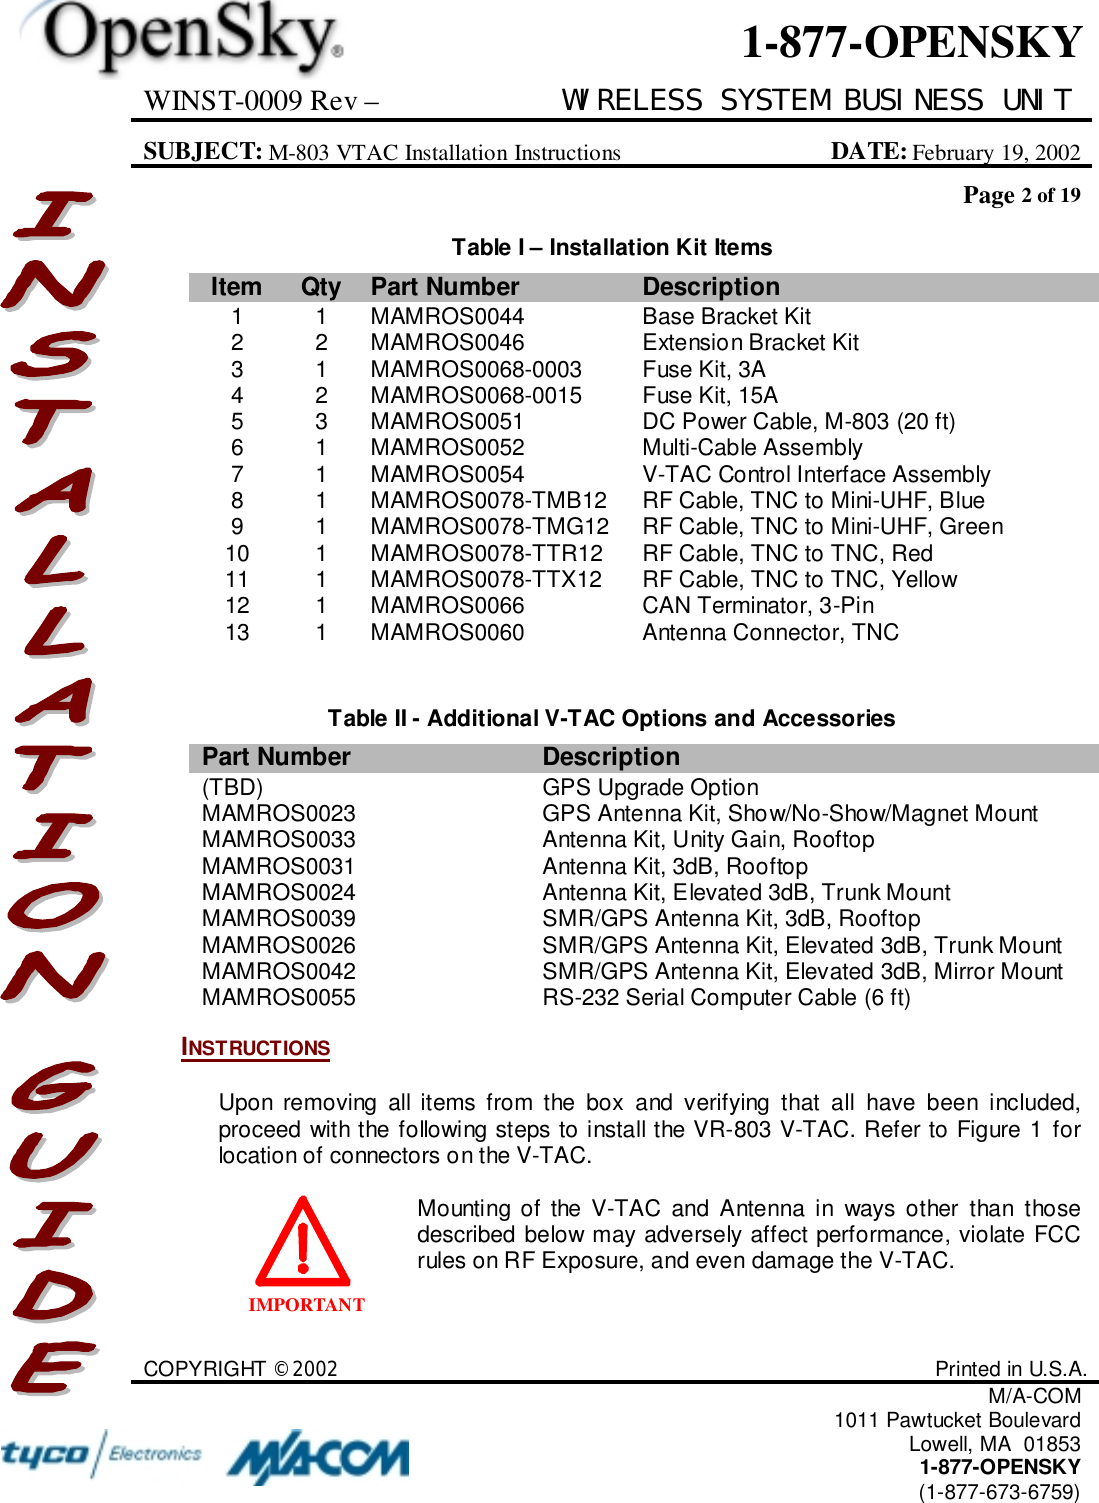
WINST-0009 Rev – WIRELESS SYSTEM BUSINESS UNITSUBJECT: M-803 VTAC Installation Instructions DATE: February 19, 2002Page 2 of 19COPYRIGHT ©2002 Printed in U.S.A.M/A-COM1011 Pawtucket BoulevardLowell, MA  018531-877-OPENSKY(1-877-673-6759)1-877-OPENSKYIMPORTANTTable I – Installation Kit ItemsItem Qty Part Number Description1 1 MAMROS0044 Base Bracket Kit2 2 MAMROS0046 Extension Bracket Kit3 1 MAMROS0068-0003 Fuse Kit, 3A4 2 MAMROS0068-0015 Fuse Kit, 15A5 3 MAMROS0051 DC Power Cable, M-803 (20 ft)6 1 MAMROS0052 Multi-Cable Assembly7 1 MAMROS0054 V-TAC Control Interface Assembly8 1 MAMROS0078-TMB12 RF Cable, TNC to Mini-UHF, Blue9 1 MAMROS0078-TMG12 RF Cable, TNC to Mini-UHF, Green10 1 MAMROS0078-TTR12 RF Cable, TNC to TNC, Red11 1 MAMROS0078-TTX12 RF Cable, TNC to TNC, Yellow12 1 MAMROS0066 CAN Terminator, 3-Pin13 1 MAMROS0060 Antenna Connector, TNCTable II - Additional V-TAC Options and AccessoriesPart Number Description(TBD) GPS Upgrade OptionMAMROS0023 GPS Antenna Kit, Show/No-Show/Magnet MountMAMROS0033 Antenna Kit, Unity Gain, RooftopMAMROS0031 Antenna Kit, 3dB, RooftopMAMROS0024 Antenna Kit, Elevated 3dB, Trunk MountMAMROS0039 SMR/GPS Antenna Kit, 3dB, RooftopMAMROS0026 SMR/GPS Antenna Kit, Elevated 3dB, Trunk MountMAMROS0042 SMR/GPS Antenna Kit, Elevated 3dB, Mirror MountMAMROS0055 RS-232 Serial Computer Cable (6 ft)INSTRUCTIONSUpon removing all items from the box and verifying that all have been included,proceed with the following steps to install the VR-803 V-TAC. Refer to Figure 1 forlocation of connectors on the V-TAC.Mounting of the V-TAC and Antenna in ways other than thosedescribed below may adversely affect performance, violate FCCrules on RF Exposure, and even damage the V-TAC.
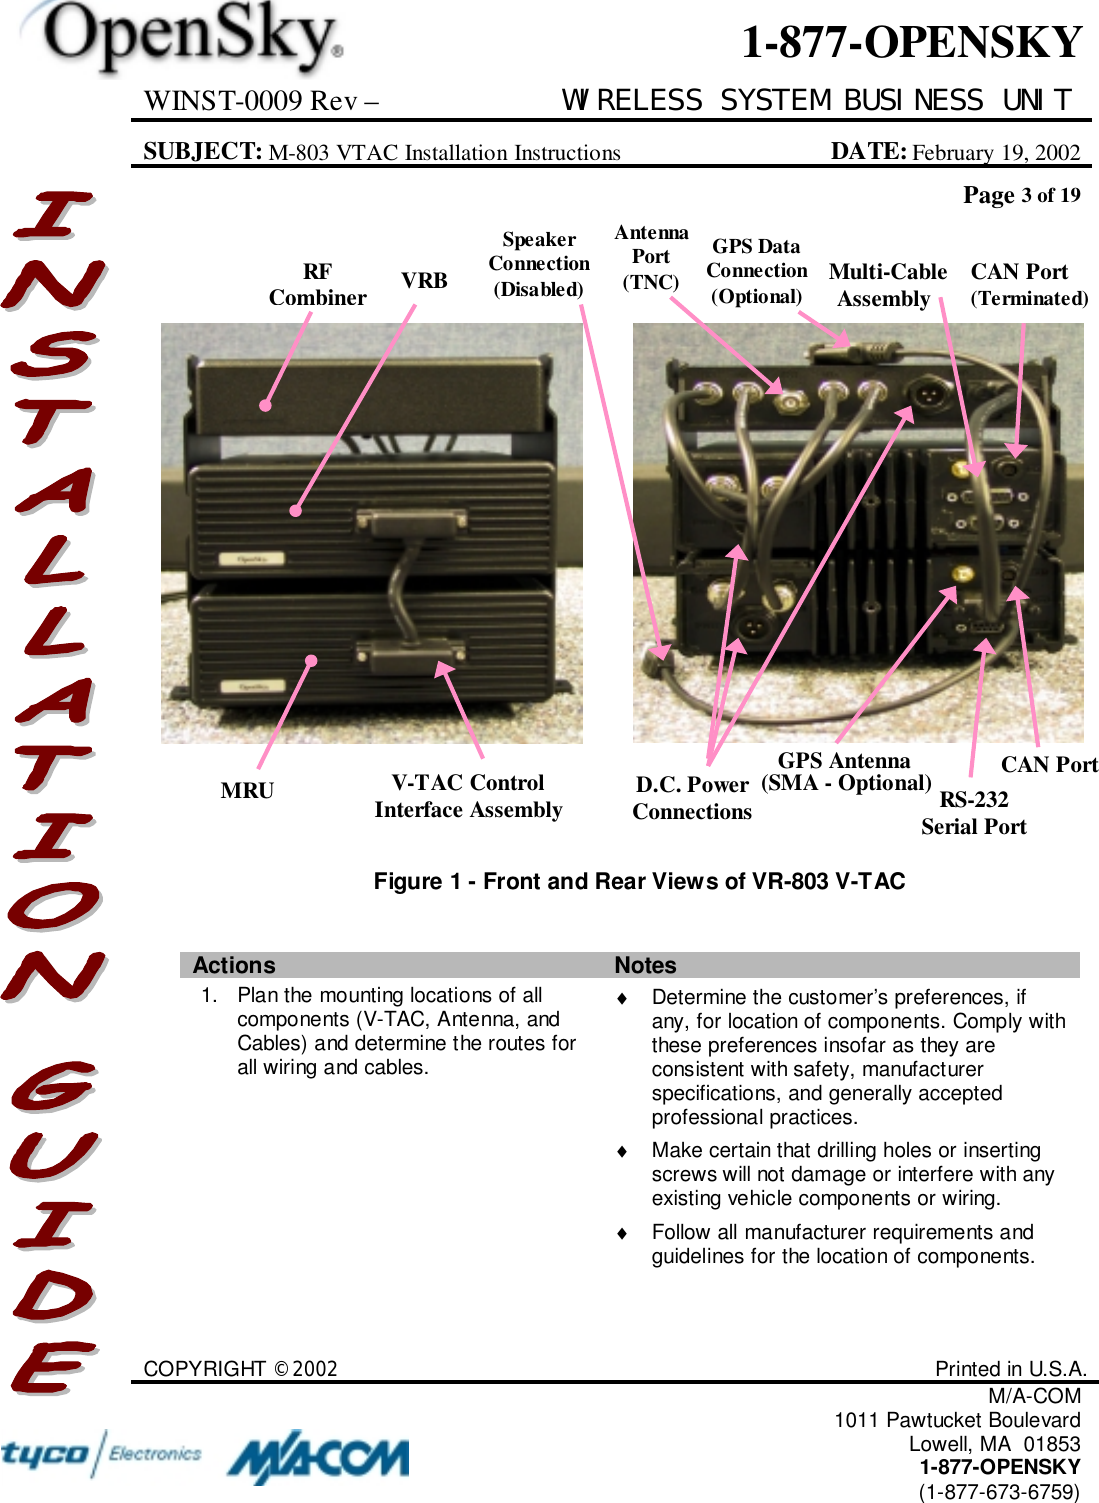
WINST-0009 Rev – WIRELESS SYSTEM BUSINESS UNITSUBJECT: M-803 VTAC Installation Instructions DATE: February 19, 2002Page 3 of 19COPYRIGHT ©2002 Printed in U.S.A.M/A-COM1011 Pawtucket BoulevardLowell, MA  018531-877-OPENSKY(1-877-673-6759)1-877-OPENSKYActions Notes1. Plan the mounting locations of allcomponents (V-TAC, Antenna, andCables) and determine the routes forall wiring and cables.♦  Determine the customer’s preferences, ifany, for location of components. Comply withthese preferences insofar as they areconsistent with safety, manufacturerspecifications, and generally acceptedprofessional practices.♦  Make certain that drilling holes or insertingscrews will not damage or interfere with anyexisting vehicle components or wiring.♦  Follow all manufacturer requirements andguidelines for the location of components.MRUVRBRFCombinerV-TAC ControlInterface AssemblyMulti-CableAssemblyD.C. PowerConnections RS-232Serial Port(SMA - Optional)GPS Antenna CAN PortSpeakerConnection(Disabled)GPS DataConnection(Optional) CAN Port(Terminated)AntennaPort(TNC)Figure 1 - Front and Rear Views of VR-803 V-TAC
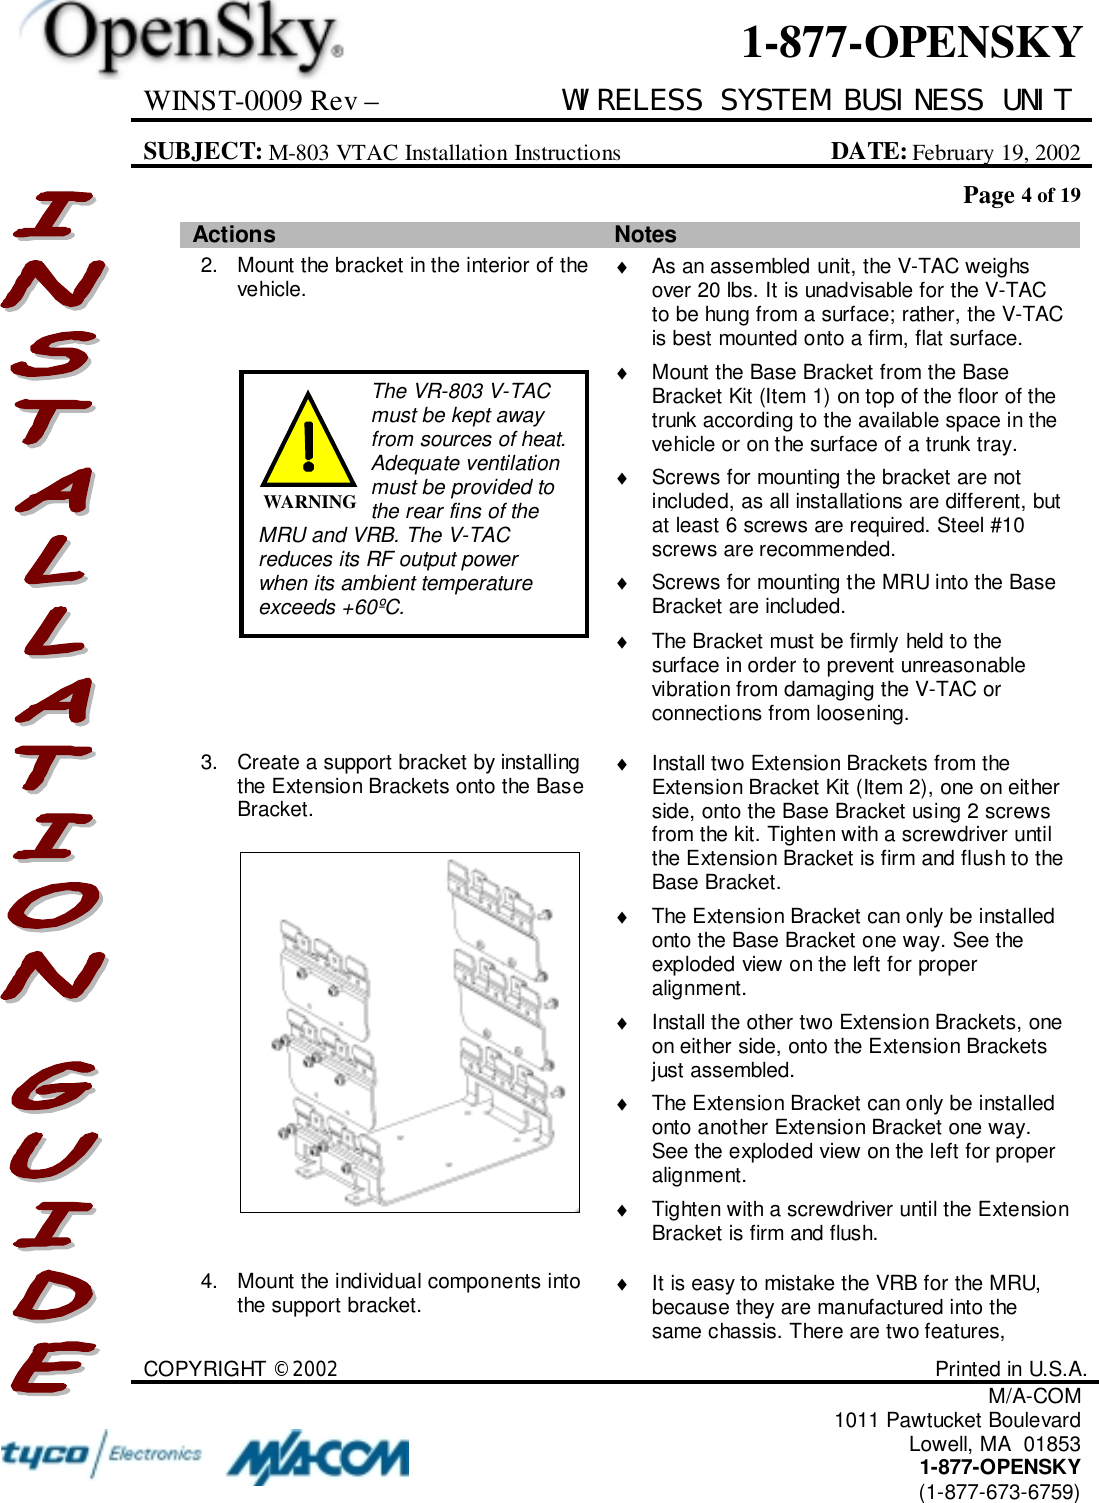
WINST-0009 Rev – WIRELESS SYSTEM BUSINESS UNITSUBJECT: M-803 VTAC Installation Instructions DATE: February 19, 2002Page 4 of 19COPYRIGHT ©2002 Printed in U.S.A.M/A-COM1011 Pawtucket BoulevardLowell, MA  018531-877-OPENSKY(1-877-673-6759)1-877-OPENSKYActions Notes2. Mount the bracket in the interior of thevehicle. ♦  As an assembled unit, the V-TAC weighsover 20 lbs. It is unadvisable for the V-TACto be hung from a surface; rather, the V-TACis best mounted onto a firm, flat surface.♦  Mount the Base Bracket from the BaseBracket Kit (Item 1) on top of the floor of thetrunk according to the available space in thevehicle or on the surface of a trunk tray.♦  Screws for mounting the bracket are notincluded, as all installations are different, butat least 6 screws are required. Steel #10screws are recommended.♦  Screws for mounting the MRU into the BaseBracket are included.♦  The Bracket must be firmly held to thesurface in order to prevent unreasonablevibration from damaging the V-TAC orconnections from loosening.3. Create a support bracket by installingthe Extension Brackets onto the BaseBracket.♦  Install two Extension Brackets from theExtension Bracket Kit (Item 2), one on eitherside, onto the Base Bracket using 2 screwsfrom the kit. Tighten with a screwdriver untilthe Extension Bracket is firm and flush to theBase Bracket.♦  The Extension Bracket can only be installedonto the Base Bracket one way. See theexploded view on the left for properalignment.♦  Install the other two Extension Brackets, oneon either side, onto the Extension Bracketsjust assembled.♦  The Extension Bracket can only be installedonto another Extension Bracket one way.See the exploded view on the left for properalignment.♦  Tighten with a screwdriver until the ExtensionBracket is firm and flush.4. Mount the individual components intothe support bracket. ♦  It is easy to mistake the VRB for the MRU,because they are manufactured into thesame chassis. There are two features,The VR-803 V-TACmust be kept awayfrom sources of heat.Adequate ventilationmust be provided tothe rear fins of theMRU and VRB. The V-TACreduces its RF output powerwhen its ambient temperatureexceeds +60ºC.WARNING
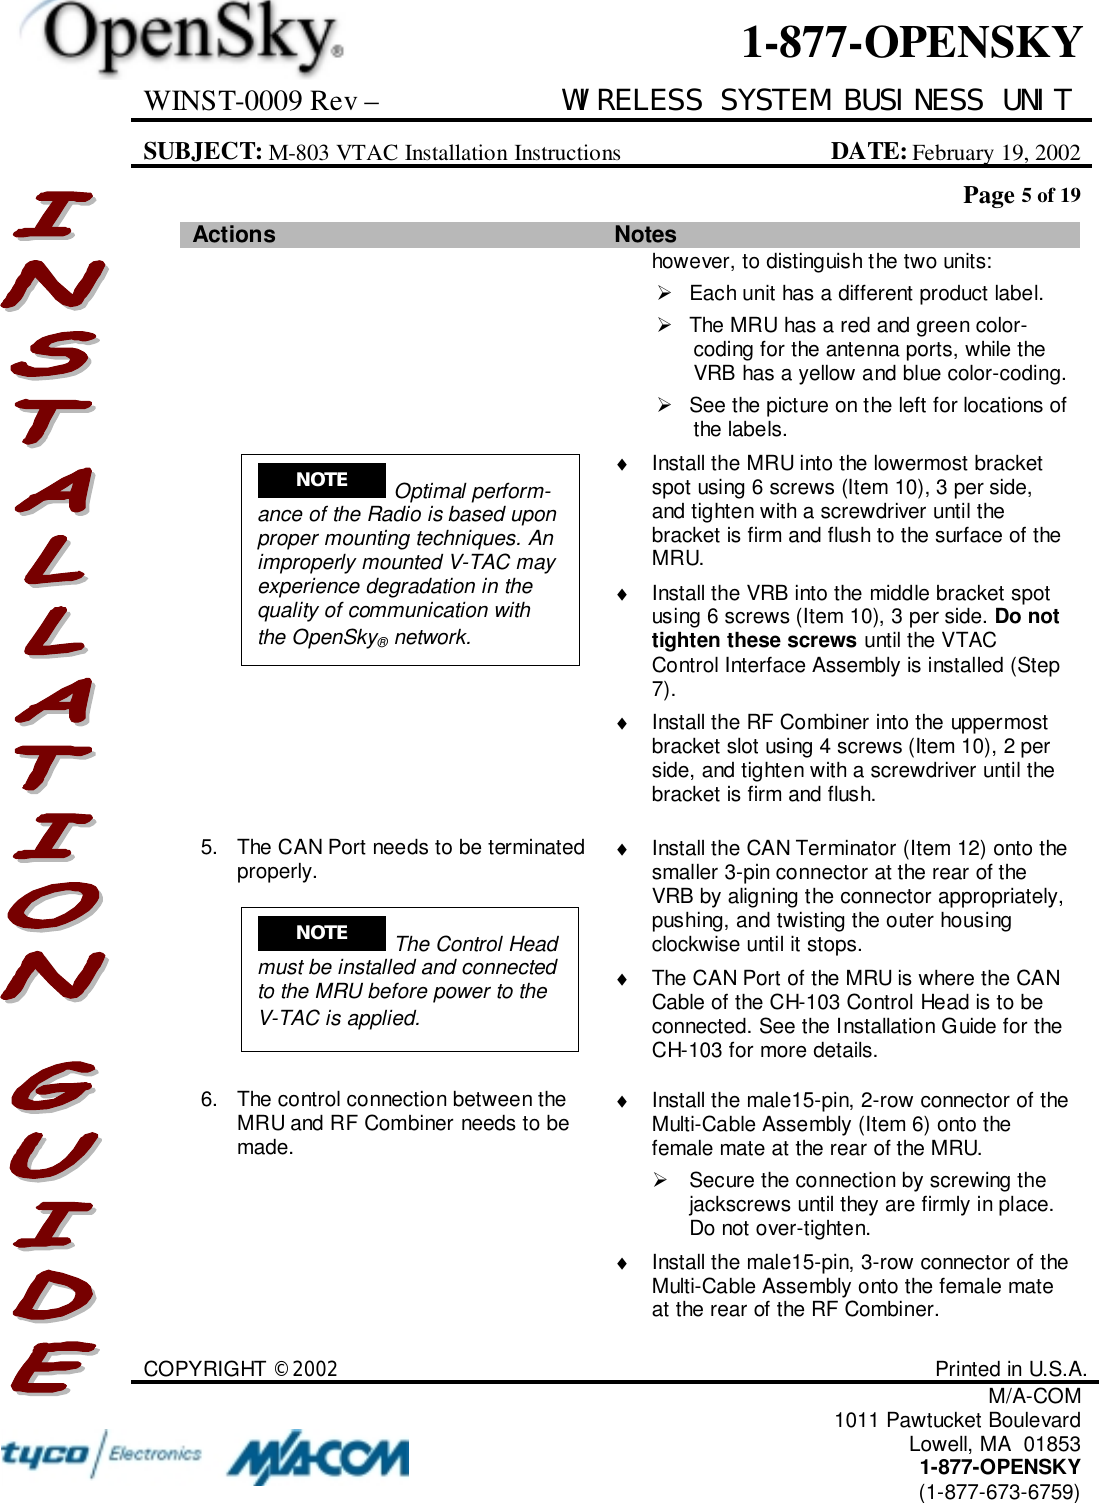
WINST-0009 Rev – WIRELESS SYSTEM BUSINESS UNITSUBJECT: M-803 VTAC Installation Instructions DATE: February 19, 2002Page 5 of 19COPYRIGHT ©2002 Printed in U.S.A.M/A-COM1011 Pawtucket BoulevardLowell, MA  018531-877-OPENSKY(1-877-673-6759)1-877-OPENSKYActions Noteshowever, to distinguish the two units:!  Each unit has a different product label.!  The MRU has a red and green color-coding for the antenna ports, while theVRB has a yellow and blue color-coding.!  See the picture on the left for locations ofthe labels.♦  Install the MRU into the lowermost bracketspot using 6 screws (Item 10), 3 per side,and tighten with a screwdriver until thebracket is firm and flush to the surface of theMRU.♦  Install the VRB into the middle bracket spotusing 6 screws (Item 10), 3 per side. Do nottighten these screws until the VTACControl Interface Assembly is installed (Step7).♦  Install the RF Combiner into the uppermostbracket slot using 4 screws (Item 10), 2 perside, and tighten with a screwdriver until thebracket is firm and flush.5. The CAN Port needs to be terminatedproperly. ♦  Install the CAN Terminator (Item 12) onto thesmaller 3-pin connector at the rear of theVRB by aligning the connector appropriately,pushing, and twisting the outer housingclockwise until it stops.♦  The CAN Port of the MRU is where the CANCable of the CH-103 Control Head is to beconnected. See the Installation Guide for theCH-103 for more details.6. The control connection between theMRU and RF Combiner needs to bemade.♦  Install the male15-pin, 2-row connector of theMulti-Cable Assembly (Item 6) onto thefemale mate at the rear of the MRU.!  Secure the connection by screwing thejackscrews until they are firmly in place.Do not over-tighten.♦  Install the male15-pin, 3-row connector of theMulti-Cable Assembly onto the female mateat the rear of the RF Combiner.NOTE  Optimal perform-ance of the Radio is based uponproper mounting techniques. Animproperly mounted V-TAC mayexperience degradation in thequality of communication withthe OpenSky® network.NOTE  The Control Headmust be installed and connectedto the MRU before power to theV-TAC is applied.
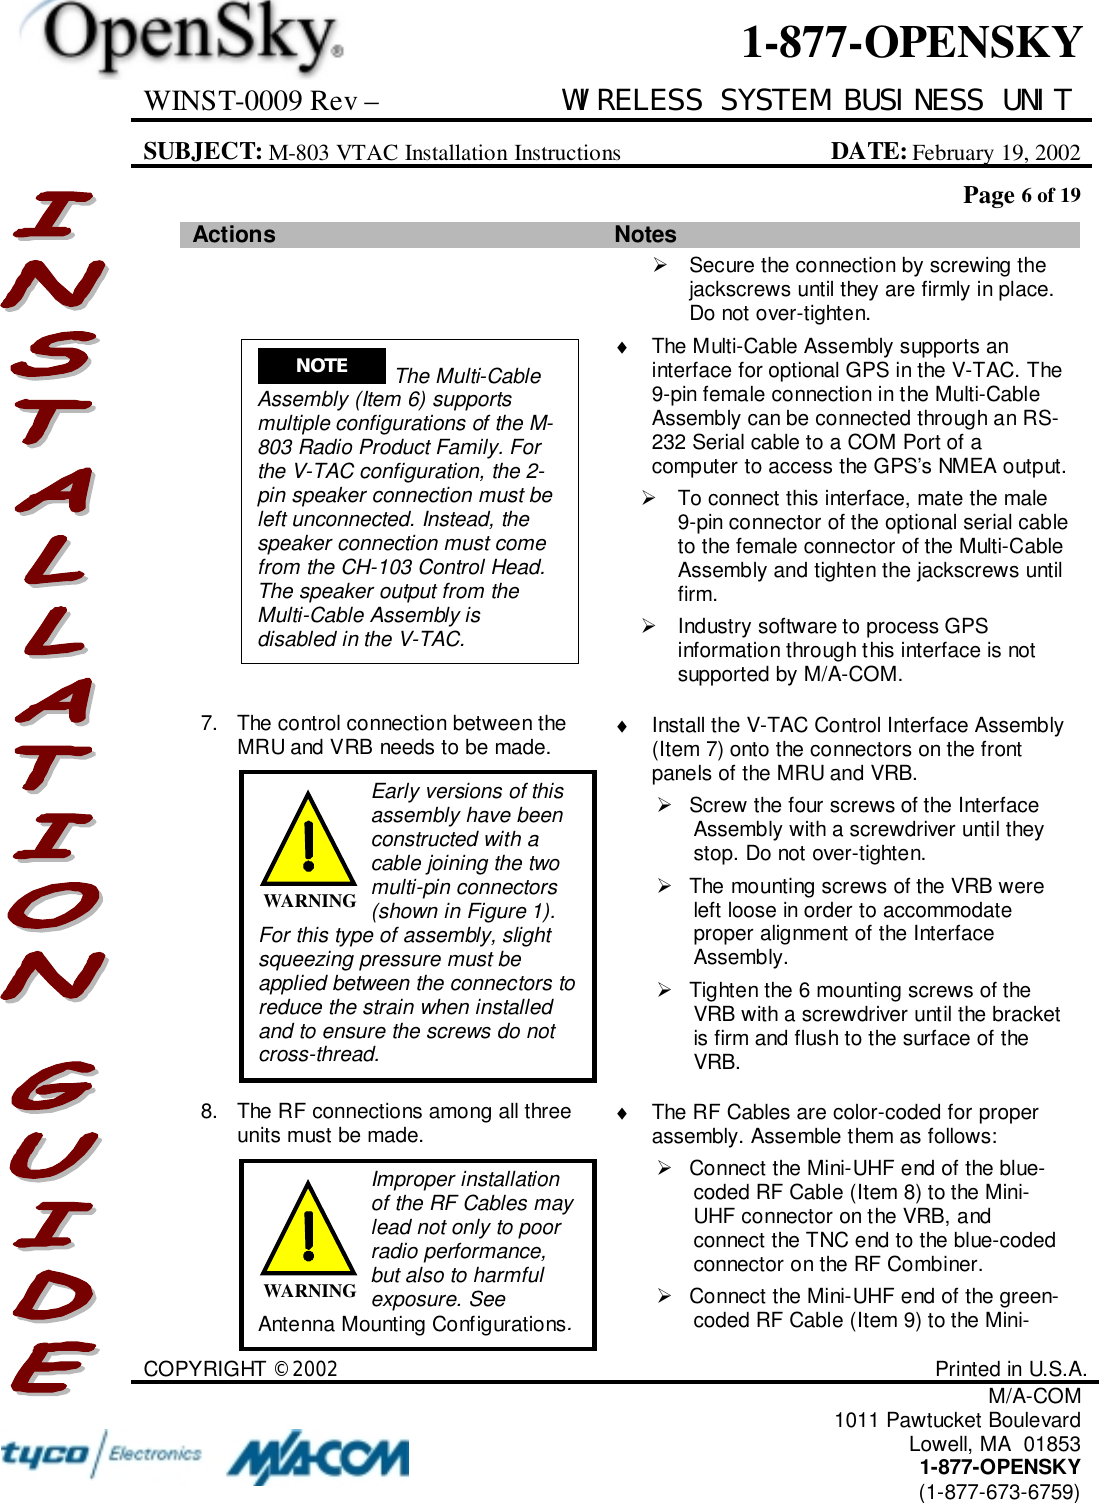
WINST-0009 Rev – WIRELESS SYSTEM BUSINESS UNITSUBJECT: M-803 VTAC Installation Instructions DATE: February 19, 2002Page 6 of 19COPYRIGHT ©2002 Printed in U.S.A.M/A-COM1011 Pawtucket BoulevardLowell, MA  018531-877-OPENSKY(1-877-673-6759)1-877-OPENSKYActions Notes!  Secure the connection by screwing thejackscrews until they are firmly in place.Do not over-tighten.♦  The Multi-Cable Assembly supports aninterface for optional GPS in the V-TAC. The9-pin female connection in the Multi-CableAssembly can be connected through an RS-232 Serial cable to a COM Port of acomputer to access the GPS’s NMEA output.!  To connect this interface, mate the male9-pin connector of the optional serial cableto the female connector of the Multi-CableAssembly and tighten the jackscrews untilfirm.!  Industry software to process GPSinformation through this interface is notsupported by M/A-COM.7. The control connection between theMRU and VRB needs to be made. ♦  Install the V-TAC Control Interface Assembly(Item 7) onto the connectors on the frontpanels of the MRU and VRB.!  Screw the four screws of the InterfaceAssembly with a screwdriver until theystop. Do not over-tighten.!  The mounting screws of the VRB wereleft loose in order to accommodateproper alignment of the InterfaceAssembly.!  Tighten the 6 mounting screws of theVRB with a screwdriver until the bracketis firm and flush to the surface of theVRB.8. The RF connections among all threeunits must be made. ♦  The RF Cables are color-coded for properassembly. Assemble them as follows:!  Connect the Mini-UHF end of the blue-coded RF Cable (Item 8) to the Mini-UHF connector on the VRB, andconnect the TNC end to the blue-codedconnector on the RF Combiner.!  Connect the Mini-UHF end of the green-coded RF Cable (Item 9) to the Mini-NOTE  The Multi-CableAssembly (Item 6) supportsmultiple configurations of the M-803 Radio Product Family. Forthe V-TAC configuration, the 2-pin speaker connection must beleft unconnected. Instead, thespeaker connection must comefrom the CH-103 Control Head.The speaker output from theMulti-Cable Assembly isdisabled in the V-TAC.Early versions of thisassembly have beenconstructed with acable joining the twomulti-pin connectors(shown in Figure 1).For this type of assembly, slightsqueezing pressure must beapplied between the connectors toreduce the strain when installedand to ensure the screws do notcross-thread.WARNINGImproper installationof the RF Cables maylead not only to poorradio performance,but also to harmfulexposure. SeeAntenna Mounting Configurations.WARNING
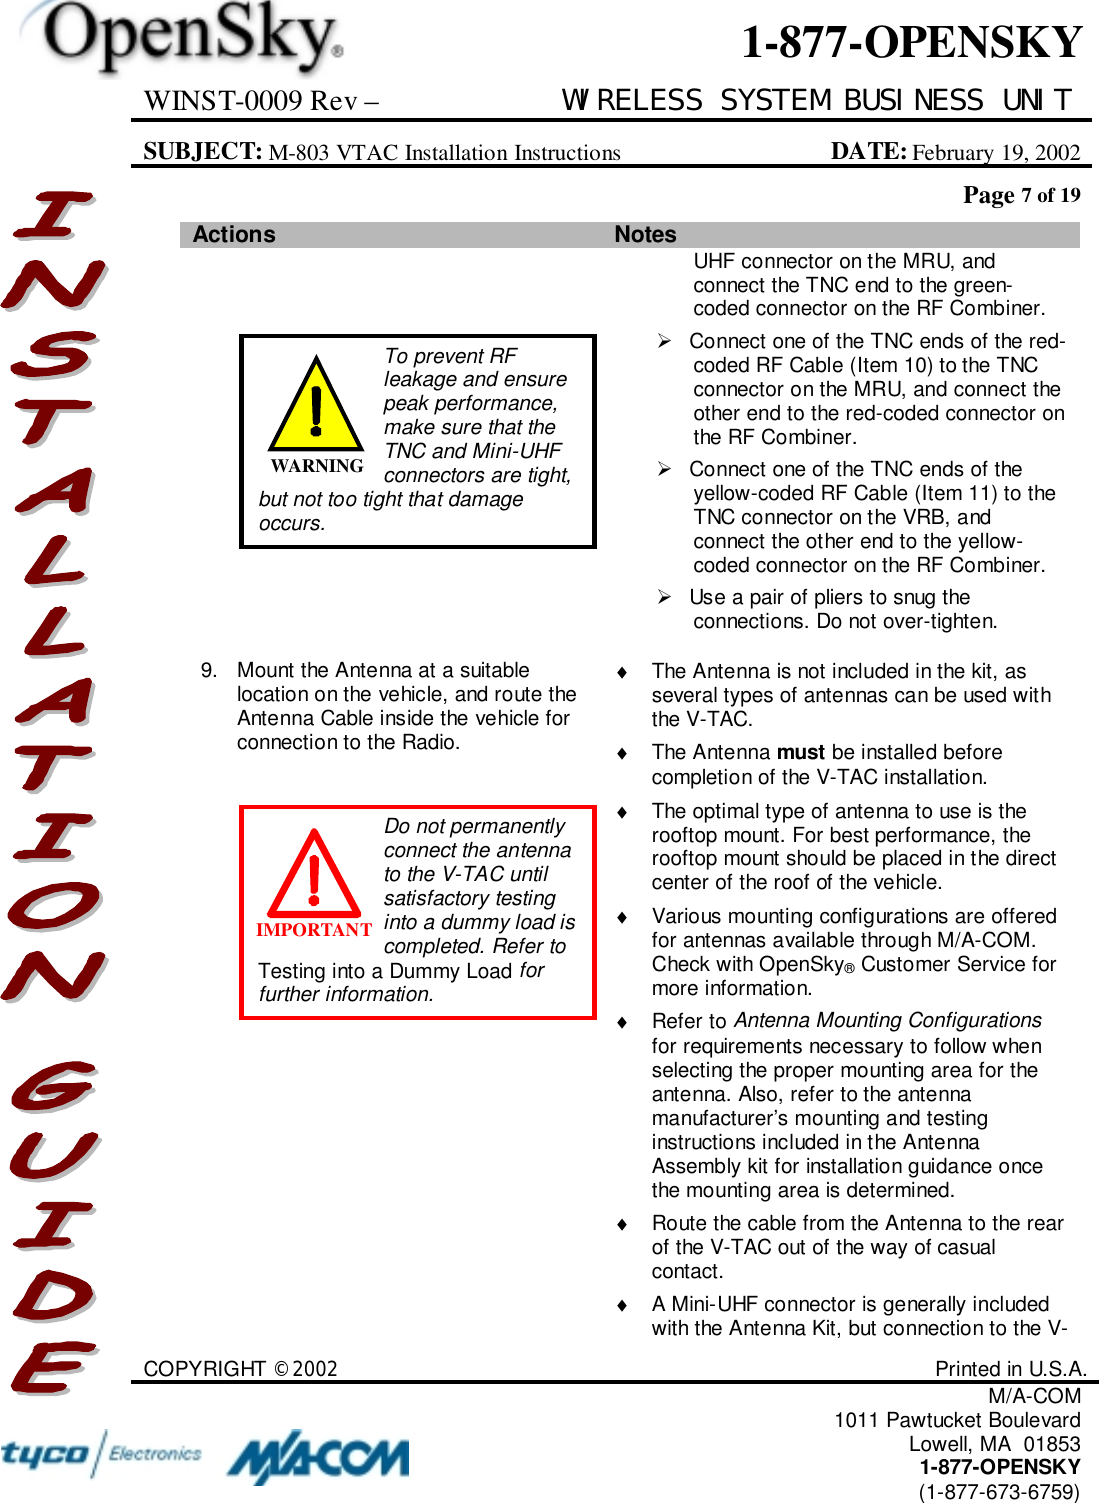
WINST-0009 Rev – WIRELESS SYSTEM BUSINESS UNITSUBJECT: M-803 VTAC Installation Instructions DATE: February 19, 2002Page 7 of 19COPYRIGHT ©2002 Printed in U.S.A.M/A-COM1011 Pawtucket BoulevardLowell, MA  018531-877-OPENSKY(1-877-673-6759)1-877-OPENSKYActions Notes UHF connector on the MRU, andconnect the TNC end to the green-coded connector on the RF Combiner.!  Connect one of the TNC ends of the red-coded RF Cable (Item 10) to the TNCconnector on the MRU, and connect theother end to the red-coded connector onthe RF Combiner.!  Connect one of the TNC ends of theyellow-coded RF Cable (Item 11) to theTNC connector on the VRB, andconnect the other end to the yellow-coded connector on the RF Combiner.!  Use a pair of pliers to snug theconnections. Do not over-tighten.9. Mount the Antenna at a suitablelocation on the vehicle, and route theAntenna Cable inside the vehicle forconnection to the Radio.♦  The Antenna is not included in the kit, asseveral types of antennas can be used withthe V-TAC.♦ The Antenna must be installed beforecompletion of the V-TAC installation.♦  The optimal type of antenna to use is therooftop mount. For best performance, therooftop mount should be placed in the directcenter of the roof of the vehicle.♦  Various mounting configurations are offeredfor antennas available through M/A-COM.Check with OpenSky® Customer Service formore information.♦ Refer to Antenna Mounting Configurationsfor requirements necessary to follow whenselecting the proper mounting area for theantenna. Also, refer to the antennamanufacturer’s mounting and testinginstructions included in the AntennaAssembly kit for installation guidance oncethe mounting area is determined.♦  Route the cable from the Antenna to the rearof the V-TAC out of the way of casualcontact.♦  A Mini-UHF connector is generally includedwith the Antenna Kit, but connection to the V-Do not permanentlyconnect the antennato the V-TAC untilsatisfactory testinginto a dummy load iscompleted. Refer toTesting into a Dummy Load forfurther information.IMPORTANTTo prevent RFleakage and ensurepeak performance,make sure that theTNC and Mini-UHFconnectors are tight,but not too tight that damageoccurs.WARNING
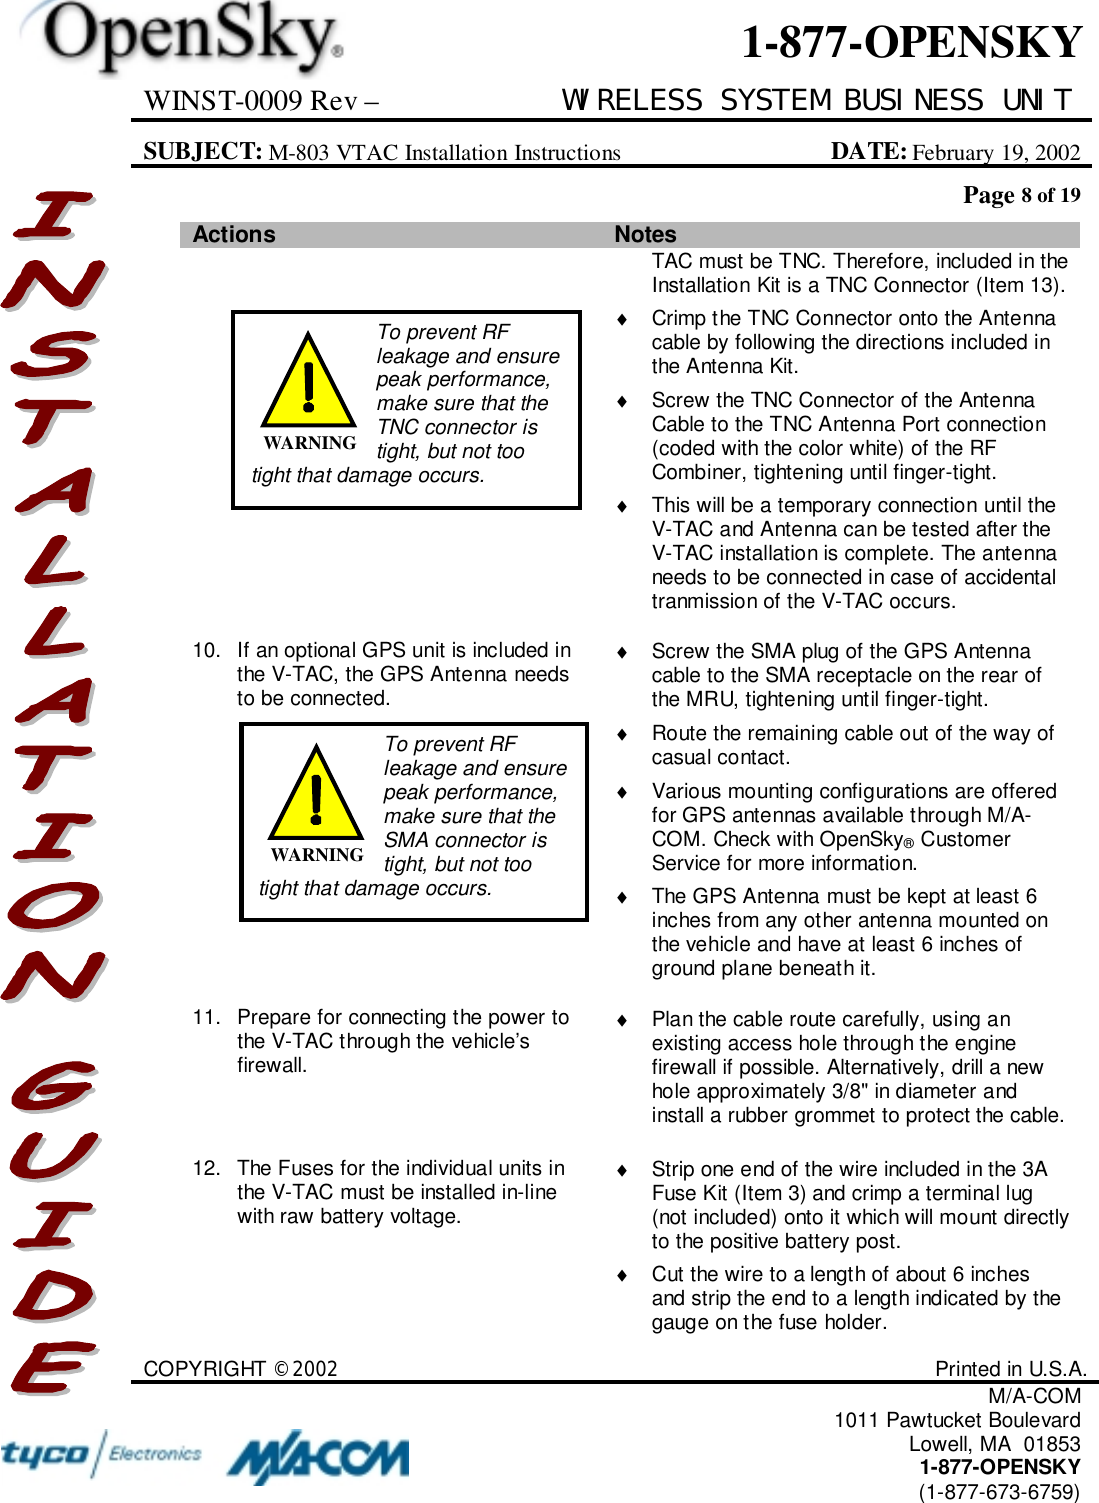
WINST-0009 Rev – WIRELESS SYSTEM BUSINESS UNITSUBJECT: M-803 VTAC Installation Instructions DATE: February 19, 2002Page 8 of 19COPYRIGHT ©2002 Printed in U.S.A.M/A-COM1011 Pawtucket BoulevardLowell, MA  018531-877-OPENSKY(1-877-673-6759)1-877-OPENSKYActions NotesTAC must be TNC. Therefore, included in theInstallation Kit is a TNC Connector (Item 13).♦  Crimp the TNC Connector onto the Antennacable by following the directions included inthe Antenna Kit.♦  Screw the TNC Connector of the AntennaCable to the TNC Antenna Port connection(coded with the color white) of the RFCombiner, tightening until finger-tight.♦  This will be a temporary connection until theV-TAC and Antenna can be tested after theV-TAC installation is complete. The antennaneeds to be connected in case of accidentaltranmission of the V-TAC occurs.10. If an optional GPS unit is included inthe V-TAC, the GPS Antenna needsto be connected.♦  Screw the SMA plug of the GPS Antennacable to the SMA receptacle on the rear ofthe MRU, tightening until finger-tight.♦  Route the remaining cable out of the way ofcasual contact.♦  Various mounting configurations are offeredfor GPS antennas available through M/A-COM. Check with OpenSky® CustomerService for more information.♦  The GPS Antenna must be kept at least 6inches from any other antenna mounted onthe vehicle and have at least 6 inches ofground plane beneath it.11. Prepare for connecting the power tothe V-TAC through the vehicle’sfirewall.♦  Plan the cable route carefully, using anexisting access hole through the enginefirewall if possible. Alternatively, drill a newhole approximately 3/8" in diameter andinstall a rubber grommet to protect the cable.12. The Fuses for the individual units inthe V-TAC must be installed in-linewith raw battery voltage.♦  Strip one end of the wire included in the 3AFuse Kit (Item 3) and crimp a terminal lug(not included) onto it which will mount directlyto the positive battery post.♦  Cut the wire to a length of about 6 inchesand strip the end to a length indicated by thegauge on the fuse holder.To prevent RFleakage and ensurepeak performance,make sure that theTNC connector istight, but not tootight that damage occurs.WARNINGTo prevent RFleakage and ensurepeak performance,make sure that theSMA connector istight, but not tootight that damage occurs.WARNING
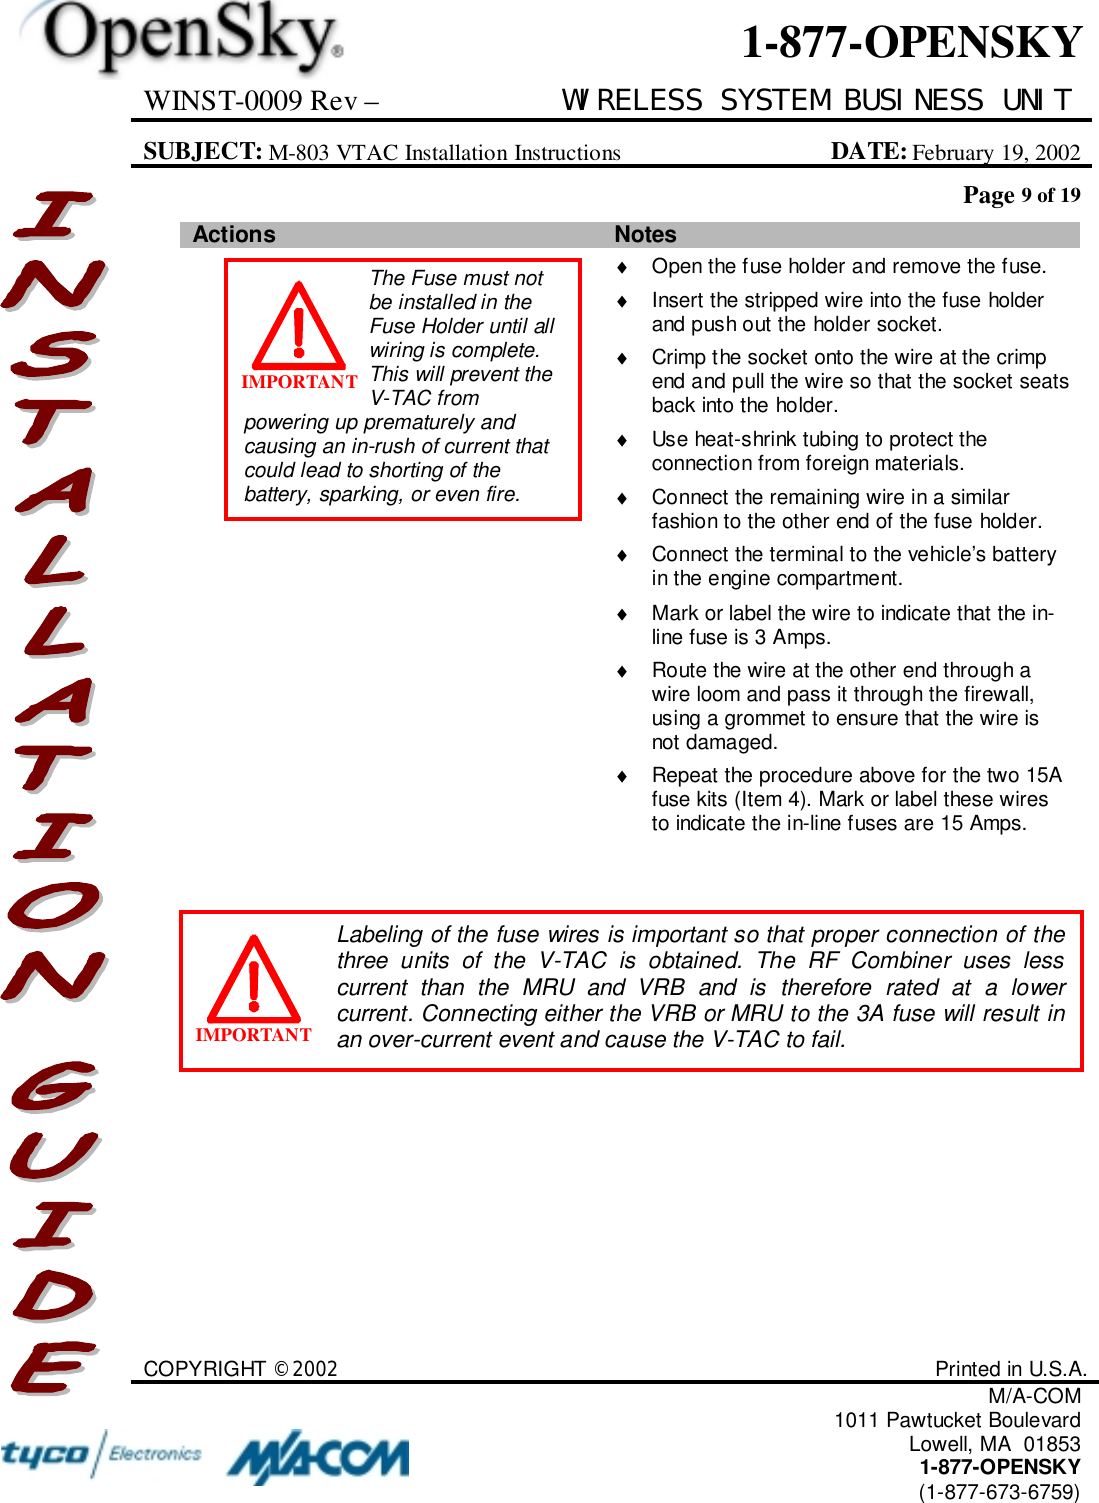
WINST-0009 Rev – WIRELESS SYSTEM BUSINESS UNITSUBJECT: M-803 VTAC Installation Instructions DATE: February 19, 2002Page 9 of 19COPYRIGHT ©2002 Printed in U.S.A.M/A-COM1011 Pawtucket BoulevardLowell, MA  018531-877-OPENSKY(1-877-673-6759)1-877-OPENSKYActions Notes♦  Open the fuse holder and remove the fuse.♦  Insert the stripped wire into the fuse holderand push out the holder socket.♦  Crimp the socket onto the wire at the crimpend and pull the wire so that the socket seatsback into the holder.♦  Use heat-shrink tubing to protect theconnection from foreign materials.♦  Connect the remaining wire in a similarfashion to the other end of the fuse holder.♦  Connect the terminal to the vehicle’s batteryin the engine compartment.♦  Mark or label the wire to indicate that the in-line fuse is 3 Amps.♦  Route the wire at the other end through awire loom and pass it through the firewall,using a grommet to ensure that the wire isnot damaged.♦  Repeat the procedure above for the two 15Afuse kits (Item 4). Mark or label these wiresto indicate the in-line fuses are 15 Amps.The Fuse must notbe installed in theFuse Holder until allwiring is complete.This will prevent theV-TAC frompowering up prematurely andcausing an in-rush of current thatcould lead to shorting of thebattery, sparking, or even fire.IMPORTANTLabeling of the fuse wires is important so that proper connection of thethree units of the V-TAC is obtained. The RF Combiner uses lesscurrent than the MRU and VRB and is therefore rated at a lowercurrent. Connecting either the VRB or MRU to the 3A fuse will result inan over-current event and cause the V-TAC to fail.IMPORTANT
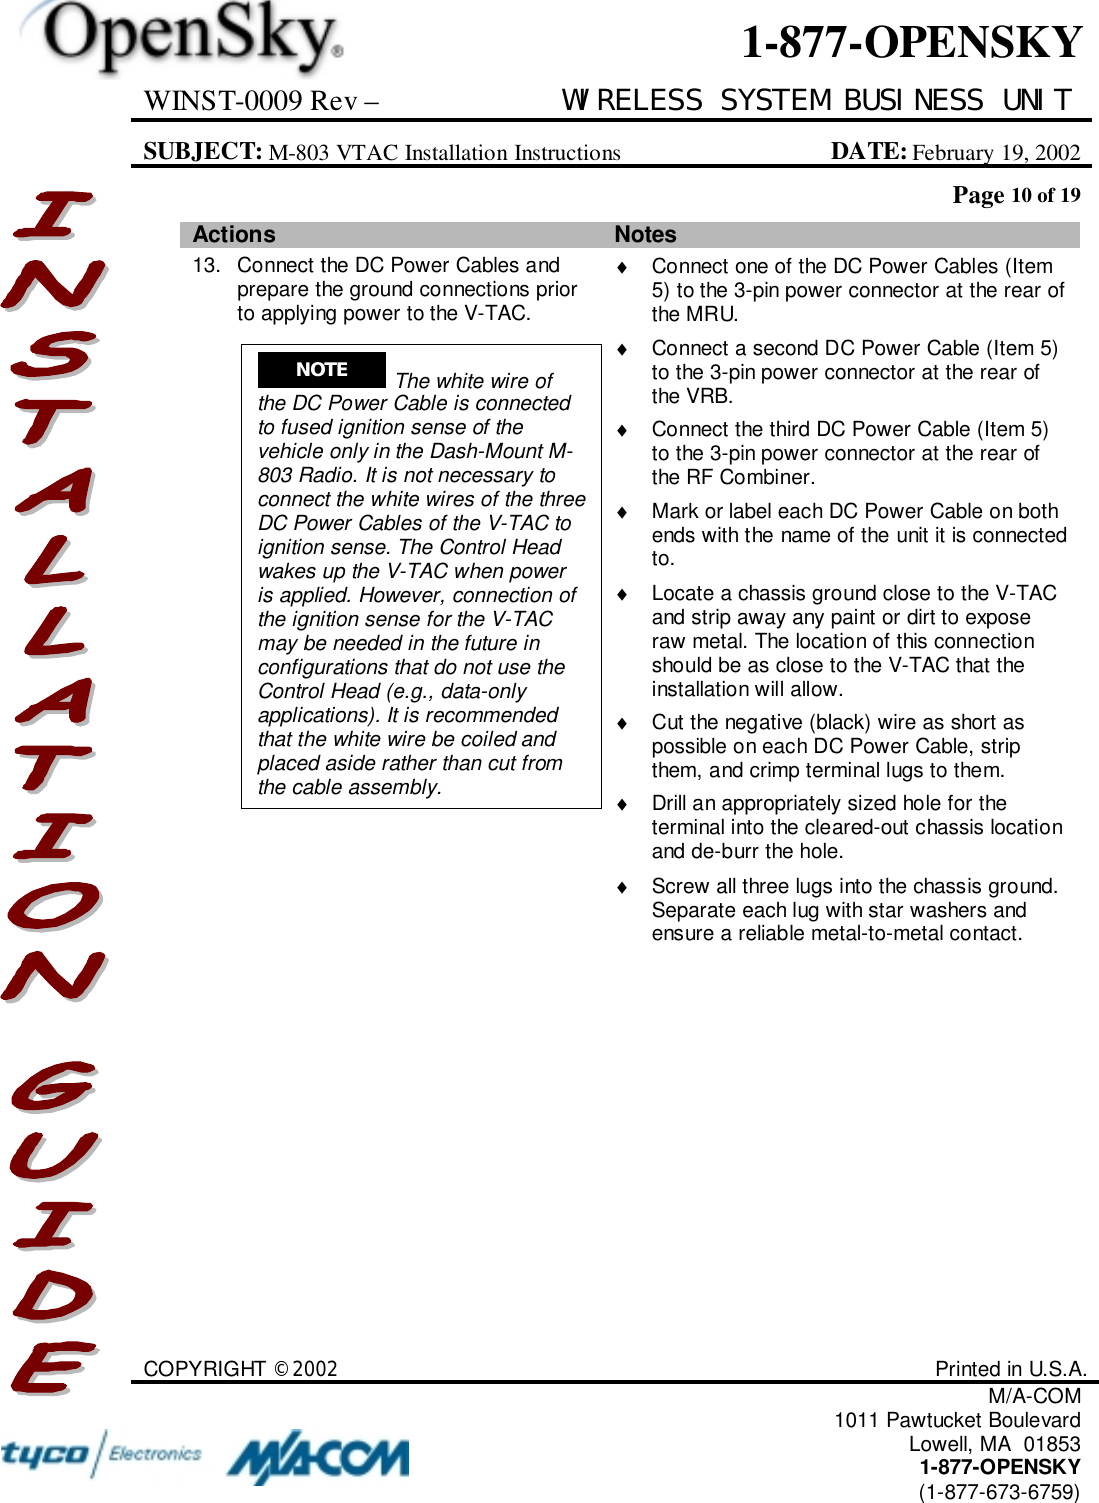
WINST-0009 Rev – WIRELESS SYSTEM BUSINESS UNITSUBJECT: M-803 VTAC Installation Instructions DATE: February 19, 2002Page 10 of 19COPYRIGHT ©2002 Printed in U.S.A.M/A-COM1011 Pawtucket BoulevardLowell, MA  018531-877-OPENSKY(1-877-673-6759)1-877-OPENSKYActions Notes13. Connect the DC Power Cables andprepare the ground connections priorto applying power to the V-TAC.♦  Connect one of the DC Power Cables (Item5) to the 3-pin power connector at the rear ofthe MRU.♦  Connect a second DC Power Cable (Item 5)to the 3-pin power connector at the rear ofthe VRB.♦  Connect the third DC Power Cable (Item 5)to the 3-pin power connector at the rear ofthe RF Combiner.♦  Mark or label each DC Power Cable on bothends with the name of the unit it is connectedto.♦  Locate a chassis ground close to the V-TACand strip away any paint or dirt to exposeraw metal. The location of this connectionshould be as close to the V-TAC that theinstallation will allow.♦  Cut the negative (black) wire as short aspossible on each DC Power Cable, stripthem, and crimp terminal lugs to them.♦  Drill an appropriately sized hole for theterminal into the cleared-out chassis locationand de-burr the hole.♦  Screw all three lugs into the chassis ground.Separate each lug with star washers andensure a reliable metal-to-metal contact.NOTE  The white wire ofthe DC Power Cable is connectedto fused ignition sense of thevehicle only in the Dash-Mount M-803 Radio. It is not necessary toconnect the white wires of the threeDC Power Cables of the V-TAC toignition sense. The Control Headwakes up the V-TAC when poweris applied. However, connection ofthe ignition sense for the V-TACmay be needed in the future inconfigurations that do not use theControl Head (e.g., data-onlyapplications). It is recommendedthat the white wire be coiled andplaced aside rather than cut fromthe cable assembly.
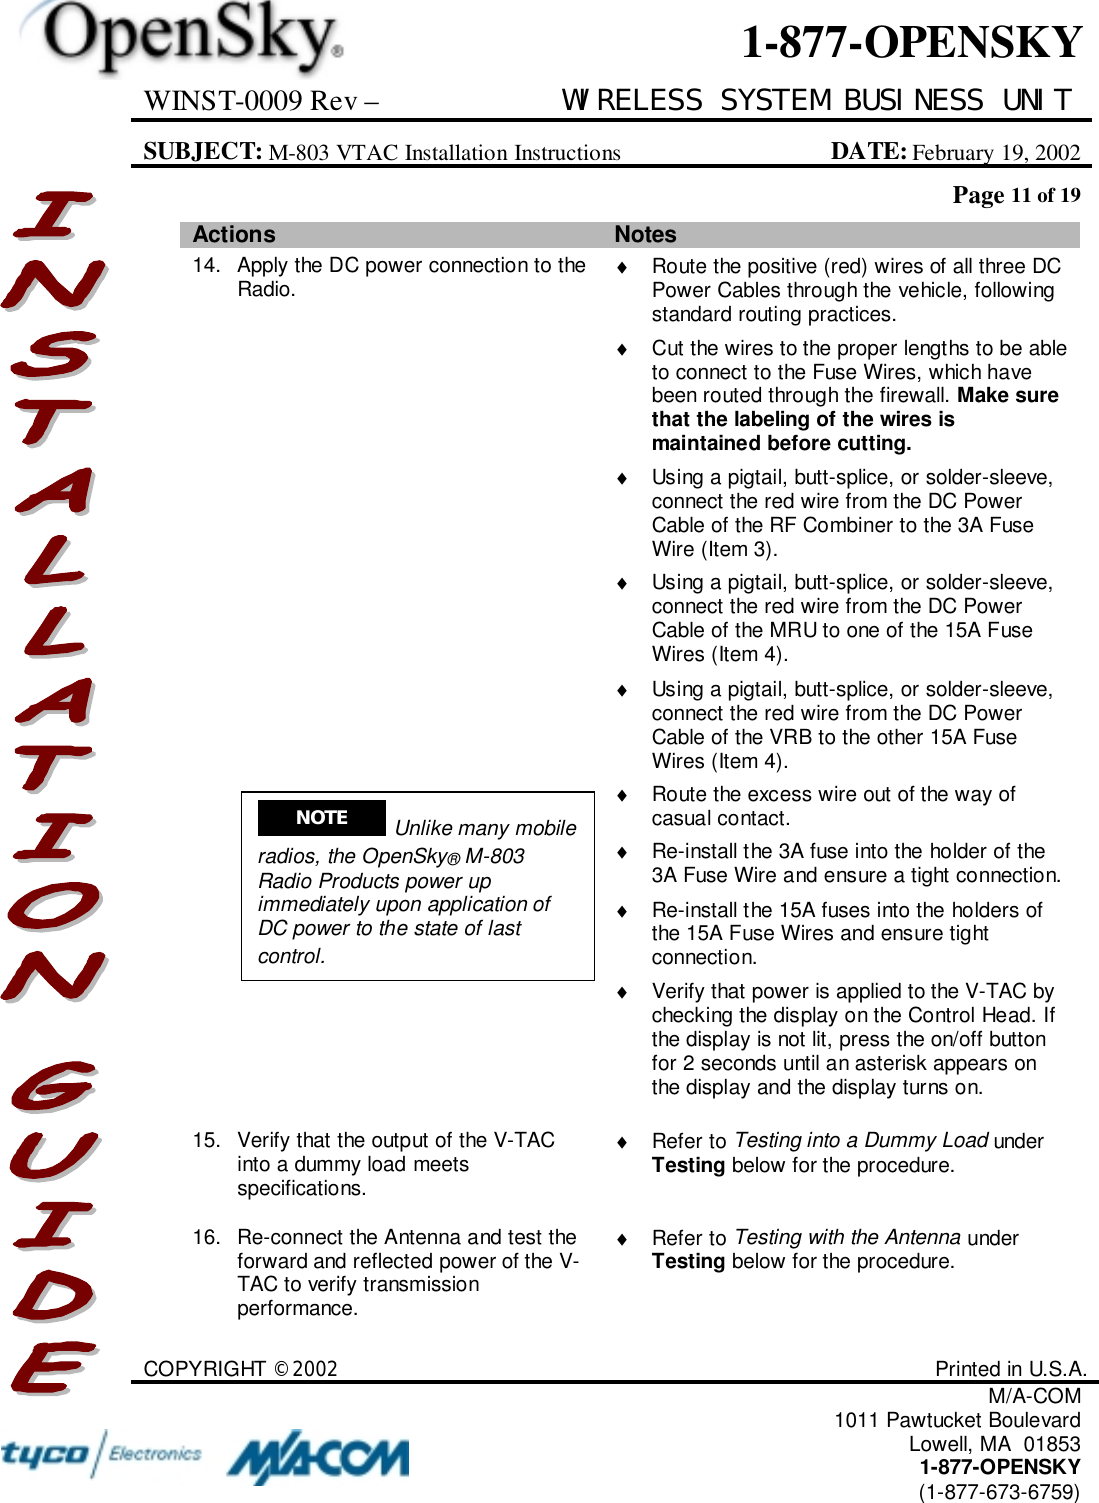
WINST-0009 Rev – WIRELESS SYSTEM BUSINESS UNITSUBJECT: M-803 VTAC Installation Instructions DATE: February 19, 2002Page 11 of 19COPYRIGHT ©2002 Printed in U.S.A.M/A-COM1011 Pawtucket BoulevardLowell, MA  018531-877-OPENSKY(1-877-673-6759)1-877-OPENSKYActions Notes14. Apply the DC power connection to theRadio. ♦  Route the positive (red) wires of all three DCPower Cables through the vehicle, followingstandard routing practices.♦  Cut the wires to the proper lengths to be ableto connect to the Fuse Wires, which havebeen routed through the firewall. Make surethat the labeling of the wires ismaintained before cutting.♦  Using a pigtail, butt-splice, or solder-sleeve,connect the red wire from the DC PowerCable of the RF Combiner to the 3A FuseWire (Item 3).♦  Using a pigtail, butt-splice, or solder-sleeve,connect the red wire from the DC PowerCable of the MRU to one of the 15A FuseWires (Item 4).♦  Using a pigtail, butt-splice, or solder-sleeve,connect the red wire from the DC PowerCable of the VRB to the other 15A FuseWires (Item 4).♦  Route the excess wire out of the way ofcasual contact.♦  Re-install the 3A fuse into the holder of the3A Fuse Wire and ensure a tight connection.♦  Re-install the 15A fuses into the holders ofthe 15A Fuse Wires and ensure tightconnection.♦  Verify that power is applied to the V-TAC bychecking the display on the Control Head. Ifthe display is not lit, press the on/off buttonfor 2 seconds until an asterisk appears onthe display and the display turns on.15. Verify that the output of the V-TACinto a dummy load meetsspecifications.♦ Refer to Testing into a Dummy Load underTesting below for the procedure.16. Re-connect the Antenna and test theforward and reflected power of the V-TAC to verify transmissionperformance.♦ Refer to Testing with the Antenna underTesting below for the procedure.NOTE  Unlike many mobileradios, the OpenSky® M-803Radio Products power upimmediately upon application ofDC power to the state of lastcontrol.
WINST-0009 Rev – WIRELESS SYSTEM BUSINESS UNITSUBJECT: M-803 VTAC Installation Instructions DATE: February 19, 2002Page 12 of 19COPYRIGHT ©2002 Printed in U.S.A.M/A-COM1011 Pawtucket BoulevardLowell, MA  018531-877-OPENSKY(1-877-673-6759)1-877-OPENSKYActions Notes17. Complete the installation byorganizing, securing, and checking allcables and components.♦  Take whatever steps are practical to makethe installation neat and functional for theRadio’s user. Organize and secure allcables; make sure all connections are tightbut not over-stressed.TESTINGThis section sets forth procedures to verify the performance of the installed V-TAC.Testing uses a wattmeter (or, alternatively, a VSWR meter) to measure RF power.There are three procedures in this section: Changing Operating Modes, Testing intoa Dummy Load, and Testing with the Antenna. Note that, while the normaloperating mode of the V-TAC for voice or data communications is OpenSky® TrunkingProtocol (OTP), the radio must be operating in OpenSky® Conventional FM (OCF)mode for testing. The reason for this is that OTP uses a Time Domain-Multiple Access(TDMA) protocol in which transmit power is difficult to measure with standardequipment. Conventional FM mode allows for 100% duty-cycle transmissions. Followthe procedure under Changing Operating Modes to switch between the OCF andOTP.Note also that the accuracy of test results depends on a radio power source in therange of 13.8–16 volts DC at greater than 8 amps. Make sure the vehicle’s battery isfully charged by running the engine for a few minutes before the test, and keep theengine running during the test procedures.Test Equipment CommentsWattmeter Bird Electronic Corporation Model 43 orequivalent, with N-Series female connectors onboth the input and output sides.As an alternative to using a wattmeter, aVoltage Standing Wave Ratio (VSWR) meter,Bird Electronic Corporation Model 4391A orequivalent, can be used to carry out therequired RF (radio frequency) power testing.Slug For use with the wattmeter; rated power of 25watts and frequency range appropriate to the800 MHz output of the OpenSky® V-TAC [BirdElectronics Element 25E (25 watts, 400–1000MHz) or equivalent].
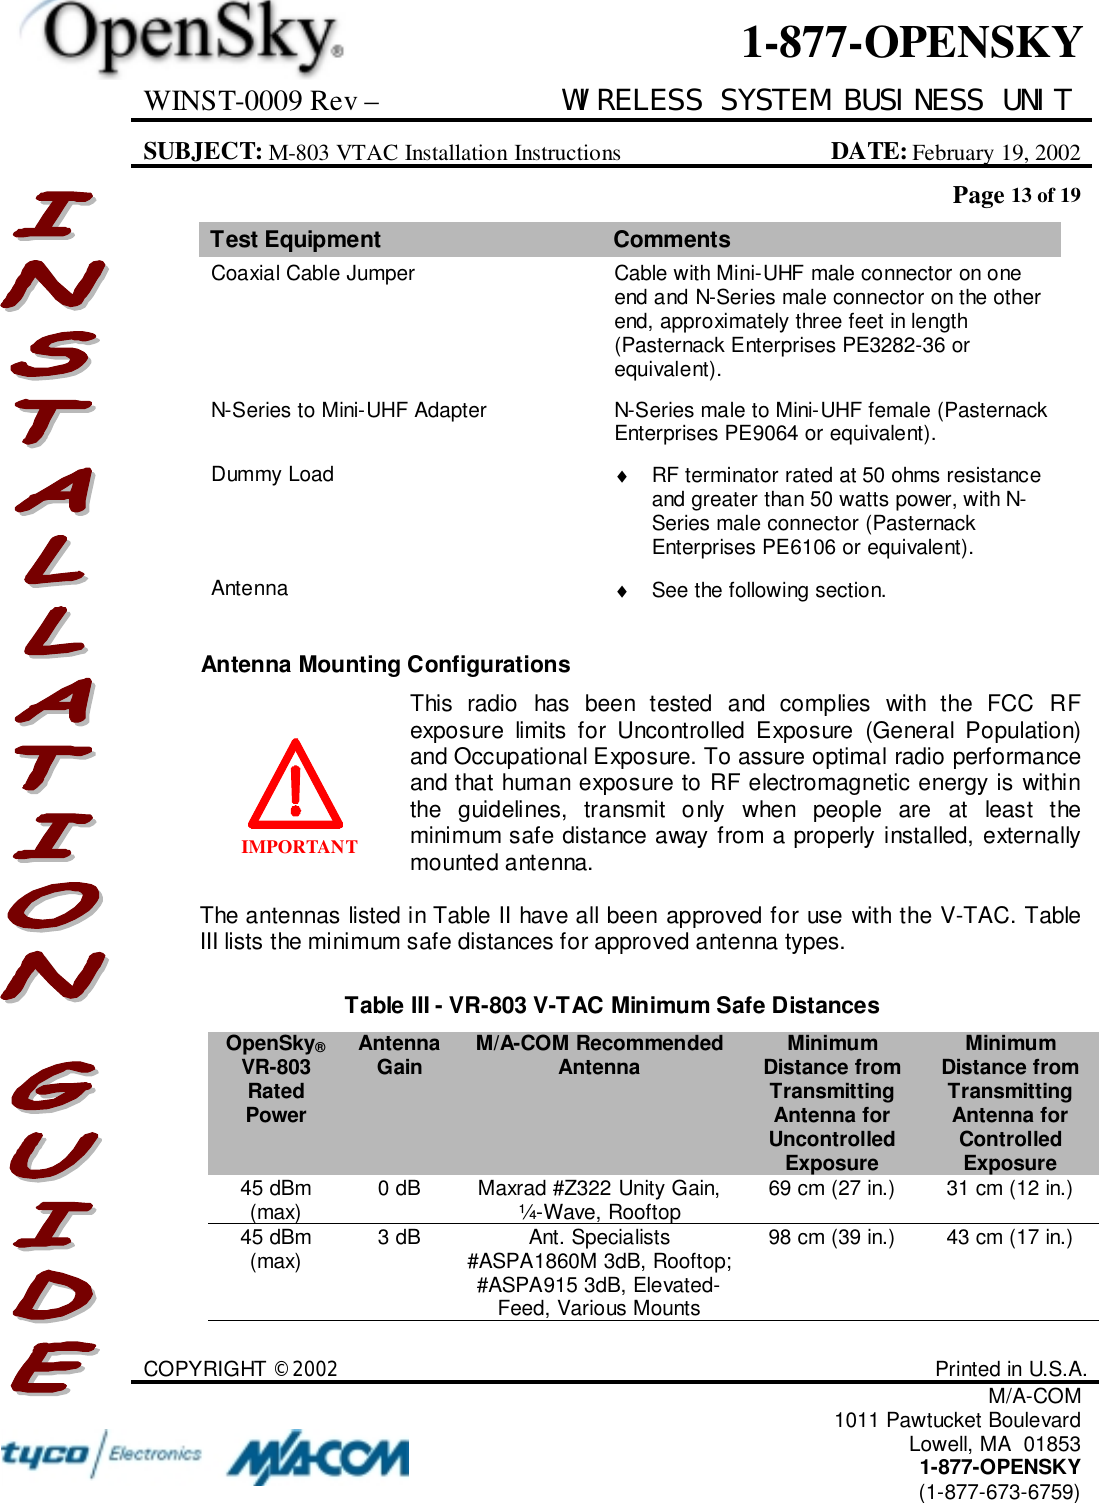
WINST-0009 Rev – WIRELESS SYSTEM BUSINESS UNITSUBJECT: M-803 VTAC Installation Instructions DATE: February 19, 2002Page 13 of 19COPYRIGHT ©2002 Printed in U.S.A.M/A-COM1011 Pawtucket BoulevardLowell, MA  018531-877-OPENSKY(1-877-673-6759)1-877-OPENSKYIMPORTANTTest Equipment CommentsCoaxial Cable Jumper Cable with Mini-UHF male connector on oneend and N-Series male connector on the otherend, approximately three feet in length(Pasternack Enterprises PE3282-36 orequivalent).N-Series to Mini-UHF Adapter N-Series male to Mini-UHF female (PasternackEnterprises PE9064 or equivalent).Dummy Load ♦  RF terminator rated at 50 ohms resistanceand greater than 50 watts power, with N-Series male connector (PasternackEnterprises PE6106 or equivalent).Antenna ♦  See the following section.Antenna Mounting ConfigurationsThis radio has been tested and complies with the FCC RFexposure limits for Uncontrolled Exposure (General Population)and Occupational Exposure. To assure optimal radio performanceand that human exposure to RF electromagnetic energy is withinthe guidelines, transmit only when people are at least theminimum safe distance away from a properly installed, externallymounted antenna.The antennas listed in Table II have all been approved for use with the V-TAC. TableIII lists the minimum safe distances for approved antenna types.Table III - VR-803 V-TAC Minimum Safe DistancesOpenSky®VR-803RatedPowerAntennaGain M/A-COM RecommendedAntenna MinimumDistance fromTransmittingAntenna forUncontrolledExposureMinimumDistance fromTransmittingAntenna forControlledExposure45 dBm(max) 0 dB Maxrad #Z322 Unity Gain,¼-Wave, Rooftop 69 cm (27 in.) 31 cm (12 in.)45 dBm(max) 3 dB Ant. Specialists#ASPA1860M 3dB, Rooftop;#ASPA915 3dB, Elevated-Feed, Various Mounts98 cm (39 in.) 43 cm (17 in.)
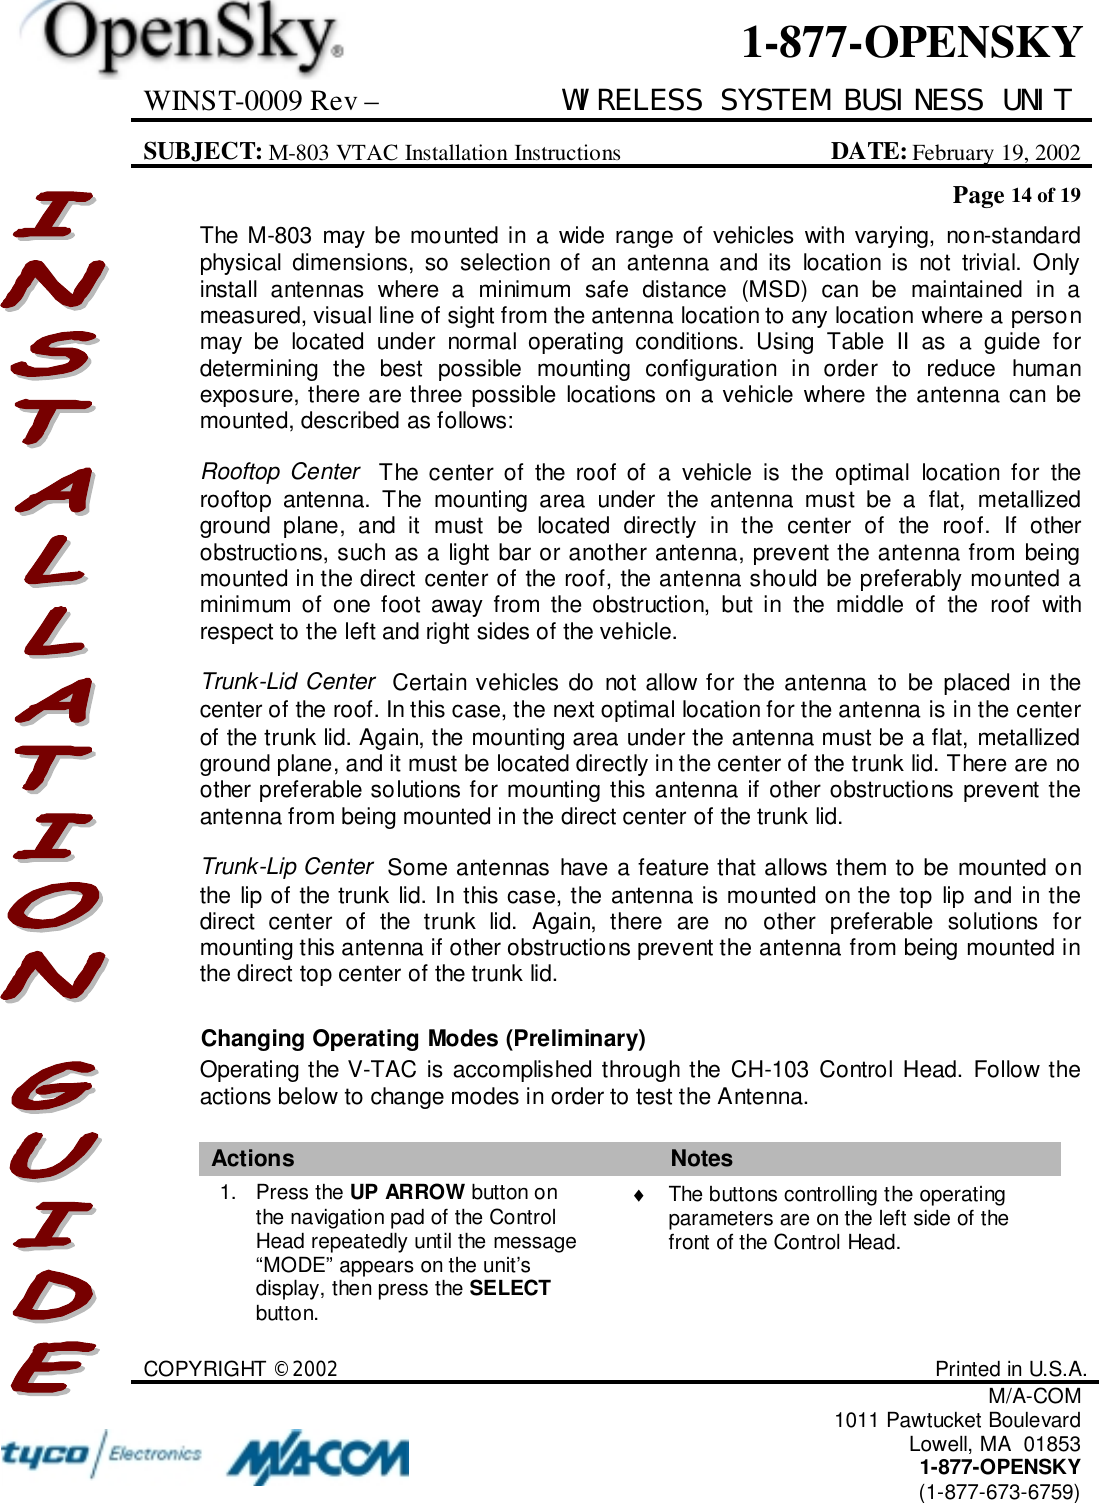
WINST-0009 Rev – WIRELESS SYSTEM BUSINESS UNITSUBJECT: M-803 VTAC Installation Instructions DATE: February 19, 2002Page 14 of 19COPYRIGHT ©2002 Printed in U.S.A.M/A-COM1011 Pawtucket BoulevardLowell, MA  018531-877-OPENSKY(1-877-673-6759)1-877-OPENSKYThe M-803 may be mounted in a wide range of vehicles with varying, non-standardphysical dimensions, so selection of an antenna and its location is not trivial. Onlyinstall antennas where a minimum safe distance (MSD) can be maintained in ameasured, visual line of sight from the antenna location to any location where a personmay be located under normal operating conditions. Using Table II as a guide fordetermining the best possible mounting configuration in order to reduce humanexposure, there are three possible locations on a vehicle where the antenna can bemounted, described as follows:Rooftop Center  The center of the roof of a vehicle is the optimal location for therooftop antenna. The mounting area under the antenna must be a flat, metallizedground plane, and it must be located directly in the center of the roof. If otherobstructions, such as a light bar or another antenna, prevent the antenna from beingmounted in the direct center of the roof, the antenna should be preferably mounted aminimum of one foot away from the obstruction, but in the middle of the roof withrespect to the left and right sides of the vehicle.Trunk-Lid Center  Certain vehicles do not allow for the antenna to be placed in thecenter of the roof. In this case, the next optimal location for the antenna is in the centerof the trunk lid. Again, the mounting area under the antenna must be a flat, metallizedground plane, and it must be located directly in the center of the trunk lid. There are noother preferable solutions for mounting this antenna if other obstructions prevent theantenna from being mounted in the direct center of the trunk lid.Trunk-Lip Center  Some antennas have a feature that allows them to be mounted onthe lip of the trunk lid. In this case, the antenna is mounted on the top lip and in thedirect center of the trunk lid. Again, there are no other preferable solutions formounting this antenna if other obstructions prevent the antenna from being mounted inthe direct top center of the trunk lid.Changing Operating Modes (Preliminary)Operating the V-TAC is accomplished through the CH-103 Control Head. Follow theactions below to change modes in order to test the Antenna.Actions Notes1. Press the UP ARROW button onthe navigation pad of the ControlHead repeatedly until the message“MODE” appears on the unit’sdisplay, then press the SELECTbutton.♦  The buttons controlling the operatingparameters are on the left side of thefront of the Control Head.
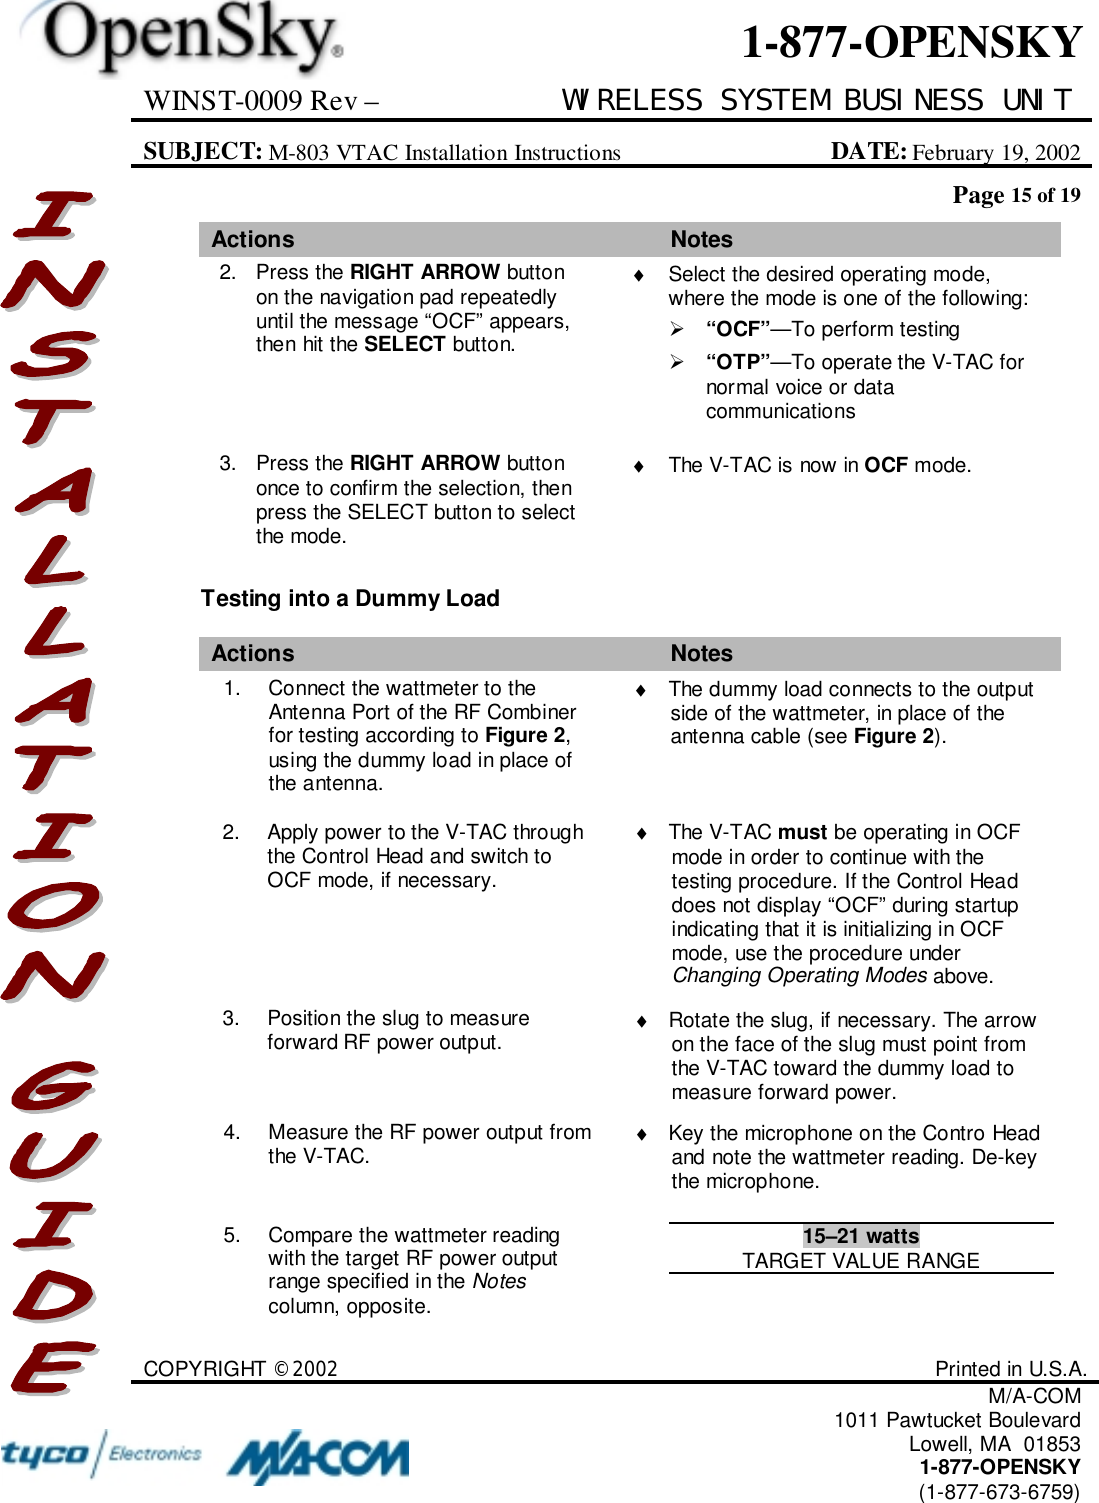
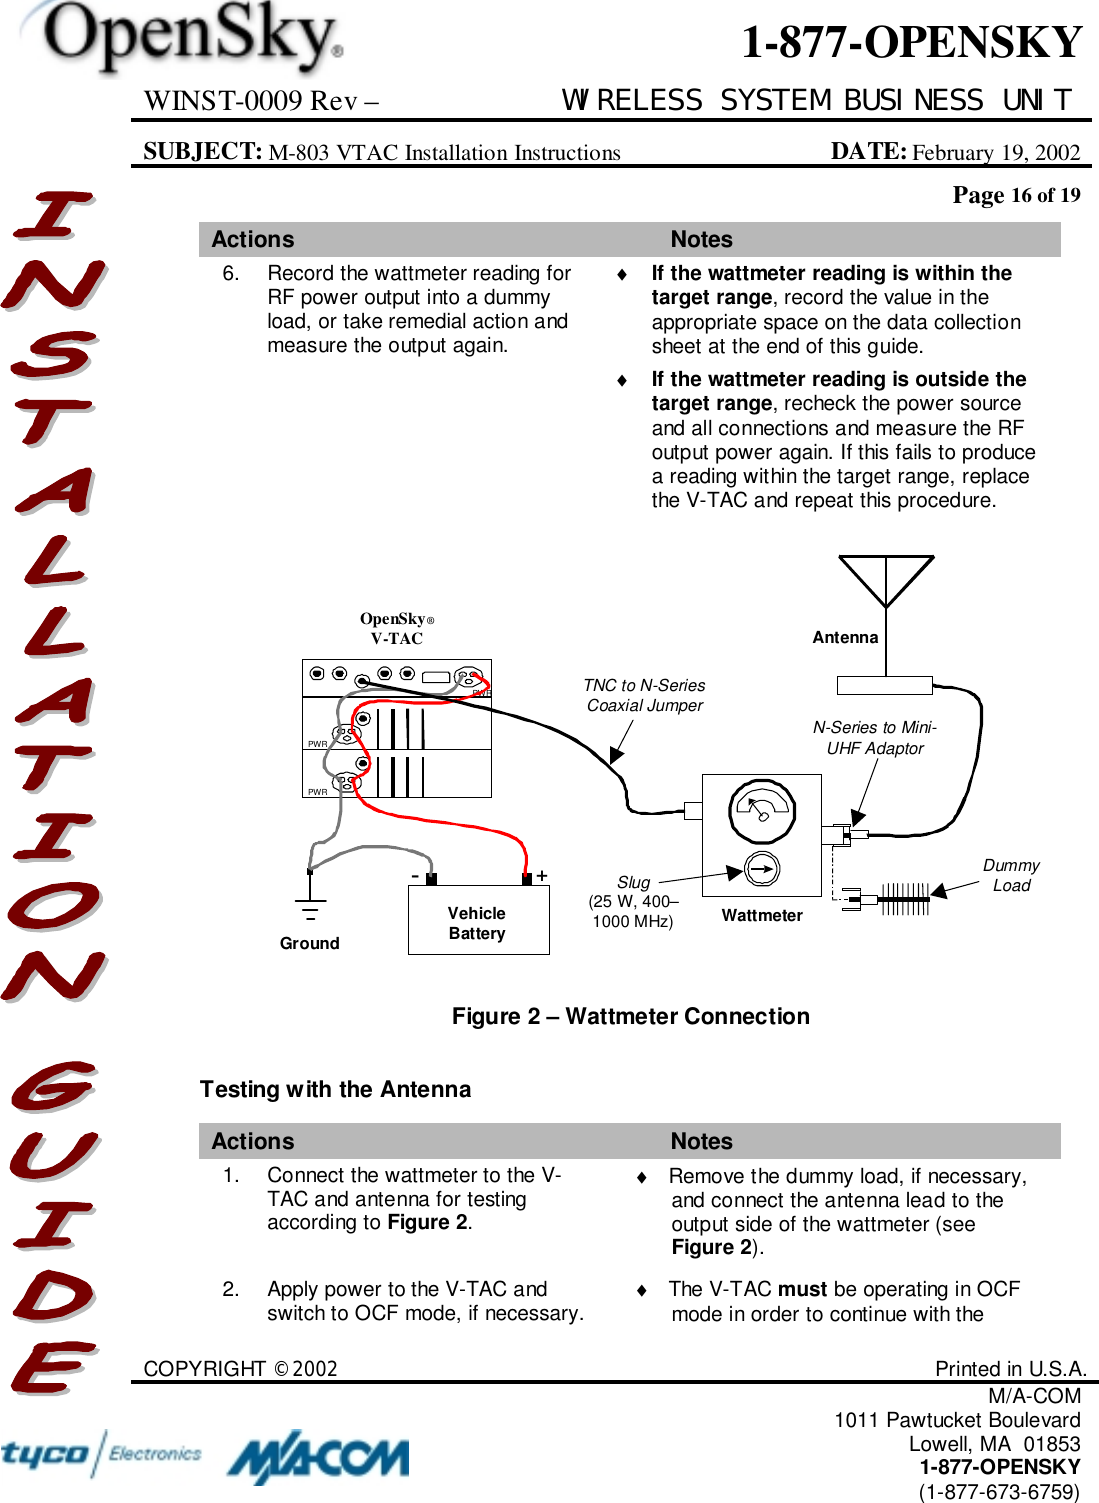
WINST-0009 Rev – WIRELESS SYSTEM BUSINESS UNITSUBJECT: M-803 VTAC Installation Instructions DATE: February 19, 2002Page 15 of 19COPYRIGHT ©2002 Printed in U.S.A.M/A-COM1011 Pawtucket BoulevardLowell, MA  018531-877-OPENSKY(1-877-673-6759)1-877-OPENSKYActions Notes2. Press the RIGHT ARROW buttonon the navigation pad repeatedlyuntil the message “OCF” appears,then hit the SELECT button.♦  Select the desired operating mode,where the mode is one of the following:! “OCF”—To perform testing! “OTP”—To operate the V-TAC fornormal voice or datacommunications3. Press the RIGHT ARROW buttononce to confirm the selection, thenpress the SELECT button to selectthe mode.♦  The V-TAC is now in OCF mode.Testing into a Dummy LoadActions Notes1. Connect the wattmeter to theAntenna Port of the RF Combinerfor testing according to Figure 2,using the dummy load in place ofthe antenna.♦  The dummy load connects to the outputside of the wattmeter, in place of theantenna cable (see Figure 2).2. Apply power to the V-TAC throughthe Control Head and switch toOCF mode, if necessary.♦ The V-TAC must be operating in OCFmode in order to continue with thetesting procedure. If the Control Headdoes not display “OCF” during startupindicating that it is initializing in OCFmode, use the procedure underChanging Operating Modes above.3. Position the slug to measureforward RF power output. ♦  Rotate the slug, if necessary. The arrowon the face of the slug must point fromthe V-TAC toward the dummy load tomeasure forward power.4. Measure the RF power output fromthe V-TAC. ♦  Key the microphone on the Contro Headand note the wattmeter reading. De-keythe microphone.5. Compare the wattmeter readingwith the target RF power outputrange specified in the Notescolumn, opposite.15–21 wattsTARGET VALUE RANGE
WINST-0009 Rev – WIRELESS SYSTEM BUSINESS UNITSUBJECT: M-803 VTAC Installation Instructions DATE: February 19, 2002Page 16 of 19COPYRIGHT ©2002 Printed in U.S.A.M/A-COM1011 Pawtucket BoulevardLowell, MA  018531-877-OPENSKY(1-877-673-6759)1-877-OPENSKYActions Notes6. Record the wattmeter reading forRF power output into a dummyload, or take remedial action andmeasure the output again.♦ If the wattmeter reading is within thetarget range, record the value in theappropriate space on the data collectionsheet at the end of this guide.♦ If the wattmeter reading is outside thetarget range, recheck the power sourceand all connections and measure the RFoutput power again. If this fails to producea reading within the target range, replacethe V-TAC and repeat this procedure.Figure 2 – Wattmeter ConnectionTesting with the AntennaActions Notes1. Connect the wattmeter to the V-TAC and antenna for testingaccording to Figure 2.♦  Remove the dummy load, if necessary,and connect the antenna lead to theoutput side of the wattmeter (seeFigure 2).2. Apply power to the V-TAC andswitch to OCF mode, if necessary. ♦ The V-TAC must be operating in OCFmode in order to continue with theOpenSky®V-TACPWRWattmeterN-Series to Mini-UHF AdaptorTNC to N-SeriesCoaxial JumperSlug(25 W, 400–1000 MHz)DummyLoadVehicleBattery–+GroundAntennaPWRPWR
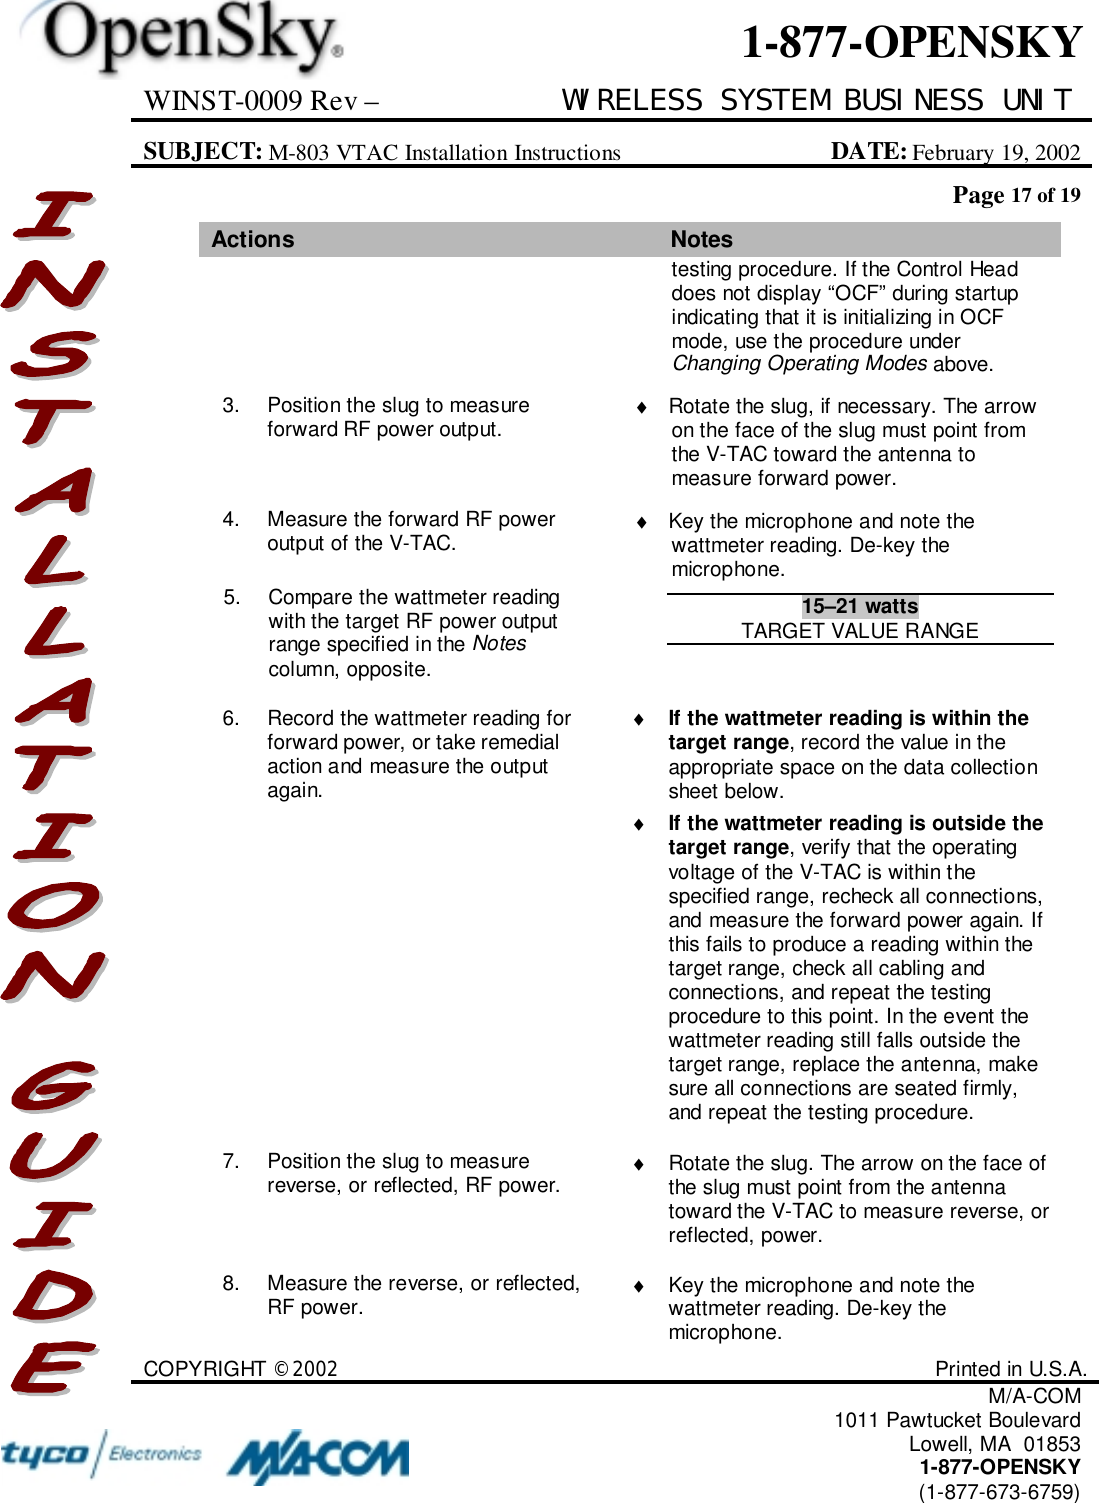
WINST-0009 Rev – WIRELESS SYSTEM BUSINESS UNITSUBJECT: M-803 VTAC Installation Instructions DATE: February 19, 2002Page 17 of 19COPYRIGHT ©2002 Printed in U.S.A.M/A-COM1011 Pawtucket BoulevardLowell, MA  018531-877-OPENSKY(1-877-673-6759)1-877-OPENSKYActions Notestesting procedure. If the Control Headdoes not display “OCF” during startupindicating that it is initializing in OCFmode, use the procedure underChanging Operating Modes above.3. Position the slug to measureforward RF power output. ♦  Rotate the slug, if necessary. The arrowon the face of the slug must point fromthe V-TAC toward the antenna tomeasure forward power.4. Measure the forward RF poweroutput of the V-TAC. ♦  Key the microphone and note thewattmeter reading. De-key themicrophone.5. Compare the wattmeter readingwith the target RF power outputrange specified in the Notescolumn, opposite.15–21 wattsTARGET VALUE RANGE6. Record the wattmeter reading forforward power, or take remedialaction and measure the outputagain.♦ If the wattmeter reading is within thetarget range, record the value in theappropriate space on the data collectionsheet below.♦ If the wattmeter reading is outside thetarget range, verify that the operatingvoltage of the V-TAC is within thespecified range, recheck all connections,and measure the forward power again. Ifthis fails to produce a reading within thetarget range, check all cabling andconnections, and repeat the testingprocedure to this point. In the event thewattmeter reading still falls outside thetarget range, replace the antenna, makesure all connections are seated firmly,and repeat the testing procedure.7. Position the slug to measurereverse, or reflected, RF power. ♦  Rotate the slug. The arrow on the face ofthe slug must point from the antennatoward the V-TAC to measure reverse, orreflected, power.8. Measure the reverse, or reflected,RF power. ♦  Key the microphone and note thewattmeter reading. De-key themicrophone.
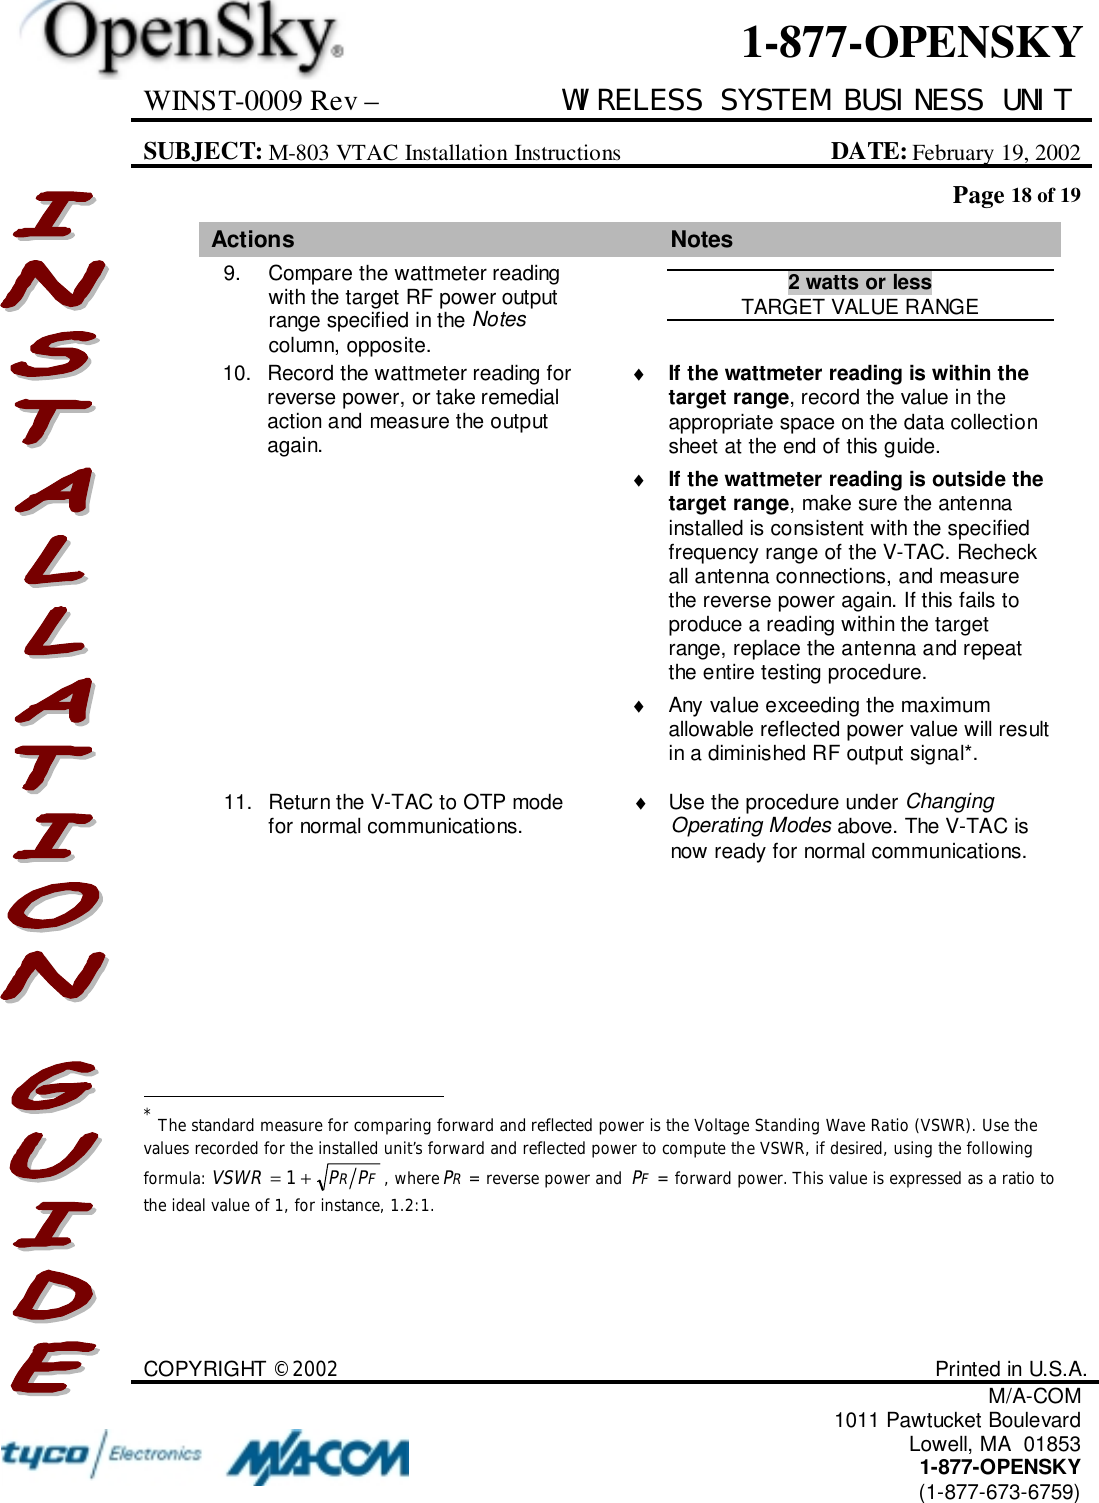
WINST-0009 Rev – WIRELESS SYSTEM BUSINESS UNITSUBJECT: M-803 VTAC Installation Instructions DATE: February 19, 2002Page 18 of 19COPYRIGHT ©2002 Printed in U.S.A.M/A-COM1011 Pawtucket BoulevardLowell, MA  018531-877-OPENSKY(1-877-673-6759)1-877-OPENSKYActions Notes9. Compare the wattmeter readingwith the target RF power outputrange specified in the Notescolumn, opposite.2 watts or lessTARGET VALUE RANGE10. Record the wattmeter reading forreverse power, or take remedialaction and measure the outputagain.♦ If the wattmeter reading is within thetarget range, record the value in theappropriate space on the data collectionsheet at the end of this guide.♦ If the wattmeter reading is outside thetarget range, make sure the antennainstalled is consistent with the specifiedfrequency range of the V-TAC. Recheckall antenna connections, and measurethe reverse power again. If this fails toproduce a reading within the targetrange, replace the antenna and repeatthe entire testing procedure.♦  Any value exceeding the maximumallowable reflected power value will resultin a diminished RF output signal*.11. Return the V-TAC to OTP modefor normal communications. ♦  Use the procedure under ChangingOperating Modes above. The V-TAC isnow ready for normal communications.                                                          * The standard measure for comparing forward and reflected power is the Voltage Standing Wave Ratio (VSWR). Use thevalues recorded for the installed unit’s forward and reflected power to compute the VSWR, if desired, using the followingformula: FR PPVSWR+= 1, whereRP= reverse power and FP= forward power. This value is expressed as a ratio tothe ideal value of 1, for instance, 1.2:1.
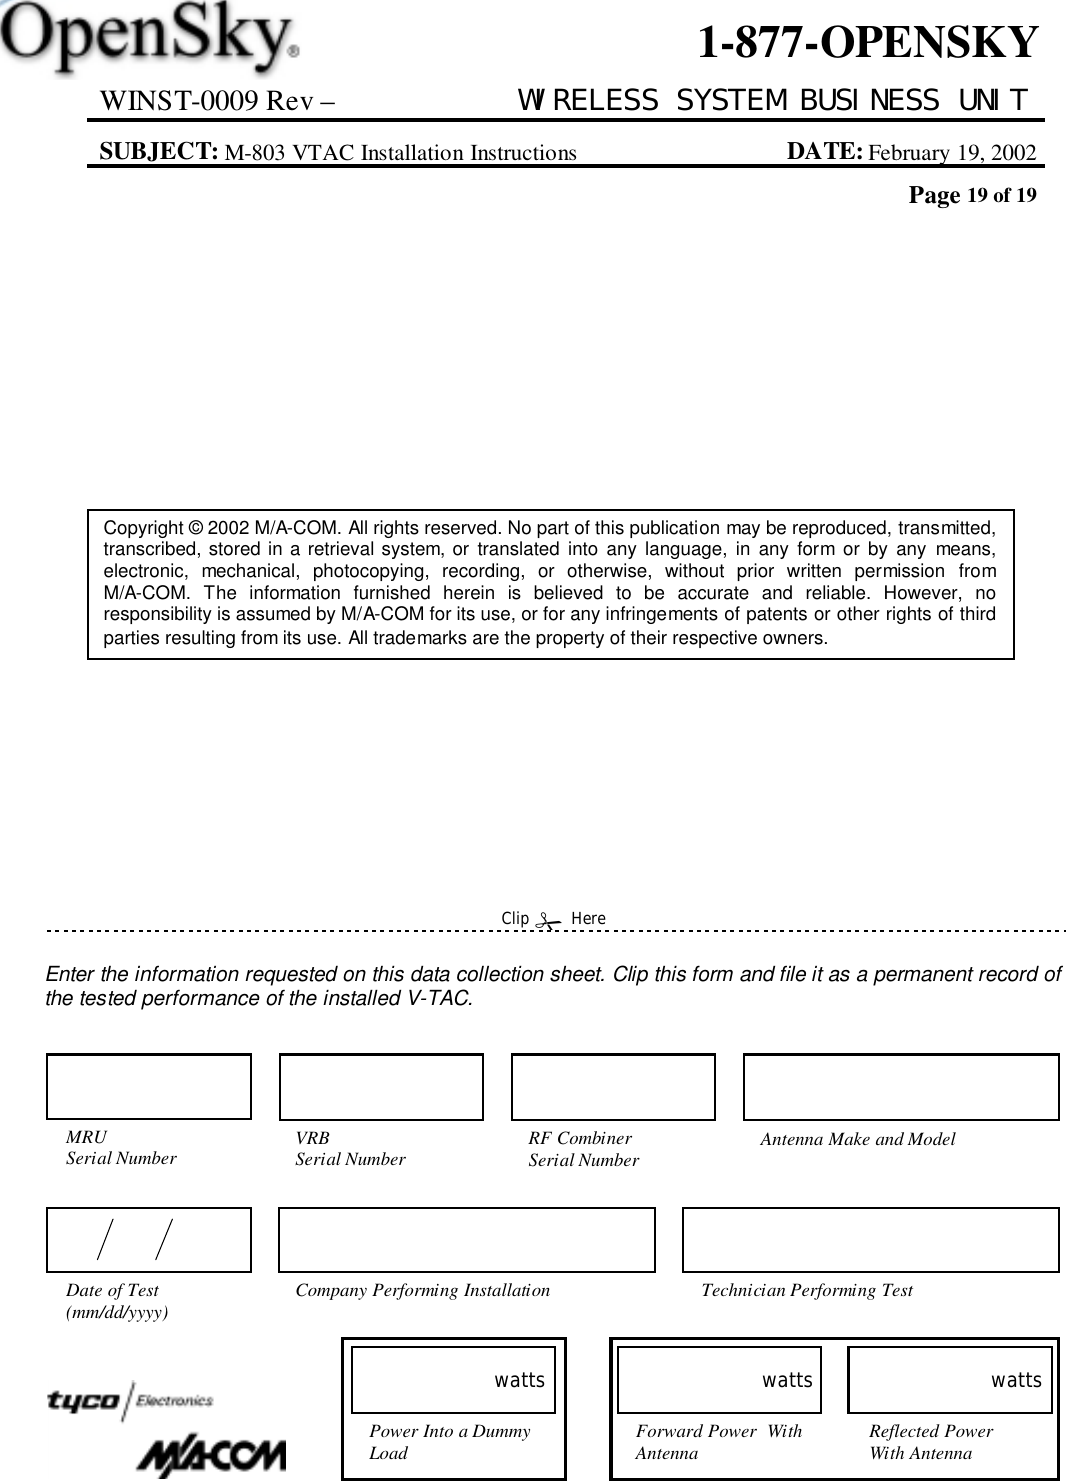
WINST-0009 Rev – WIRELESS SYSTEM BUSINESS UNITSUBJECT: M-803 VTAC Installation Instructions DATE: February 19, 2002Page 19 of 191-877-OPENSKYCopyright © 2002 M/A-COM. All rights reserved. No part of this publication may be reproduced, transmitted,transcribed, stored in a retrieval system, or translated into any language, in any form or by any means,electronic, mechanical, photocopying, recording, or otherwise, without prior written permission fromM/A-COM. The information furnished herein is believed to be accurate and reliable. However, noresponsibility is assumed by M/A-COM for its use, or for any infringements of patents or other rights of thirdparties resulting from its use. All trademarks are the property of their respective owners.Enter the information requested on this data collection sheet. Clip this form and file it as a permanent record ofthe tested performance of the installed V-TAC.Clip " HereForward Power  WithAntennawattsReflected PowerWith AntennawattsPower Into a DummyLoadwattsCompany Performing Installation Technician Performing TestDate of Test(mm/dd/yyyy)MRUSerial Number Antenna Make and ModelVRBSerial Number RF CombinerSerial Number

Navigation menu