Grandstream Networks GXV3275 IP Multimedia Phone User Manual USERS MANUAL 2 OF 2
Grandstream Networks, Inc. IP Multimedia Phone USERS MANUAL 2 OF 2
Contents
- 1. User Manual
- 2. User Manual 1
- 3. User Manual 2
- 4. REGULATORY MANUAL
- 5. USERS MANUAL 1 OF 2
- 6. USERS MANUAL 2 OF 2
USERS MANUAL 2 OF 2


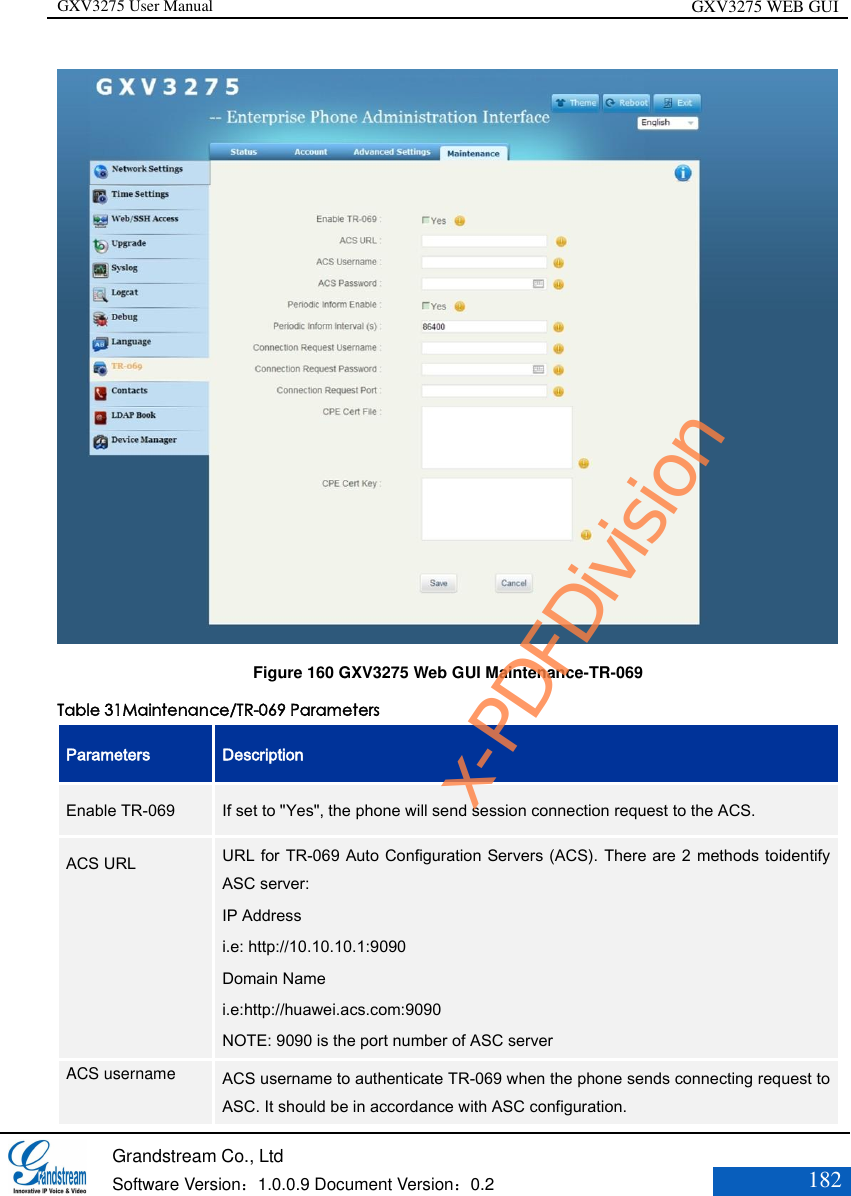
![GXV3275 User Manual GXV3275 WEB GUI Grandstream Co., Ltd Software Version:1.0.0.9 Document Version:0.2 158 Parameters Description Start Video Automatically Press the Conference button will automatically connect the active line to the conference. Remote Video Request Configure video request type. Three options are available: Prompt, Accept, deny. The default setting is “Prompt”. Dial Plan Prefix Set dial prefix. Any numbers dialed with this account will automatically add this prefix Dial Plan Dial Plan Rules: 1. Accepted Digits: 1,2,3,4,5,6,7,8,9,0 , *, #; 2. Grammar: x - any digit from 0-9; xx - at least 2 digit numbers from 0-9; ^ - exclude [3-5] - any digit of 3, 4, or 5 [147] - any digit of 1, 4, or 7 <2=011> -when the digit is 2, it will be replaced with 011 Set to {x+} allows dial out with all digits. 3. Example: {[369]11 | 1617xxxxxxx} –- allows dialing numbers 311, 611 and 911 and 1617 area code {^1900x+ | <=1617>xxxxxxx} –prevents dialing any number started with 1900 and 1617 area code will be added automatically when dialing number with 7 digits length; Refer-To Use Target Contact The default setting is "No". If set to "Yes" and the server support this function, the phone will use the "Refer-To" header for attended transfer. Auto Answer The default setting is "No". If set to "Yes", the phone will automatically turn on the speaker phone to answer incoming calls. Send Anonymous If set to "Yes", the "From" header in outgoing INVITE messages will be set to anonymous, essentially blocking the Caller ID to be displayed. Anonymous Call Rejection The default setting is "No”. If set to "Yes", anonymous calls will be rejected. x-PDFDivision](https://usermanual.wiki/Grandstream-Networks/GXV3275.USERS-MANUAL-2-OF-2/User-Guide-2233562-Page-64.png)
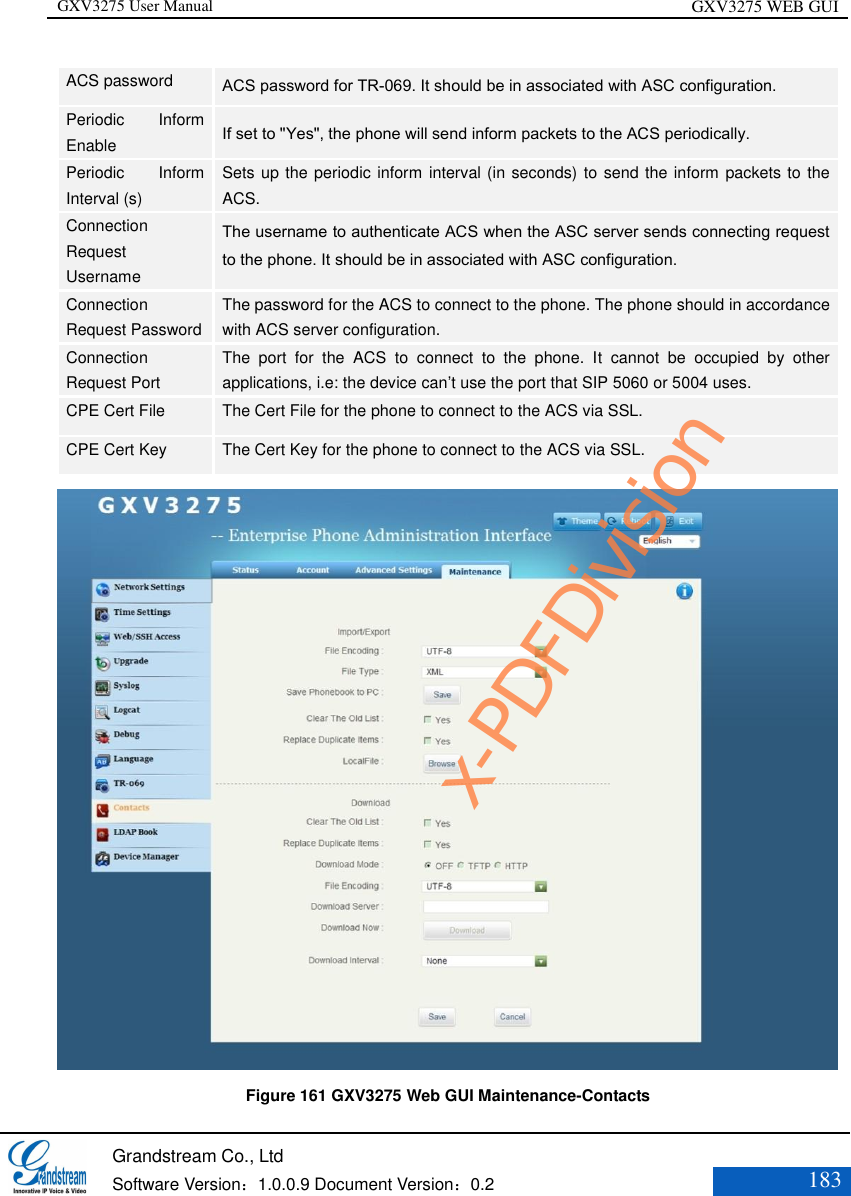
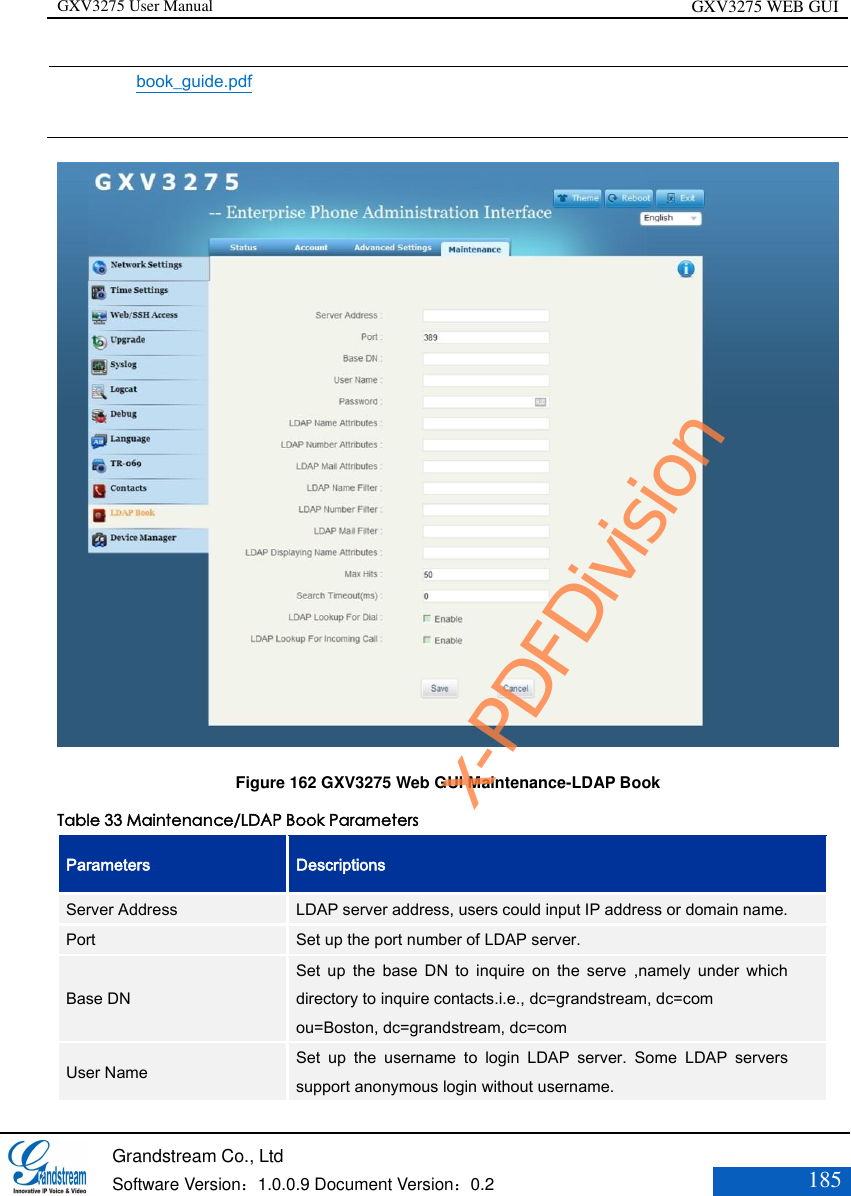
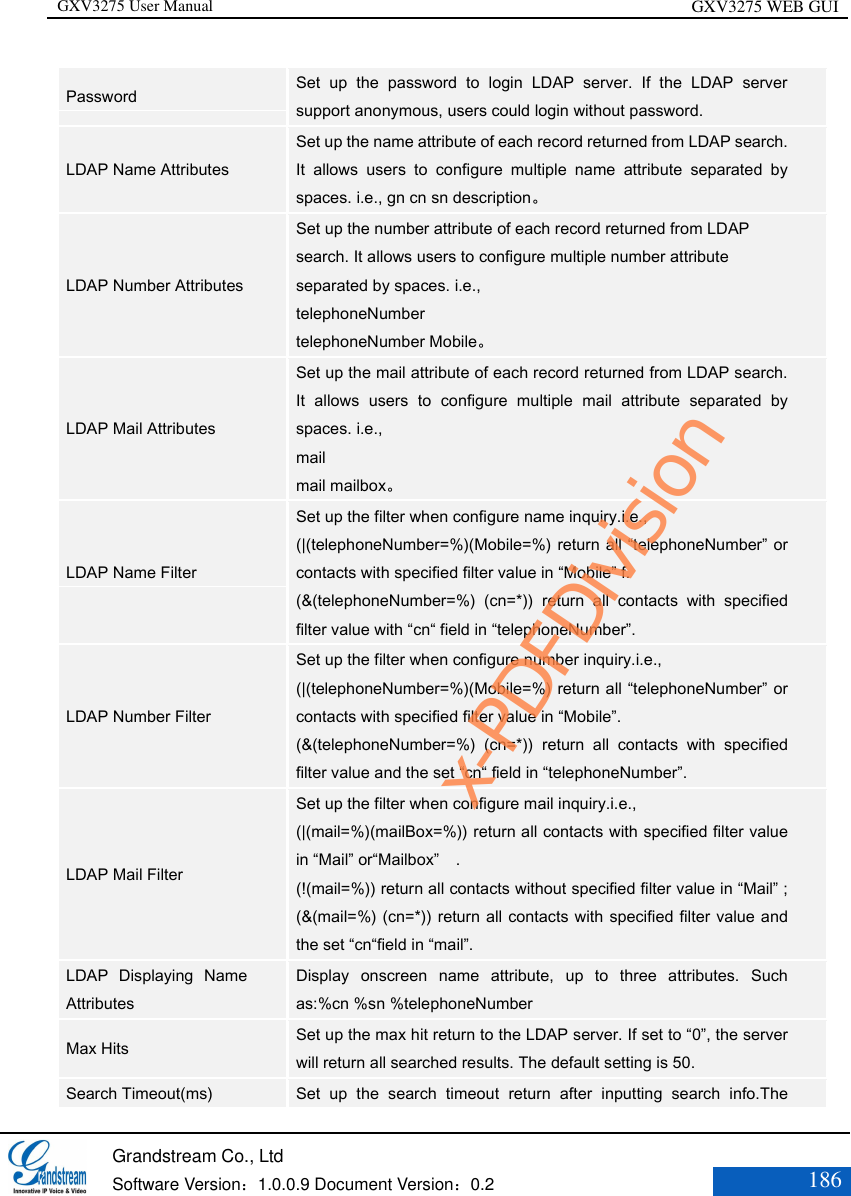
![GXV3275 User Manual GXV3275 WEB GUI Grandstream Co., Ltd Software Version:1.0.0.9 Document Version:0.2 184 Table 32 Maintenance/Contacts Parameters Parameters Description Import/Export File Encoding Supports import/export Contacts: UTF-8,GBK,UTF-16,UTF-32,Big5,Big5-HKSCS ,Shift-JIS ,IOS8859-1 ,IOS8859-15 ,Windows-1251,EUC-KR. File Type Supports import/export Contacts: XML,VCard,CSV. Save Phonebook to PC Allow users to save XML file to PC.Click Save to save the pop-up XML file to PC. Clear The Old List The phone will delete all the old list before downloading new ones if check. The default is uncheck. Replace Duplicate Items The phone will delete all the duplicated items before downloading new ones if check. The default is uncheck. Local File Click Browse to select XML file and download it to the phone. Download Clear The Old List The phone will delete all the duplicated items before downloading new ones if check. The default is uncheck. Replace Duplicate Items The phone will delete all the duplicated items before downloading new ones if check. The default is uncheck. Download Mode Select network download mode: OFF/TFTP/HTTP. File Encoding Supports import/export Contacts: UTF-8,GBK,UTF-16,UTF-32,Big5,Big5-HKSCS,Shift-JIS,IOS8859-1,IOS8859-15,Windows-1251,EUC-KR. The default is UTF-8. Download Server Set up the server to download with from network. Download Now Click Download to download Contacts file to the phone from the configured server. Note: The contacts file must be the formatted file the phone supports. Download Interval The interval to download from server. The default is None, namely will not automatically request download, users can set up as needed. Note: Please download phonebook for more GXV3275 xml info; refer to GXV3275 xml Contacts Guide for details. http://www.grandstream.com/products/gxp_series/gxV3275/documents/gxV3275_xml_phone批注 [J1]: 缺少其他文件编码 x-PDFDivision](https://usermanual.wiki/Grandstream-Networks/GXV3275.USERS-MANUAL-2-OF-2/User-Guide-2233562-Page-90.png)