Glenayre Electronics GL-T8600-CN Base Station User Manual Users manuall part 3
Glenayre Electronics Inc Base Station Users manuall part 3
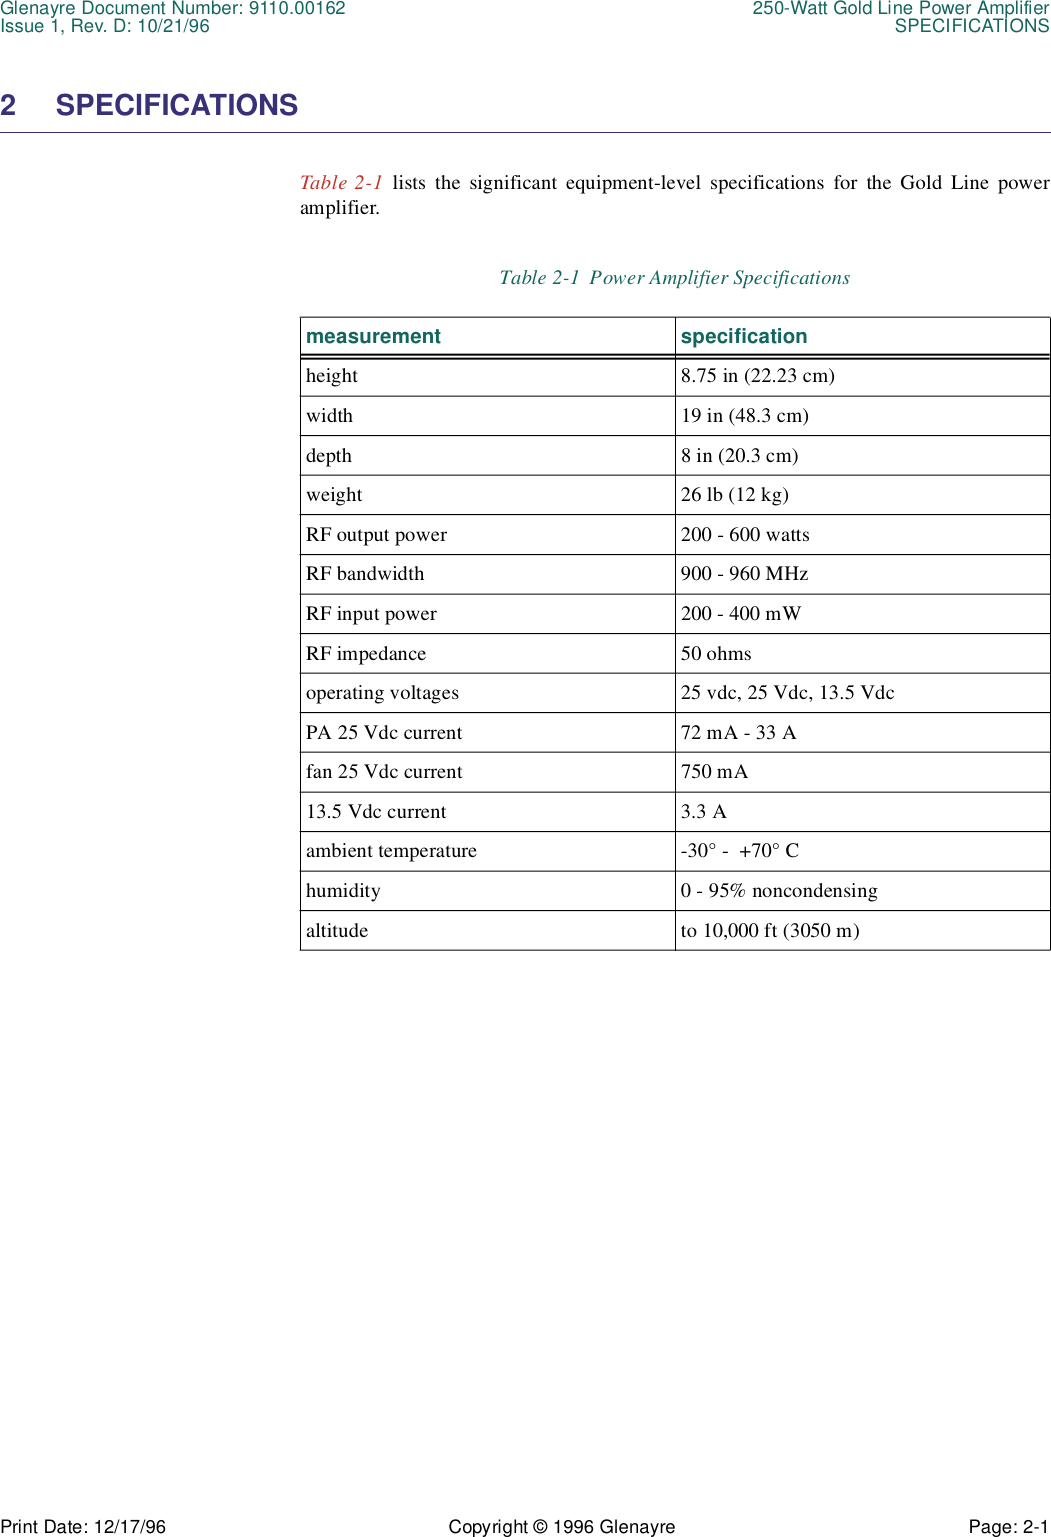
Contents
- 1. Users manual part 1
- 2. Users manual part 2
- 3. Users manuall part 3
- 4. Users manual part 4
- 5. Users manual part 5
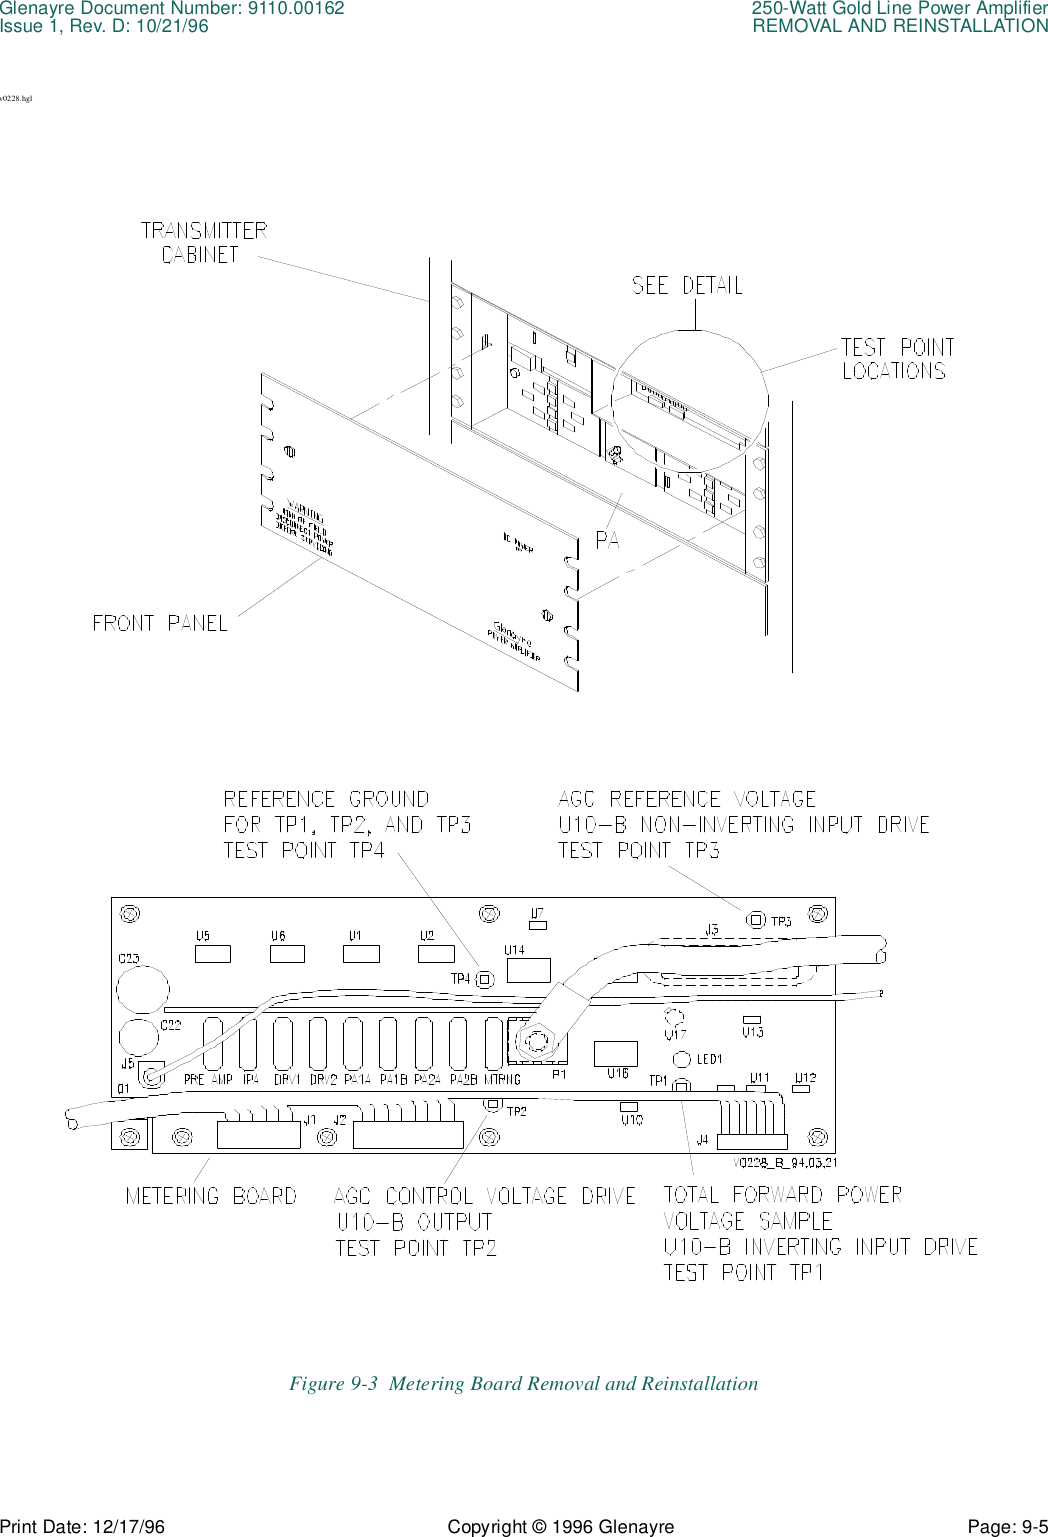
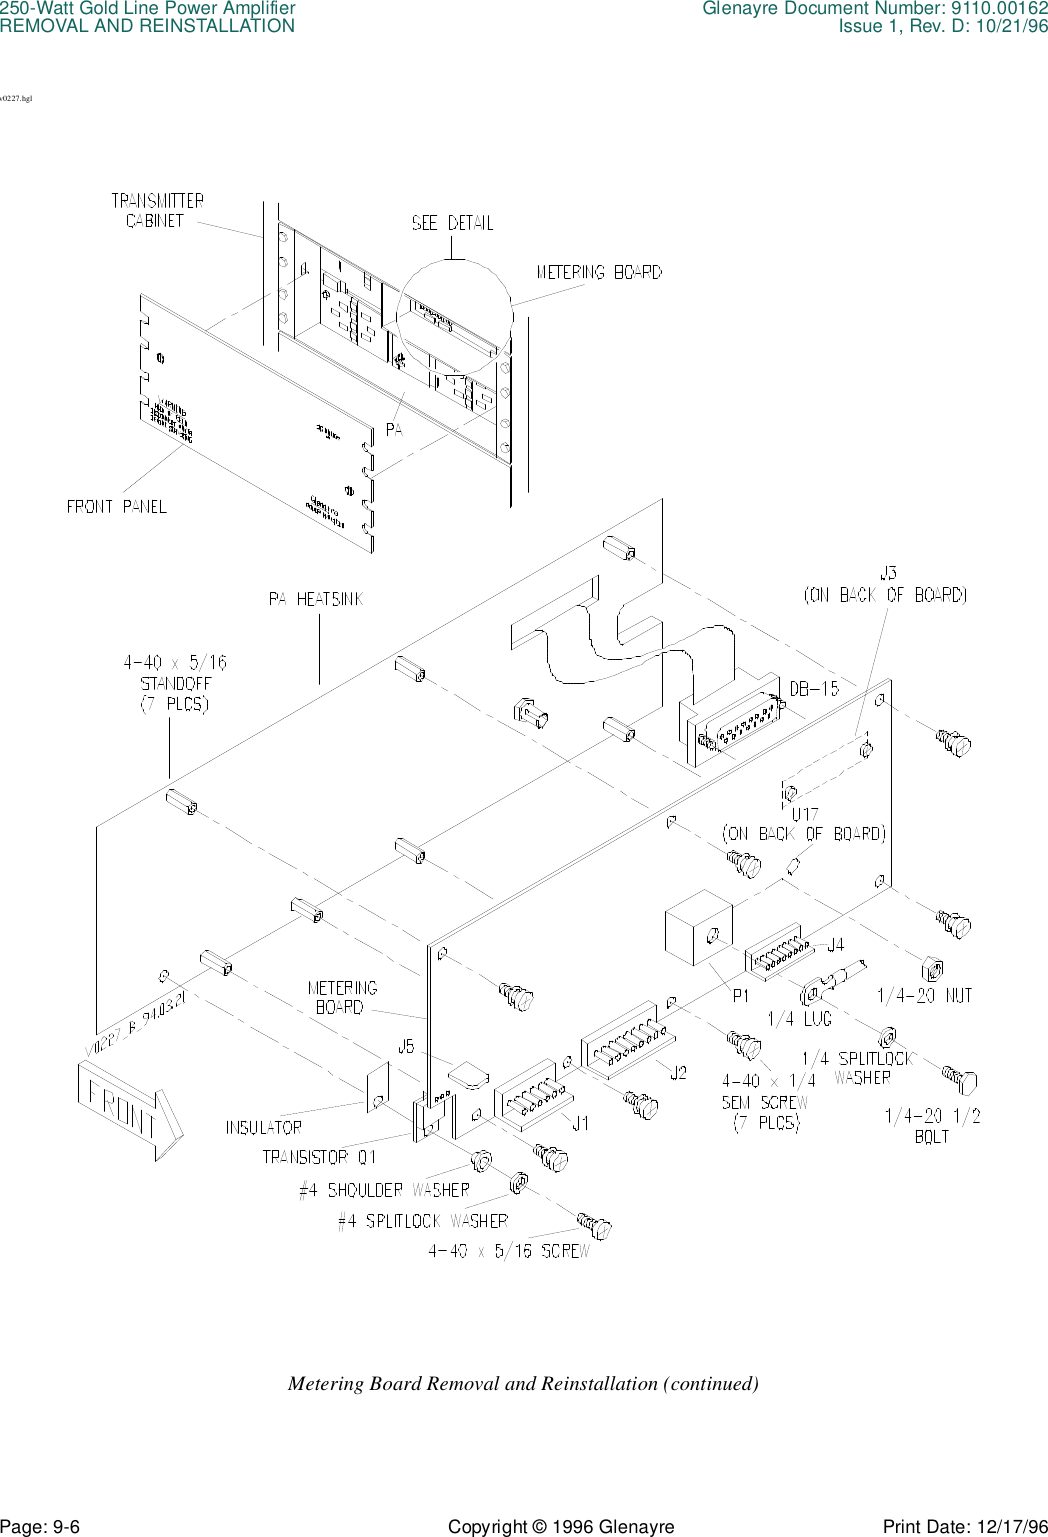
Users manuall part 3