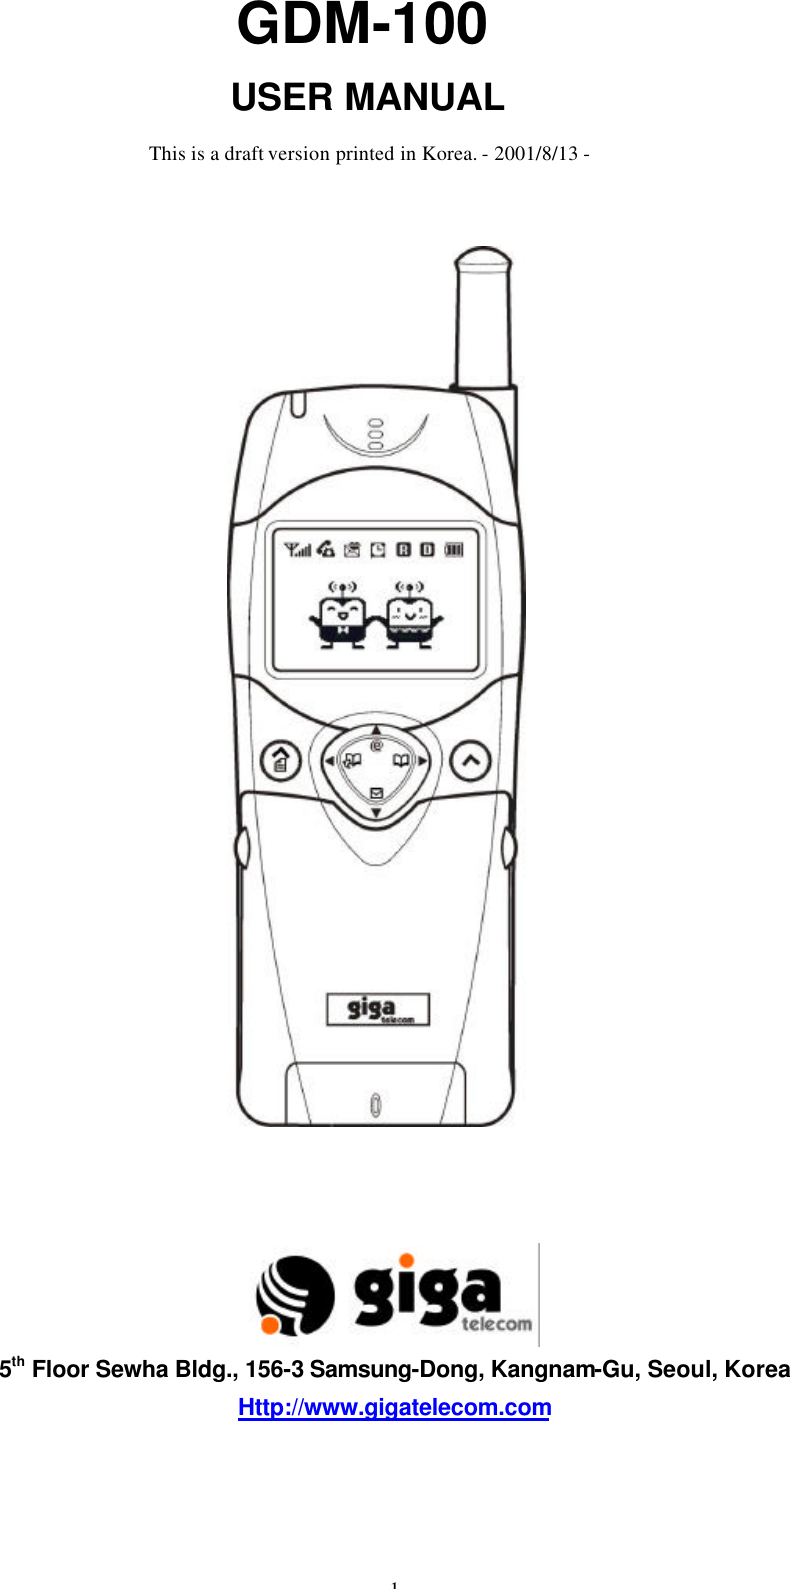
Giga Telecom GDM-100 Dual-Mode Cellular Phone (AMPS/CDMA) User Manual Manual4
Giga Telecom, Inc. Dual-Mode Cellular Phone (AMPS/CDMA) Manual4
UserManual.wiki
>
Giga Telecom
>
GDM 100 User Manual
Amendment Users Manual
Navigation menu
Upload a User Manual
Namespaces
Wiki Guide
HTML
PDF
Info
Views
User Manual
Discussion / Help
Navigation


![17 FUNCTION KEYS Soft left key Search for phonebook with address. [SRCH] In the menu facility, returns to the previous menu level. [PREV], [CANL] Soft right key In condition of flip closed, enters the Short Messages menu. (èOn the Flip Closed, enters the Messages menu. [MSG]) In the menu facility, selects menu function or stores information that you have entered. (èIn the menu, selects a function [SEL] and store a information [STO] and confirm a information [OK] Navigation-left key: To scroll through menu, lists and text. Navigation-right key: To scroll through menu, lists and text Navigation-up key: To connect a WAP. To scroll through menu, lists and text. Navigation-down key: To search a list. To enter the message menu. To scroll through menu, lists and text. To switch a capital/small letter in putting letters Send key Makes or answers call. Clear key To delete numbers and letters from the display. To delete an item from a list. In the menu facility, returns to the previous menu level. End/power key Ends a call. Switches the phone on or off when pressed and held In the menu facility returns to the idle mode and cancels your input 0-9 key Enters numbers, letters and characters. Enters *character. In the idle mode, enters the lock mode when pressed and held. Enters number ‘0’ Prefix of an international call - speed dial Enters # character. In the idle mode, quickly changes to Etiquette mode when pressed and held. Side up key and side down key. Adjusts the earpiece volume and the microphone volume during a conversation. Adjusts the key ringer volume in the idle mode. To scroll through menus, lists and text. Voice memo key. To record the voice of the other party to enter the voice memo and voice dialing in calling.](https://usermanual.wiki/Giga-Telecom/GDM-100/User-Guide-170123-Page-17.png)
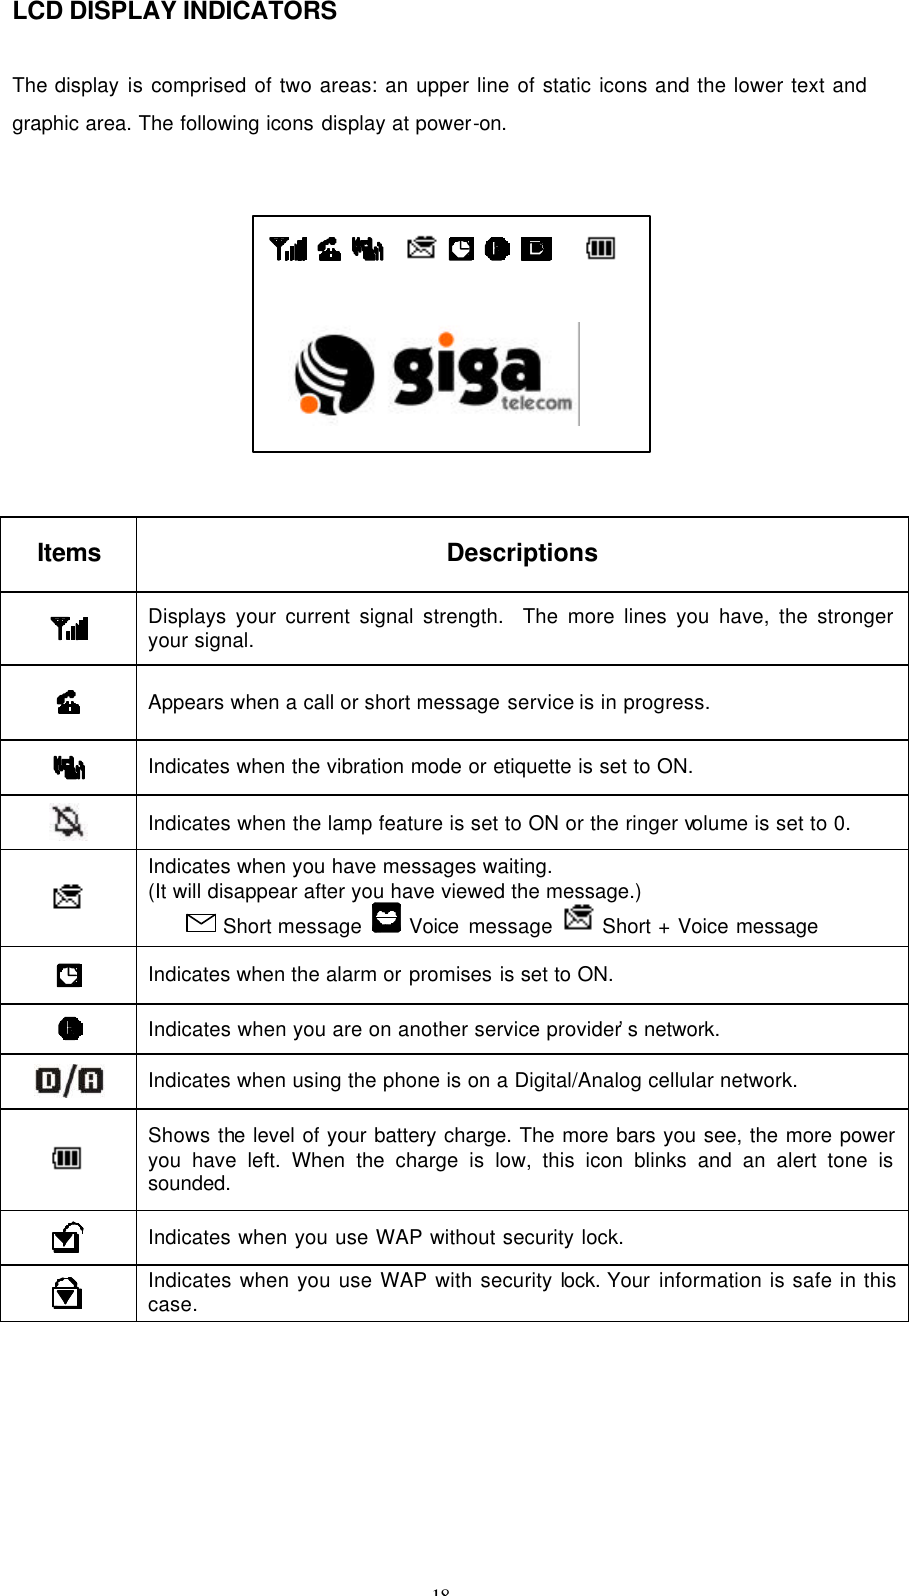
![19 GETTING STARTED +Turning The Phone On And Off When you're ready to turn your phone on, check to see that the charged battery has been installed on the back of the phone. 1. Open the flip cover. 2. Hold down the key for more than one second to switch the phone on. The red light flashes and an alert sounds simultaneously. When the system locates services, the greeting message displays along with the date and time. Calls can now be places and received. If the system cannot locate service, the greeting message displays without the date and time. In this case, calls cannot be placed nor received. Try again later when service is available. 3. To turn the phone off, hold down key for more than one second. +Locking or unlocking the phone: Lock: In standby mode, press and hold . Unlock: Press and hold and enter the lock code (4 digits). Initial values are "0000". When the phone is locked: +The indicator [ ] is shown. +Calls can be answered and ended as normal. +Calls may be possible to the emergency numbers programmed into the phone. . +Antenna Position The antenna can be used in its fully extended or fully retracted position only. It is recommended that the antenna be fully extended for optimum performance and signal strength or while operating in poor signal areas.](https://usermanual.wiki/Giga-Telecom/GDM-100/User-Guide-170123-Page-19.png)
![20 +Network services A number of features included in this guide are called Network Services. They are special services provided by wireless service providers. Before being able to take advantage of any of these network services, subscription to these service(s) from your home service provider is required. Then obtain instructions for their use. +How to Input characters Press a number several times until the desired letter appears. (A number followed by “P” means how many times the number should be pressed until the desired letter appears.) At first, a capital letter appears when a character has been entered. Change a capital letter into a small letter or a small letter into a capital letter using Navigation down key. After two seconds, the cursor will automatically advance to the next space once character has been entered. To edit a mistake, press to correct the last letter entered. Capital Letter Small Letter Frequency Key 1P 2P 3P 4P 5P 1P 2P 3P 4P 5P 1 1 Space 1 Space 2 A B C 2 a B c 2 3 D E F 3 d e f 3 4 G H I 4 g h I 4 5 J K L 5 j k l 5 6 M N O 6 m n o 6 7 P Q R S 7 p q r s 7 8 T U V 8 t u v 8 9 W X Y Z 9 w x y z 9 0 0 0 ++How to input special characters To input the special character, use the navigation up key. There are special characters that can be used are as follows. ! @ # $ % ^ & * () ? + - / \ = ~ _ | “ < > [] {}; : , . ‘‘ Use the Navigation up and down keys to find desired letters.](https://usermanual.wiki/Giga-Telecom/GDM-100/User-Guide-170123-Page-20.png)

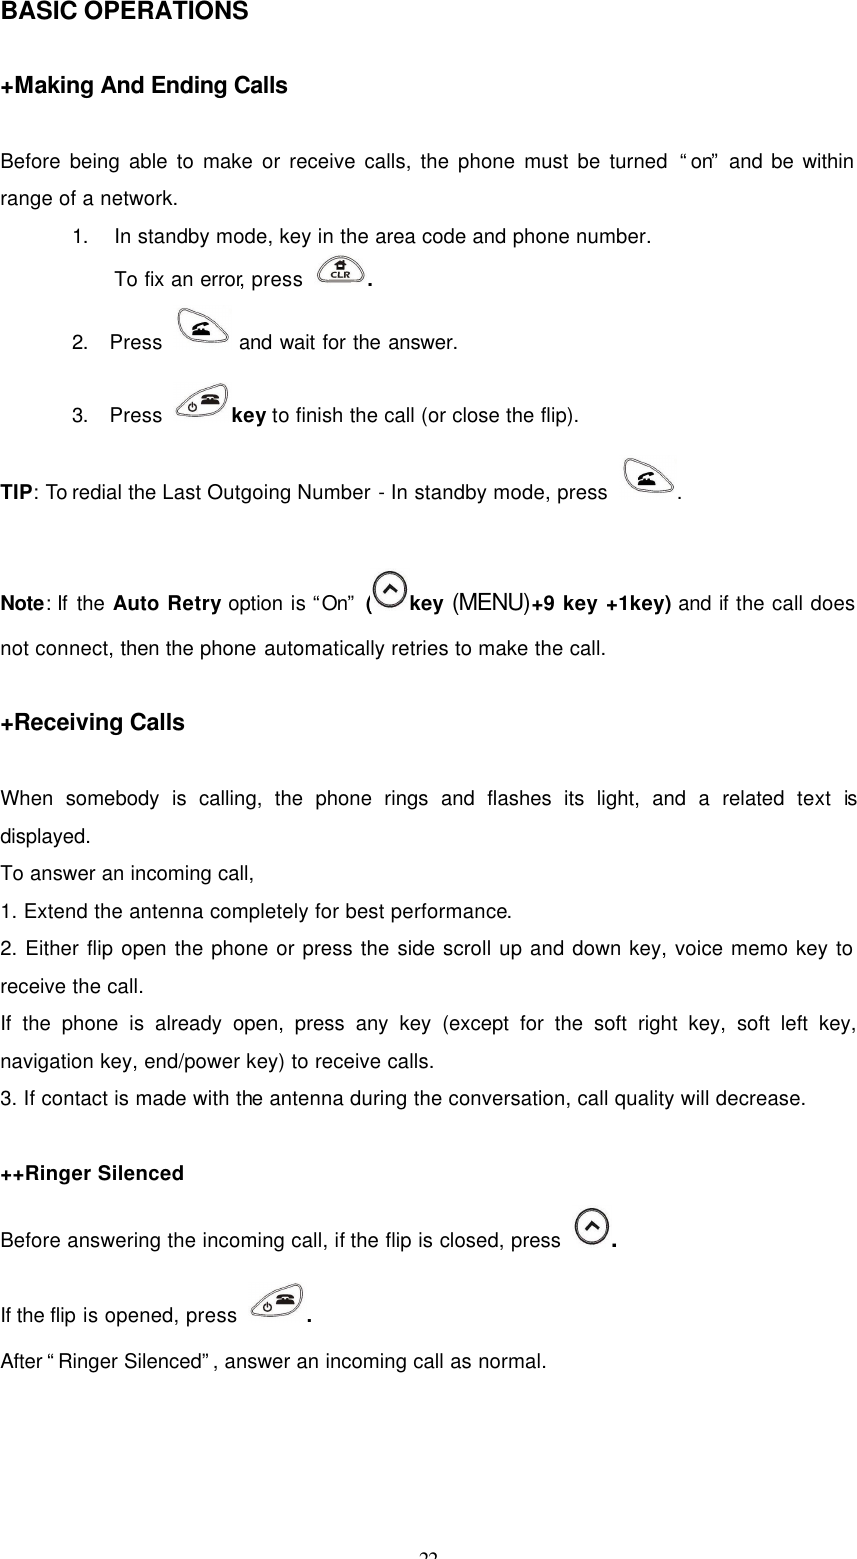
![23 ++Etiquette Mode To switch to etiquette mode press for a while. Press and hold until the vibration icon appears and “Switching to Etiquette Mode” display appears. The phone will switch to etiquette mode immediately. Press and hold for a while again to terminate the Etiquette Mode. +Emergency Dialing Even if the phone is locked, emergency numbers can be dialed. 1.There is (are) different pre-defined emergency number(s) for each country saved in the phone. Country / Carrier Brazil / Telefonica Peru/ Telefonica Brazil / Telesp Venezuela/ Telcel Emergency Number 190,192,193,199 105,116 190,192,193,199 911 2. 5 personal emergency numbers can be stored and edited as well. (Menu-2-7) 3.To dial personal emergency numbers: #+Emergency call address (1~5)+send. USING VARIABLE FUNCTIONS +Making Calls From a Phone Book Regularly dialed numbers can be saved in the phonebook memory. Each memory location allows storage of up to four phone numbers and one E-mail address under one person's name. Simply recall the number to dial. The phone can store up to 190 names and numbers. There are several ways to access up to 190 numbers in the Phonebook Menu. Follow the steps outlined in the sections below. ++Creating an Add entry; To Save Numbers To Your Phone Book 1. In idle mode, enter the desired phone number and then [STO] to store the number. OR Press key+2+6, to enter a “creating add entry” menu. The phone book entries are displayed.](https://usermanual.wiki/Giga-Telecom/GDM-100/User-Guide-170123-Page-23.png)
![24 2. Enter a memory number (001-190) and . If a memory number is not assigned, the phone will do it automatically. 3. Enter memory number (001-190) and press [OK] 4. Select a label. The following labels are available: home, work, mobile, and pager label. After selecting the label, press [SEL]. 5. Select a group and press [SEL]. 6. Select whether set a Voice Dial or not then press [SEL]. -> Saved. ++Erasing a name and phone number To clear label: Move to the desired label using the Navigation key then Press. To clear memory location: Move to the desired location using the Navigation key then Press To clear entire phonebook: Press [MENU]+6+5+1. ++Making people groups (MENU-2-5): Persons can be saved in groups. There can be 8 groups including a Secret group. The secret group cannot be erased, but its ring tone can be changed. Each group has a different ring tone. (Network Service) ++Adding a stored name and phone number: Once an entry has been added to the phonebook, multiple phone numbers can be put into that entry. 1. Select the desired memory location (Use the search option) 2. Select the label to add ([empty]): Move the Navigation Key to desired label. Then Press [EDIT]. 3. Enter phone number. 4. Press [STO].](https://usermanual.wiki/Giga-Telecom/GDM-100/User-Guide-170123-Page-24.png)
![25 ++Editing an Existing Phonebook Entry: 1. Select the desired entry (Use search option) 2. Highlight the desired feature and press [EDIT]. 3. Follow the phone's intuitive prompts. 4. Name, phone number, E-mail, turbo dial, Voice dial, Group, Ring tone can all be edited. NOTE: Ring tone – Each Entry can have a different ring tone if Network supports Caller ID. ++Reviewing all memory location 1. In stand-by mode, Press +2+1 key in the idle mode. 2. All numbers in the Phonebook can be reviewed in memorial order. 3. Use the Navigation Key to scroll through the Phonebook entry list. 4. Press to dial the stored number. ++Storing an Emergency Number This menu provides the option of storing five emergency numbers. 1.In stand-by mode, Press +2+7. 2.Enter a desired emergency number. 3.Press soft right key. NOTE: An emergency call like this can be made in stand -by mode. (Press # + Emergency location (1~5)+ .) ++Current Memory Status In stand-by mode, Enter +2+8. ++Storing the International Telephone Number 1. In stand-by mode, Press + 2 + 9. 2. Enter the desired number. When making an international call, press and hold then the stored prefix of the International Call Service number will be displayed on the LCD, and press the rest of the number (country number, local number, and personal number) then .](https://usermanual.wiki/Giga-Telecom/GDM-100/User-Guide-170123-Page-25.png)
![26 ++Indicating My Phone Number You can see your own phone number. In stand-by mode, Press +2+# or soft left key+ #. ++Finding a number using a person’s name 1. In the idle mode Press +2+2. 2. Press the name of the desired person and then the screen shows the number of the name stored in the Phonebook. Even if only the first letter of the name is entered, the screen shows the name such as “Gi” for “Giga”, “G T” for “Giga Telecom” and “G T I” for “Giga Telecom Inc”. 3. Enter the desired name. 4. Press to dial the stored number. ++Finding the name using the Navigation Key 1. In the idle mode press +2+3 then enter memory location and press [OK]. 2. The screen shows the entries stored in the Phonebook in memorial order. 3. Use the navigation key to find the desired memory and press . 4. Press to dial the stored number. ++Finding a number using phone number (if at least one digit one digit is known) 1. Press + 2+4 in the idle mode, and then enter phone number and press . 2. The screen shows the entries stored in the Phone Book in numerical order if press one digit you know and then press ok. 3. Enter the desired number and press . 5. Press to dial the stored number. ++Tip: Quick search In stand-by mode, 1. Searching by Memory location: Press the desired memory location address (1~190)](https://usermanual.wiki/Giga-Telecom/GDM-100/User-Guide-170123-Page-26.png)
![27 + [ADDR]. 2. Searching by Phone number: Press the phone numbers (more than 191) and press [SRCH]. +Using Speed Dialing Once phone numbers are stored in the phonebook memory, they can be easily dialed. This feature allows one-touch access to numbers stored in the first nine memory locations, 001-009. (Two-touch access to memory locations, 010-099: Three touch access to memory locations, 100-190) For example, press and hold a key, 1 through 9, and the call is placed. Note: If two or more telephone numbers are stored in the same address, the Turbo Number will be dialed first. ++Abbreviated Dialing (One -Touch Dial) Memory locations 001 through 009 are special one-touch locations. The phone numbers stored in the Phonebook from 001 through 09 can be dialed simply by pressing the corresponding button numbers 1 through 9. For example: Location no. 008 Press and hold 8. Or Press 8 and then . The number (and name) stored is displayed and then dialed. ++Two – Touch Dial Phone numbers stored in the phone book locations 010 through 099 can be dialed simply by pressing the corresponding two buttons, 10-99. Press the first digit briefly and then hold down the second digit of the phone book memory. For example: Location no. 018 Press 1 briefly and hold down 8. Or Press 1 + 8 + . The stored number (and name) is displayed and then dialed. ++Three – Touch Dial Phone numbers stored in the phone book locations 100 through 199 simply by pressing the three corresponding digits.](https://usermanual.wiki/Giga-Telecom/GDM-100/User-Guide-170123-Page-27.png)
![28 Press the first and the second digit briefly, then hold down the third digit of the phone book. For example: Location no. 123 Press 1 and 2 briefly and then hold down 3. The number (and name) stored is displayed and then dialed. +Voice Dialing The phone can stored up to 20 different numbers for voice dialing. Using the voice dial option requires that the names be programmed into the phone. ( [Menu]-7-6). For more information, see menu-7 Voice service. 1. First, flip open 2. Press . 3. After the prompt, say a desired voice tag that is saved on the phone. For more information, see menu-7 Voice service. ++Note: 1. Avoid recording similar names 2. Avoid recording in noisy places. 3. Speak to the phone clearly and naturally 4. Avoid very long and very short names. 5. Record the name again if a voice dialed call does not connect properly. +Missed Call Notification: If you are unable to answer a call for any reason, you can find out who called by viewing the number through the Missed Call service. If for any reason a call is missed, simply call back the person by pressing . The number of times a call is missed is displayed on the idle screen immediately after the call is missed. Press [OK] to return to the stand-by state. When this network service is activated, missed call numbers can be seen in the incoming call list +Auto Machine (Automatic Answering Mode)](https://usermanual.wiki/Giga-Telecom/GDM-100/User-Guide-170123-Page-28.png)
![29 If you have set Automatic Answering option to “On” ( [MENU] +9+7-Auto machine) and the call connects automatic answering mode. Also, if you press and hold key, Automatic Answering is set. IN-CALL OPTIONS The phone provides a number of functions that can be used during a call. These functions may not be utilized at all times. Many of the in-call options depend on network services. Press key during a call to access the following +Sending My Phone Number This Phone can send DTMF tones of its number to communicate with answering machines, computerized telephony service etc. Make a call in the normal way. Press [MENU] and Press 1. +Number Memo 1. During a call [MENU] and 2. 2. Press the number to be stored and press [ADD] After the call, the number memo can be viewed at the outgoing call list (MENU-1-2) +Mute / Un-mute It is sometimes necessary to mute a call so that the other party cannot hear you. If you can switch your phone’s microphone off, the other party cannot hear you. Press [MENU] and then press 4. Example: If you wish to say something to another person in the room but do not want the calling party to hear you. Tip: Press Navigation up key to Quick Mute/Un-mute +Phone Book](https://usermanual.wiki/Giga-Telecom/GDM-100/User-Guide-170123-Page-29.png)
![30 To access the Phonebook menu. Press [MENU] + 2. +Indicating My Phone Number During a conversation, to see your own phone number press [MENU] +. +Voice Recording During a conversation, the phone can make voice recording of the other party. To turn on voice recording, press . The message “Recording” displays, along with the timer display. To stop recording, press again. +Adjusting the Volume during conversation During a call, to adjust the earpiece volume, use the volume keys on the left side of the phone. Press to increase/decrease the volume. In the idle mode, adjust the volume using the same keys. USING NETWORK SERVICE FEATURES +Call Waiting Incoming calls can be answered while a call is in progress, as long as the network supports this service. Contact your service provider to activate Call Waiting. When a waiting call is detected, the incoming calls alert sounds (network dependent) and a text notification is displayed. NOTE: Ask how to use Call Waiting Service because it depends on each individual carrier. +Three-Way Calling](https://usermanual.wiki/Giga-Telecom/GDM-100/User-Guide-170123-Page-30.png)
![33 +Sending messages The phone can transmit text messages, pages and store the transmitted messages. Press Navigation-down to open the messaging menu and Press 3. You can select the following message menu. ++Send Messages Press Navigation-down key+3+1key in order to send a new message in stand-by mode. Write the new message and enter its destination phone number, then the desired call back number. Or Press the Navigation-down key+3+2key in order to edit and send a previously written message. Received messages can be forwarded. To forward, press Navigation-down +3+3. ++Numeric Paging In stand-by mode, press Navigation-down+3+4. Enter the desired destination address number and the desired callback number. ++Phone book In stand-by mode, press Navigation-down +3+5. A saved number in the phonebook can be transmitted to a third party. After searching a desired phonebook memory location, press [SEL]. To send all information, press [DONE] when the cursor is at the name field. To select some part of label, move with Navigation and press [SEL]. After check the label(s), press [DONE]. Enter the desired destination phone number and the desired callback number. ++Note In the stand-by mode press Navigation-down+3+6. You can transmit a saved Personal note in your phone. To add new contents to Personal note, press Menu + 5+4. After highlighting desired Memo, enter the desired destination phone number and the desired callback number.](https://usermanual.wiki/Giga-Telecom/GDM-100/User-Guide-170123-Page-33.png)
![35 You will find your recent call history list. This is a list of the last 20 phone numbers dialed and last 20 received phone calls. The call history list makes redialing a number fast and easy. It is continually updated as new numbers are added to the beginning of the list and the oldest entries are removed from bottom of the list. ++Incoming This function depends on Caller ID service by your network provider. This option views the received calls. When accessing this menu, the most recent incoming calls are displayed. Press [MENU] +1+1. ++Outgoing (Indicates a call you placed) The phone stores up to 20 dialed calls. When accessing this menu, the list of outgoing calls is displayed. Press [MENU]+1+2. ++Air Time Using this option, view the call time of the last call, as well as total airtime for all calls since the timer was last reset. Press [MENU]+1+3. 1. Last Call (time): duration of the last call 2. Home Calls: Number of all home calls and their duration of time 3. Roam Calls: Number of all roam calls and their duration of time 4. All Calls: total duration of all calls made since the timer was last reset 5. Reset Air Time: resets the call times SCHEDULE It is useful menu to handle a busy schedule. Press [MENU] +3. Schedule menu enables management of personal information such as Appointments, Alarm, Anniversary, Schedule, To Do List, and D-Day](https://usermanual.wiki/Giga-Telecom/GDM-100/User-Guide-170123-Page-35.png)
![36 +Appointed Time Sets the alarm to ring at an appointed time within 24hours. After setting the alarm, to check the left time (menu +3+1-see left time-ok). The Appointed time sets the phone to alarm after a certain time. For example, the phone can be set to alarm after 5, 10,15, 30, 45minutes, 1 hour ~ 10, 12, 14, 16,18, 20, 22, 24 hours. To set the alarm. Press [MENU]+3+1 Use scroll up and down using Navigation-key to select the desired time. Press +Alarm To set the Alarm to ring at a specific time. Press [MENU] +3+2 Select alarm Yes. And then select AM or PM by using scroll up or down key. Enter the desired time, and then press . When the alarm goes off [ALARM] displays on the screen and the phone will ring for a minute. To stop the alarm when it rings simply, Open/Close the phone Or Press any key ++Selecting alarm sound To select a unique alarm sound from 7 different melodies. Press [MENU] +3+0 +Anniversary The phone can save up to 10 anniversaries. ++Setting the Anniversary Press [MENU] +3+3+ (select [Empty]).](https://usermanual.wiki/Giga-Telecom/GDM-100/User-Guide-170123-Page-36.png)
![37 1. Enter an Anniversary name and then press . 2. Enter an Anniversary Time and then press . 3. Enter a Schedule Alarm and then press . ++Editing the Anniversary If a task is already defined in the Anniversary, it is displayed selecting the Anniversary menu option. Press soft right key to edit the content. +Schedule Up to 10 schedulescan be saved. First press [Menu] +3+8 key. Highlight the desired date to schedule. Next, Press and enter Schedule Contents. ++Entering the Schedule 1 Press [MENU] +3+4+ [SET] (Select [Empty]) Enter Schedule Content and then press [OK]. Enter a Schedule Time (date, time) and then press [OK]. Enter a Schedule Term and then press [OK]. Enter a Schedule Alarm and then press [SEL]. ++Editing the Schedule 2 If a task is already defined in the Schedule, it is displayed when you select the Schedule menu option. Press soft right key to edit the content. +To Do List Up to 10 To Do Lists can be saved. ++Creating the To Do List](https://usermanual.wiki/Giga-Telecom/GDM-100/User-Guide-170123-Page-37.png)
![38 Press +3+5+(Select [Empty]) [SET]. 1. Enter a “To do Content” and then press [OK]. 2. Enter a “To do Term” and then press [OK]. 3. Enter a “To do Condition” and then press [OK]. 4. Finish / Process (Saved), press [SEL]. ++Editing the To Do List If a task is already defined in the To Do List, it is displayed when the To Do List menu option is selected. Press to edit the content. +D-Day ++Setting the D-Day Press + 3+ 6. The phone counts how many days, hours and minutes are left for the day on which an important action is planned to happen or begin. 1. Enter D-Day name and then press [SEL]. 2. Enter D-Day, year, date and then press [SEL]. ++Editing the D-Day If a task is already defined in the D-Day, it is displayed when you select the D-Day menu option is selected. Press [SEL] to edit the content. TIP: Press + * to check today’s schedule, anniversary, To-do-list, D-day in the stand-by mode. And then Press * or Navigation key if you want to scroll its contents. +Time Signal](https://usermanual.wiki/Giga-Telecom/GDM-100/User-Guide-170123-Page-38.png)
![39 To set the Time Signal, Press [MENU] + 3+7. And select the Time Signal “Set” and then press [SEL]. +Calendar Press [MENU] +3+8. The monthly calendar from year1980 to year 2099 can be viewed. Moves to the last year Moves to the next year Navigation-left key: Moves to the last day Navigation-right key: Moves to the next day Navigation-up key: Moves to the last week Navigation-down key: Moves to the next week Forward to the next month Back to the last month +Set Time Press [MENU] +3+9. The phone notifies you with time by Network. However, the intentional user time can be set based on time by Network. If set to Disable option, it will return to time by Network. +Alarm Sound To choose 1 melody among 7 melodies, it is convenient to distinguish the Alarm Sound from bell sound because it is different from bell sounds. Press [MENU]+3+0. SOUND To use the Sounds menu to customize various sound settings.](https://usermanual.wiki/Giga-Telecom/GDM-100/User-Guide-170123-Page-39.png)
![40 Press [MENU] key + 4key. +Ring Tone Press [MENU]+ 4+1. Sets the ringing tone for voice calls. This option allows you to select the desired ringing tone. You can choose among 11(4 Bells, 7 Melodies) different bells or melodies. Scroll to the desired tone and press [SEL] +Ring Type To adjust ring type Press [MENU]+4+2. This option provides 3 types of incoming call alert modes. The following options are available. Bell: The phone sounds selected bell. Vibrator: The phone does not ring but vibrates only. Vibrator + Bell: The phone vibrates first, and then rings. Lamp: The backlight is switched on and the lamp blinks; the phone neither rings nor vibrates. +Ring Volume To adjust the ring volume Press [MENU]+4+3. Or press the scroll side up or side down key. This option adjusts the ringer volume from one to nine levels. The ringer can also be turned off. The higher the graph, the louder the volume is. +Key Volume To adjust key volume Press [MENU]+4+4. This option allows adjustment of the tone volume that the keypad generates when a key is pressed. Also in the idle mode, use scroll side up or side down key on the left side of the phone to adjust key volume.](https://usermanual.wiki/Giga-Telecom/GDM-100/User-Guide-170123-Page-40.png)
![41 Adjust the key volume from one to nine levels. Also turn the ringer off. The higher the graph, the louder the volume is. +Tone Length To adjust tone length Press [MENU]+4+5. Some phones can recognize only longer tones. Tone length may have to be changed to long for some calls. When calling a paging system, the phone should be in the Normal mode. +Voice Volume To adjust voice volume Press [MENU]+4+6. This adjusts voice volume from levels one to nine. The higher the graph, the louder the volume is. +Microphone Volume To adjust microphone volume Press [MENU]+4+7. This adjusts microphone volume from levels one to nine. The higher the graph, the louder the volume is. +Alert ++Connect Tone To set the phone to sound the connect tone when your call is connected to the system. Press [MENU]+4+8+1. ++Fade Alert To set the phone to sound the fade alert when a call is disconnected or dropped. Press [MENU]+4+8+2. ++Minute Beep With this menu option set to check, the phone sounds an alert 10 seconds before each](https://usermanual.wiki/Giga-Telecom/GDM-100/User-Guide-170123-Page-41.png)
![42 elapsed minute as a reminder of the length of the current call. Press [MENU]+4+8+3. ++Roam Alert To set the phone to sound the roam alert when the call is roam status to the system. Press [MENU]+4+8+4. ++SVC Alert With this menu option set to check, the phone beeps when leaving service area or when returning to a service area. To adjust a SVC Alert volume Press [MENU]+ 4+8+5. UTILITIES +Calculator To use the phone as a calculator Press [MENU]+ 5+1. The calculator provides the basic arithmetic functions: Addition( + ), Subtraction( - ), Multiplication( ×) and Division( / ). ++How to use the Calculator 1. Input the first number using the numeric keys. 2. Press a navigation key until the required arithmetic symbol appears by pressing Navigation Key Add( + ), subtract( - ), multiply( ×) and divide( / ). 3. Input the second number. 4. To calculate the result, press soft right key (=). +++Tip: If you want to hold the result of calculation, press # key. For example, if you press # key during calculation, it will change A[+,-,×, /]B ->A to B[+,-,×, /]A ->B. And then you can continue calculate with that result of calculation. Ex) 5(A)+3(B)=8(A) and press #key 2(B)+8(A)=10(B), 5(B)+8(A)=13(B), 13(B)+8(A)=21(A)…](https://usermanual.wiki/Giga-Telecom/GDM-100/User-Guide-170123-Page-42.png)
![43 +World Time To check the current time for 64 major cities around the world in alphabetical order, by using the navigation keys -Up, Down, Left, Right keys. Press [MENU]+5+2. The screen shows the: • City name • Current date and time +Convert Unit To use the unit converter Press [MENU]+5+3. The converter changes Units such as Length, Area, Volume, Weight, Speed, and Temperature. ++How to make a Unit Conversion 1.Select the desired unit through [UNIT]. 2. Input the number using the numeric keys. 3. The conversion is done automatically. +Personal Note To write or edit a personal note (up to 16 personal notes), proceed as follows. Press [MENU]+5+4+(Select [Empty]) press [SEL]. 1. Input the item name, press [OK] soft right key. 2. Enter the data, press [OK]. If a task is already defined in the Personal Note, it is displayed when selecting the Personal Note menu option. Presses [SEL] to edit the content. +Stop Watch](https://usermanual.wiki/Giga-Telecom/GDM-100/User-Guide-170123-Page-43.png)
![44 The phone can be used as a stopwatch. To use the stopwatch, 1. Press [MENU]+5+5. 2. Press the [STRT] to start. On operating the stopwatch, 3-1. To stop, Press [STOP]. 3-1-1. If you press [STRT] again, you can check the cumulative time. 3-1-1-1. If you press [SPLT], you can check the split time. 3-1-2. If you press [INIT], you can return to the initial situation. SECURITY To access the security menu, enter a four-digit lock code. The lock code is preset to “0000” at the factory. +Lock When the phone is locked, only emergency calls can be made or calls can be received. All other functions of the phone are disabled. If the lock code is forgotten, take the phone to the nearest Service Center To lock the phone Press [MENU]+6+1. On Power up: the phone locks automatically at the next power on. Off: the phone remains unlocked. Always: the phone always locks. ++Tip: Press for a while, and the phone is locked. Press + Security Code, and the phone is unlocked.](https://usermanual.wiki/Giga-Telecom/GDM-100/User-Guide-170123-Page-44.png)
![45 +Restrict Press [MENU]+6+2. For your protection, choose the restriction option to restrict International Phone and Phonebook. Press [MENU]+6+2+1. Phonebook: The Use of the Phonebook can be restricted by this option. Press [MENU] key +6+2+2. International call: international calls cannot be connected. The phone can be restricted or unrestricted by each option individually. +Hide Data To secure data, Hide Data can be set up in Phonebook, Message, Note, Outgoing, and Incoming. If it is hidden, you should enter the security code to view. Press [MENU]+6+3. +Lock Code To change the current lock code to a new one. Press [MENU]+6+4. The lock code is preset to 0000 at factory. Enter a new, four-digit lock code twice, then press [OK]. +Clear Memory To erase all phone memories such as user-input in the phonebook, outgoing, incoming, and schedule to do list respectively. Press [MENU]+6+5. +Reset Phone Resetting the Phone will restore all the factory defaults. Once this feature is selected, the reset process cannot be canceled or reversed. Press [MENU]+6+6.](https://usermanual.wiki/Giga-Telecom/GDM-100/User-Guide-170123-Page-45.png)
![46 Place the scroll bar at OK Enter [OK]. VOICE SERVICE Up to 20 stored voice tag entries can be added to a desired name and phone number. Any spoken word, for example a name, can be a voice tag. Before using the voice service menu, the Record User Command menu must be registered. (To do so, enter [MENU]+7+6) by saying the desired voice command. This option registers voice on the phonebook menu. Enter [MENU]+2 for subsequent voice dialing. The phone provides voice prompts and screen displays to guide through the recording process. Respond to the prompt by saying the desired name to save. The phone stores the name as a first sample, and then prompts for the name again. Respond to the prompt by repeating the name after the beep. The phone stores the name as a second sample, and then requests the phone number. Enter the phone number by pressing the digit keys. To store the phone number, press the record key. If the name matches with the Phonebook, the number is displayed along with the record notification. +Voice Dial List Press [MENU] key +7+1key. Check the desired voice dial list, already stored Voice dialing. To have 20 Voice tags that can be stored. +Voice Memo To use the voice memo and record up to 3 minutes (30 memos) regardless of frequency. ++How to Record Voice Memo Press [MENU] +7+2+2.](https://usermanual.wiki/Giga-Telecom/GDM-100/User-Guide-170123-Page-46.png)
![47 The screen displays the: “Record Voice Memo?” prompt. Press [OK]. And then you can start to record. Press any key to stop recording. ++How to Replay Voice Memo You can play back all memos recorded, starting with the most recent memo. You can choose the voice memo you want to replay using Navigation key. Press [MENU]+7+2+1. The screen displays the Memo location, Date and Time when the memo is recorded. NOTE: The phone cannot automatically answer incoming call when it is filled with memories. +Set Up Voice Dial Voice Dialing is always active once the names have been recorded and the associated phone number that has been entered. To place a call using Voice Dialing, simply press . You can initiate a Voice Dialing call by opening the flip cover and then by selecting this option. Press [MENU] key +7+3key. Manual: Enables Voice Dialing only by pressing . Auto: Simply enables Voice Dialing by opening the flip cover. Always off: Voice Dialing is not used. This menu allows you to get quick access to the frequently used menus by saying your own voice command. +Clear Voice Dial This option erases all voice dialing entries. Press [MENU]+7+4. Enter the security code.](https://usermanual.wiki/Giga-Telecom/GDM-100/User-Guide-170123-Page-47.png)
![48 ++The screen displays the: Remove all voice tags proceeds. Press [OK], to confirm the deletion of all voice dials. ++The screen displays: All message tags were deleted successfully. To clear messages one by one, press Menu+7+1. Highlight the voice dial and to delete you want to erase. +Automatic Answer This function answers an incoming call automatically after a number of rings that the user sets. Before using this option, set the Speaker “on” to “call screen menu”. Press [MENU]+7+5+3 for Call Screening. After setting up the “call screen” menu, hear the voice of the counter party simultaneously, during the recording of the voice memo Press [MENU]+9+7 and select the time of “the phone automatically answers calls” option, then press [SEL]. While the message is being played, to answer an incoming call press or . Tip: Press for a while, Automatic Answer will be On/Off instantly. ++Recording Greeting Message You must record your own greeting message. If you always want to use the greeting message of Auto Answer option, you have to record the greeting message three times, each one of Record-8K, Record-EVRC and Record-13K. Press [MENU]+7+5+2. However, if the voice memory is full, Auto Answer does not work. +++The screen displays the: Recording Greeting Message](https://usermanual.wiki/Giga-Telecom/GDM-100/User-Guide-170123-Page-48.png)
![49 +++You can hear the following instructions: Please record at tone After hearing the beep, start recording the message. When the recording message is finished, then press any key to terminate. +++The screen displays: Greeting Saved successfully. ++Greeting Message Play To hear previously saved Greeting Messages. Press [MENU]+7+5+1. +++The screen displays Playing Greeting Message And then, you can hear the recording message. ++Call Screen If speaker on is set in the call screen menu, you can hear the voice of the counter party at the same time, when he is recording the voice memo. If you set up speaker off the call screen menu, you cannot hear the voice of the counter party, when he is recording the voice memo. Press [MENU] +7+5+3. +Record User Command To use the voice dial, register the Record User Command menu by saying your own voice command. The phone provides voice prompts and screen displays to guide you through the recording process. How to record user command Press [MENU]+7+6. ++The screen displays the Please hold phone to ear and wait.](https://usermanual.wiki/Giga-Telecom/GDM-100/User-Guide-170123-Page-49.png)
![50 ++You can hear the following instructions: “Now training control word. Please say the word. Yes.” Respond to the prompt by repeating the words. The phone stores the voice as the first sample, and then prompts for the word again. Please say the word, YES Again Please say the word, NO Again If voice was successfully recorded, the following message will play. “Training was successful.” The Voice menu can be used after completing the above procedures. DATA SERVICES For Data Service, the Date Service Cable must be purchased at the place of purchase of the phone. To send or receive data through the phone, Press [MENU]+8. 1. Service Type: High Internet, Normal Internet, Normal Data, 2. Termination Type: This receive call option can be set to voice, modem or fax. Voice: receives a call. Modem: receives or sends data Fax: receives or sends fax. ++NOTE: Ask the carrier in your country how to use Data Service because Data Service differ from country to country. SET UP](https://usermanual.wiki/Giga-Telecom/GDM-100/User-Guide-170123-Page-50.png)
![51 +Auto Retry Press [MENU] 9+1+“Yes”. When the call is not connected, this function retries the call automatically at a set interval or amount or retries. +Prefix Dial Press [MENU]9+2. If you set to “Yes” then, a call is placed the phone automatically makes prefix dialing. +Back Light To select whether or not the phone uses the LCD backlight. The following options are available. Press [MENU]+9+3. Flip open: The backlight comes on during you open the flip cover. Set up Seconds: The backlight comes on when a key is pressed or a call is received and switches off 5, 10, 20, 30 seconds after the last key is pressed. Always off: The backlight is not used. +Idle Display Press [MENU]+9+4. To set a greeting message to be displayed in the idle mode. Press [MENU]+9+4+1 It is preset to Giga. To change the greeting display type press [MENU]+9+4+2 It can be changed to displays such as Basic, Digital Watch, Giga Logo, World Time- Present Time and D-Day in your preference.](https://usermanual.wiki/Giga-Telecom/GDM-100/User-Guide-170123-Page-51.png)
![52 +Animation Plays during power are on/ off. Press [MENU]+9+5 and select the animation option, then press soft right key. It is shown when the power is on or off. +Auto Hyphen Press [MENU] +9+6. If you set to “on” then, the phone automatically hyphenates numbers as follows: (area code)-(number). Digits following a pause are not hyphenated. Time Pause: Wait two seconds before sending the next string of digits. Hard Pause: Cause the Phone to stop dialing until is pressed after selecting send tone. ++Pause Dialing This function is to dial in the electronic system for using the Audio Response System (ARS) provided by bank or Beep Call. The pausing character (P for hard Pause or T for time pause) is inserted in the middle of the appropriated phone number enabling transmission after one second for the number following the time pausing character or by pressing only, if it is a hard pause. 1. Press Navigation-right and down to select P. for the use of P (Pause). The "P" is displayed on the screen. Pause: For the number following P, transmission is possible by pressing 2. For the use of the Time pause (T), press Navigation-left and up to see the "T" Time pause: It takes 3 seconds for each “T” to transmission following numbers 3. Press Navigation-right and down two times, to select H (Hyphen: -) 4. Press Navigation-right and down three times, to select N. My phone number is displayed on the screen. ++ Prefix Dialing Prefix Dialing allows you to alter a phone number in the phonebook by adding additional numbers. For example, if the phonebook entry was entered without an area code and you](https://usermanual.wiki/Giga-Telecom/GDM-100/User-Guide-170123-Page-52.png)
![53 are out of town, you can prefix that entry with the appropriate area code. 1. Select the phonebook entry or call history using one of the previously described methods. 2. Select the phone number label of the person you want to call. 3. Add additional numbers. 4. Press . Also, use this prefix dialing option while checking SMS. +Auto Answer Setting Press [MENU]+9+7. To set “automation answering” option -Disable: Not use this option -1ring after (5sec. After): To answer an incoming call automatically after 1 ring sounds. -3rings after (10sec. After): To answer an incoming call automatically after 3 rings sound. -5rings after (15sec. After): To answer an incoming call automatically after 5 rings sound. Auto Machine: You can use Auto Answering Machine Tip: The time in the round brackets above means when vibration mode or lamp mode is set to on. +Language To select the language of voice prompts, menus and key-input. Press [MENU]+9+8. English Portuguêse Español +Contrast To adjust the brightness of the LCD by using level 9 indicators. Press [MENU]+9+9. +Select System In this option, to select the system service mode and NAM. Press [MENU]+9+#.](https://usermanual.wiki/Giga-Telecom/GDM-100/User-Guide-170123-Page-53.png)
![54 ++Force mode Press [MENU]+9+#+1. You can select the system service mode between CDMA and Analog. Each service mode allows selection of a roaming option. Roaming is a feature, which is only applicable in areas where there are at least two cellular service providers having valid roaming agreements. Roaming, when available, allows the phone to register on one of the networks, but use the facilities of the other if the phone’s network is not available. This system priority feature allows you to program the phone for optimum operation when within thehome service area or when outside the home service area. Contact your home cellular service provider for information on the availability of this feature and roaming agreements they have with other cellular service providers. ++Select system Press [MENU]+9+#+2. There are four different roaming options: Home Only: the phone uses the home network only. Standard: the phone uses Standard network. A Only: the phone uses A system only. B Only: the phone uses B system only. ++Set Auto NAM Press [MENU]+9+#+3. If you set to On this option, the phone selects the networks automatically based on system information for the area you are in. ++Select NAM The NAM (Number Assignment Module) enables you to subscribe to one or more service networks. To set the phone to the desired network. To select a NAM from two NAMs. Press [MENU]+9+#+4. GAMES The phone allows time out to enjoy a game.](https://usermanual.wiki/Giga-Telecom/GDM-100/User-Guide-170123-Page-54.png)
![55 Press + *. +Game Start Allow you to start game. Press [MENU]+ *+1. +Game Level Allows you to select the level of difficulty. Press [MENU]+*+2 Select the required level among 10 levels using the up and down keys. And press the [SEL] to select. +How to Play Press [MENU]+*+3. The object of the game is to change the opponent’s pieces into my pieces. (èIf you have more pieces than opponent’s pieces, you win the game.) Blocking each end of the opponent’s pieces (èWhite) can do this (vertically, horizontally, or diagonally), which will change all the opponent’s pieces (èWhite) blocked inside into your pieces (èblack). Your game will continue until there is no place to change the opponent’s pieces into my pieces. ++Keys used in the game: Up - Number Key '2' or Soft Navigation Key 'Up' Down - Number Key '8' or Soft Navigation Key 'Down' Left - Number Key '4' or Soft Navigation Key 'Left' Right - Number Key '6' or Soft Navigation Key 'Right' To place a piece - Number Key '5' or Soft Right Key To end the game - Asterisk Key '*' + End Key or just End Key ++How to calculate the score: Each piece is counted as a point. Therefore, the total numbers of my pieces are my total score.](https://usermanual.wiki/Giga-Telecom/GDM-100/User-Guide-170123-Page-55.png)